

▶︎動画でも話してるので、文章読むのが面倒な方はこちらをみてもらえればと思います。
今回は、Magic Animateの利用方法について解説します。

これを読めば誰でも簡単にクオリティーの高いAI美女が作れるようになっているので興味がある人は、下のバナーをクリックして購入してみてね🎶

Magic Animateの利用方法について
Magic Animateのソースコードは公開されています。

公開されているコードへのリンクは以下に貼っておきますので、そちらをご確認ください。
このソースコードをGoogle Colabで動作させます。
まずは、Google Colabのサイトにアクセスします。
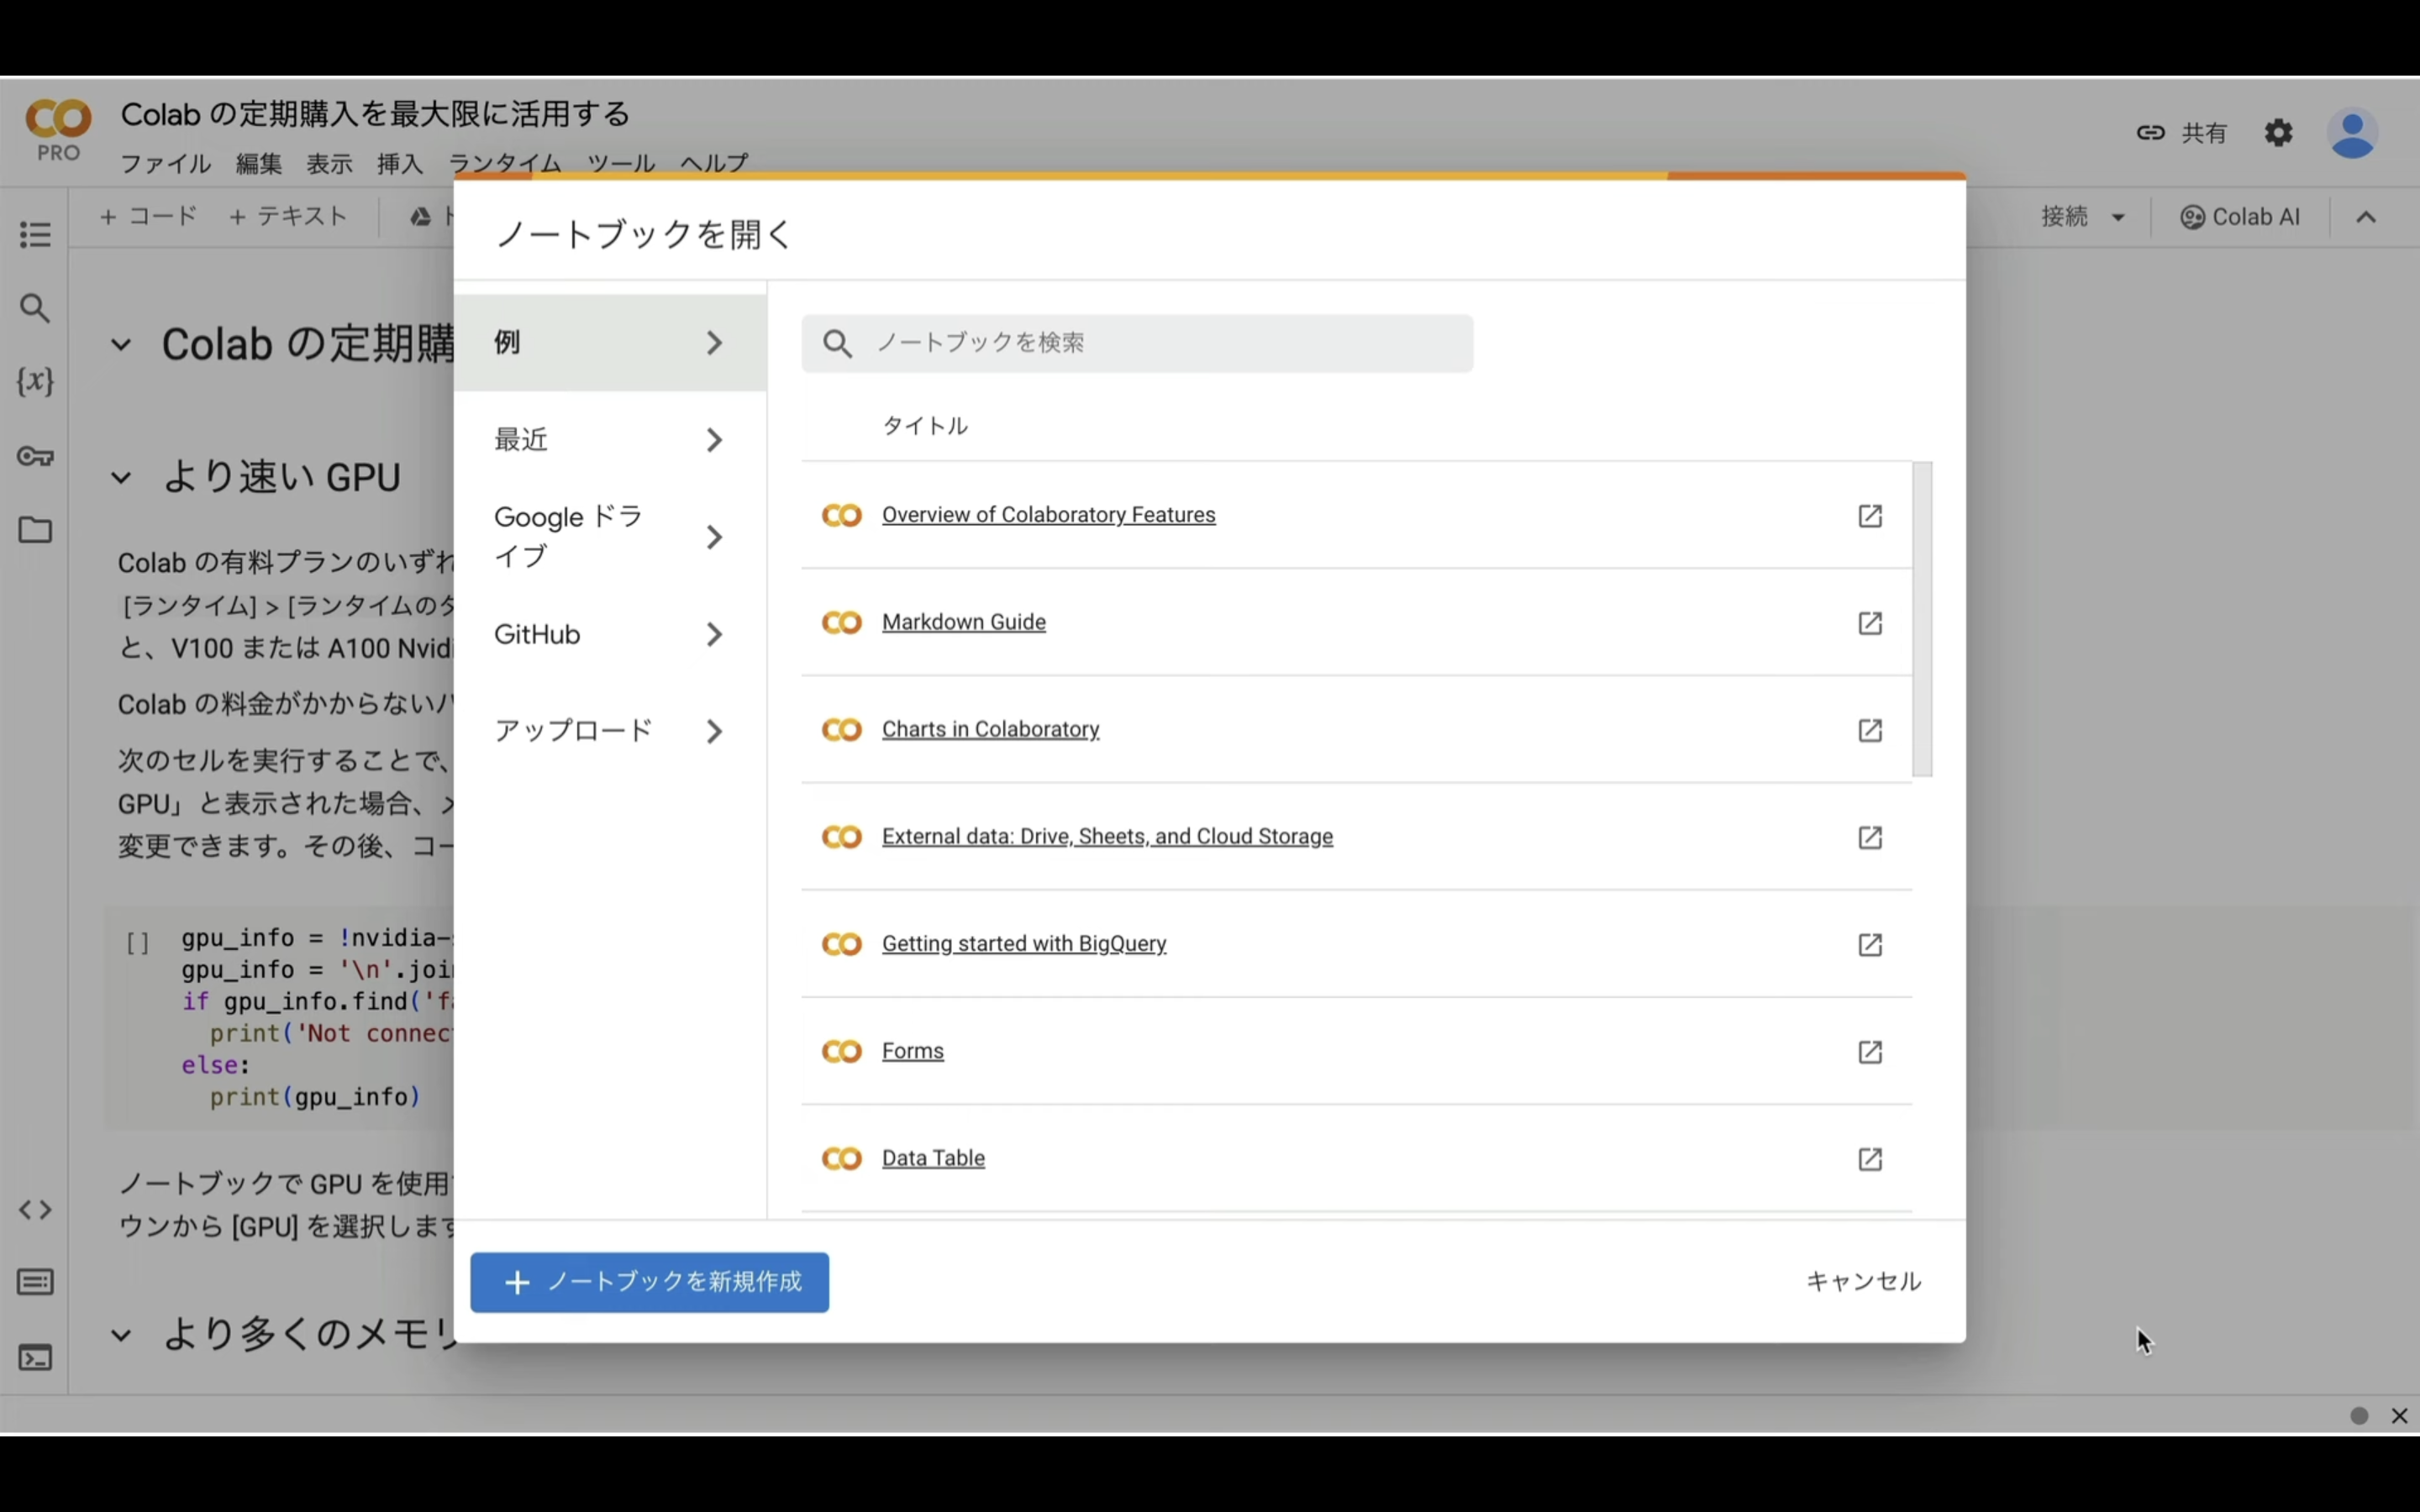
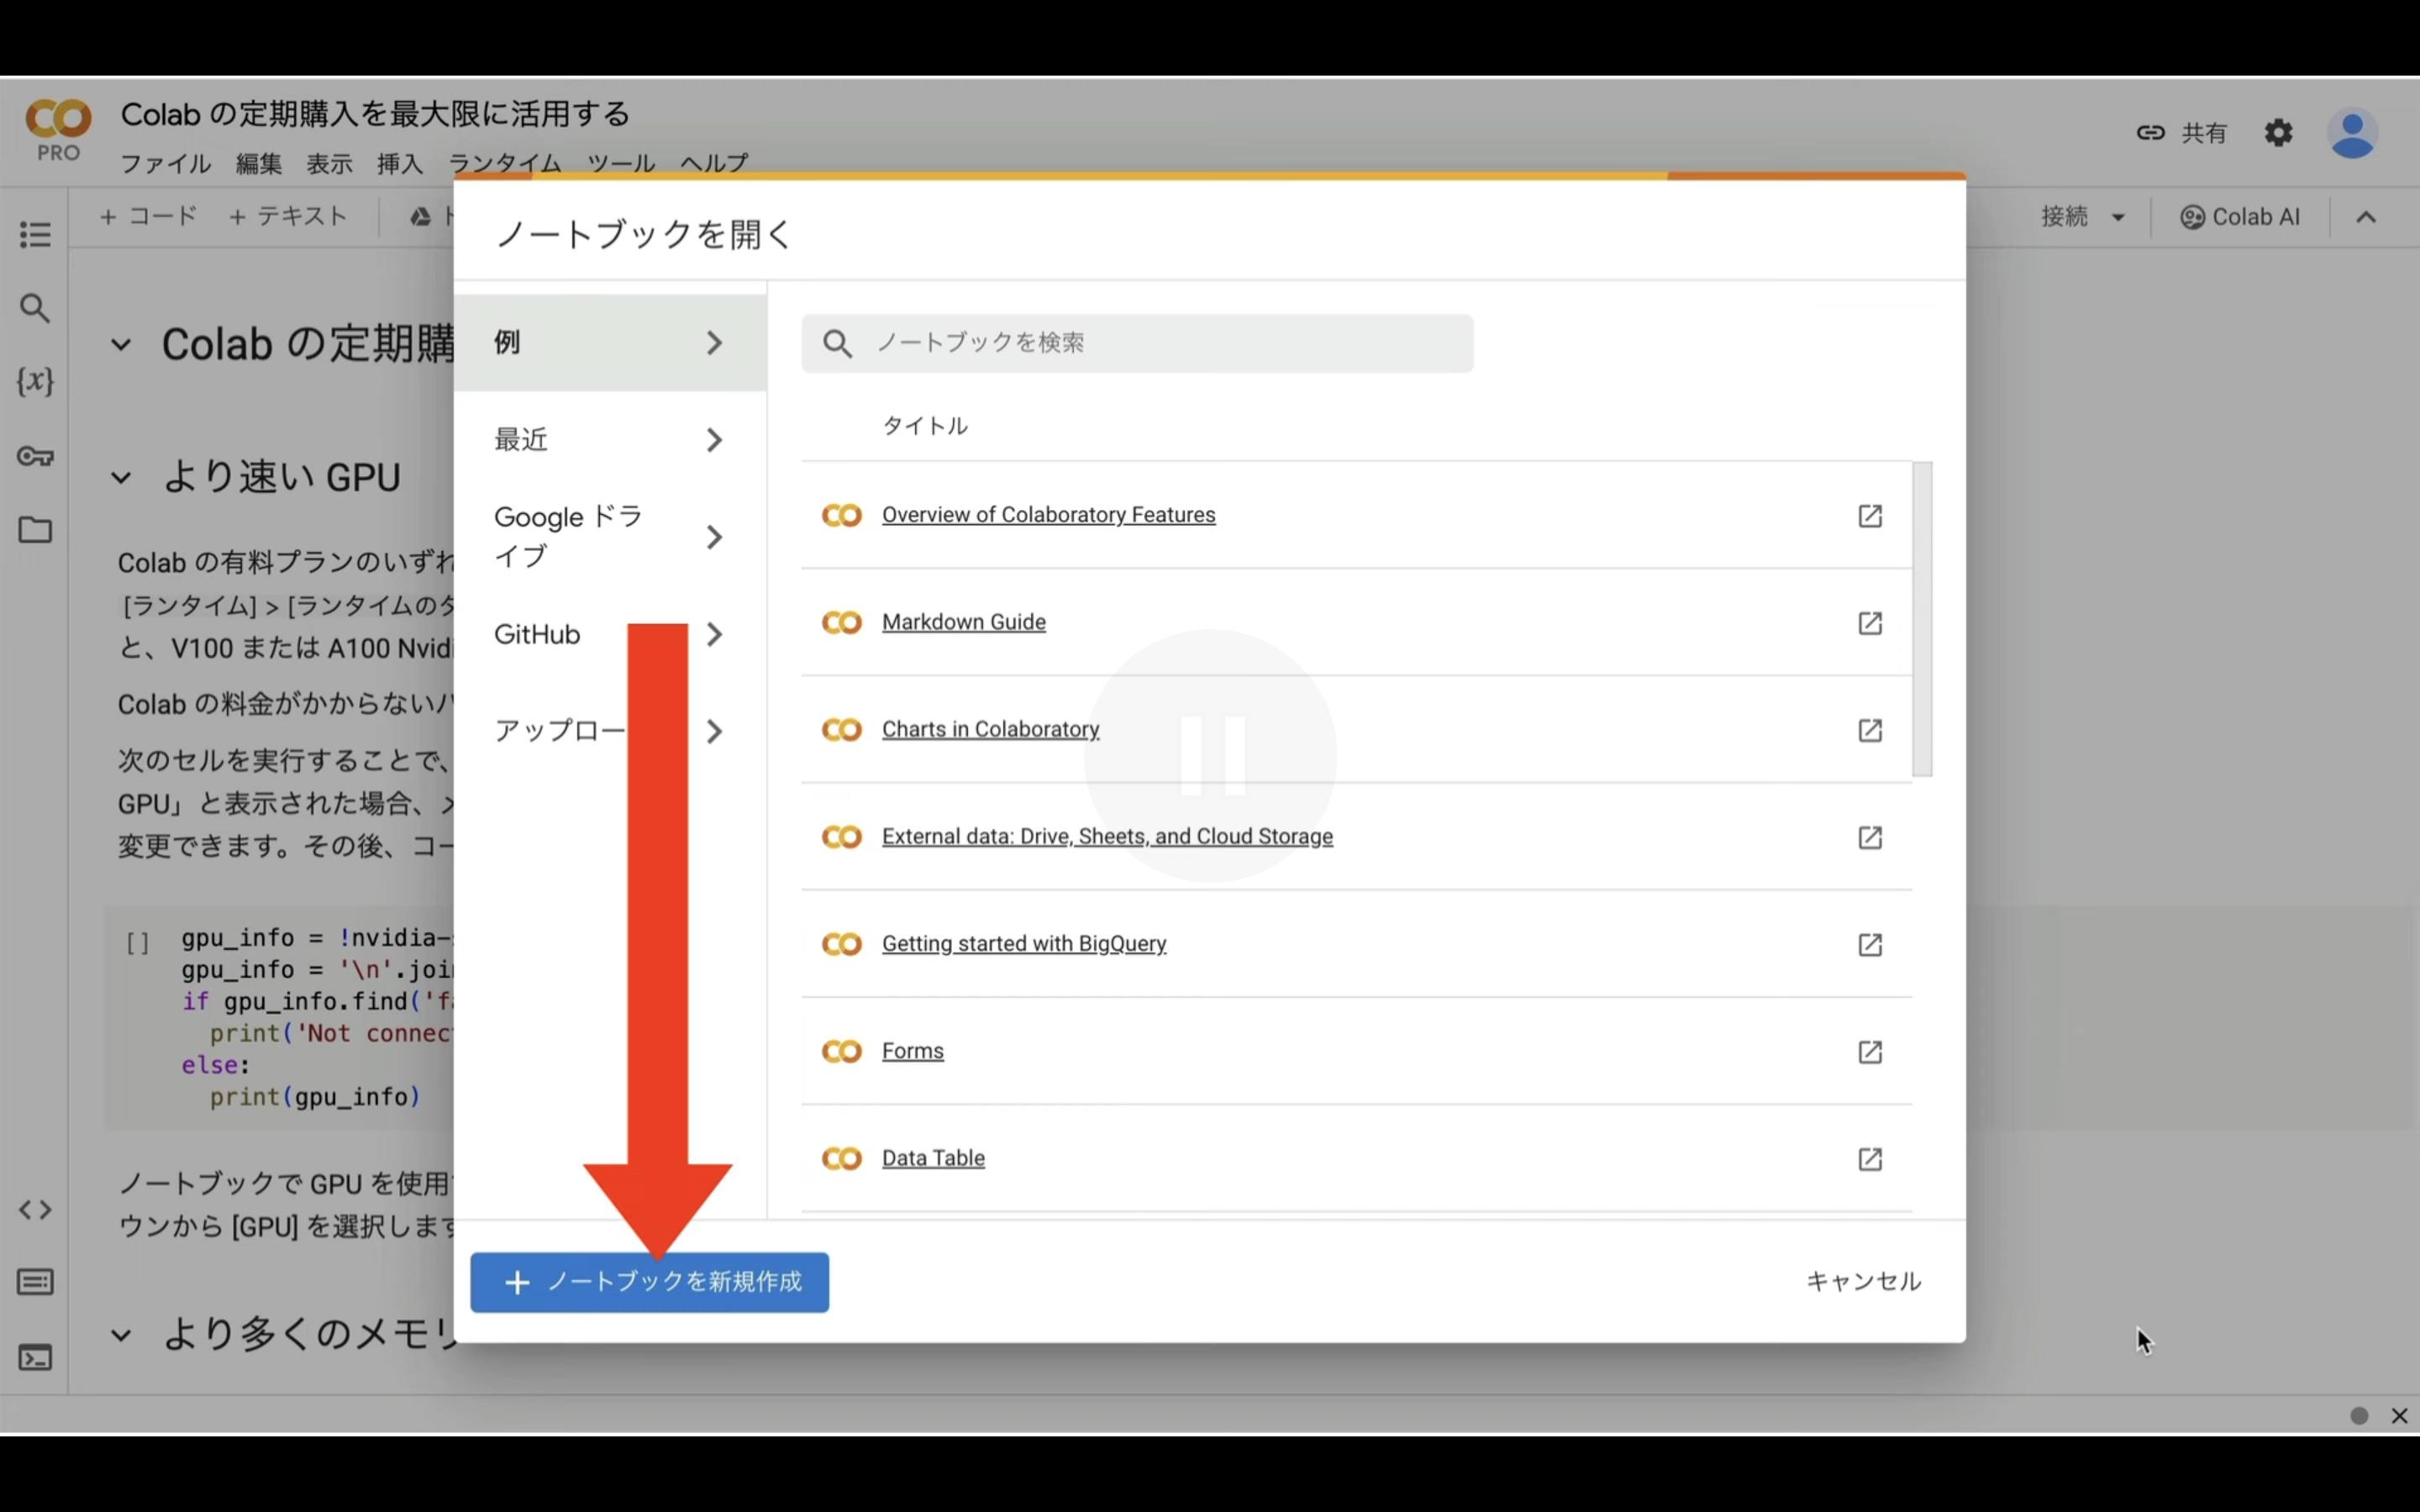
Google Colabの画面を表示したら、「ノートブックを新規作成」と書かれているボタンをクリックします。
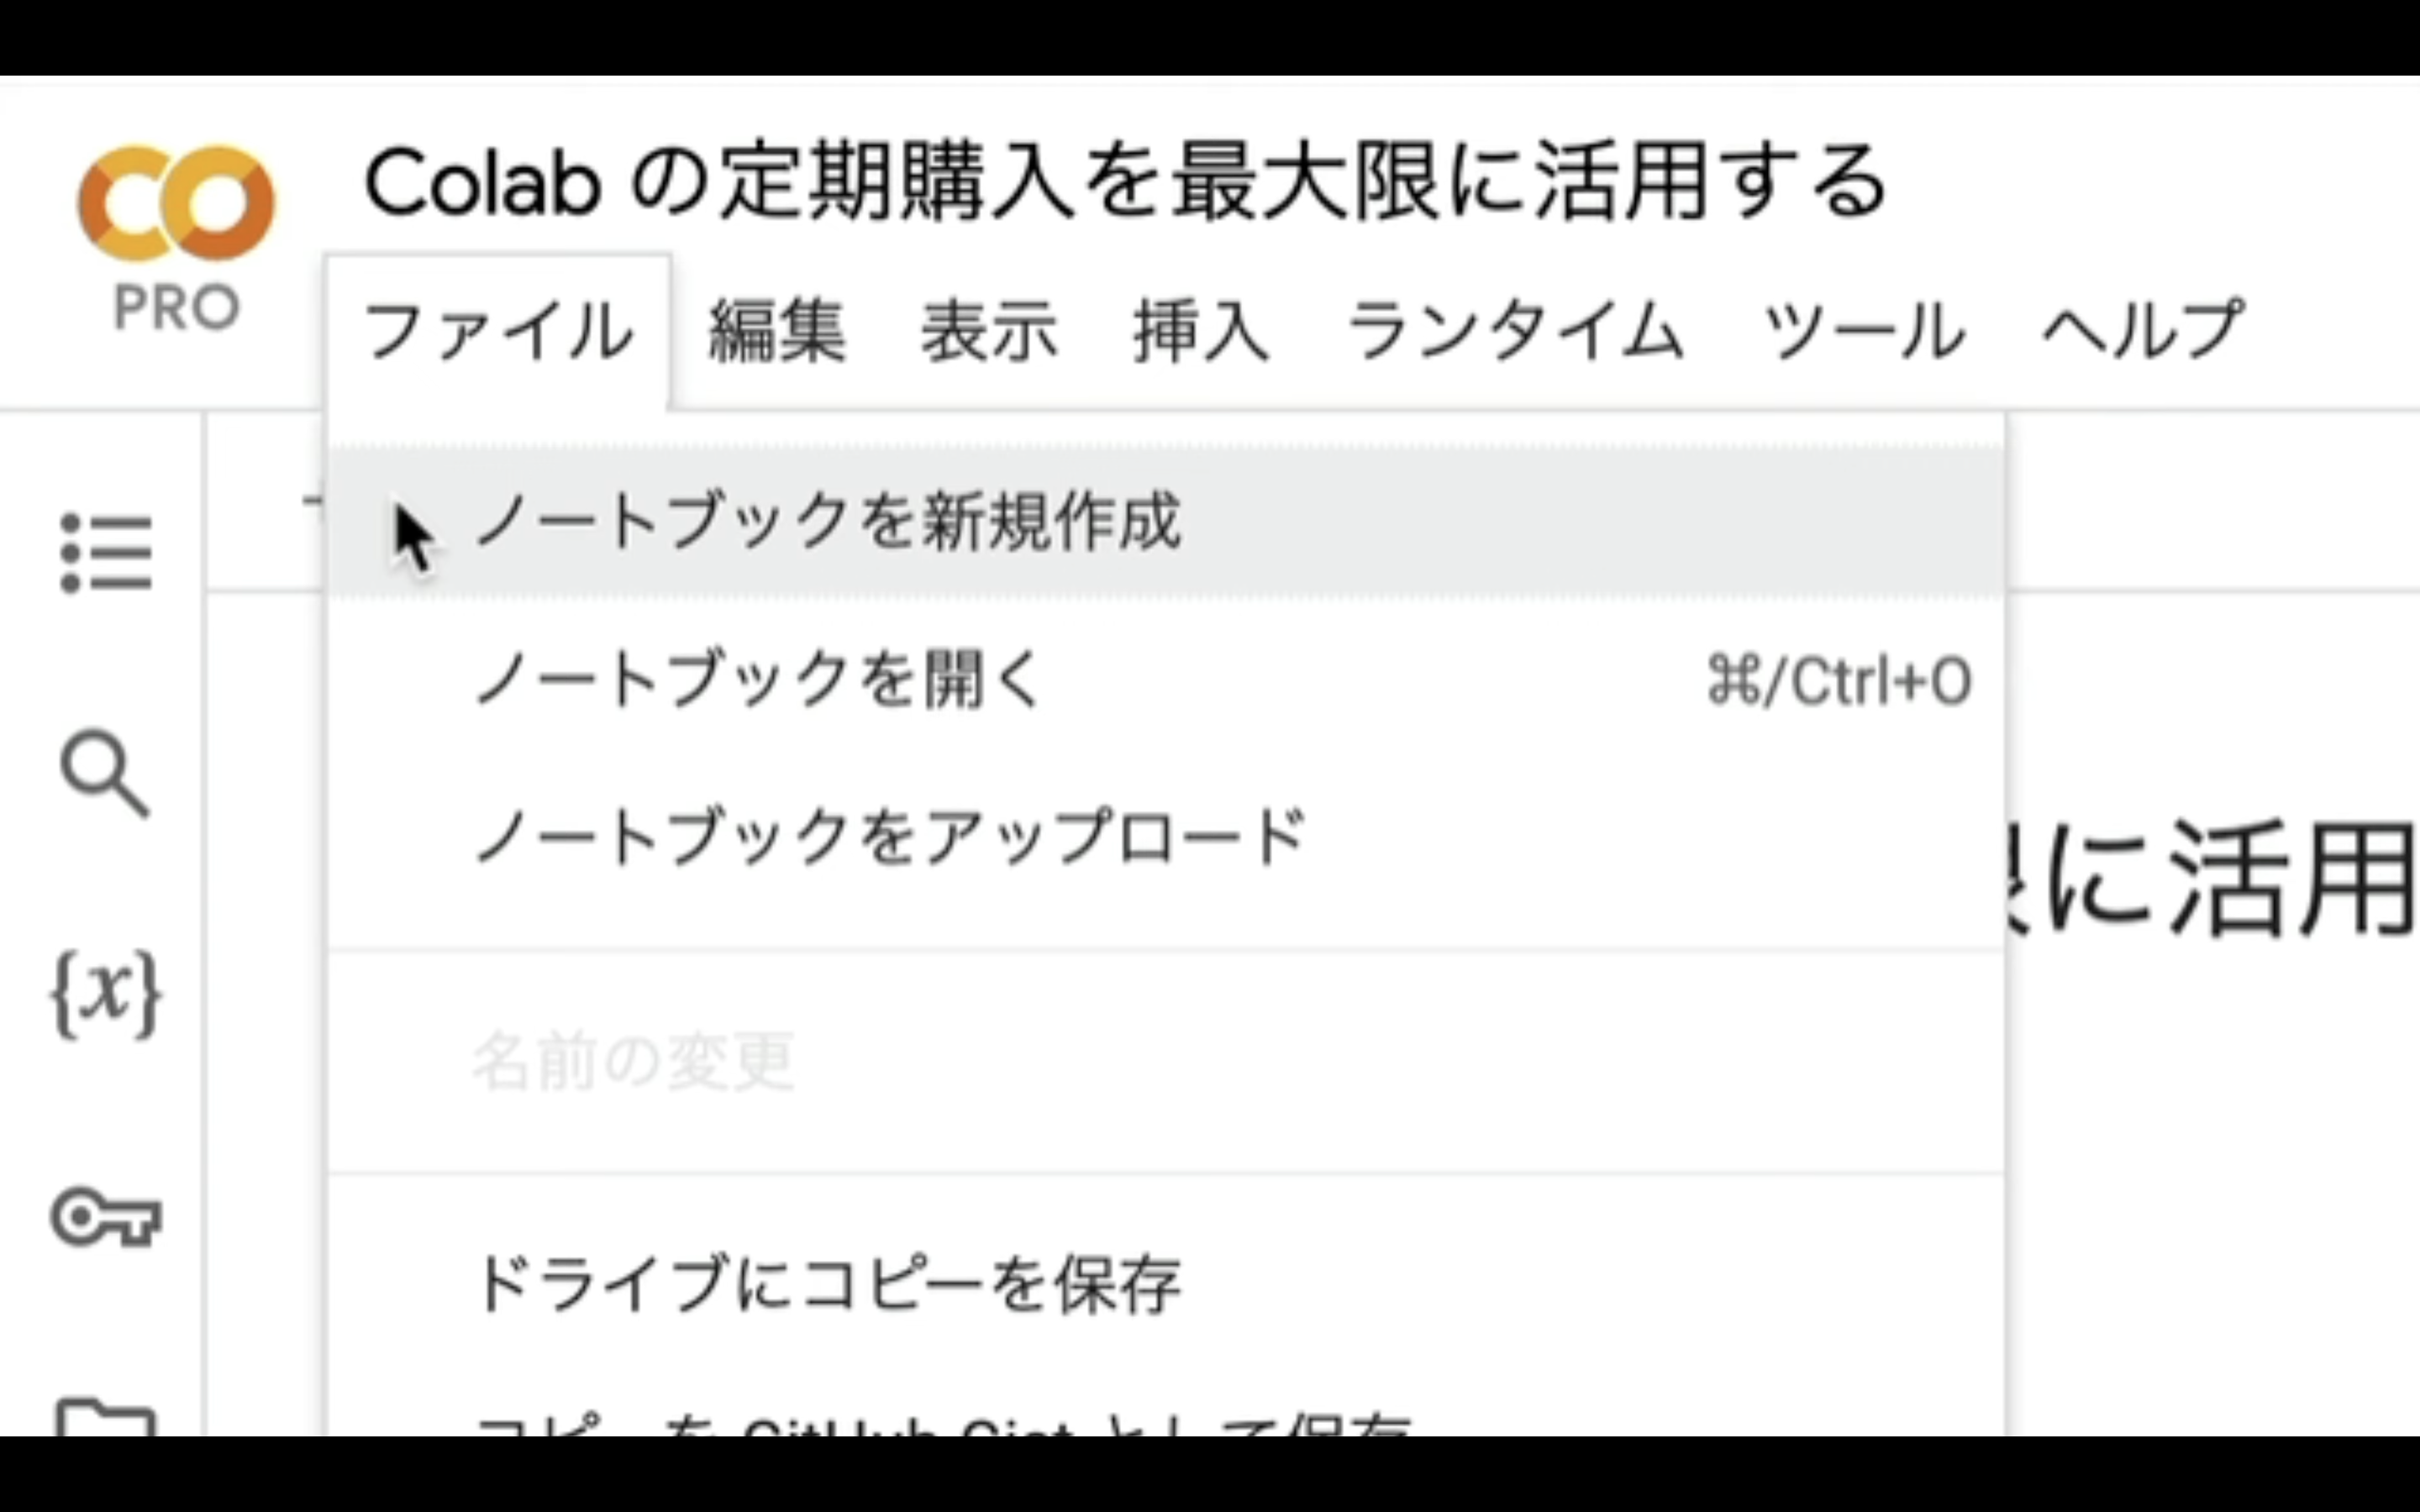
もし、このようなポップアップ画面が表示されない場合は、メニューの中から「ファイル」を選択し、「ノートブックを新規作成」を選択します。
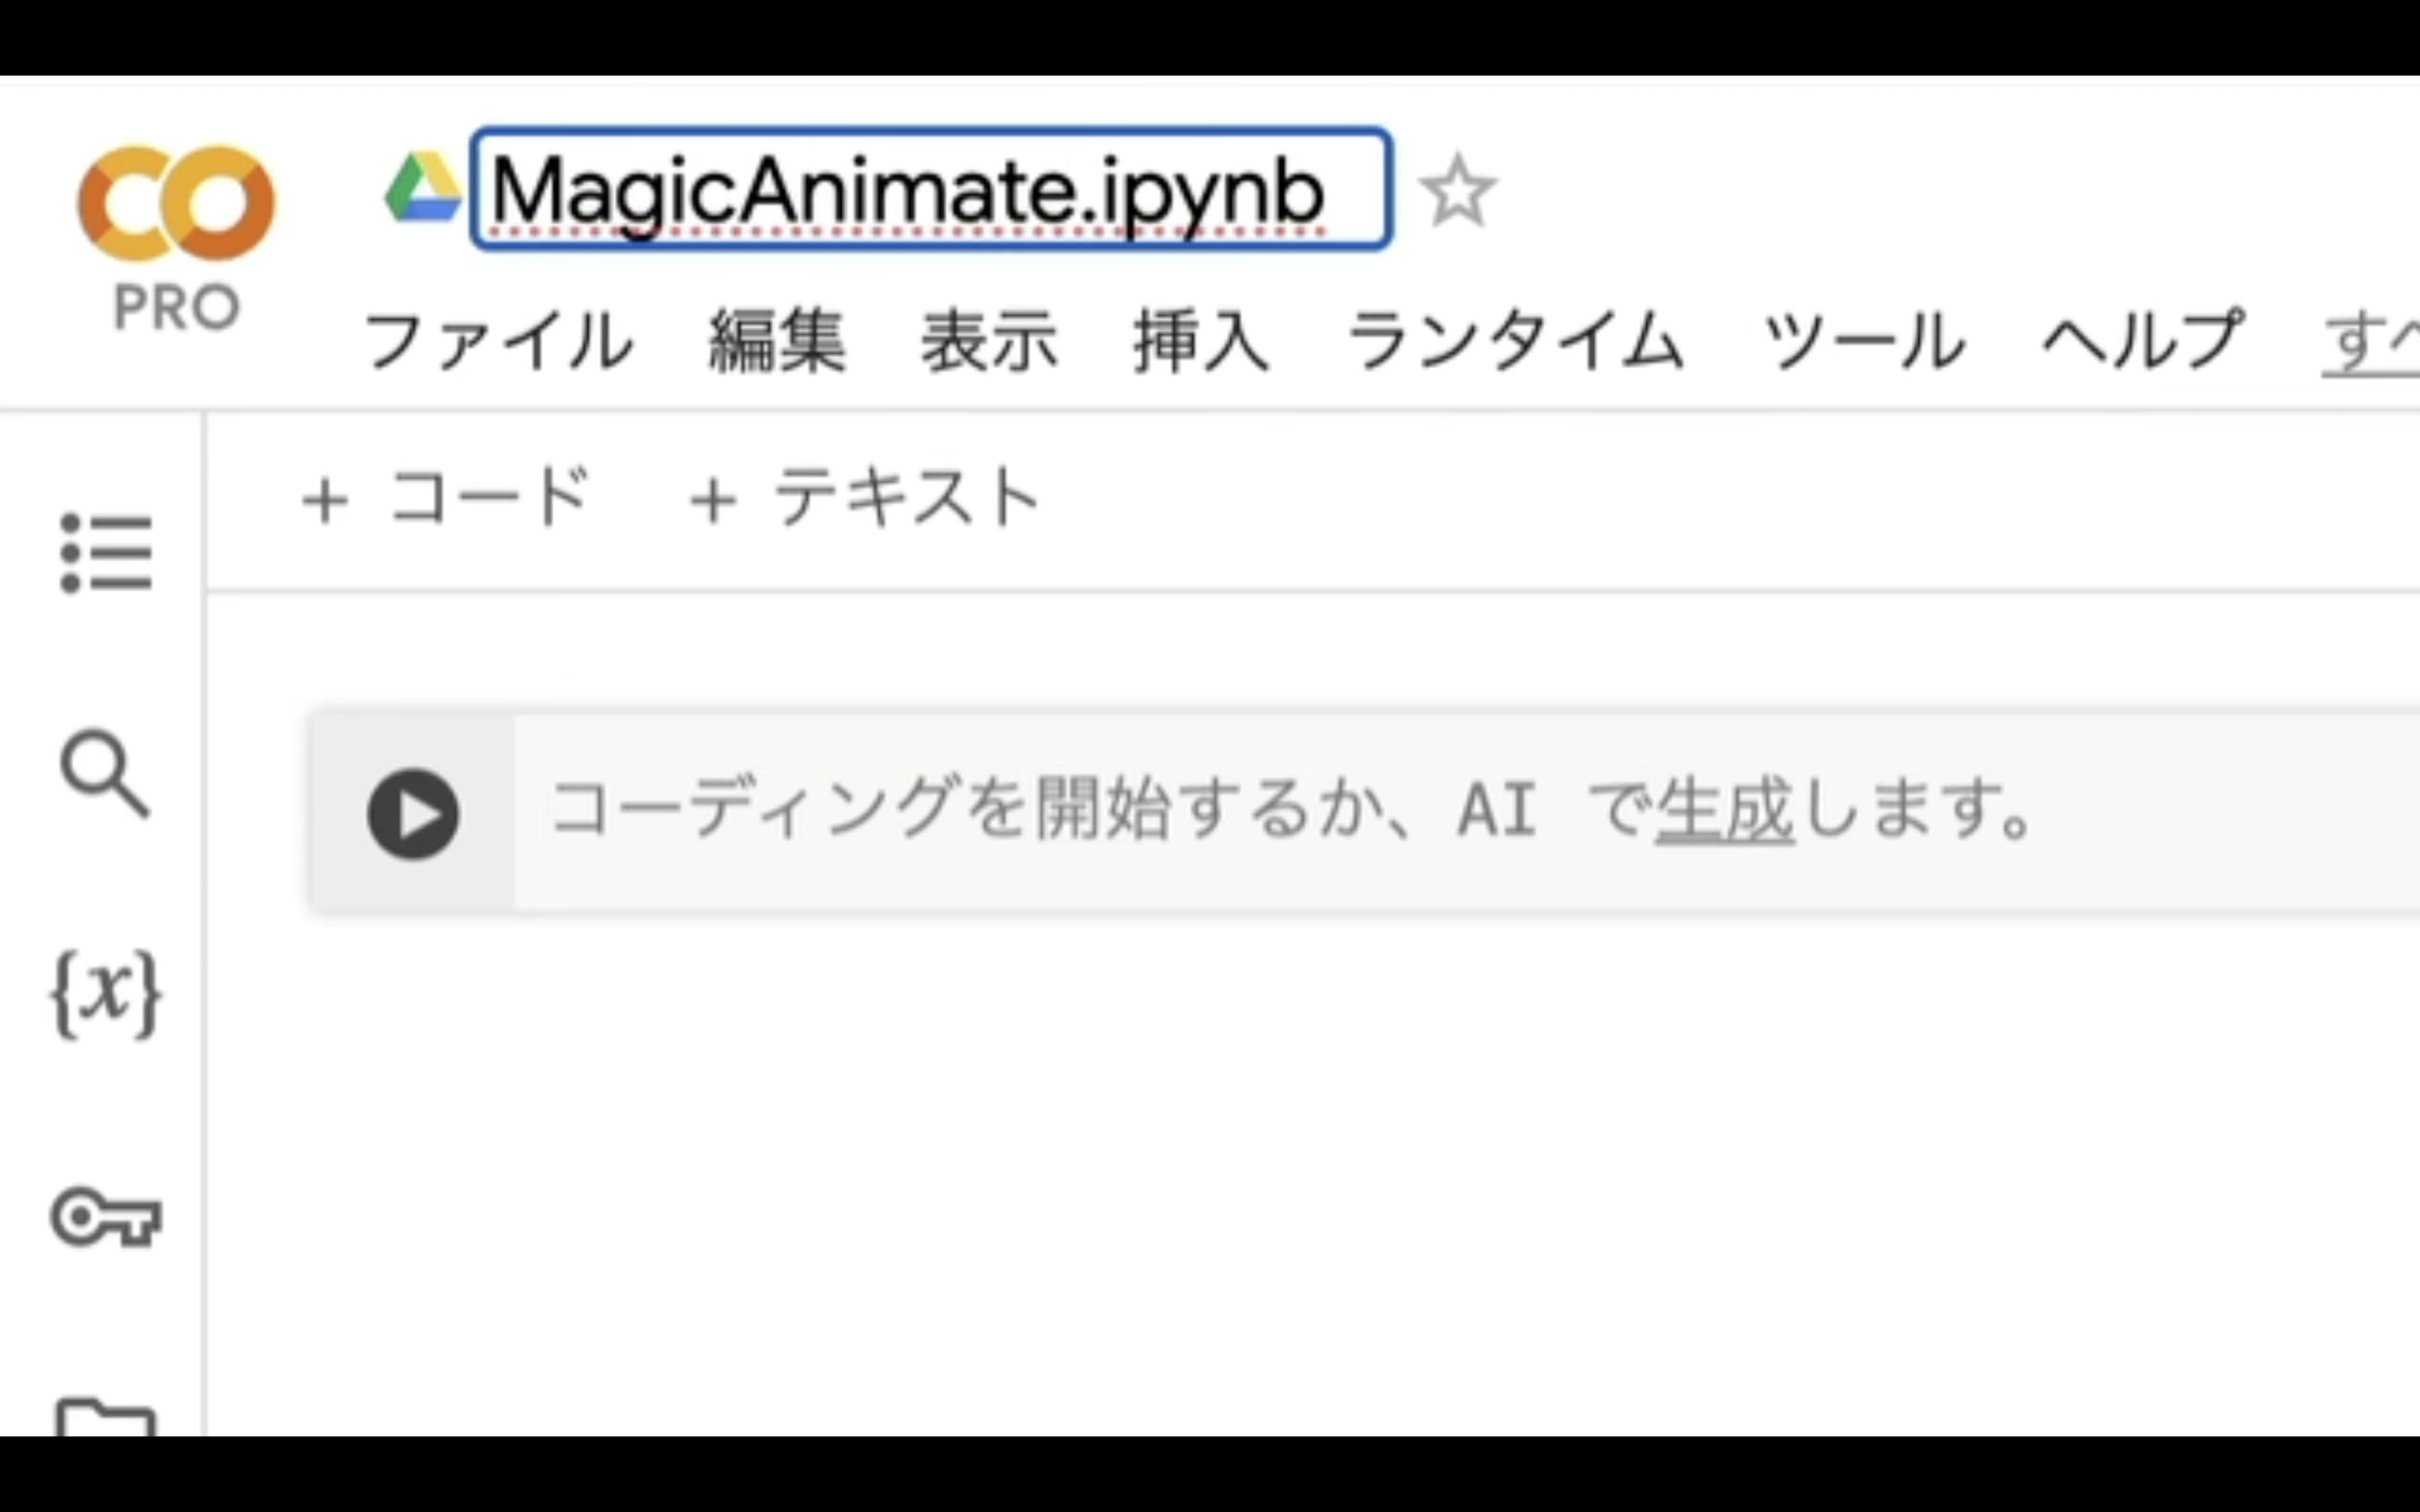
ノートブックを新規作成したら、名前を変更しておきましょう。
この解説では、特定の名前にしておきます。
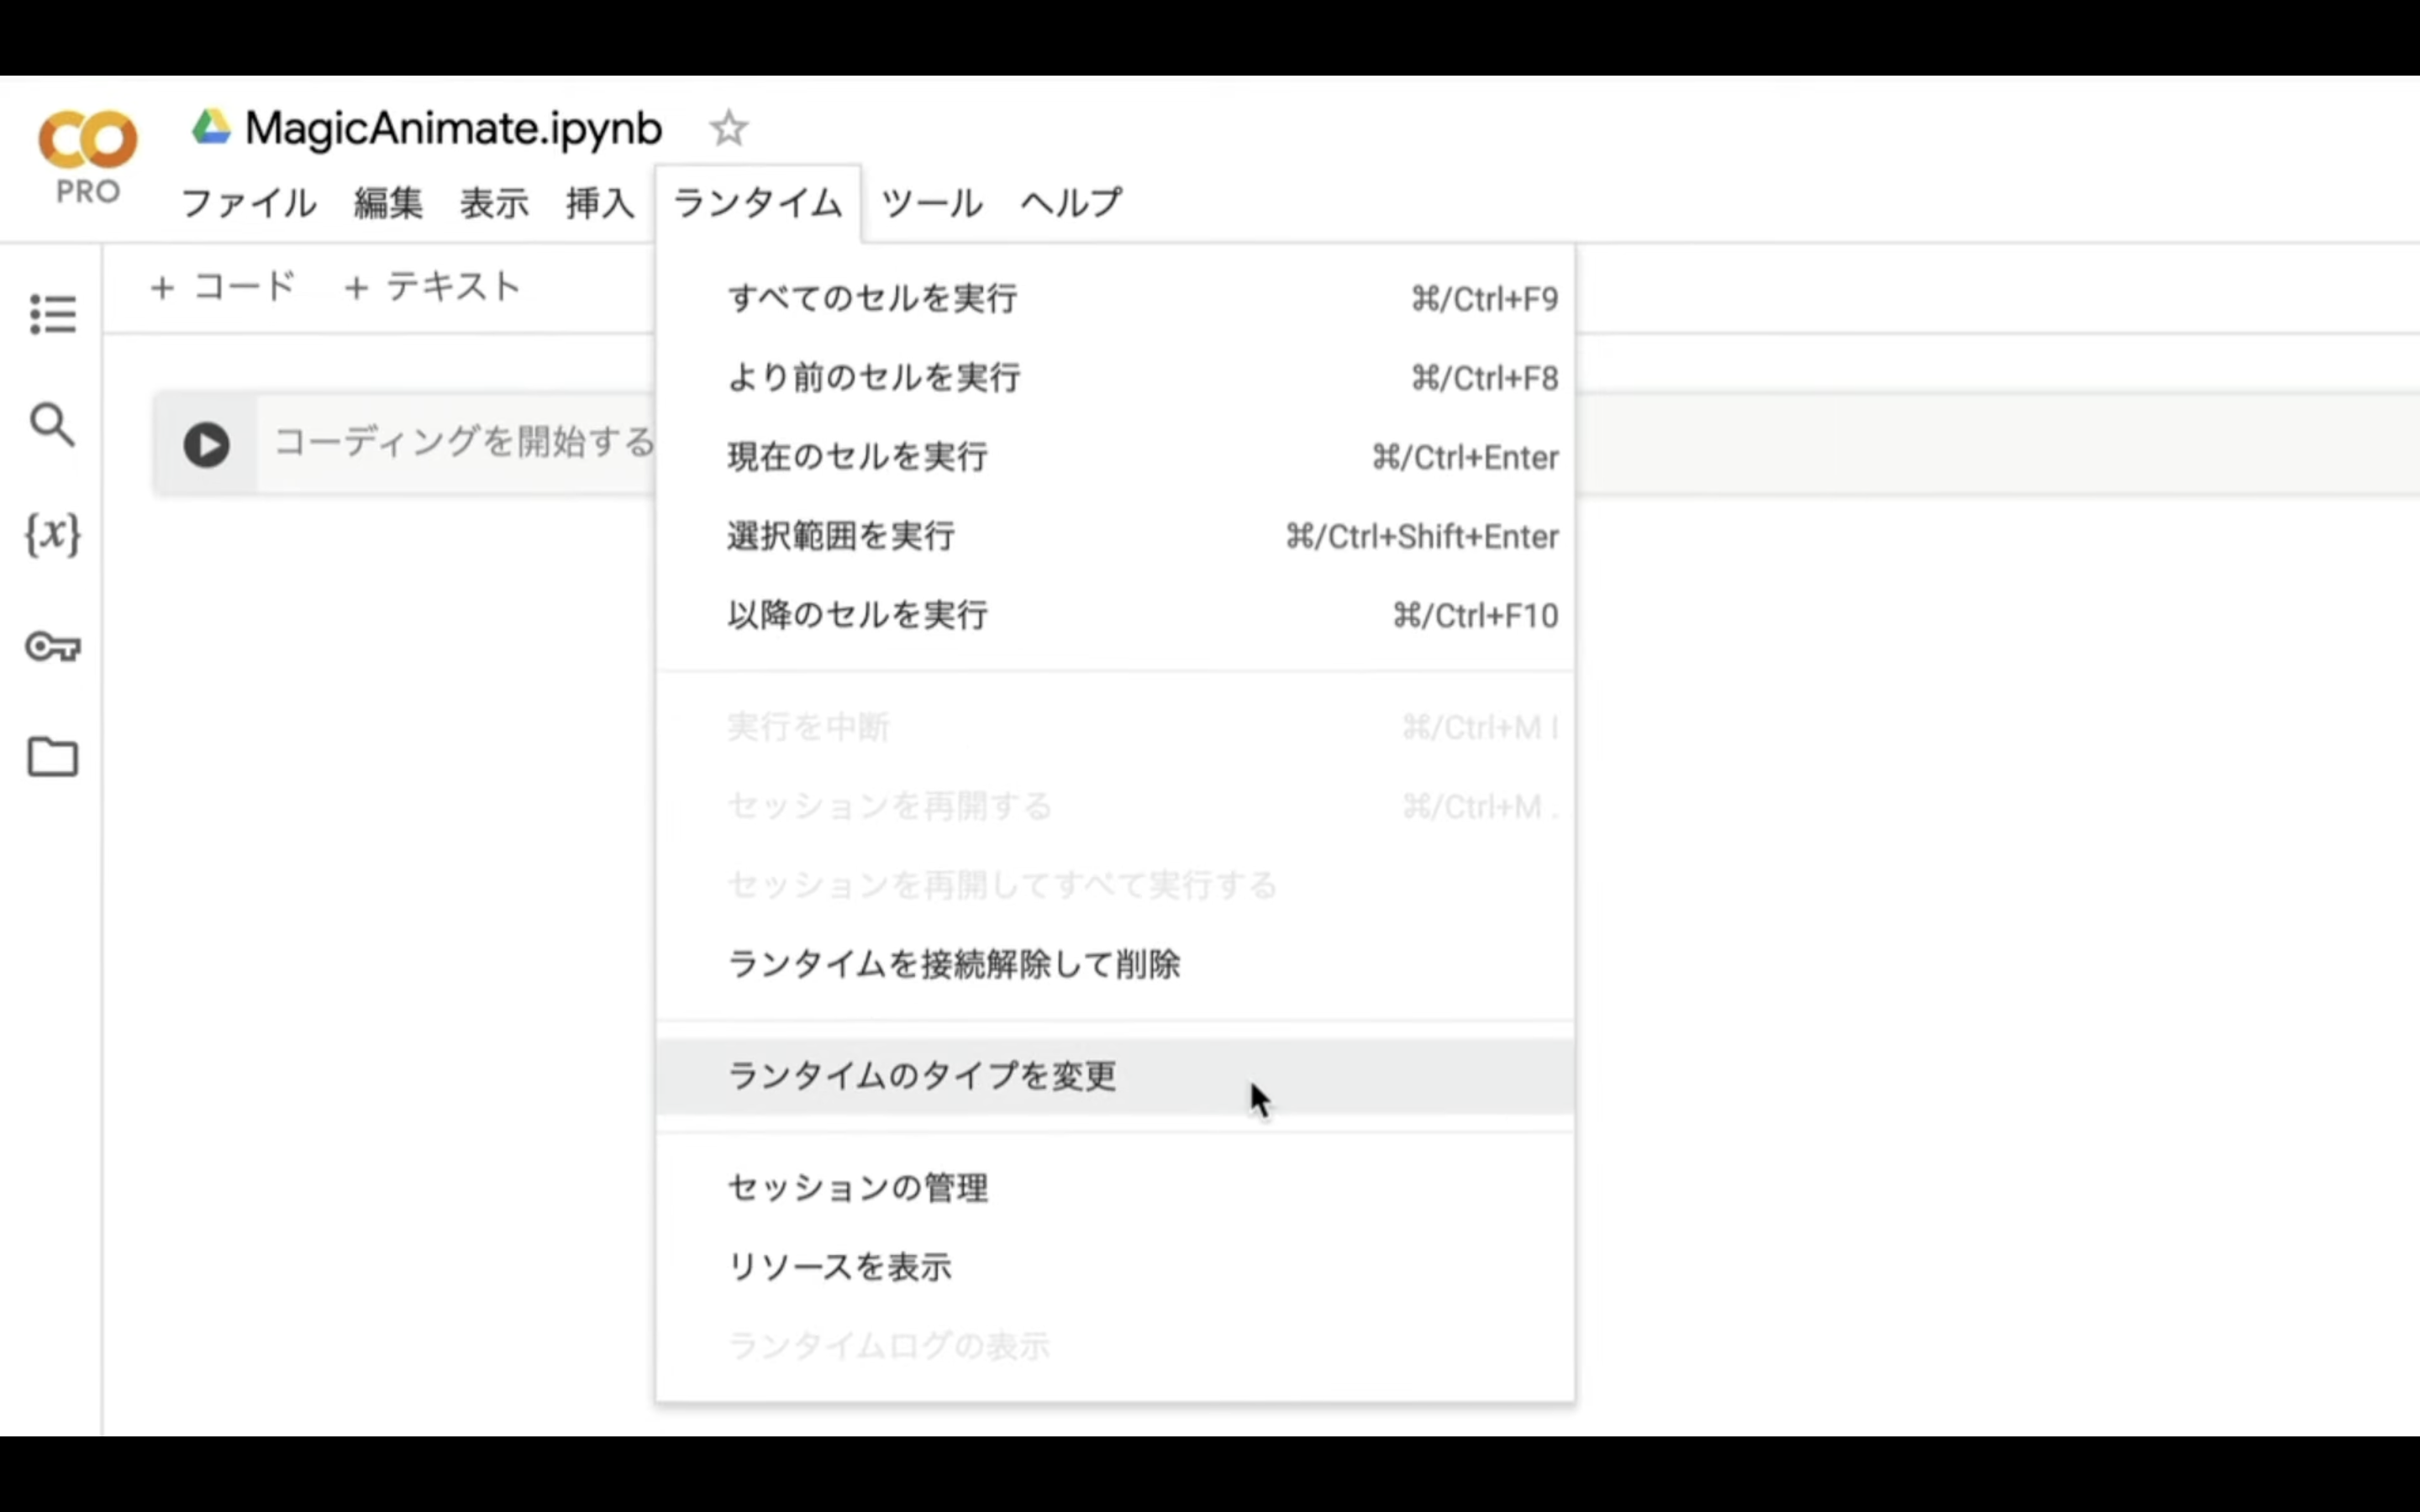
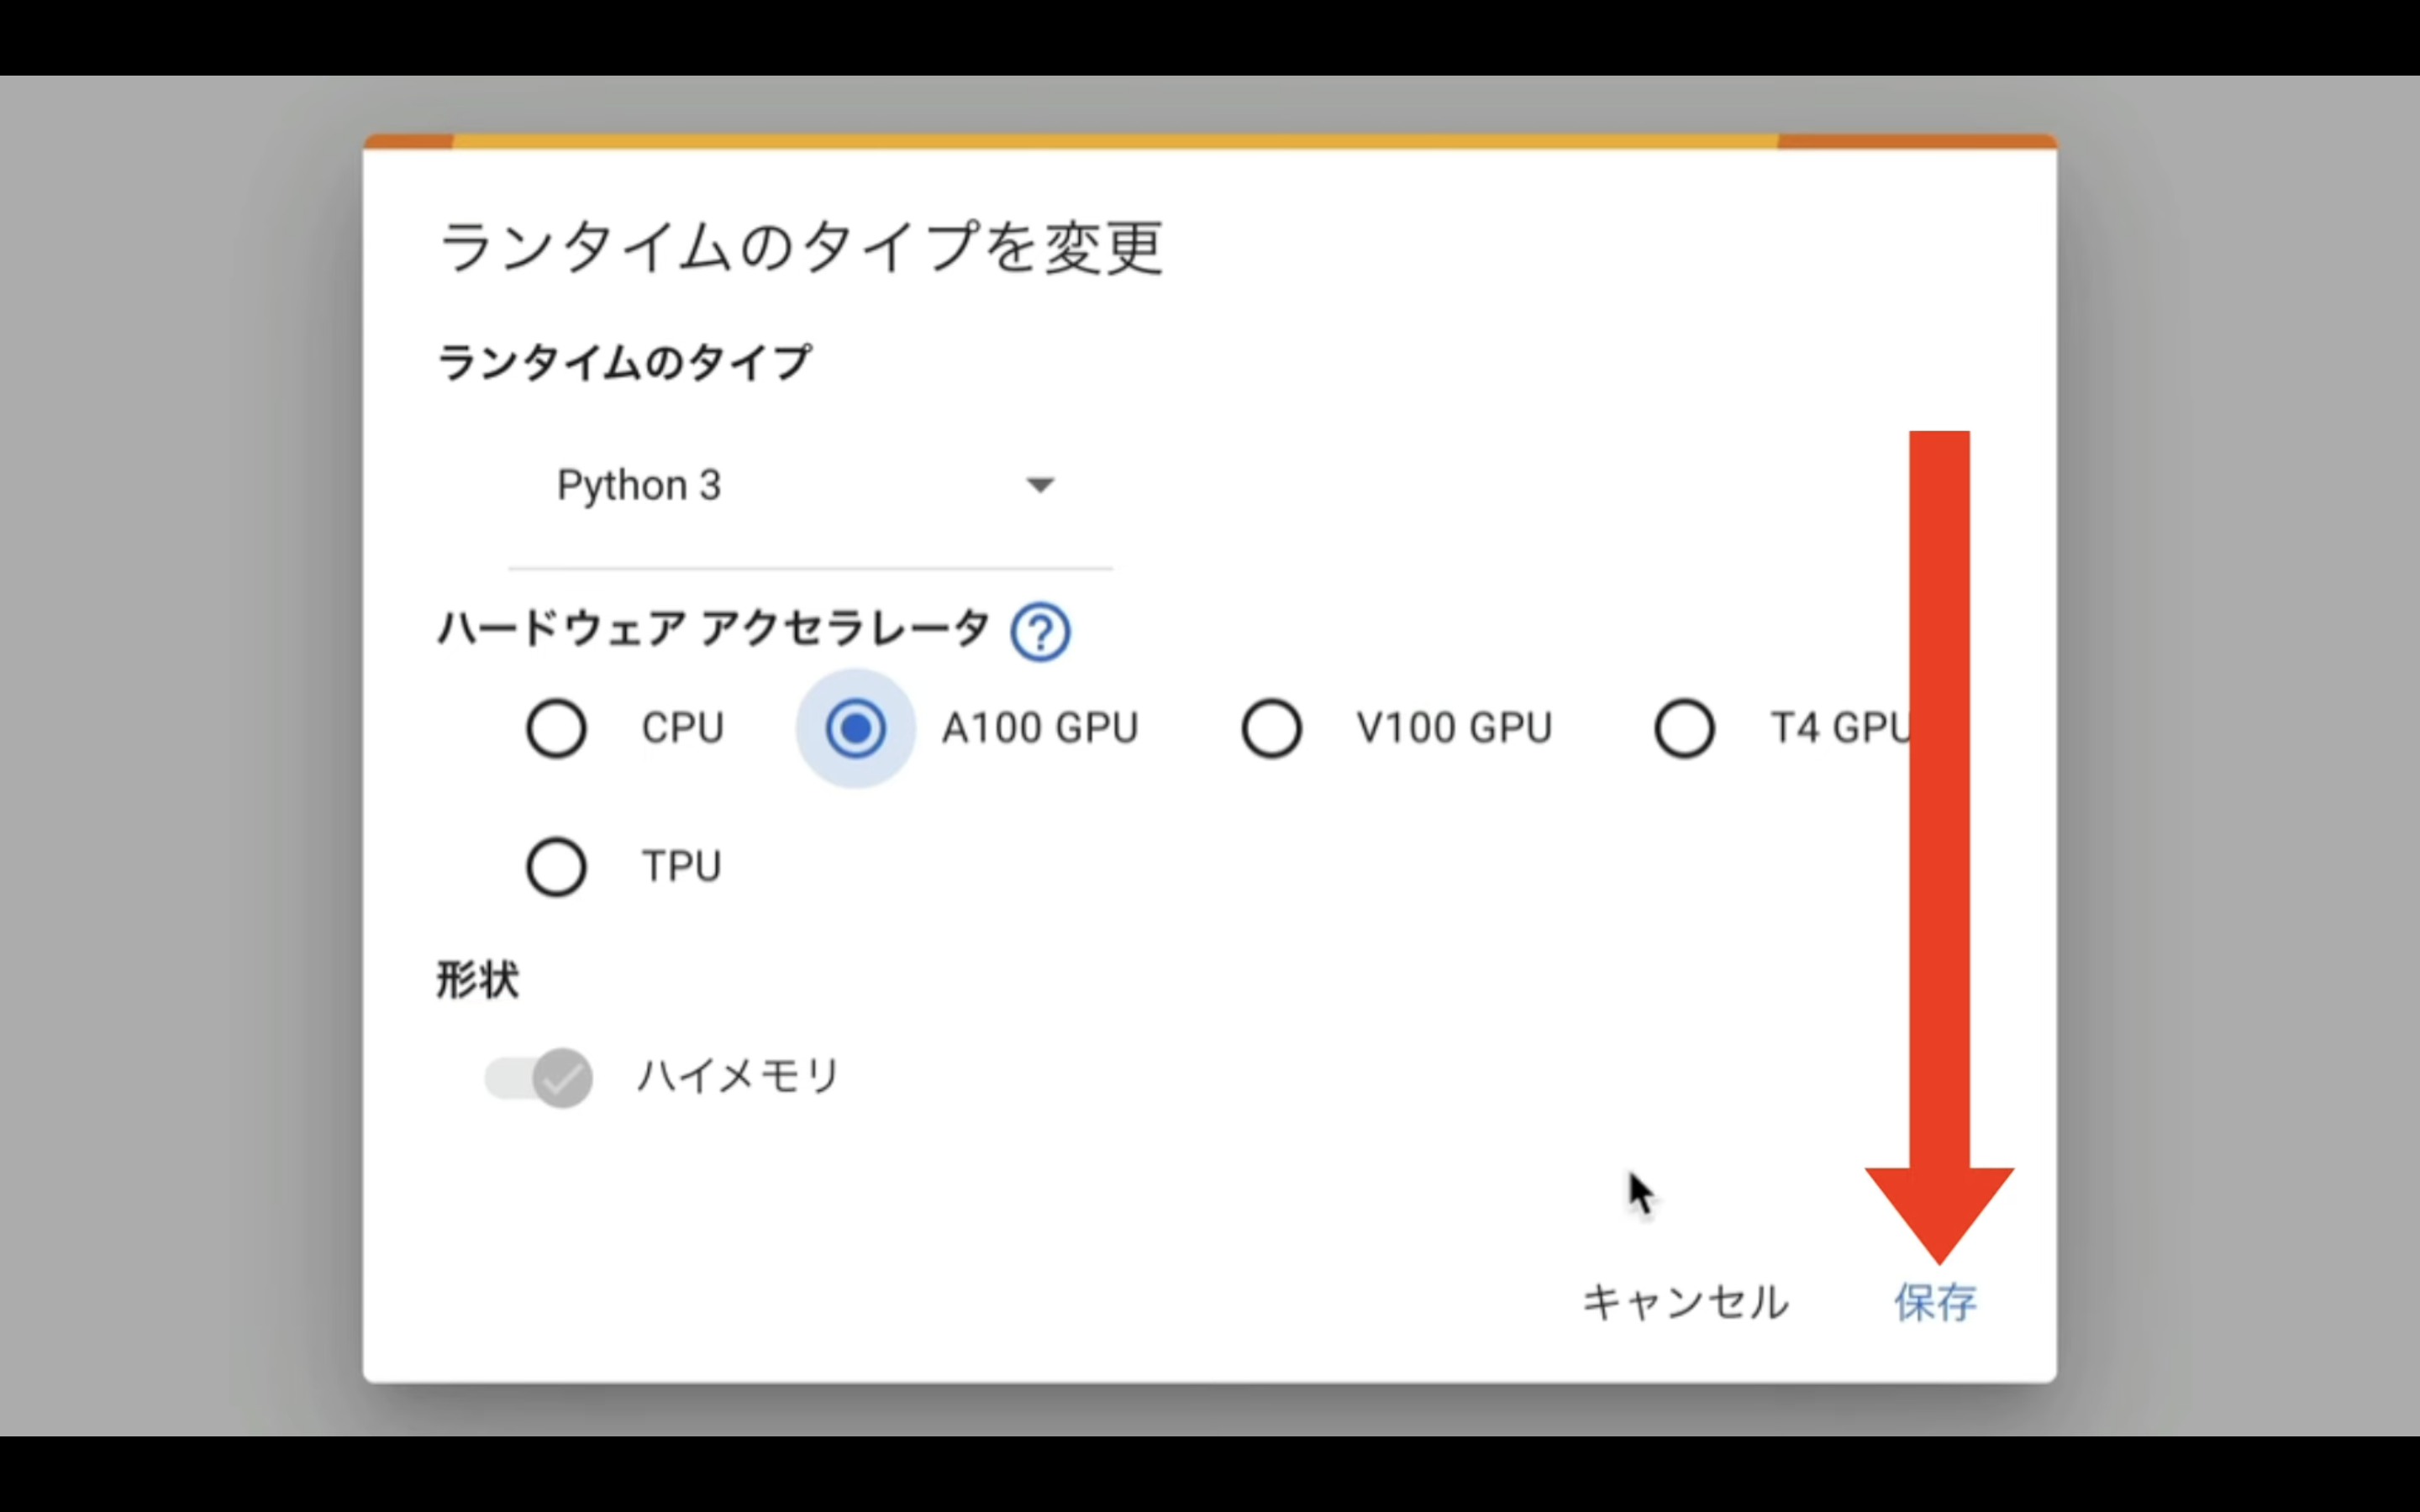
次に、ランタイムのタイプを変更します。
メニューの中から「ランタイム」を選択し、表示された項目の中から「ランタイムのタイプを変更」を選択します。
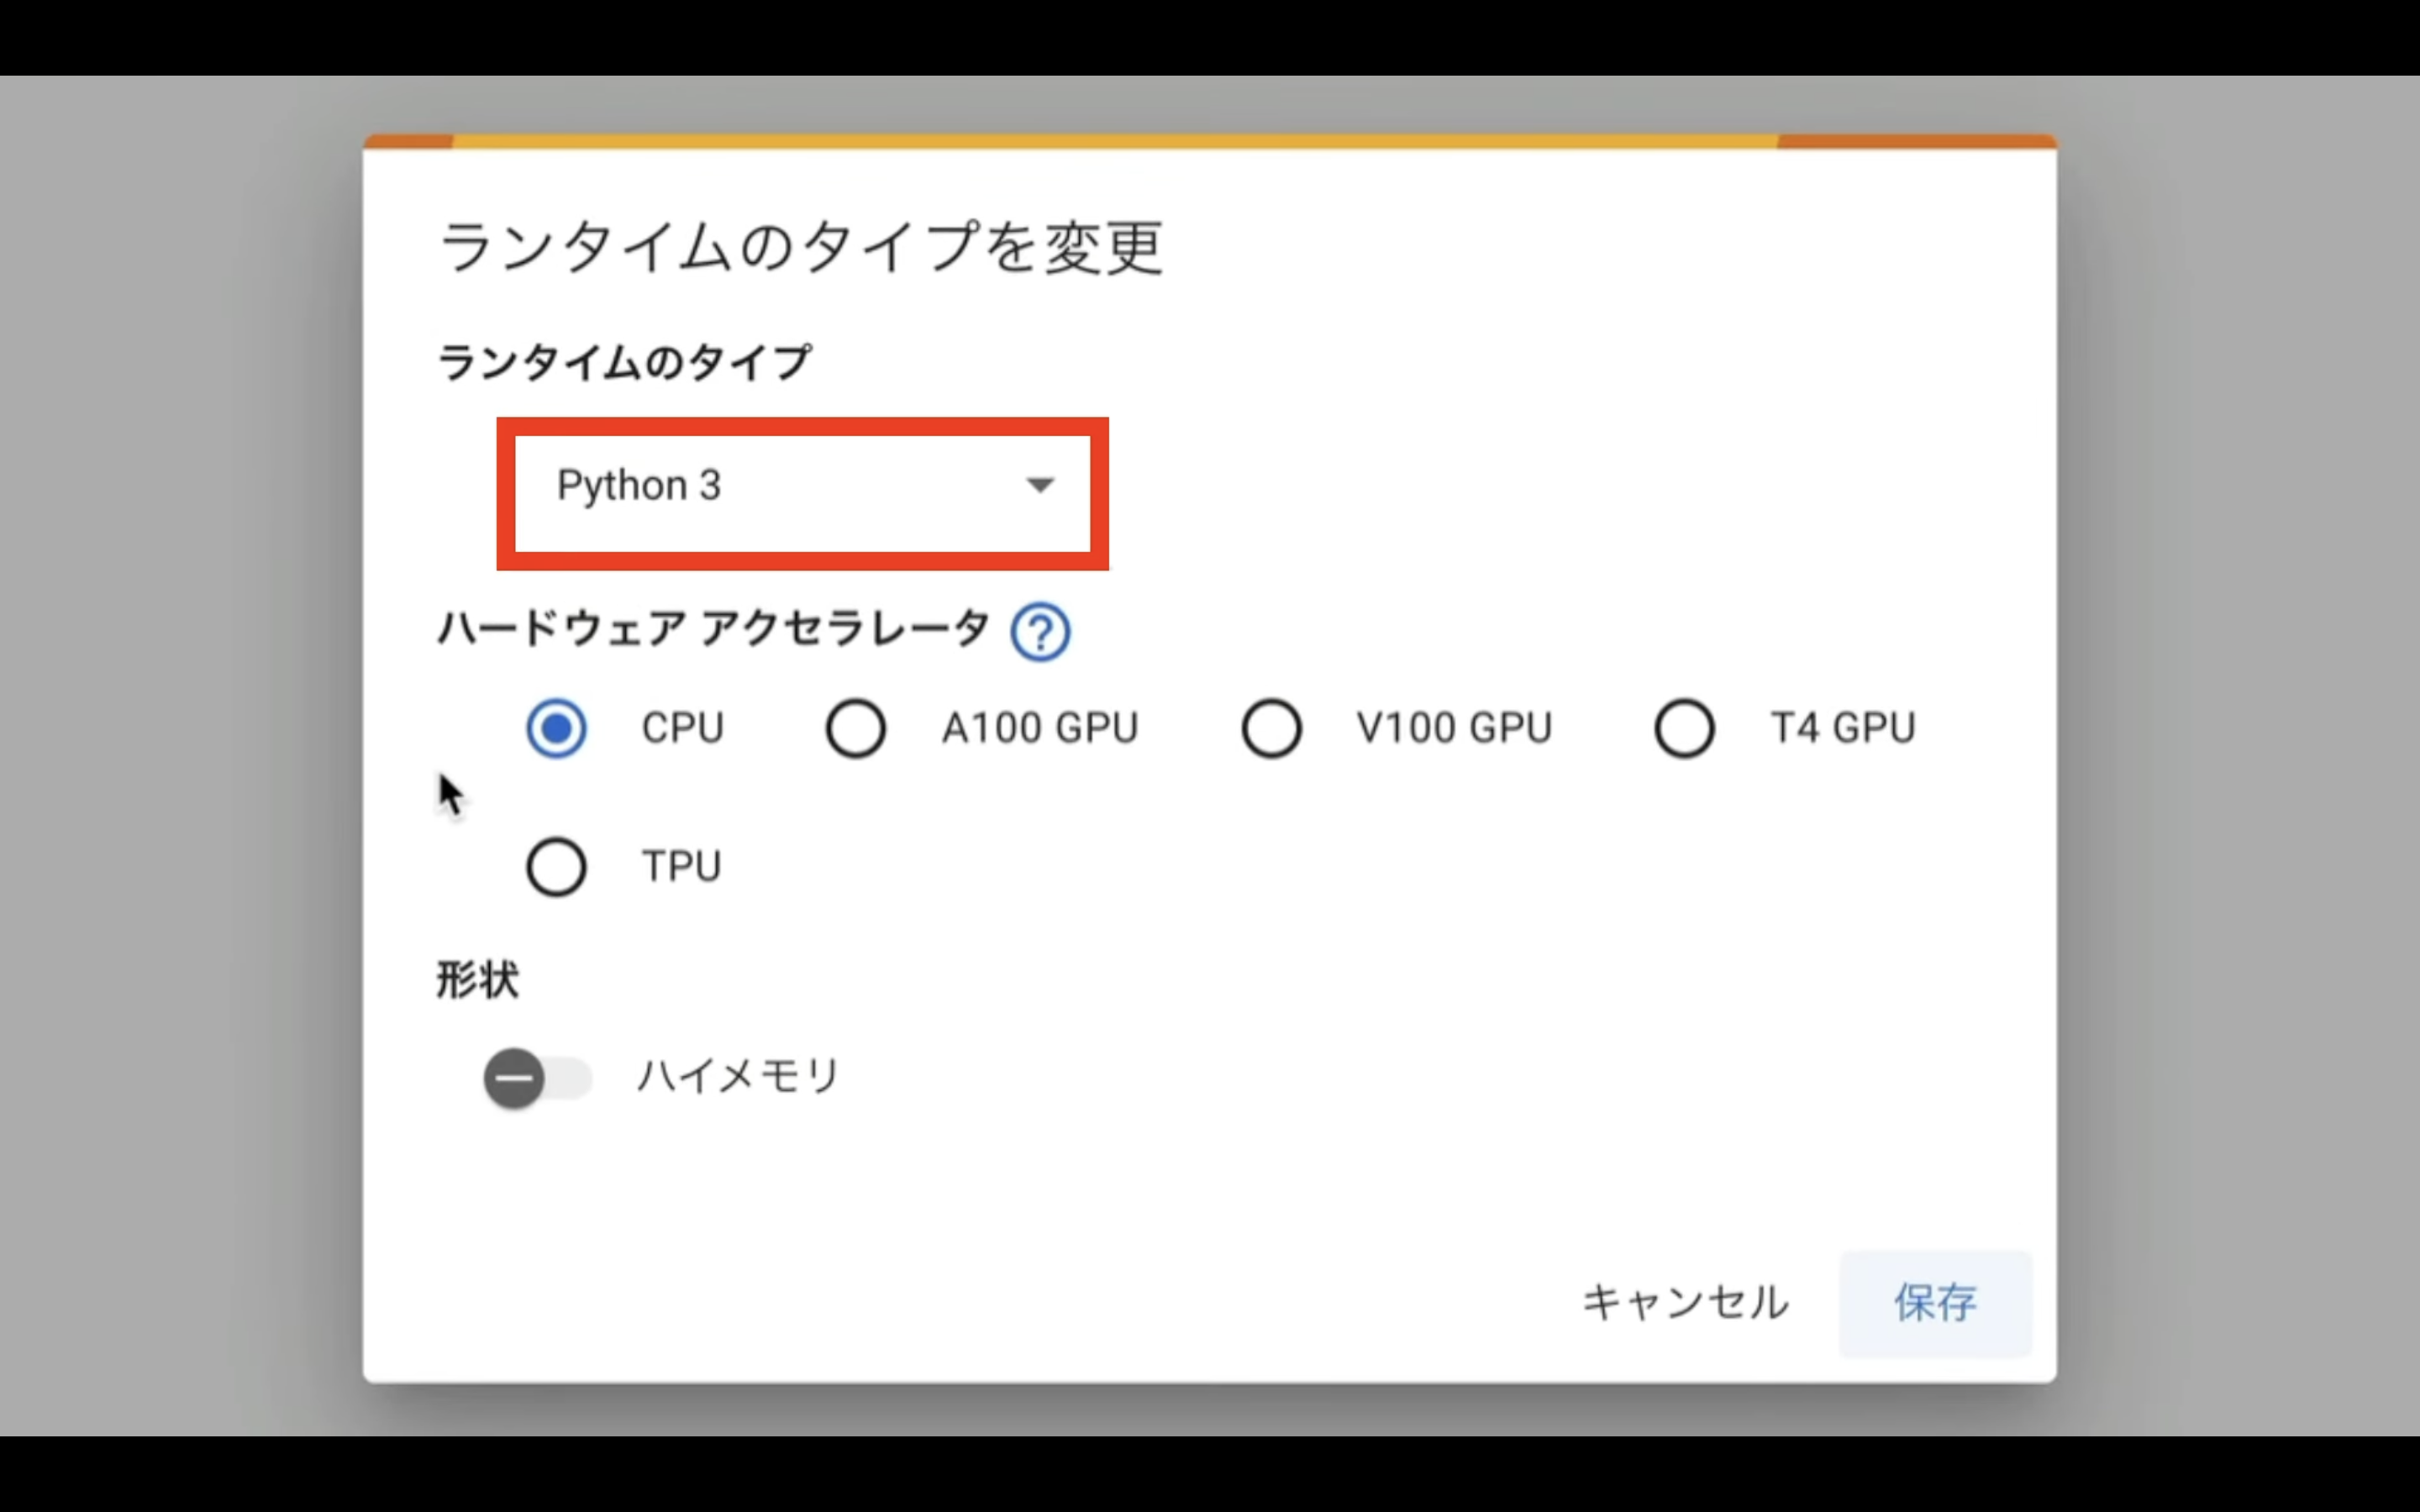
ランタイムのタイプはPython 3にしておき、ハードウェアアクセラレーターは、可能な限り高スペックなGPUを選択して処理時間を短縮したいため、A100 GPUを選択しておきます。
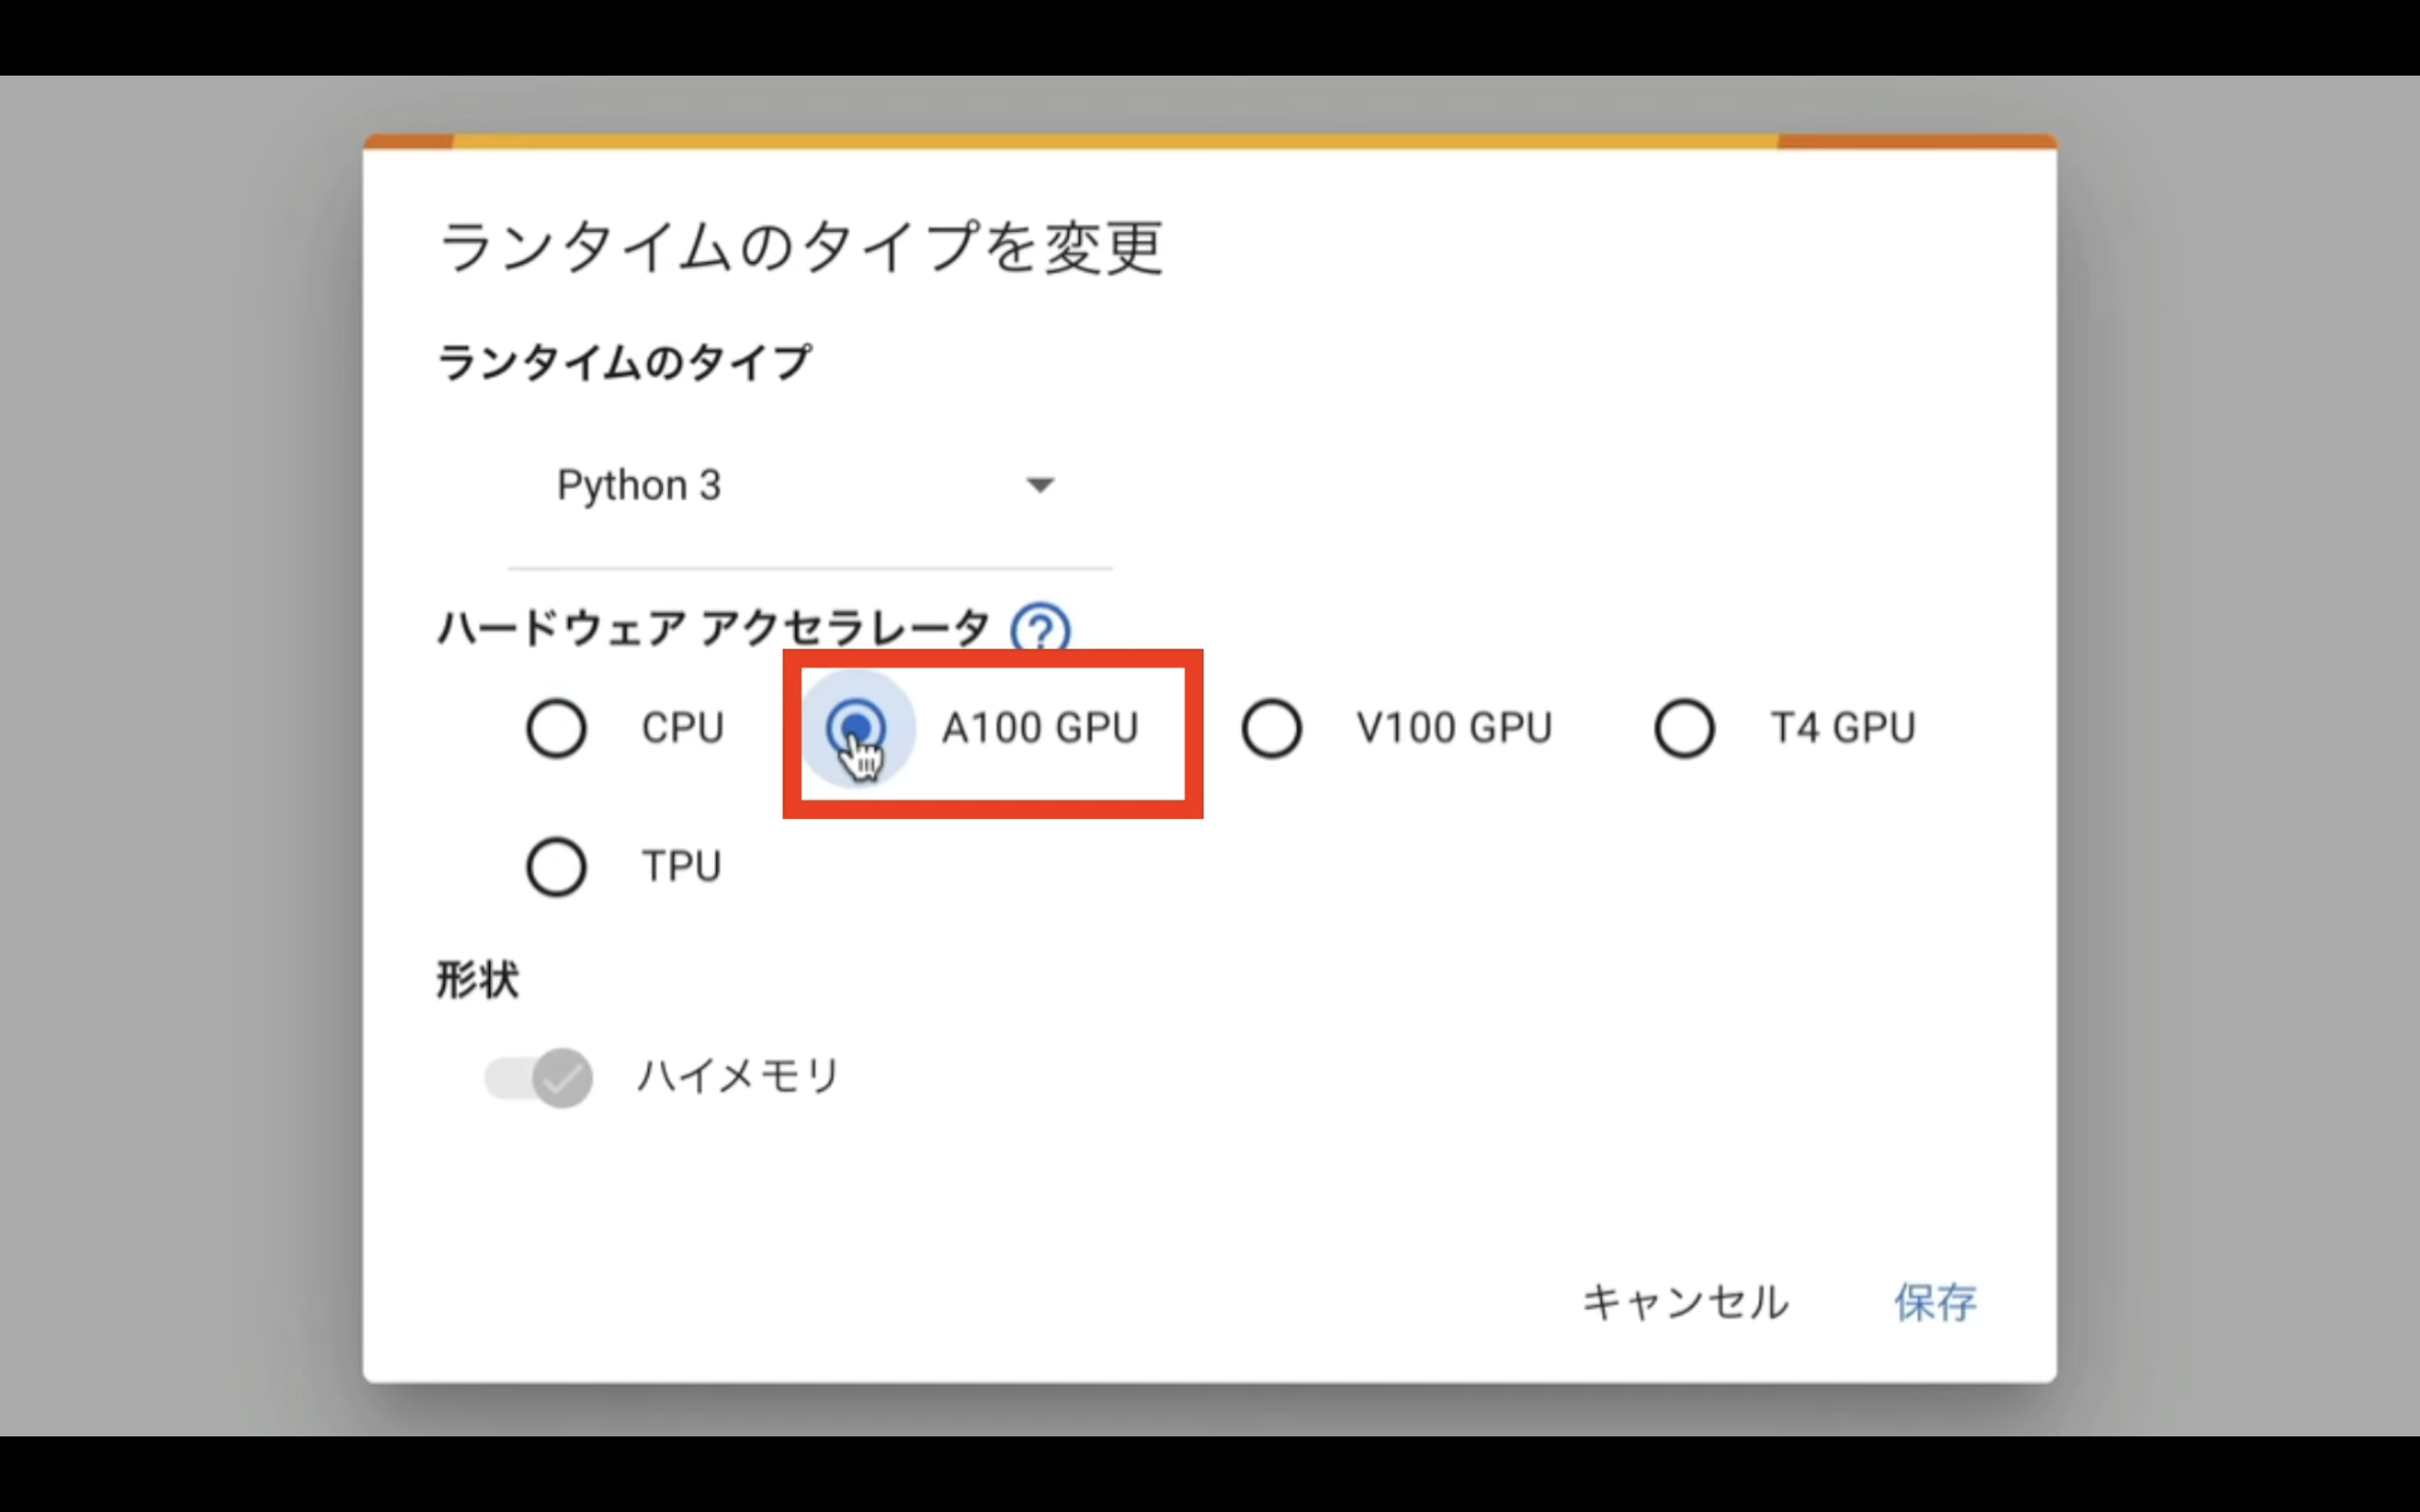
これは、A100 GPUが有料版のGoogle Colabでなければ選択できないためです。
A100 GPUを選択すると、ハイメモリーが自動で有効になります。
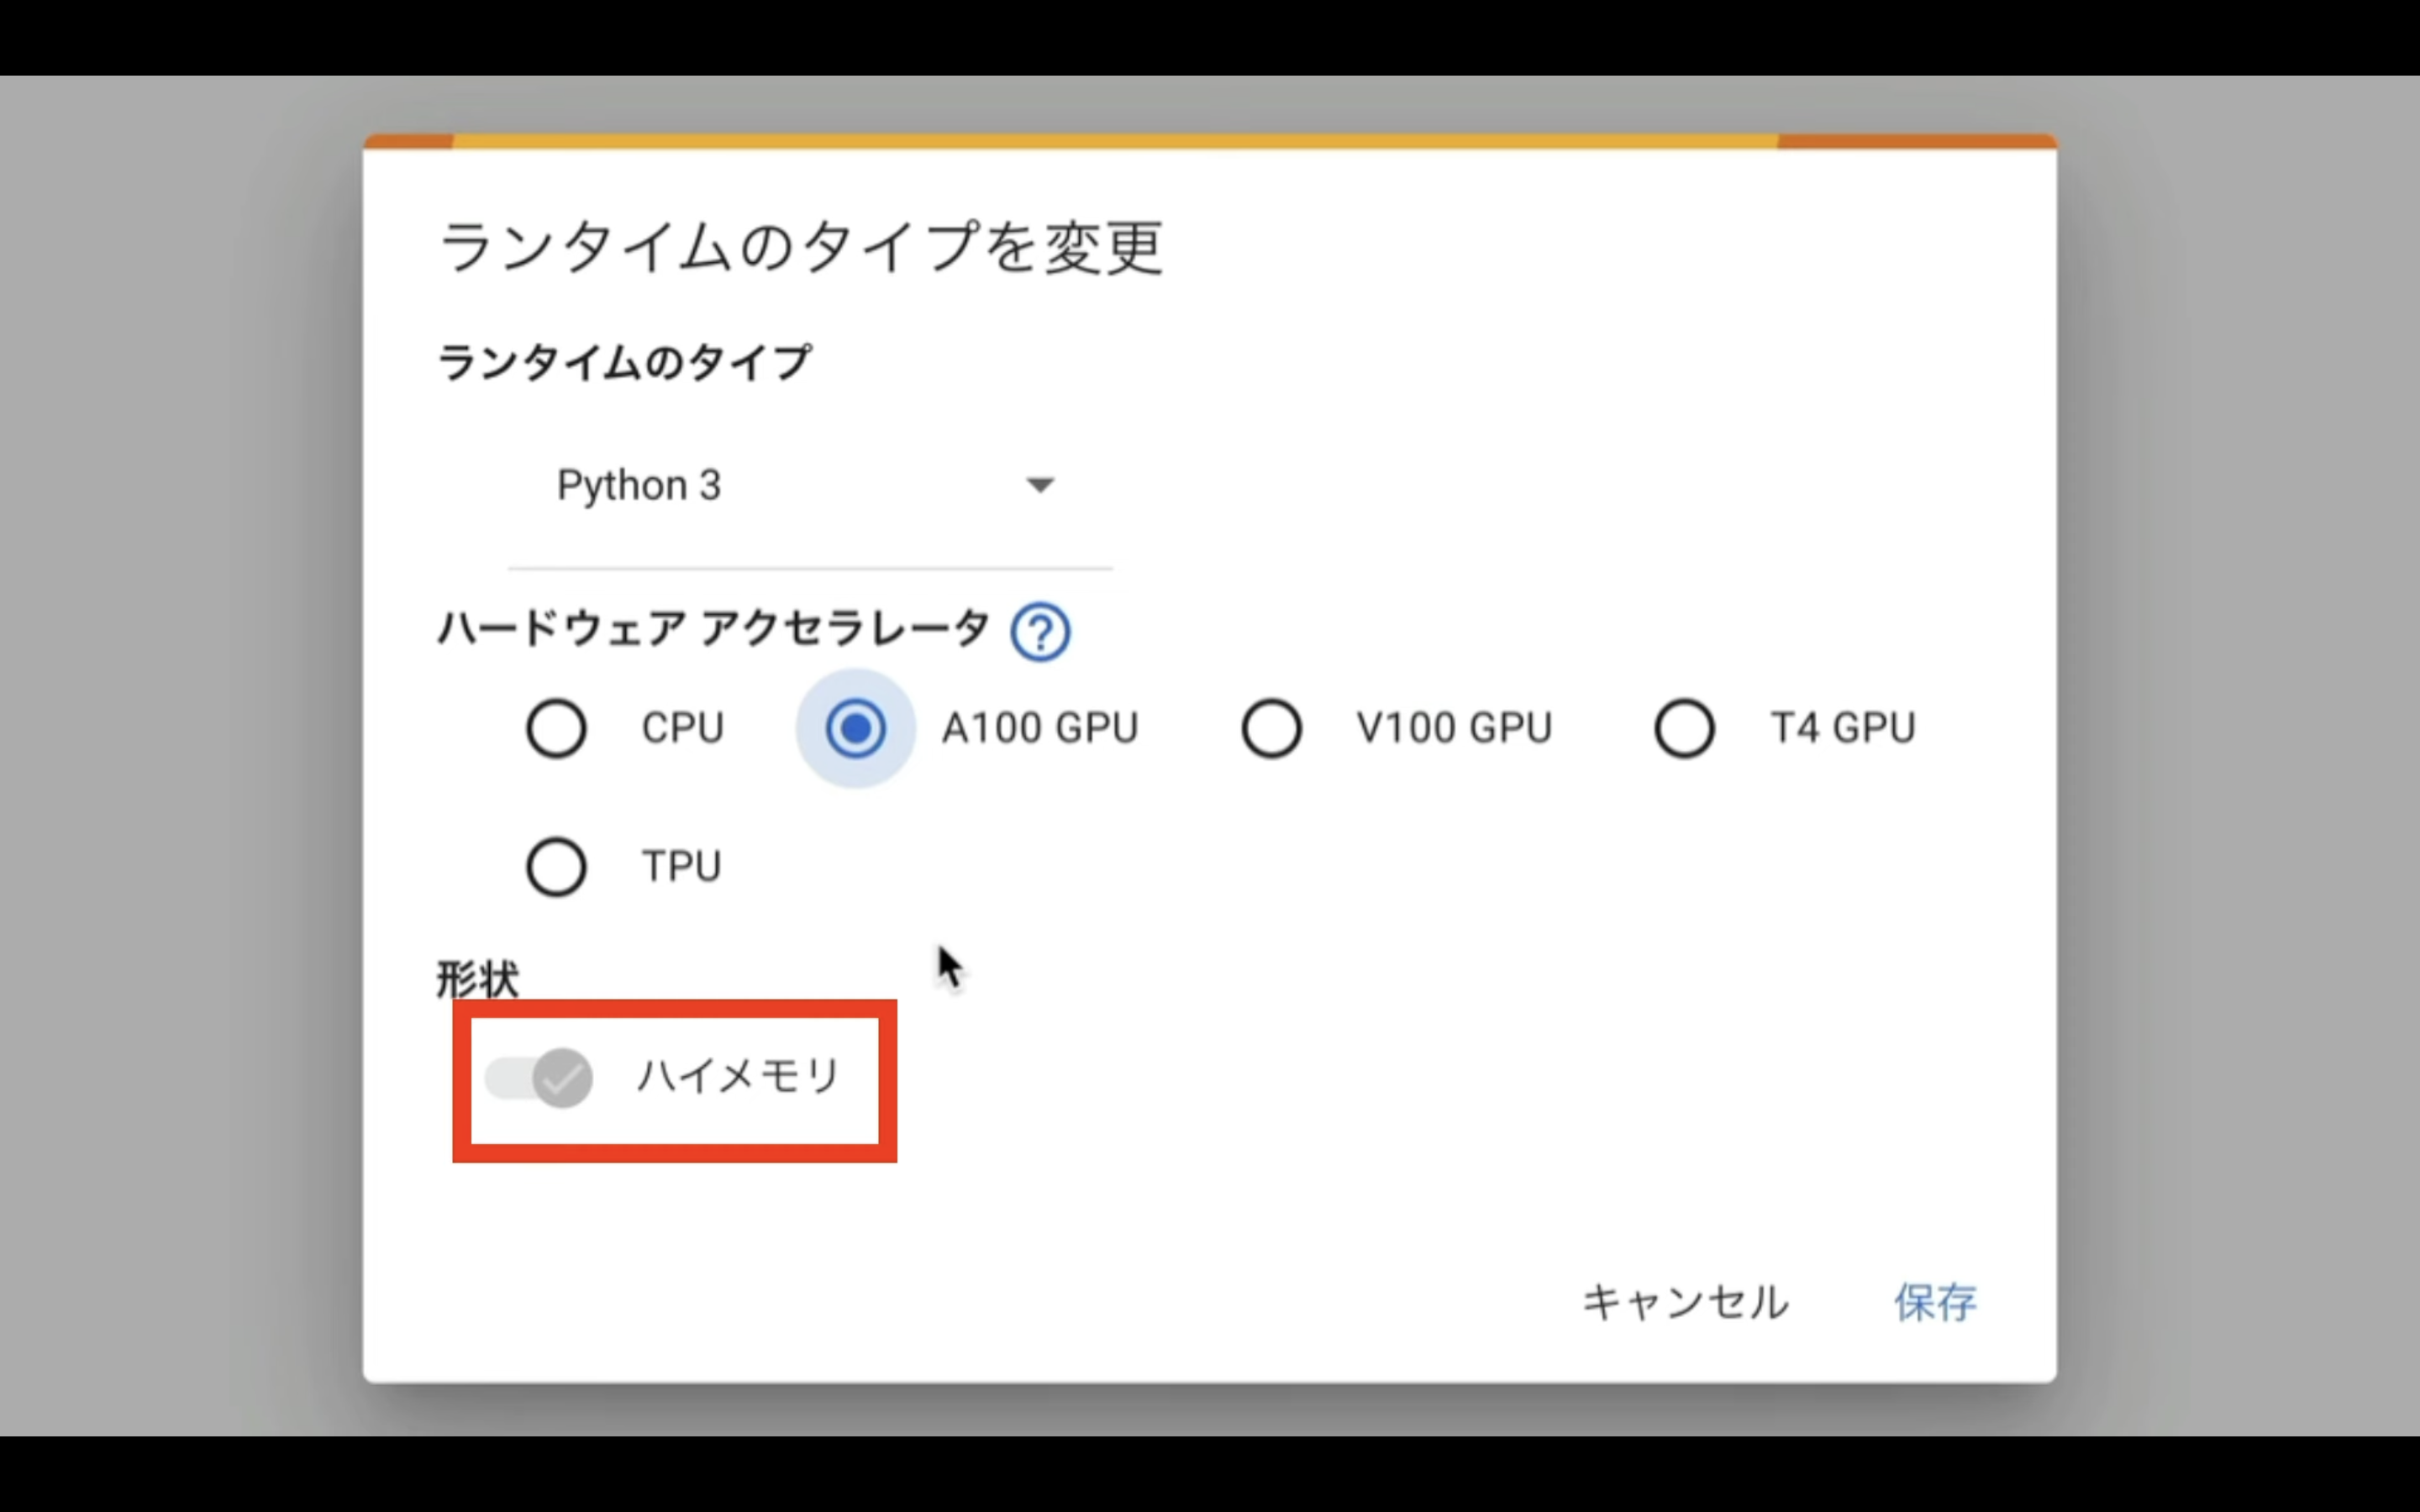
ランタイムのタイプを変更したら、「保存」ボタンをクリックします。
これで、Magic Animateのソースコードを実行するための準備が整いました。

ソースコードを実行
下記に貼ってあるテキストをコピーします。
!pip install -q torch==2.0.1+cu118 torchvision==0.15.2+cu118 torchaudio==2.0.2+cu118 torchtext==0.15.2 torchdata==0.6.1 --extra-index-url https://download.pytorch.org/whl/cu118 -U
!pip install -q xformers==0.0.20 triton==2.0.0 gradio_client==0.2.7 -U

!git clone https://github.com/magic-research/magic-animate.git
%cd /content/magic-animate
!pip install -r requirements.txt

!mkdir /content/magic-animate/pretrained_models

%cd /content/magic-animate/pretrained_models
!git lfs clone https://huggingface.co/zcxu-eric/MagicAnimate
!git lfs clone https://huggingface.co/stabilityai/sd-vae-ft-mse

!GIT_LFS_SKIP_SMUDGE=1 git clone https://huggingface.co/runwayml/stable-diffusion-v1-5 --progress --verbose
%cd /content/magic-animate/pretrained_models/stable-diffusion-v1-5
!git checkout fp16
!git fetch origin fp16
!git reset --hard origin/fp16
# !git lfs pull

!wget --continue --show-progress -O /content/magic-animate/pretrained_models/stable-diffusion-v1-5/v1-5-pruned-emaonly.safetensors https://huggingface.co/runwayml/stable-diffusion-v1-5/resolve/main/v1-5-pruned-emaonly.safetensors
!wget --continue --show-progress -O /content/magic-animate/pretrained_models/stable-diffusion-v1-5/v1-5-pruned.safetensors https://huggingface.co/runwayml/stable-diffusion-v1-5/resolve/main/v1-5-pruned.safetensors

%cd /content/magic-animate
!python -m demo.gradio_animate
テキストをコピーしたら、Google Colabの画面に戻り、テキストボックスに先ほどコピーしたテキストを貼り付け、そして「再生」ボタンを押します。
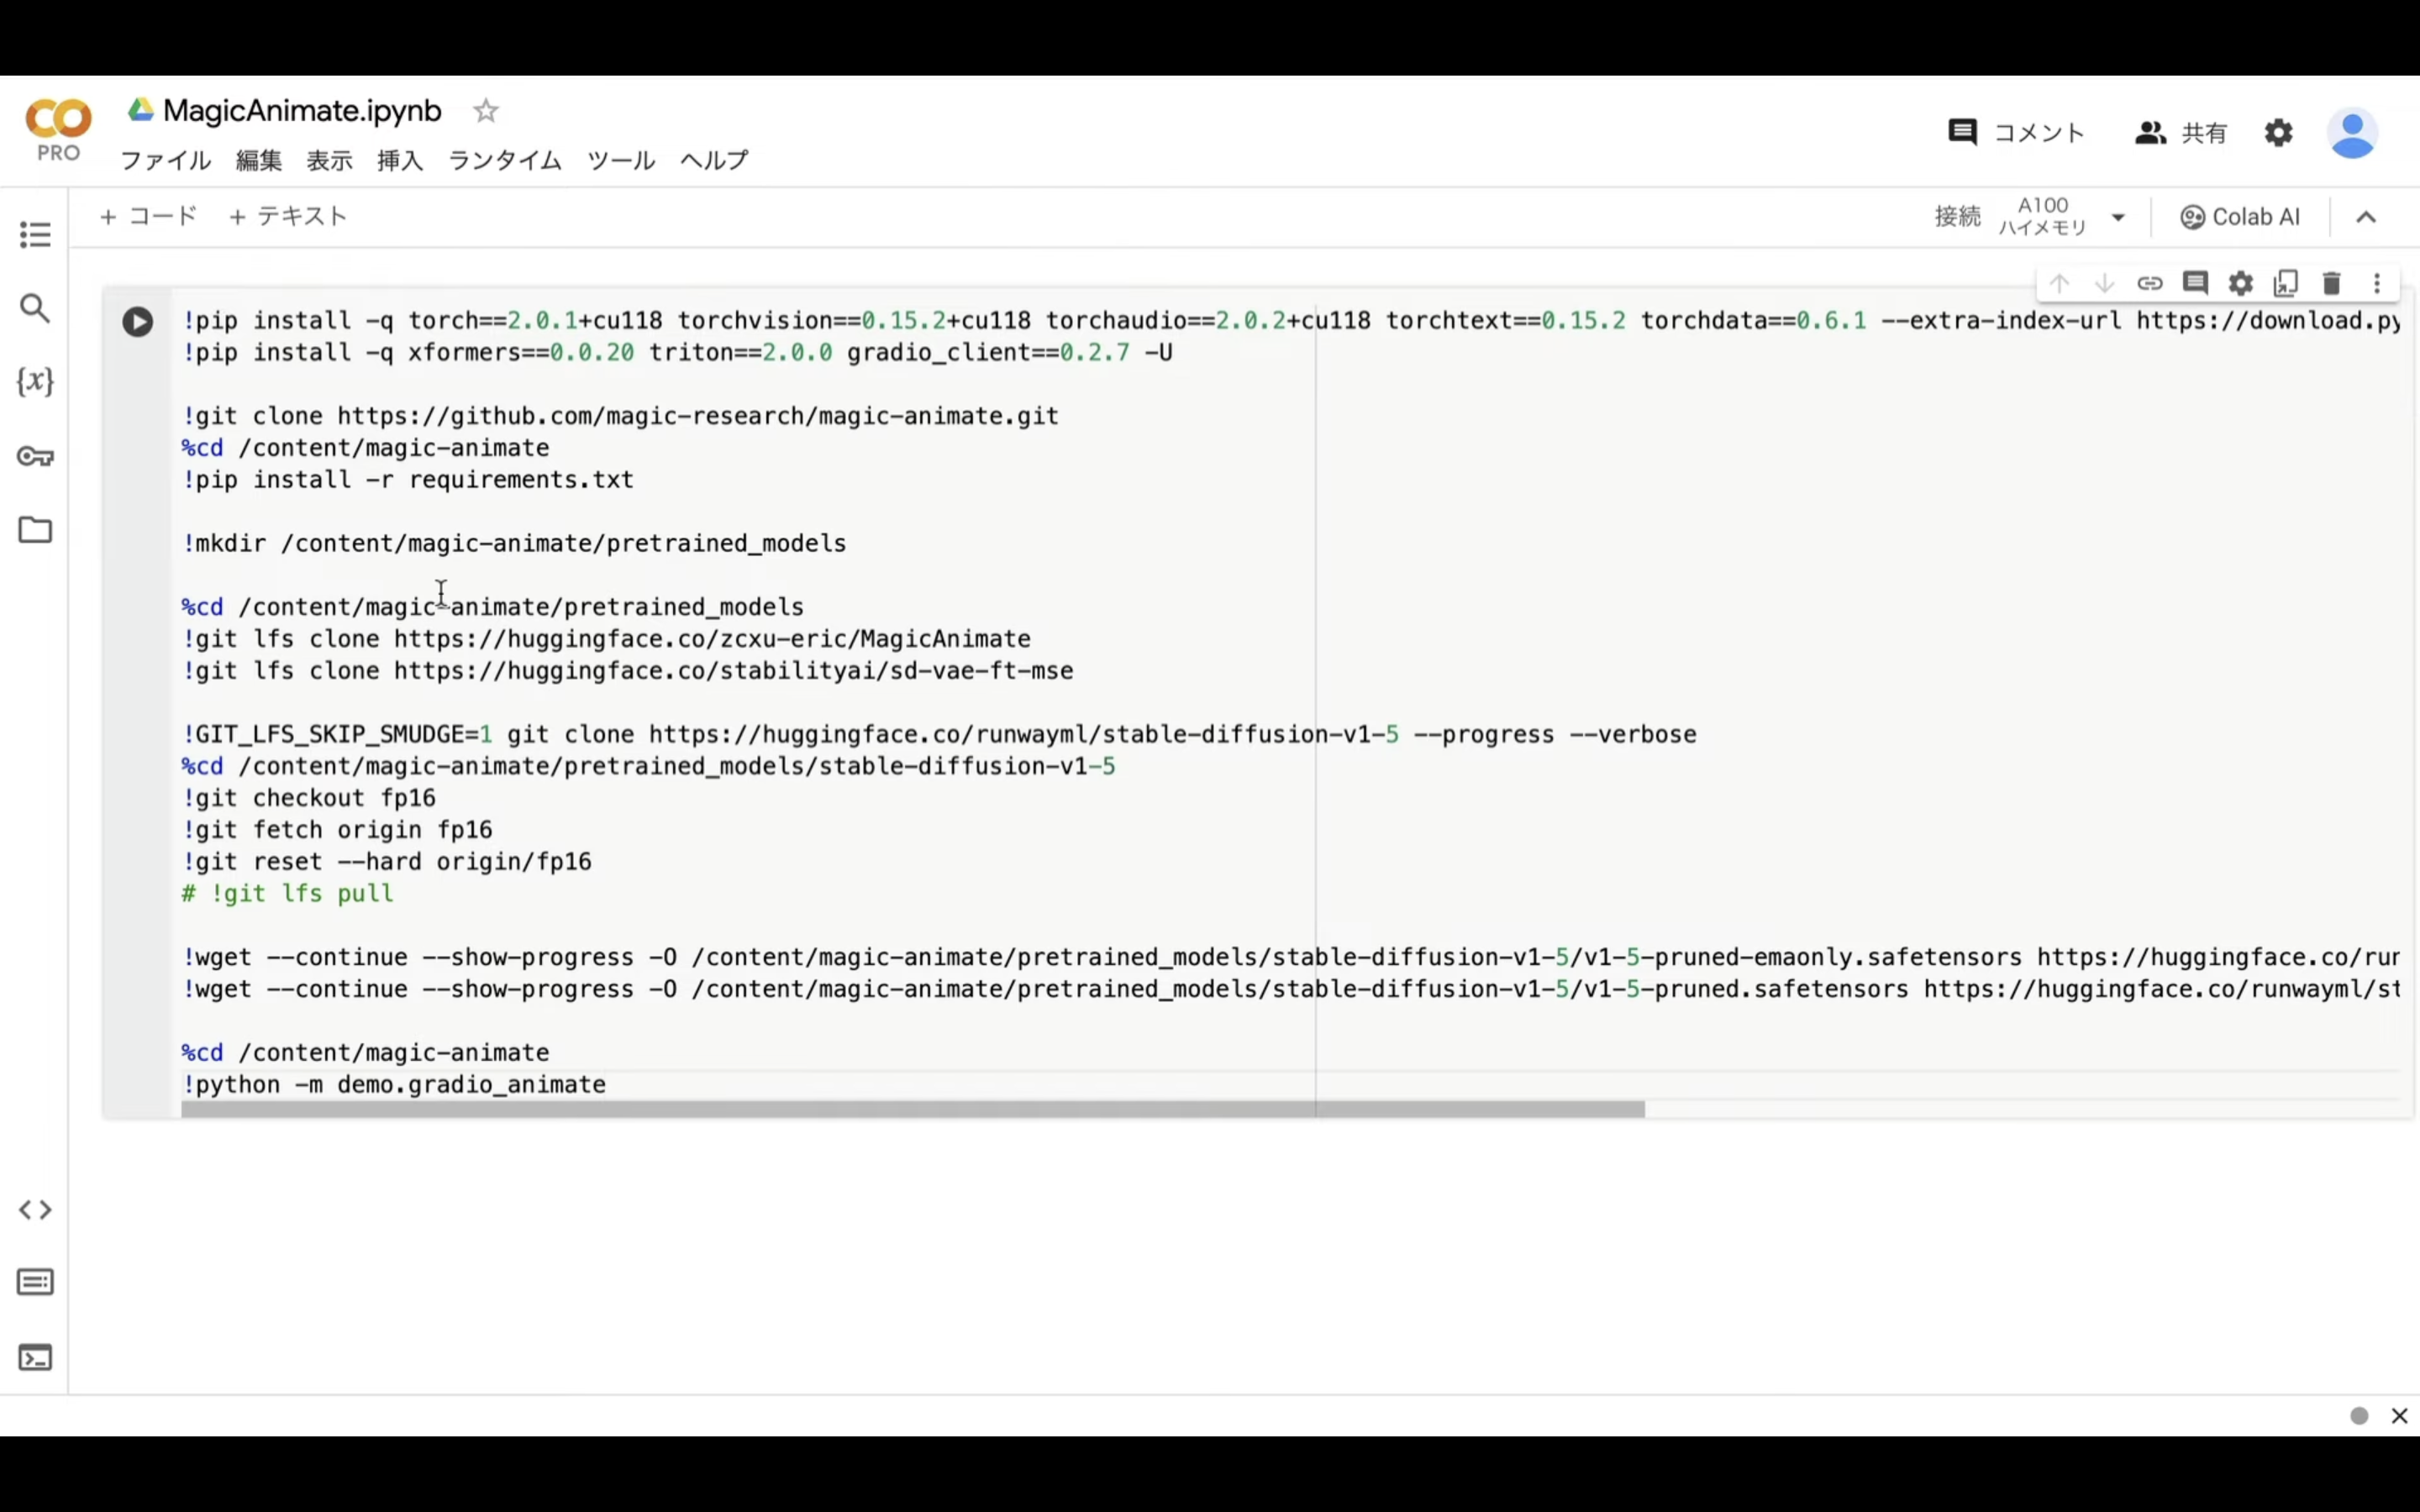
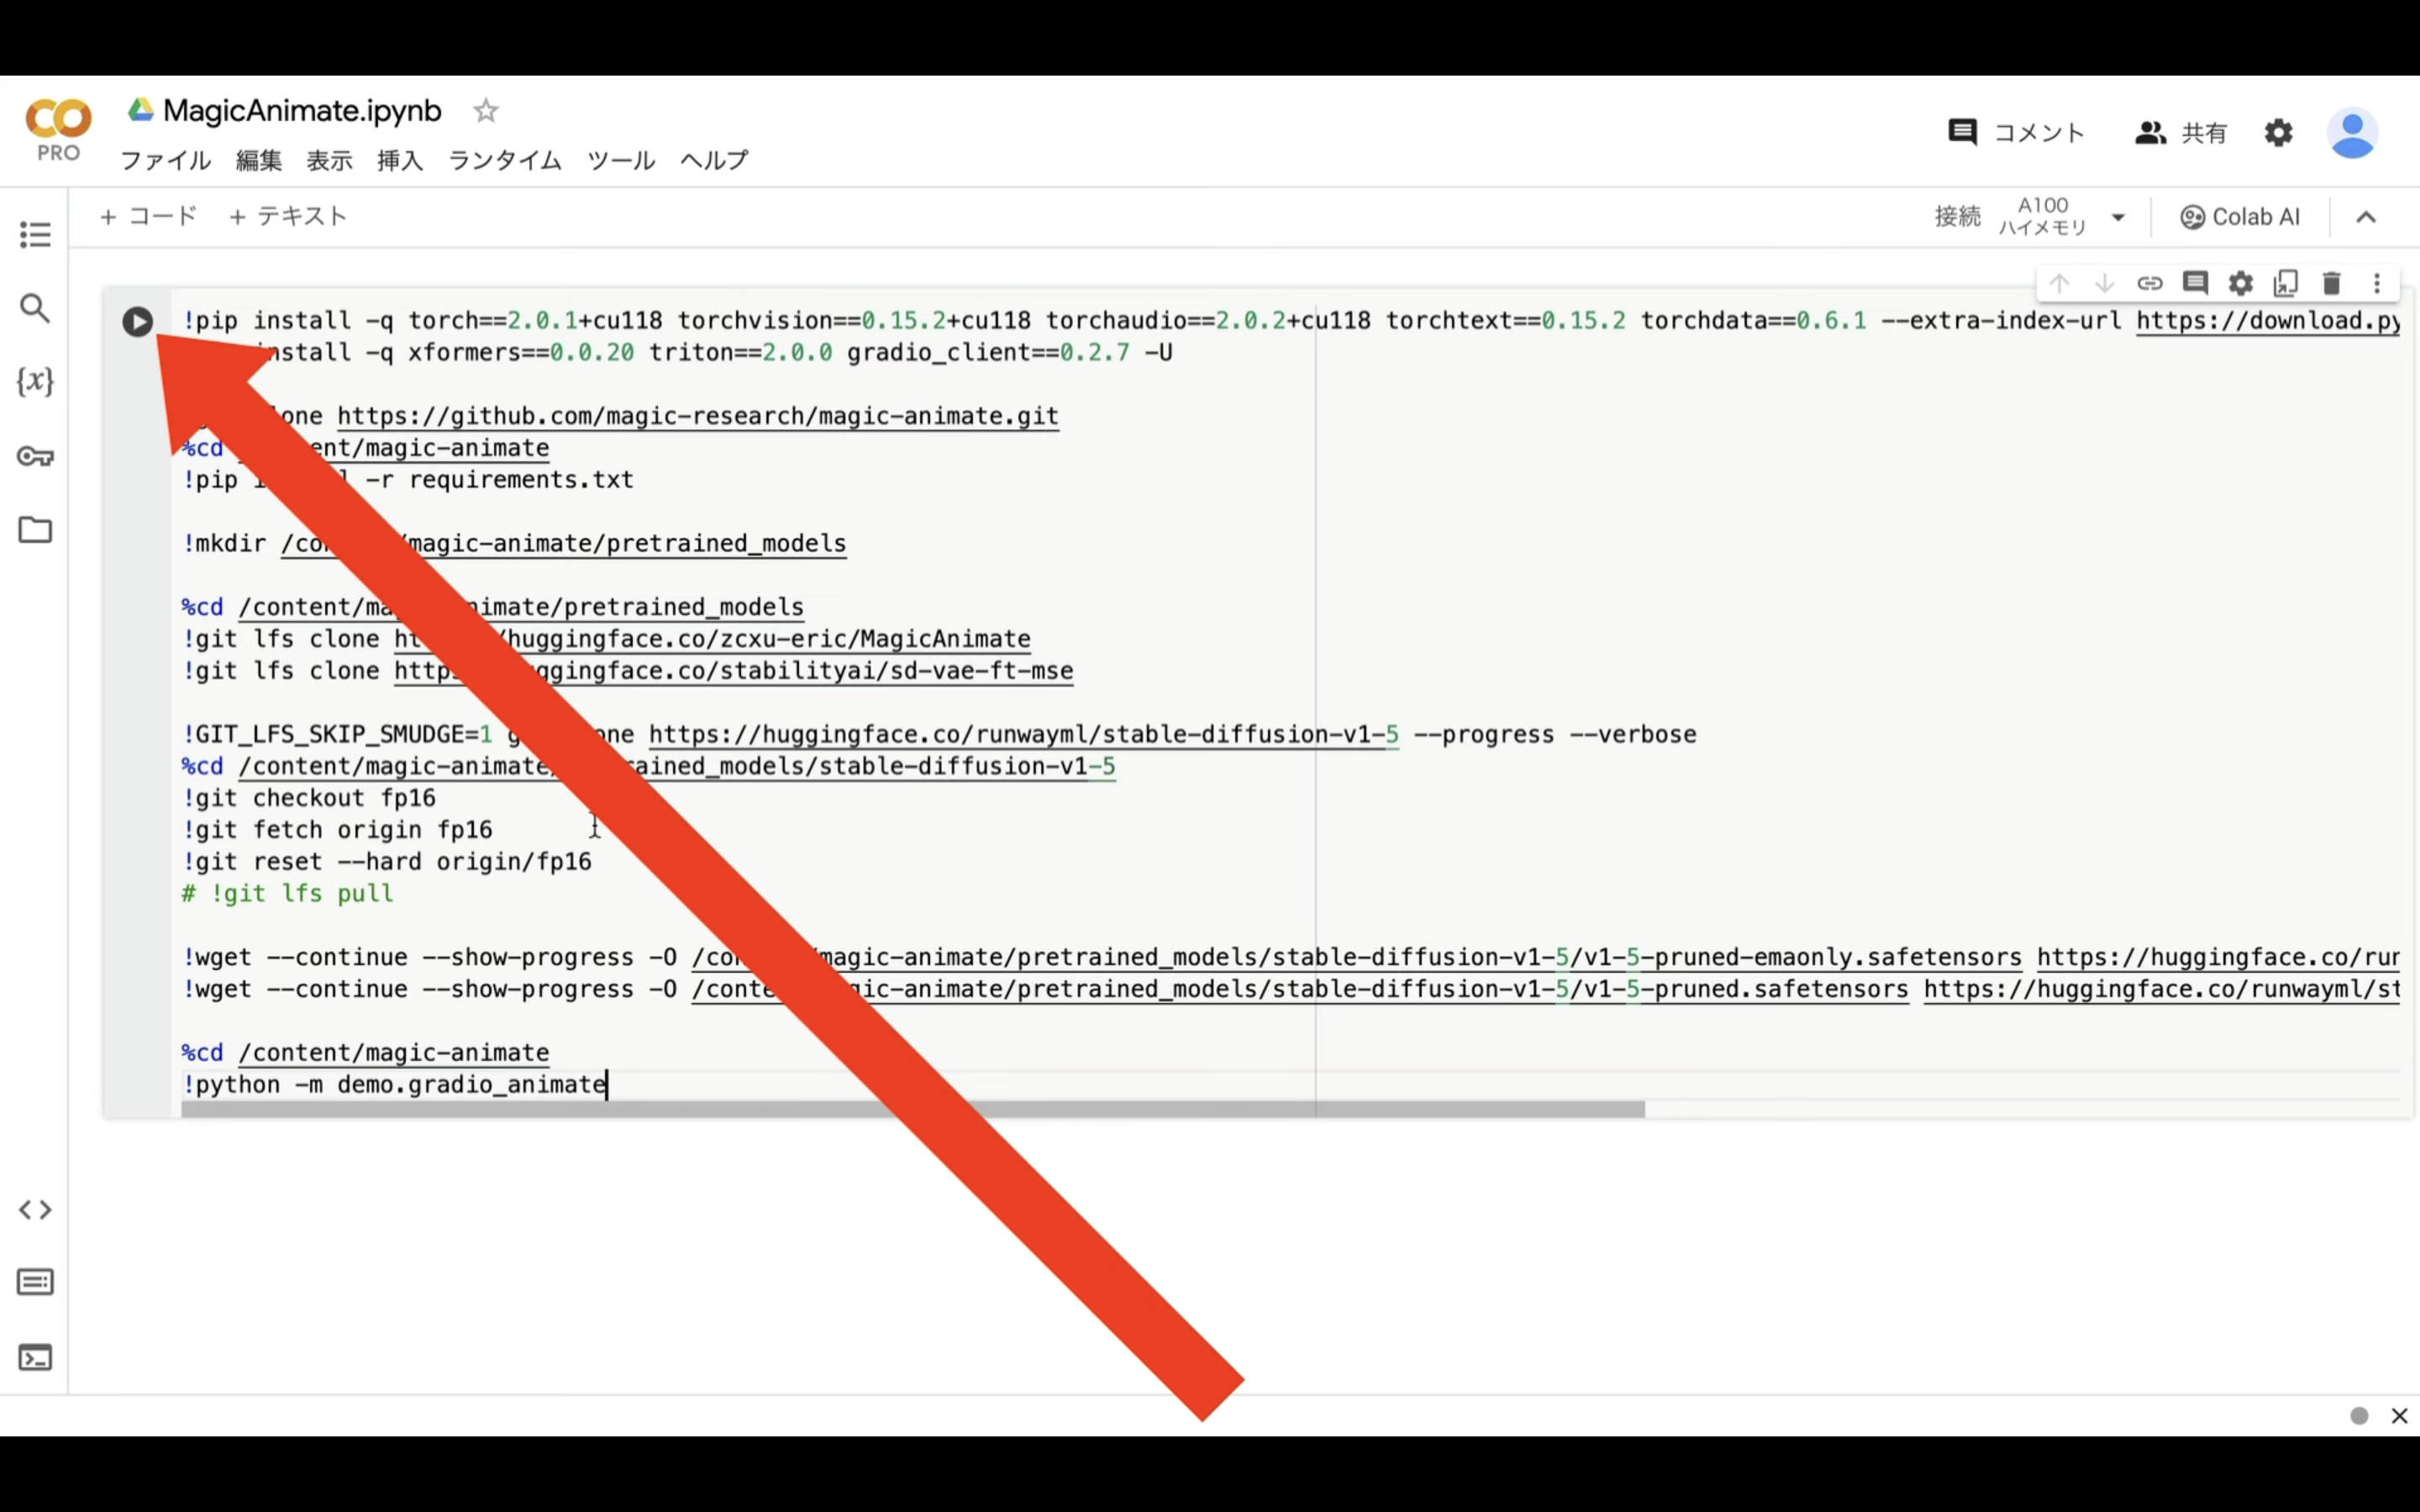
これで、貼り付けたテキストの内容が実行されます。
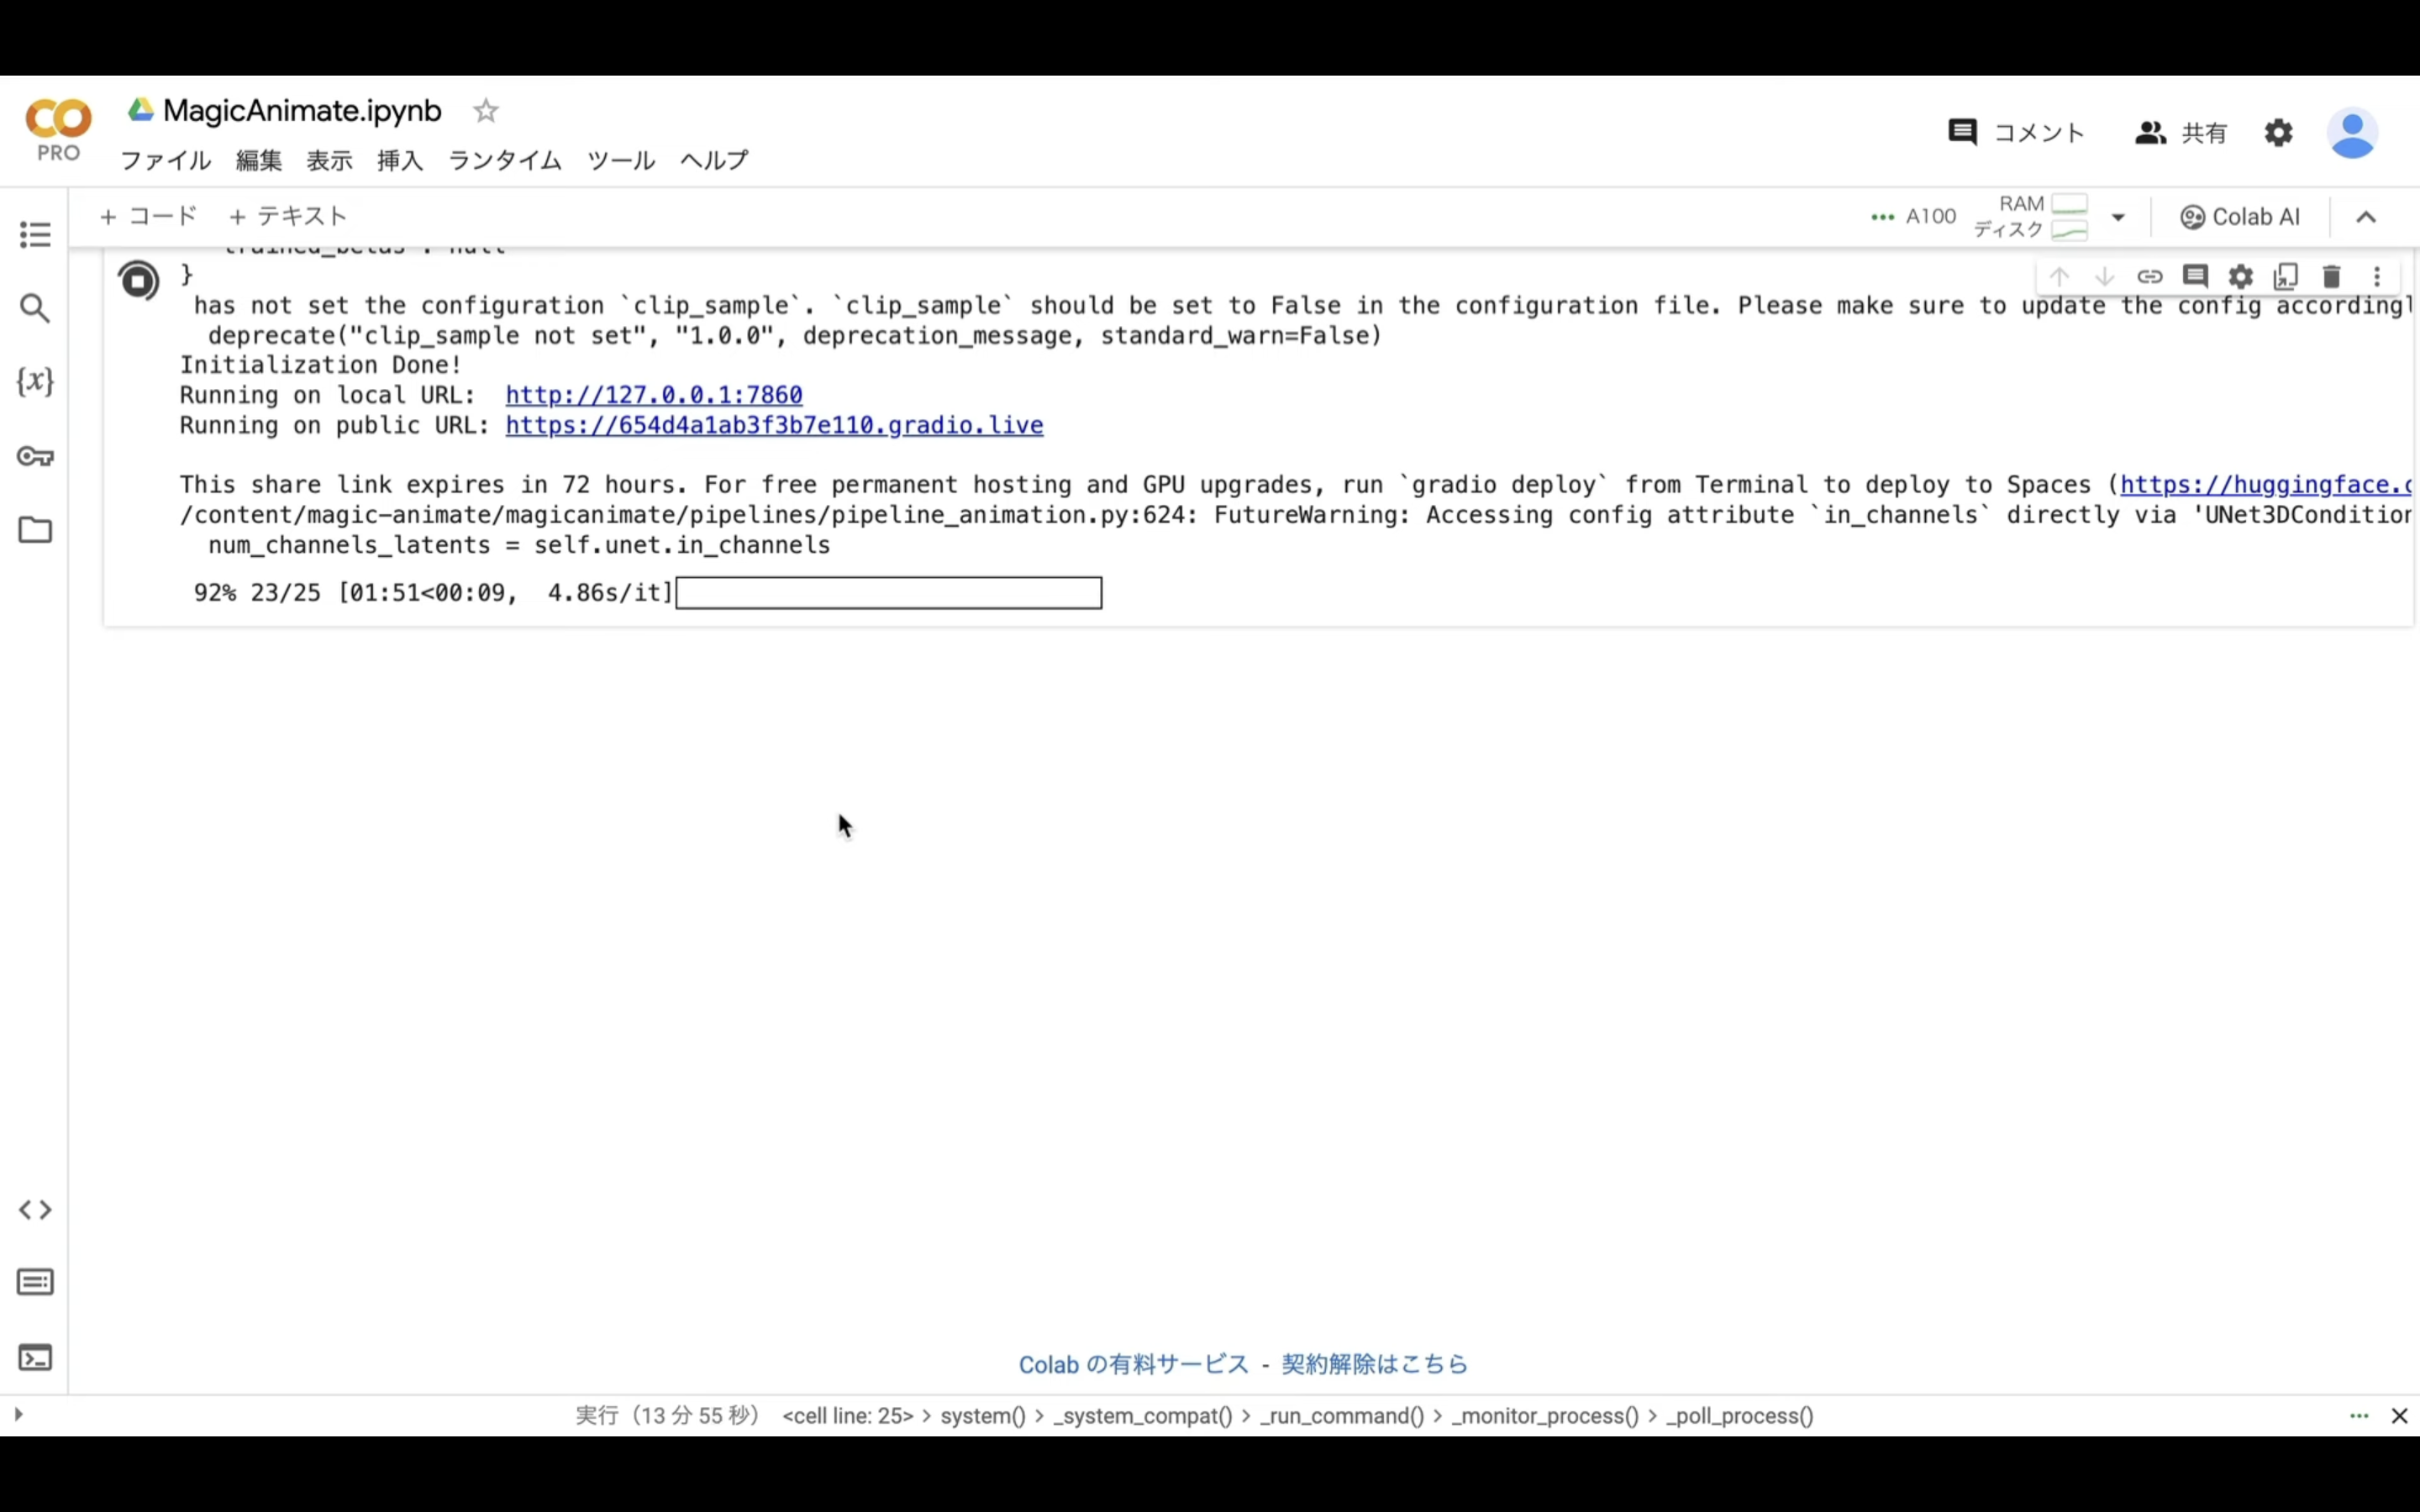
この処理には5分以上かかることがあります。
このようなURLが表示されたら、「gradio.live」というテキストが含まれている方のリンクをクリックします。
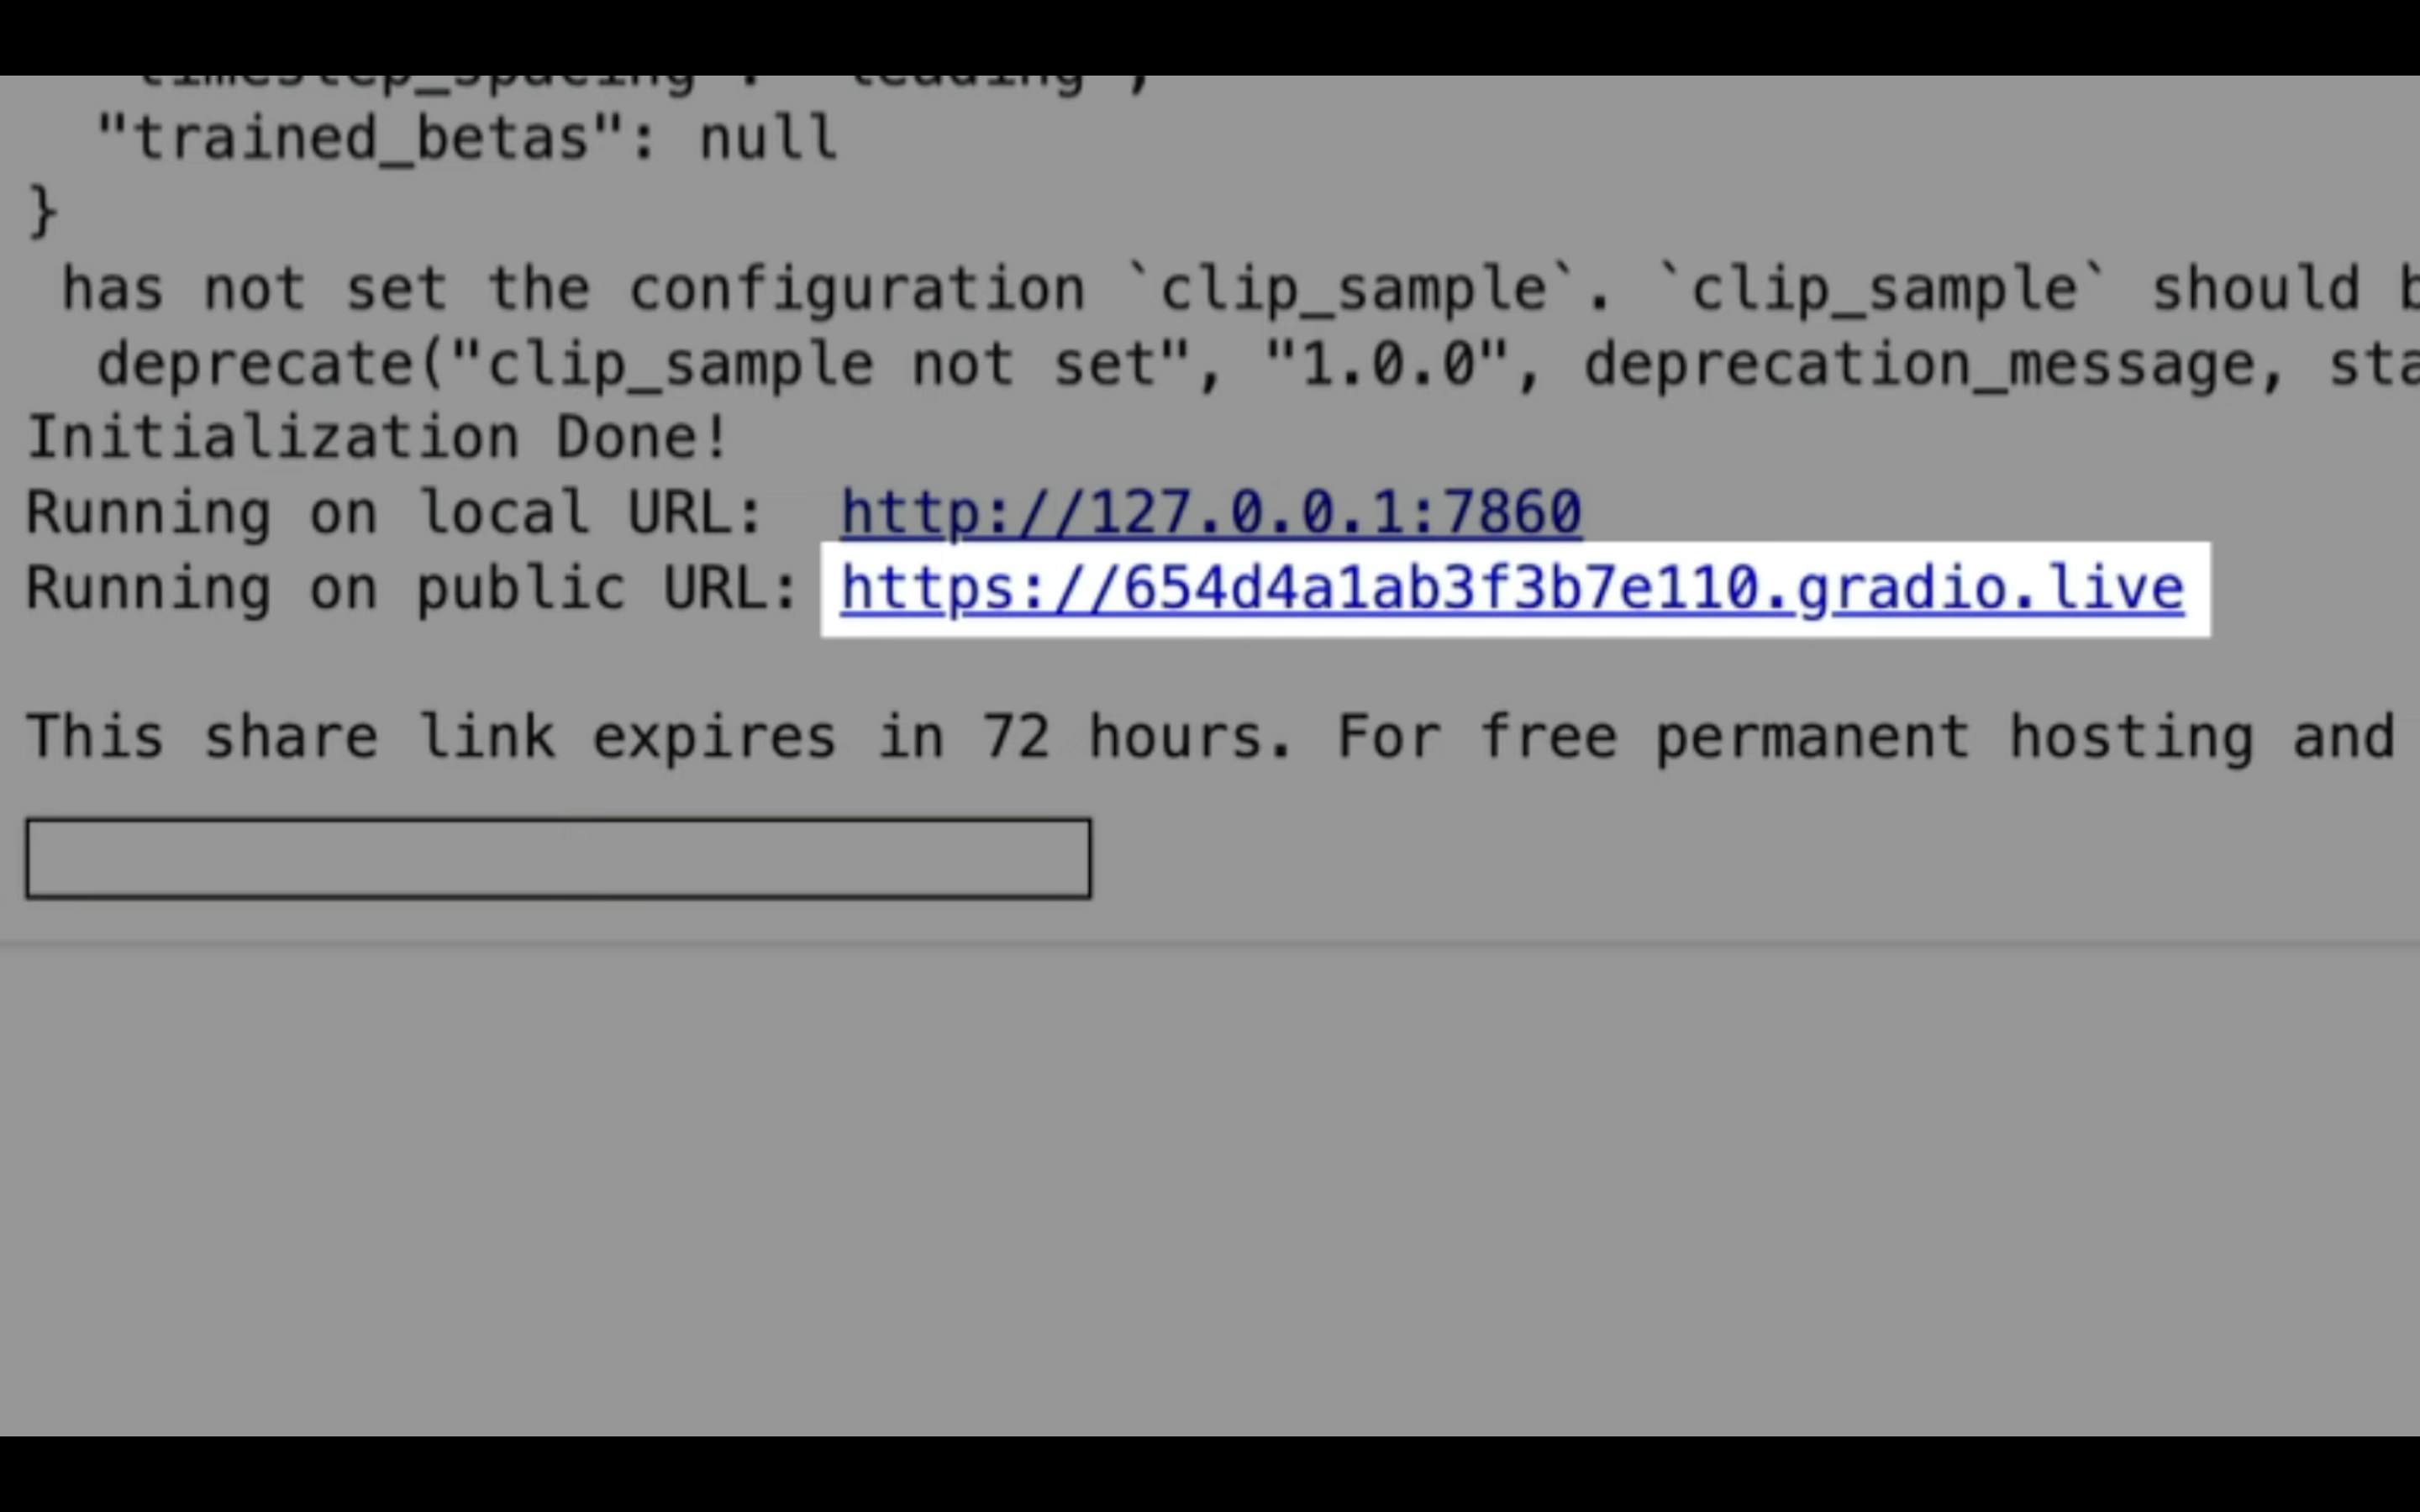
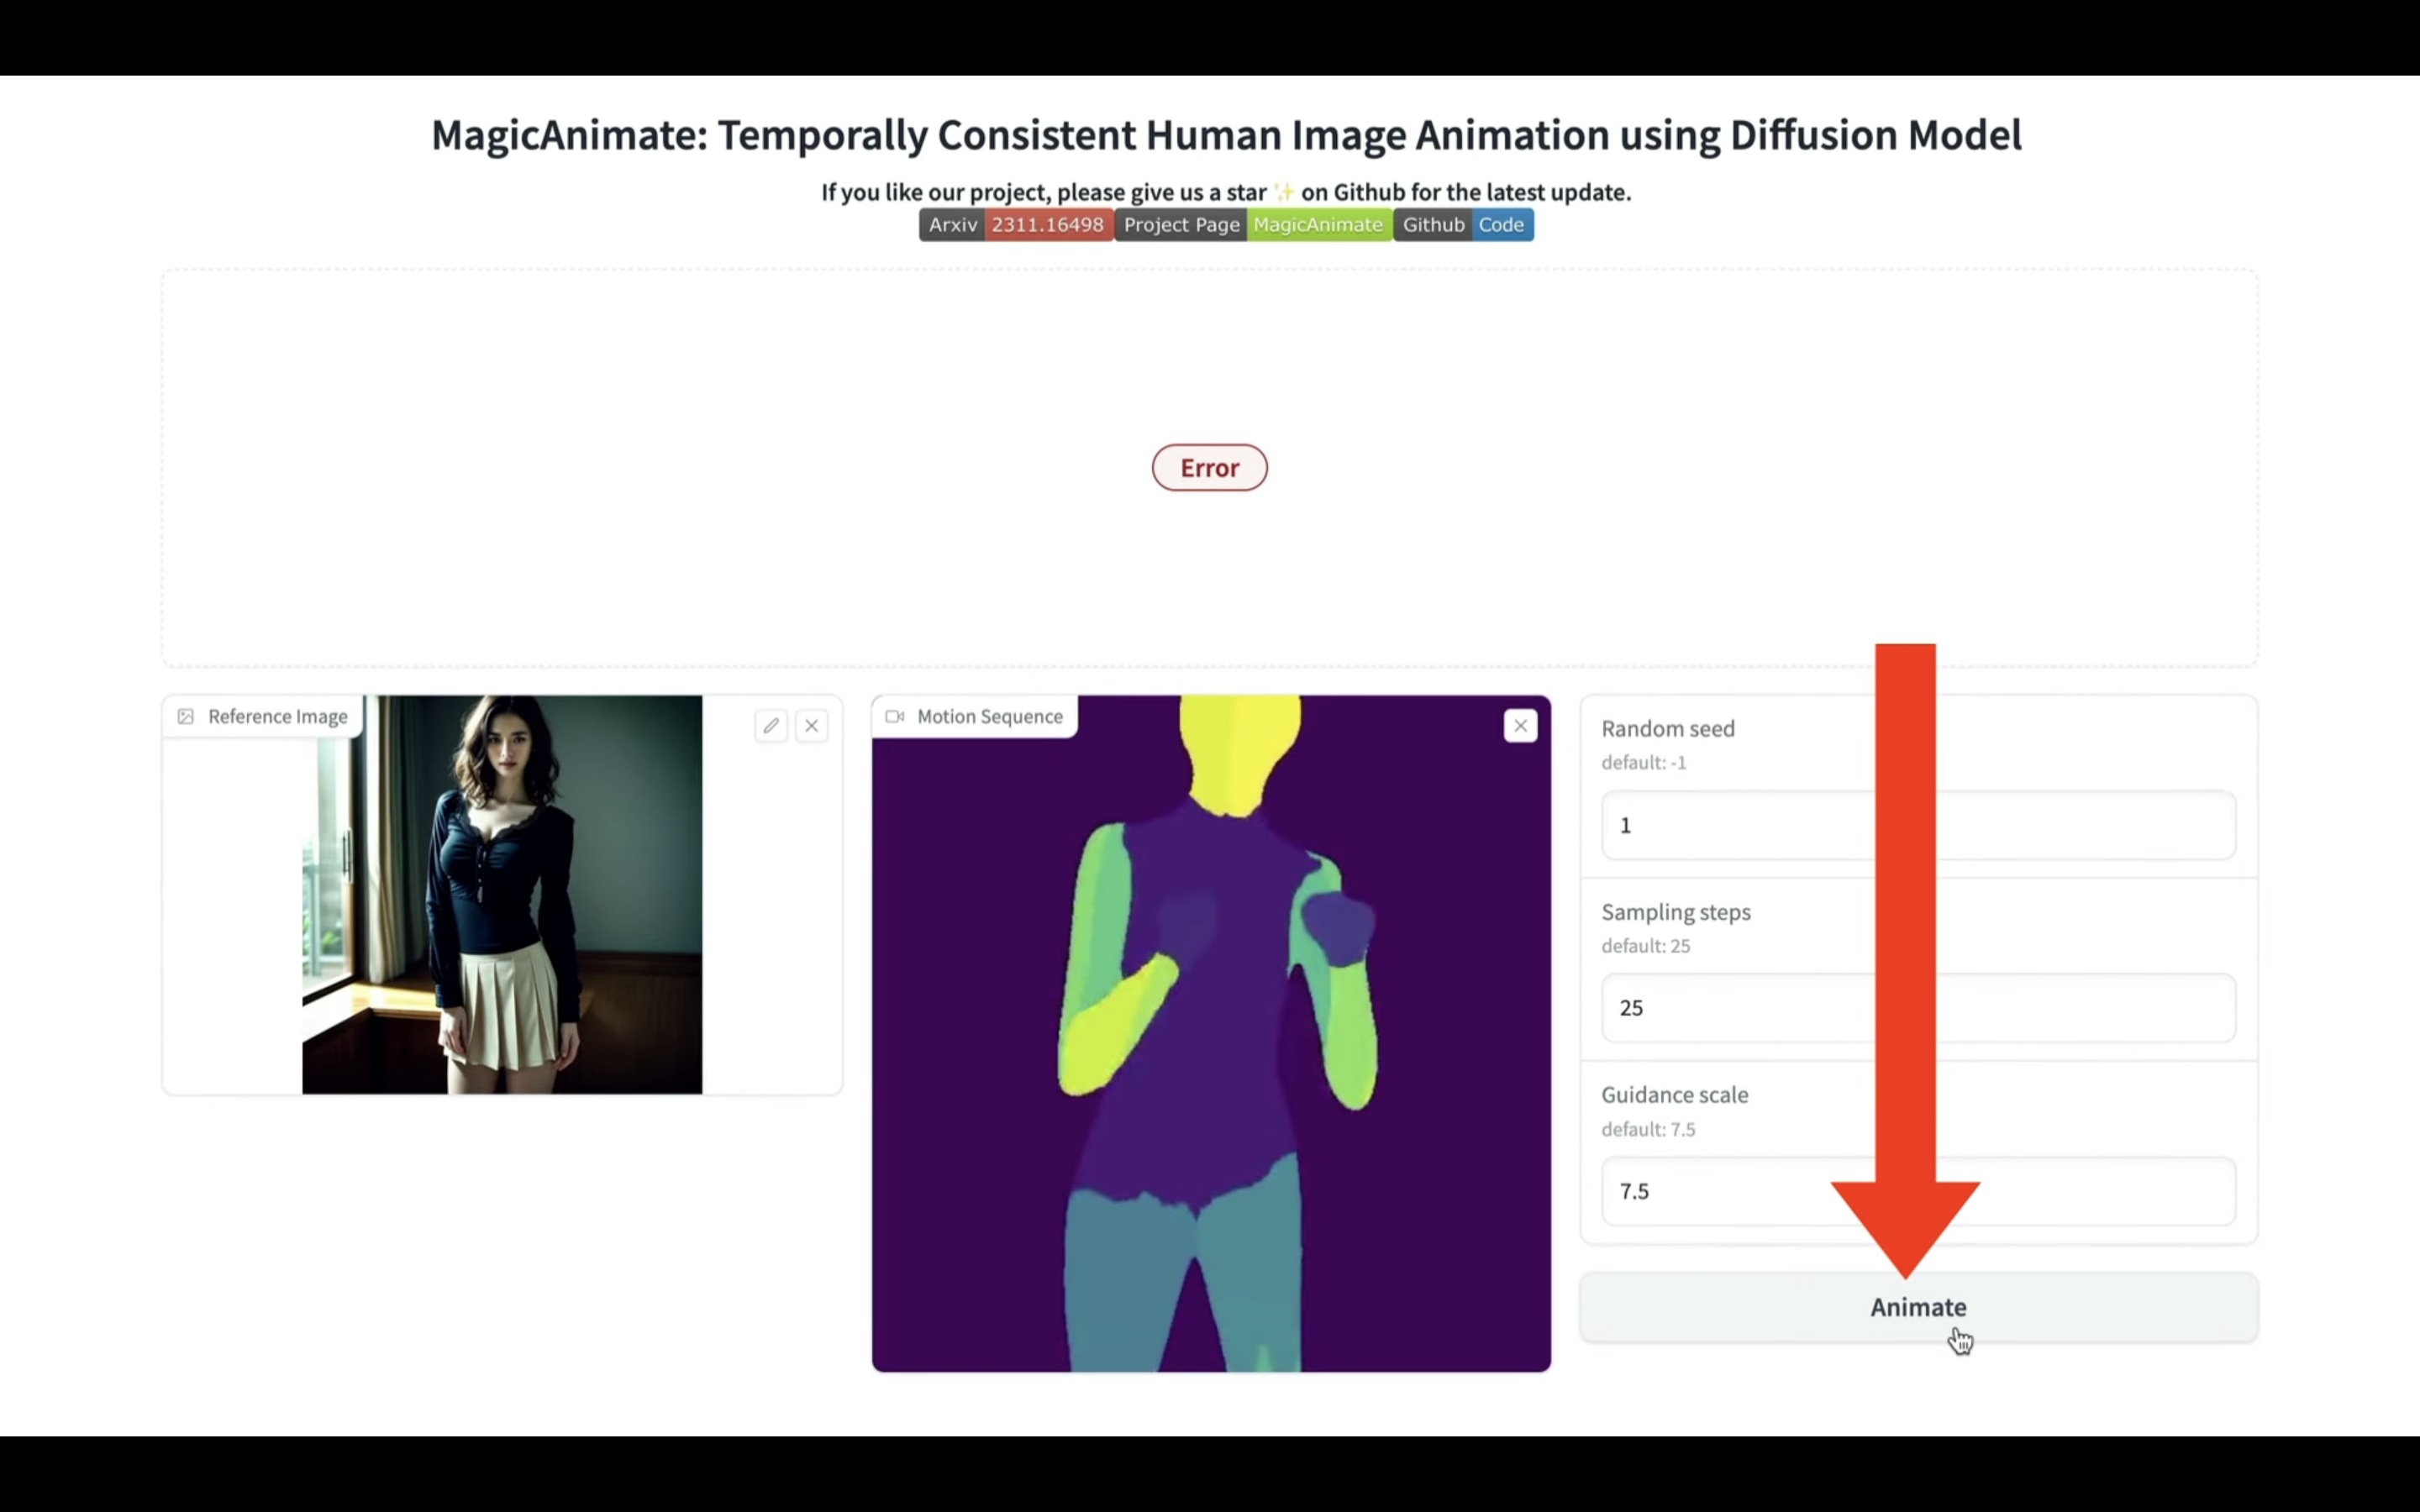
そうすると、Magic Animateの操作画面が表示されます。
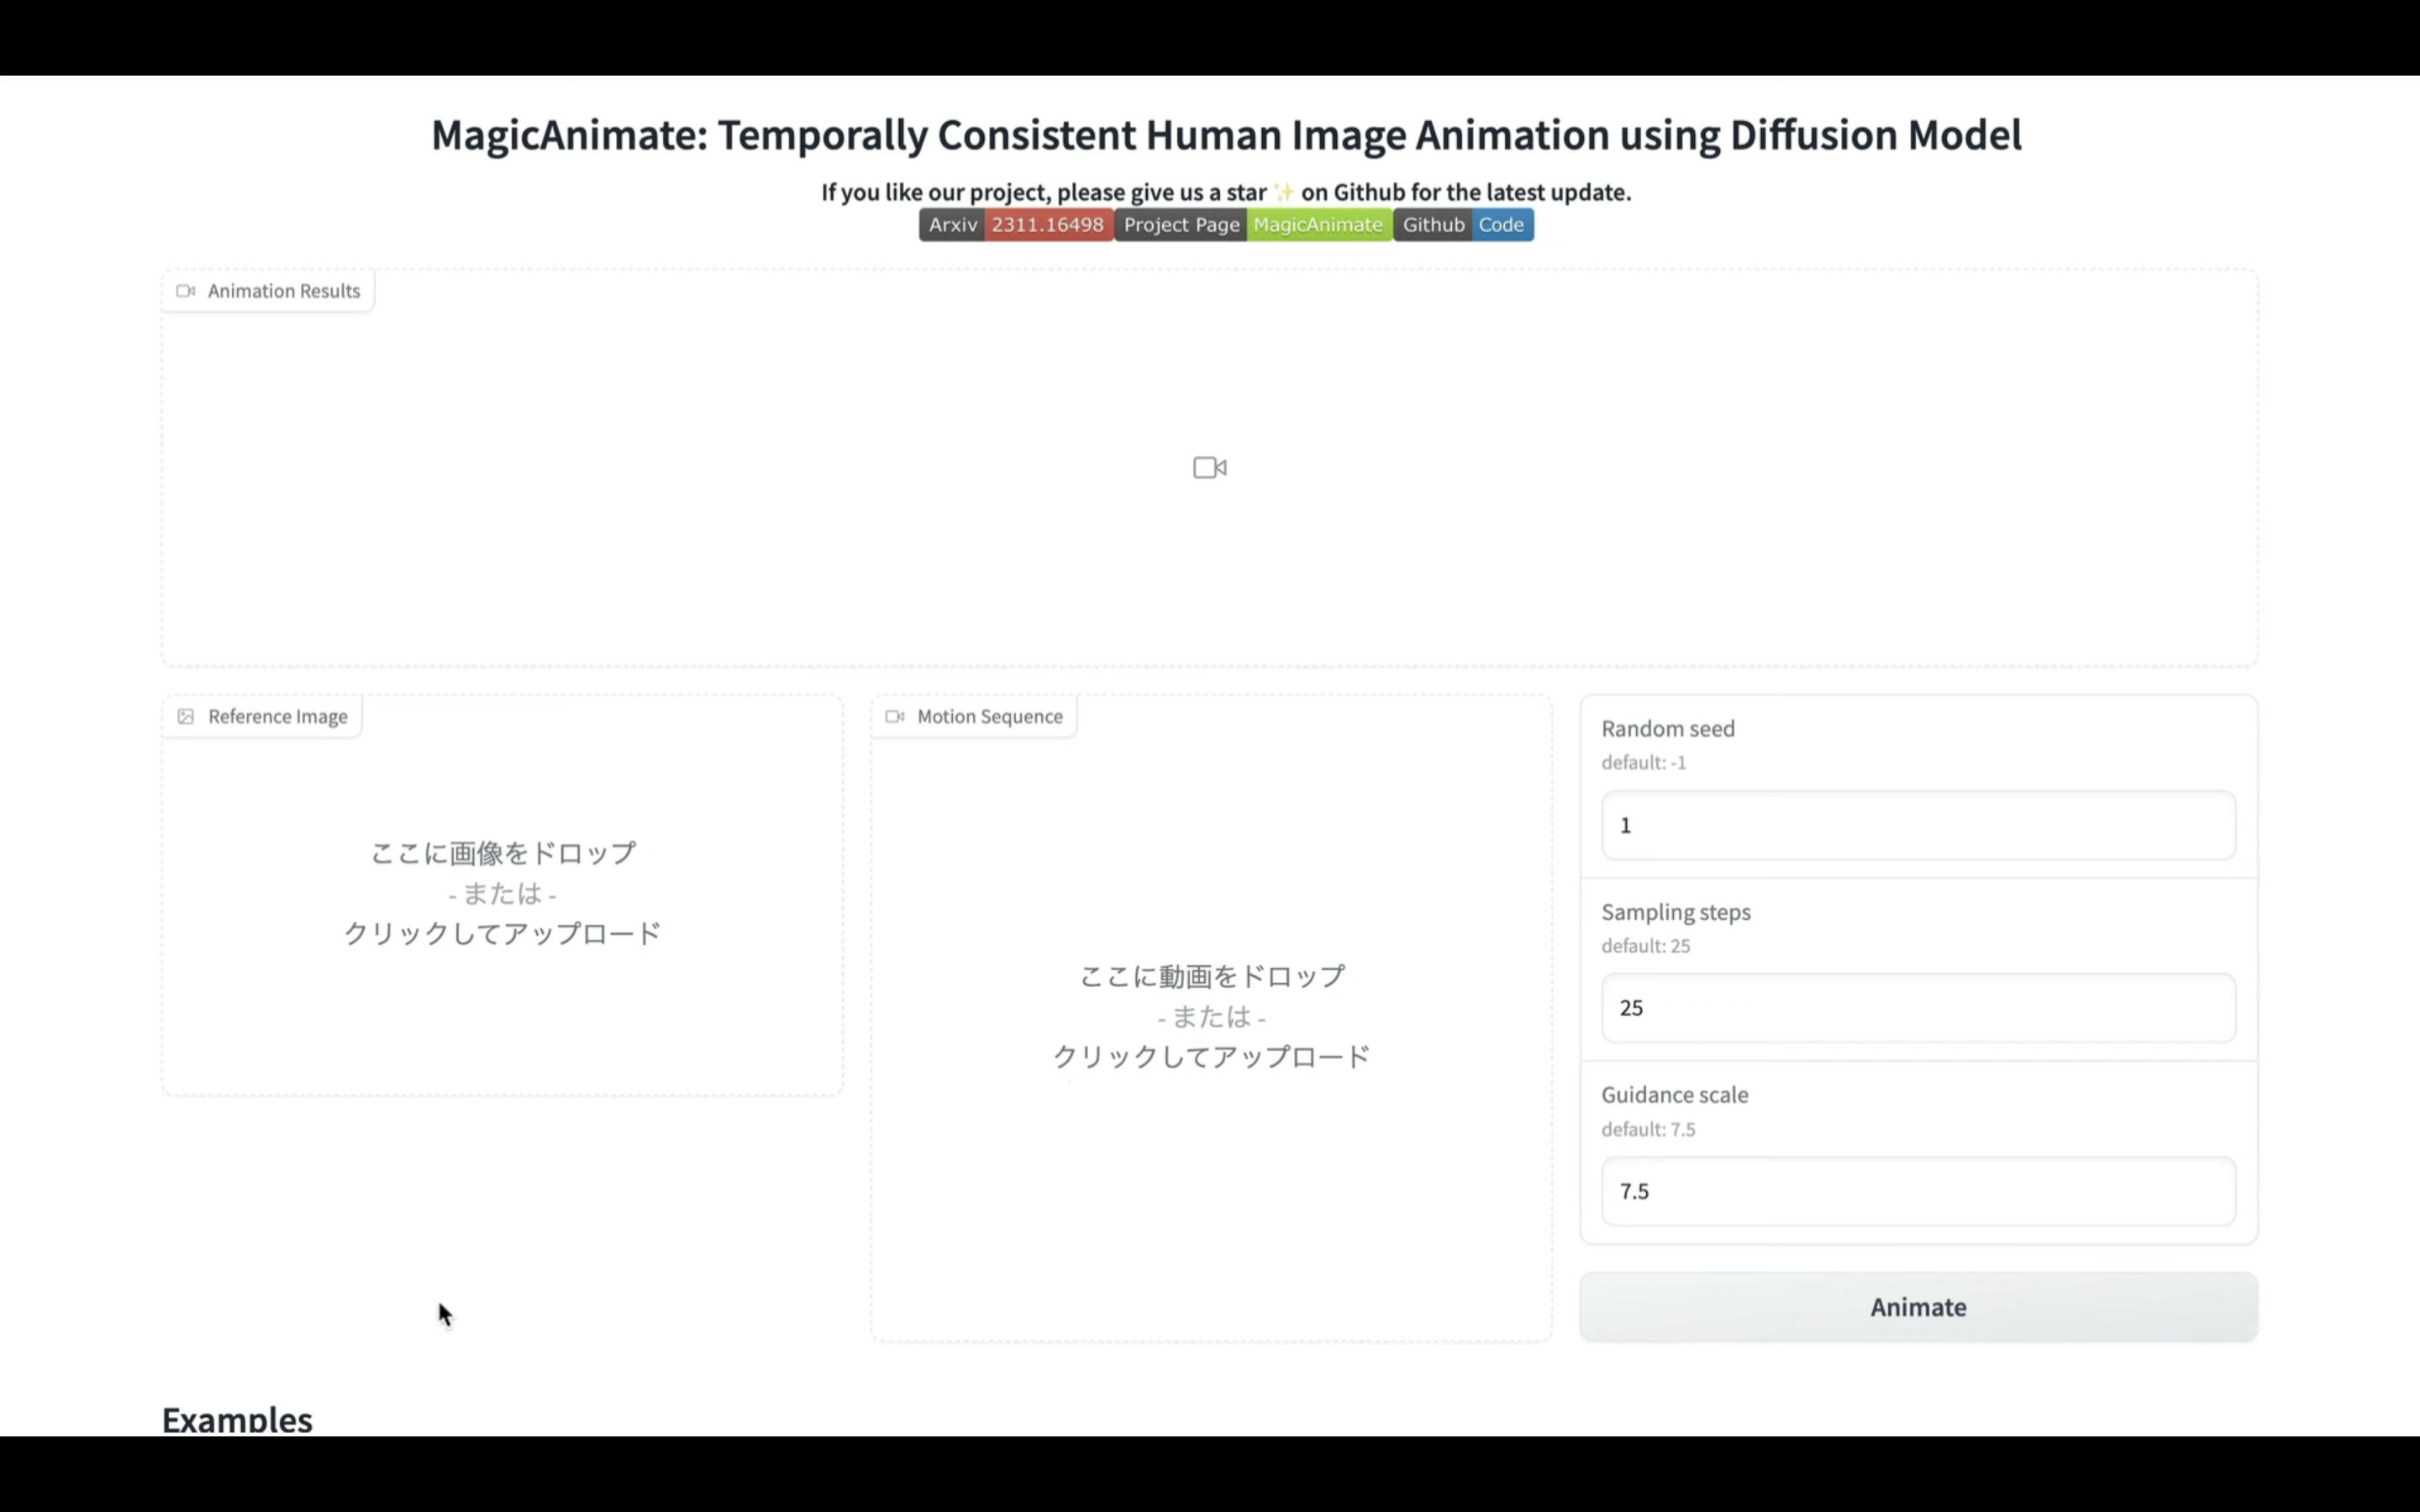
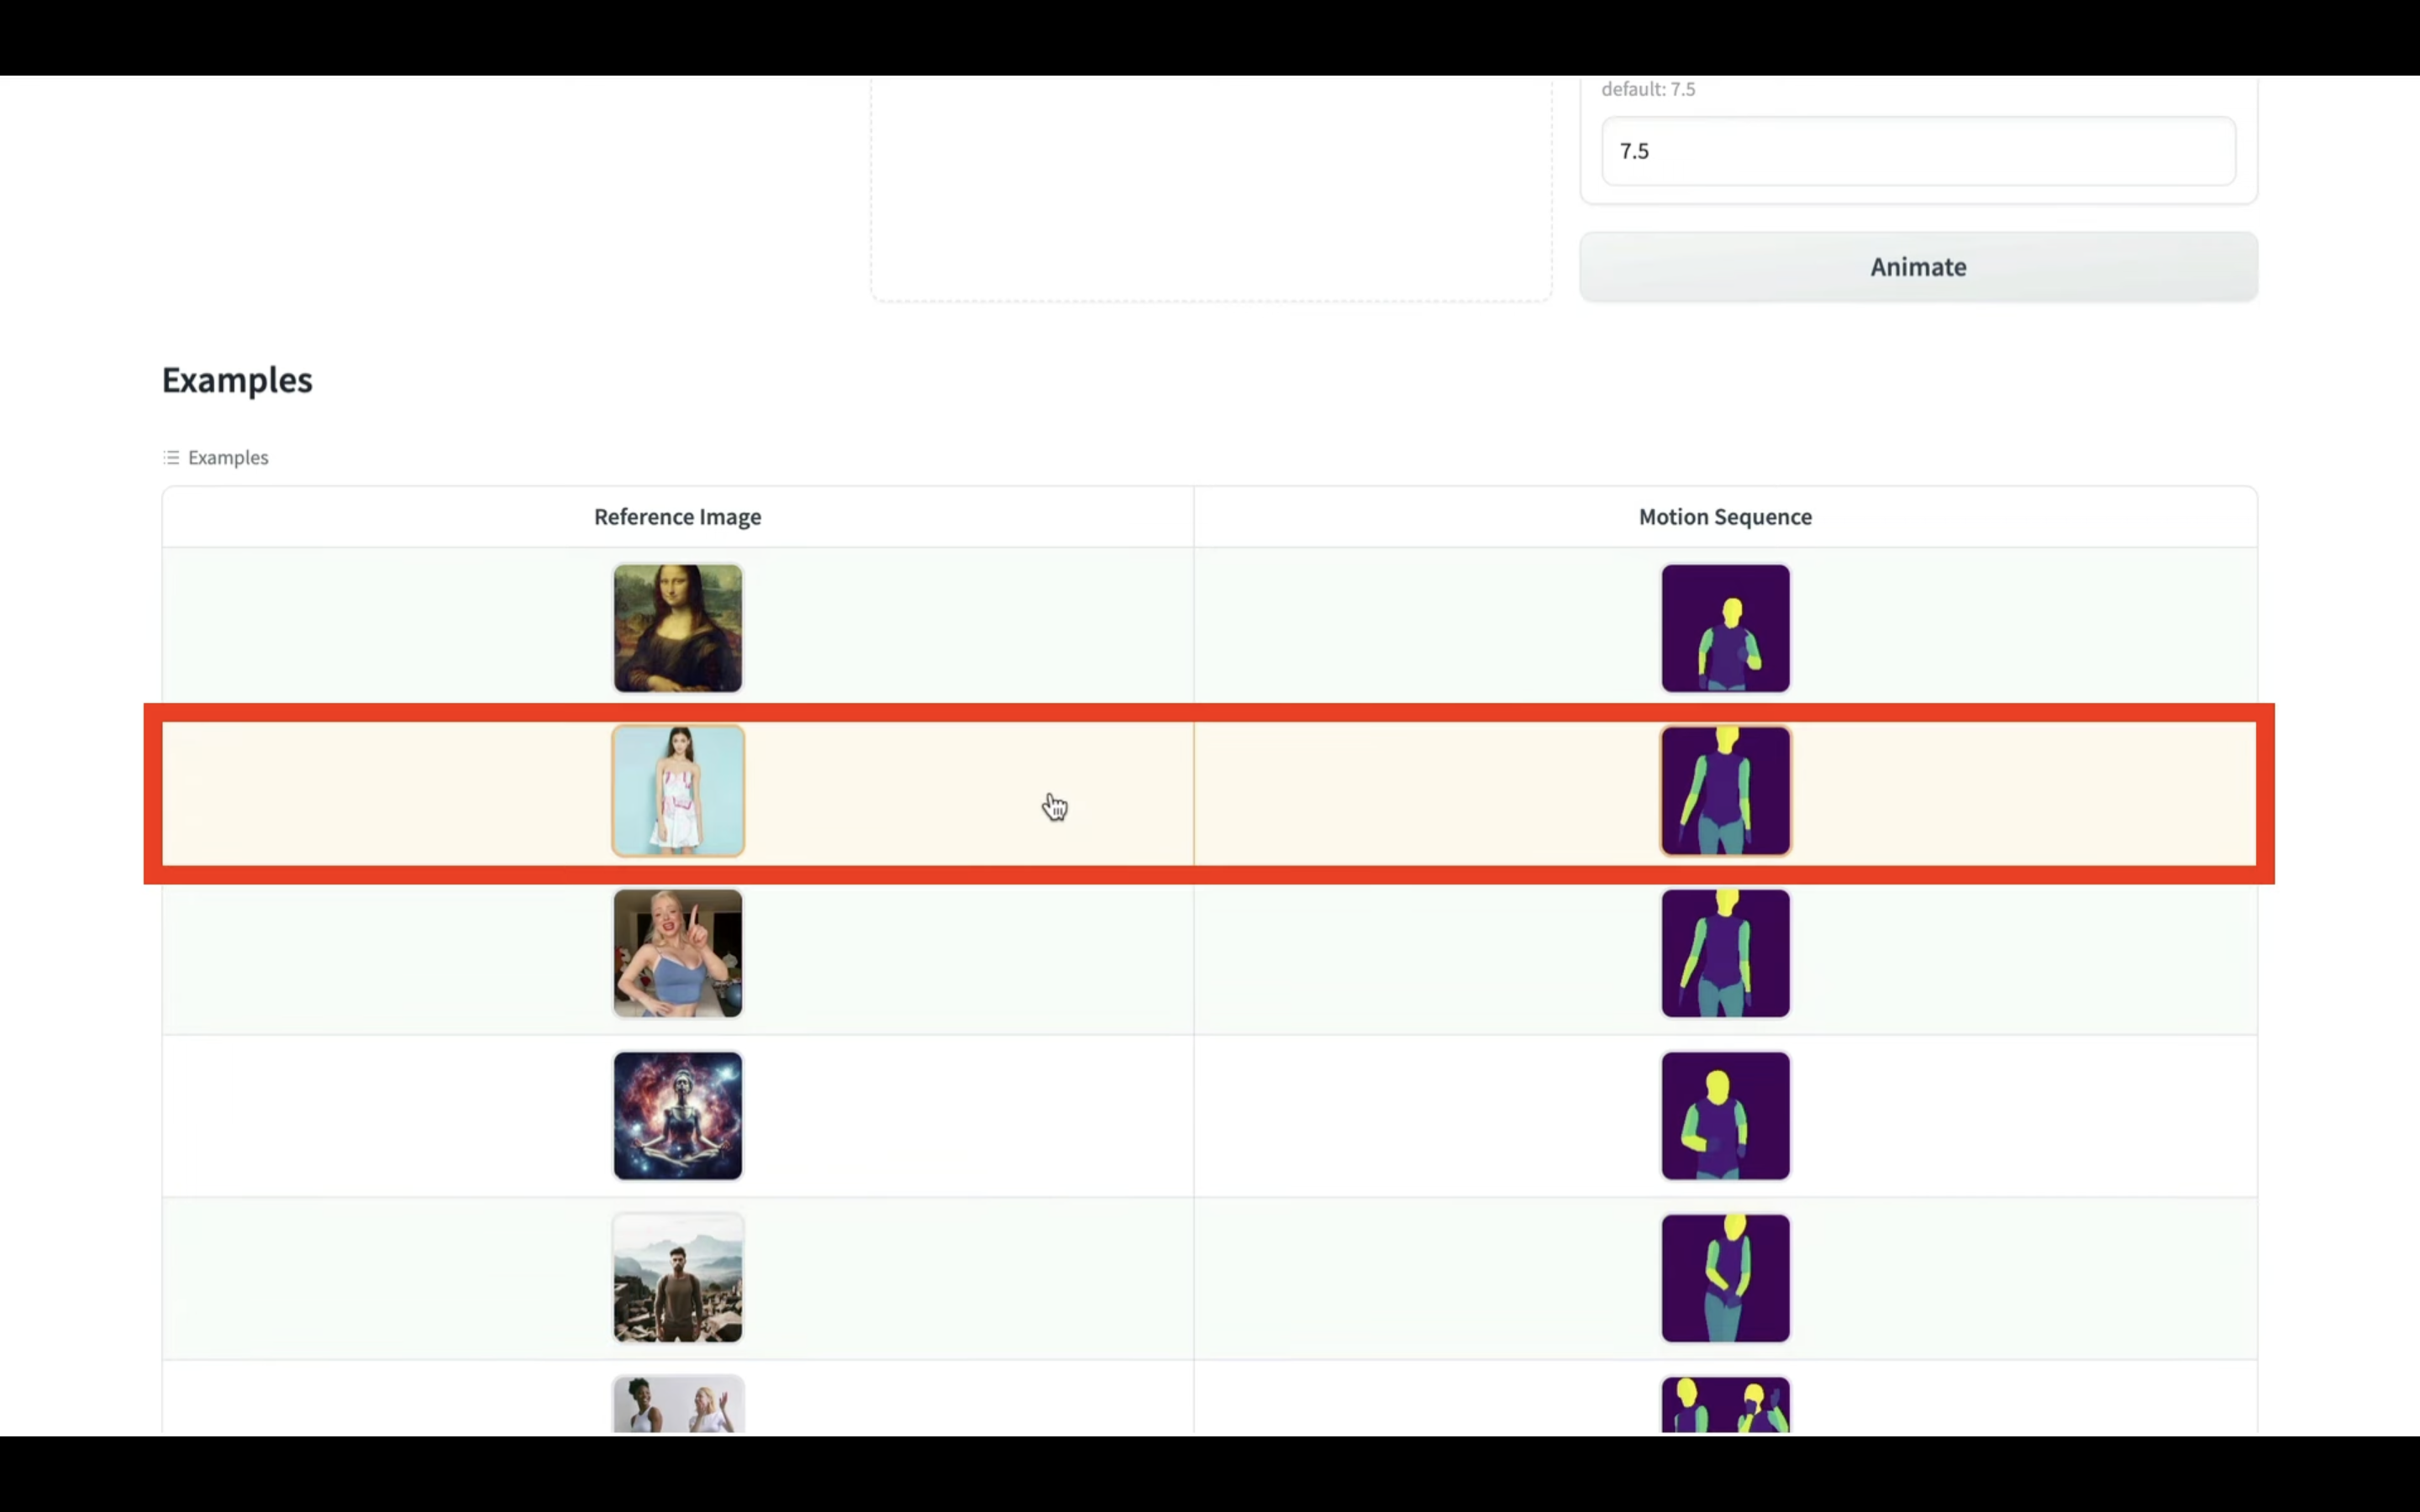
この画面にはデモ用のファイルが用意されているので、まずはそちらで試してみましょう。

このデモファイルをクリックすると、左側に画像が表示されます。
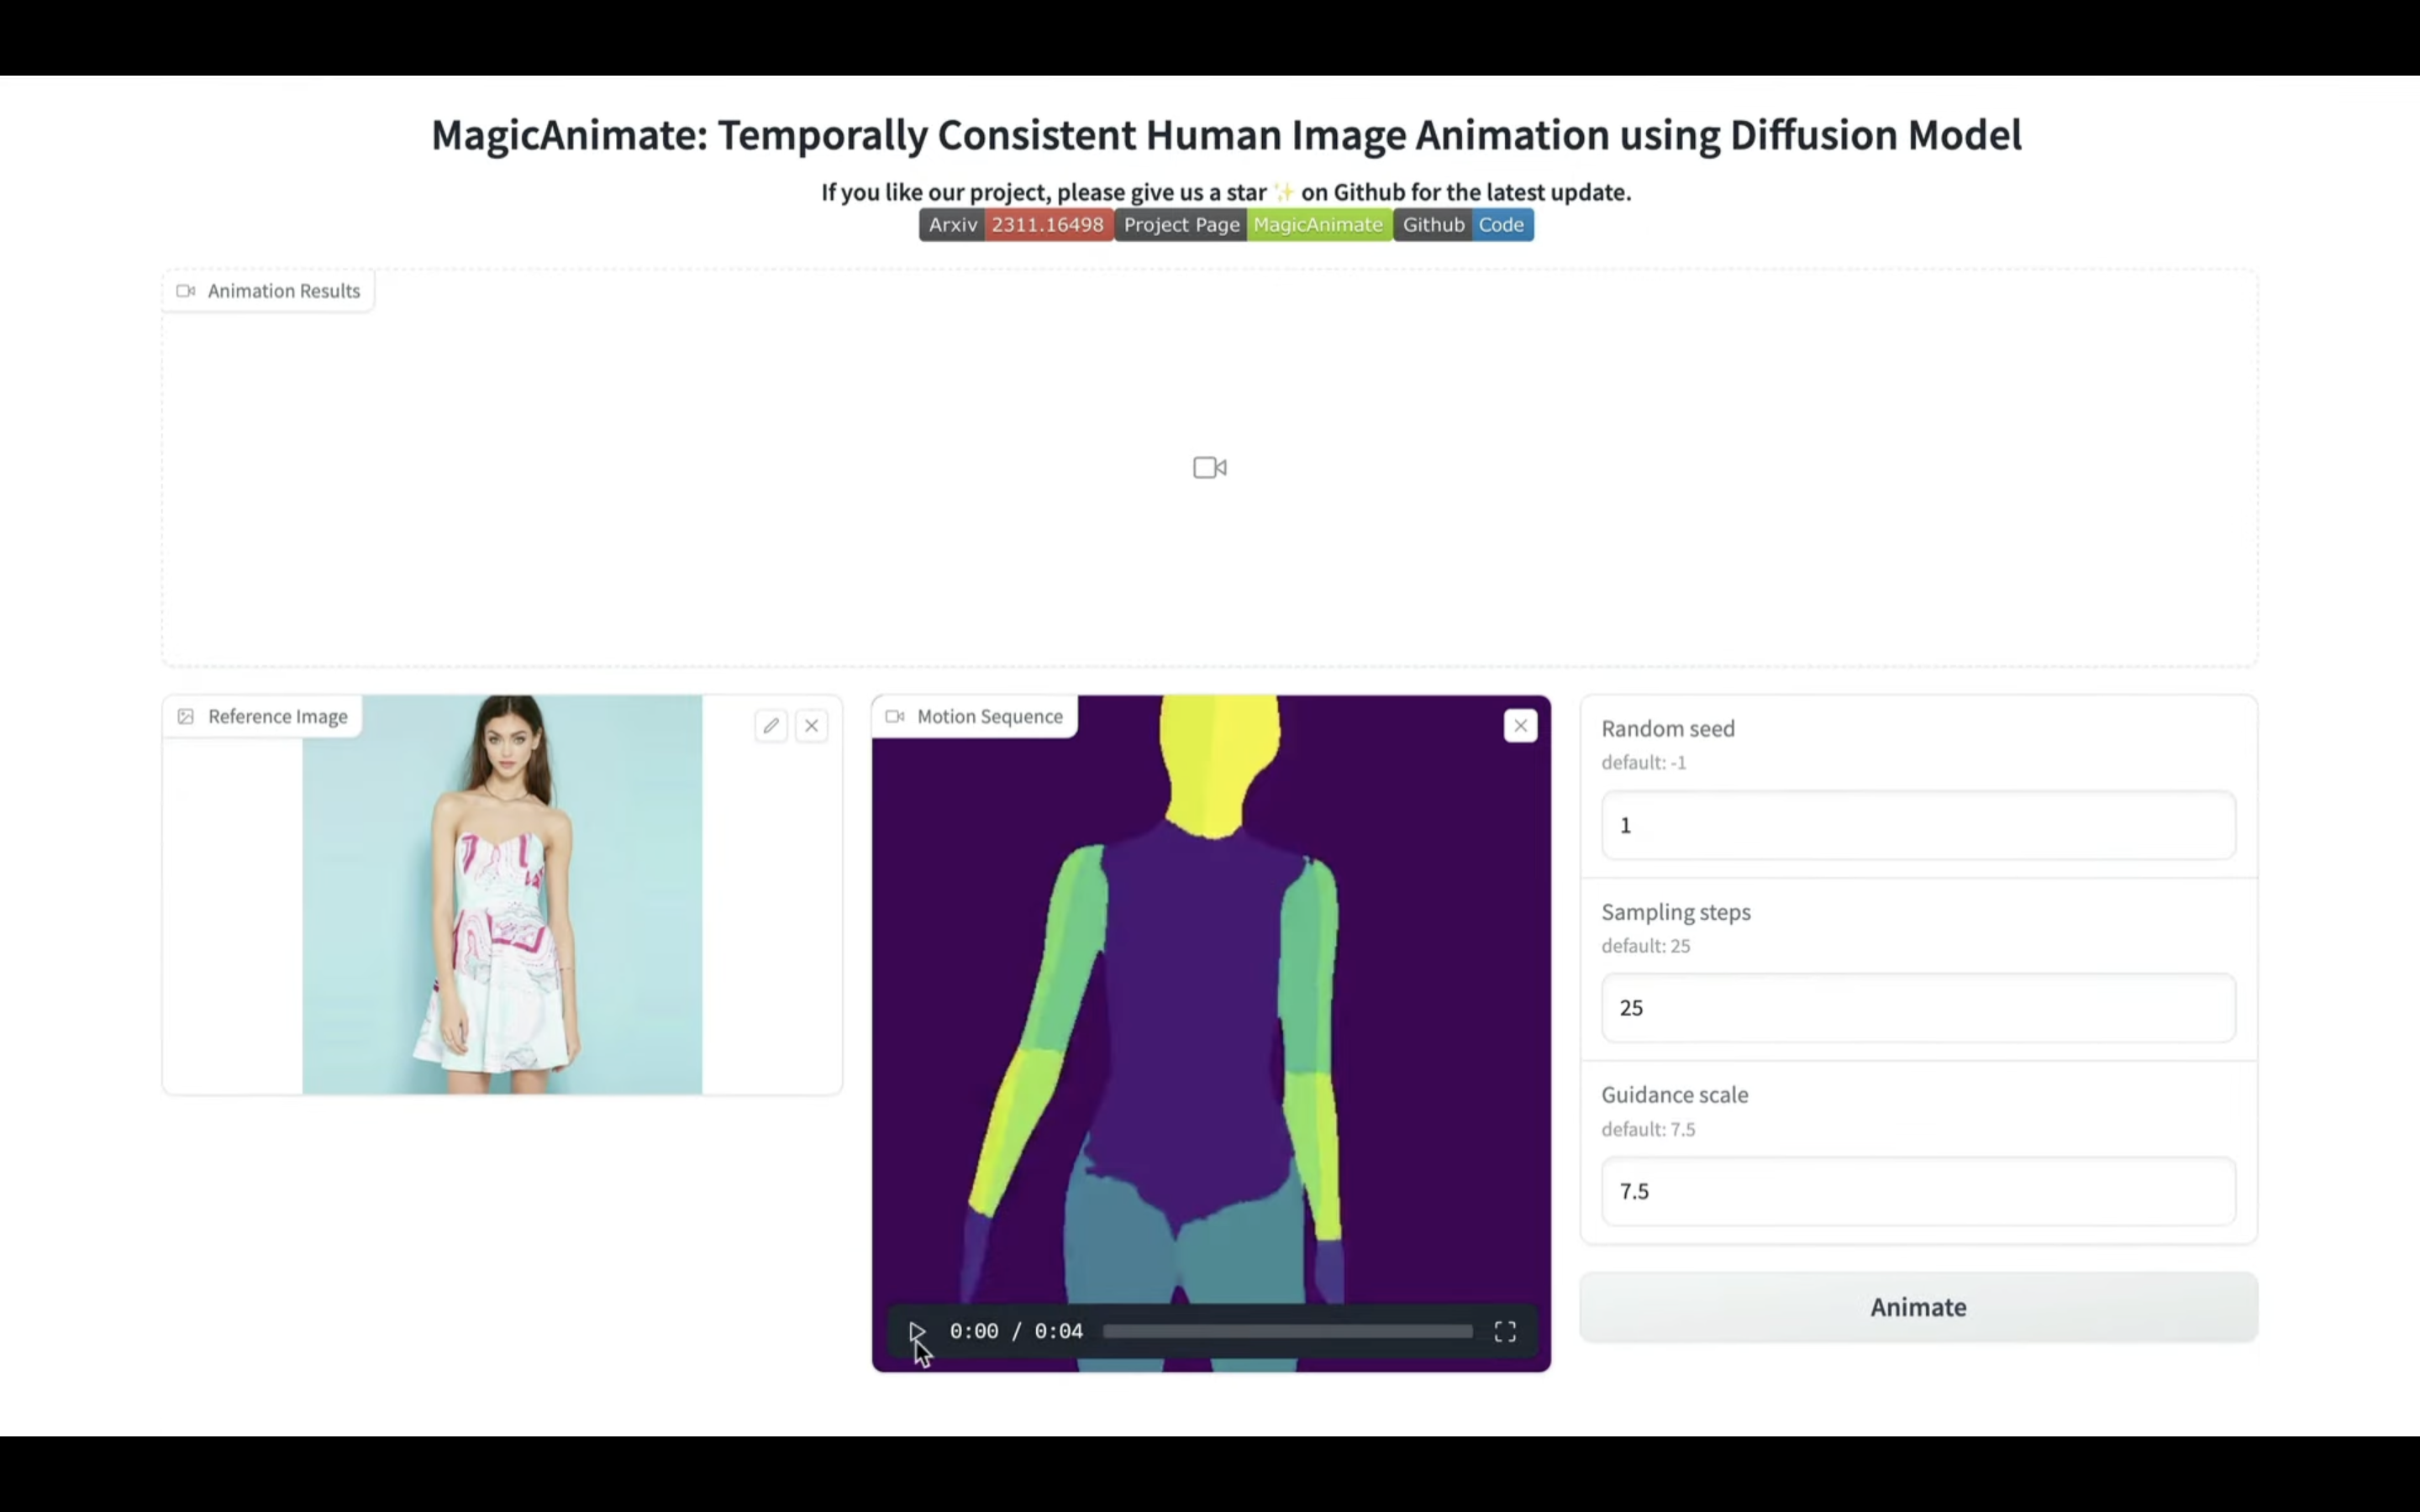
この画像を元に、中央に表示されている動画の動きに合わせた動画が生成されます。
Animateと書かれているボタンをクリックします。

これで動画の生成が開始されます。
残念ながら、実行時間が長すぎるため、この画面ではエラーになってしまいます。
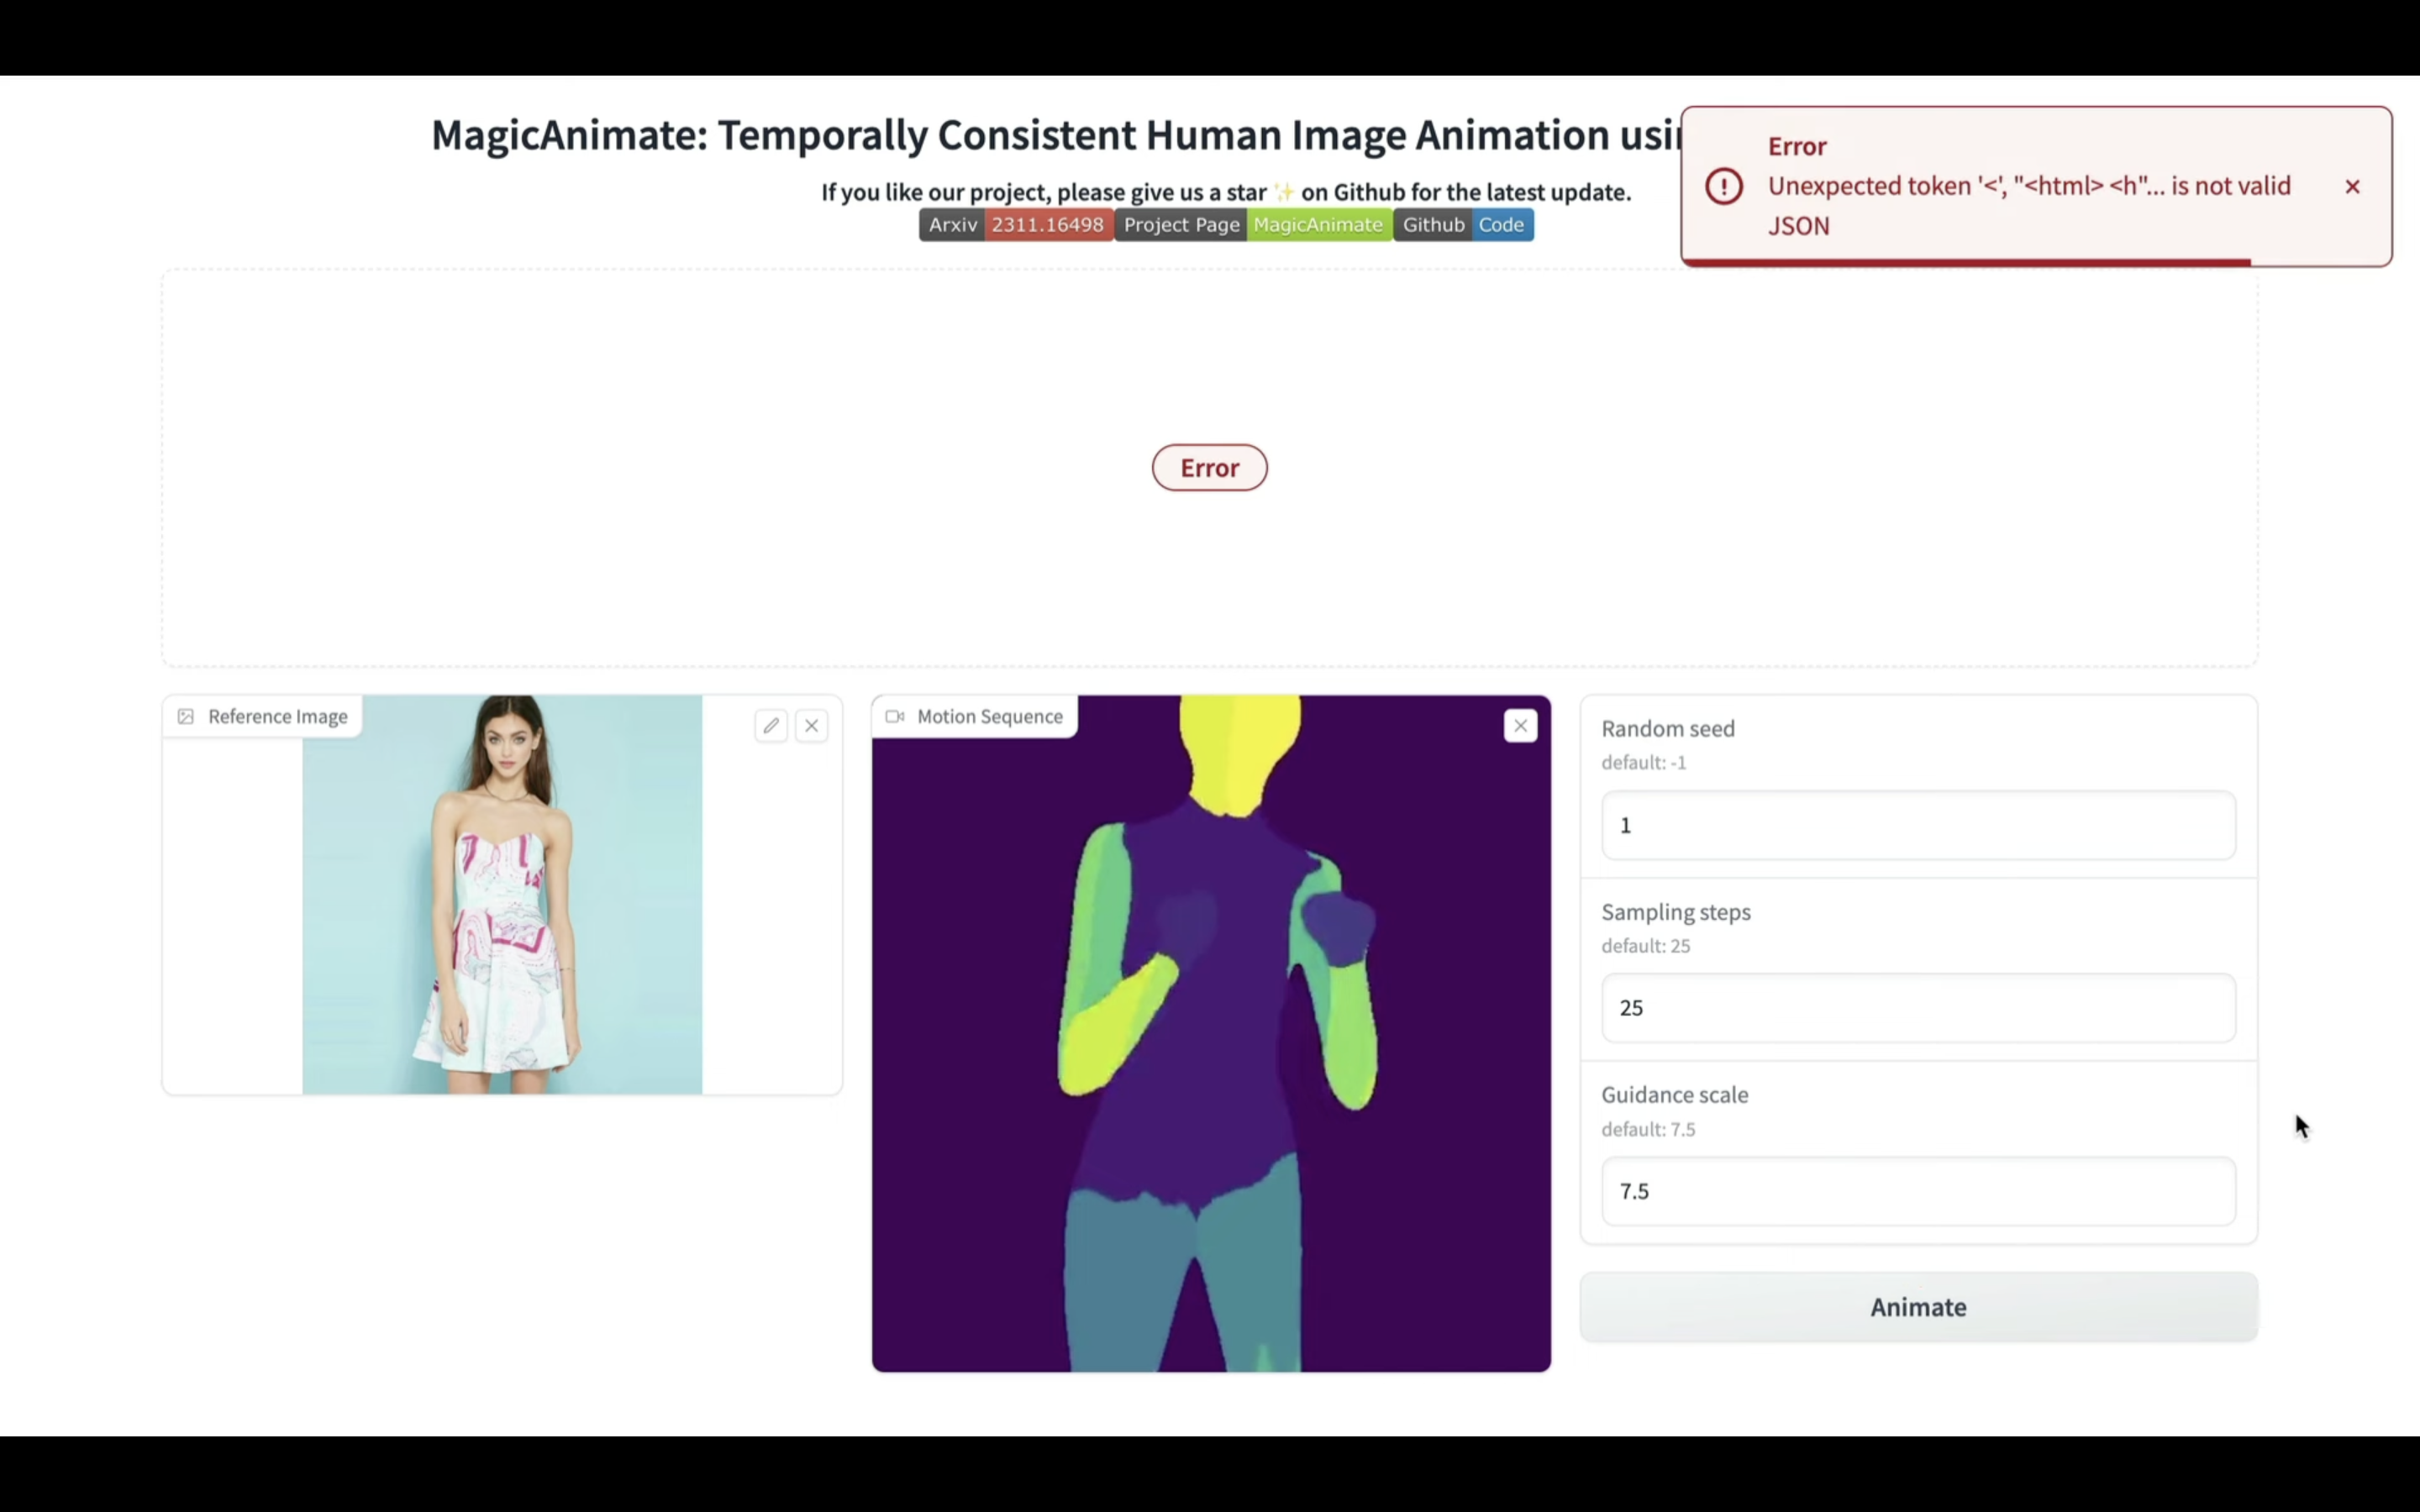
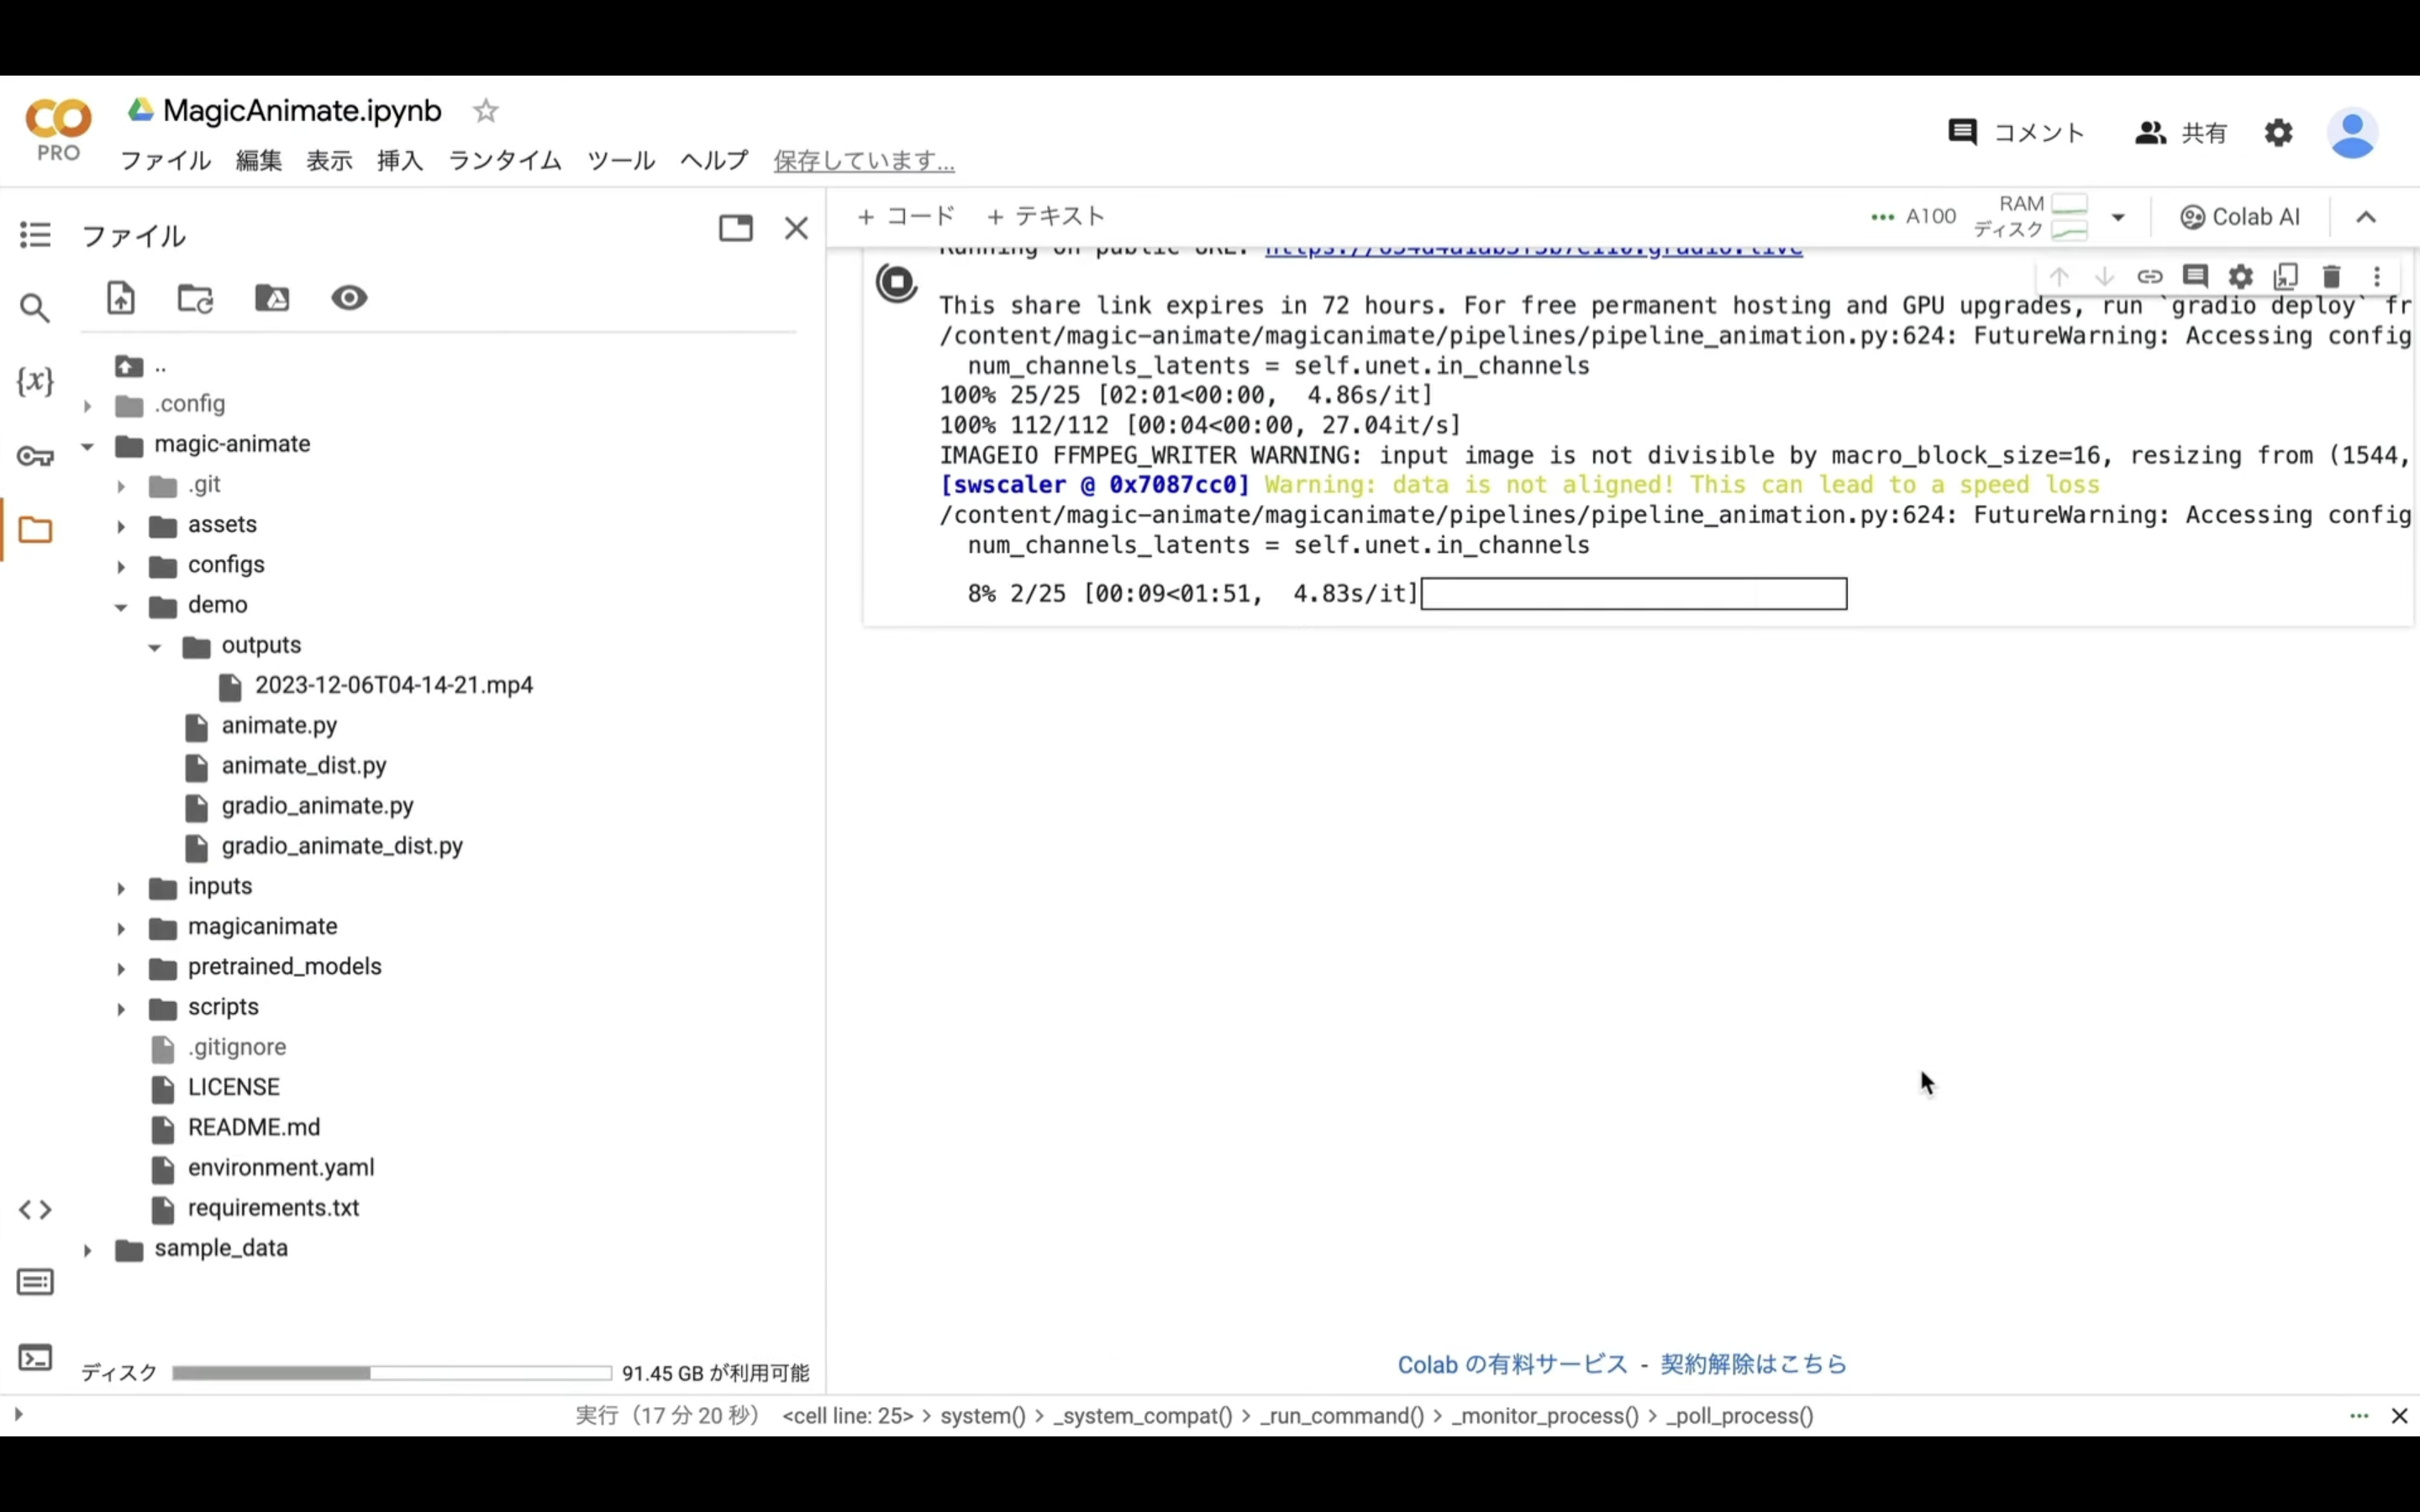
それでも処理は続いているので、Google Colabの画面に切り替えます。
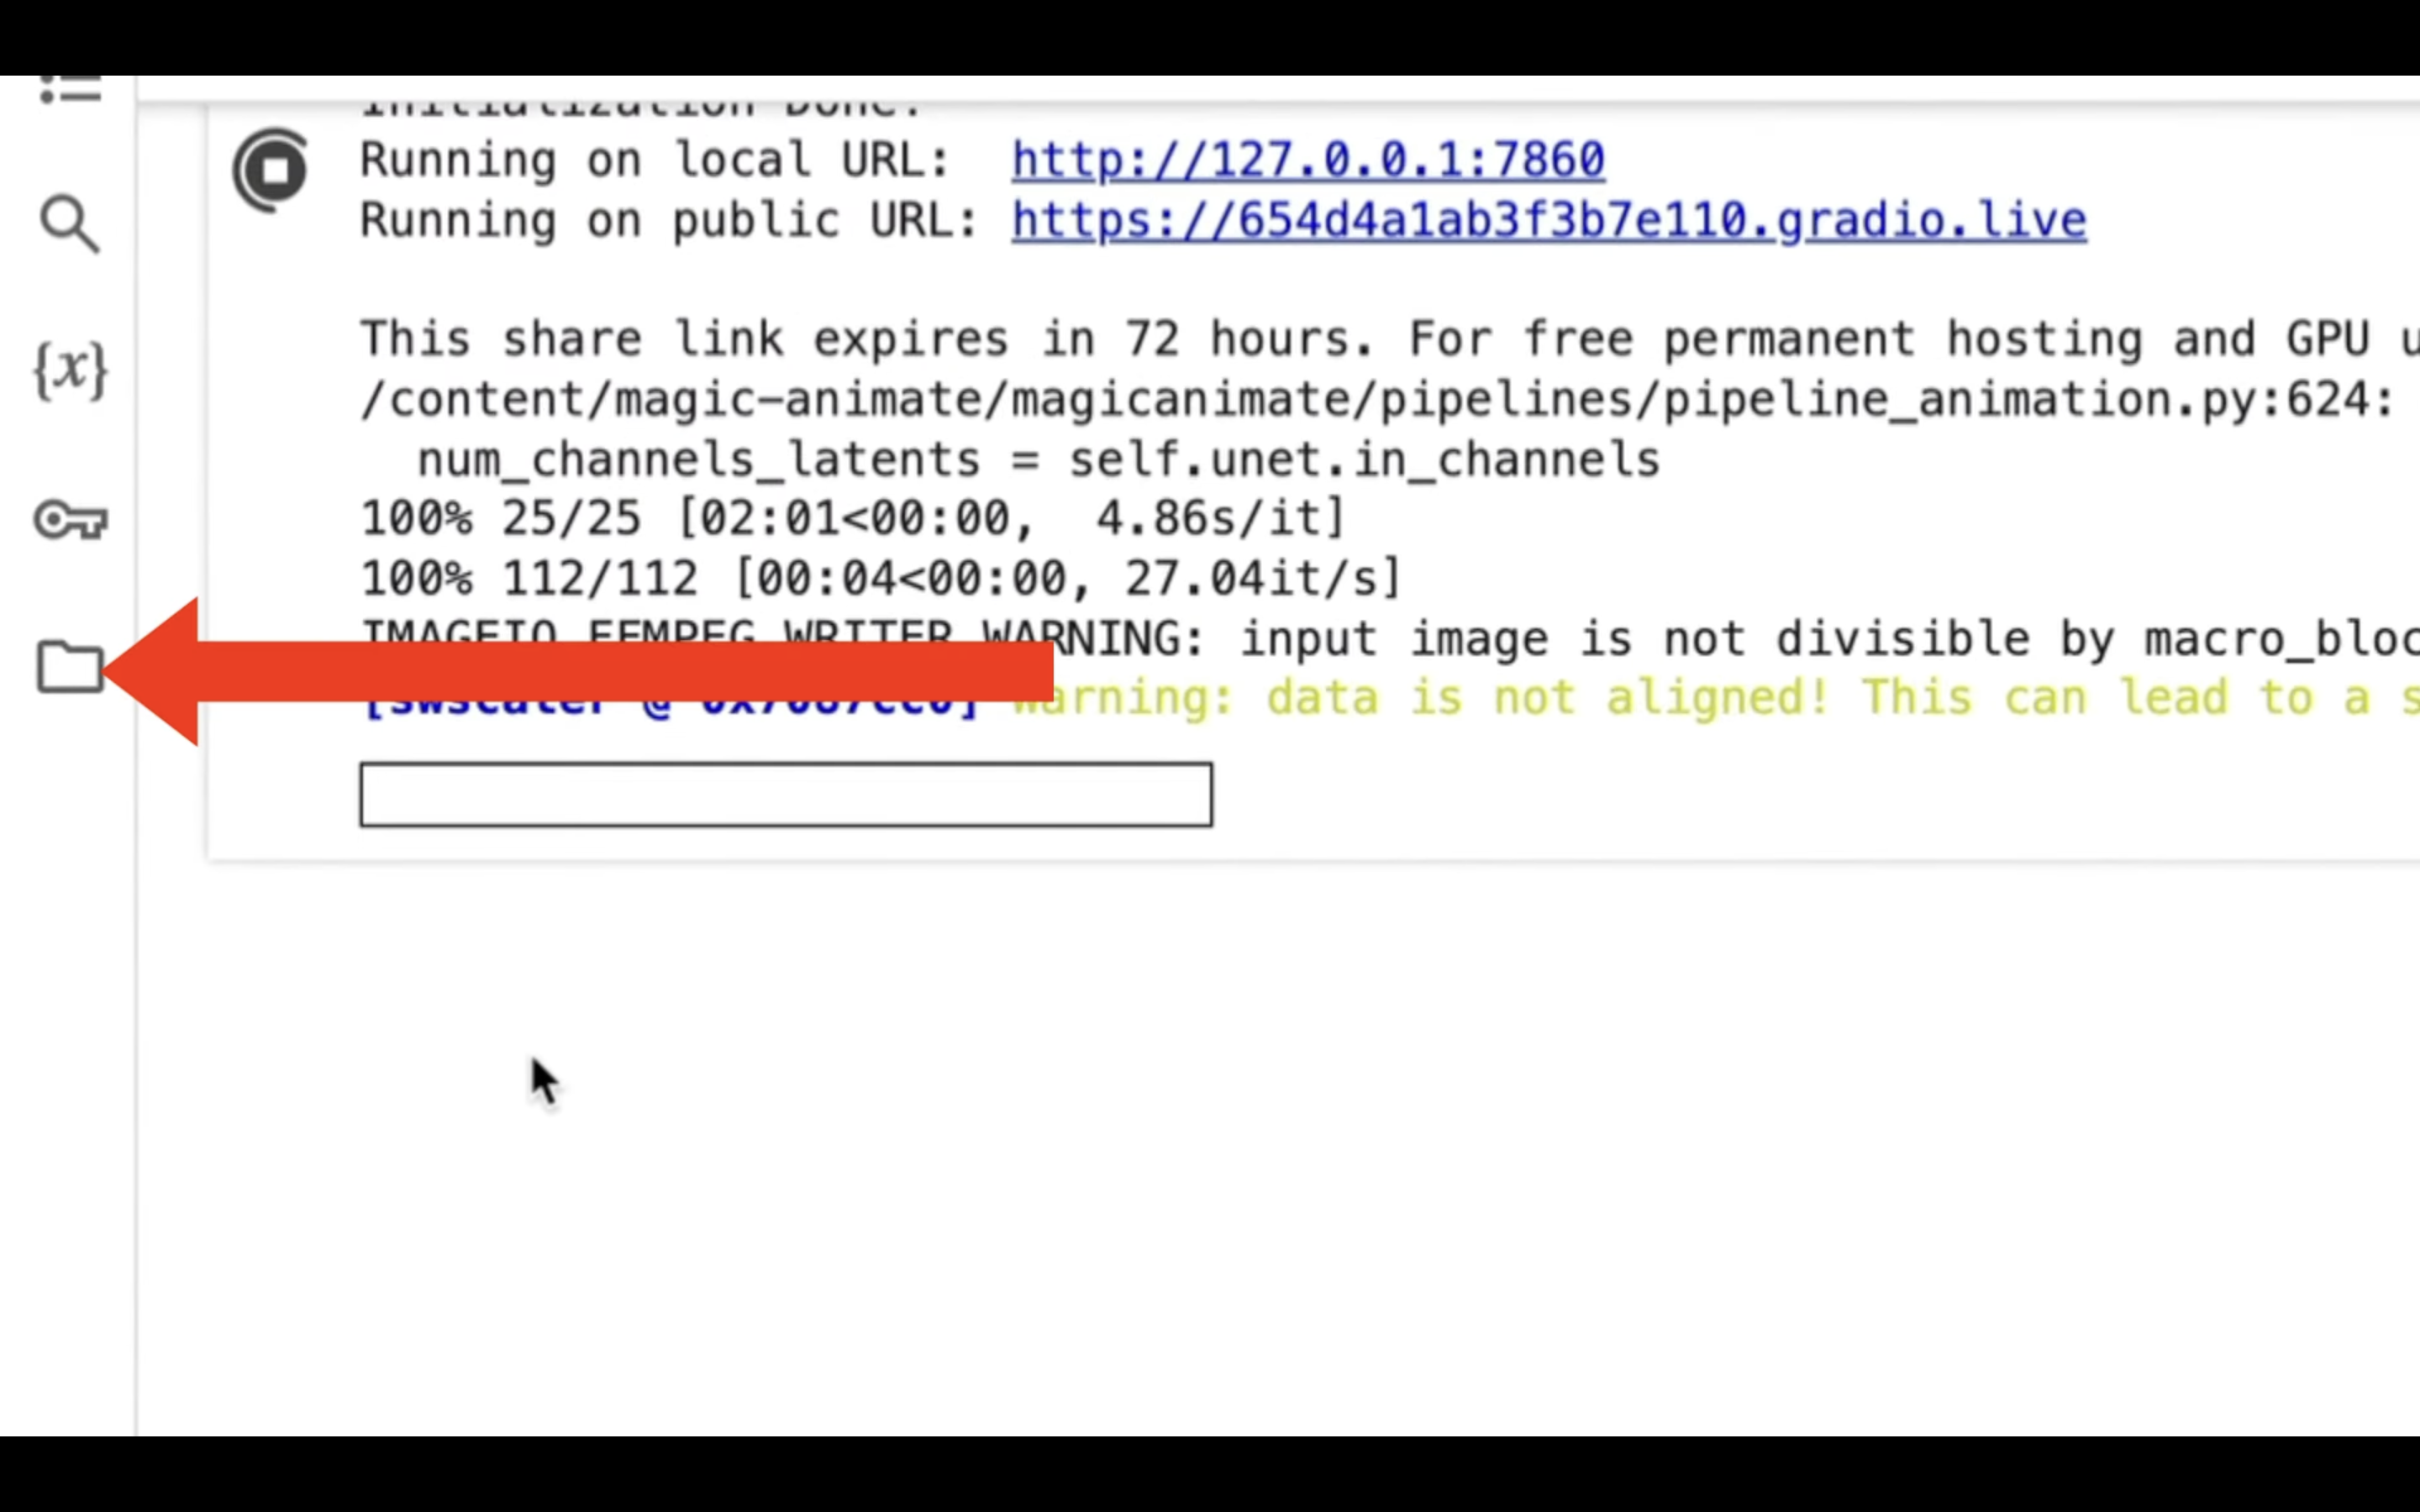
処理が完了すると、このような表示になります。
それでは、早速作成された動画を確認していきましょう。
フォルダのマークをクリックします。
そうすると、フォルダとファイルの一覧画面が表示されます。
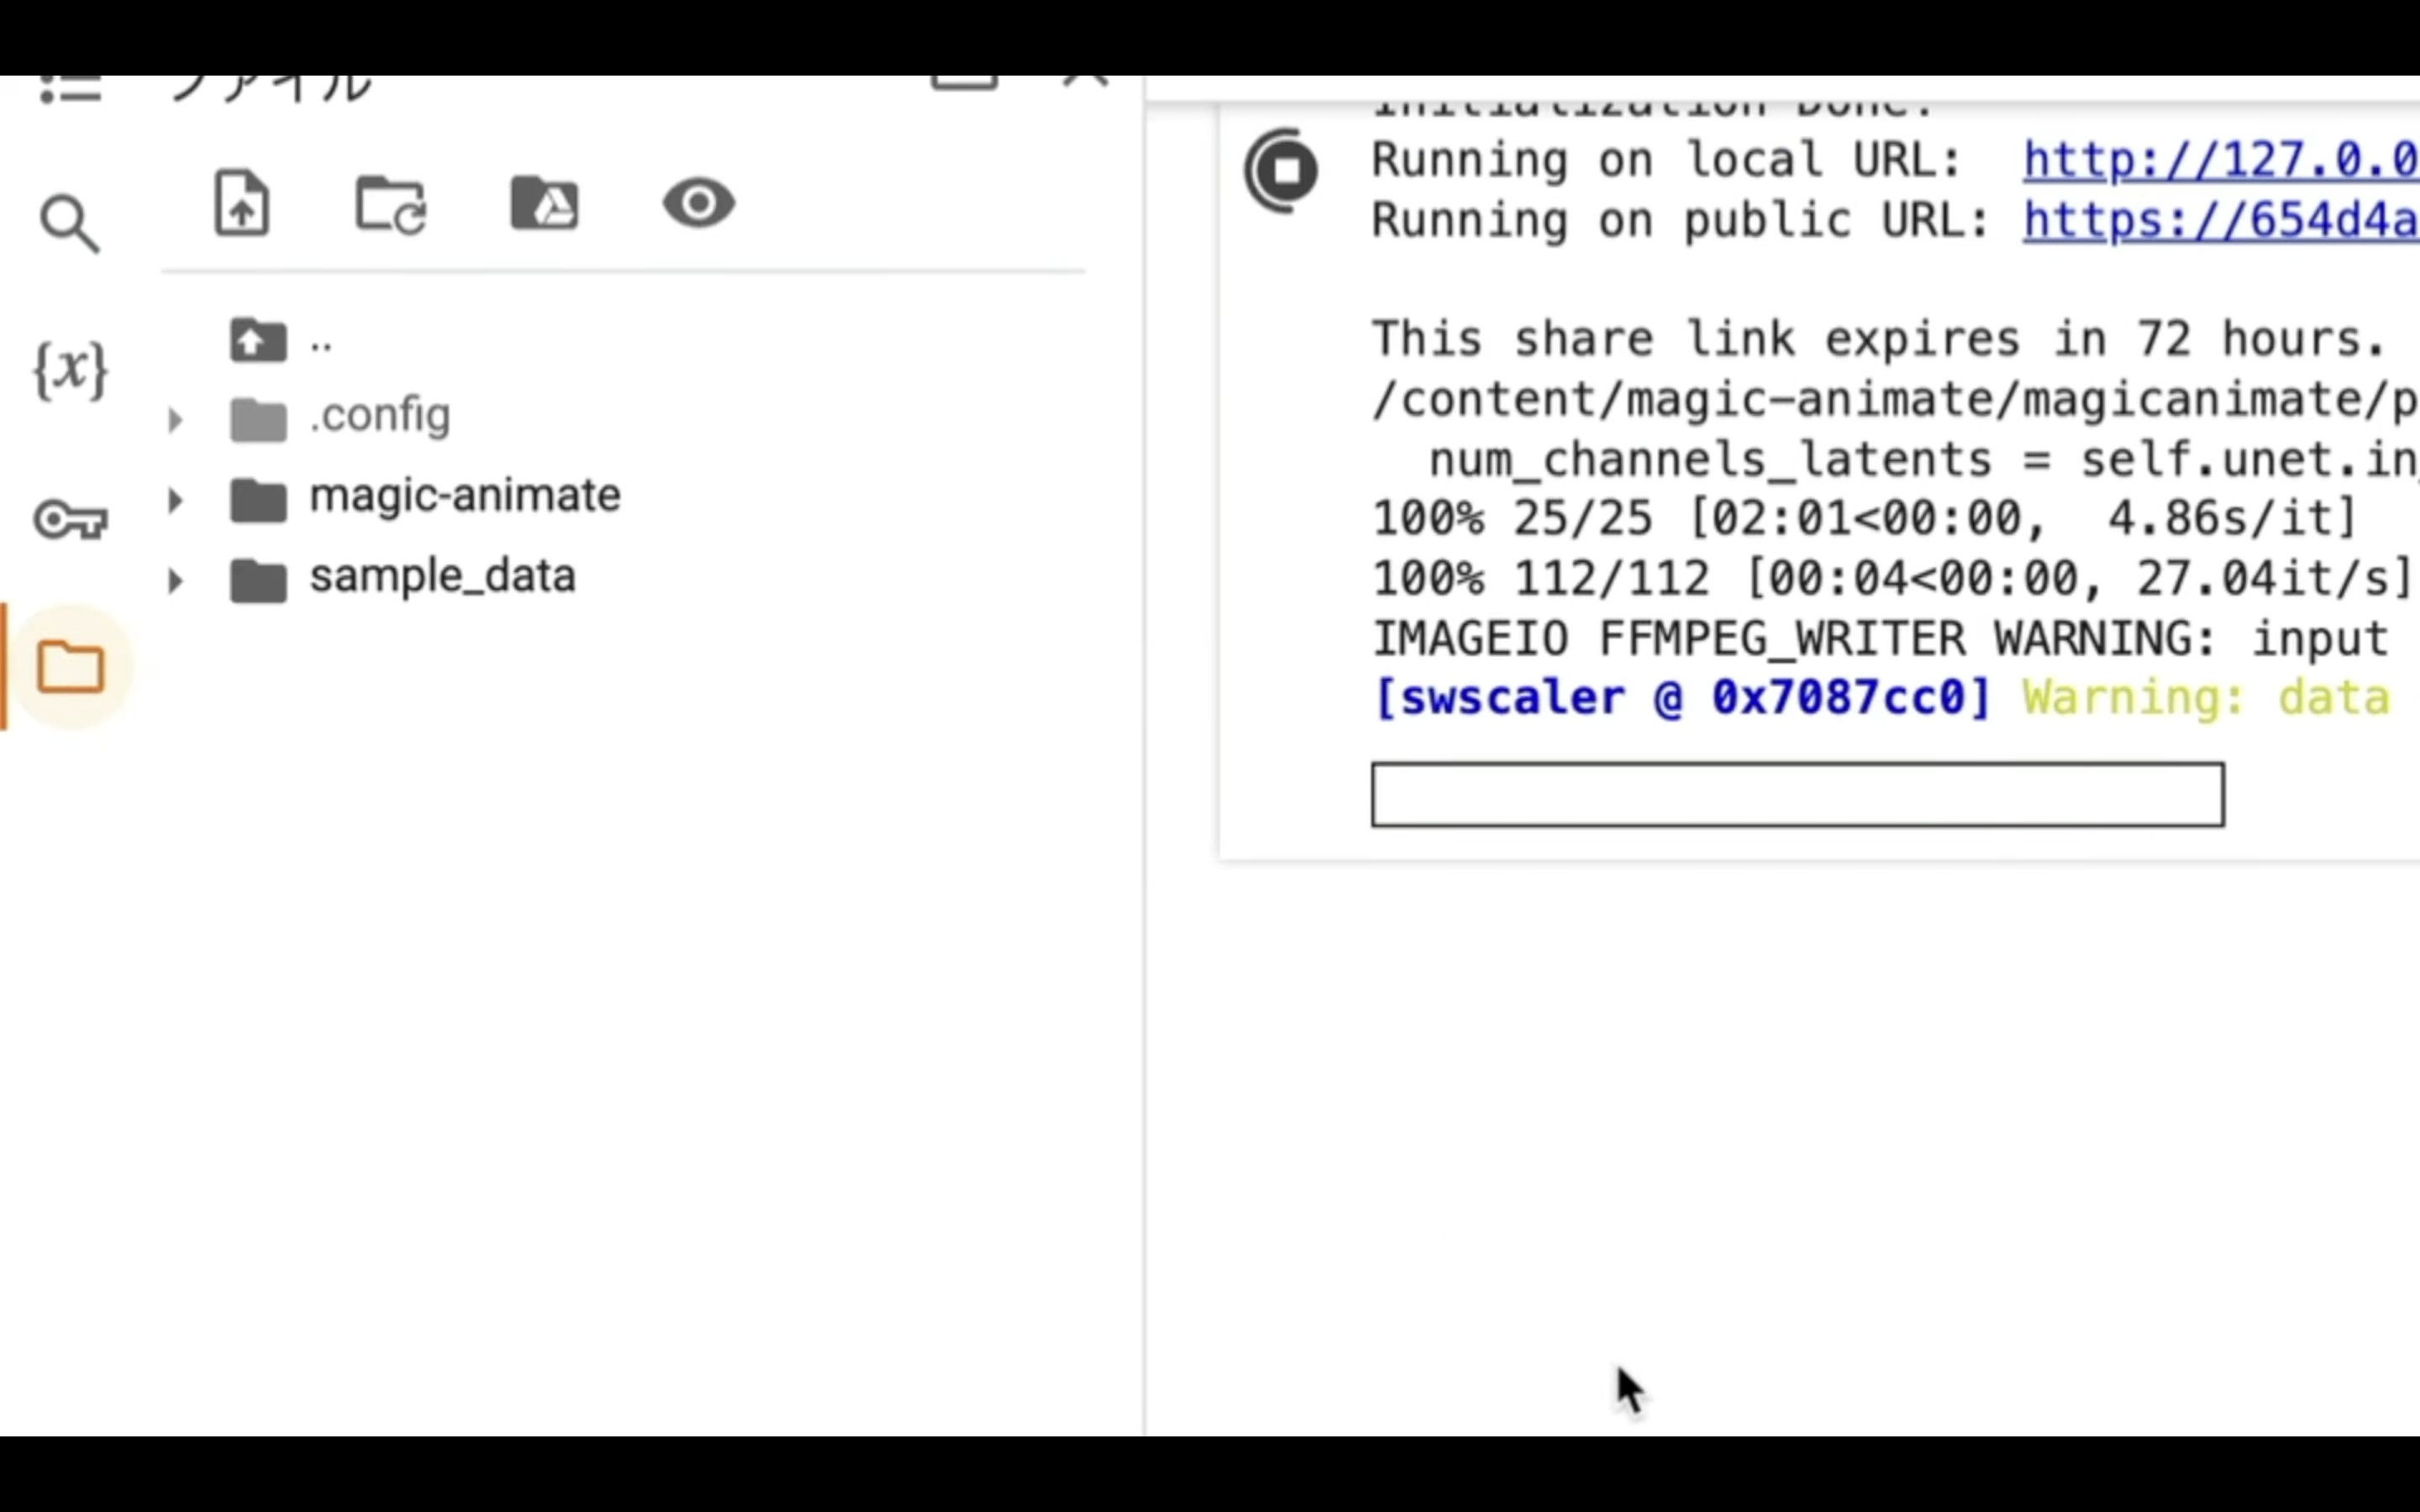
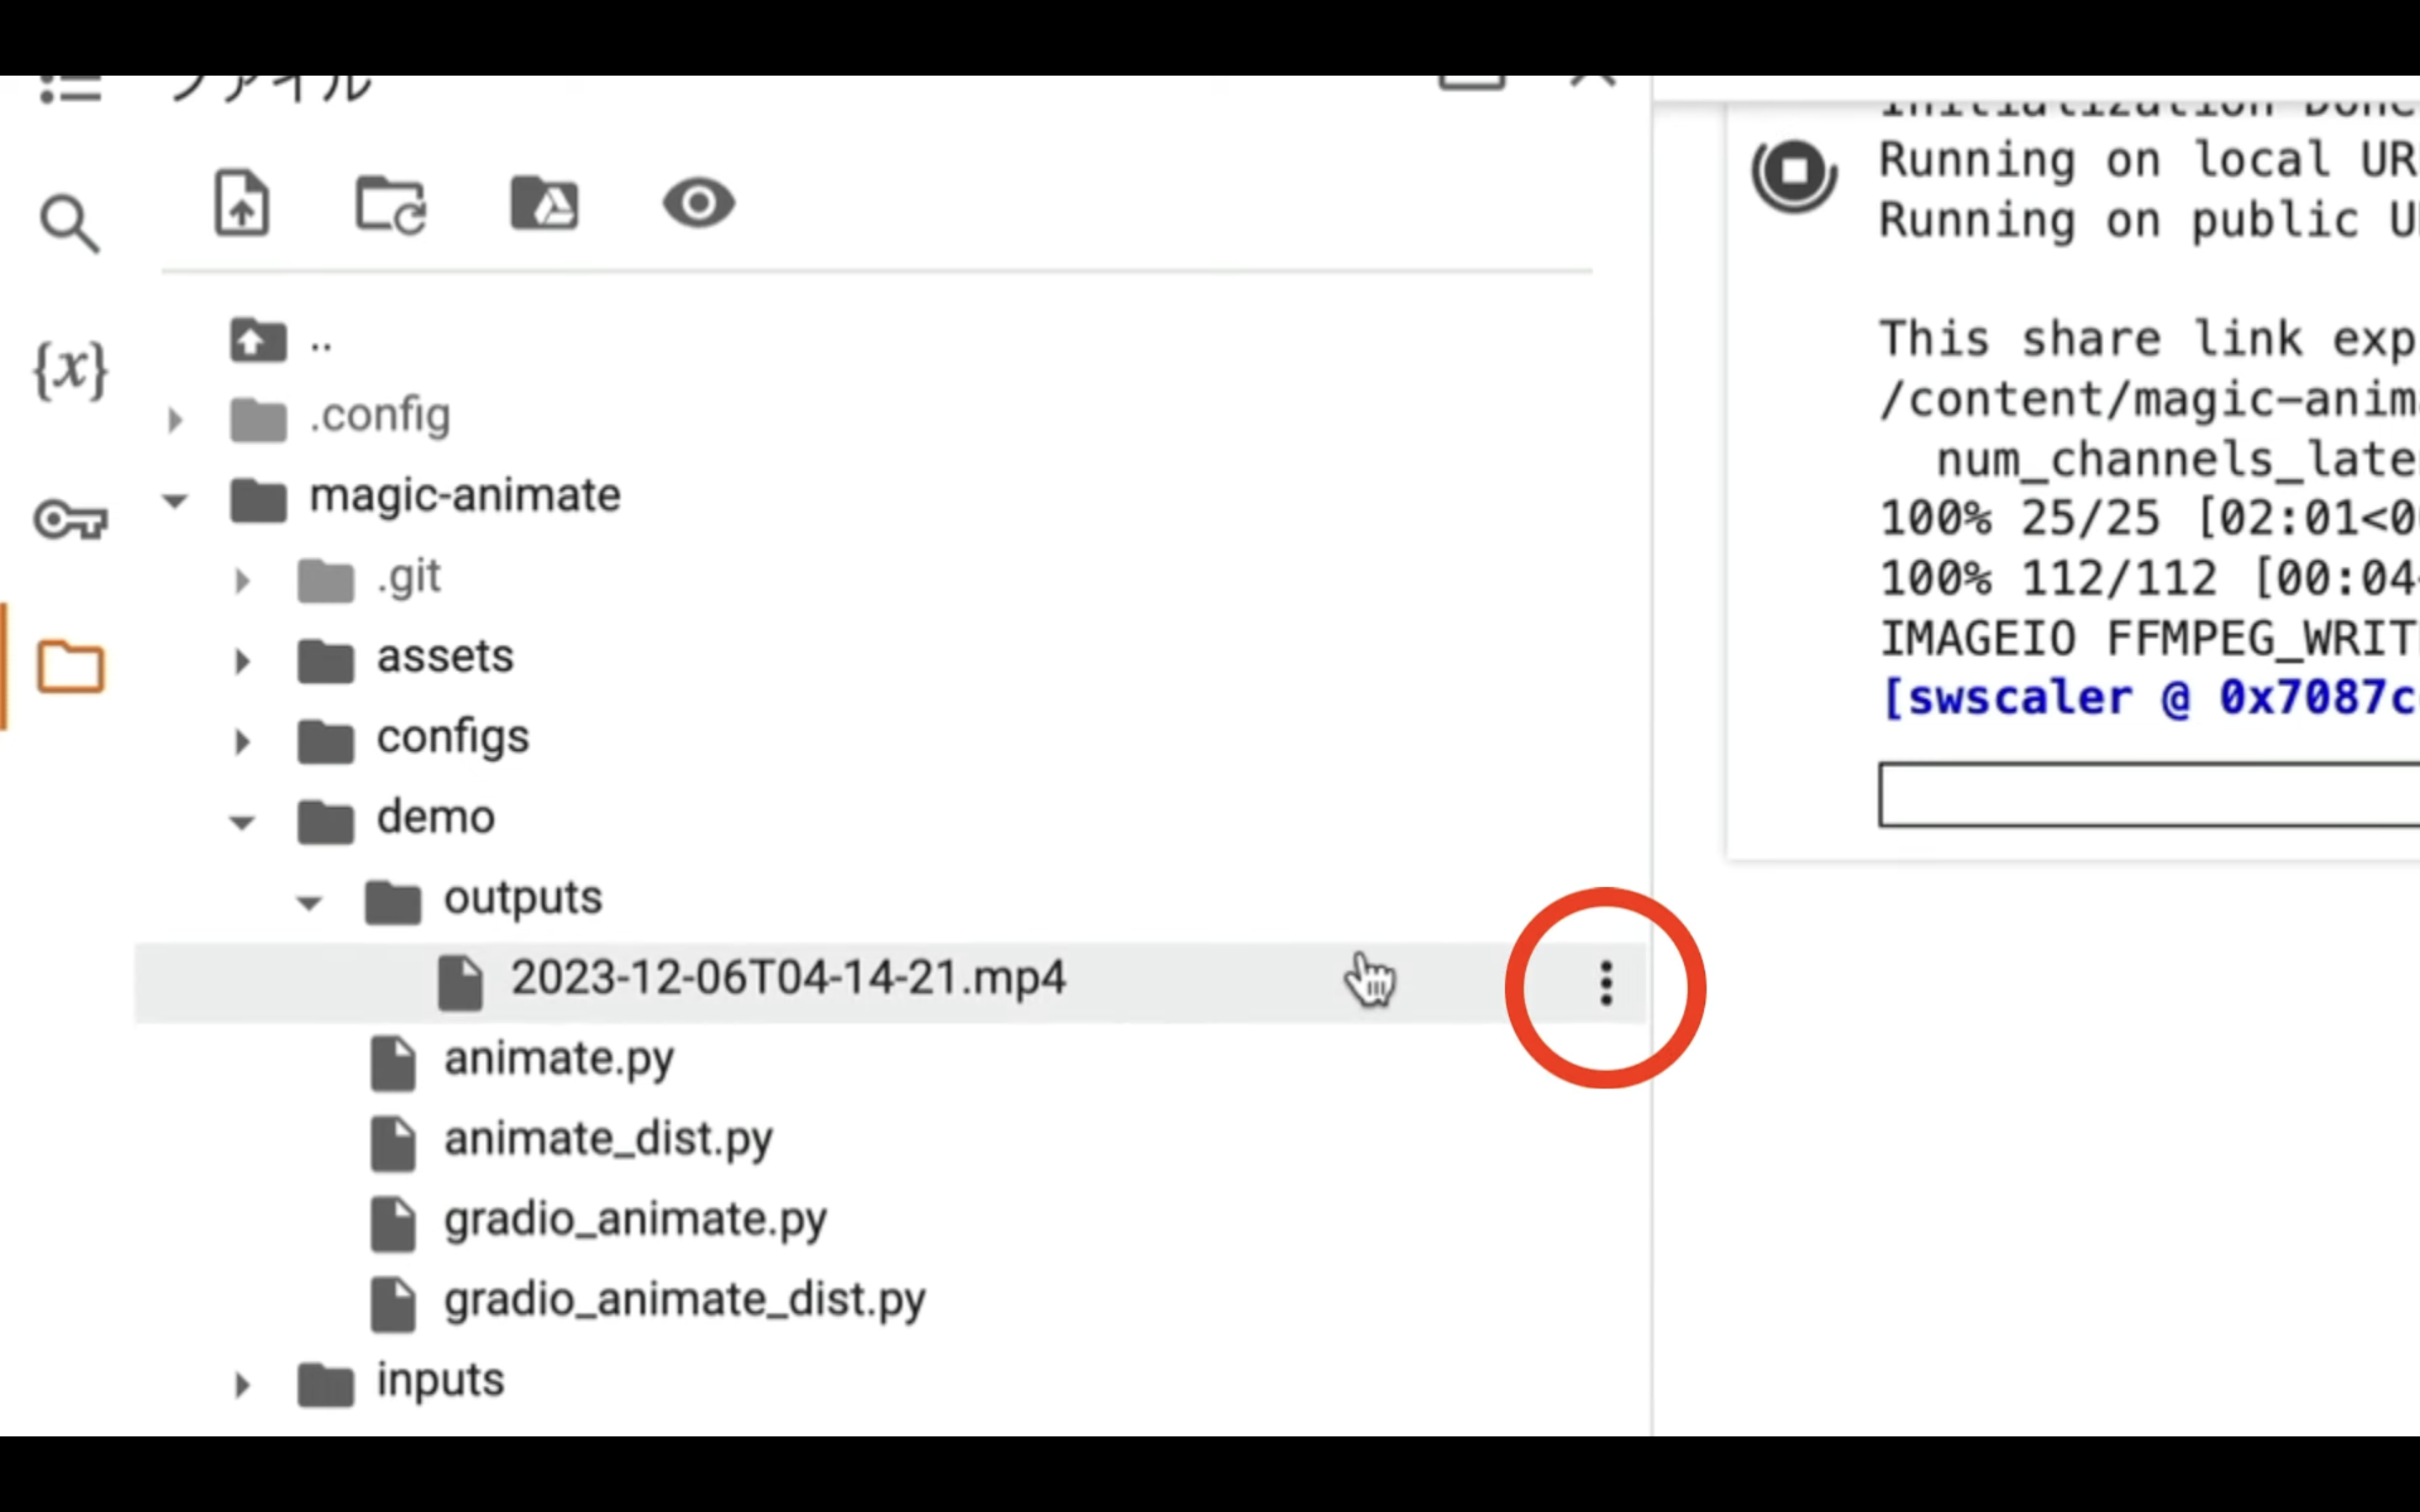
この一覧の中から、「Magic Animate」「demo」「outputs」の順番でフォルダを展開していきます。

このoutputsフォルダの中にあるMP4ファイルが、今回生成された動画です。

右側のドットをクリックしてダウンロードを選択することで、自分のパソコンにファイルを保存することができます。
今回生成された動画がこちらです。
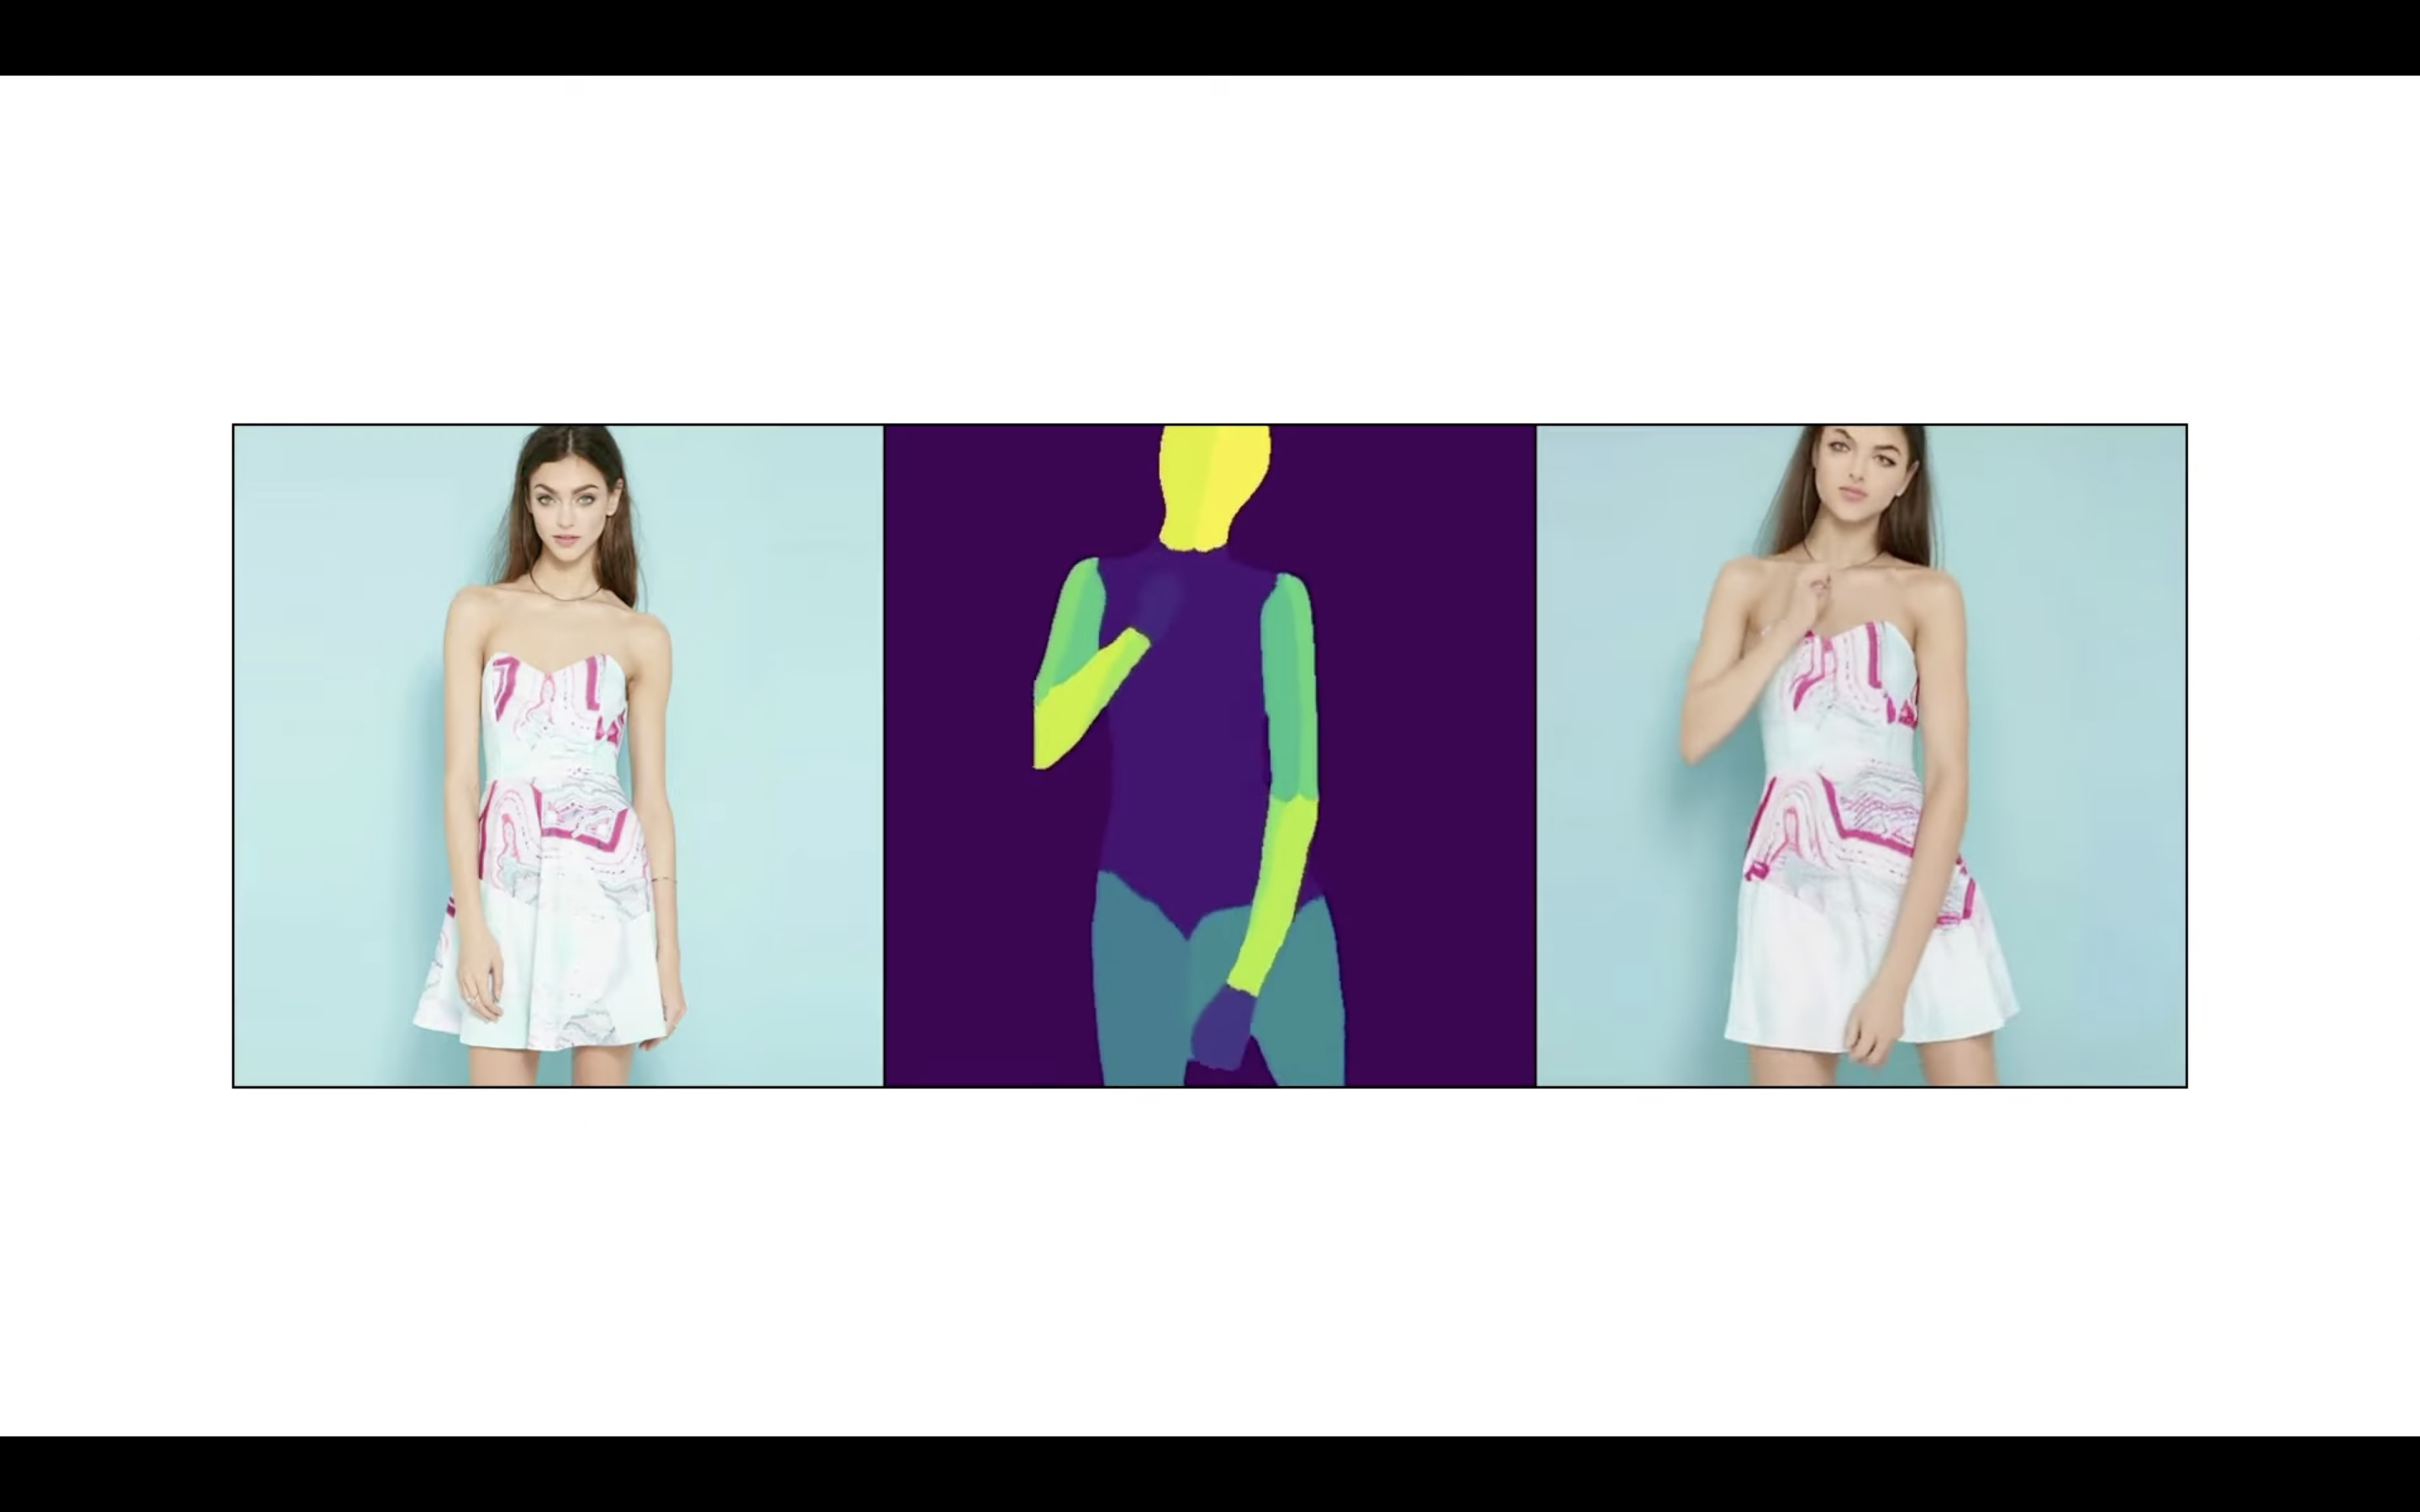
このように、1枚の画像から指定の動きに合わせた動画が生成されています。
それでは次に、別の画像で試してみましょう。
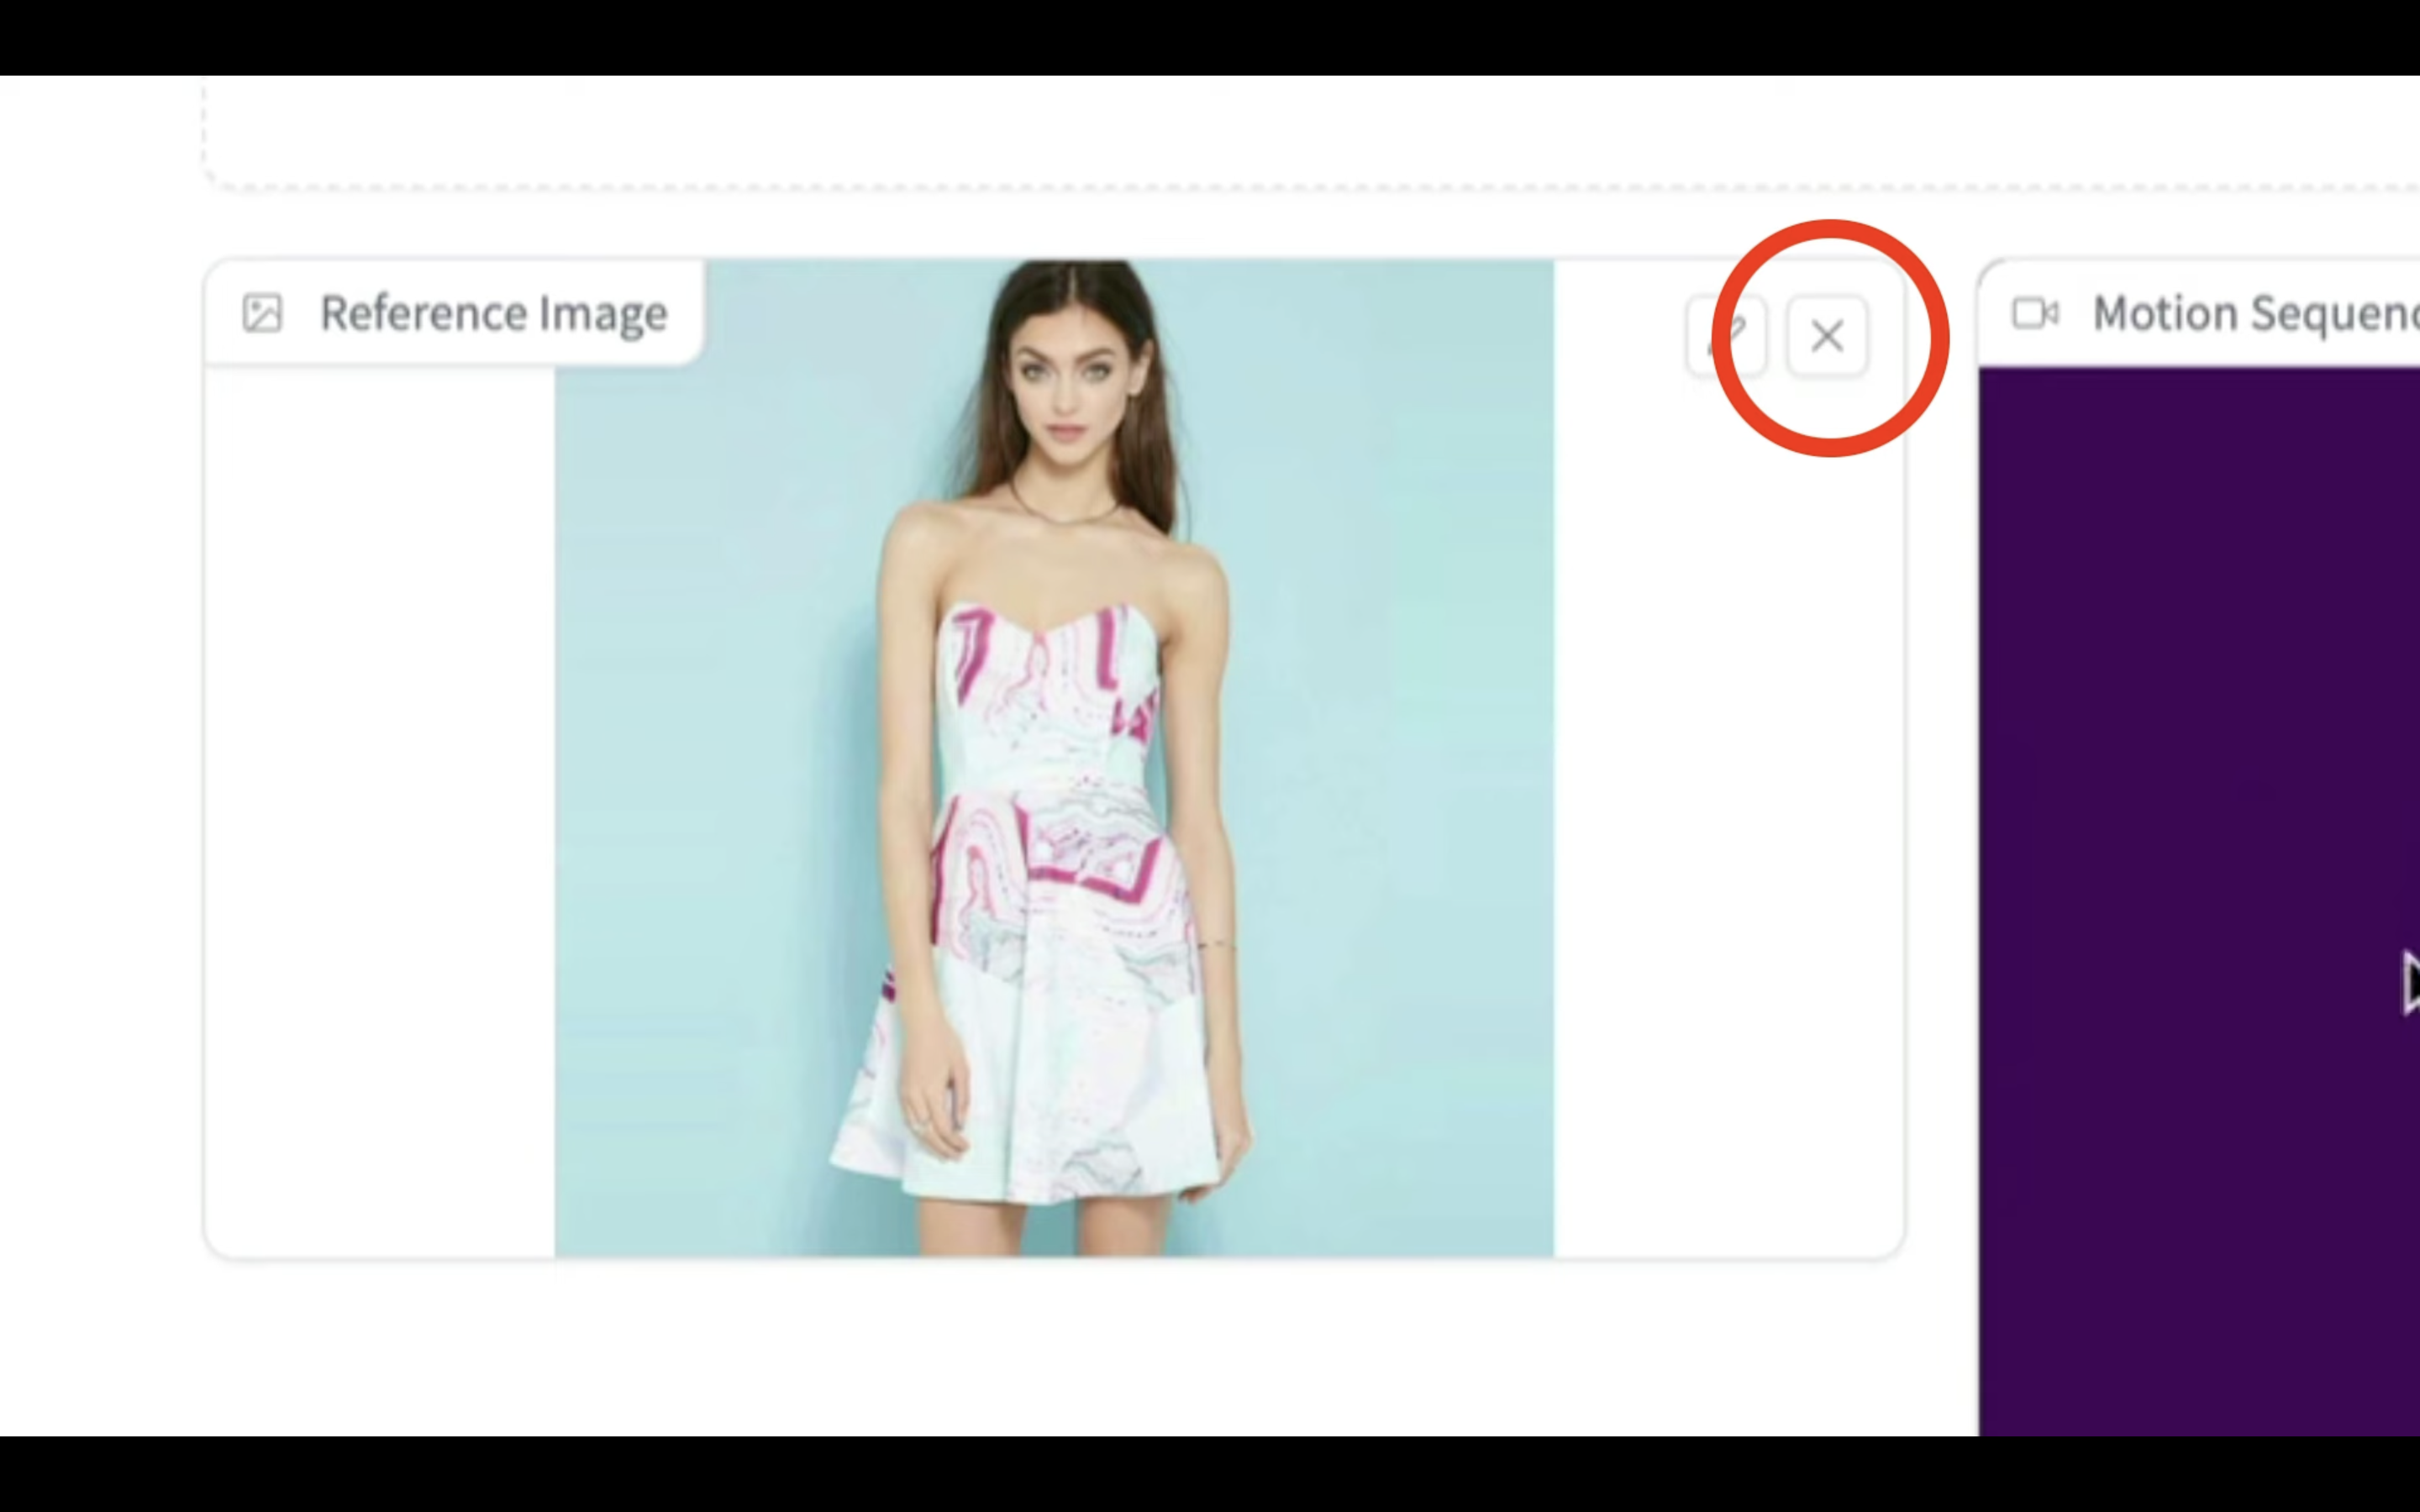
画像の右上にある✖️ボタンをクリックします。
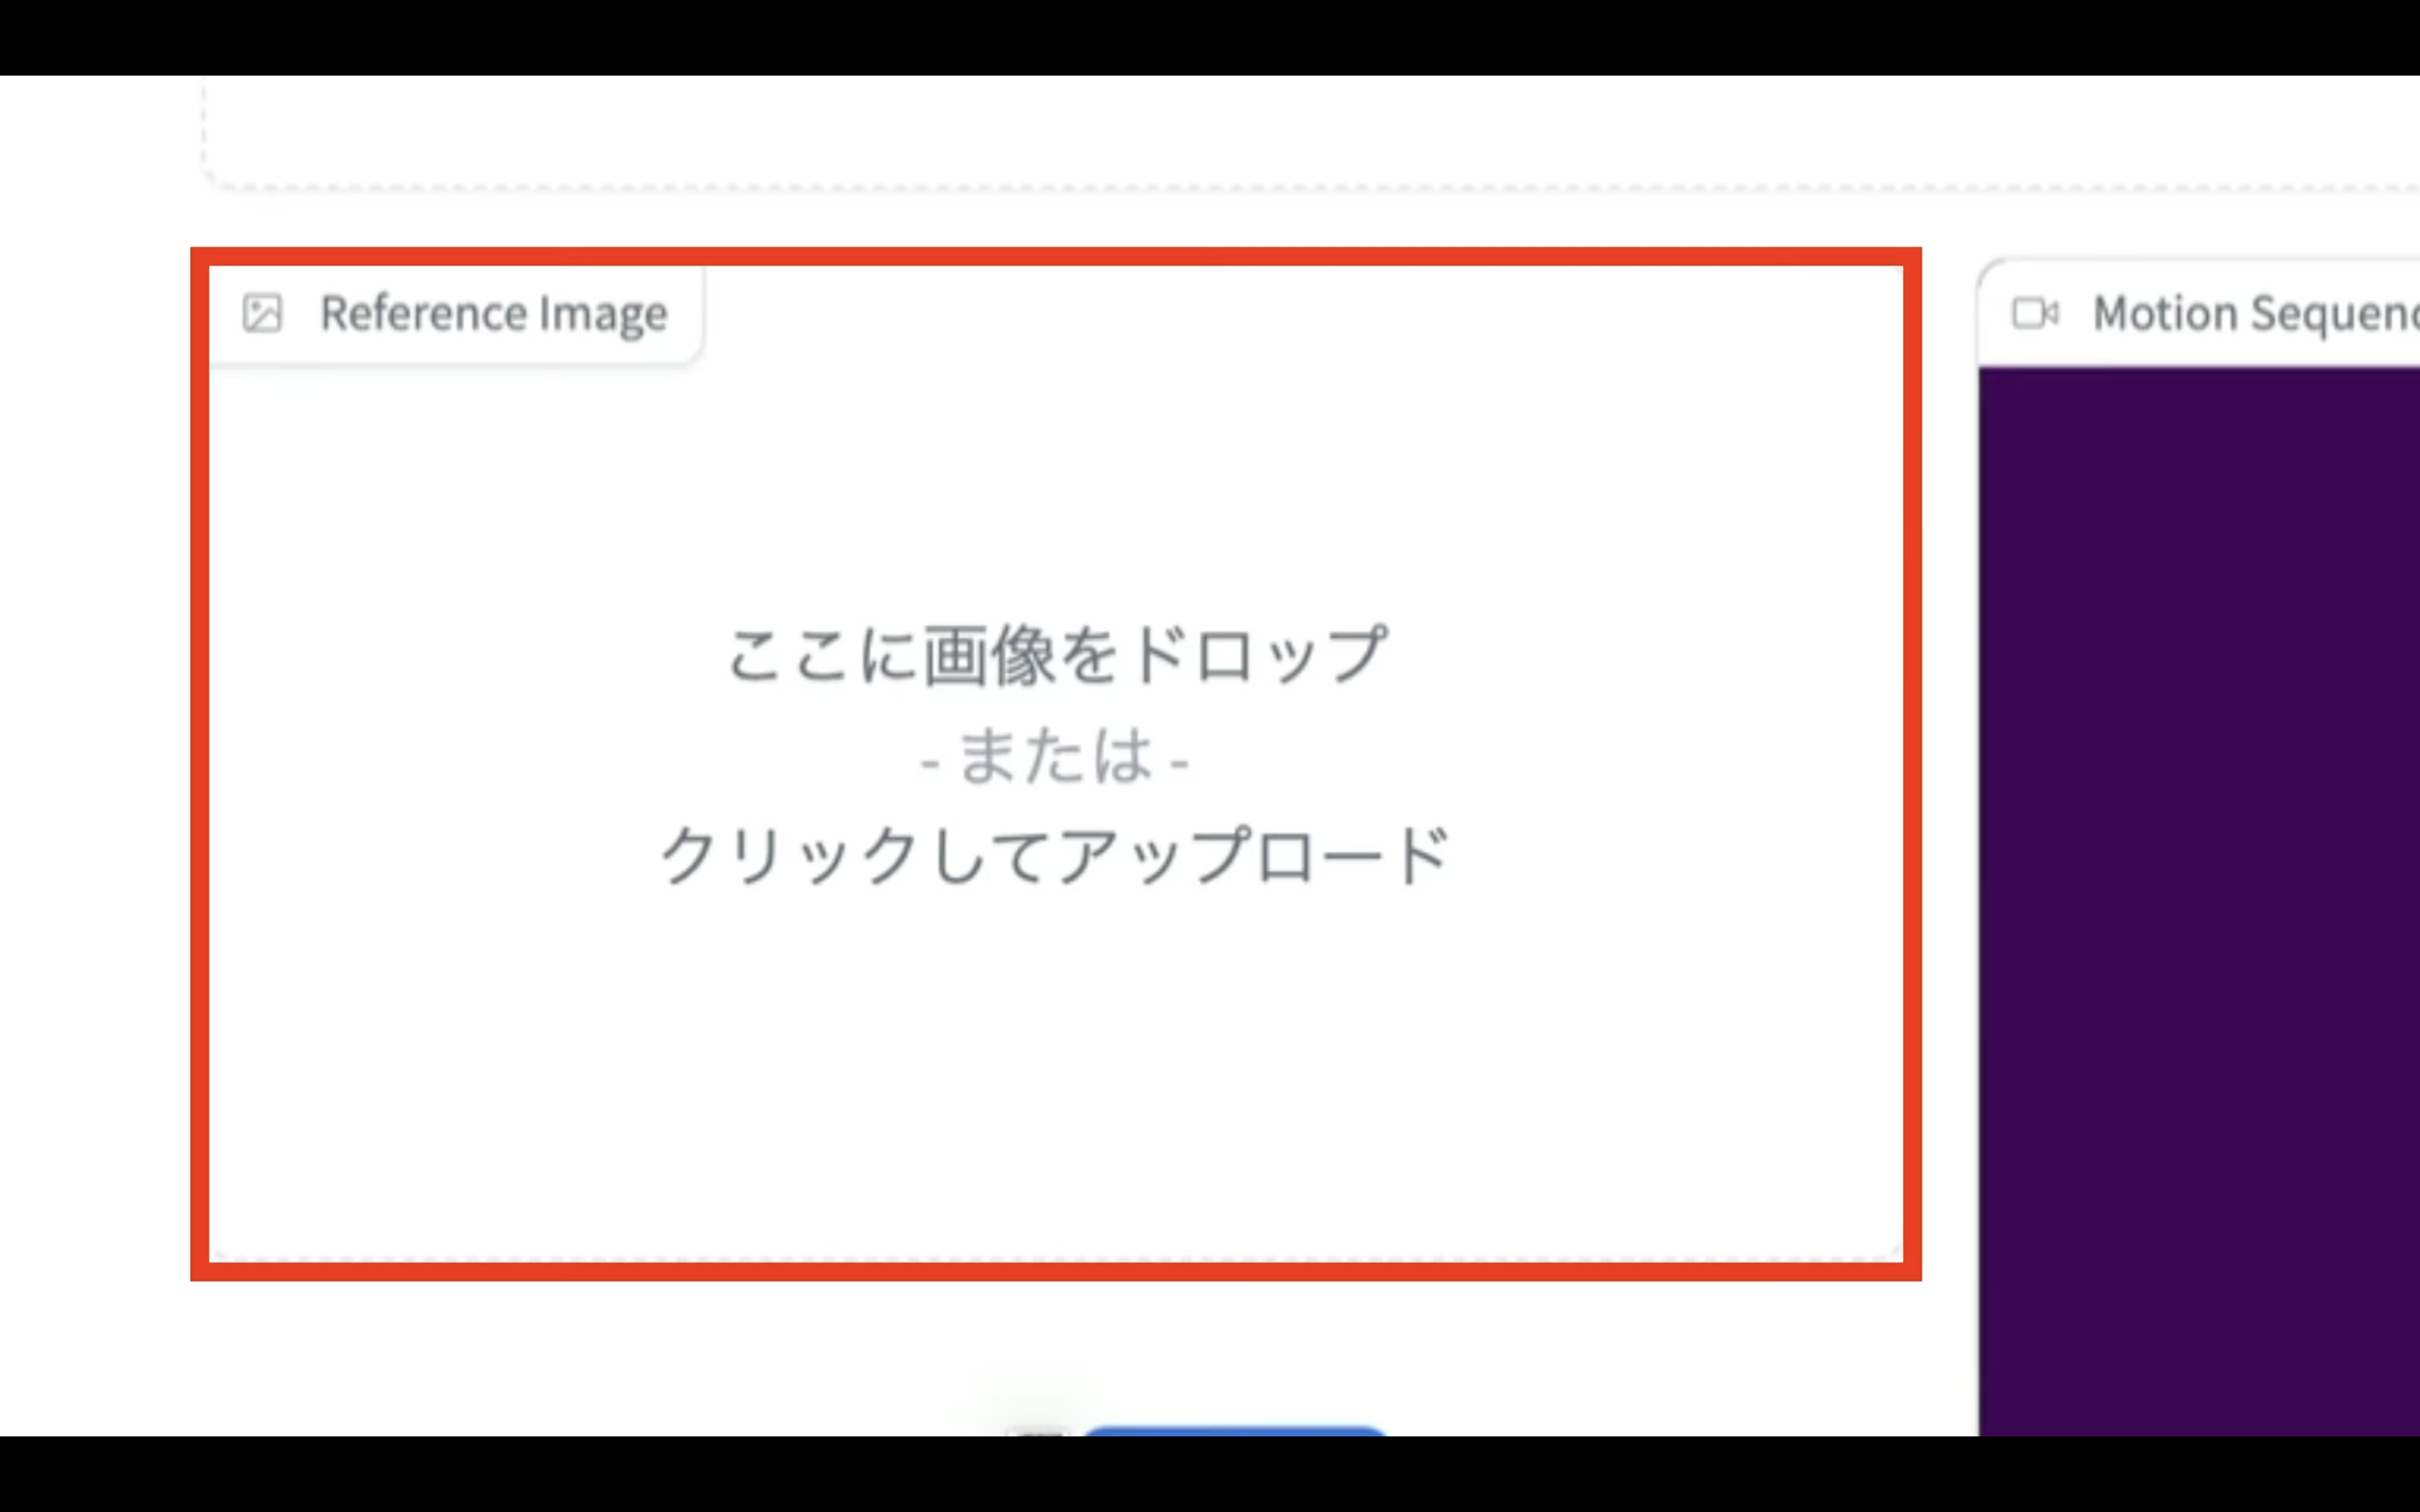
そして、画像ファイルをこの部分にドラッグアンドドロップします。
今回はこのような画像をアップロードしてみました。
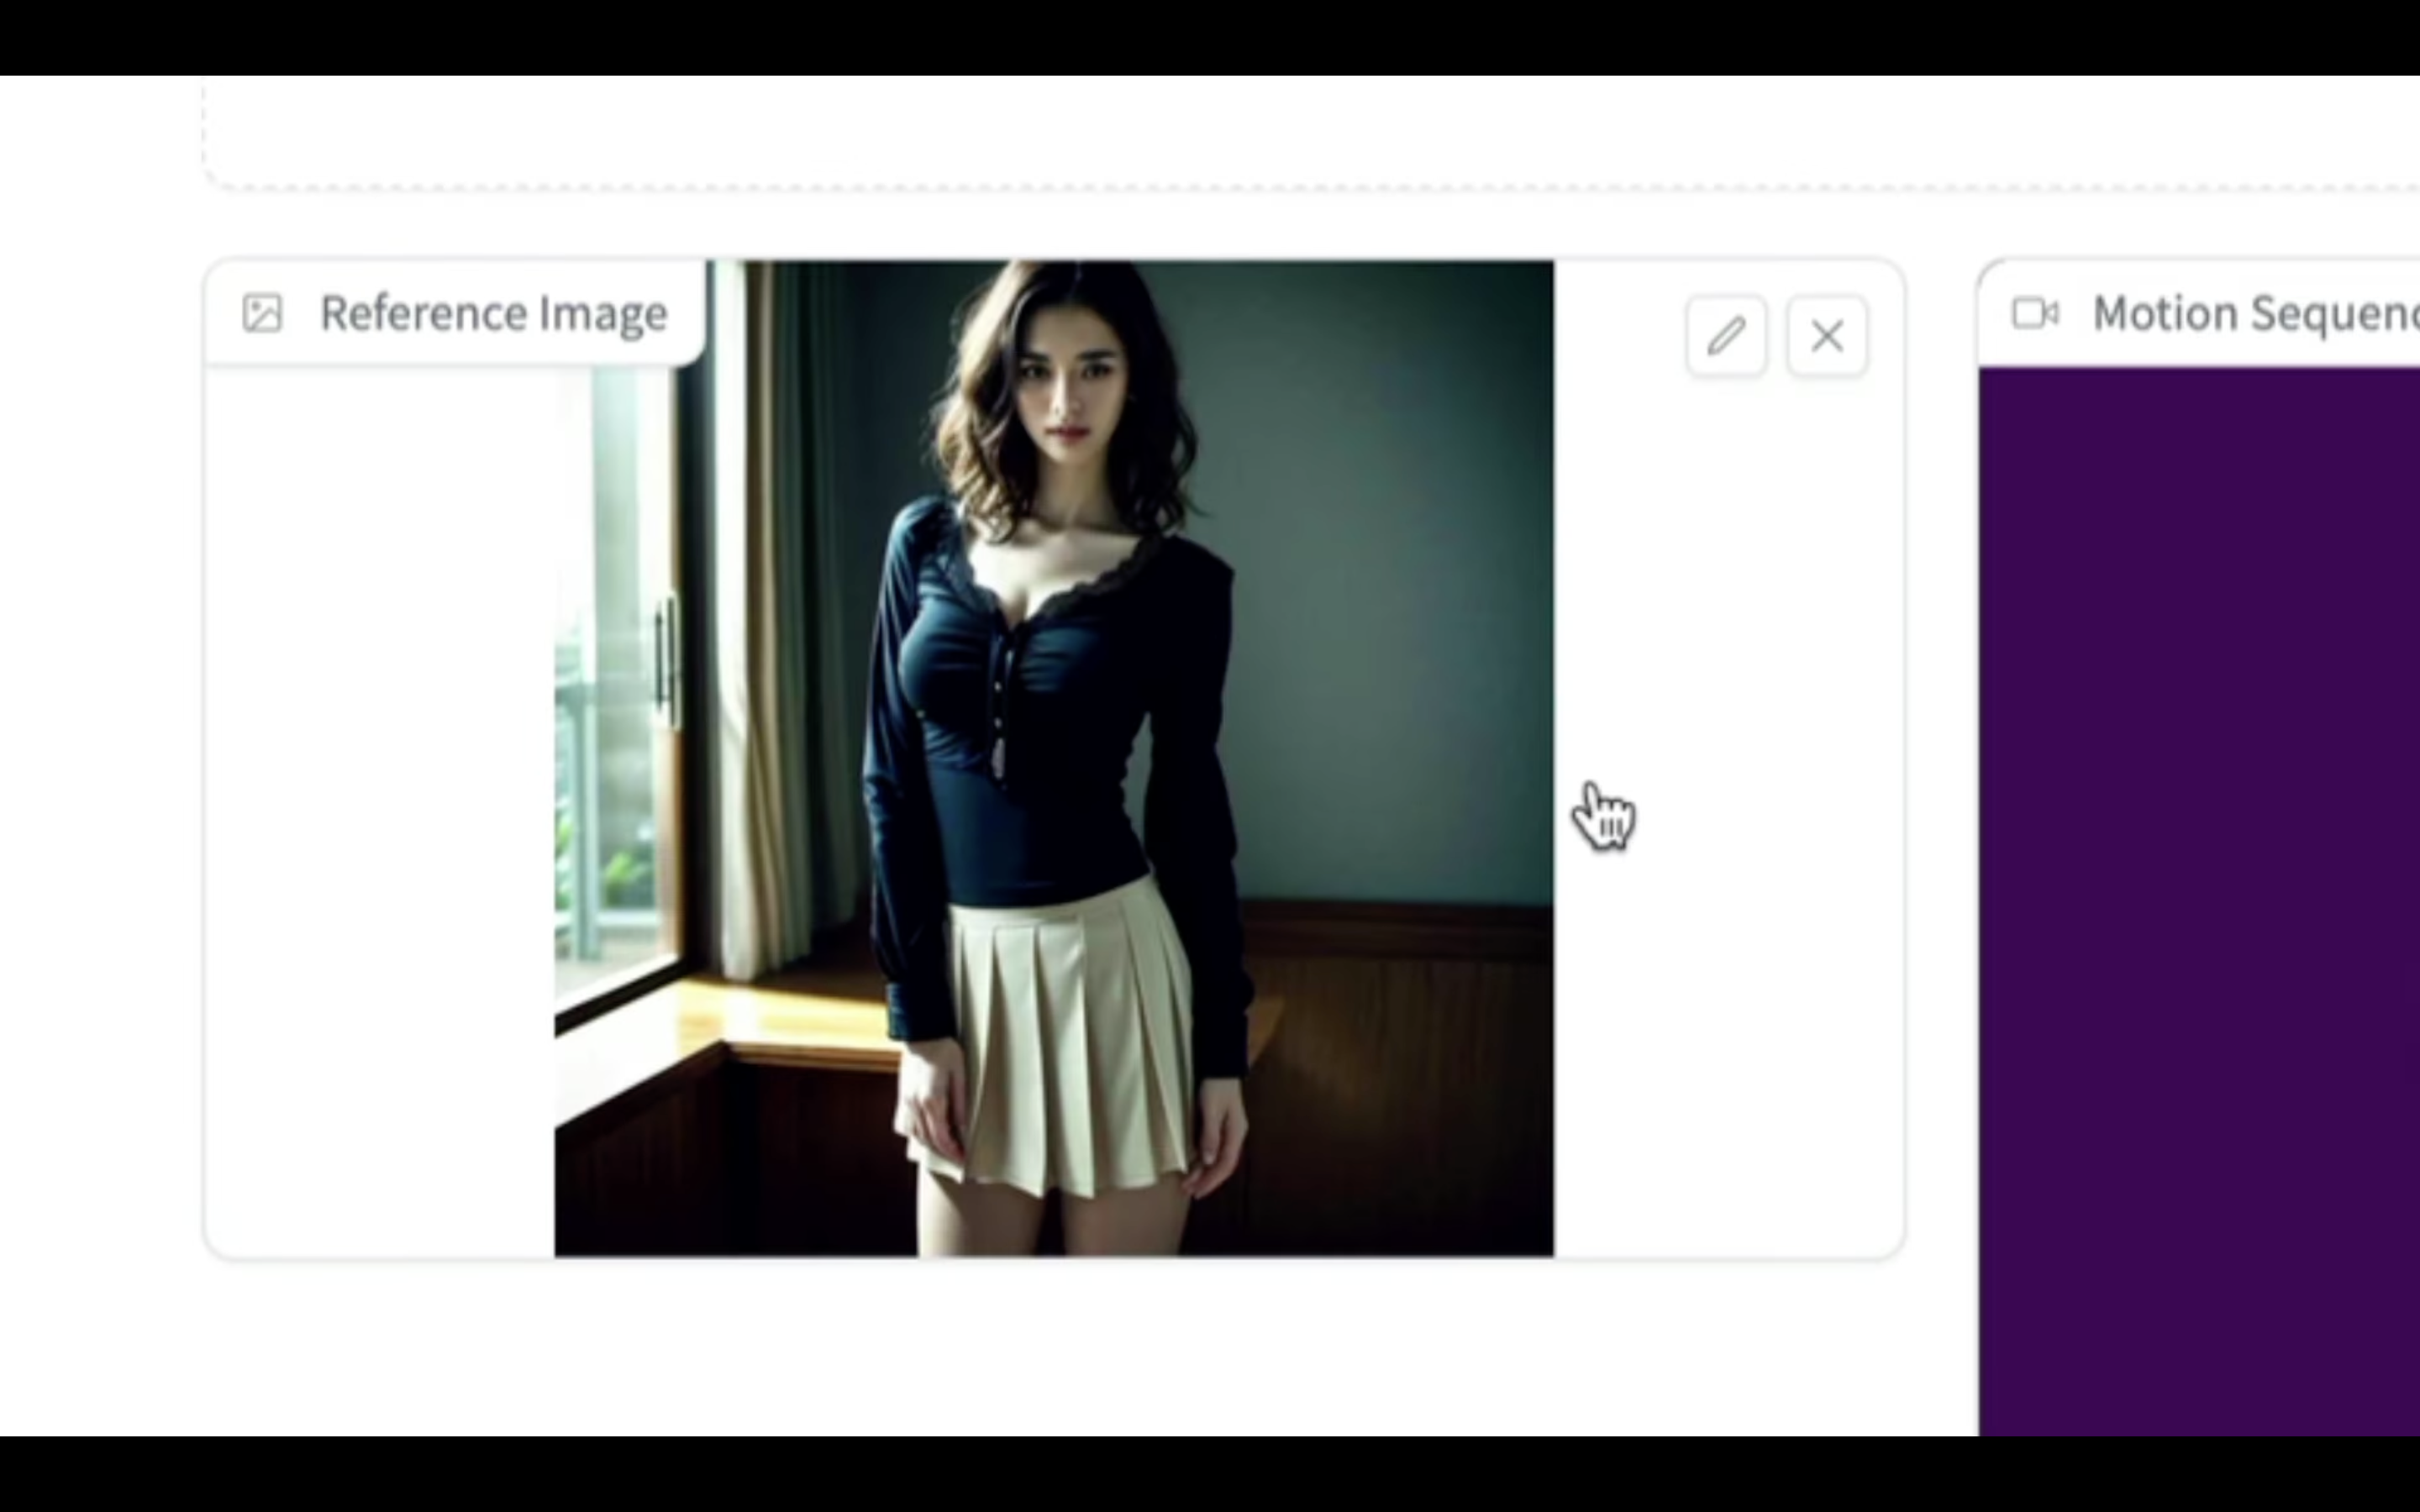
Animateと書かれているボタンをクリックします。
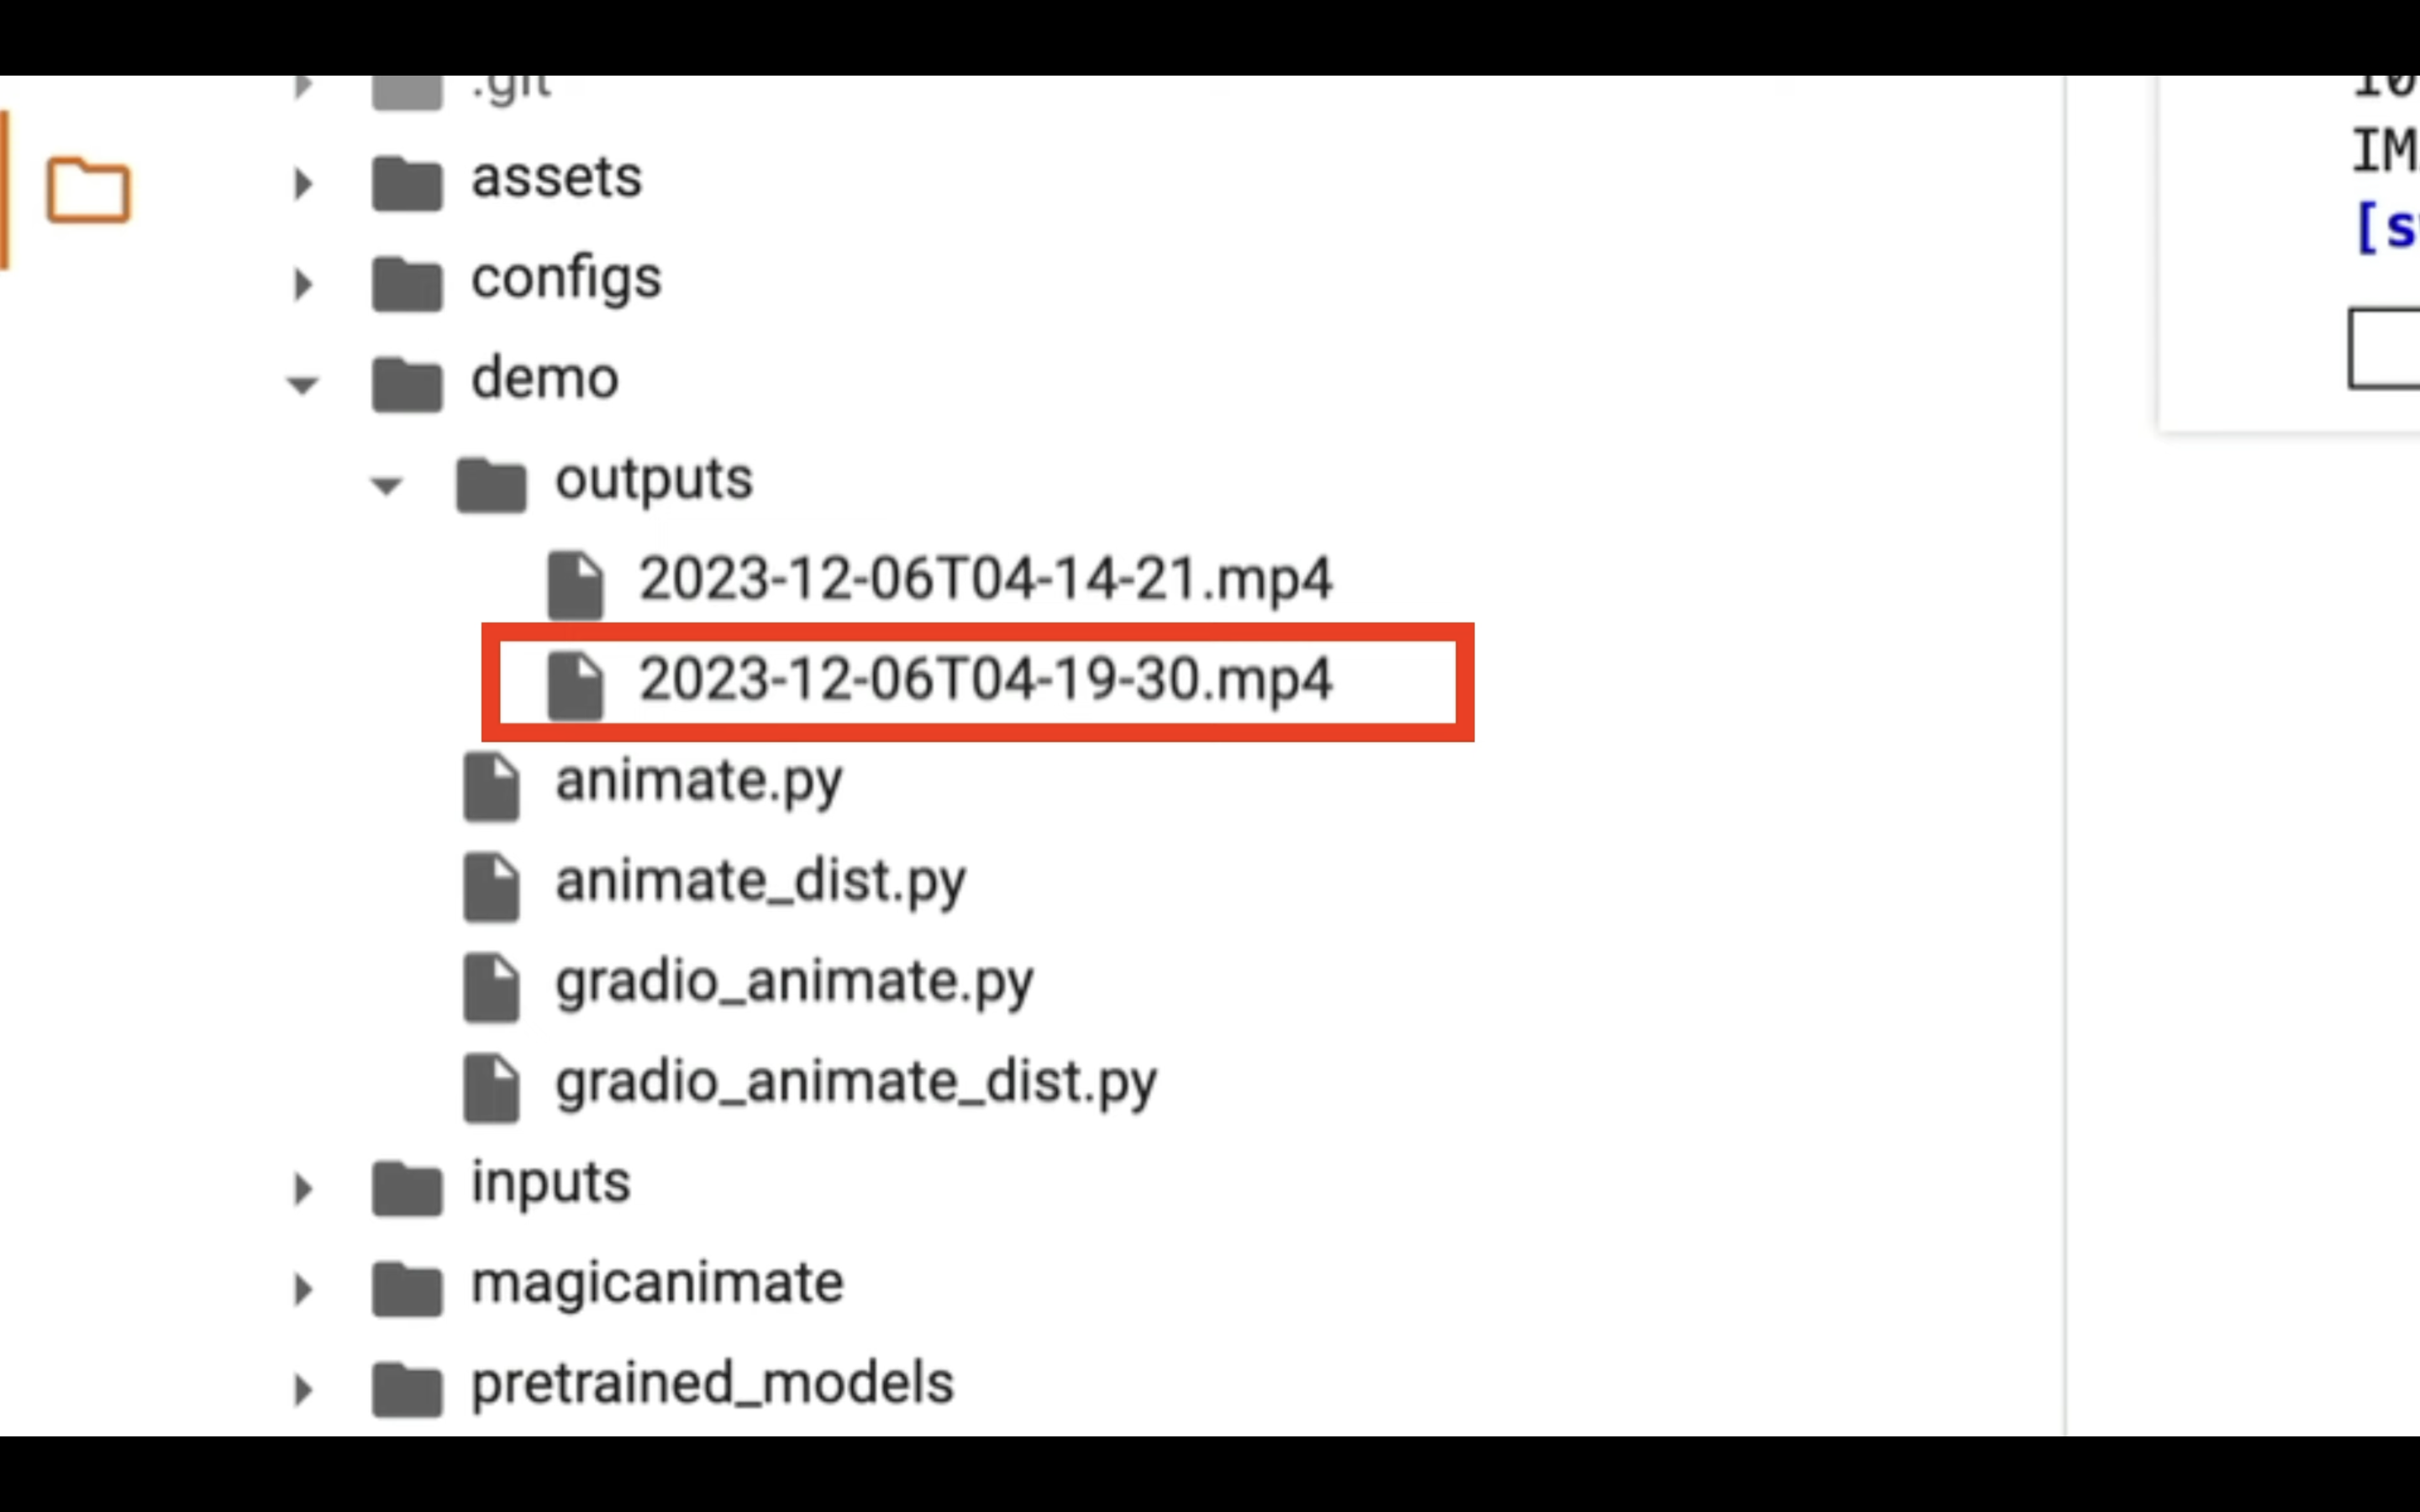
動画の生成処理が開始されるので、Google Colabの画面に切り替えます。
動画が生成されるまでしばらく待ちます。
しばらく待っていると、outputsフォルダーの中に新しいファイルが追加されます。
今回作成された動画がこちらです。
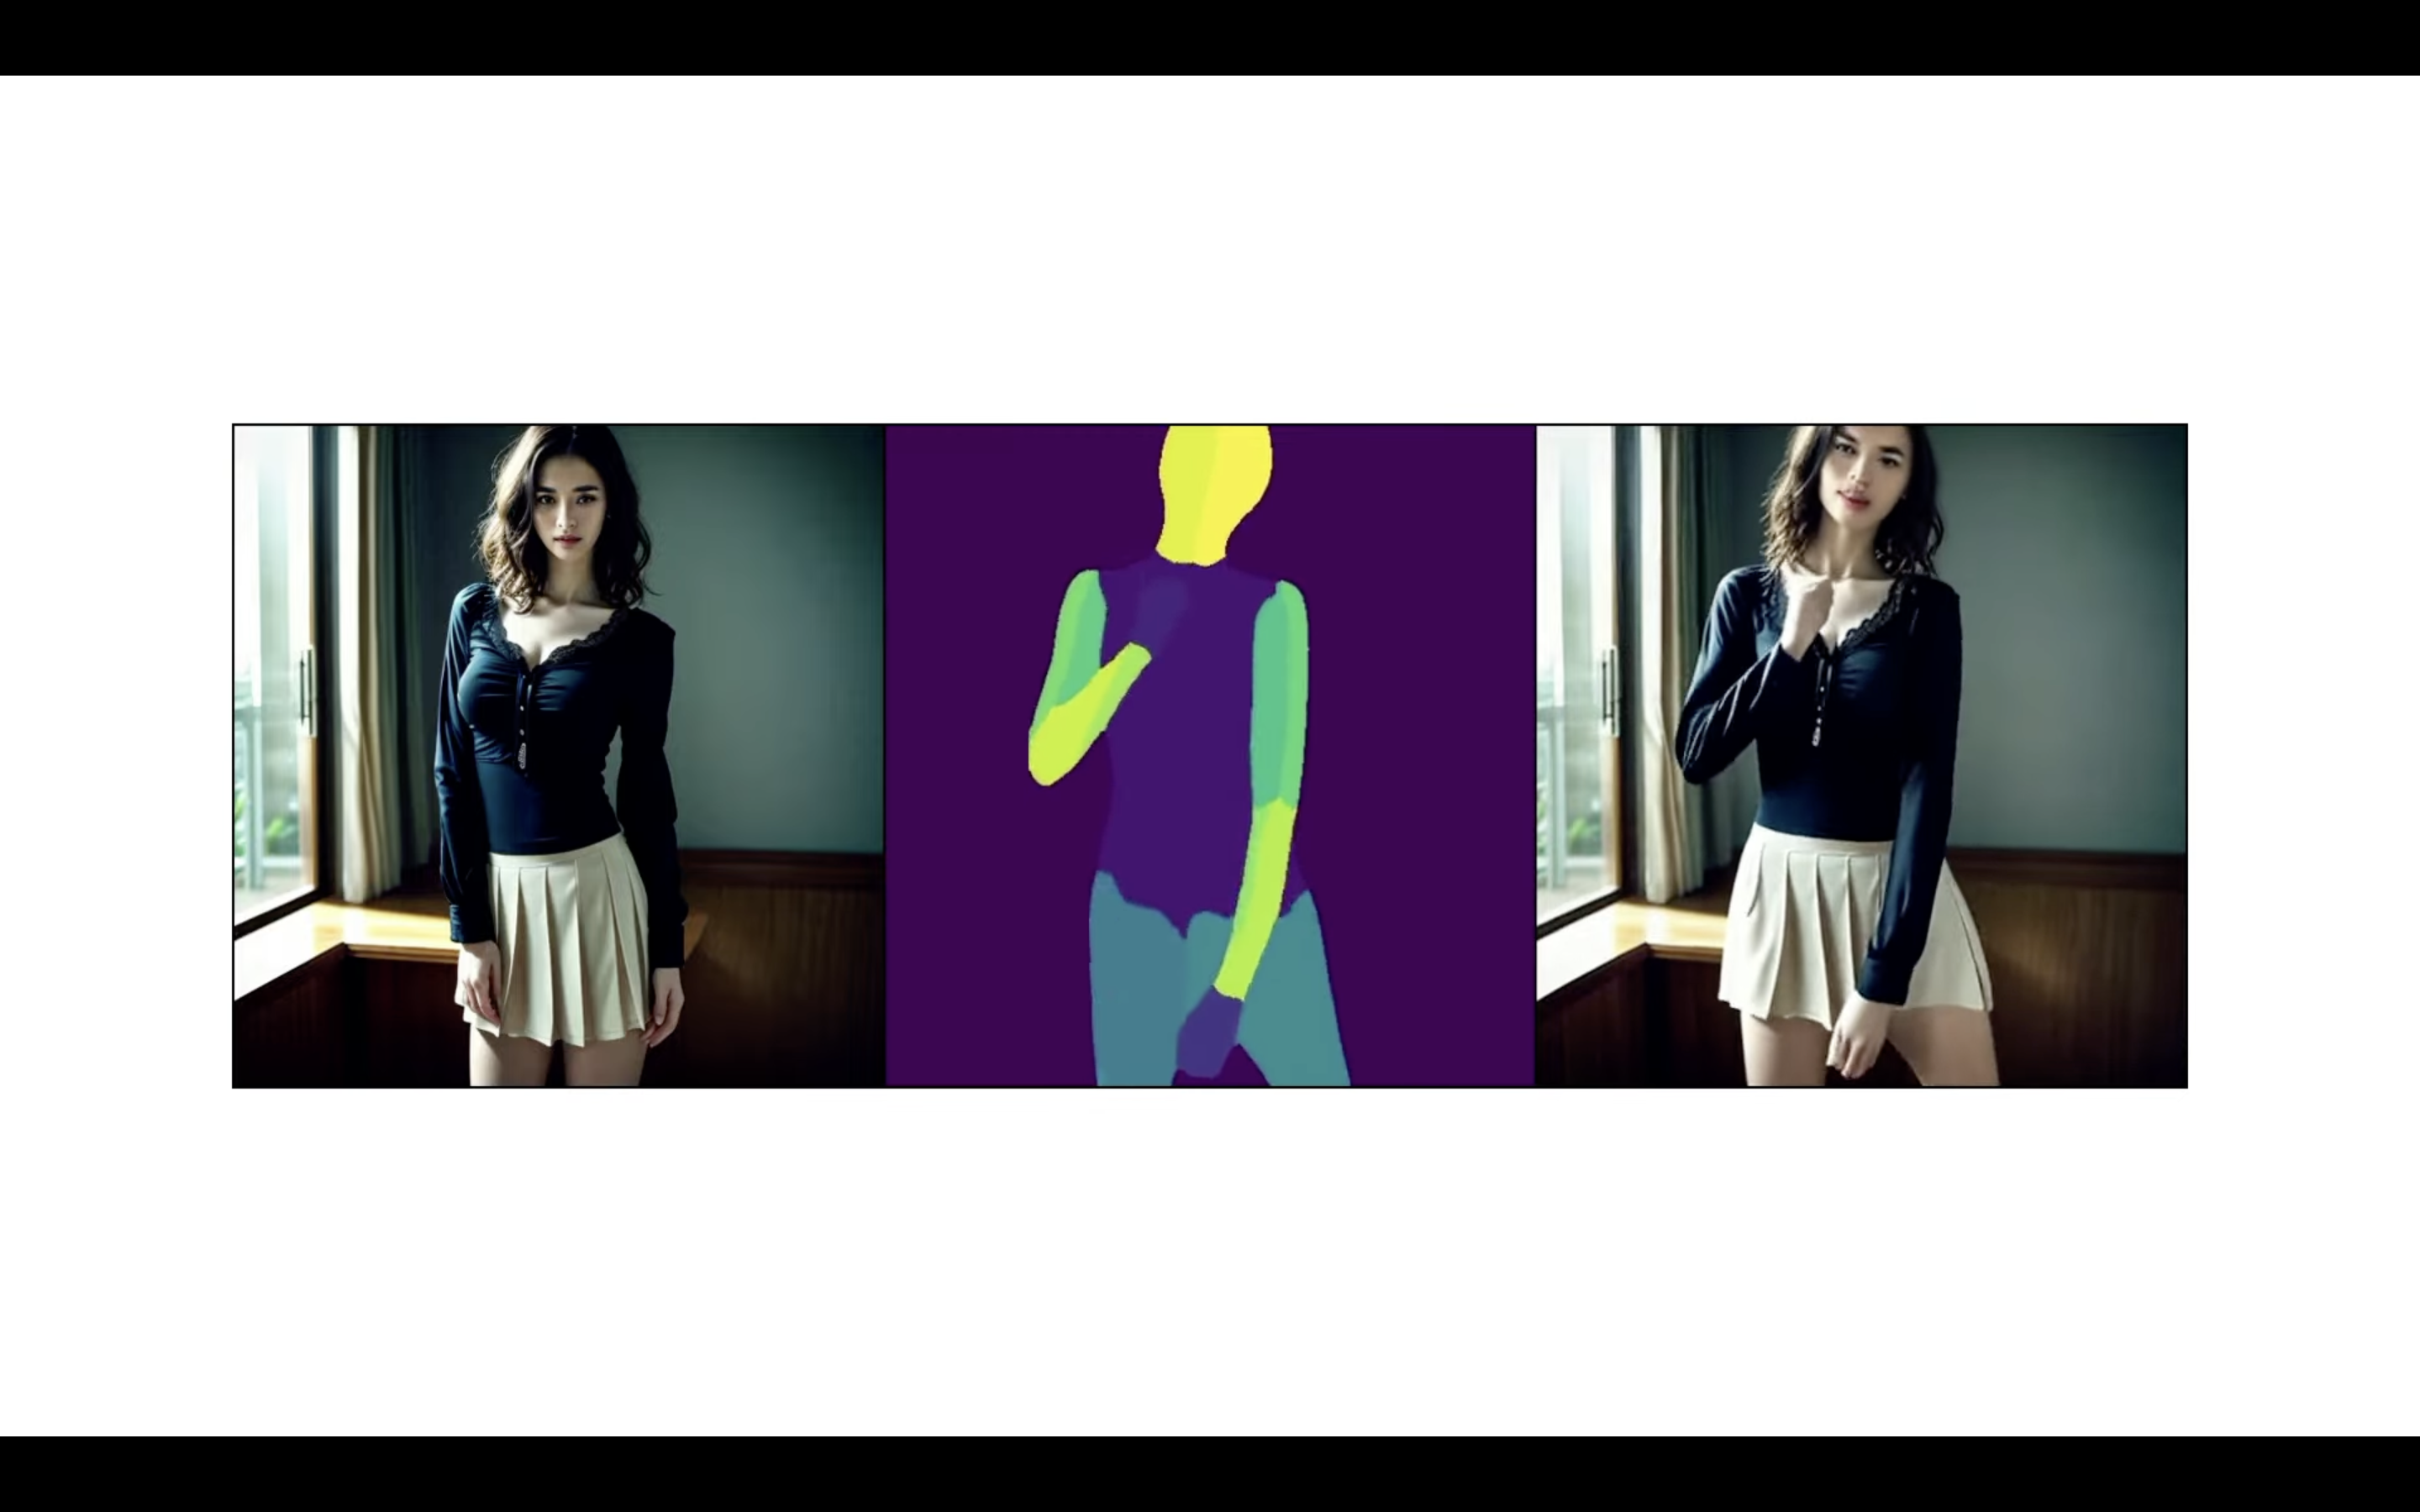
このように、Magic Animateを利用すると、1枚の画像からこのような動画を生成することができます。
是非お試しください。