
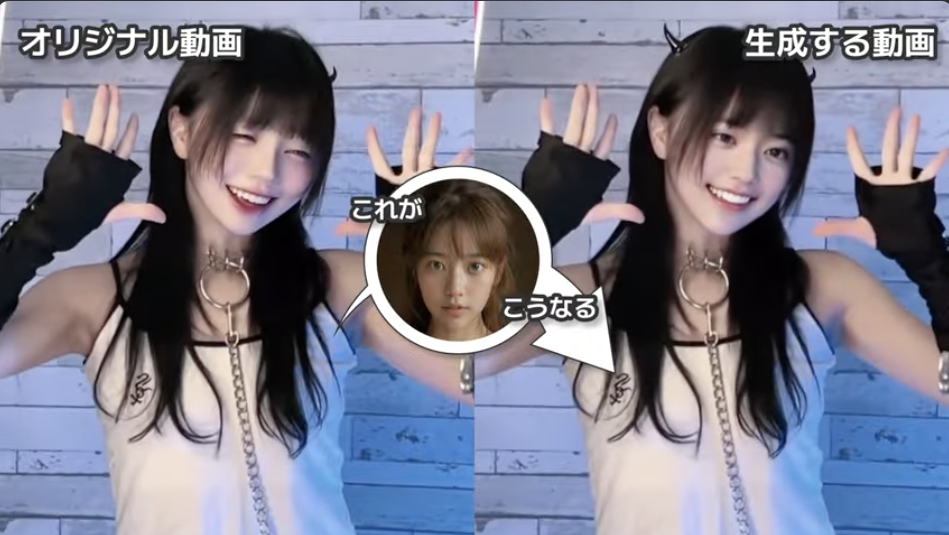
今回は、バーチャルTikTokを生成する方法について解説します。
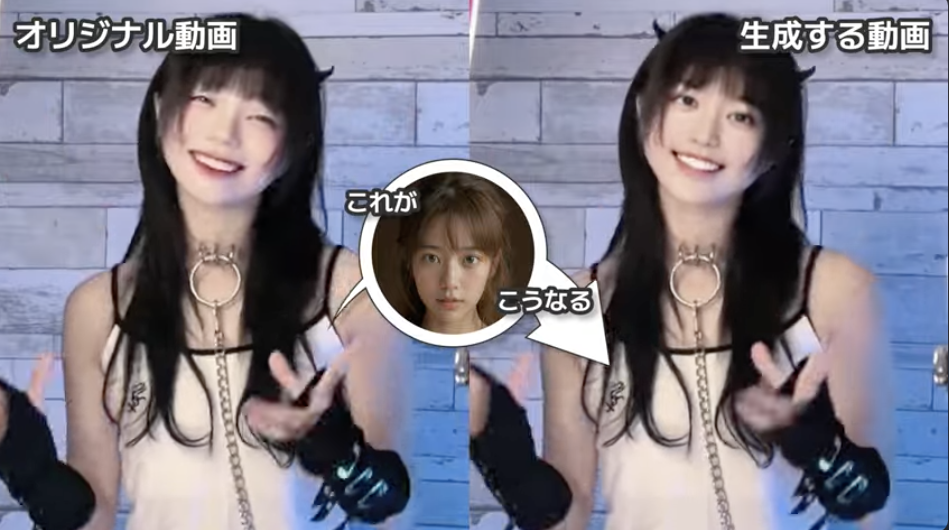
この記事を最後まで見ていただければ、こんな感じでオリジナルのTikTokから仮想のTikTokを生成する方法を理解することができます。ぜひ最後までご覧ください。
この動画で紹介する内容は、OpenArtというサイトにあるconfUIの設定ファイルを参考にしております。この解説ではGoogle ColabでconfUIを動作させていきます。
参考にしたファイルはこちらになります。
Google Colabを準備する
まずはGoogle Colabのサイトにアクセスします。
Google Colabの画面を表示したら、「ノートブックを新規作成」と書かれているボタンをクリックします。
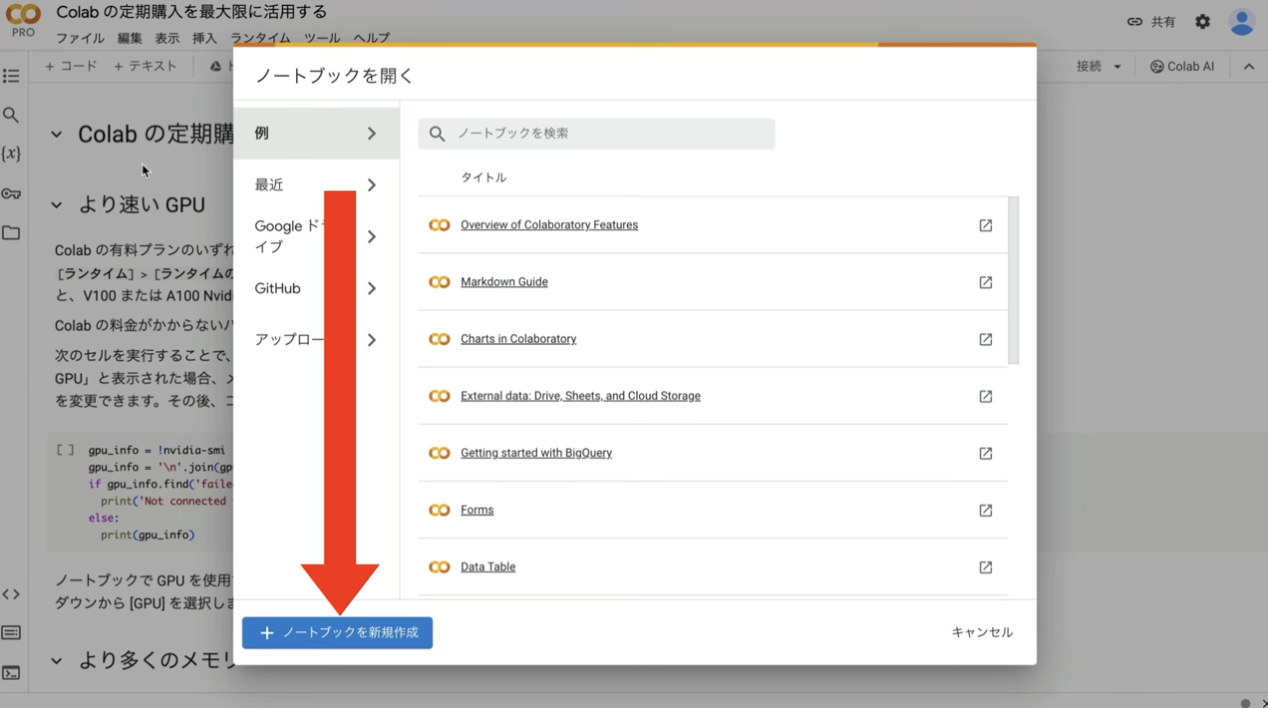
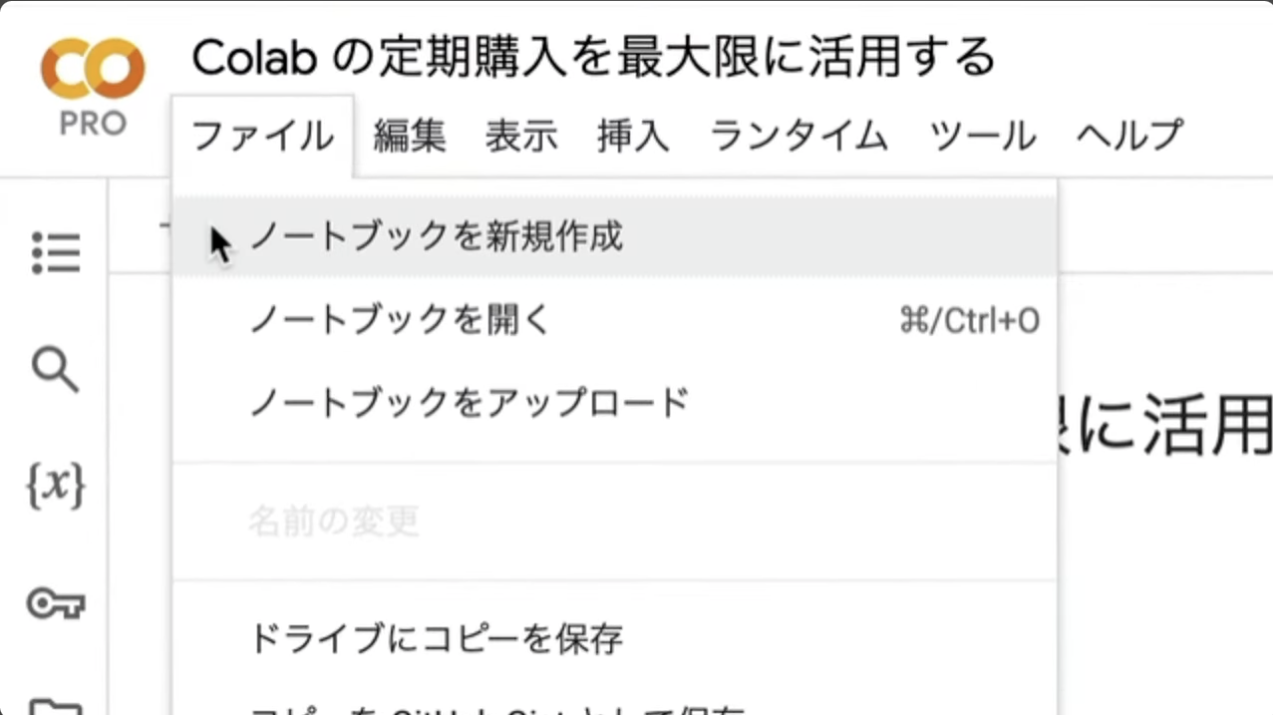
もしこのようなポップアップ画面が表示されない場合は、メニューの中から「ファイル」を選択して「ノートブックを新規作成」を選択します。
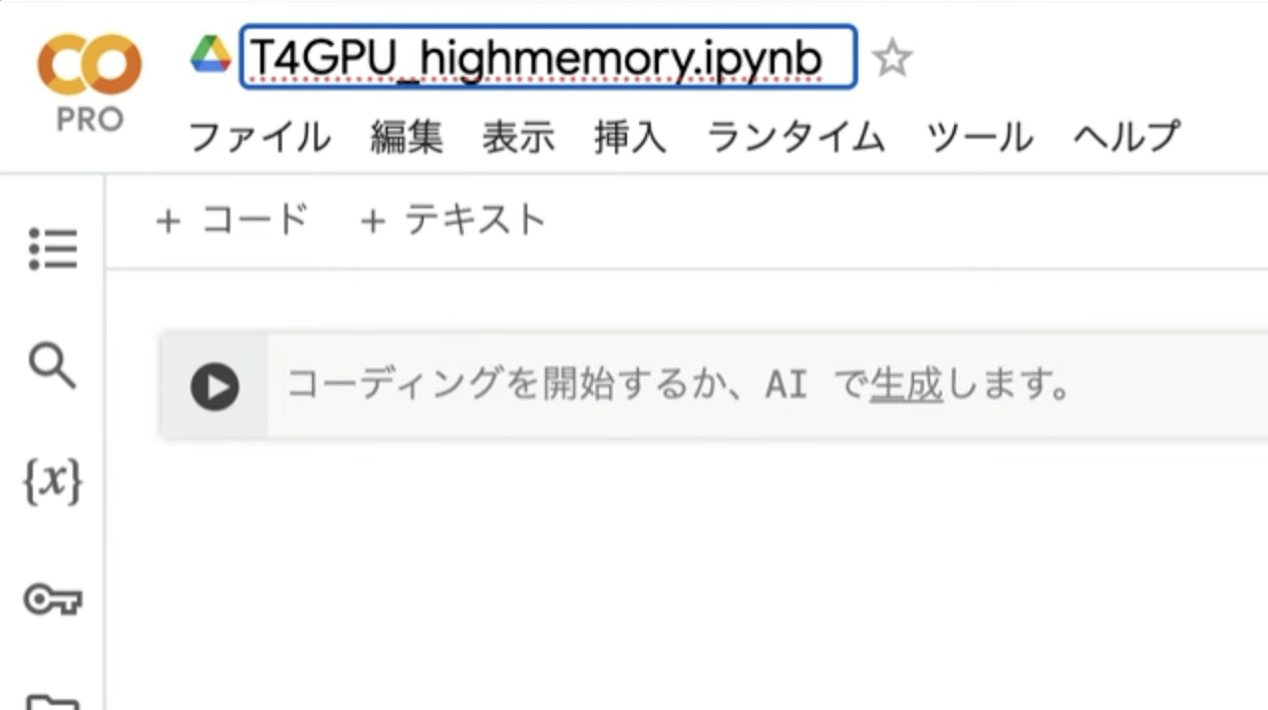
ノートブックを新規作成したら、名前を変更しておきましょう。この解説では、以下のような名前にしておきました。
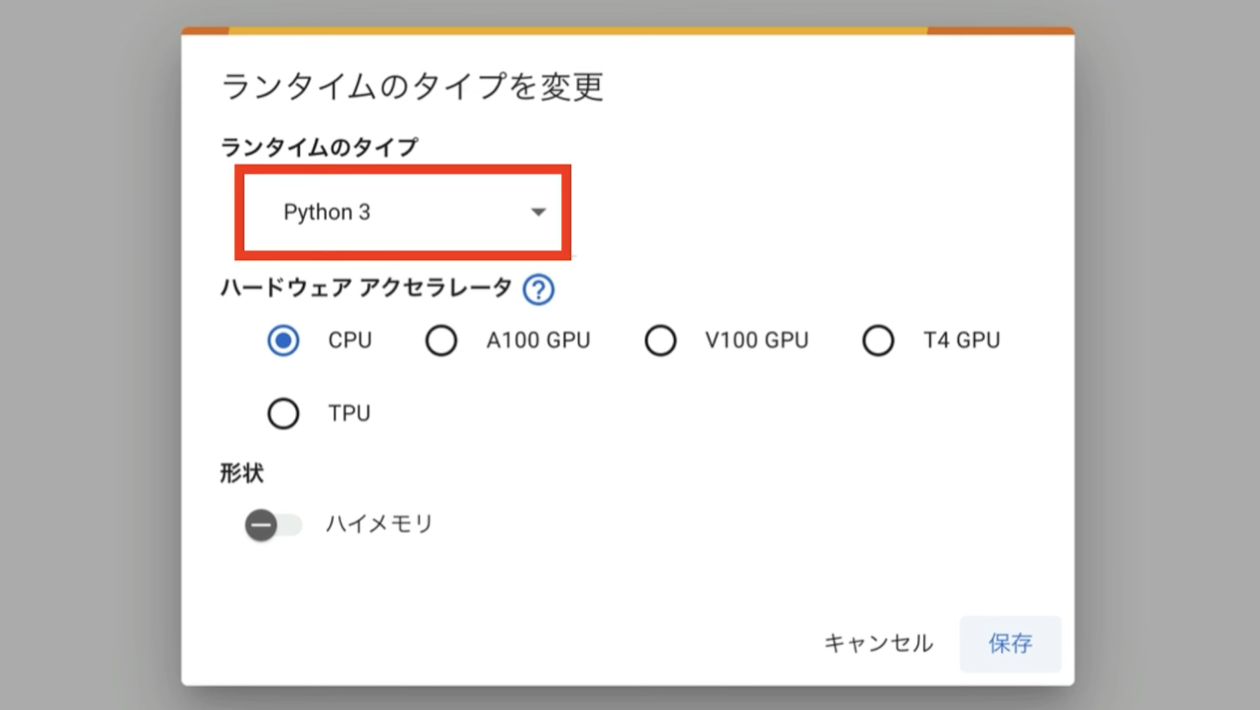
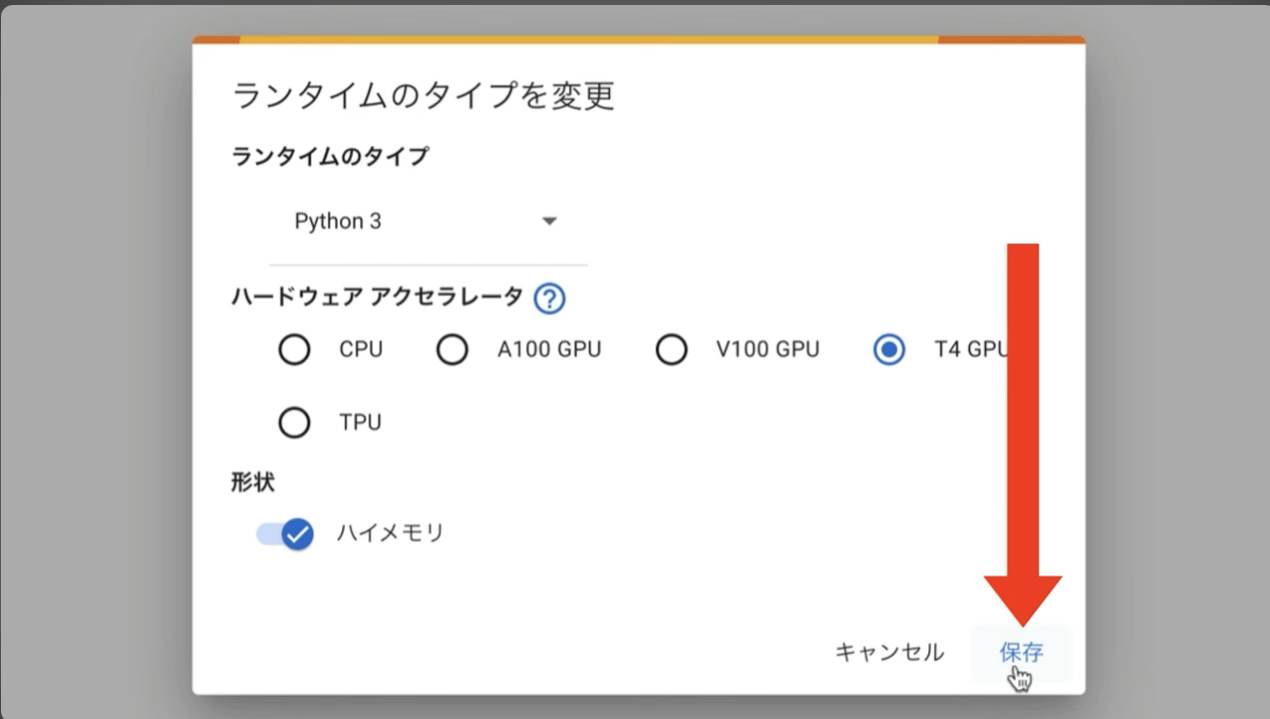
次に、ランタイムのタイプを変更します。メニューの中から「ランタイム」を選択して、「ランタイムのタイプを変更」を選択します。

そうするとランタイムのタイプの設定画面が表示されます。ランタイムのタイプはPython3にしておきます。
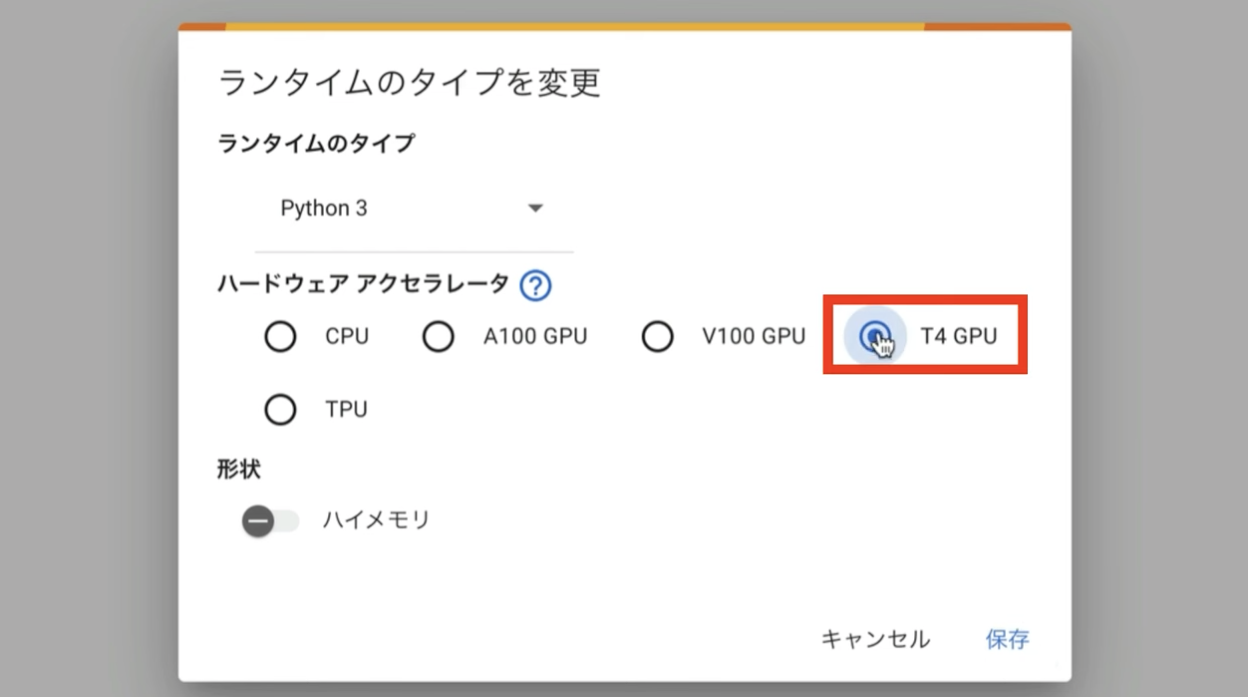
ハードウェアアクセラレーターはT4 GPUを選択します。
そして、ハイメモリーの設定を有効にしておきます。ハイメモリーの設定は無料版のGoogle Colabでは有効にすることができません。
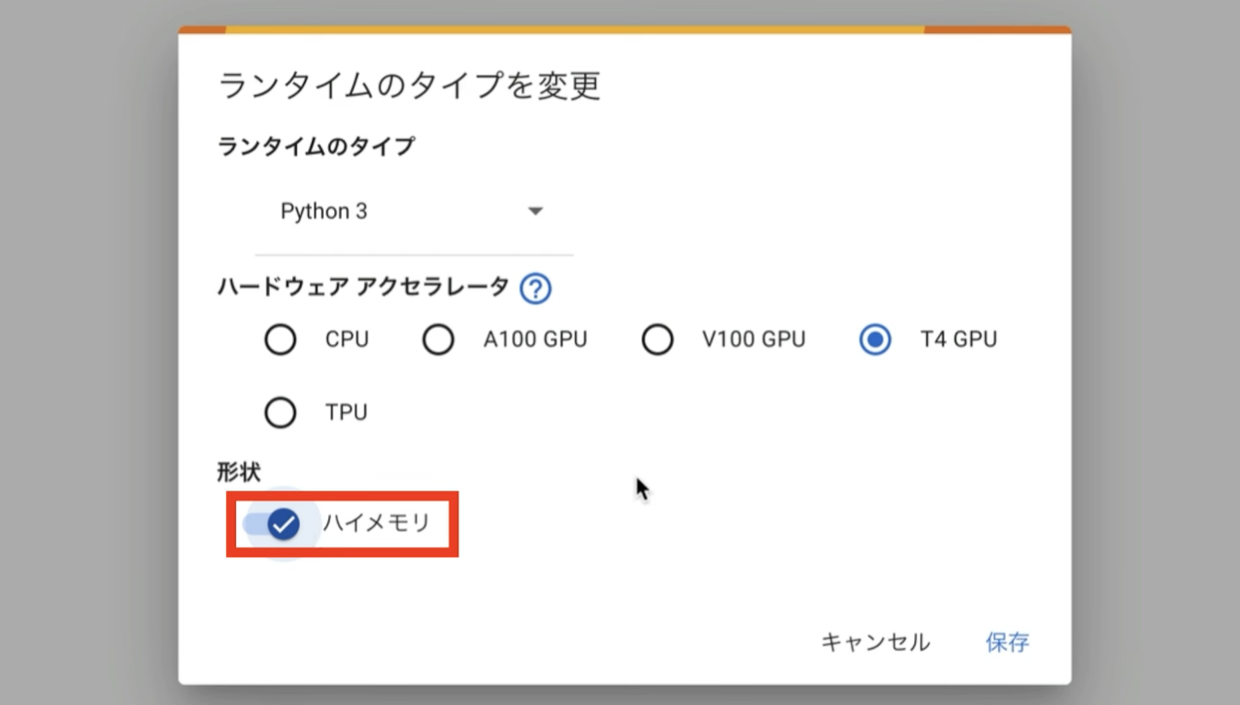
そのため、この動画では有料版のGoogle Colabで解説を進めます。ランタイムのタイプをこのように変更したら、保存ボタンをクリックします。
これでGoogle Colabでコードを実行するための準備が整いました。
コードを実行する
それでは早速実行していきましょう。まずは以下のコードをコピーしてください。
tiktok_share_link = input("TikTokの共有リンクを入力してください: ")
print(tiktok_share_link)
!apt -y install -qq aria2
%cd /content
!git clone https://github.com/comfyanonymous/ComfyUI
%cd /content/ComfyUI
!git reset --hard 7cd0cdfce601a52c52252ace517b9f52f6237fdb
!pip install -r requirements.txt
# ComfyUI Managerのインストール
%cd /content/ComfyUI/custom_nodes
!git clone https://github.com/ltdrdata/ComfyUI-Manager.git
!git clone https://github.com/11cafe/comfyui-workspace-manager.gitz
%cd /content/ComfyUI/custom_nodes
!git clone https://github.com/rgthree/rgthree-comfy
%cd rgthree-comfy
!pip install -r requirements.txt
%cd /content/ComfyUI/custom_nodes
!git clone https://github.com/Kosinkadink/ComfyUI-VideoHelperSuite.git
# ---------------- ComfyUI-Frame-Interpolationの設定開始 ---------------------
%cd /content/ComfyUI/custom_nodes
!git clone https://github.com/Fannovel16/ComfyUI-Frame-Interpolation.git
%cd ComfyUI-Frame-Interpolation
!python install.py
%cd /content/ComfyUI/custom_nodes
# ---------------- ComfyUI-Frame-Interpolationの設定終了 ---------------------
# ---------------- comfyui-reactor-nodeの設定開始 ---------------------
%cd /content/ComfyUI/custom_nodes
!git clone https://github.com/Gourieff/comfyui-reactor-node.git
%cd comfyui-reactor-node
!python install.py
%cd /content/ComfyUI/custom_nodes
# ---------------- comfyui-reactor-nodeの設定終了 ---------------------
#-------------------------------------------
%cd /content
import json
import subprocess
import os
def get_video_info(video_path):
# 動画ファイルのfpsと再生時間を取得
result = subprocess.run(
['ffmpeg', '-i', video_path, '-hide_banner'],
stderr=subprocess.PIPE,
universal_newlines=True
)
fps = None
for line in result.stderr.splitlines():
if 'fps' in line:
fps = line.split(',')
for element in line.split(','):
if 'fps' in element:
fps = int(element.strip().replace('fps', ''))
# fps = float(line.split(',')[5].split()[0])
return fps
def get_node_by_id(json_data, target_id):
# nodes 配列を取得
nodes = json_data.get("nodes", [])
# id が target_id の要素を検索
for node in nodes:
if node.get("id") == target_id:
return node
return None
def update_frame_rate(video_path, json_data):
# id が 19 のノードを取得
node = get_node_by_id(json_data, 19)
fps = get_video_info(video_path)
node["widgets_values"]["frame_rate"] = fps
return json_data
def split_video(input_file, folder_path, segment_time=3):
# 動画を3秒ごとに分割する
split_command = [
'ffmpeg', '-i', input_file, '-c', 'copy', '-map', '0',
'-segment_time', str(segment_time), '-f', 'segment',
'-reset_timestamps', '1', f'{folder_path}/video%03d.mp4'
]
subprocess.run(split_command)
def reset_timestamps(folder_path):
# フォルダー内のすべてのMP4ファイルのタイムスタンプをリセットする
files = sorted([f for f in os.listdir(folder_path) if f.endswith('.mp4')])
for file_name in files:
input_path = os.path.join(folder_path, file_name)
temp_output_path = os.path.join(folder_path, f"temp_{file_name}")
reset_command = [
'ffmpeg', '-i', input_path, '-vf', 'setpts=PTS-STARTPTS',
'-af', 'asetpts=PTS-STARTPTS', temp_output_path
]
subprocess.run(reset_command)
# 上書き保存
os.replace(temp_output_path, input_path)
input_file = 'video.mp4'
!pip install tiktok_downloader
from tiktok_downloader import ttdownloader
d=ttdownloader(tiktok_share_link)
d[0].download(input_file)
folder_path = '/content/ComfyUI/input' # 分割されたファイルを保存するフォルダー
split_video(input_file, folder_path)
# タイムスタンプをリセット
reset_timestamps(folder_path)
# --------------------- 設定・入力ファイルの読み込み開始 ---------------------
prefix = "0014"
uuid = "16e8931c-9abf-476a-9917-8b0f8ad3f5b3"
root_path = f"https://archive.creativaier.com/comfyui_materials/{prefix}_{uuid}"
import requests
import json
# URLからJSONデータを取得
url = f"{root_path}/workflow.json"
response = requests.get(url)
data = response.json()
data = update_frame_rate(input_file, data)
# JavaScriptモジュール形式でデータを整形
js_content = f"export const defaultGraph = {json.dumps(data, indent=2)};"
# ファイルに書き込む
output_path = "/content/ComfyUI/web/scripts/defaultGraph.js"
with open(output_path, "w") as f:
f.write(js_content)
!aria2c --console-log-level=error -c -x 16 -s 16 -k 1M "{root_path}/photo.png" -d /content/ComfyUI/input -o photo.png
# --------------------- 設定・入力ファイルの読み込み開始 ---------------------
!wget https://github.com/cloudflare/cloudflared/releases/latest/download/cloudflared-linux-amd64.deb
!dpkg -i cloudflared-linux-amd64.deb
import subprocess
import threading
import time
import socket
def iframe_thread(port):
while True:
time.sleep(0.5)
sock = socket.socket(socket.AF_INET, socket.SOCK_STREAM)
result = sock.connect_ex(('127.0.0.1', port))
if result == 0:
break
sock.close()
print("\nComfyUI finished loading, trying to launch cloudflared (if it gets stuck here cloudflared is having issues)\n")
p = subprocess.Popen(["cloudflared", "tunnel", "--url", f"http://127.0.0.1:{port}"], stdout=subprocess.PIPE, stderr=subprocess.PIPE)
for line in p.stderr:
l = line.decode()
if "trycloudflare.com " in l:
print("This is the URL to access ComfyUI:", l[l.find("http"):], end='')
%cd /content/ComfyUI
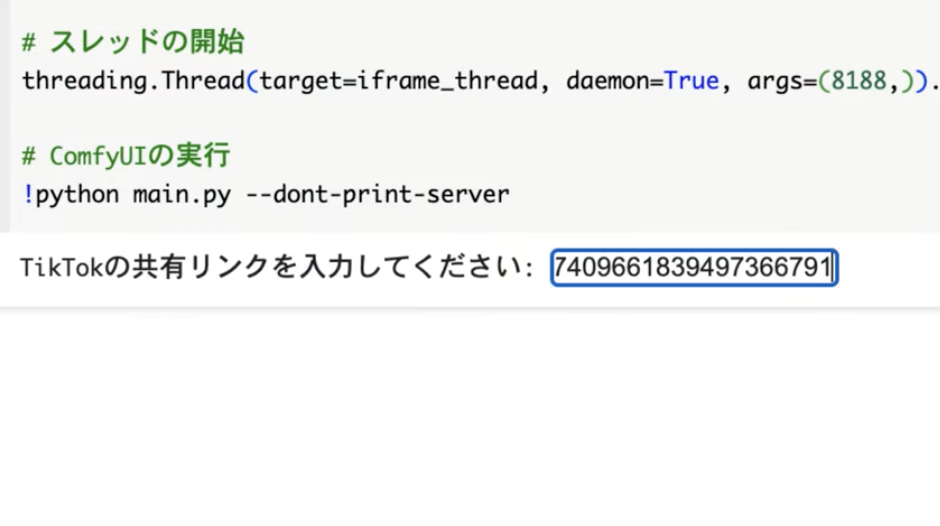
# スレッドの開始
threading.Thread(target=iframe_thread, daemon=True, args=(8188,)).start()
# ComfyUIの実行
!python main.py --dont-print-server
テキストをコピーしたら、Google Colabの画面に戻ります。
テキストボックスに先ほどコピーしたテキストを貼り付けます。そして「再生」ボタンを押します。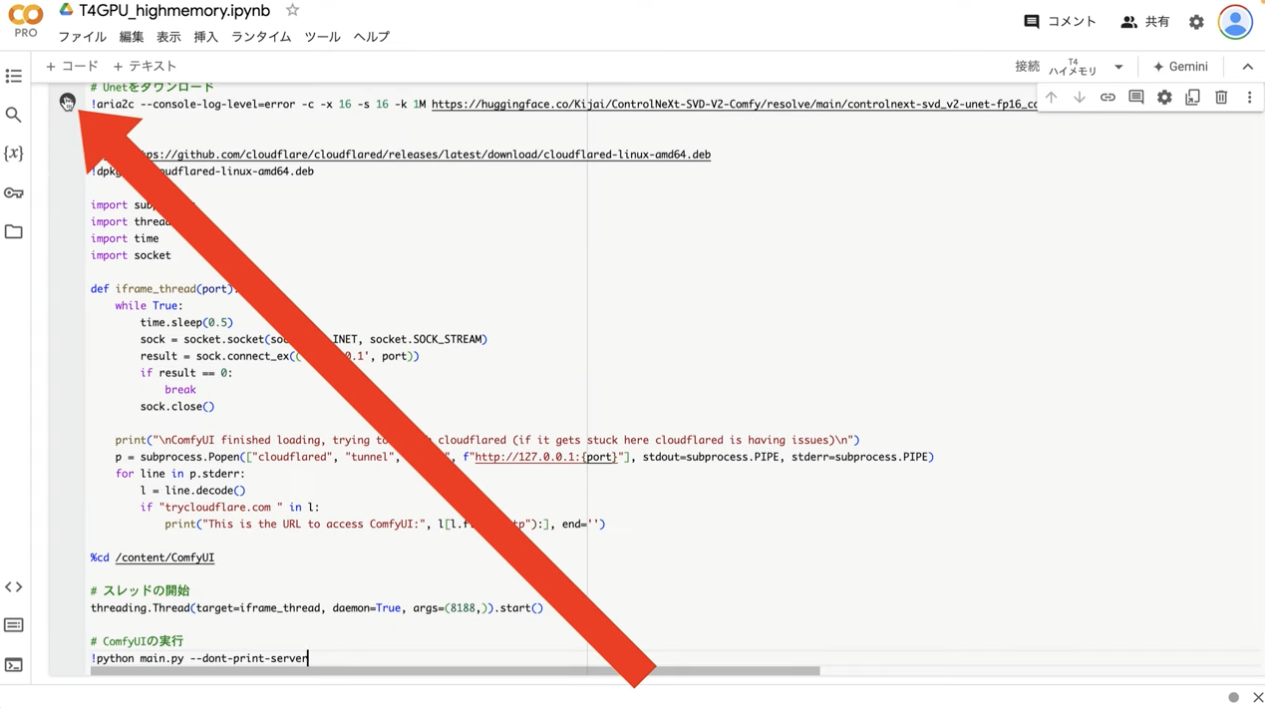
再生ボタンを押したら、最初にTikTokの共有リンクを入力するテキストボックスが表示されると思います。
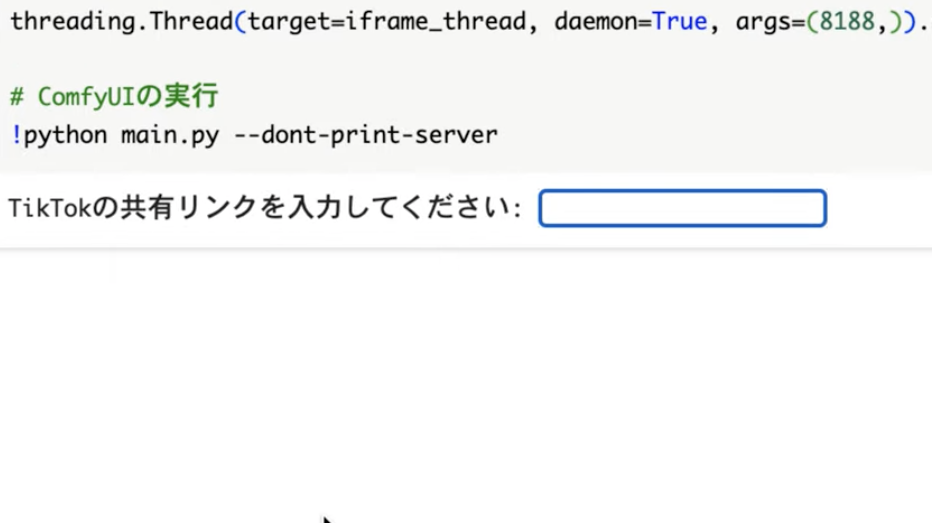
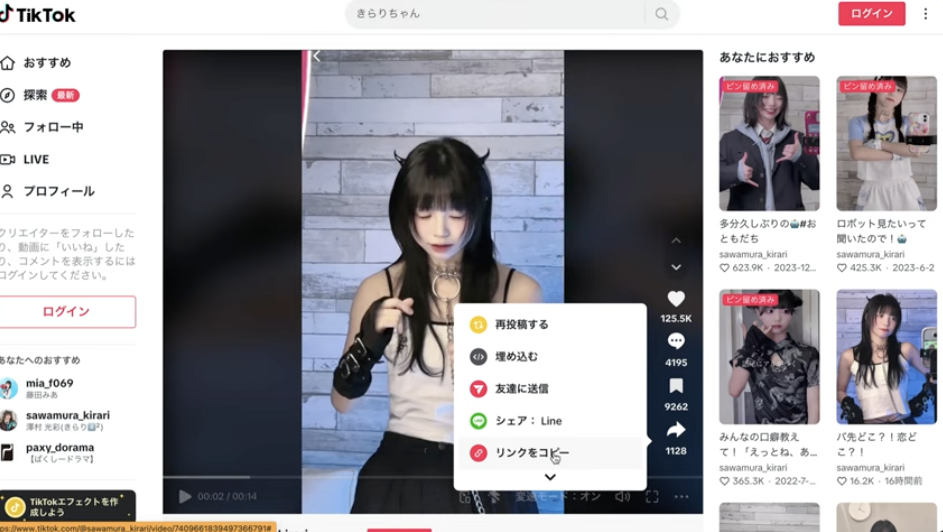
このテキストボックスに入力するために、TikTokの共有リンクをコピーします。今回はTikTokクリエイターとして大人気の沢村きらりさんの動画のリンクをコピーしておきました。
コピーしたリンクをテキストボックスに貼り付けてエンターキーを押します。
そうすると処理が再開されます。この処理には5分以上かかることもあります。しばらく待っていると、このようなリンクが表示されると思います。
 このリンクをクリックします。そうするとconfUIの画面が表示されます。
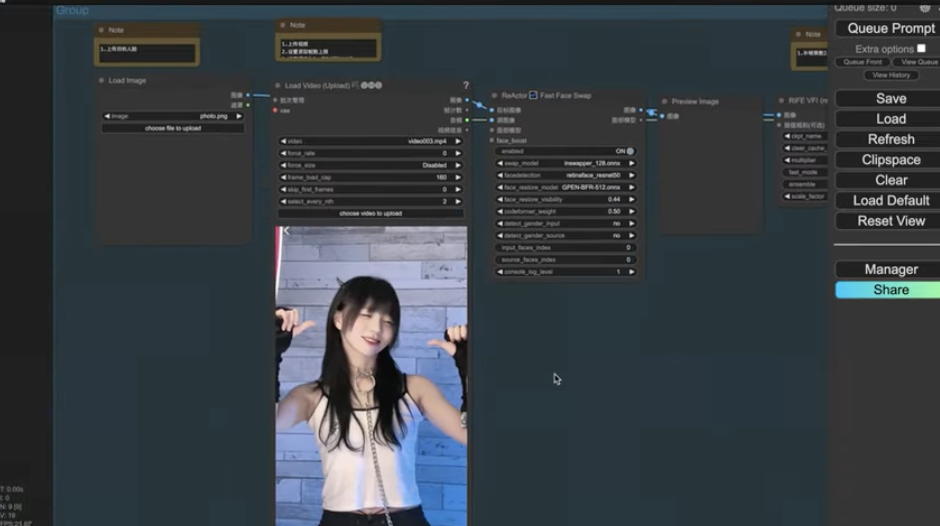
操作画面にあらかじめ用意されている画像は、「アップロード」ボタンで変更できます。
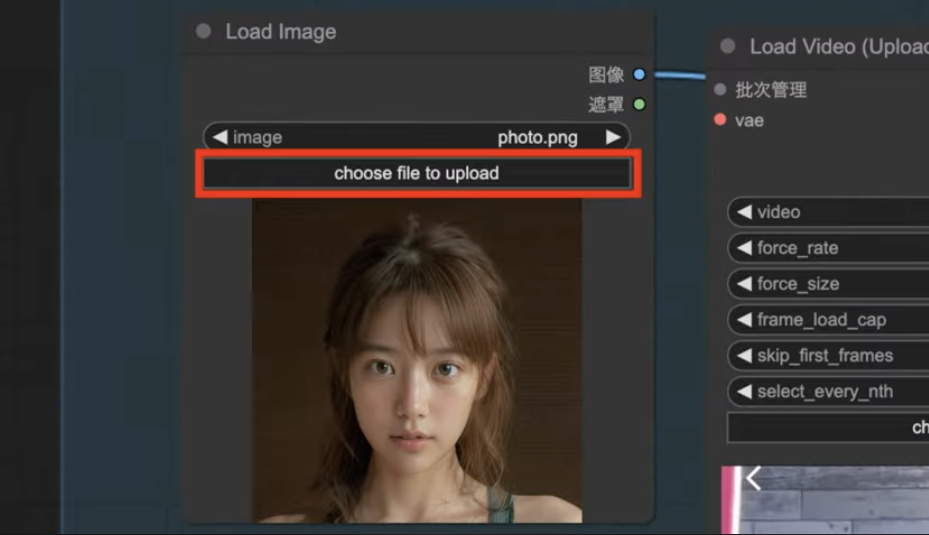
画像を設定したら次に動画を設定します。
動画は共有リンクの動画を数秒単位で分割したファイルを選択します。ファイル名は0から始まって順番に番号が振られています。
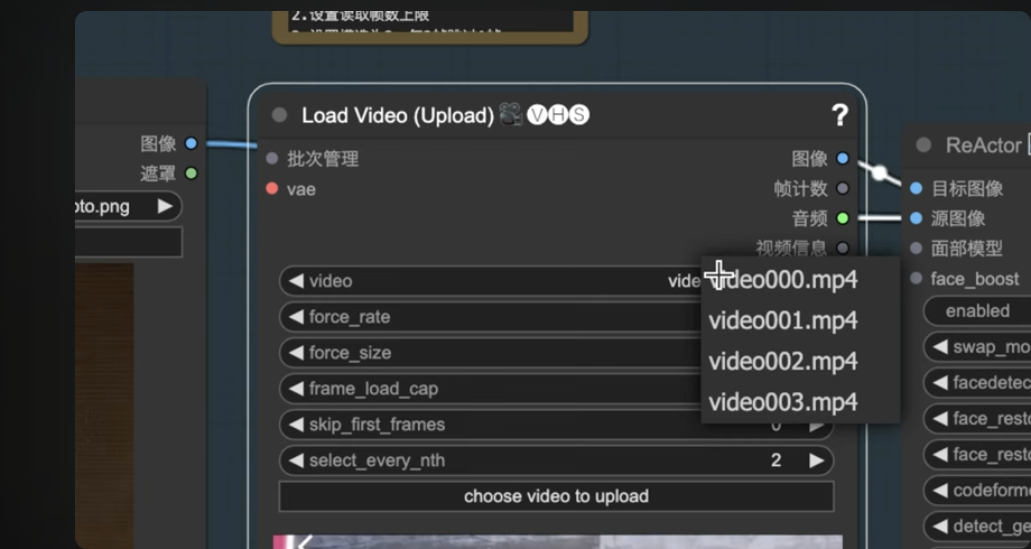
そのため、最初は「B000.MP4」を選択します。動画が表示されるまでしばらく待ちます。
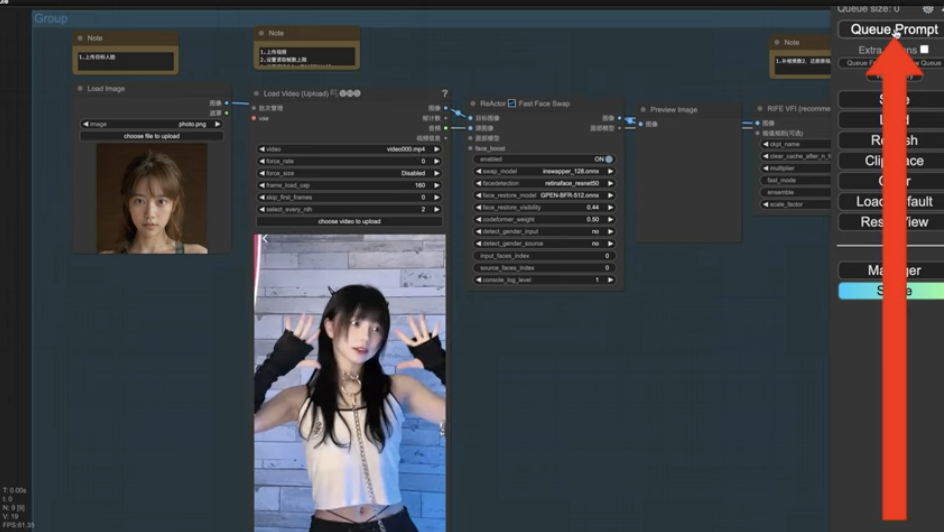
動画が表示されたら「Queue Prompt」と書かれているボタンをクリックします。これで1件目の動画の処理が開始されます。残りの動画も同じように設定していきます。
このように動画ファイルの指定を変更して、動画生成処理を順番に開始させていきます。今回の場合は「003.MP4」までこの操作を繰り返します。
最後に「003.MP4」を選択して「Qプロンプト」のボタンを押すと、Qサイズの数値が「4」になっていると思います。このQサイズの数値が「0」になるまで、この画面を開いたまま待っておく必要があります。
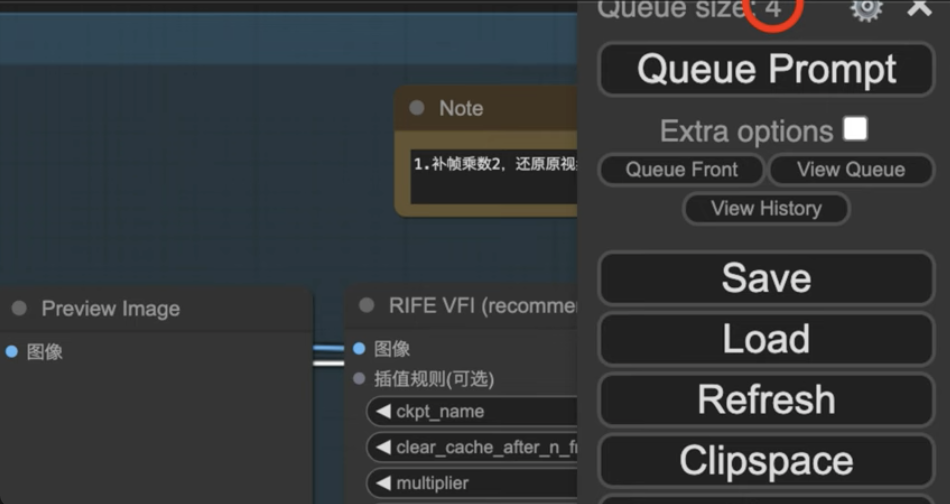
動画の長さにもよりますが、今回の場合は15分程度で処理が完了しました。
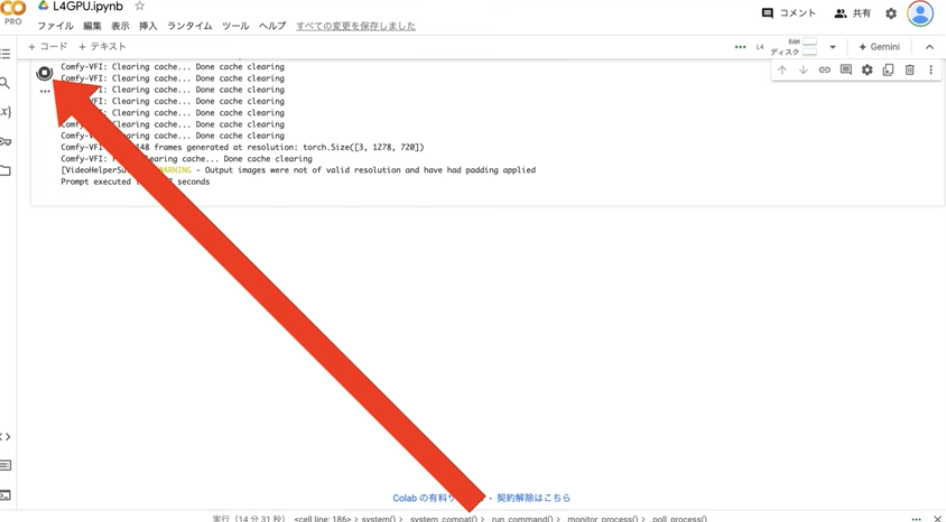
Qサイズの数値が「0」になったら、Google Colabの画面を表示します。そして「停止」ボタンを押します。
次に以下のコードをコピーします。
%cd /content
import subprocess
import os

def create_file_list_from_folder(folder_path, file_list_path='files.txt'):
    # 指定フォルダー内のMP4ファイルを基にfiles.txtを生成する
    files = sorted([f for f in os.listdir(folder_path) if f.startswith('AnimateDiff_') and f.endswith('-audio.mp4')])
    with open(file_list_path, 'w') as file_list:
        for file_name in files:
            file_list.write(f"file '{folder_path}/{file_name}'\n")

def concat_videos_with_reencode(file_list_path='files.txt', output_file='combined_output.mp4'):
    # 分割されたファイルを結合し、再エンコードする
    concat_command = [
        'ffmpeg', '-f', 'concat', '-safe', '0', '-i', file_list_path,
        '-c:v', 'libx264', '-preset', 'fast', '-crf', '22',
        '-c:a', 'aac', '-b:a', '128k',
        output_file
    ]
    subprocess.run(concat_command)

def replace_audio(original_video, input_video, output_video):
    # 元の動画の音声をcombined_output.mp4の音声に置き換える
    replace_audio_command = [
        'ffmpeg', '-i', input_video, '-i', original_video,
        '-c:v', 'copy', '-map', '0:v:0', '-map', '1:a:0', '-shortest',
        output_video
    ]
    subprocess.run(replace_audio_command)

def clean_up_temp_files(folder_path):
    # 一時ファイルを削除する
    files = [f for f in os.listdir(folder_path) if f.endswith('.mp4')]
    for file_name in files:
        os.remove(os.path.join(folder_path, file_name))
    if os.path.exists('files.txt'):
        os.remove('files.txt')

output_path = '/content/ComfyUI/output'  # 分割されたファイルを保存するフォルダー
# フォルダー内のファイルリストを自動生成
create_file_list_from_folder(output_path)

# 再エンコードしながら動画を結合
concat_videos_with_reencode()

target_path = 'final_output.mp4'

!rm -rf $target_path

# 音声を元の動画の音声に置き換える
replace_audio(input_file, 'combined_output.mp4', target_path)

# 一時ファイルを削除
# clean_up_temp_files(folder_path)

from google.colab import files
files.download(target_path)
テキストをコピーしたらGoogle Colabの画面に戻ります。そして「コード」と書かれているテキストをクリックします。
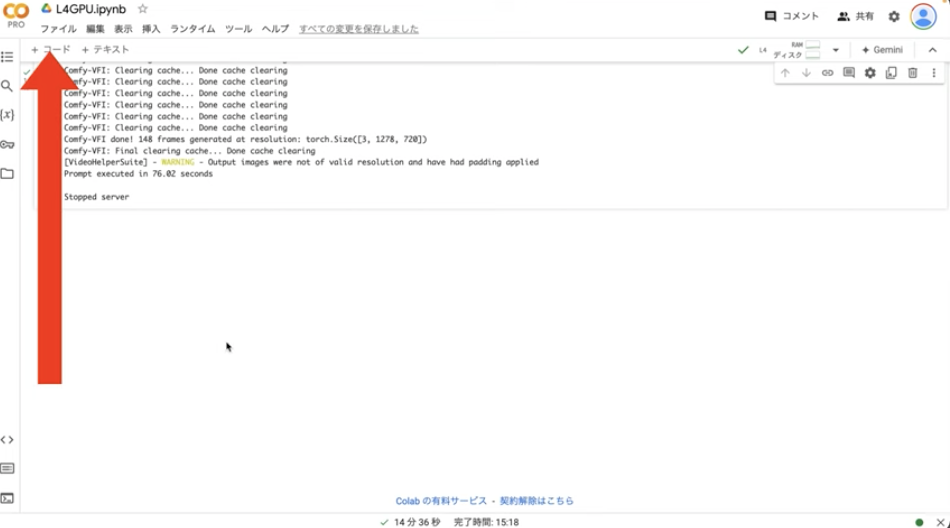
そうすると新しいテキストボックスが追加されるので、コピーしたテキストを貼り付けます。テキストを貼り付けたら「再生」ボタンを押します。
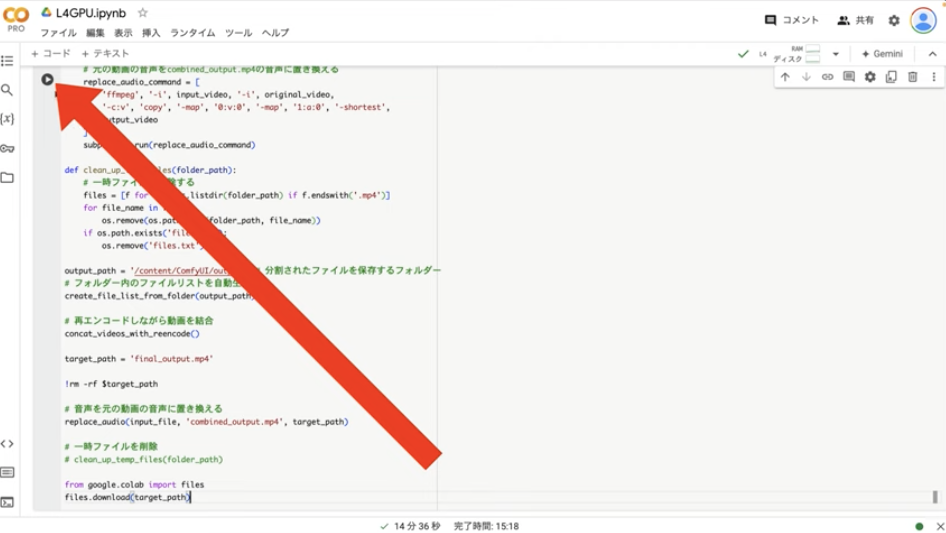
これで生成された動画ファイルがパソコンにダウンロードされるための処理が実行されます。これで動画が生成されました。
実際に作成された動画に関しては、ぜひYoutubeをご覧ください
ぜひ、あなたも実際に手を動かしながらオリジナルのバーチャルTikTokerを作成してみてくださいね!