
▶︎動画でも話してるので、文章読むのが面倒な方はこちらをみてもらえればと思います。
今回は、表情が変わる様子の動画をAIで生成する方法について解説します。

これを読めば誰でも簡単にクオリティーの高いAI美女が作れるようになっているので興味がある人は、下のバナーをクリックして購入してみてね🎶

表情が変わる様子の動画をAIで生成する方法について
この解説では、ComfyUIをGoogle Colabで動作させていきます。
もしもGoogle Colabというキーワードが分からない場合は、以下に詳細を解説している記事を貼っておきますので、必要に応じてご利用ください。
まずはGoogle Colabのサイトにアクセスします。
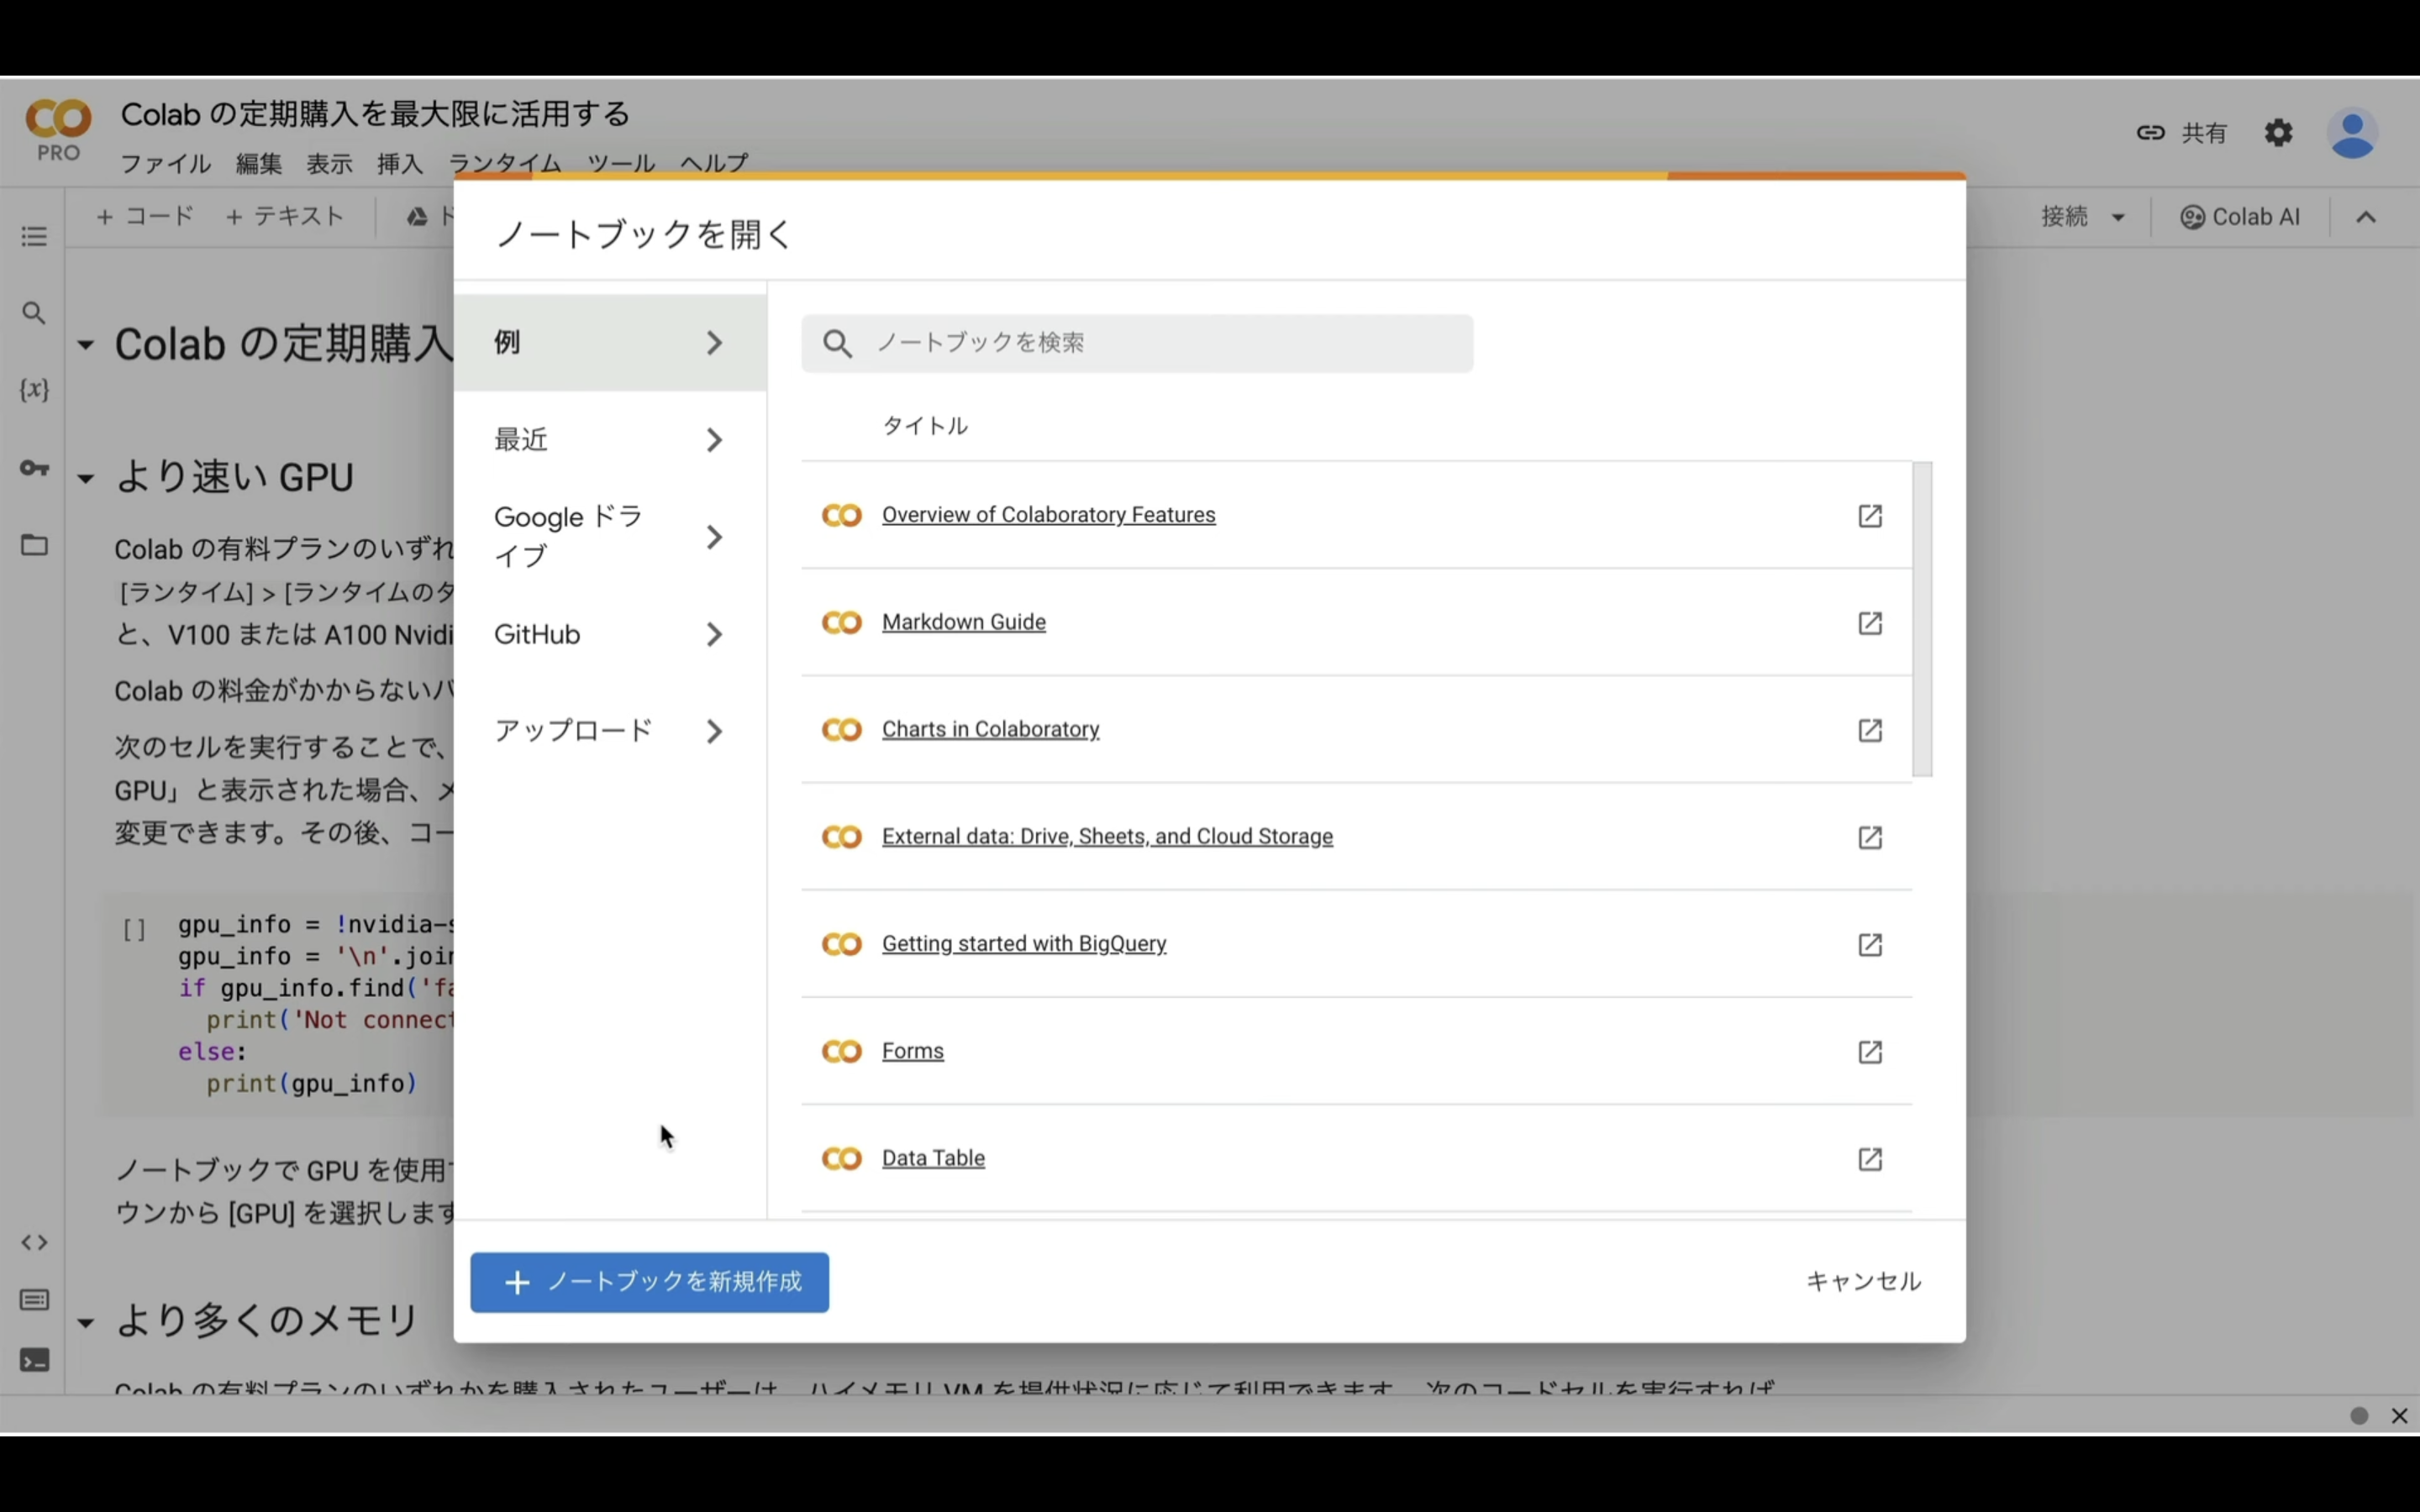
ここからの流れは下記に詳細リンクを貼っておきますので、そちらからご参照ください。
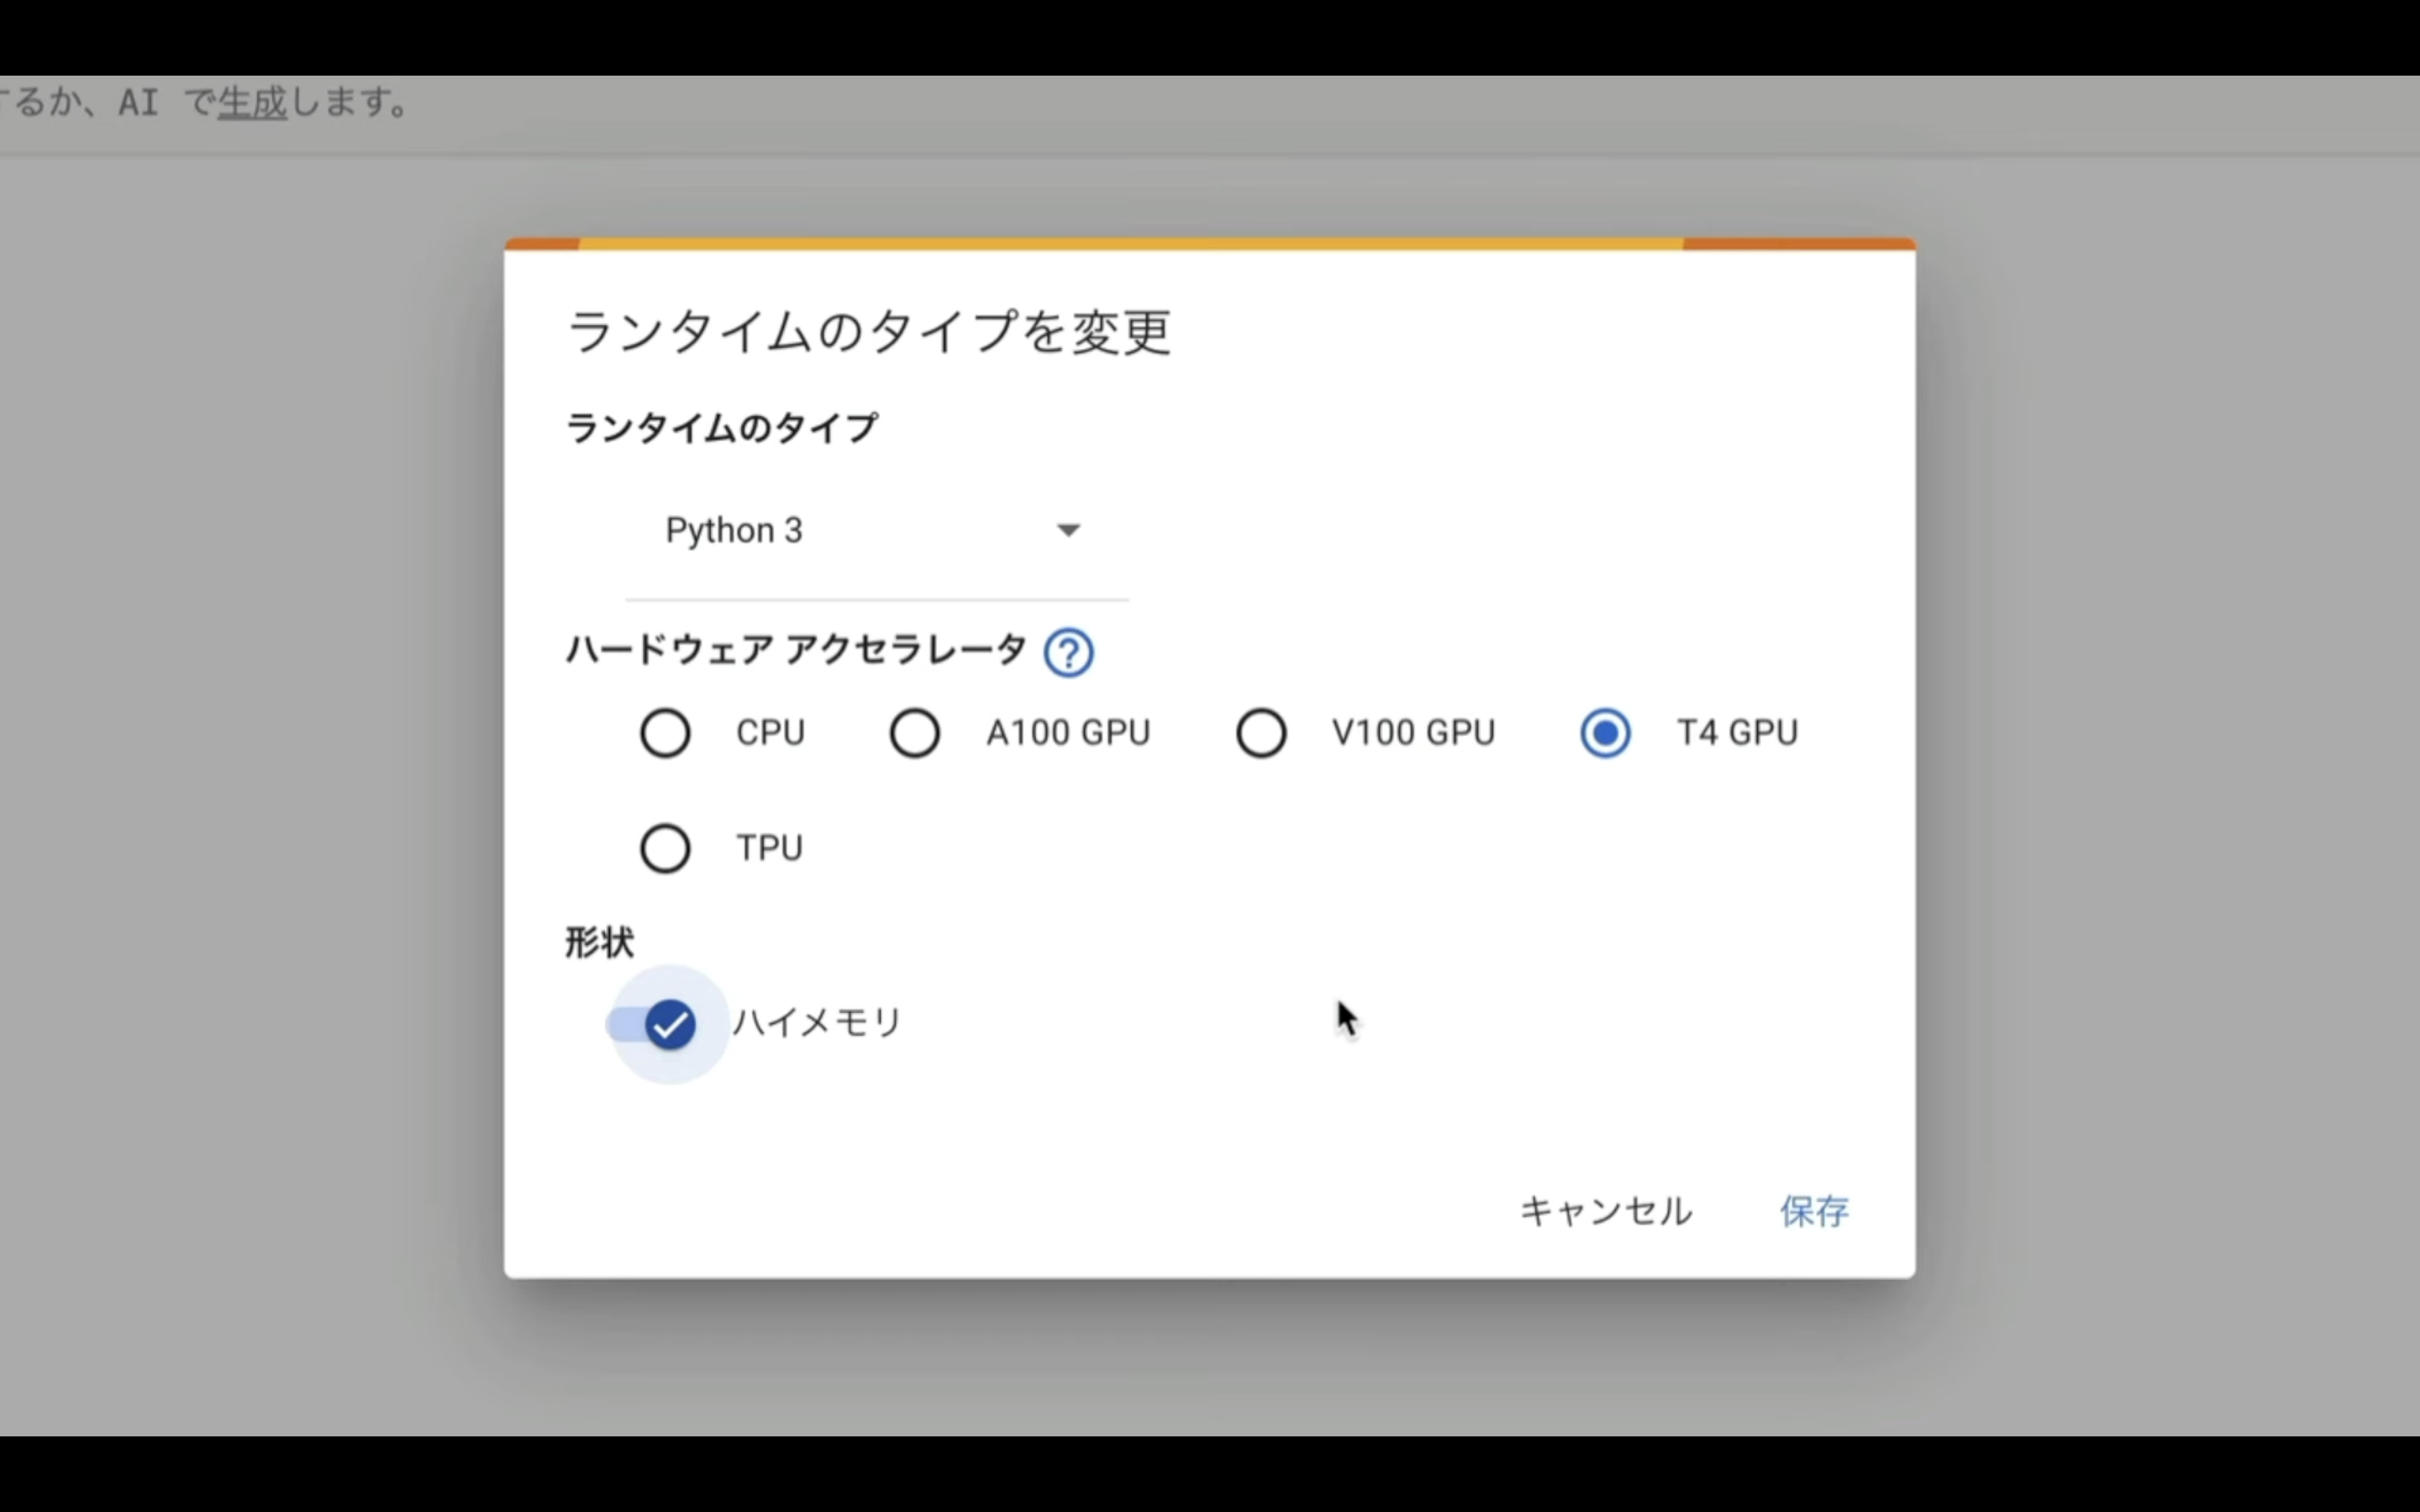
上記の記事では、ハイメモリの部分がOFFですが、今回はONにしておいてください。
これで、Google ColabでComfyUIを実行するための準備が整いました。
ComfyUIを実行
それでは早速、実行させていきましょう。
下に貼ってあるテキストをコピーします。
from pathlib import Path
import subprocess
import threading
import time
import socket

!pip install -q torch==2.0.1+cu118 torchvision==0.15.2+cu118 torchaudio==2.0.2+cu118 torchtext==0.15.2 torchdata==0.6.1 --extra-index-url https://download.pytorch.org/whl/cu118 -U
!pip install -q xformers==0.0.20 triton==2.0.0 gradio_client==0.2.7 -U
!apt -y install -qq aria2
!pip install controlnet-aux==0.0.7 onnxruntime-gpu

# 定数と設定
WORKSPACE = '/content/ComfyUI'
UPDATE_COMFY_UI = True

# ComfyUIのセットアップと更新
if not Path(WORKSPACE).exists():
  %cd /content
  print("-= Initial setup ComfyUI =-")
  !git clone https://github.com/comfyanonymous/ComfyUI
else:
  %cd $WORKSPACE
  print("-= Updating ComfyUI =-")
  !git pull

%cd $WORKSPACE/custom_nodes
!git clone https://github.com/Kosinkadink/ComfyUI-VideoHelperSuite
!git clone https://github.com/ssitu/ComfyUI_UltimateSDUpscale
!git clone https://github.com/TinyTerra/ComfyUI_tinyterraNodes
!git clone https://github.com/Kosinkadink/ComfyUI-Advanced-ControlNet
!git clone https://github.com/Kosinkadink/ComfyUI-AnimateDiff-Evolved
!git clone https://github.com/FizzleDorf/ComfyUI_FizzNodes
!git clone https://github.com/Stability-AI/stability-ComfyUI-nodes
!git clone https://github.com/RockOfFire/ComfyUI_Comfyroll_CustomNodes
!git clone https://github.com/ltdrdata/ComfyUI-Manager.git
!git clone https://github.com/mcmonkeyprojects/sd-dynamic-thresholding
!git clone https://github.com/laksjdjf/IPAdapter-ComfyUI.git
!git clone https://github.com/Fannovel16/comfyui_controlnet_aux.git
!git clone https://github.com/cubiq/ComfyUI_IPAdapter_plus.git


!aria2c --console-log-level=error -c -x 16 -s 16 -k 1M https://huggingface.co/h94/IP-Adapter/resolve/main/models/ip-adapter-plus-face_sd15.bin -d /content/ComfyUI/custom_nodes/IPAdapter-ComfyUI/models -o ip-adapter-plus-face_sd15.bin


!aria2c --console-log-level=error -c -x 16 -s 16 -k 1M https://huggingface.co/h94/IP-Adapter/resolve/main/models/image_encoder/model.safetensors -d /content/ComfyUI/models/clip_vision/ip_adapter -o model.safetensors

!aria2c --console-log-level=error -c -x 16 -s 16 -k 1M https://huggingface.co/embed/upscale/resolve/main/4x-UltraSharp.pth -d /content/ComfyUI/models/upscale_models -o 4x-UltraSharp.pth

!aria2c --console-log-level=error -c -x 16 -s 16 -k 1M https://huggingface.co/h94/IP-Adapter/resolve/main/models/ip-adapter-full-face_sd15 -d /content/ComfyUI_IPAdapter_plus/models -o ip-adapter-full-face_sd15.bin
!aria2c --console-log-level=error -c -x 16 -s 16 -k 1M https://huggingface.co/h94/IP-Adapter/resolve/main/models/ip-adapter-plus-face_sd15 -d /content/ComfyUI_IPAdapter_plus/models -o ip-adapter-plus-face_sd15.bin
!aria2c --console-log-level=error -c -x 16 -s 16 -k 1M https://huggingface.co/h94/IP-Adapter/resolve/main/models/ip-adapter-plus_sd15 -d /content/ComfyUI_IPAdapter_plus/models -o ip-adapter-plus_sd15.bin
!aria2c --console-log-level=error -c -x 16 -s 16 -k 1M https://huggingface.co/h94/IP-Adapter/resolve/main/models/ip-adapter_sd15 -d /content/ComfyUI_IPAdapter_plus/models -o ip-adapter_sd15.bin
!aria2c --console-log-level=error -c -x 16 -s 16 -k 1M https://huggingface.co/h94/IP-Adapter/resolve/main/models/ip-adapter_sd15_light -d /content/ComfyUI_IPAdapter_plus/models -o ip-adapter_sd15_light.bin
!aria2c --console-log-level=error -c -x 16 -s 16 -k 1M https://huggingface.co/h94/IP-Adapter/resolve/main/models/ip-adapter_sd15_vit-G -d /content/ComfyUI_IPAdapter_plus/models -o ip-adapter_sd15_vit-G.bin


# アニメーションモデルのダウンロード
!aria2c --console-log-level=error -c -x 16 -s 16 -k 1M https://huggingface.co/guoyww/animatediff/resolve/main/mm_sd_v15_v2.ckpt -d /content/ComfyUI/custom_nodes/ComfyUI-AnimateDiff-Evolved/models -o mm_sd_v15_v2.ckpt

# ネガティブプロンプト
!git clone https://huggingface.co/embed/negative $WORKSPACE/models/embeddings/negative
!wget -c  -P $WORKSPACE/models/embeddings/negative/

!aria2c --console-log-level=error -c -x 16 -s 16 -k 1M https://civitai.com/api/download/models/77169 -d /content/ComfyUI/models/upscale_models -o BadDream.pt
!aria2c --console-log-level=error -c -x 16 -s 16 -k 1M https://civitai.com/api/download/models/77173 -d /content/ComfyUI/models/upscale_models -o UnrealisticDream.pt
!aria2c --console-log-level=error -c -x 16 -s 16 -k 1M https://civitai.com/api/download/models/25820 -d /content/ComfyUI/models/upscale_models -o verybadimagenegative_v1.3.pt

!aria2c --console-log-level=error -c -x 16 -s 16 -k 1M https://huggingface.co/h94/IP-Adapter/resolve/main/models/ip-adapter-full-face_sd15.safetensors -d /content/ComfyUI/custom_nodes/ComfyUI_IPAdapter_plus/models -o ip-adapter-full-face_sd15.safetensors
!aria2c --console-log-level=error -c -x 16 -s 16 -k 1M https://huggingface.co/h94/IP-Adapter/resolve/main/models/ip-adapter-plus-face_sd15.safetensors -d /content/ComfyUI/custom_nodes/ComfyUI_IPAdapter_plus/models -o ip-adapter-plus-face_sd15.safetensors
!aria2c --console-log-level=error -c -x 16 -s 16 -k 1M https://huggingface.co/h94/IP-Adapter/resolve/main/models/ip-adapter-plus_sd15.safetensors -d /content/ComfyUI/custom_nodes/ComfyUI_IPAdapter_plus/models -o ip-adapter-plus_sd15.safetensors
!aria2c --console-log-level=error -c -x 16 -s 16 -k 1M https://huggingface.co/h94/IP-Adapter/resolve/main/models/ip-adapter_sd15.safetensors -d /content/ComfyUI/custom_nodes/ComfyUI_IPAdapter_plus/models -o ip-adapter_sd15.safetensors
!aria2c --console-log-level=error -c -x 16 -s 16 -k 1M https://huggingface.co/h94/IP-Adapter/resolve/main/models/ip-adapter_sd15_light.safetensors -d /content/ComfyUI/custom_nodes/ComfyUI_IPAdapter_plus/models -o ip-adapter_sd15_light.safetensors
!aria2c --console-log-level=error -c -x 16 -s 16 -k 1M https://huggingface.co/h94/IP-Adapter/resolve/main/models/ip-adapter_sd15_vit-G.safetensors -d /content/ComfyUI/custom_nodes/ComfyUI_IPAdapter_plus/models -o ip-adapter_sd15_vit-G.safetensors

%cd $WORKSPACE
# 依存関係のインストール
print("-= Install dependencies =-")
!pip install xformers!=0.0.18 -r requirements.txt --extra-index-url https://download.pytorch.org/whl/cu118 --extra-index-url https://download.pytorch.org/whl/cu118

# VAEのダウンロード
!wget -c https://huggingface.co/stabilityai/sd-vae-ft-mse-original/resolve/main/vae-ft-mse-840000-ema-pruned.safetensors -P ./models/vae/

#checkpointをダウンロード
!wget -c https://huggingface.co/runwayml/stable-diffusion-v1-5/resolve/main/v1-5-pruned-emaonly.ckpt -P ./models/checkpoints/
!aria2c --console-log-level=error -c -x 16 -s 16 -k 1M https://civitai.com/api/download/models/101605 -d $WORKSPACE/models/checkpoints -o BracingEvoMix.safetensors

#ControlNetのダウンロード
!wget -c https://huggingface.co/comfyanonymous/ControlNet-v1-1_fp16_safetensors/resolve/main/control_v11e_sd15_ip2p_fp16.safetensors -P ./models/controlnet/
!wget -c https://huggingface.co/comfyanonymous/ControlNet-v1-1_fp16_safetensors/resolve/main/control_v11e_sd15_shuffle_fp16.safetensors -P ./models/controlnet/
!wget -c https://huggingface.co/comfyanonymous/ControlNet-v1-1_fp16_safetensors/resolve/main/control_v11p_sd15_canny_fp16.safetensors -P ./models/controlnet/
!wget -c https://huggingface.co/comfyanonymous/ControlNet-v1-1_fp16_safetensors/resolve/main/control_v11f1p_sd15_depth_fp16.safetensors -P ./models/controlnet/
!wget -c https://huggingface.co/comfyanonymous/ControlNet-v1-1_fp16_safetensors/resolve/main/control_v11p_sd15_inpaint_fp16.safetensors -P ./models/controlnet/
!wget -c https://huggingface.co/comfyanonymous/ControlNet-v1-1_fp16_safetensors/resolve/main/control_v11p_sd15_lineart_fp16.safetensors -P ./models/controlnet/
!wget -c https://huggingface.co/comfyanonymous/ControlNet-v1-1_fp16_safetensors/resolve/main/control_v11p_sd15_mlsd_fp16.safetensors -P ./models/controlnet/
!wget -c https://huggingface.co/comfyanonymous/ControlNet-v1-1_fp16_safetensors/resolve/main/control_v11p_sd15_normalbae_fp16.safetensors -P ./models/controlnet/
!wget -c https://huggingface.co/comfyanonymous/ControlNet-v1-1_fp16_safetensors/resolve/main/control_v11p_sd15_openpose_fp16.safetensors -P ./models/controlnet/
!wget -c https://huggingface.co/comfyanonymous/ControlNet-v1-1_fp16_safetensors/resolve/main/control_v11p_sd15_scribble_fp16.safetensors -P ./models/controlnet/
!wget -c https://huggingface.co/comfyanonymous/ControlNet-v1-1_fp16_safetensors/resolve/main/control_v11p_sd15_seg_fp16.safetensors -P ./models/controlnet/
!wget -c https://huggingface.co/comfyanonymous/ControlNet-v1-1_fp16_safetensors/resolve/main/control_v11p_sd15_softedge_fp16.safetensors -P ./models/controlnet/
!wget -c https://huggingface.co/comfyanonymous/ControlNet-v1-1_fp16_safetensors/resolve/main/control_v11p_sd15s2_lineart_anime_fp16.safetensors -P ./models/controlnet/
!wget -c https://huggingface.co/comfyanonymous/ControlNet-v1-1_fp16_safetensors/resolve/main/control_v11u_sd15_tile_fp16.safetensors -P ./models/controlnet/


# cloudflaredのダウンロードとインストール
!wget https://github.com/cloudflare/cloudflared/releases/latest/download/cloudflared-linux-amd64.deb
!dpkg -i cloudflared-linux-amd64.deb

def iframe_thread(port):
    while True:
        time.sleep(0.5)
        sock = socket.socket(socket.AF_INET, socket.SOCK_STREAM)
        result = sock.connect_ex(('127.0.0.1', port))
        if result == 0:
            break
        sock.close()

    print("\nComfyUI finished loading, trying to launch cloudflared (if it gets stuck here cloudflared is having issues)\n")
    p = subprocess.Popen(["cloudflared", "tunnel", "--url", f"http://127.0.0.1:{port}"], stdout=subprocess.PIPE, stderr=subprocess.PIPE)
    for line in p.stderr:
        l = line.decode()
        if "trycloudflare.com " in l:
            print("This is the URL to access ComfyUI:", l[l.find("http"):], end='')

# スレッドの開始
threading.Thread(target=iframe_thread, daemon=True, args=(8188,)).start()

# ComfyUIの実行
!python main.py --dont-print-server
テキストをコピーしたら、Google Colabの画面に戻ります。

テキストボックスに先ほどコピーしたテキストを貼り付けます。
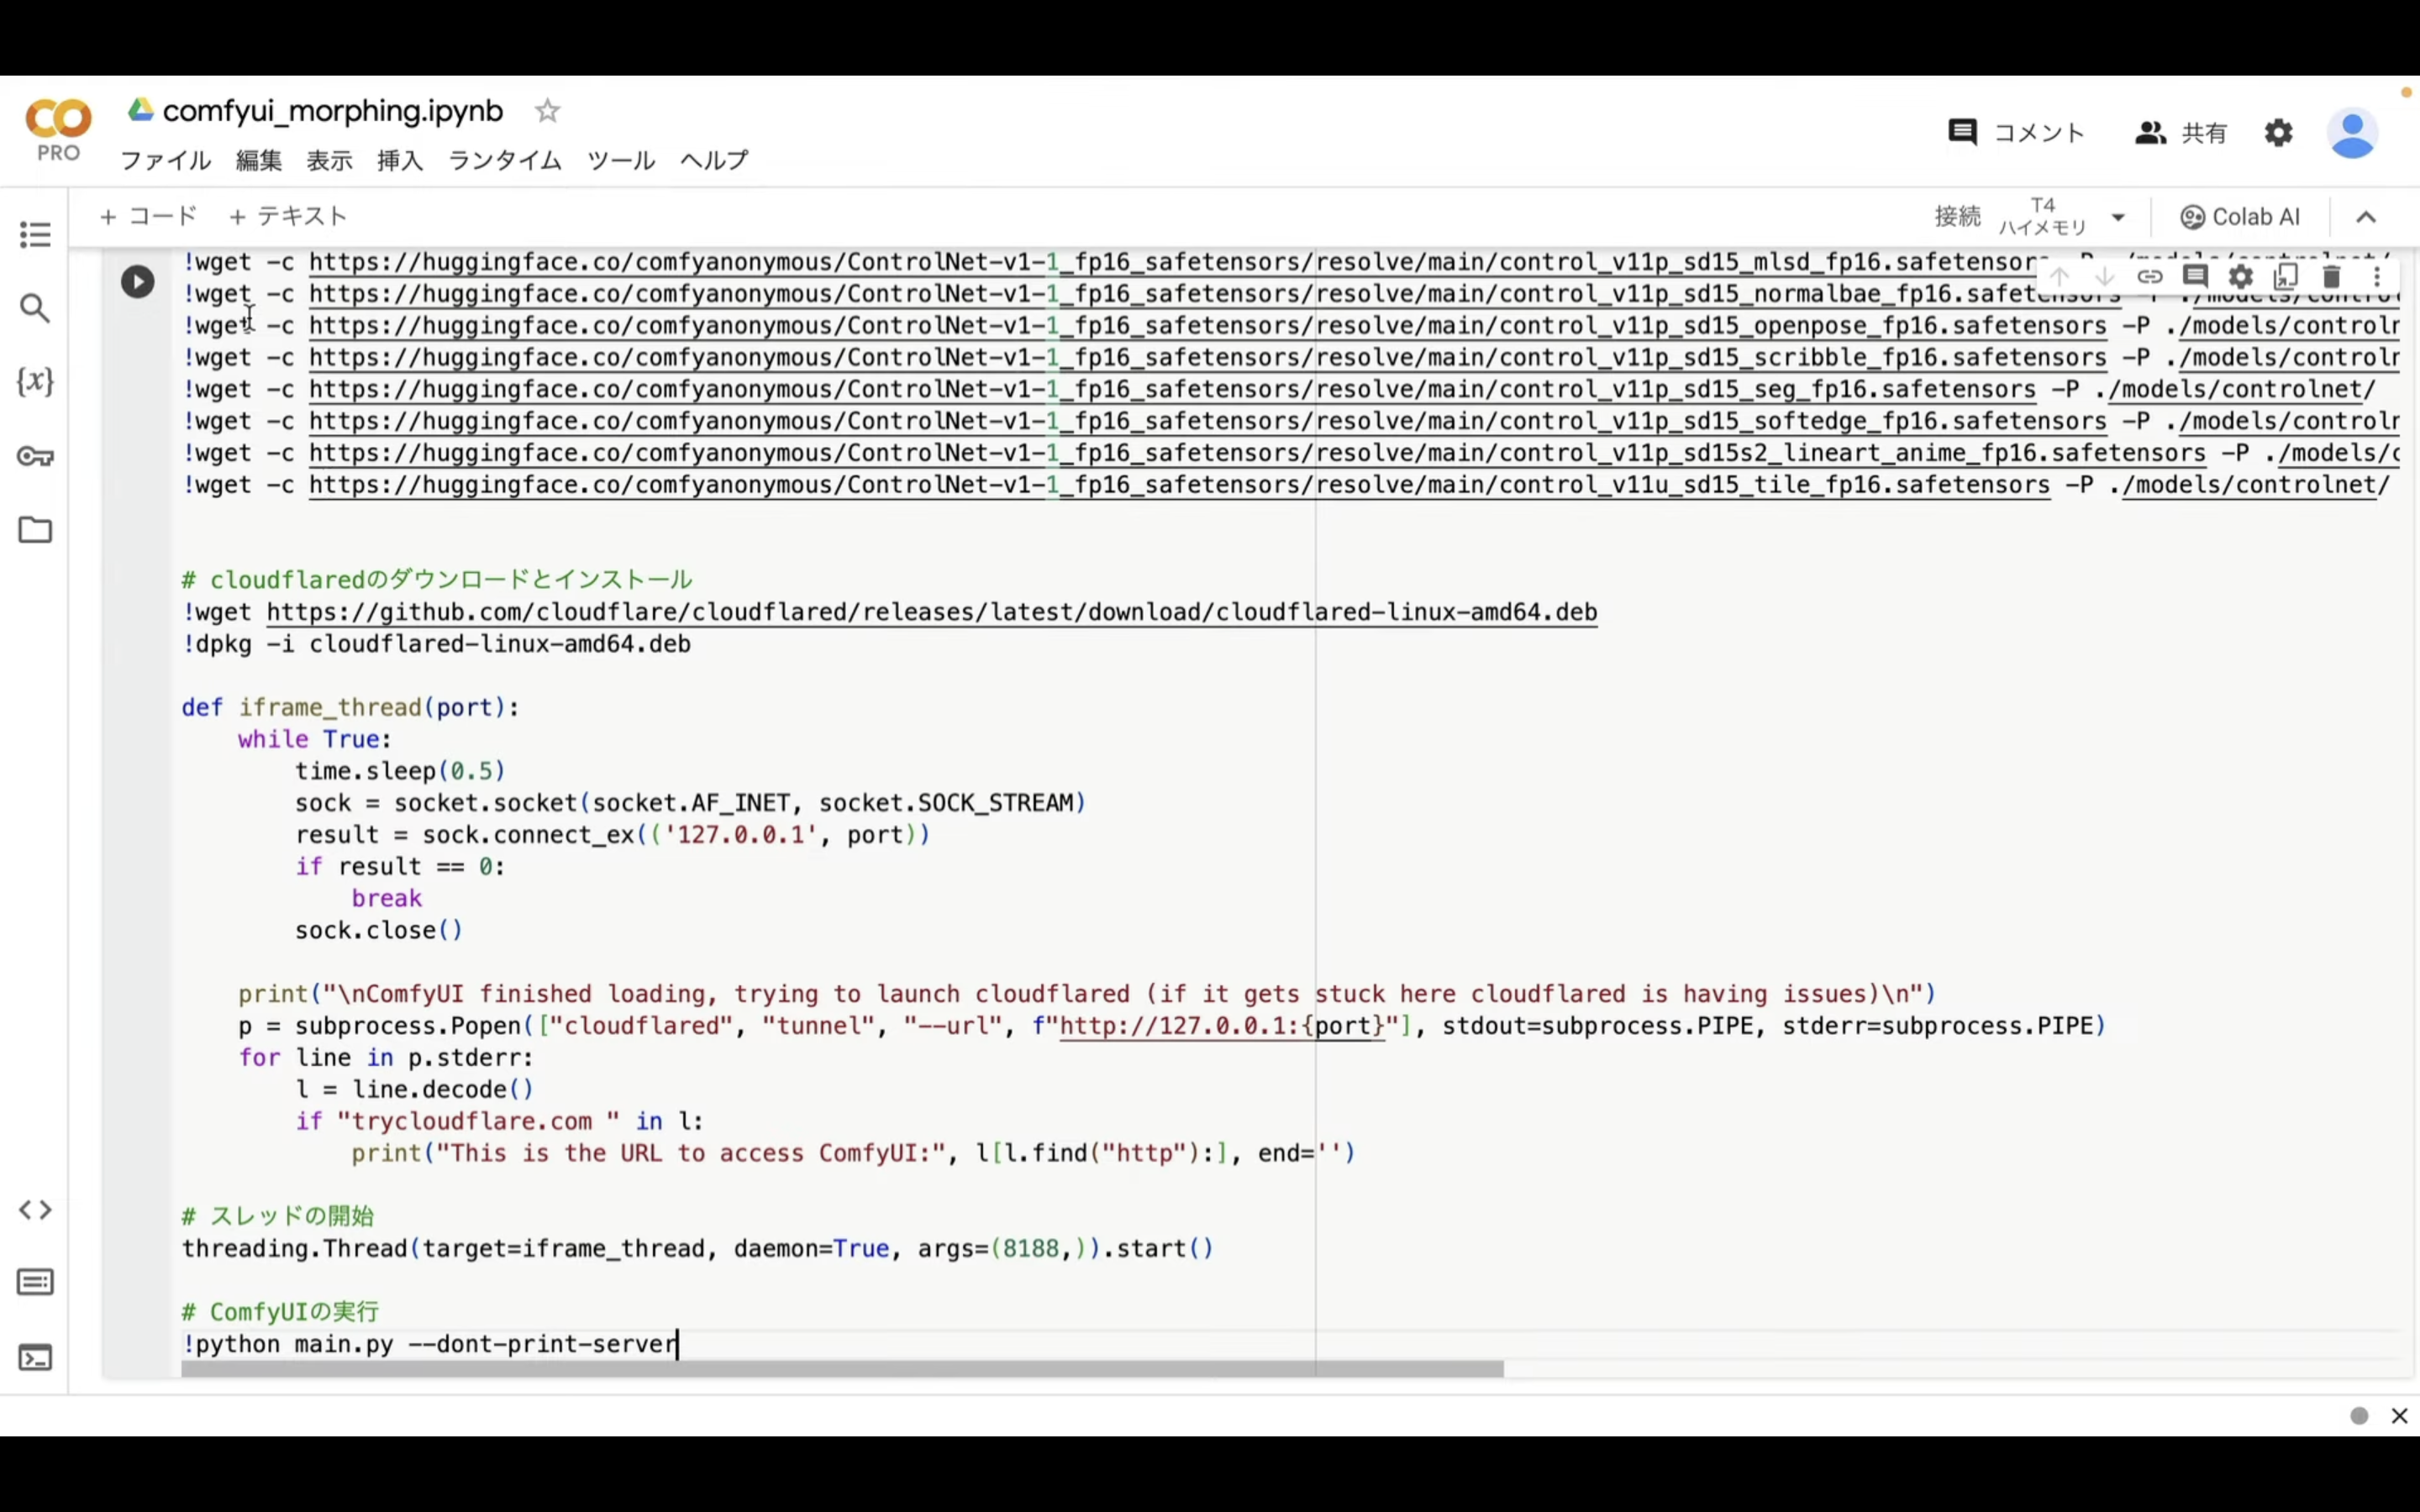
そして、再生ボタンを押します。
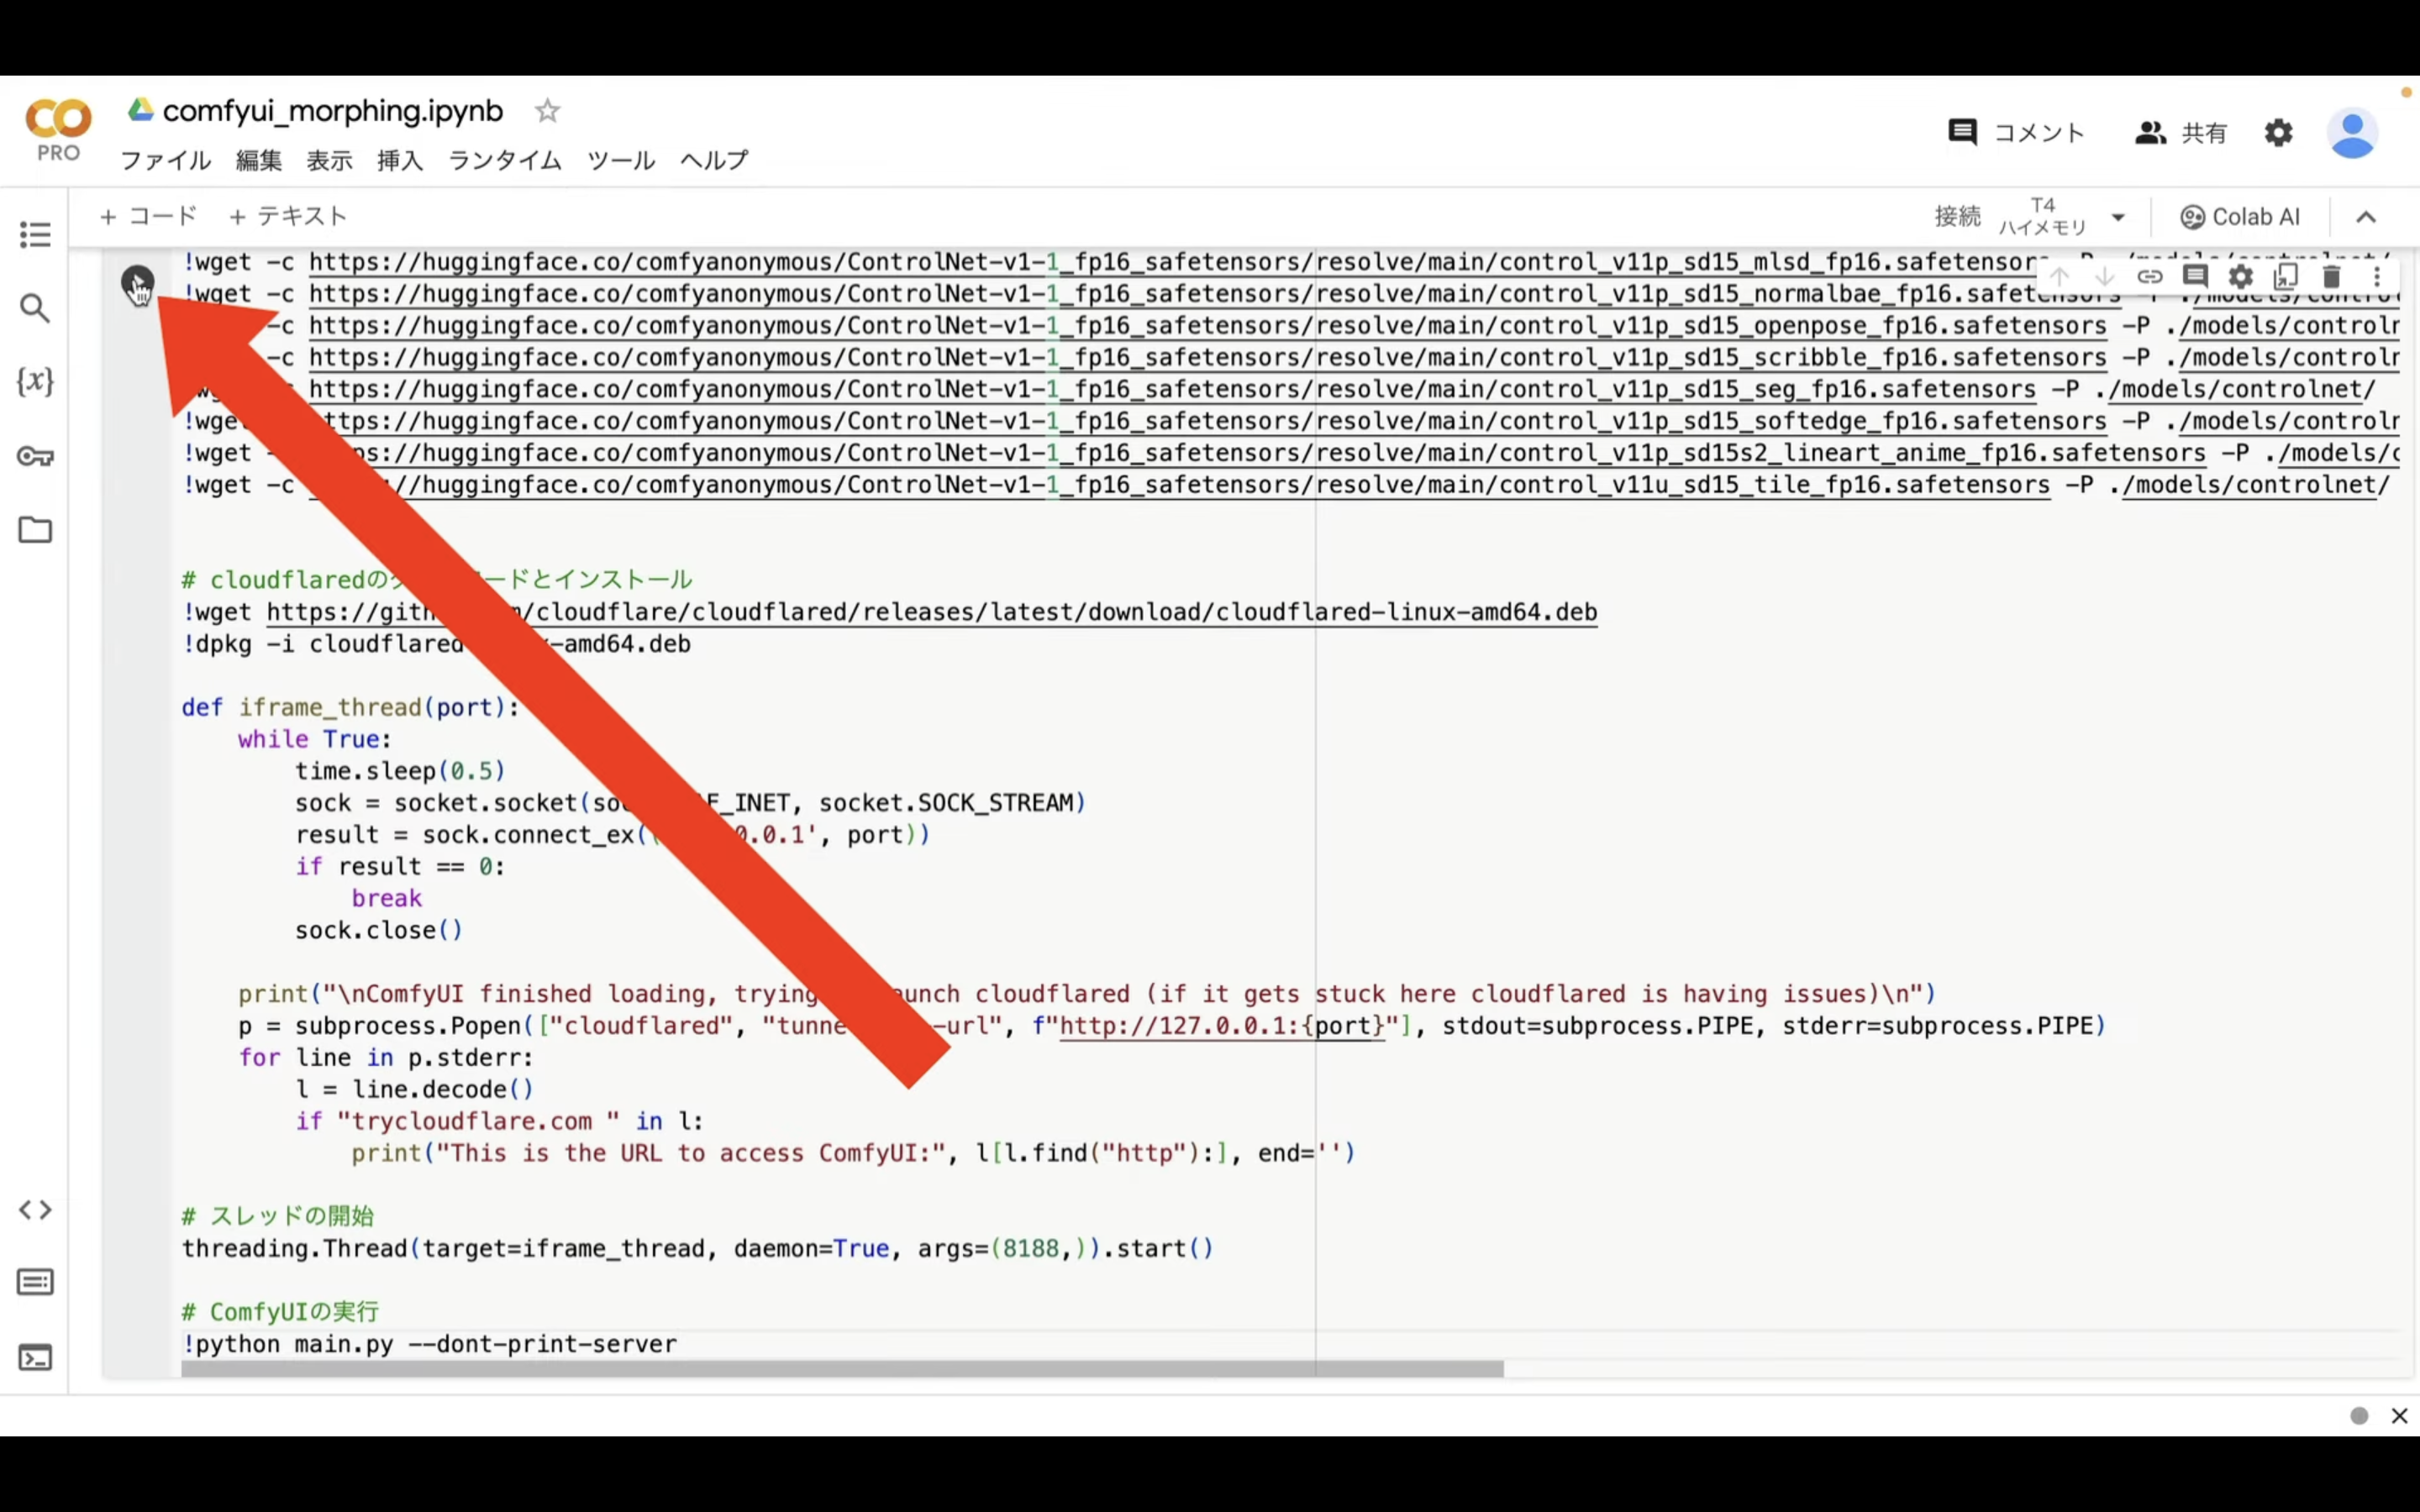
これで、貼り付けたテキストの内容が実行されます。
この処理には5分以上かかると思います。
しばらく待っていると、このようなリンクが表示されます。
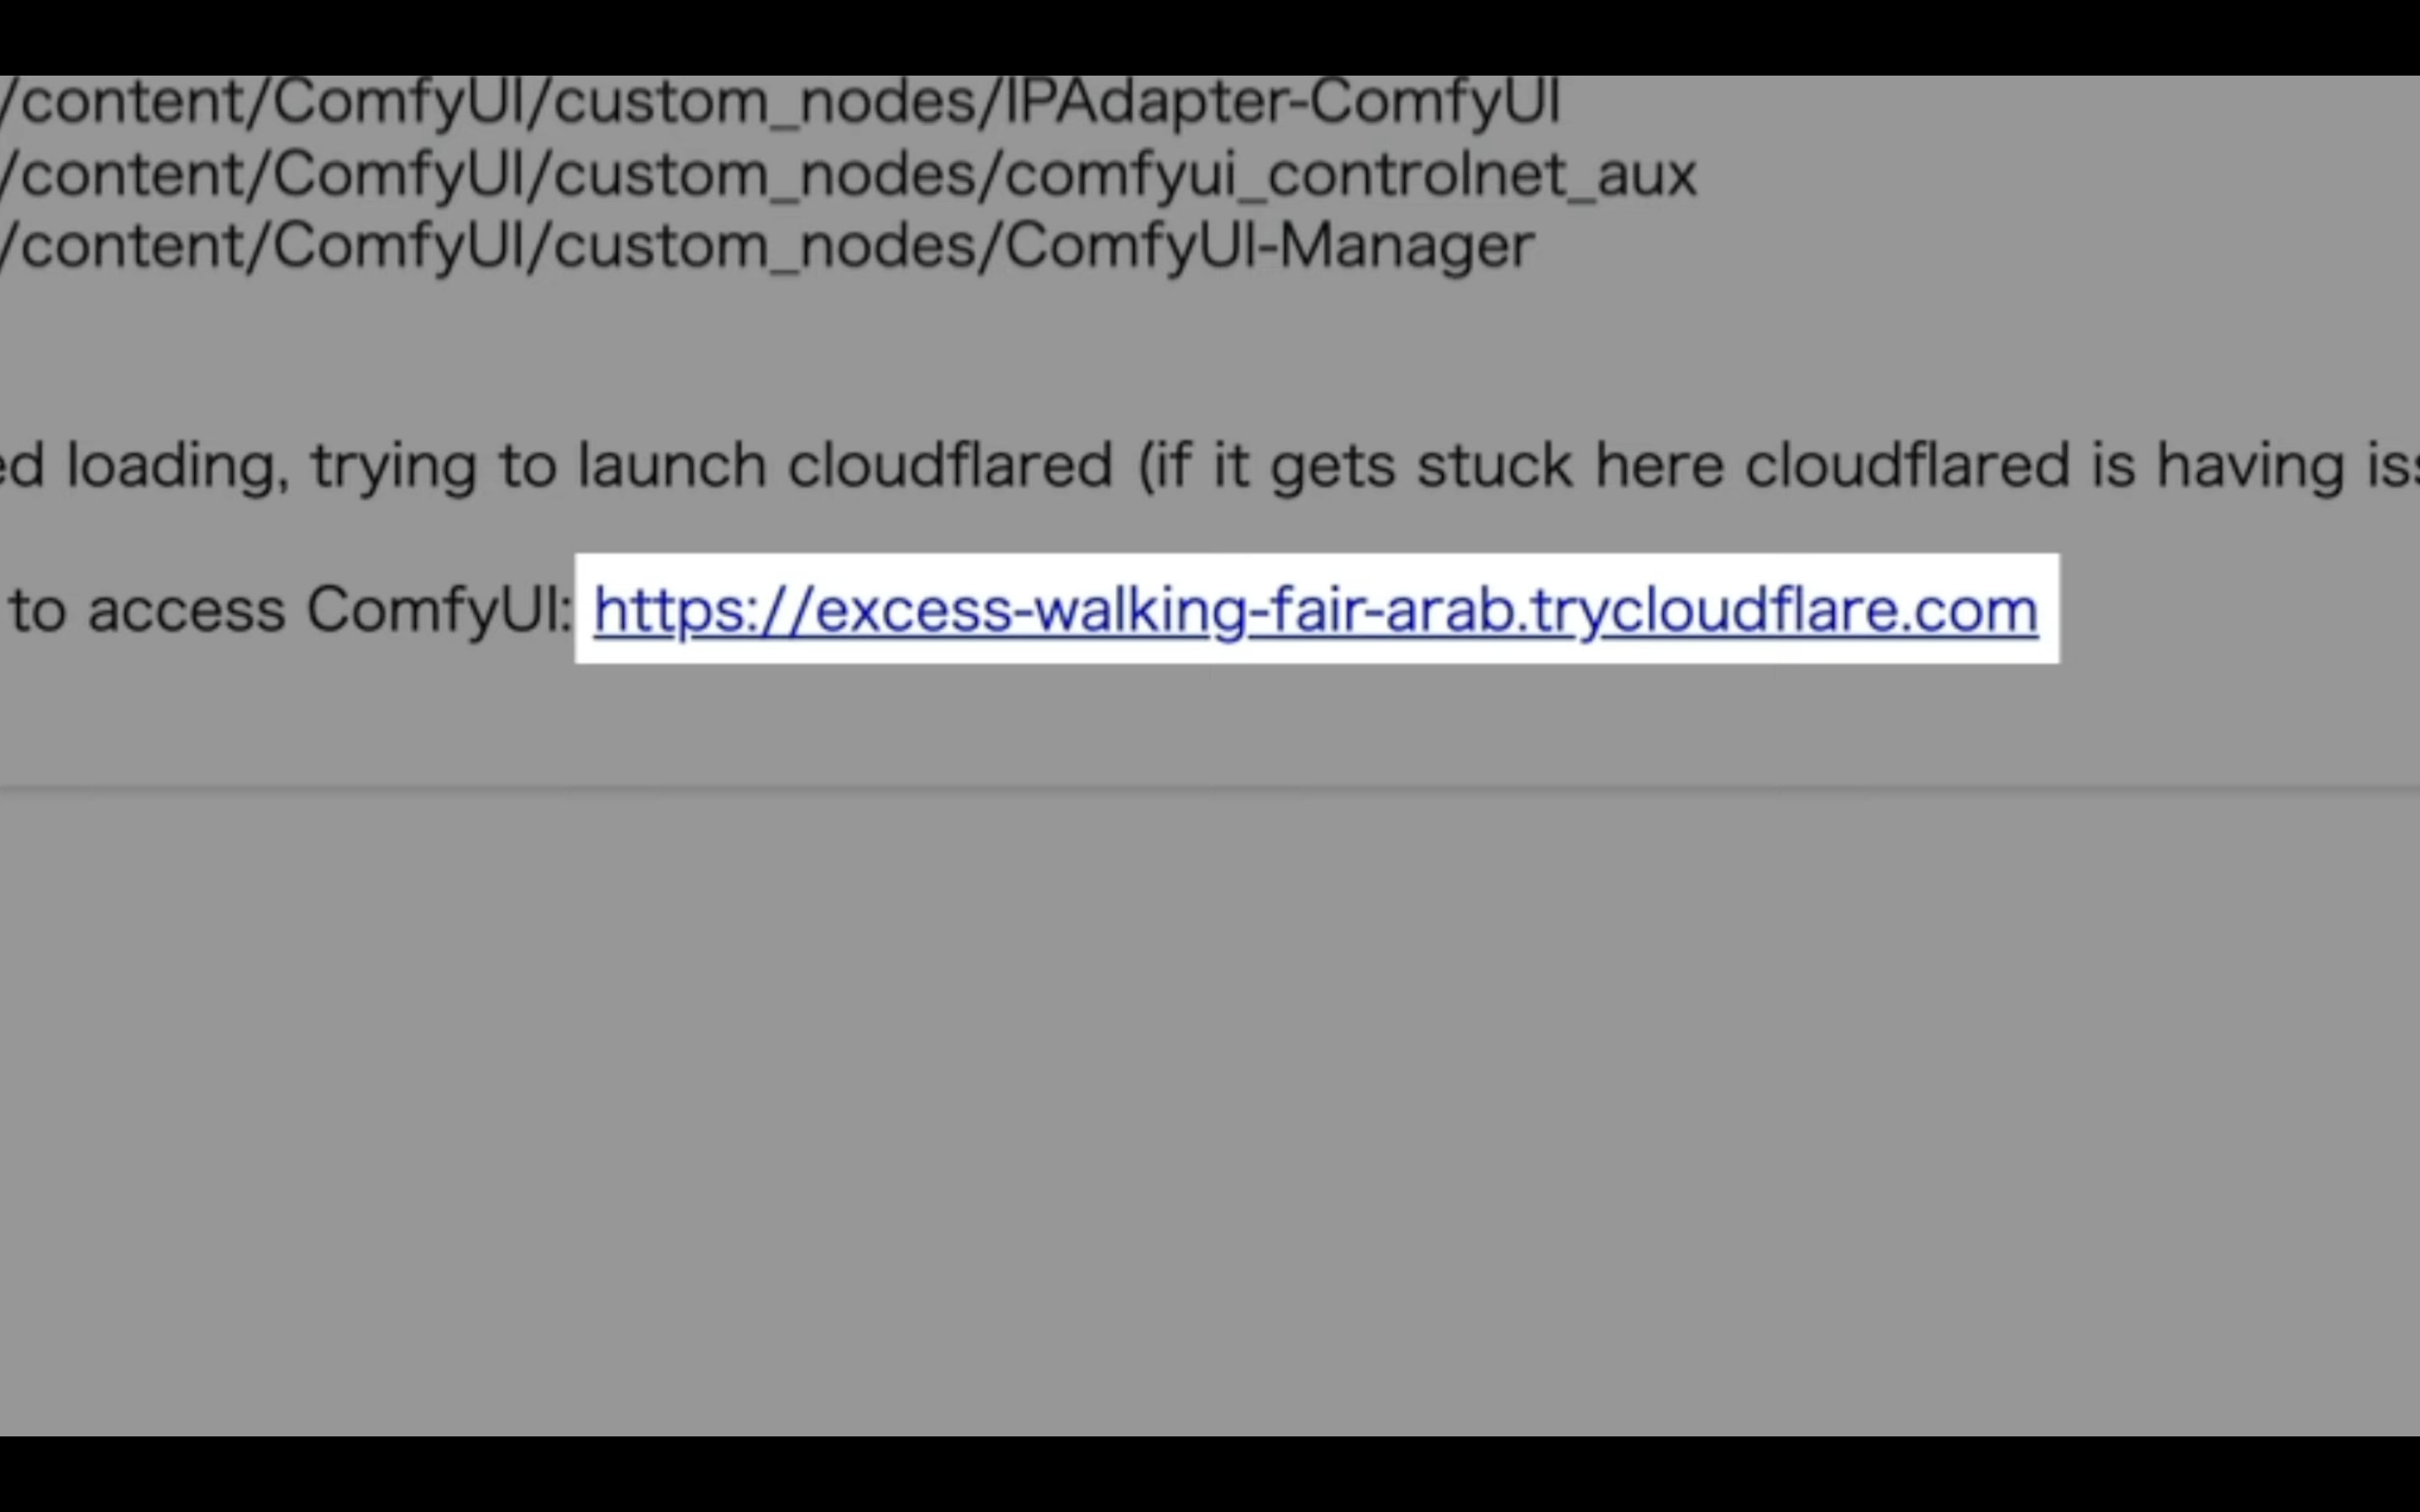
このリンクをクリックします。
そうすると、ComfyUIの画面が表示されます。
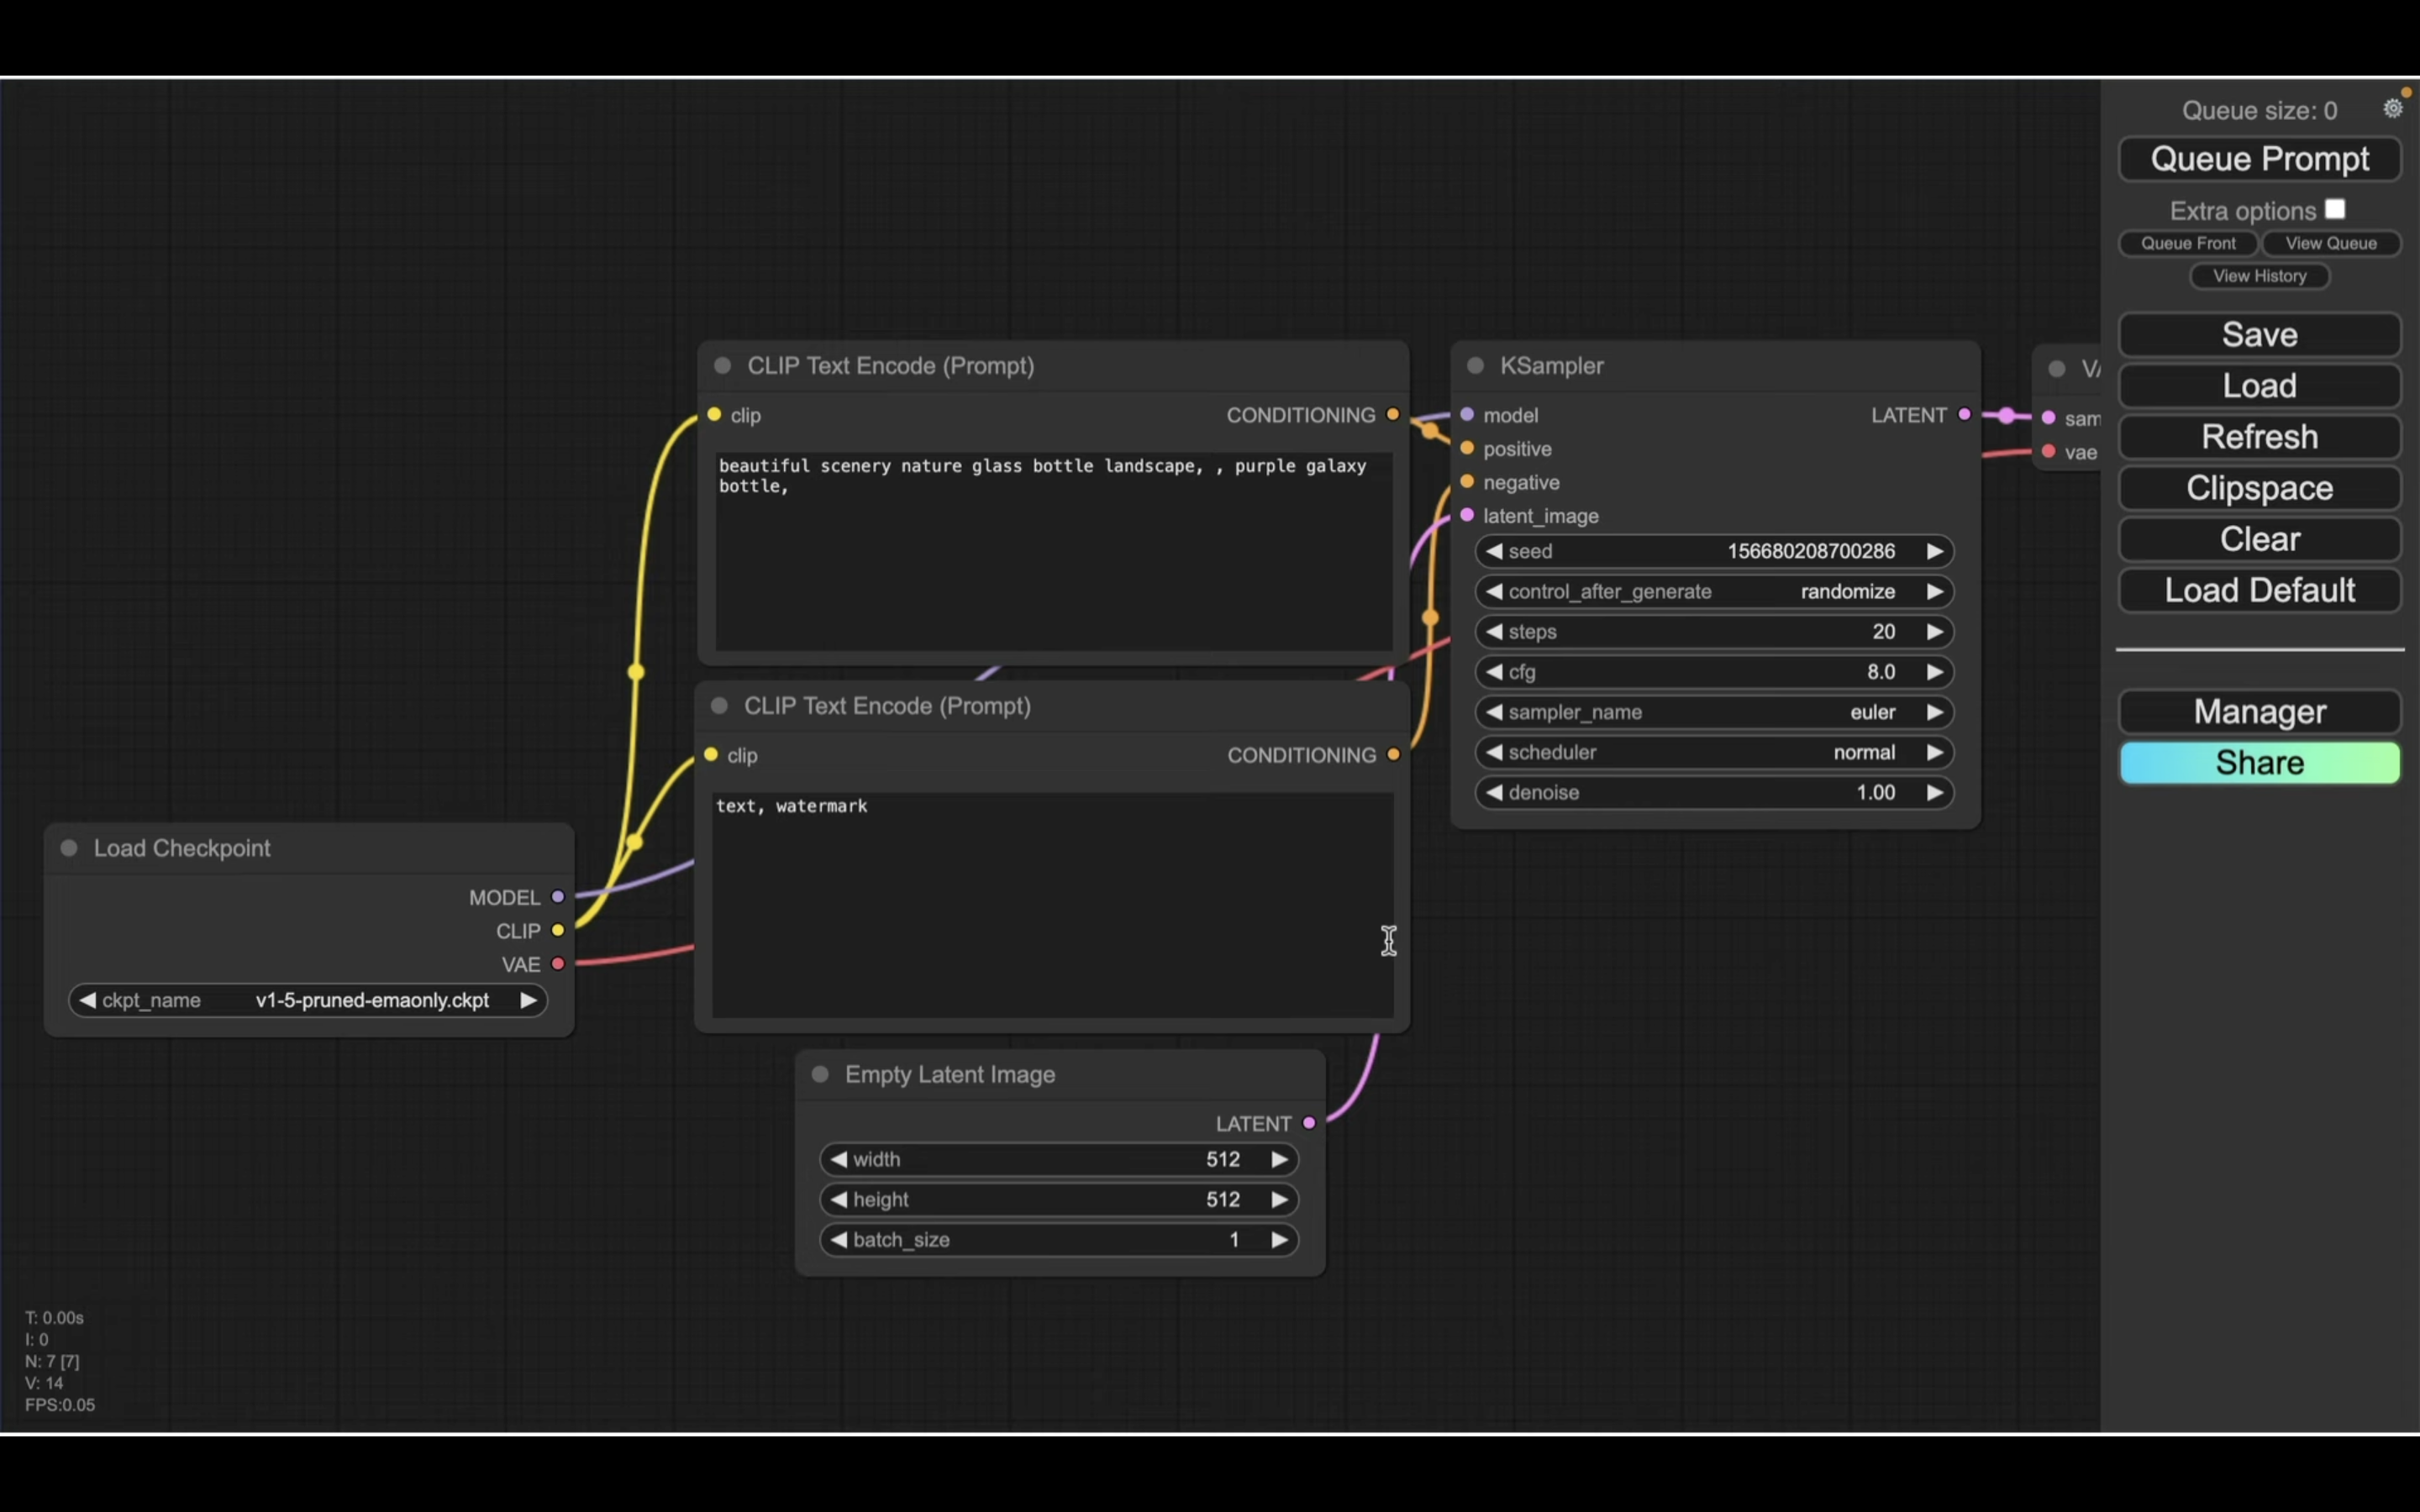
この解説では、あらかじめComfyUIの設定ファイルを用意していますので、そちらをご利用ください。
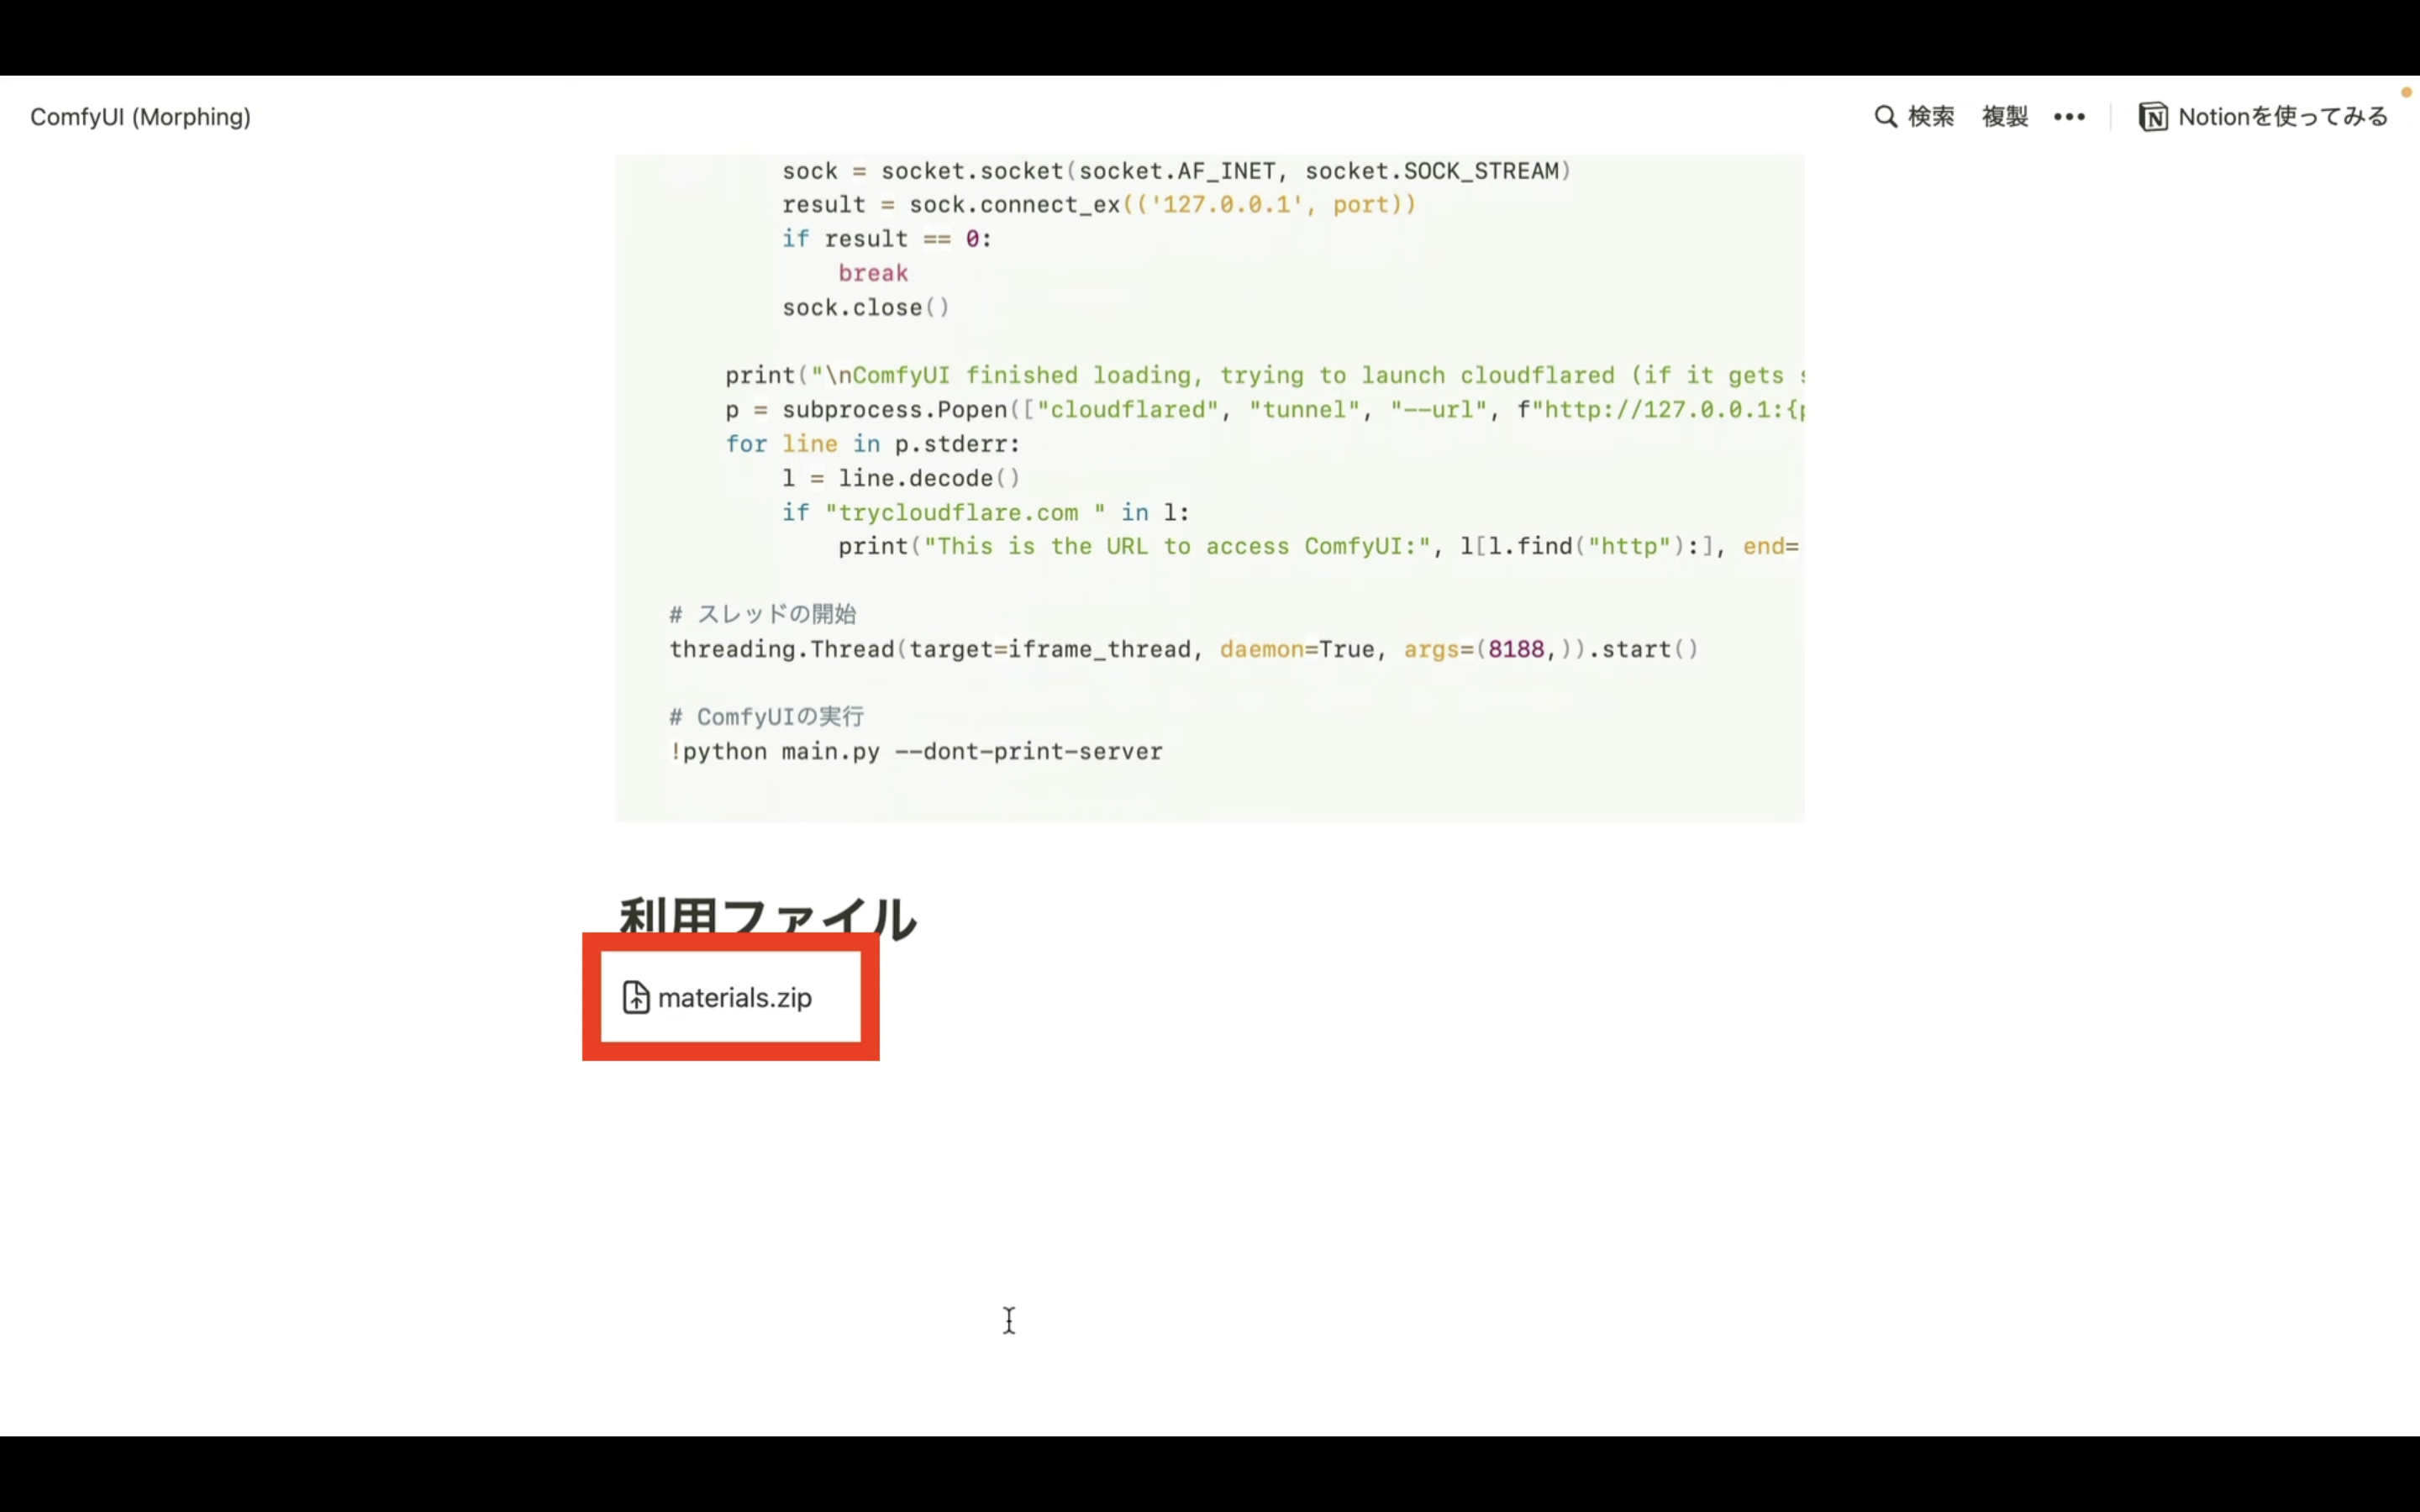
下に貼ってあるページを表示します。
このページを表示したら、「利用ファイル」と書かれているタイトルの下にあるZIPファイルをクリックします。
そうすると、ZIPファイルがダウンロードされます。
ダウンロードしたファイルを解凍したら、このようなファイルが表示されると思います。
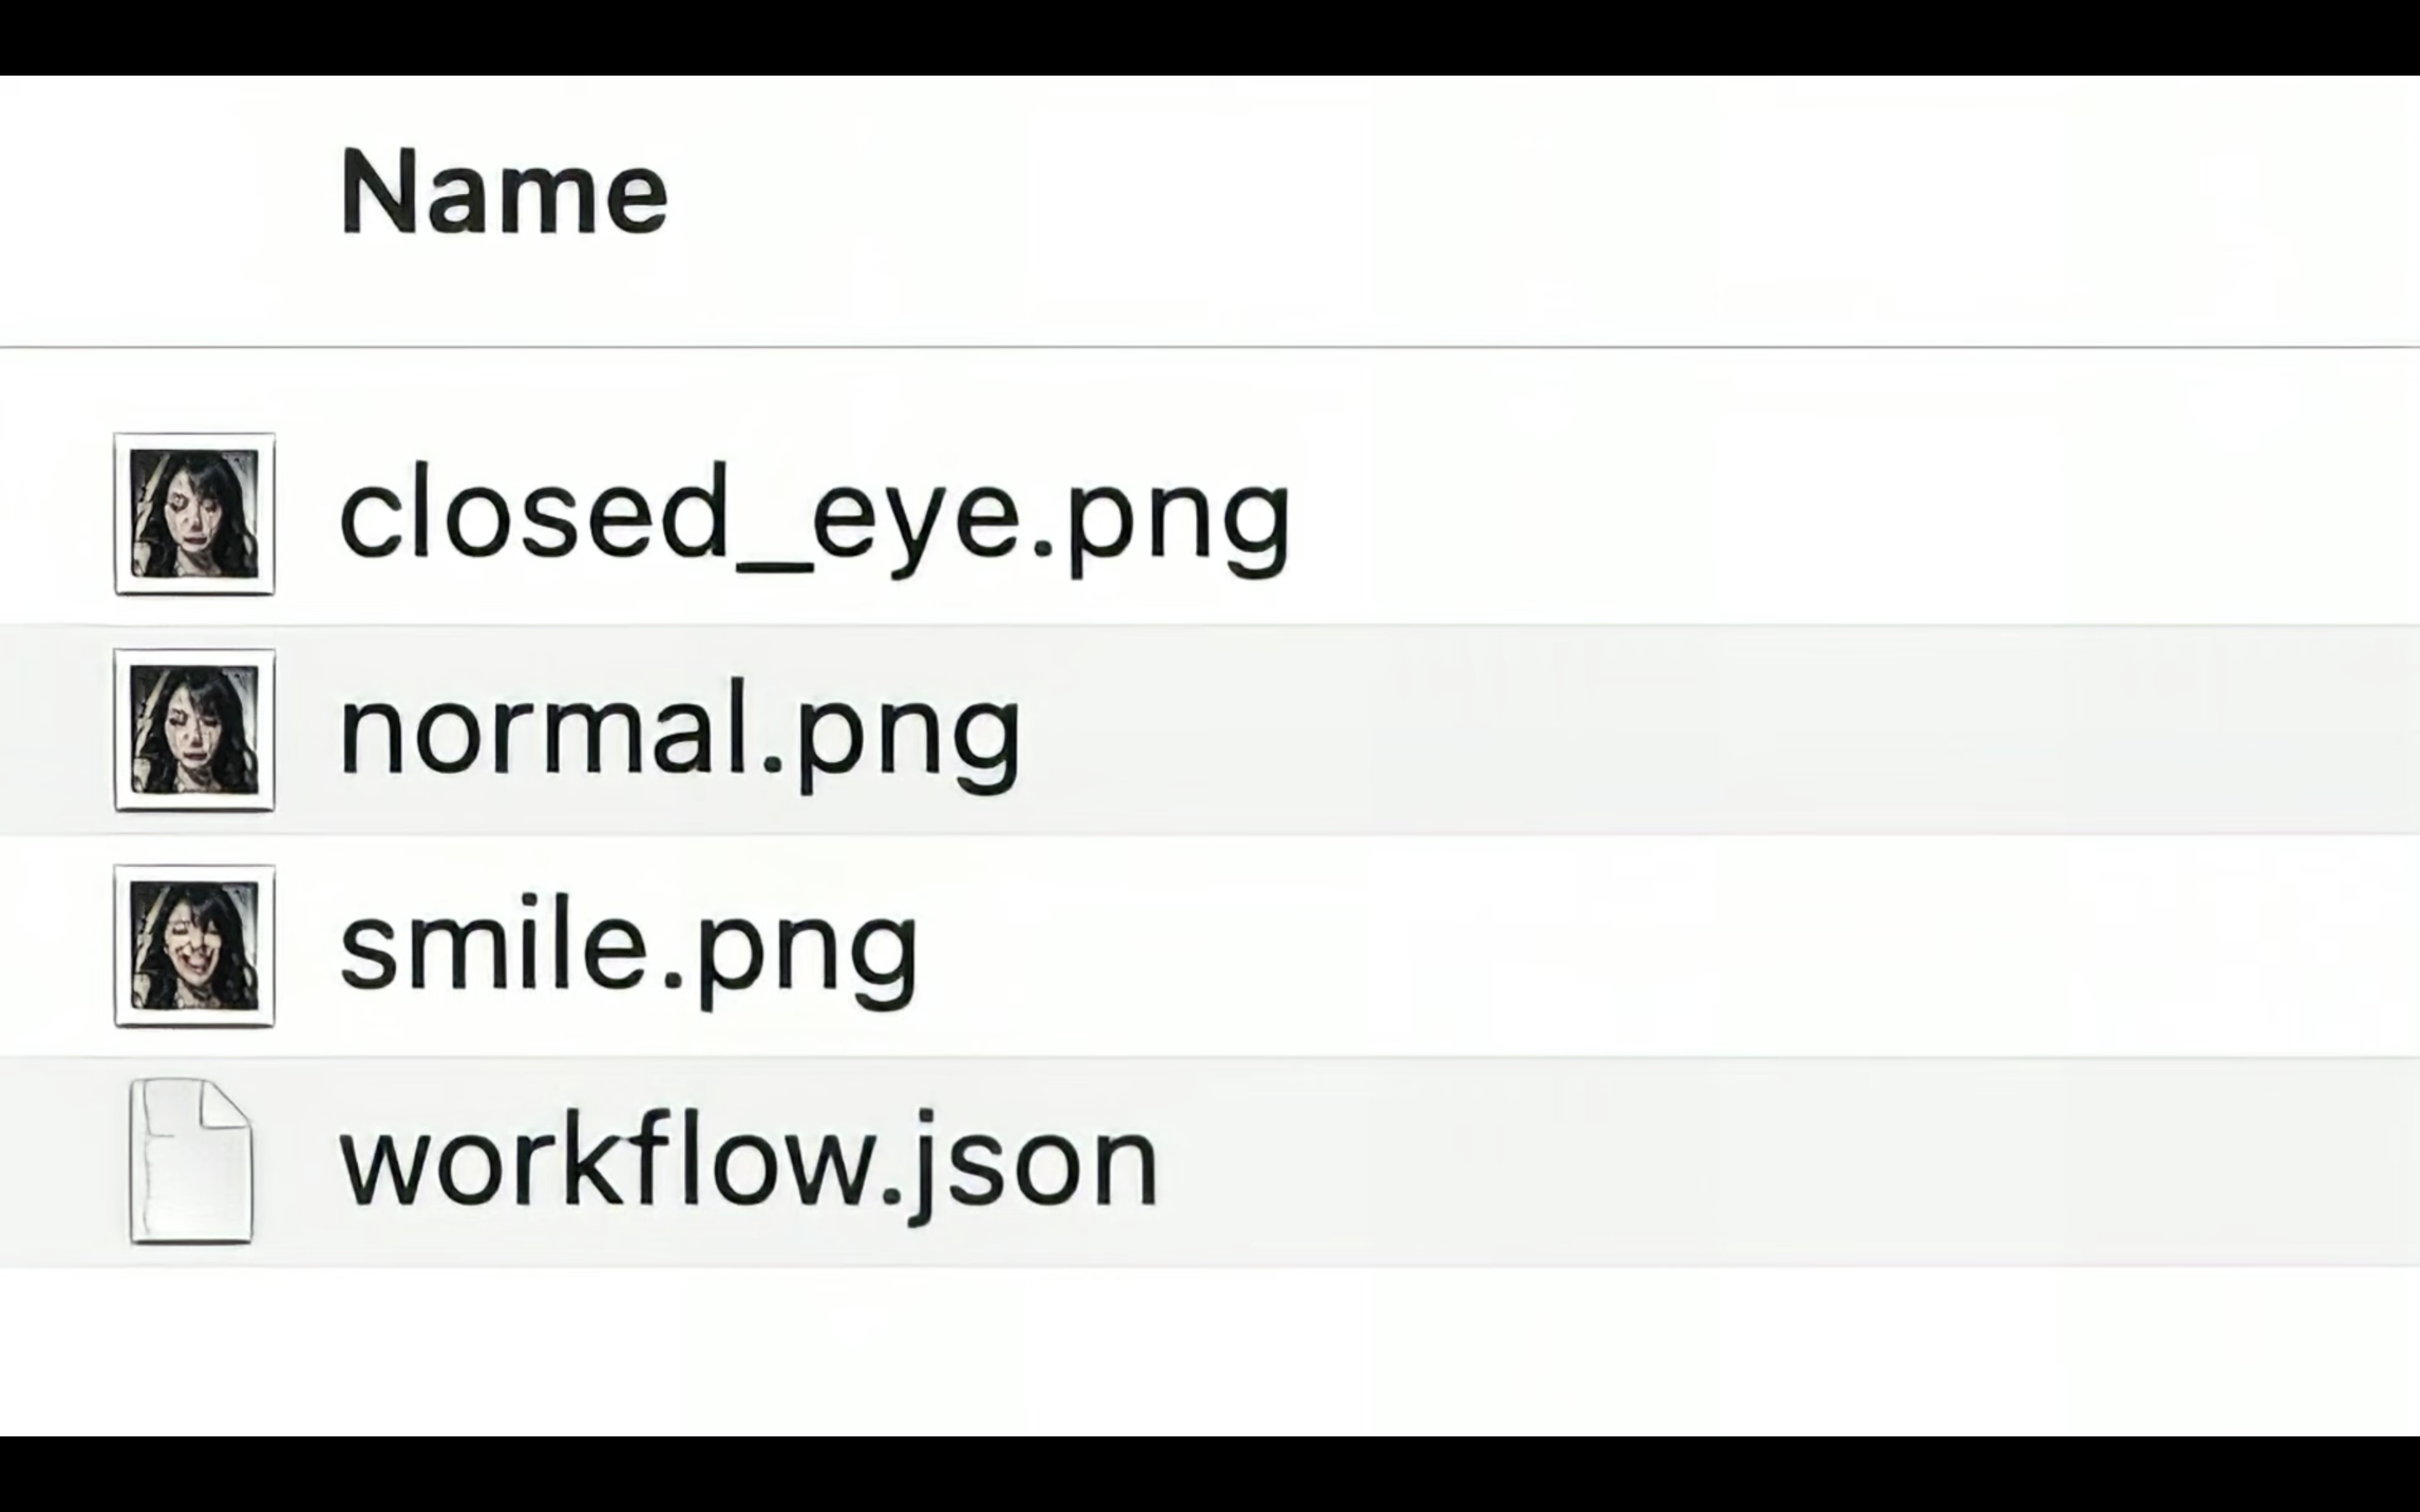
この中にあるworkflow.jsonと書かれているファイルをComfyUIの画面にドラッグ&ドロップします。
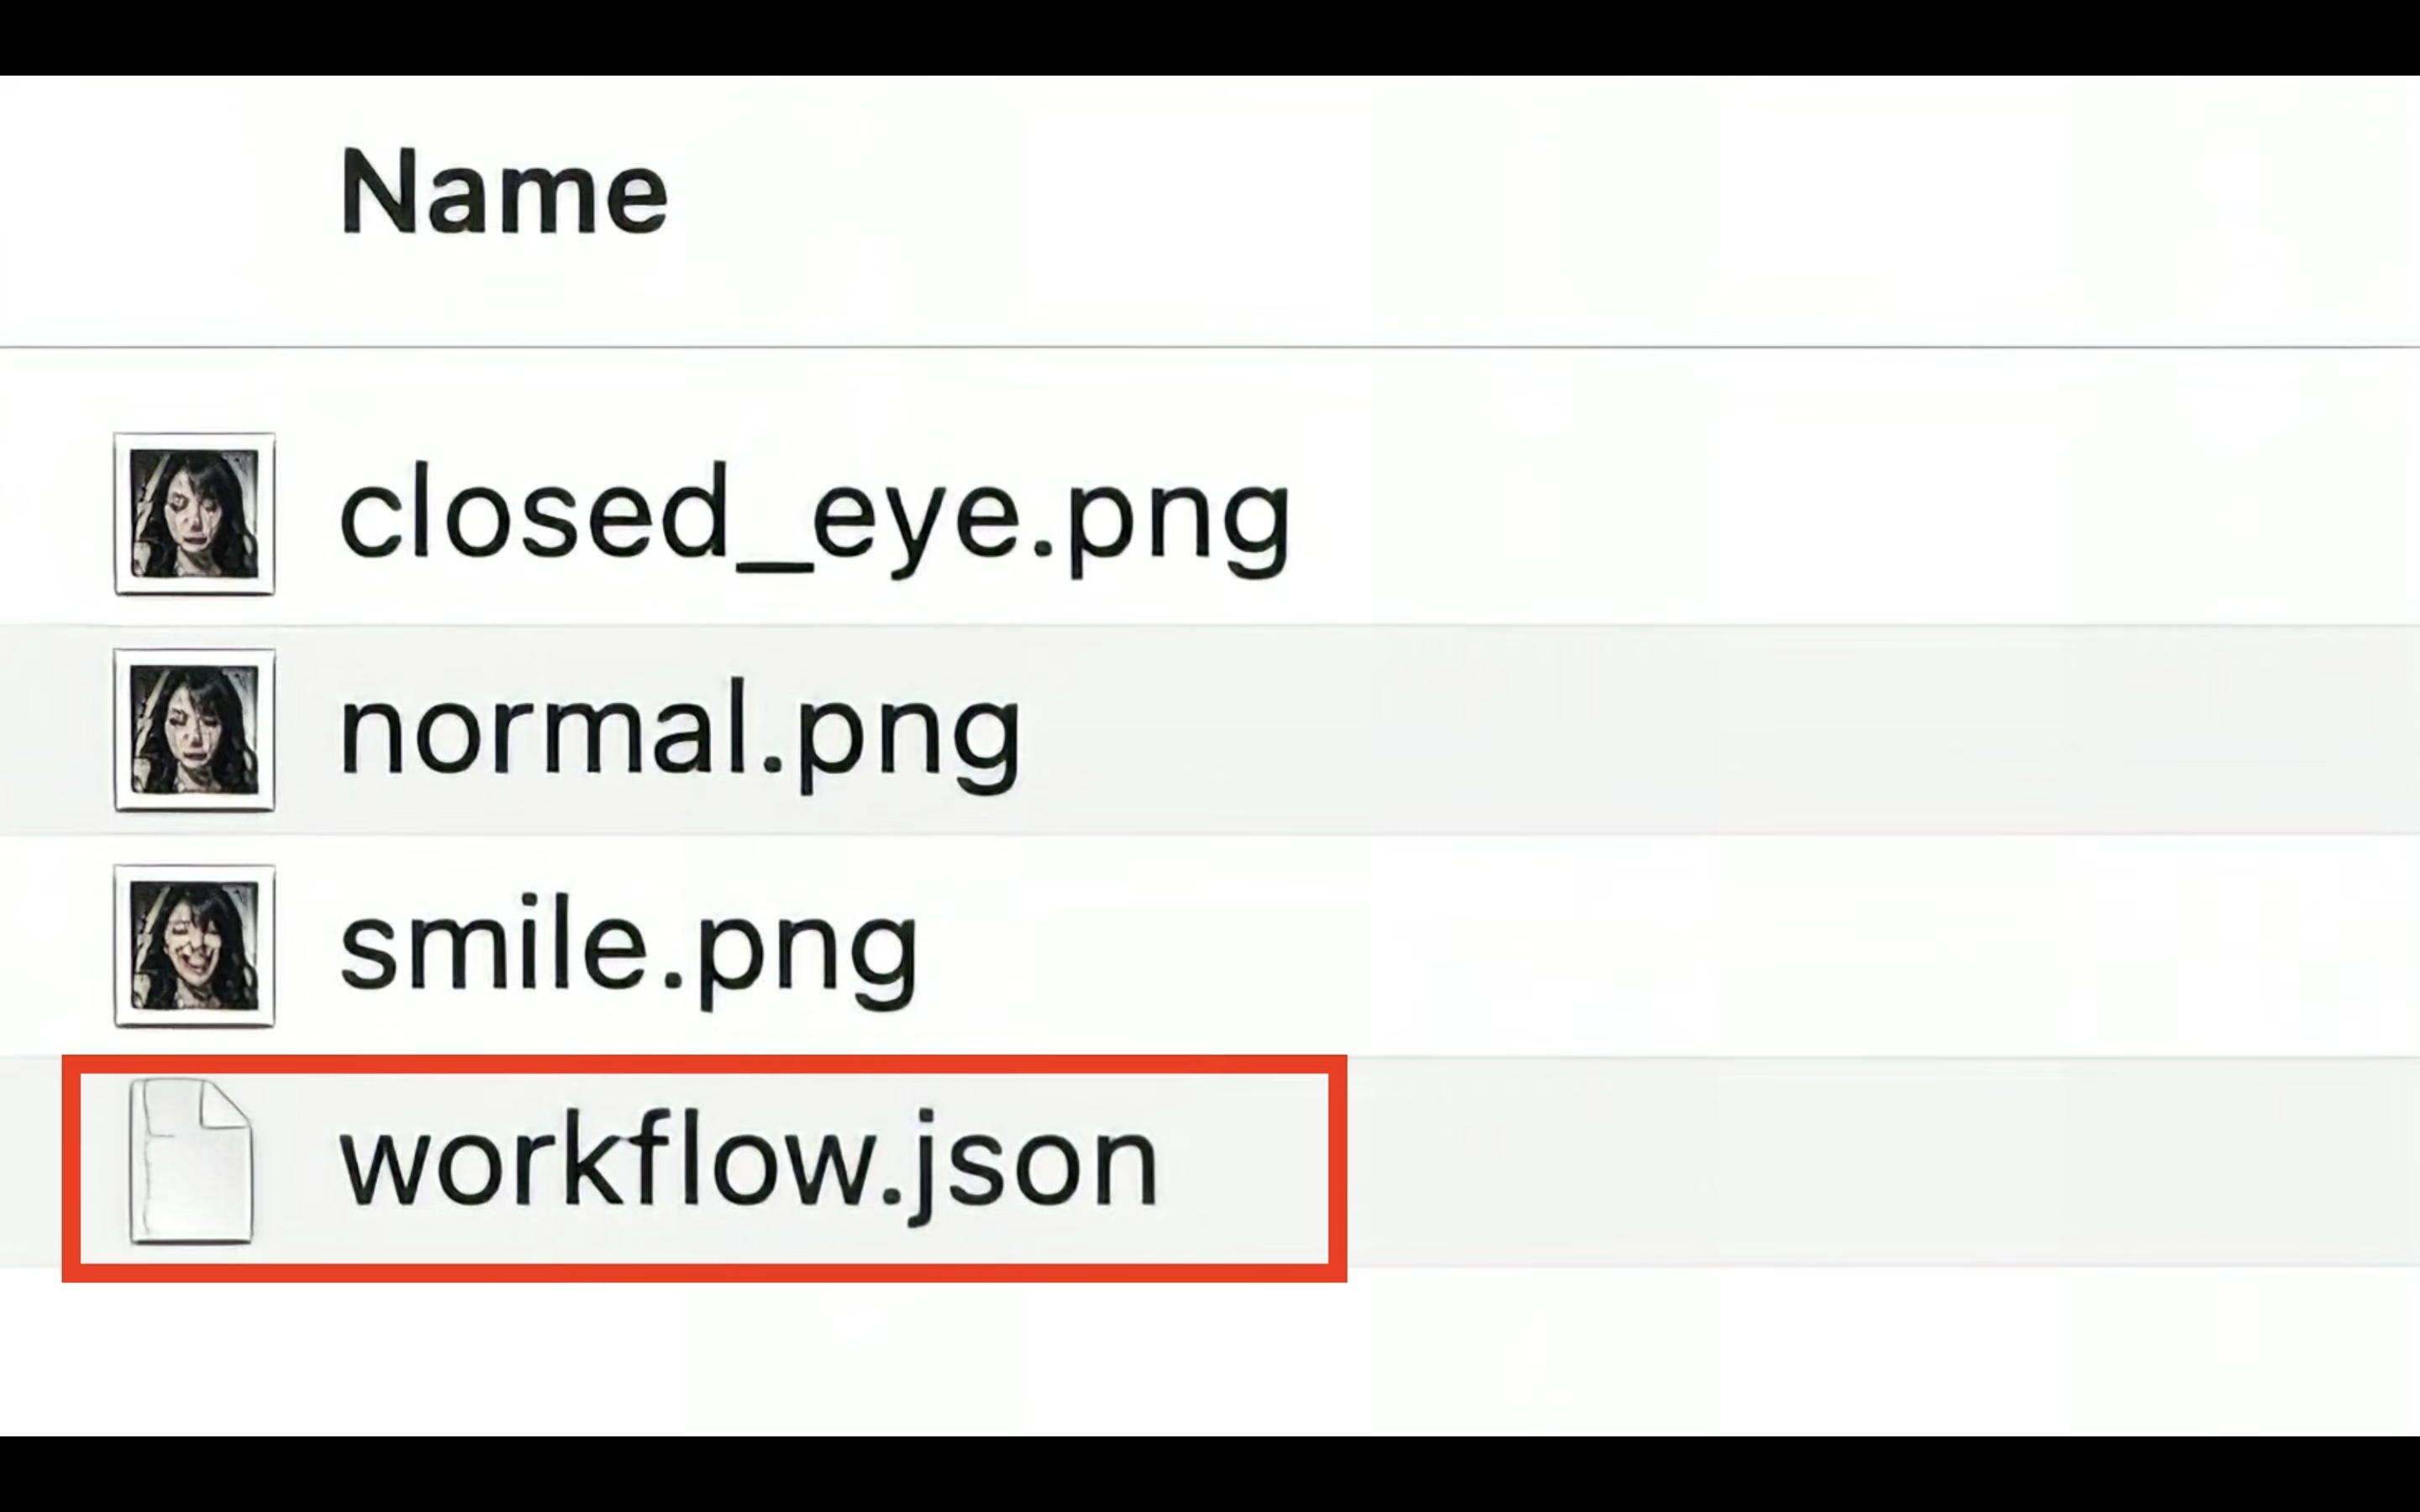
ファイルは、何も表示されていない場所にドラッグ&ドロップするようにしてください。
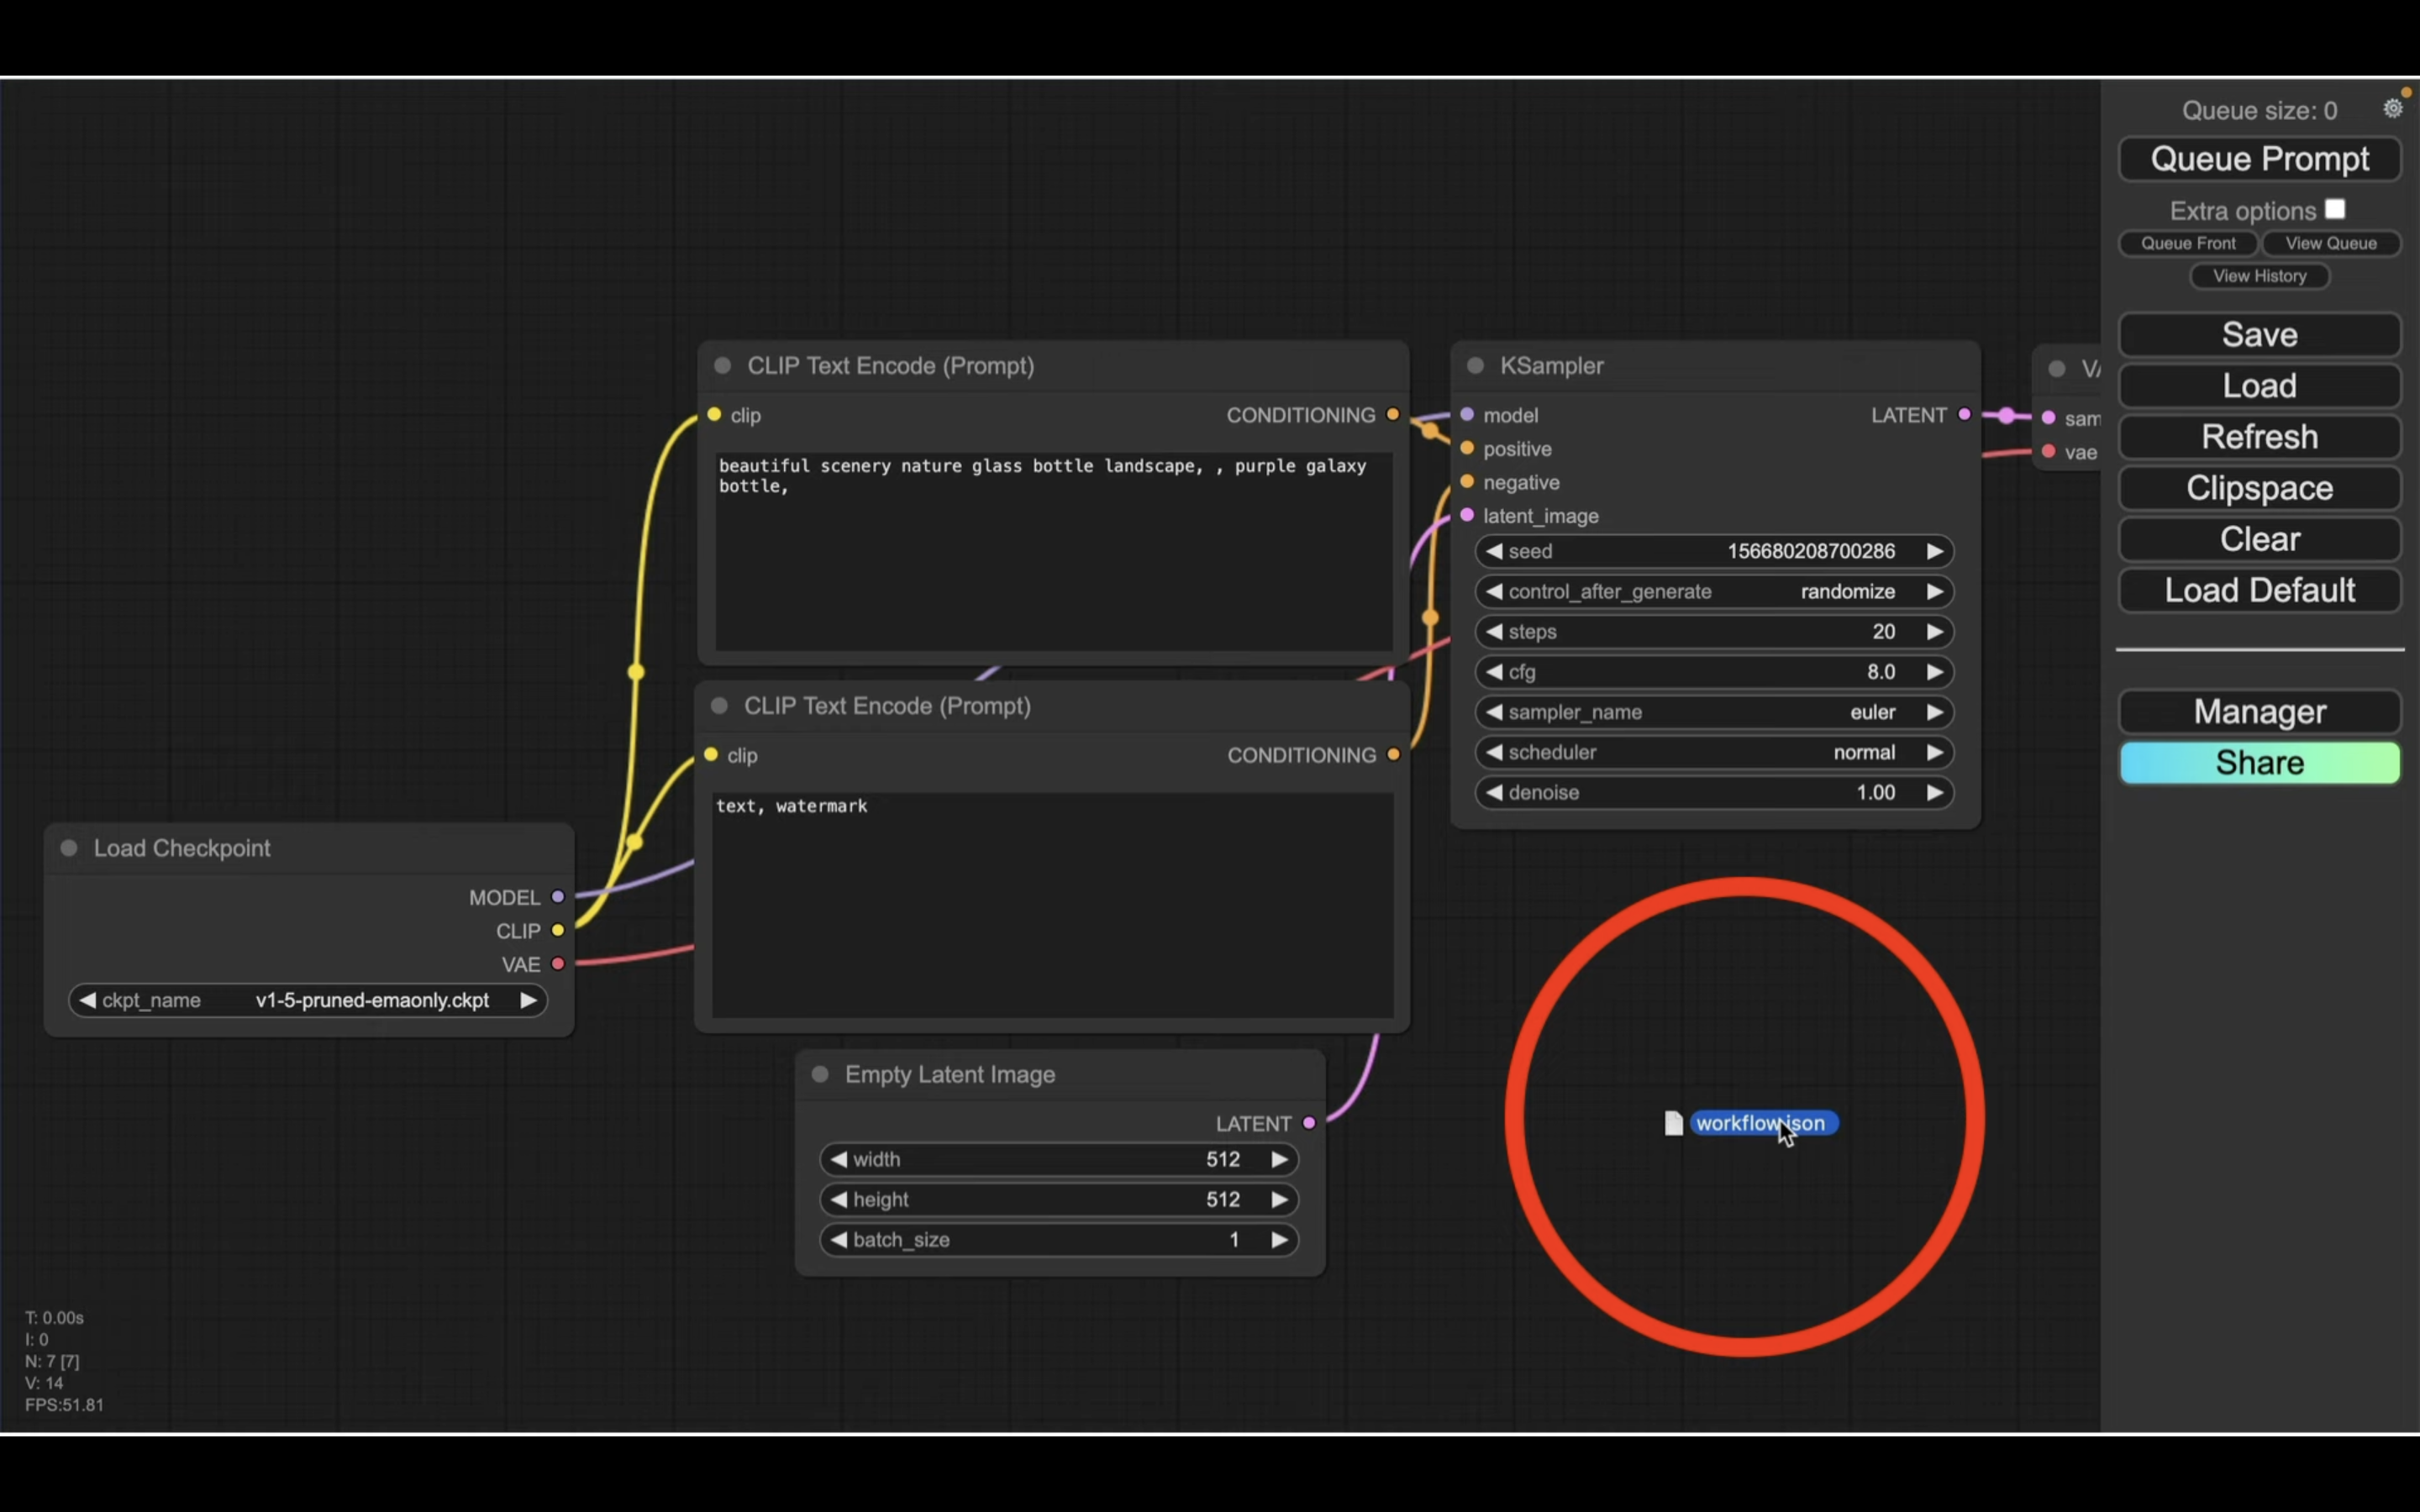
そうすると、workflow.JSONに指定してある設定内容が読み込まれます。

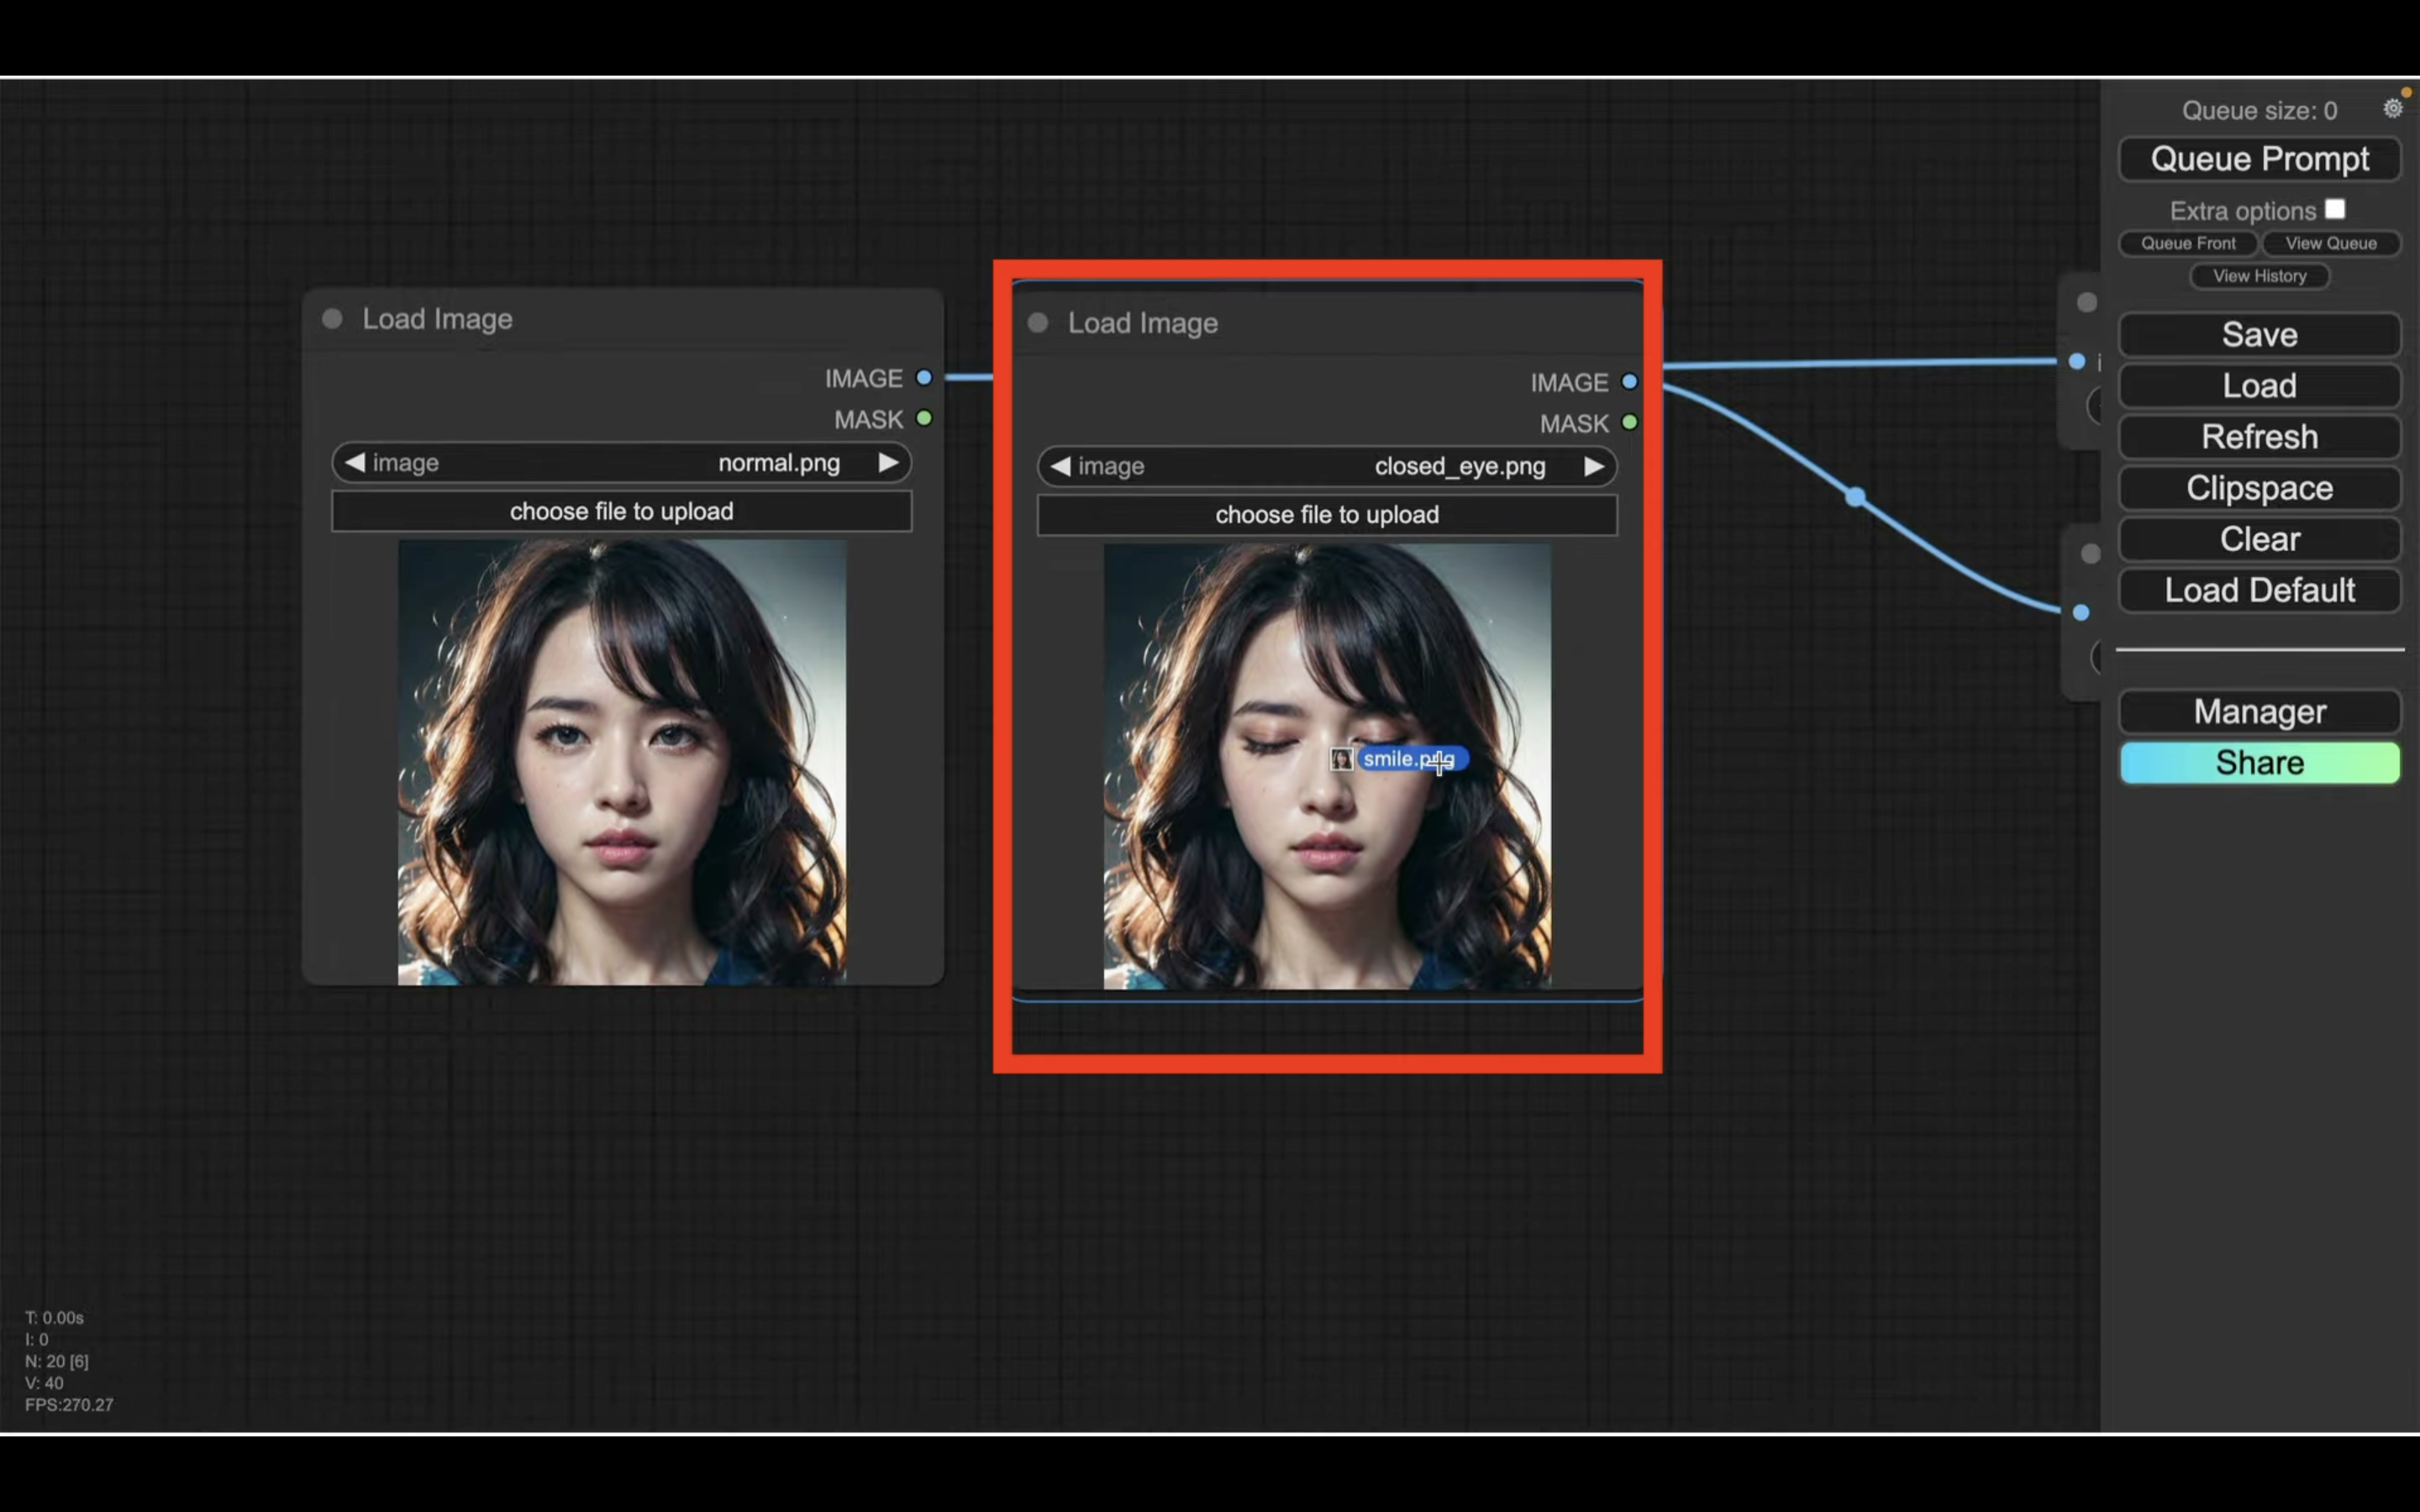
設定ファイルが読み込まれたら、画像ファイルを設定するために左側に移動します。
「Load Image」というタイトルのブロックが2つあるので、このブロックにそれぞれ画像をドラッグ&ドロップしてアップロードします。
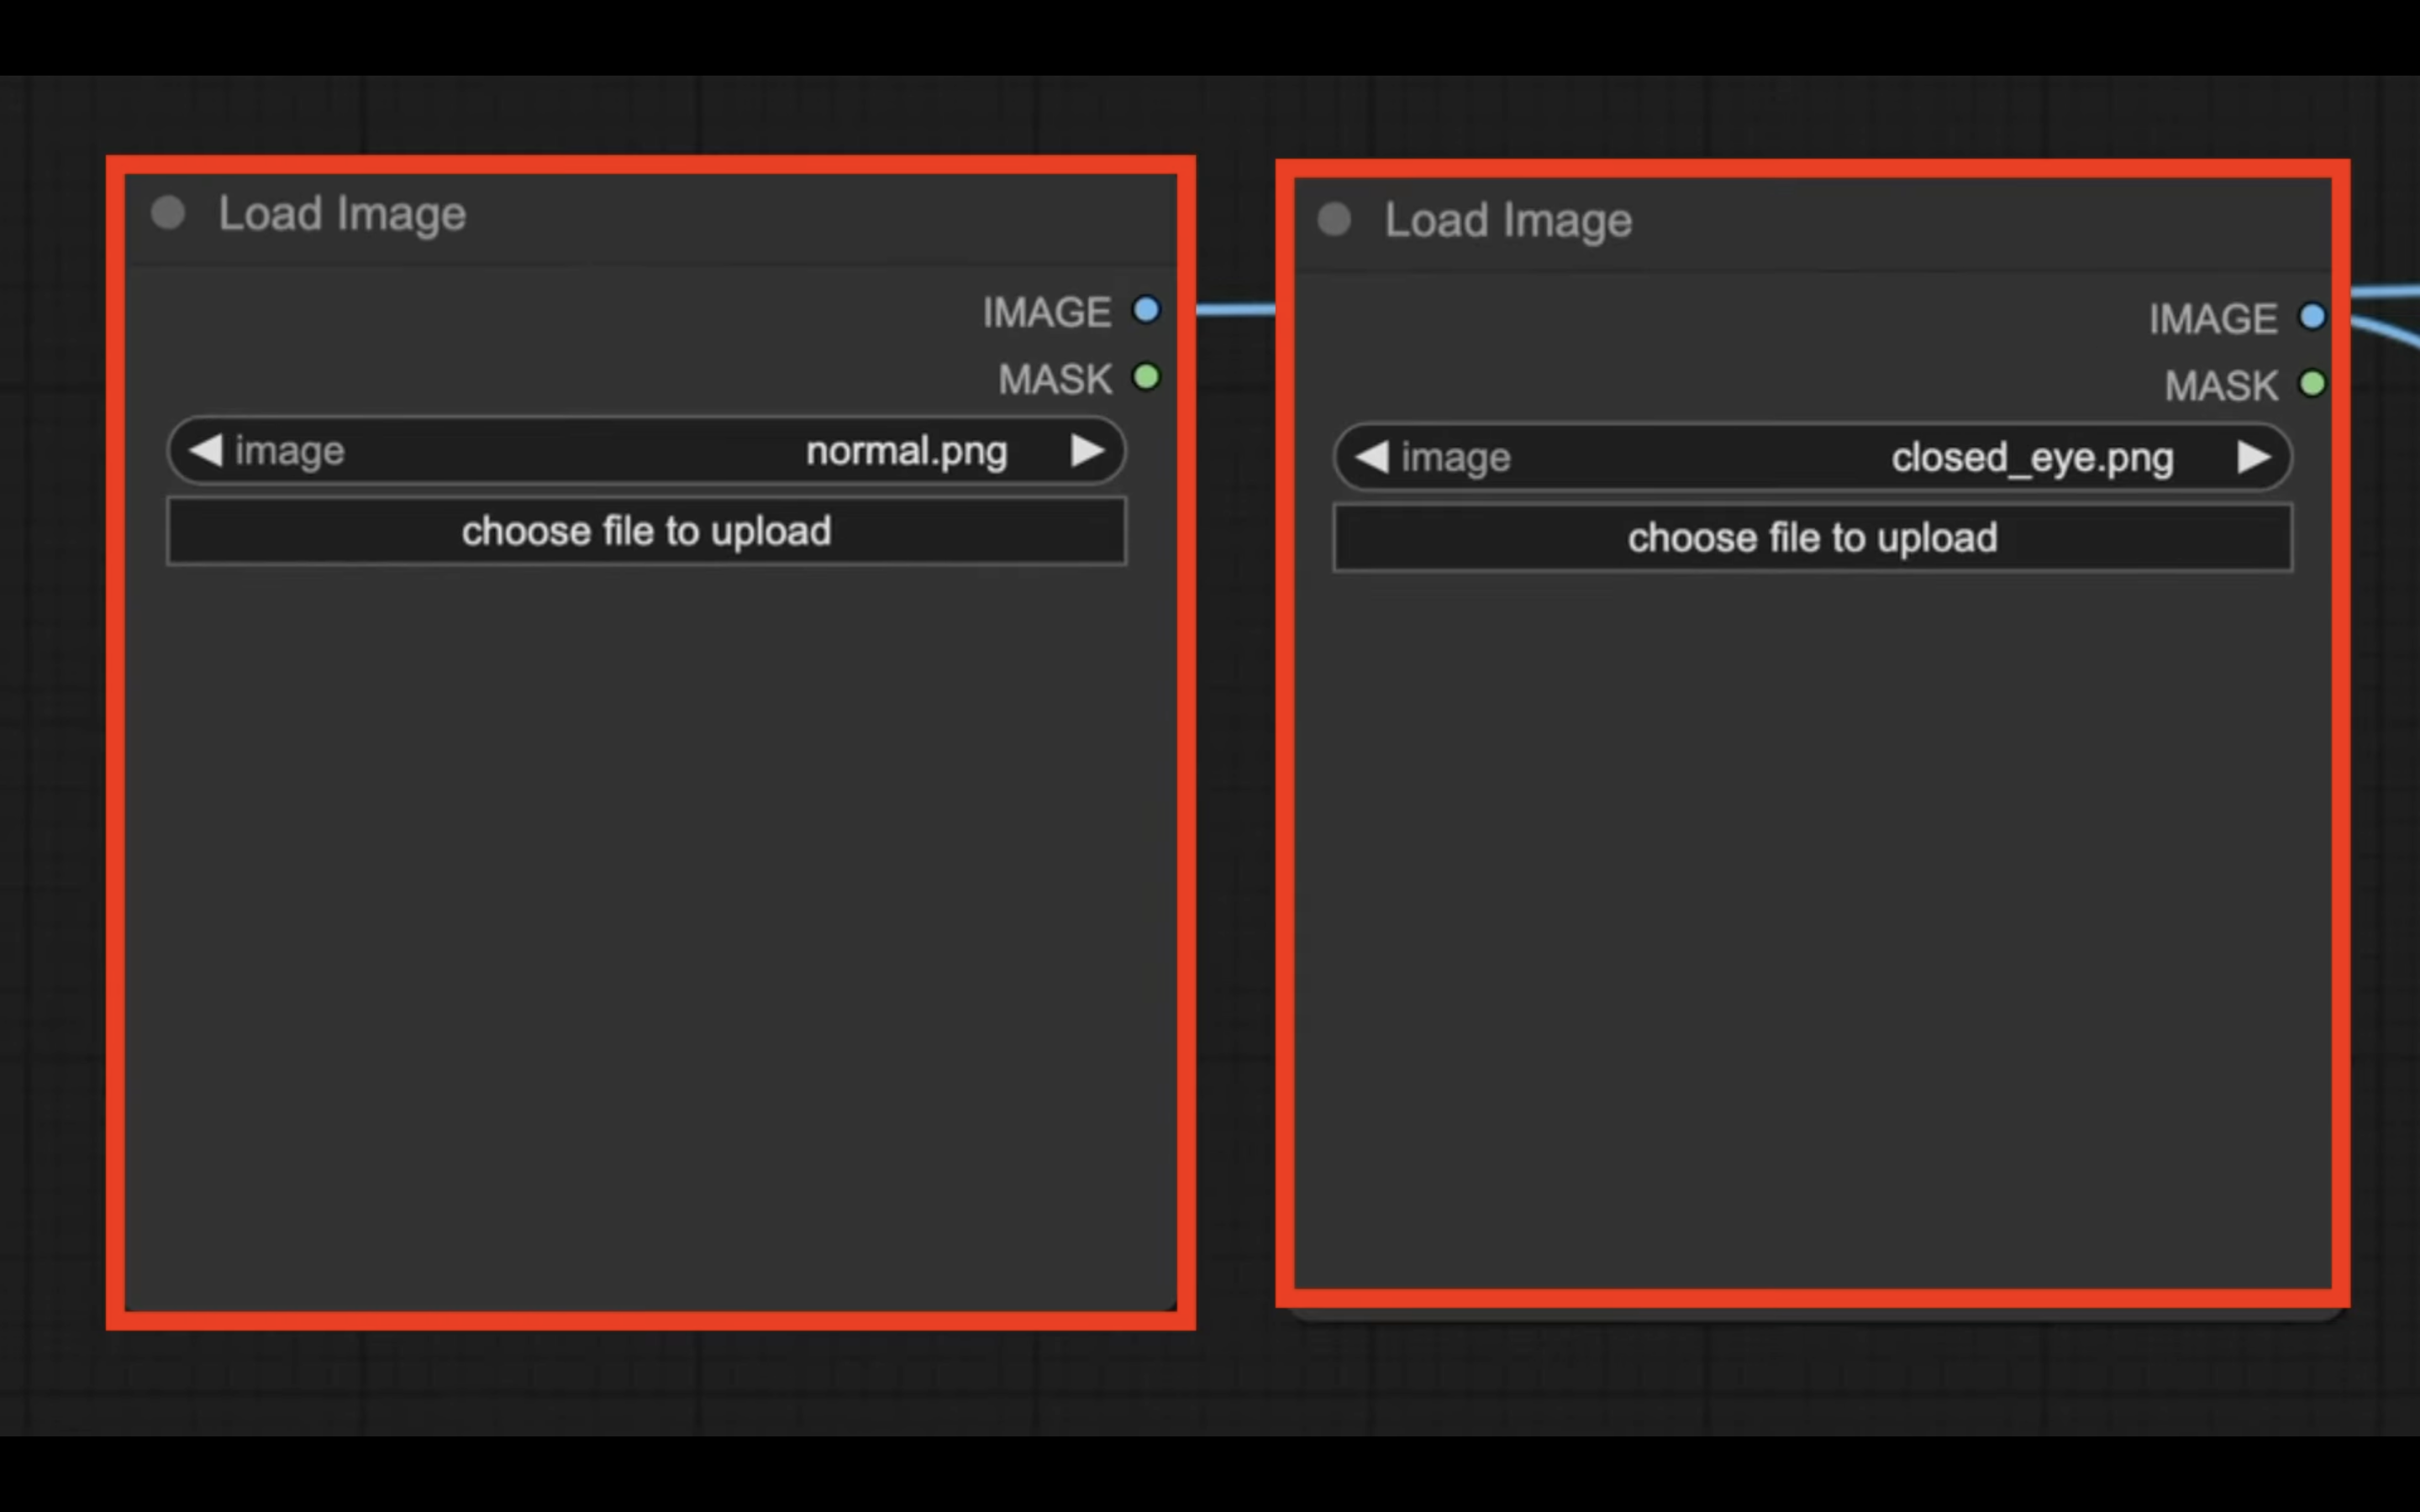
今回はこの2つの画像を使用しています。
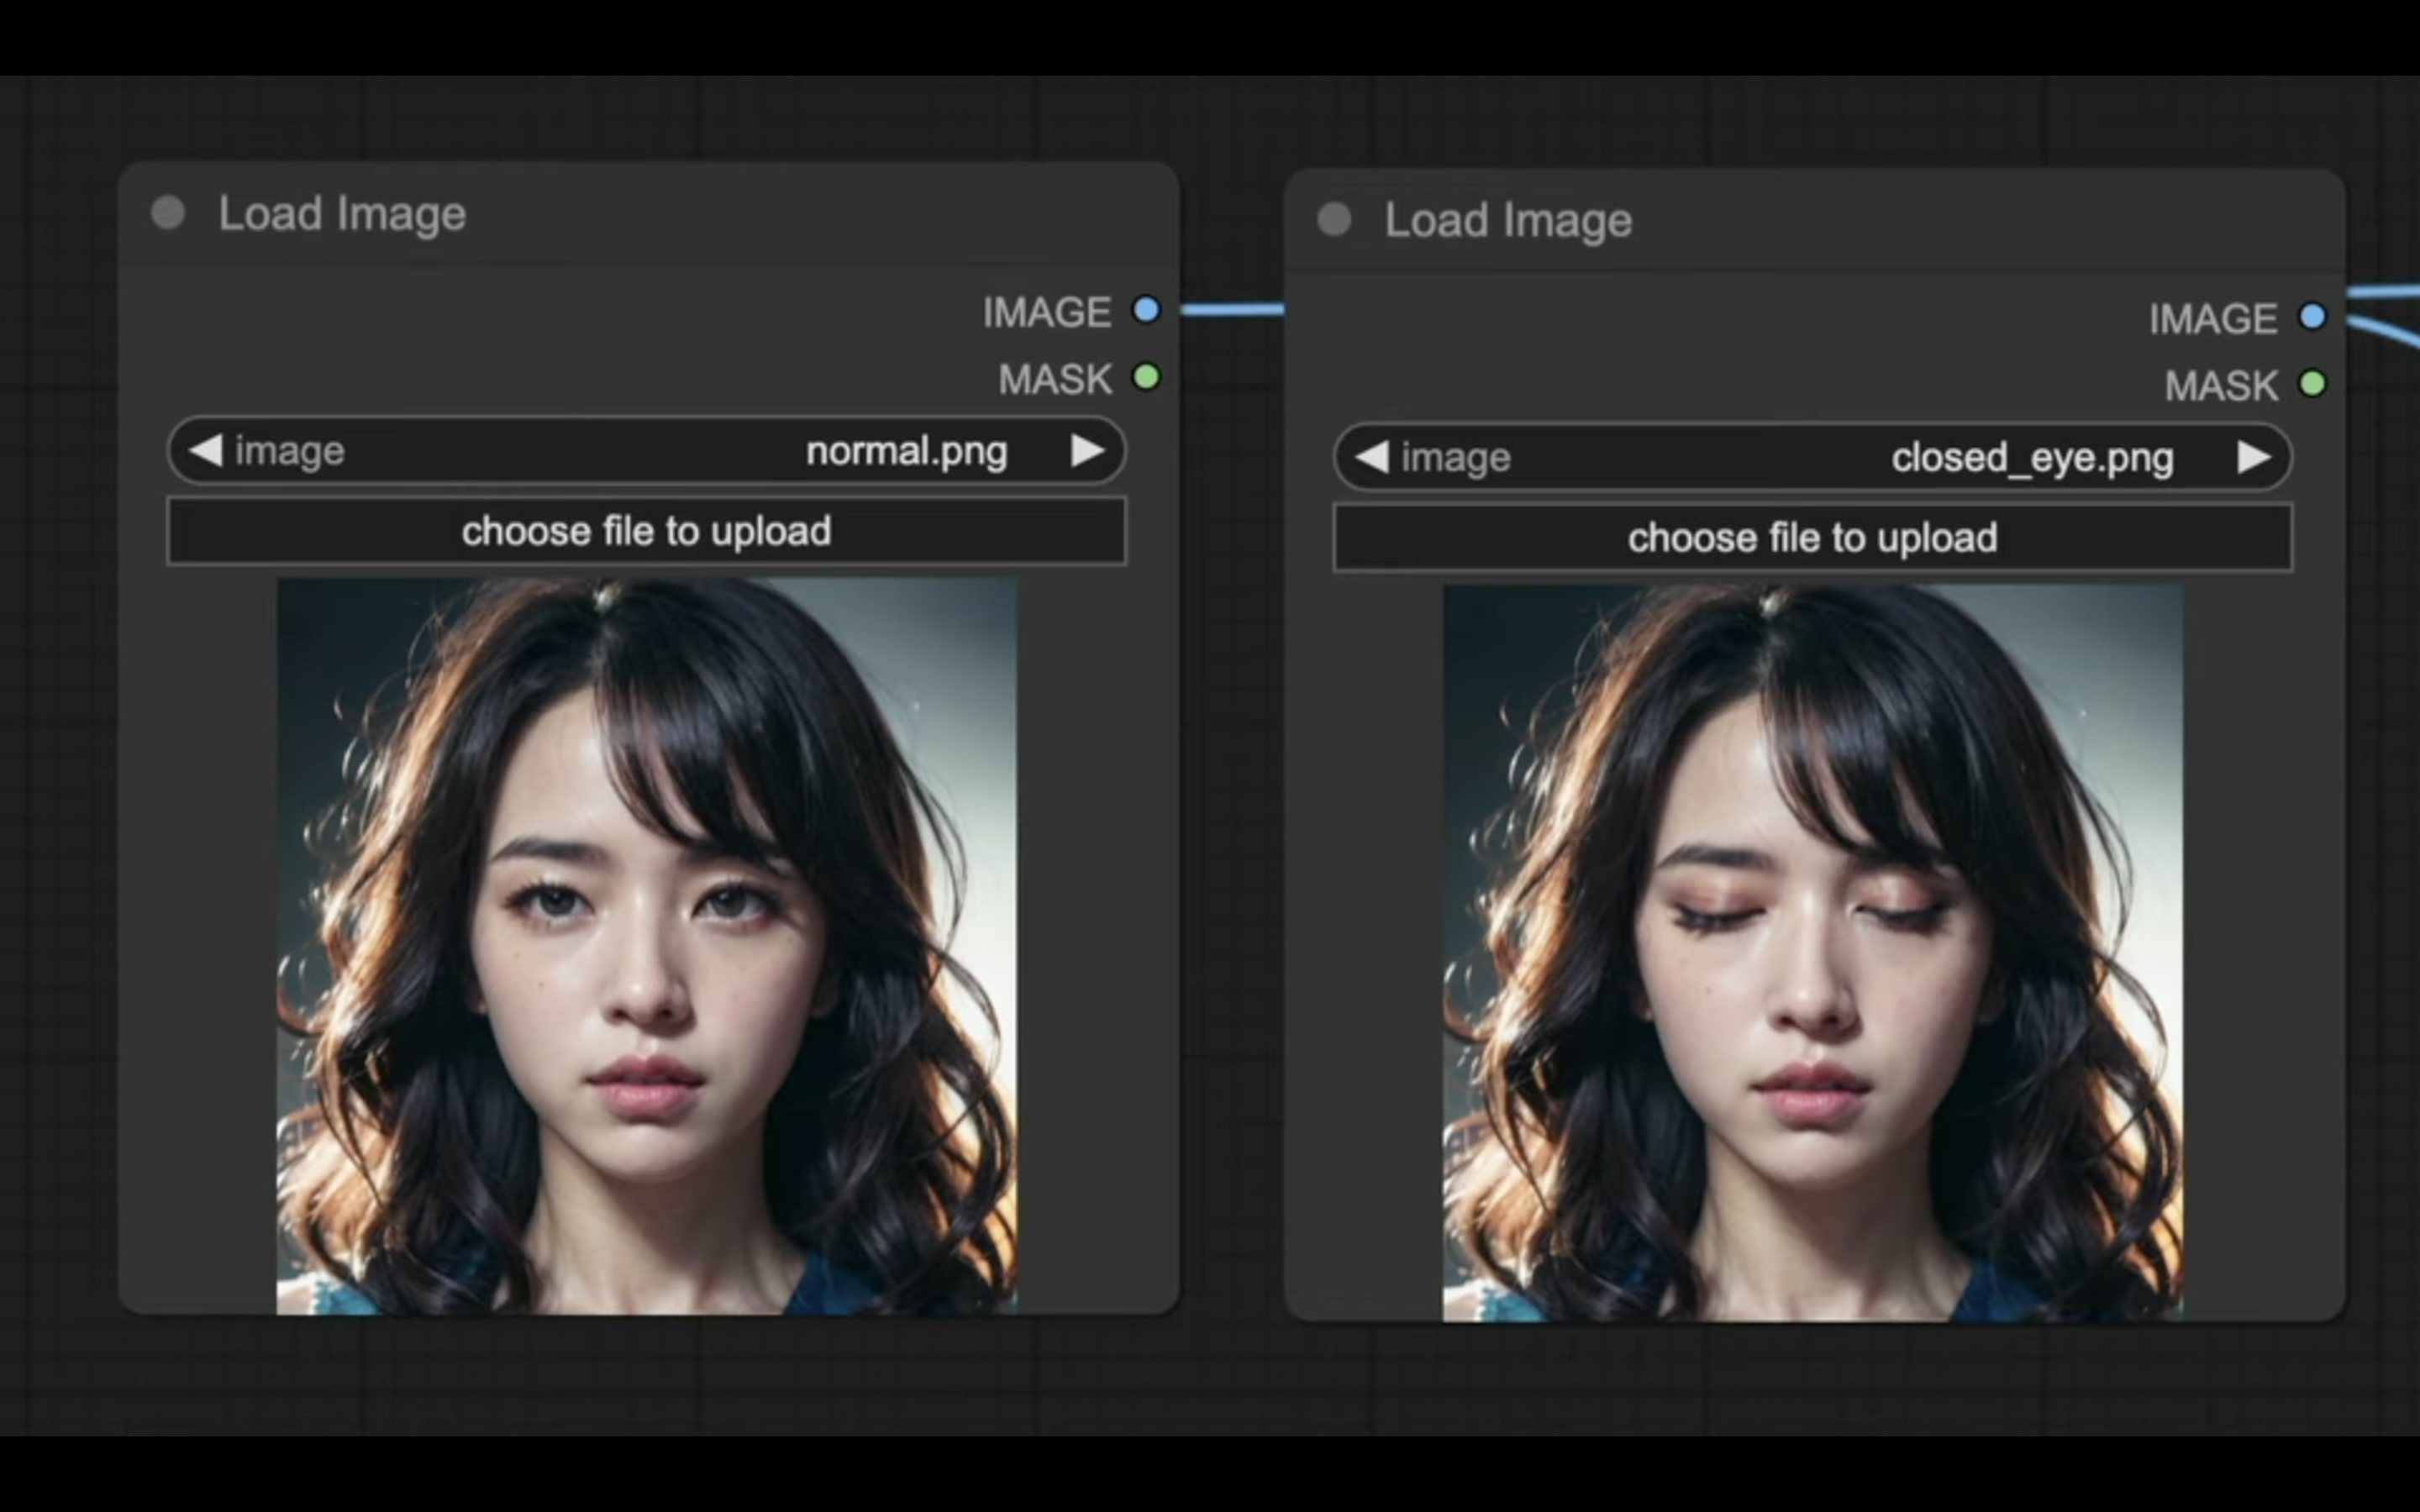
左側の通常の表情から右側の目を閉じている表情に変換させていきたいため、このように設定しています。
画像ファイルを設定したら、次に画面の右上に移動します。
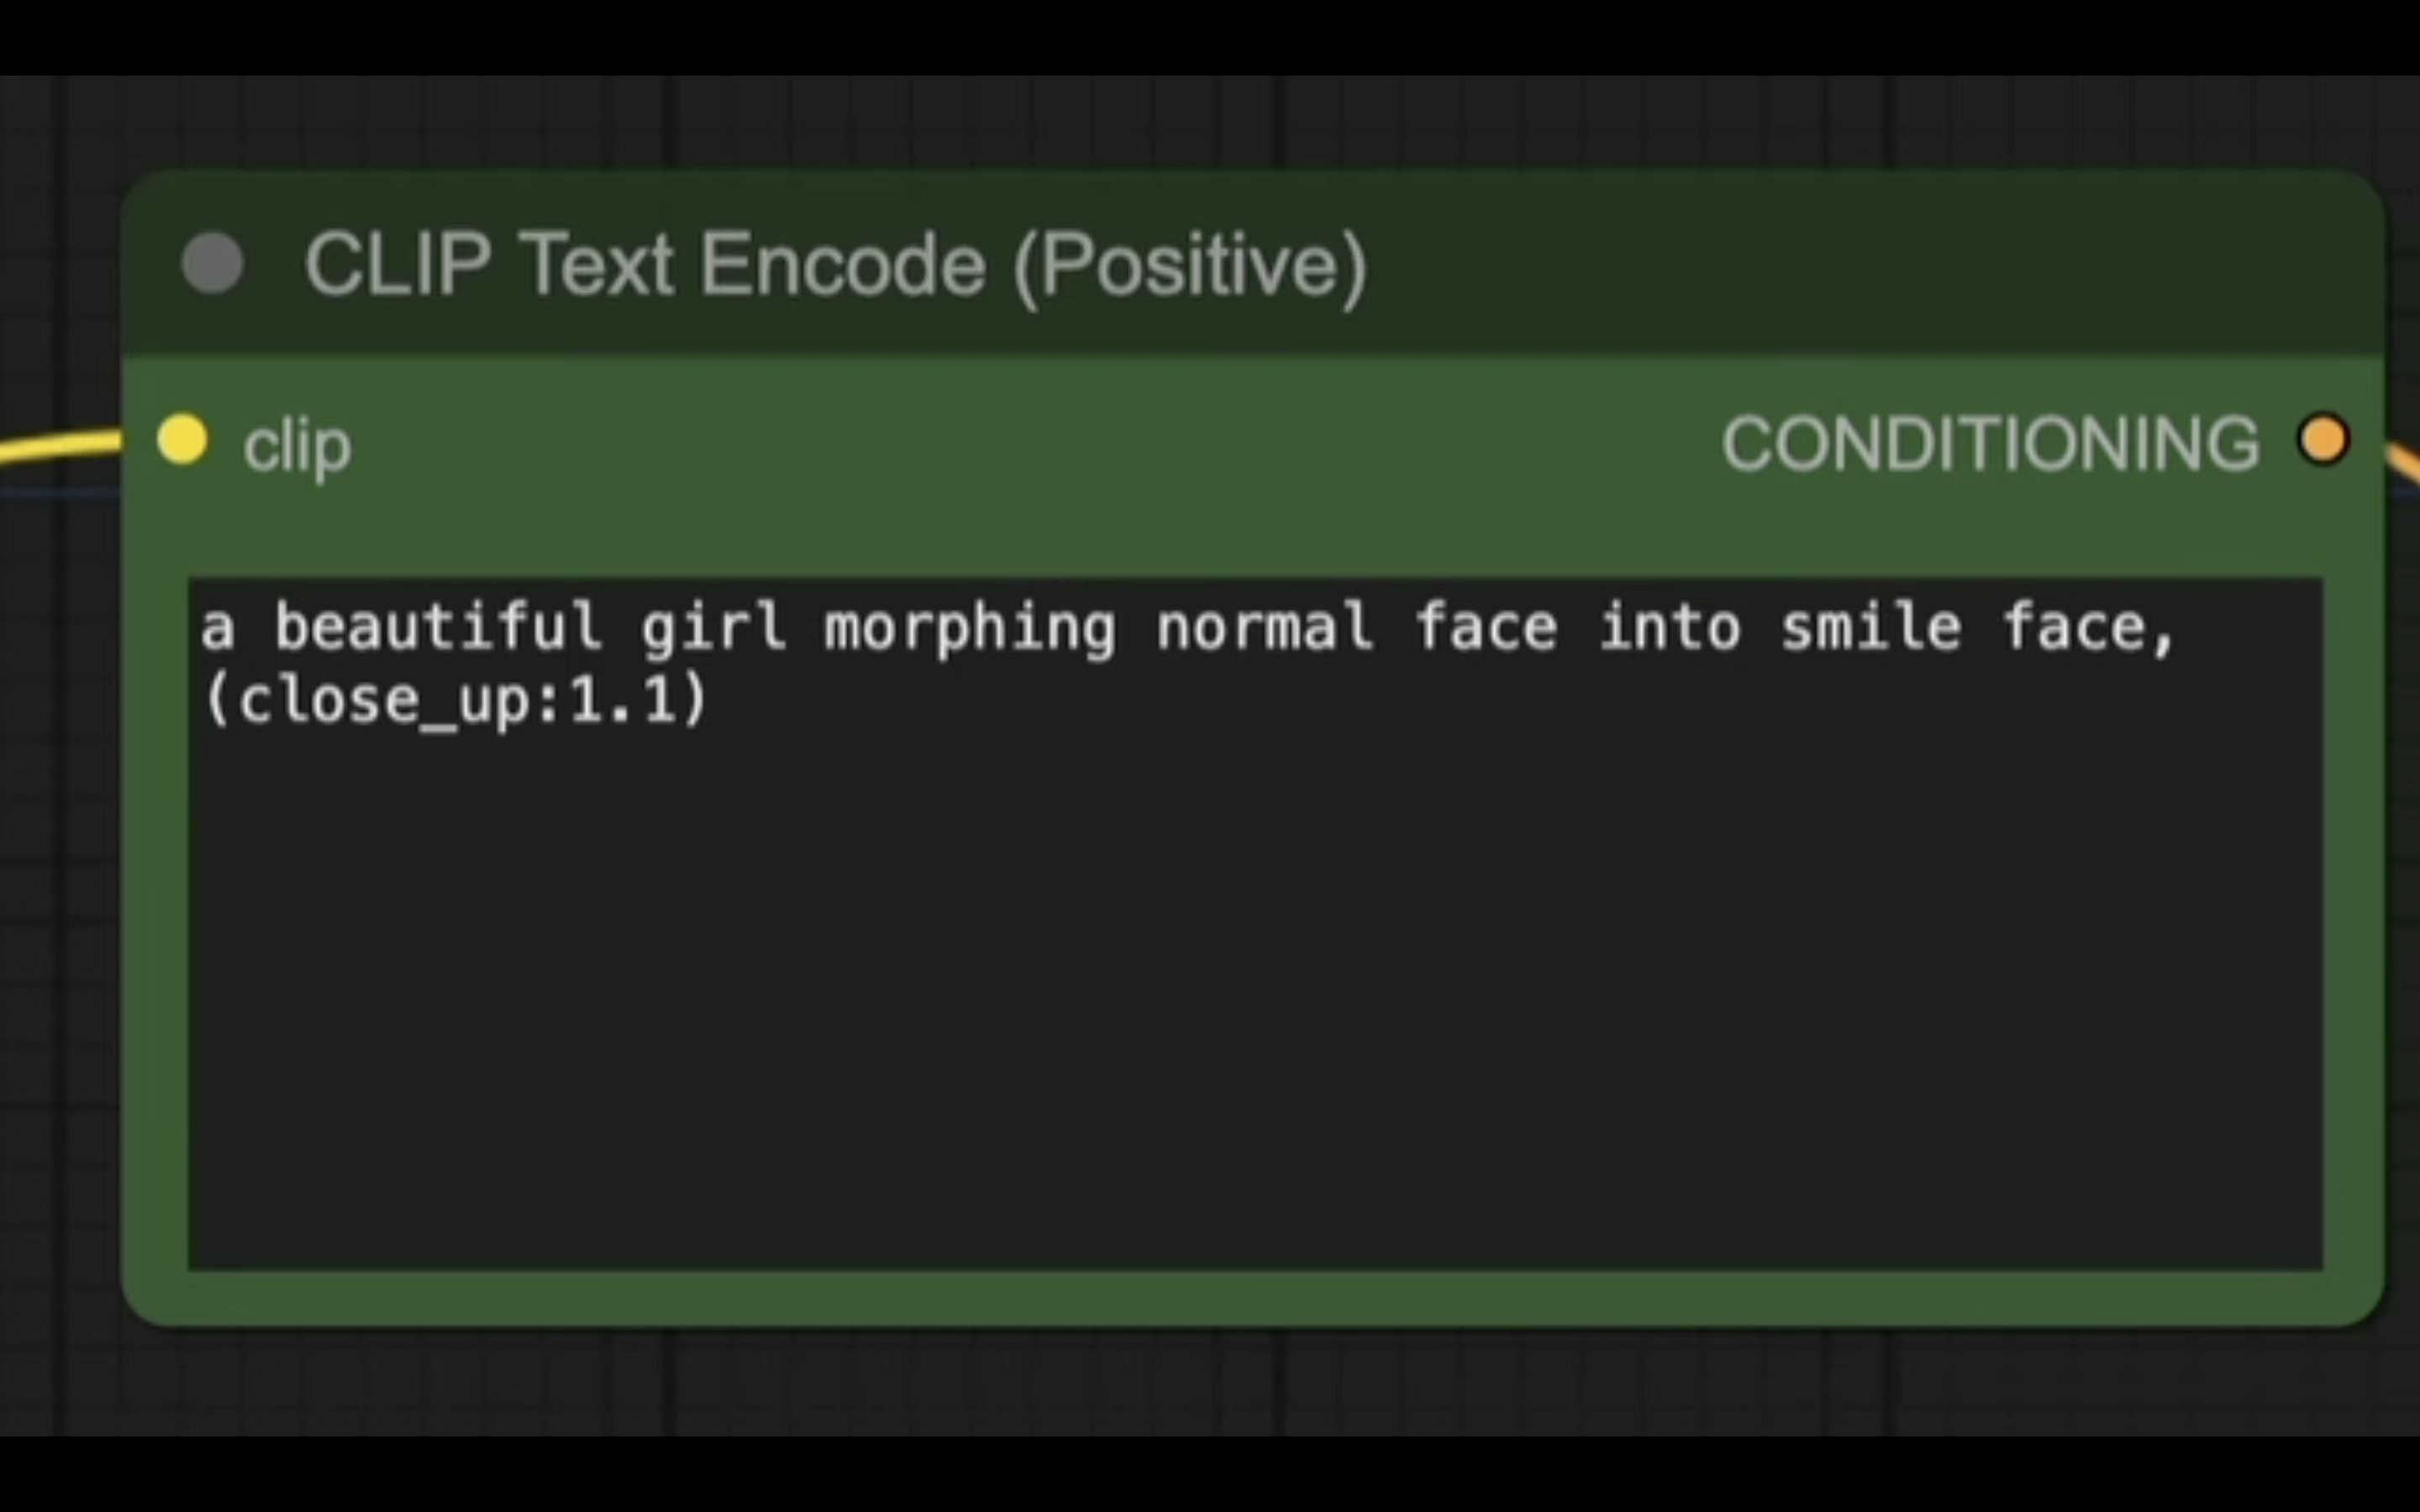
「CLIP Text Encode (Positive)」と書かれているタイトルの中にあるテキストボックスで、生成する動画の内容を指示しています。
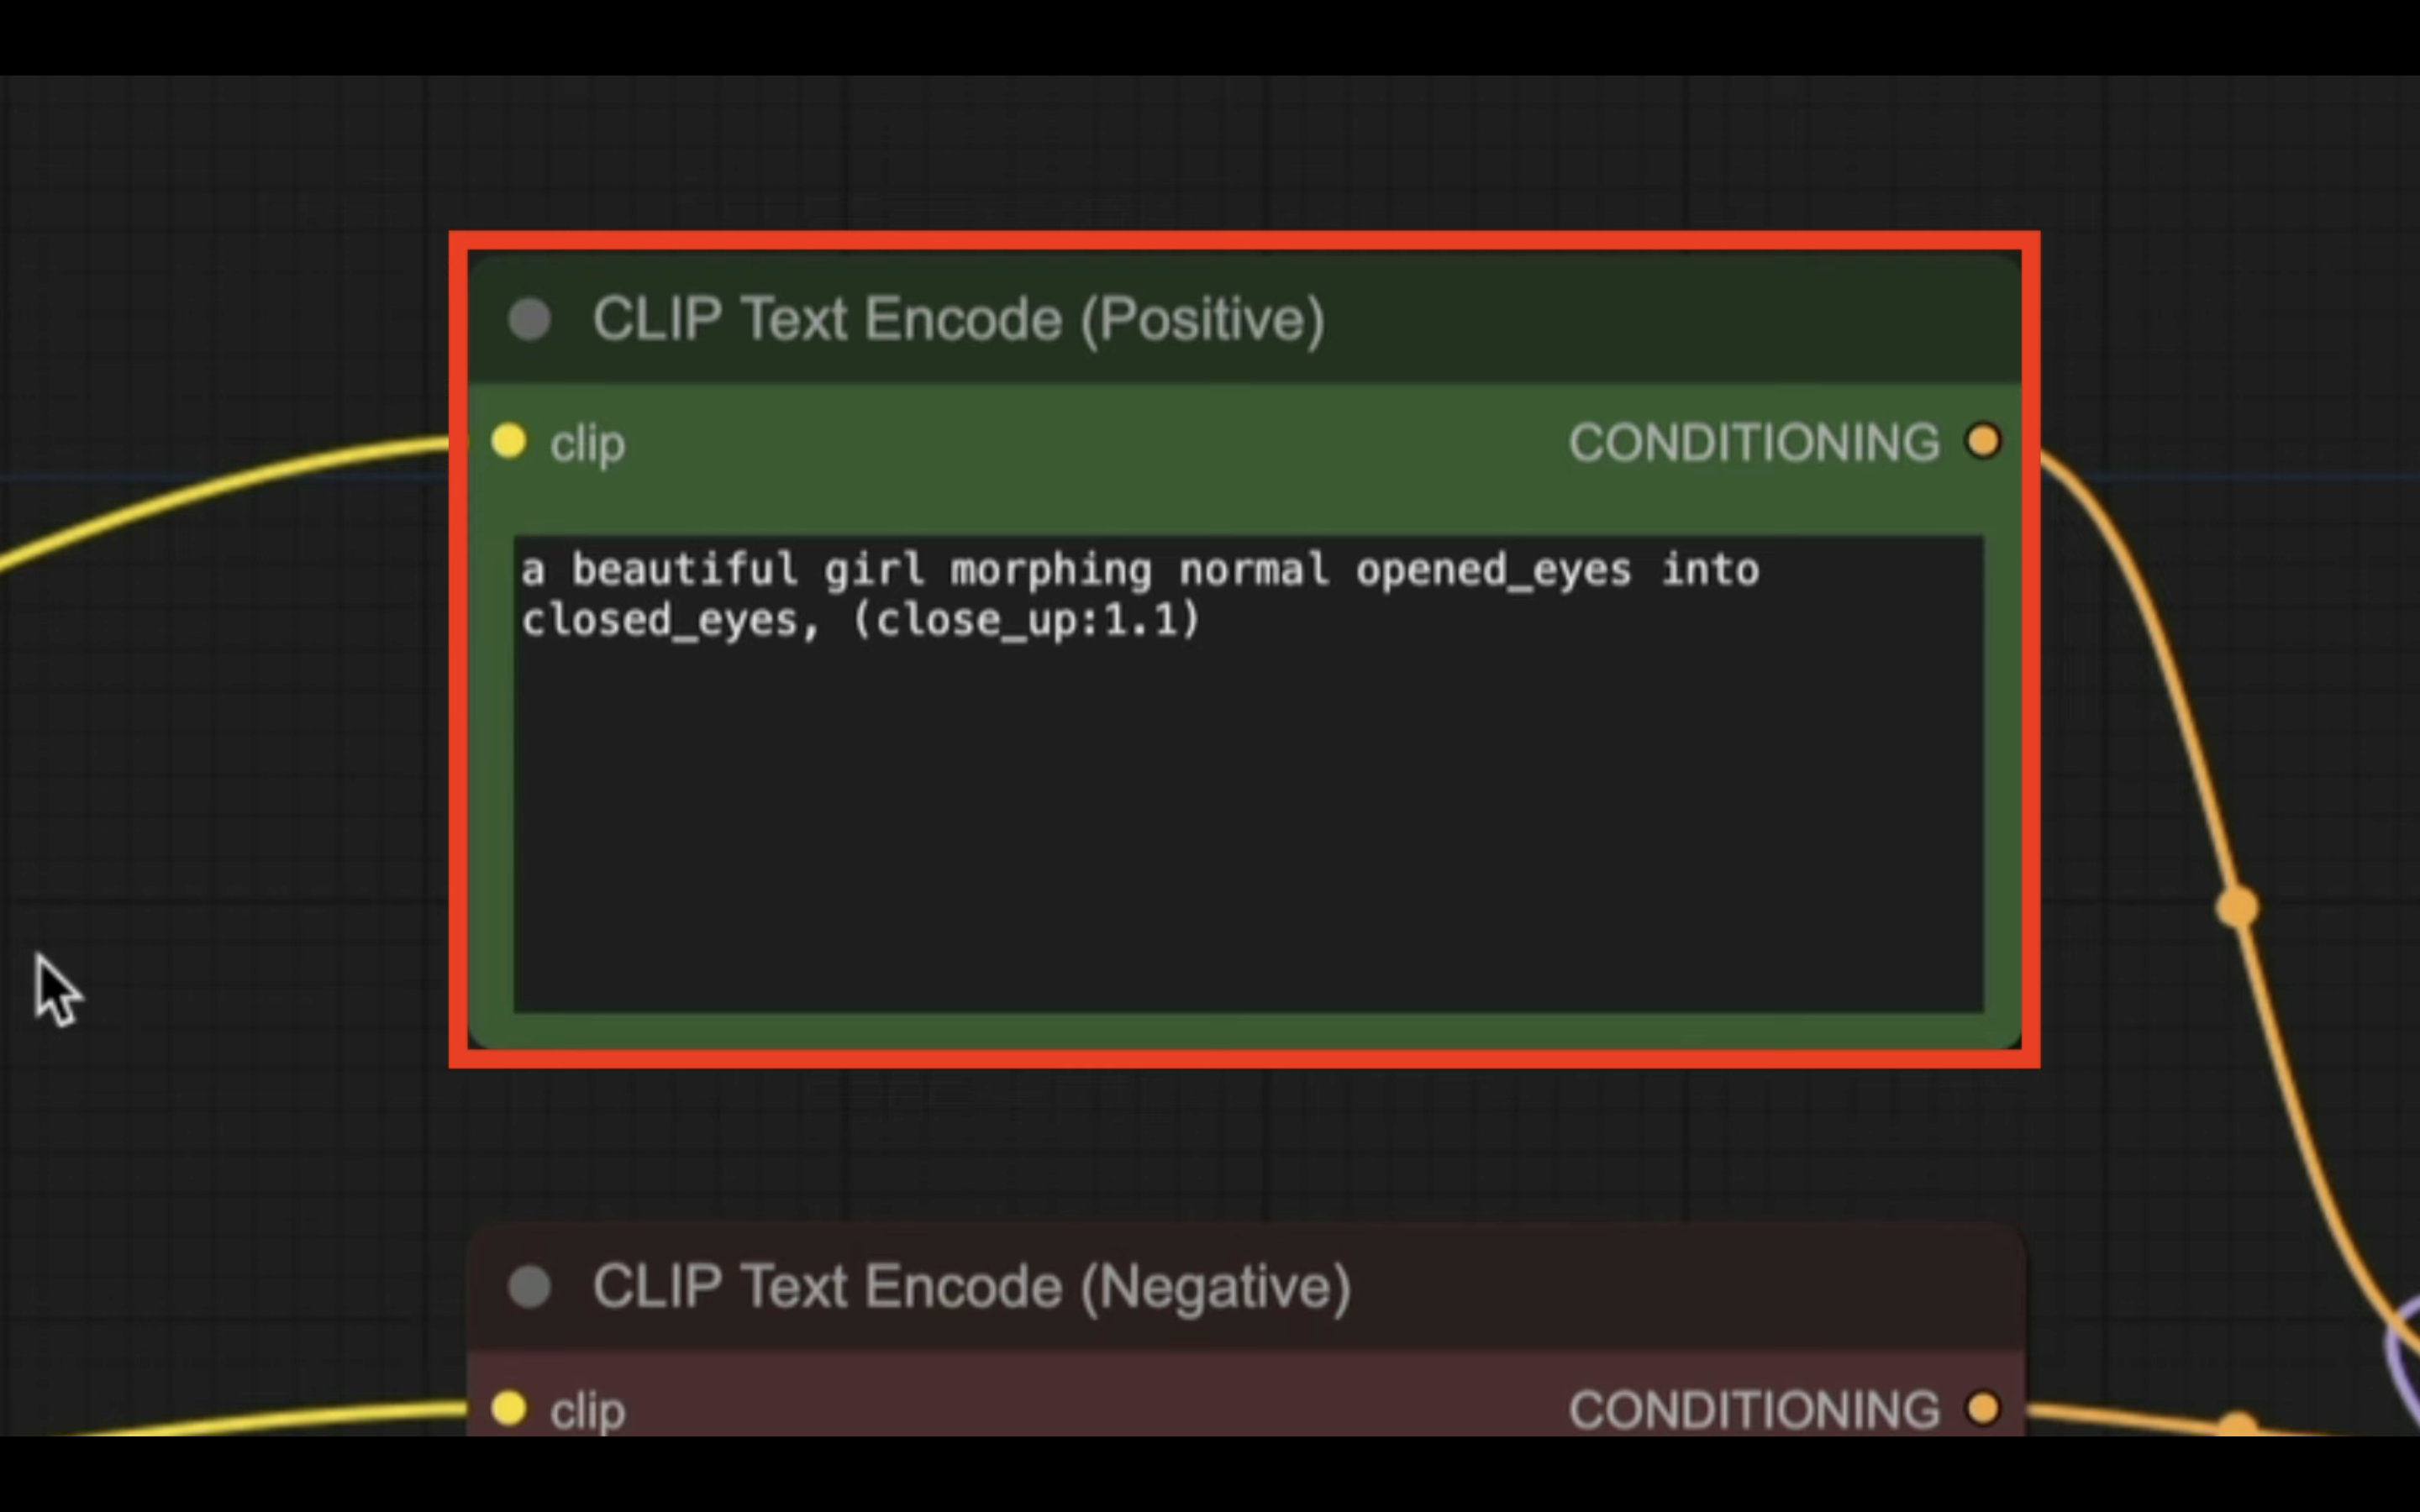
この指示のことをプロンプトと言います。
プロンプトは英語で記述します。
今回は「目を開けている状態から閉じた状態に変更していってください」というような意味の指示にしています。
これで、ComfyUIで動画を生成するための準備が整いました。
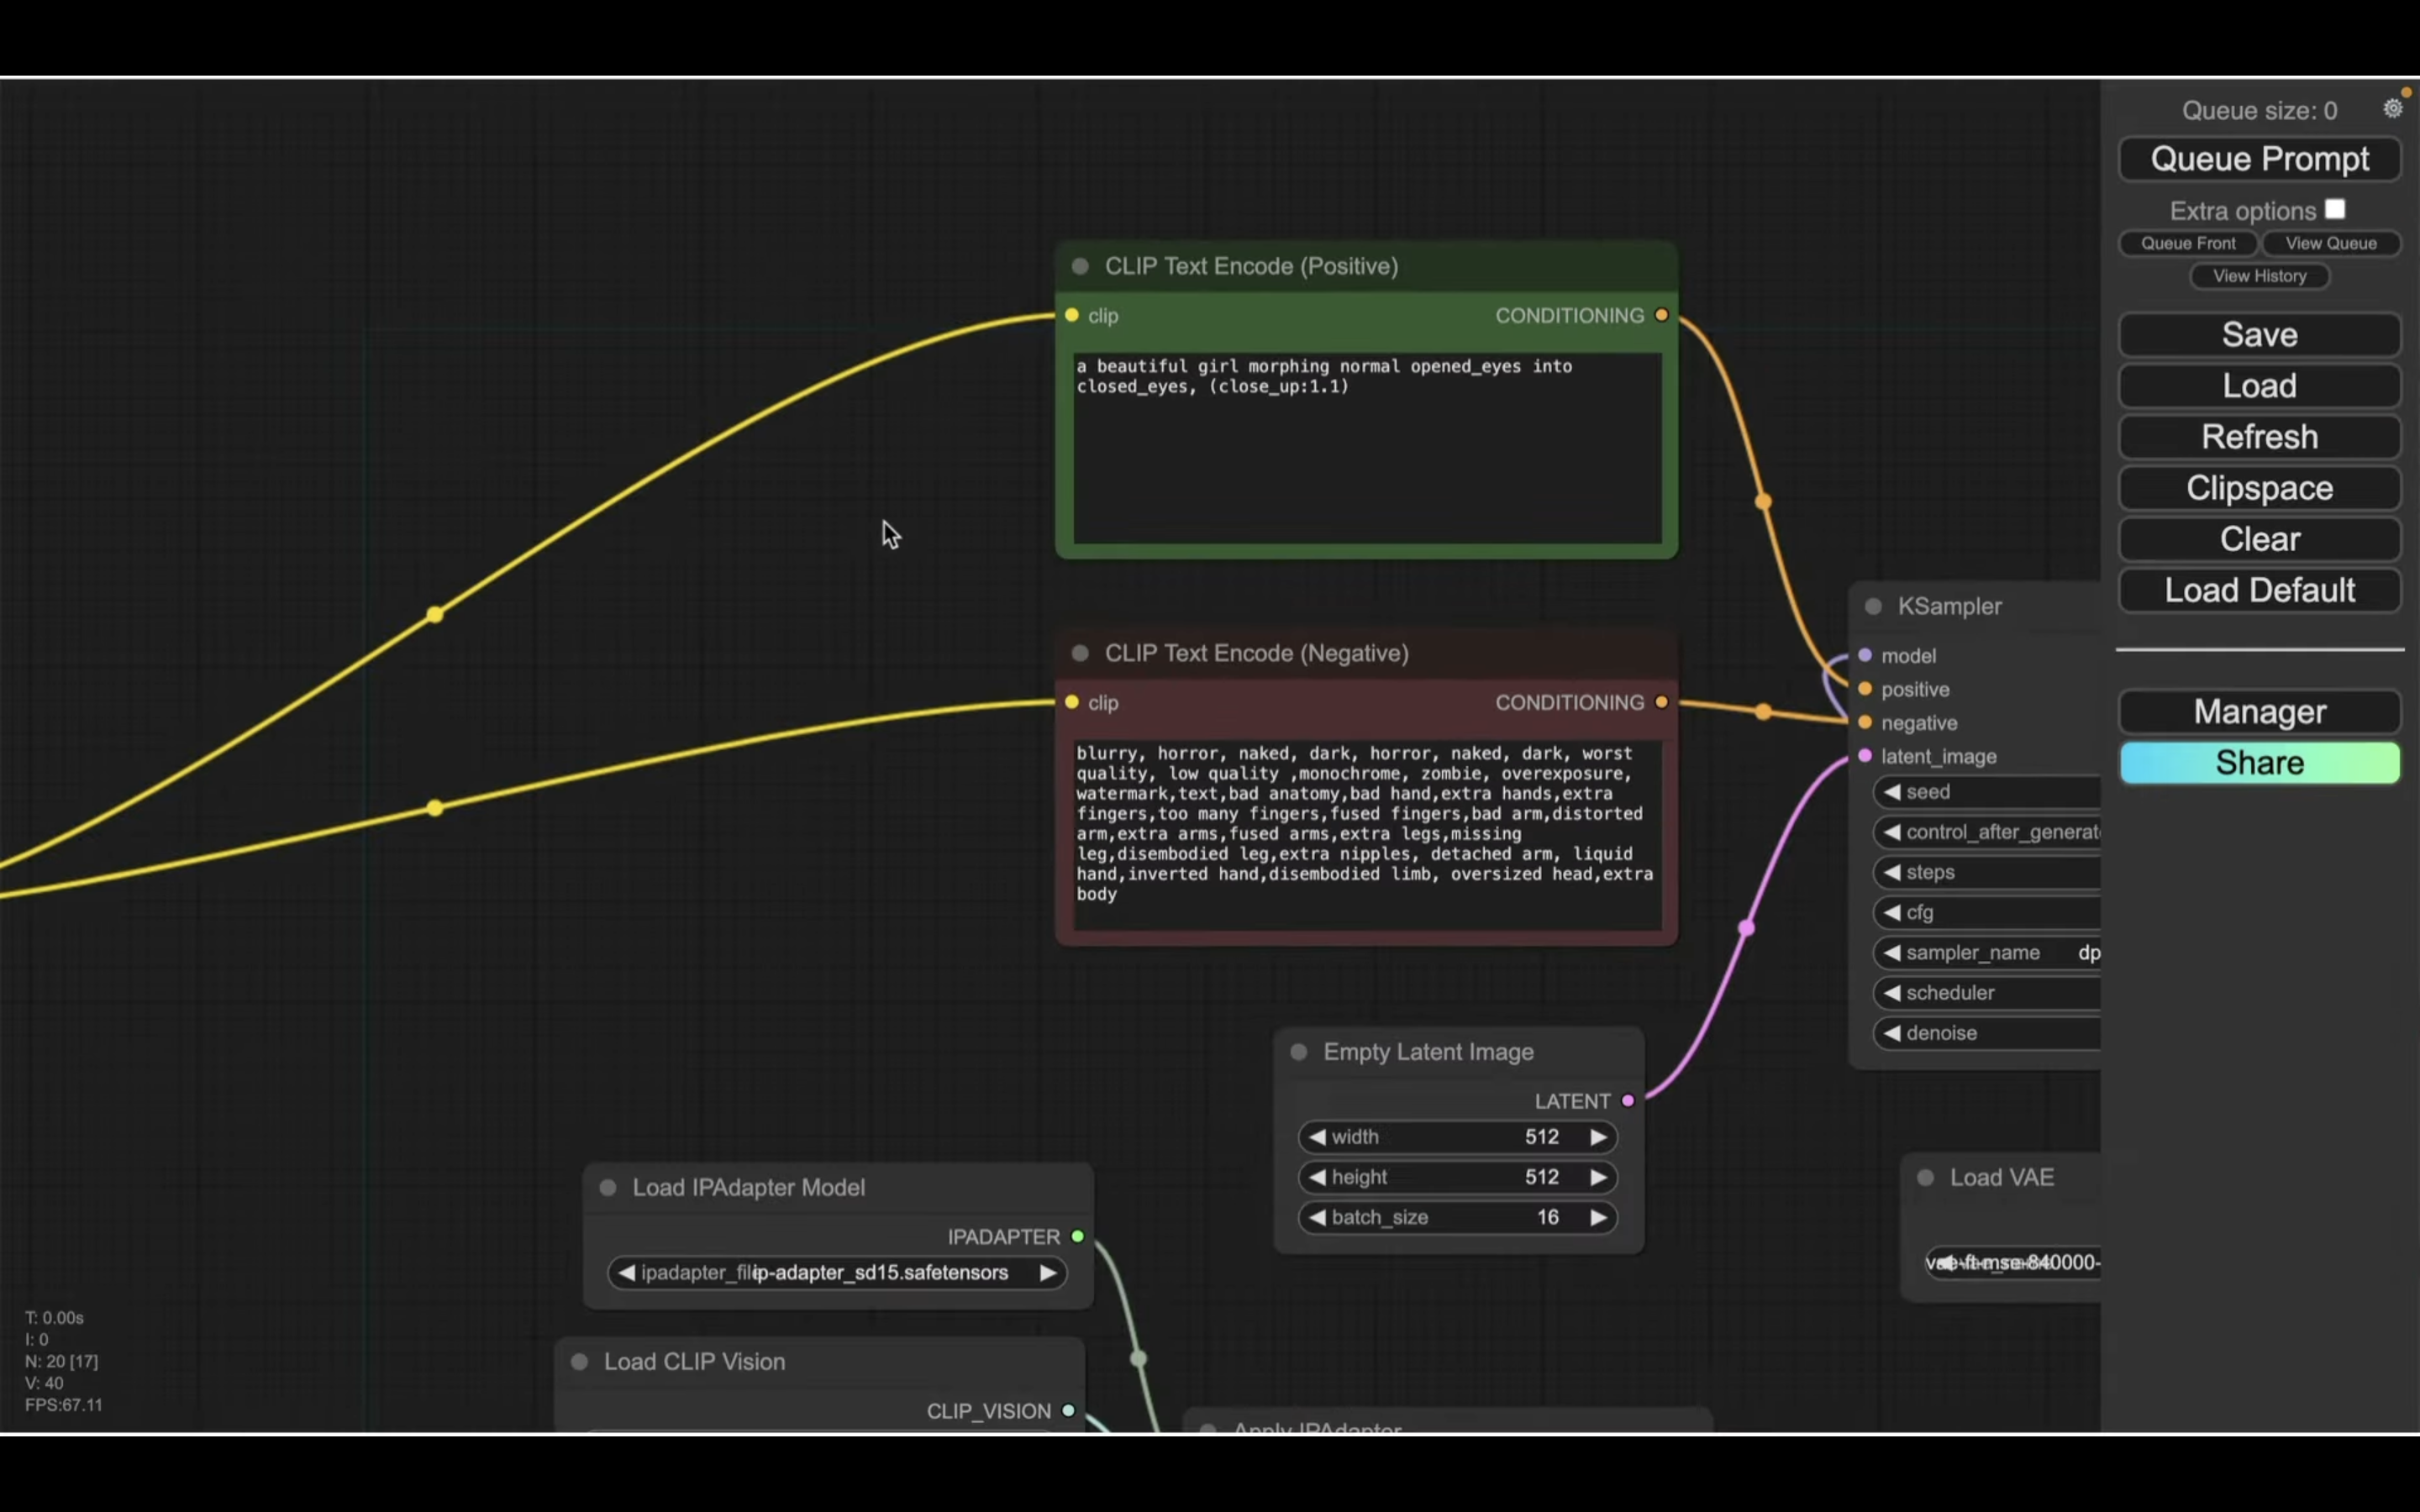
それでは早速、動画を生成していきましょう。
「Queue Prompt」と書かれているボタンをクリックします。
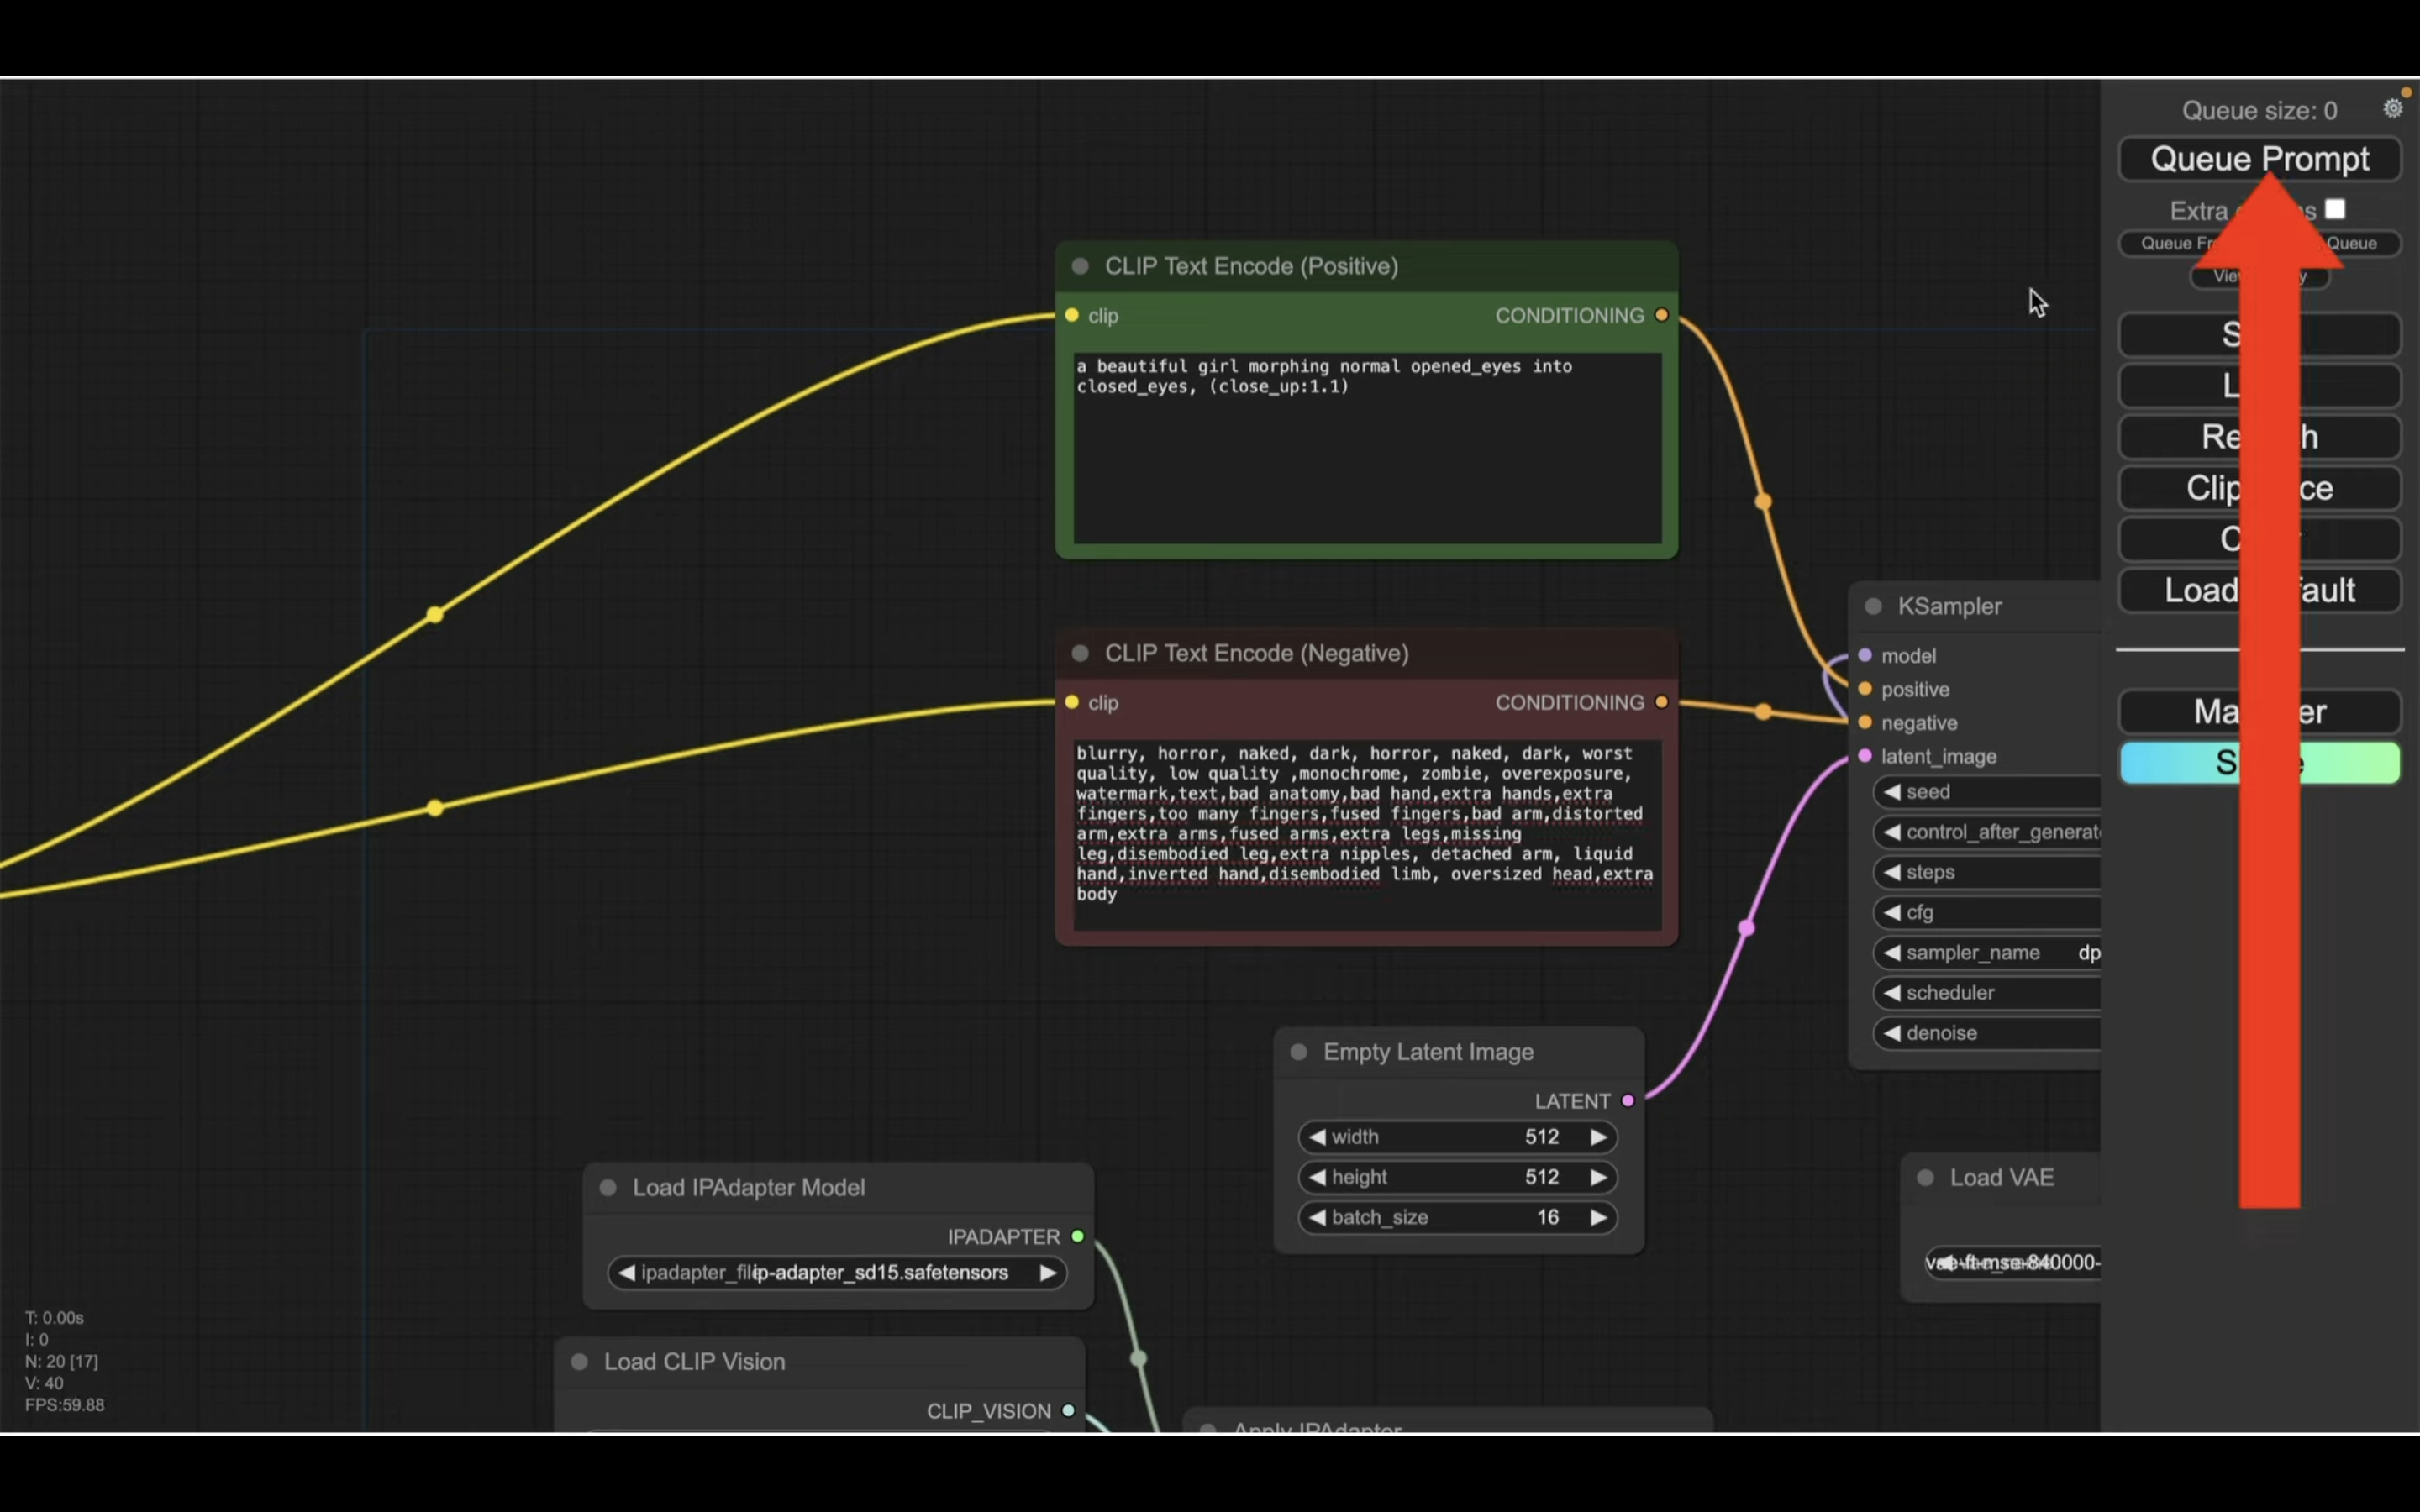
そうすると、動画の生成が開始されます。
この処理には数分程度かかります。
生成処理の状況はブロックの表示で確認できます。
緑色で囲まれているブロックが現在実行されている処理です。
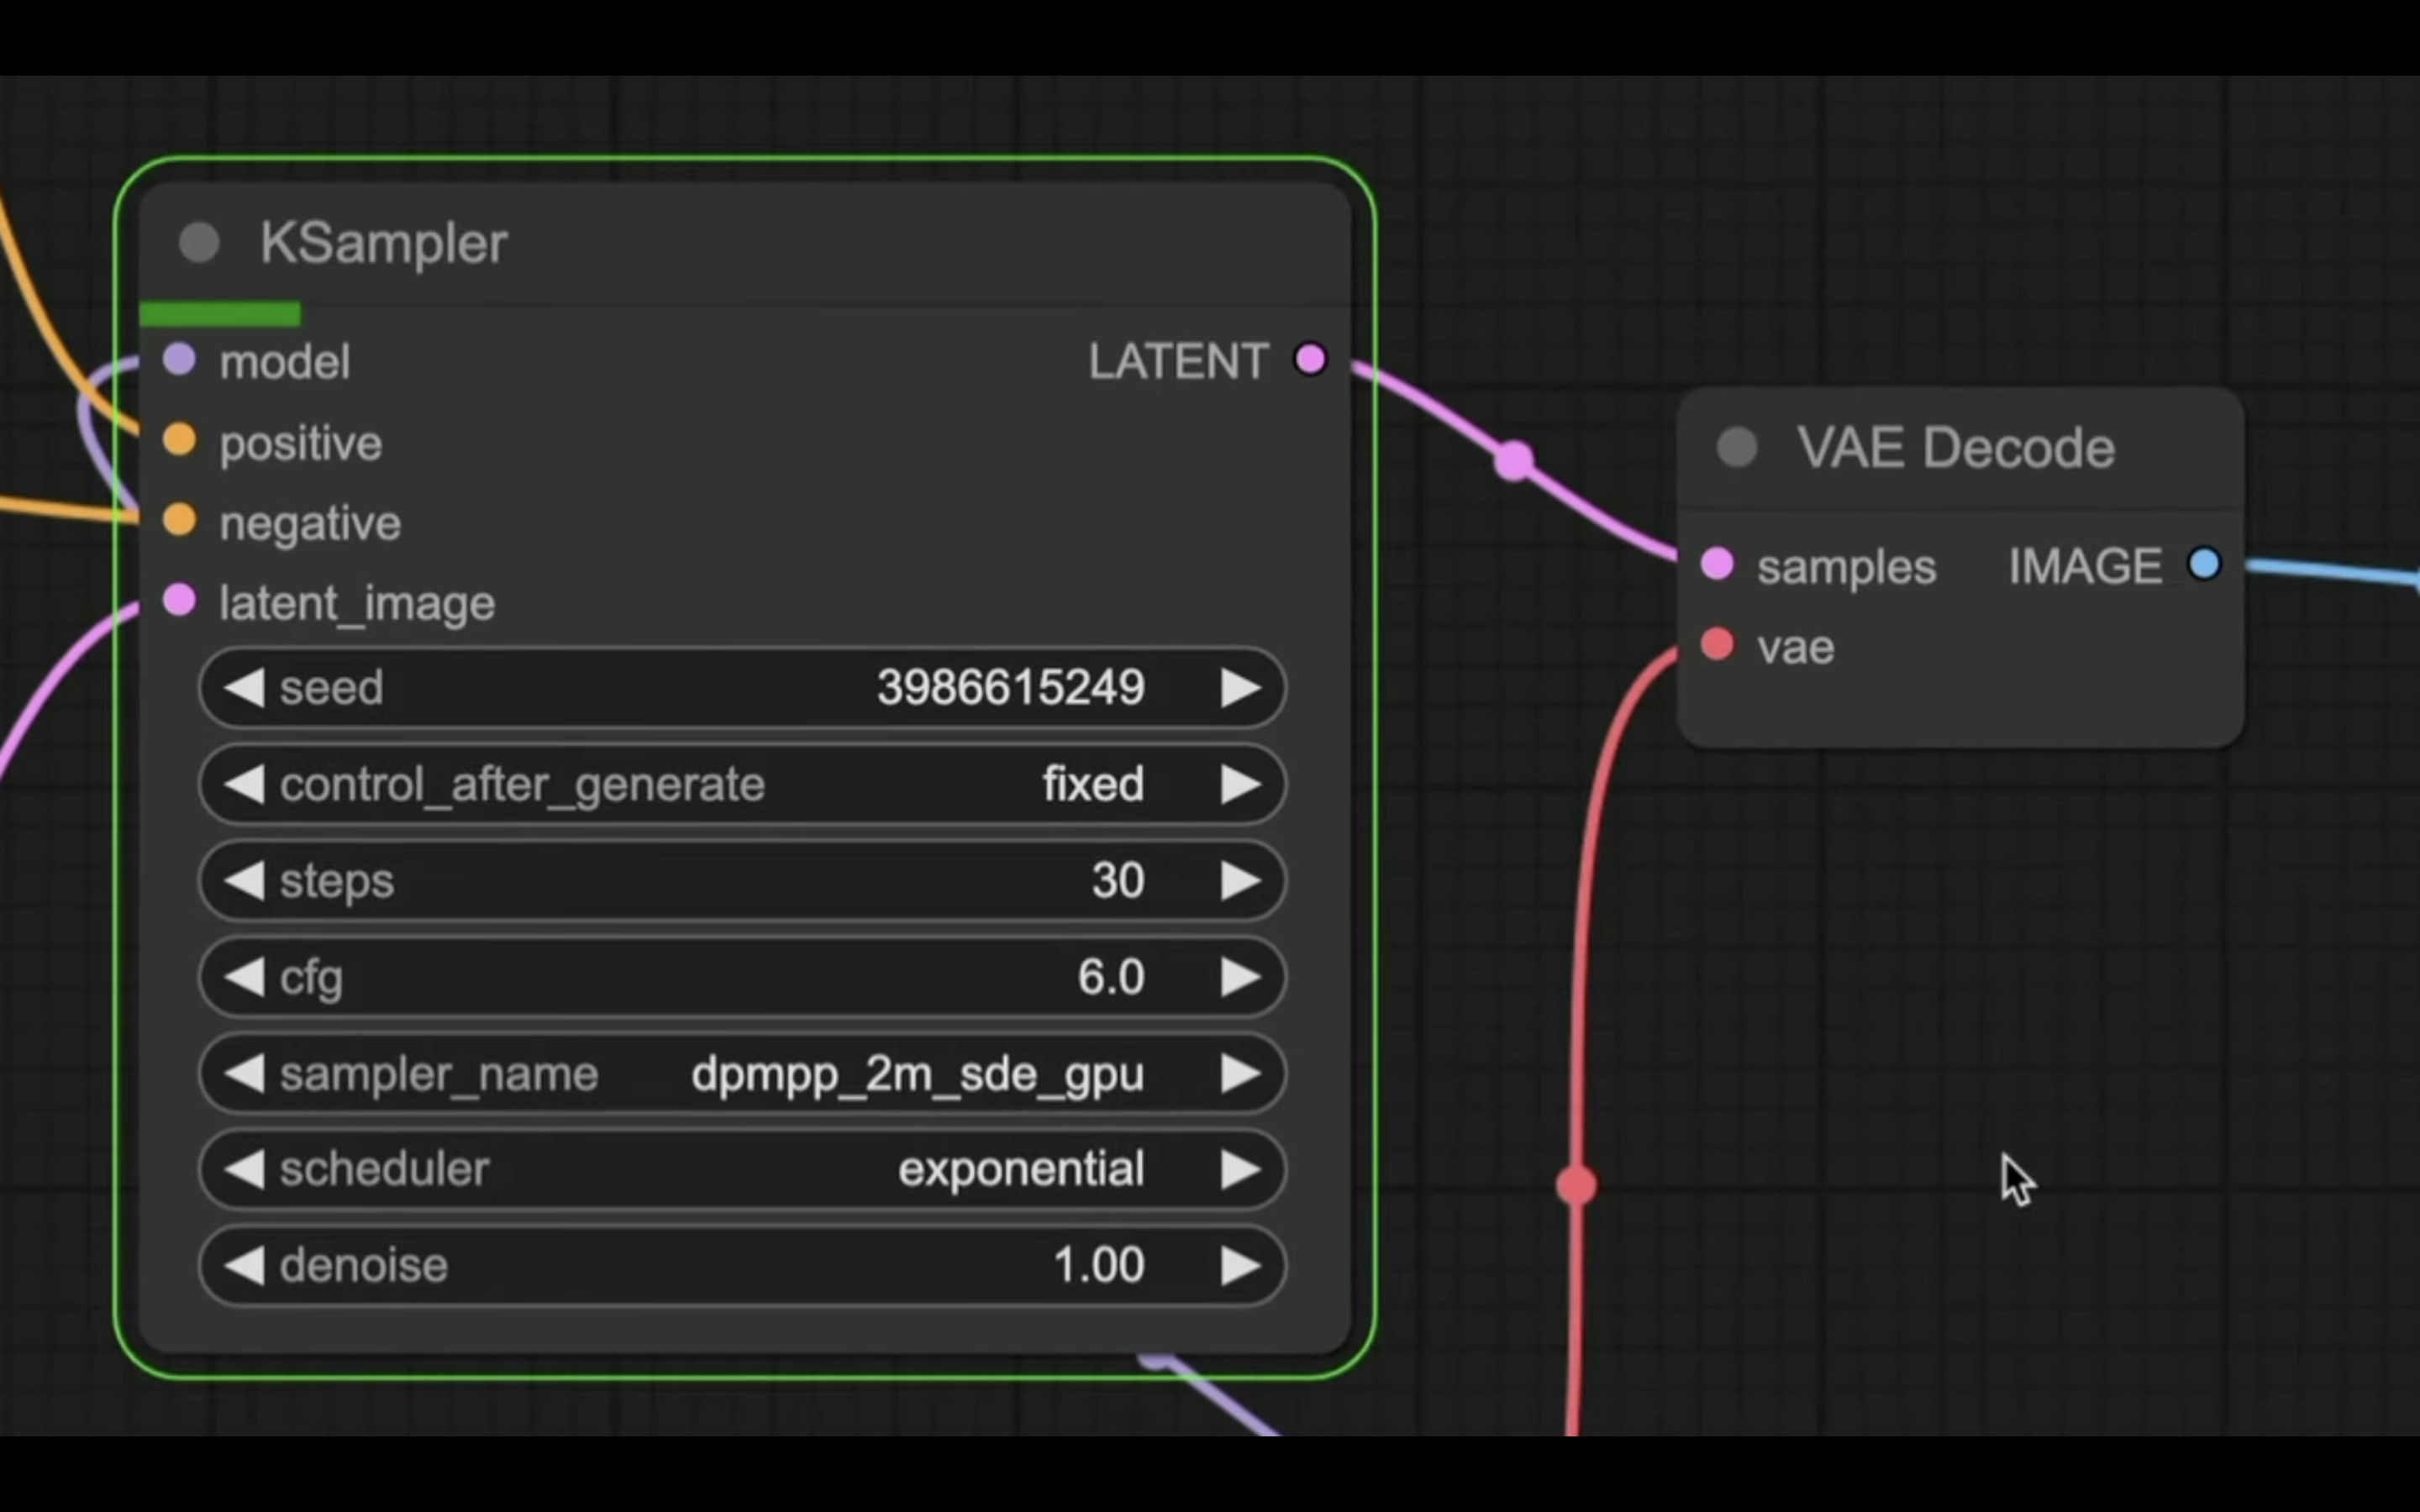
処理が完了すると、囲んでいる緑色の表示が移動します。
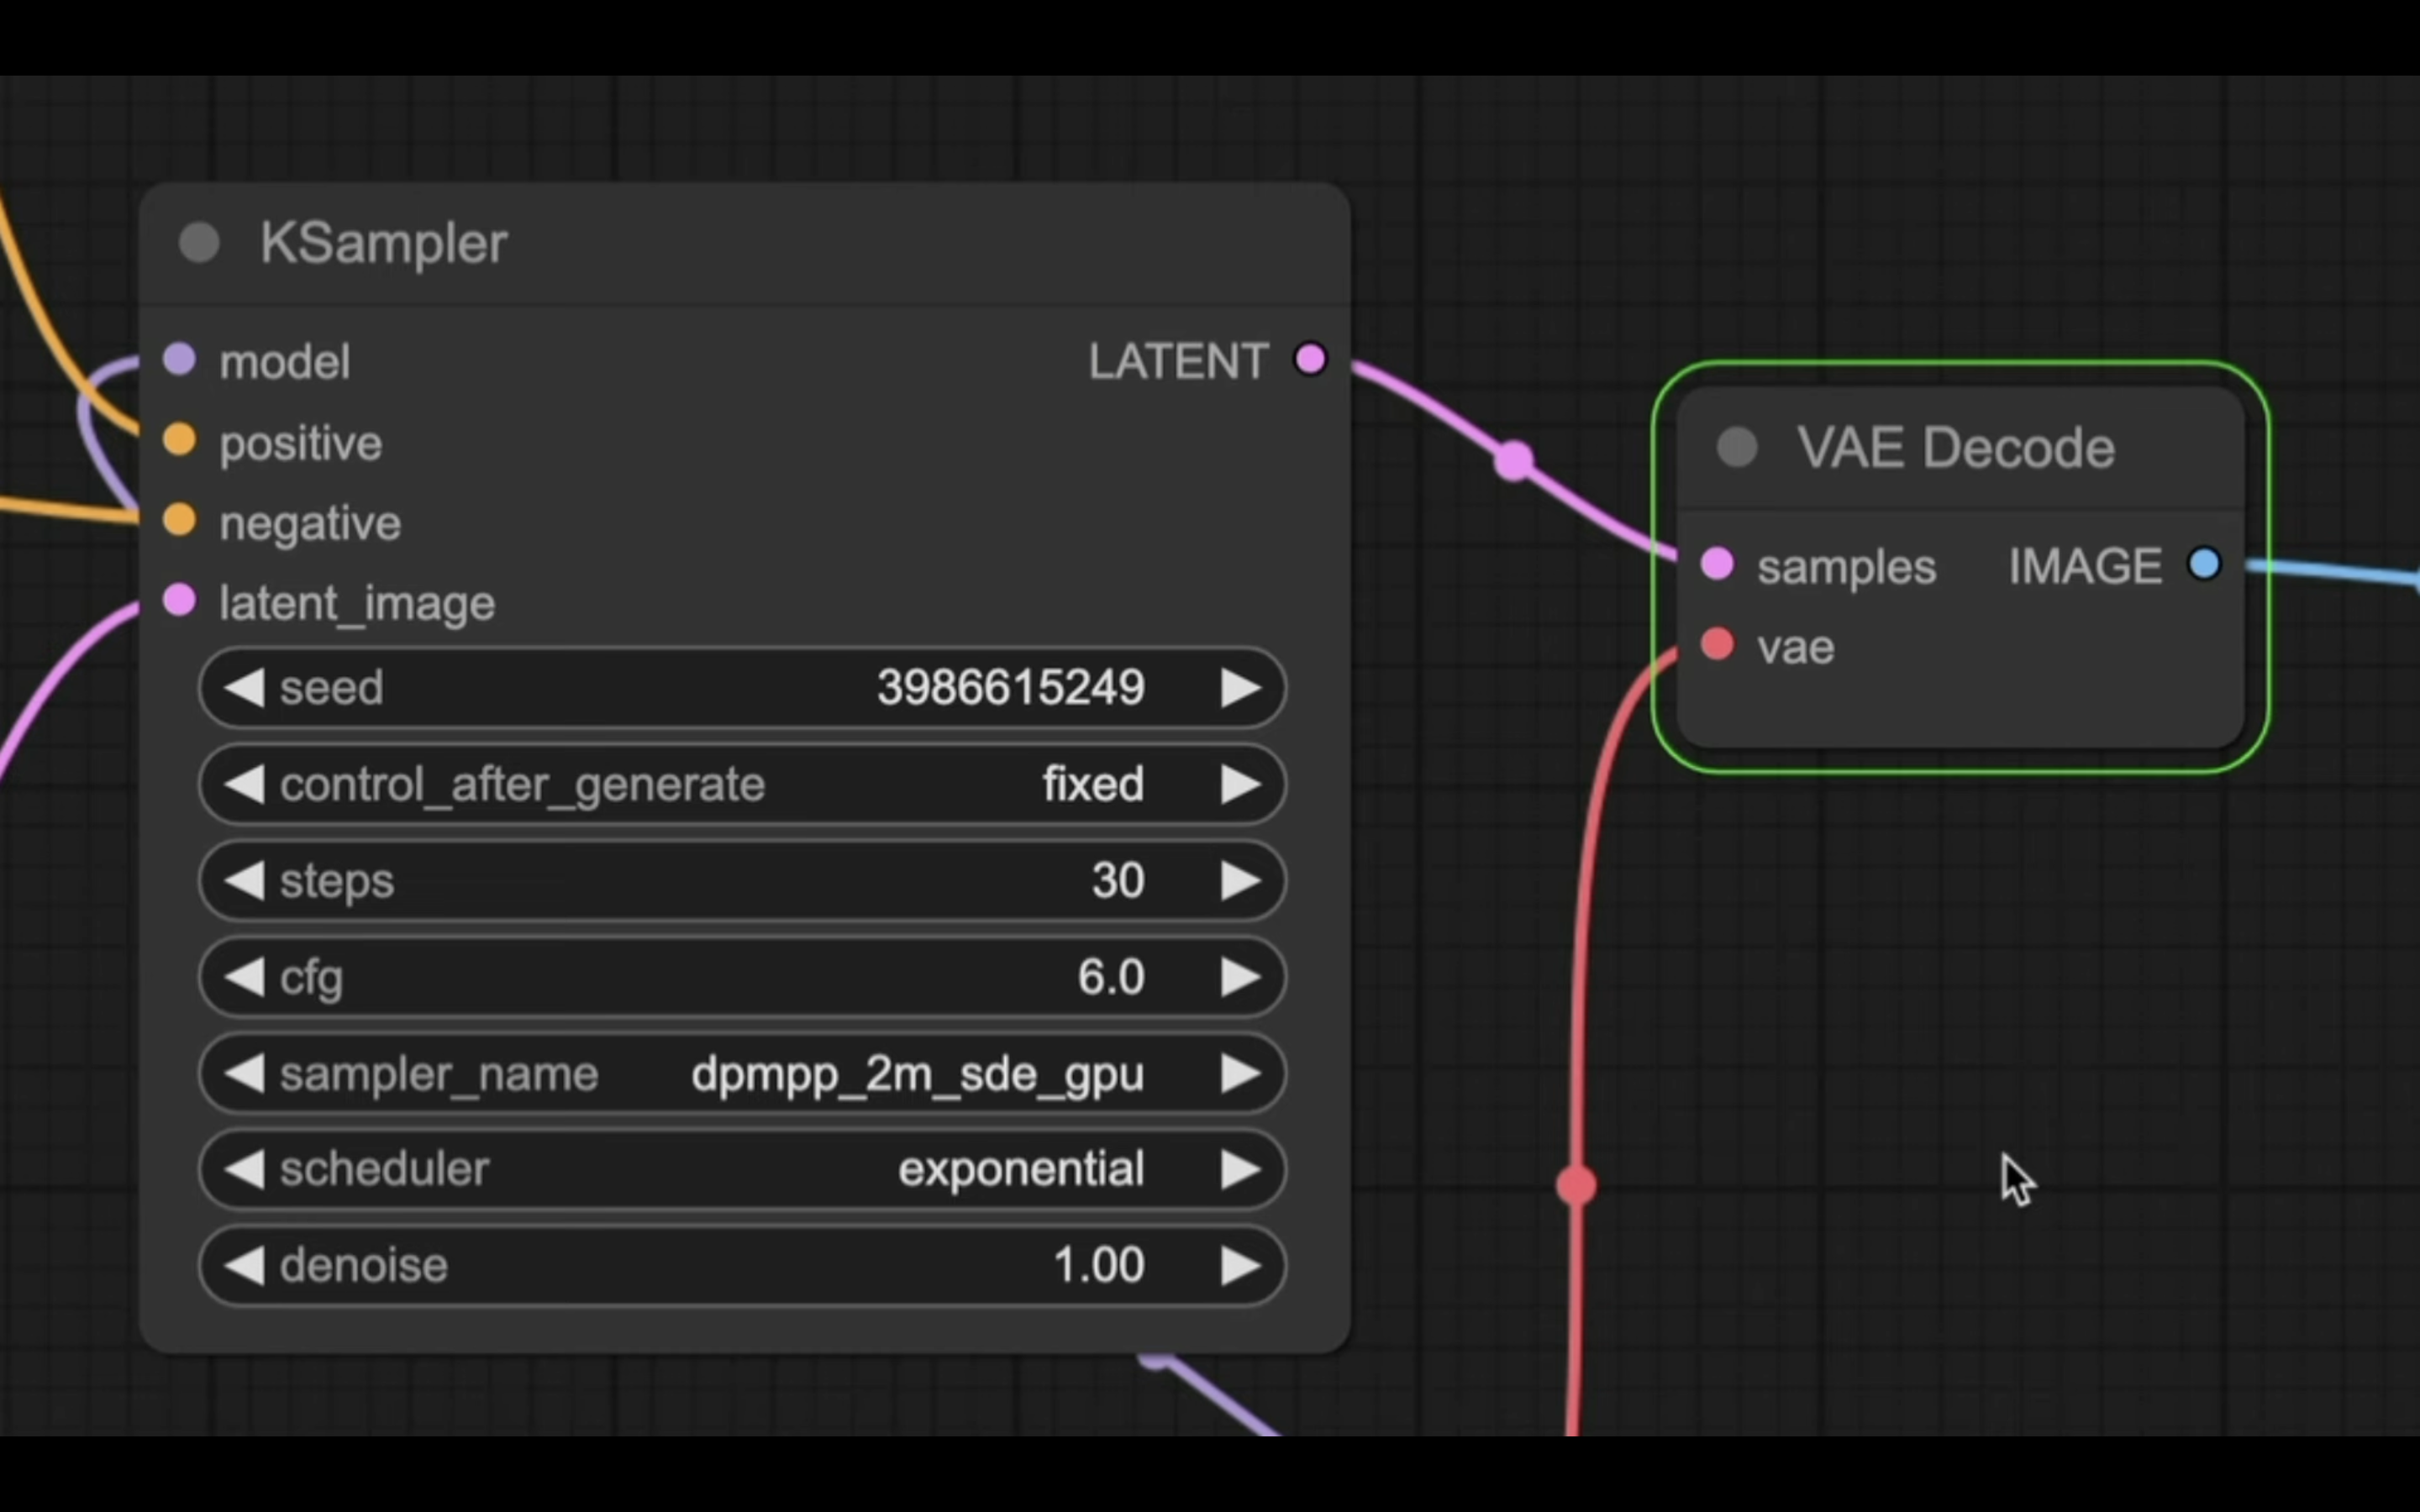
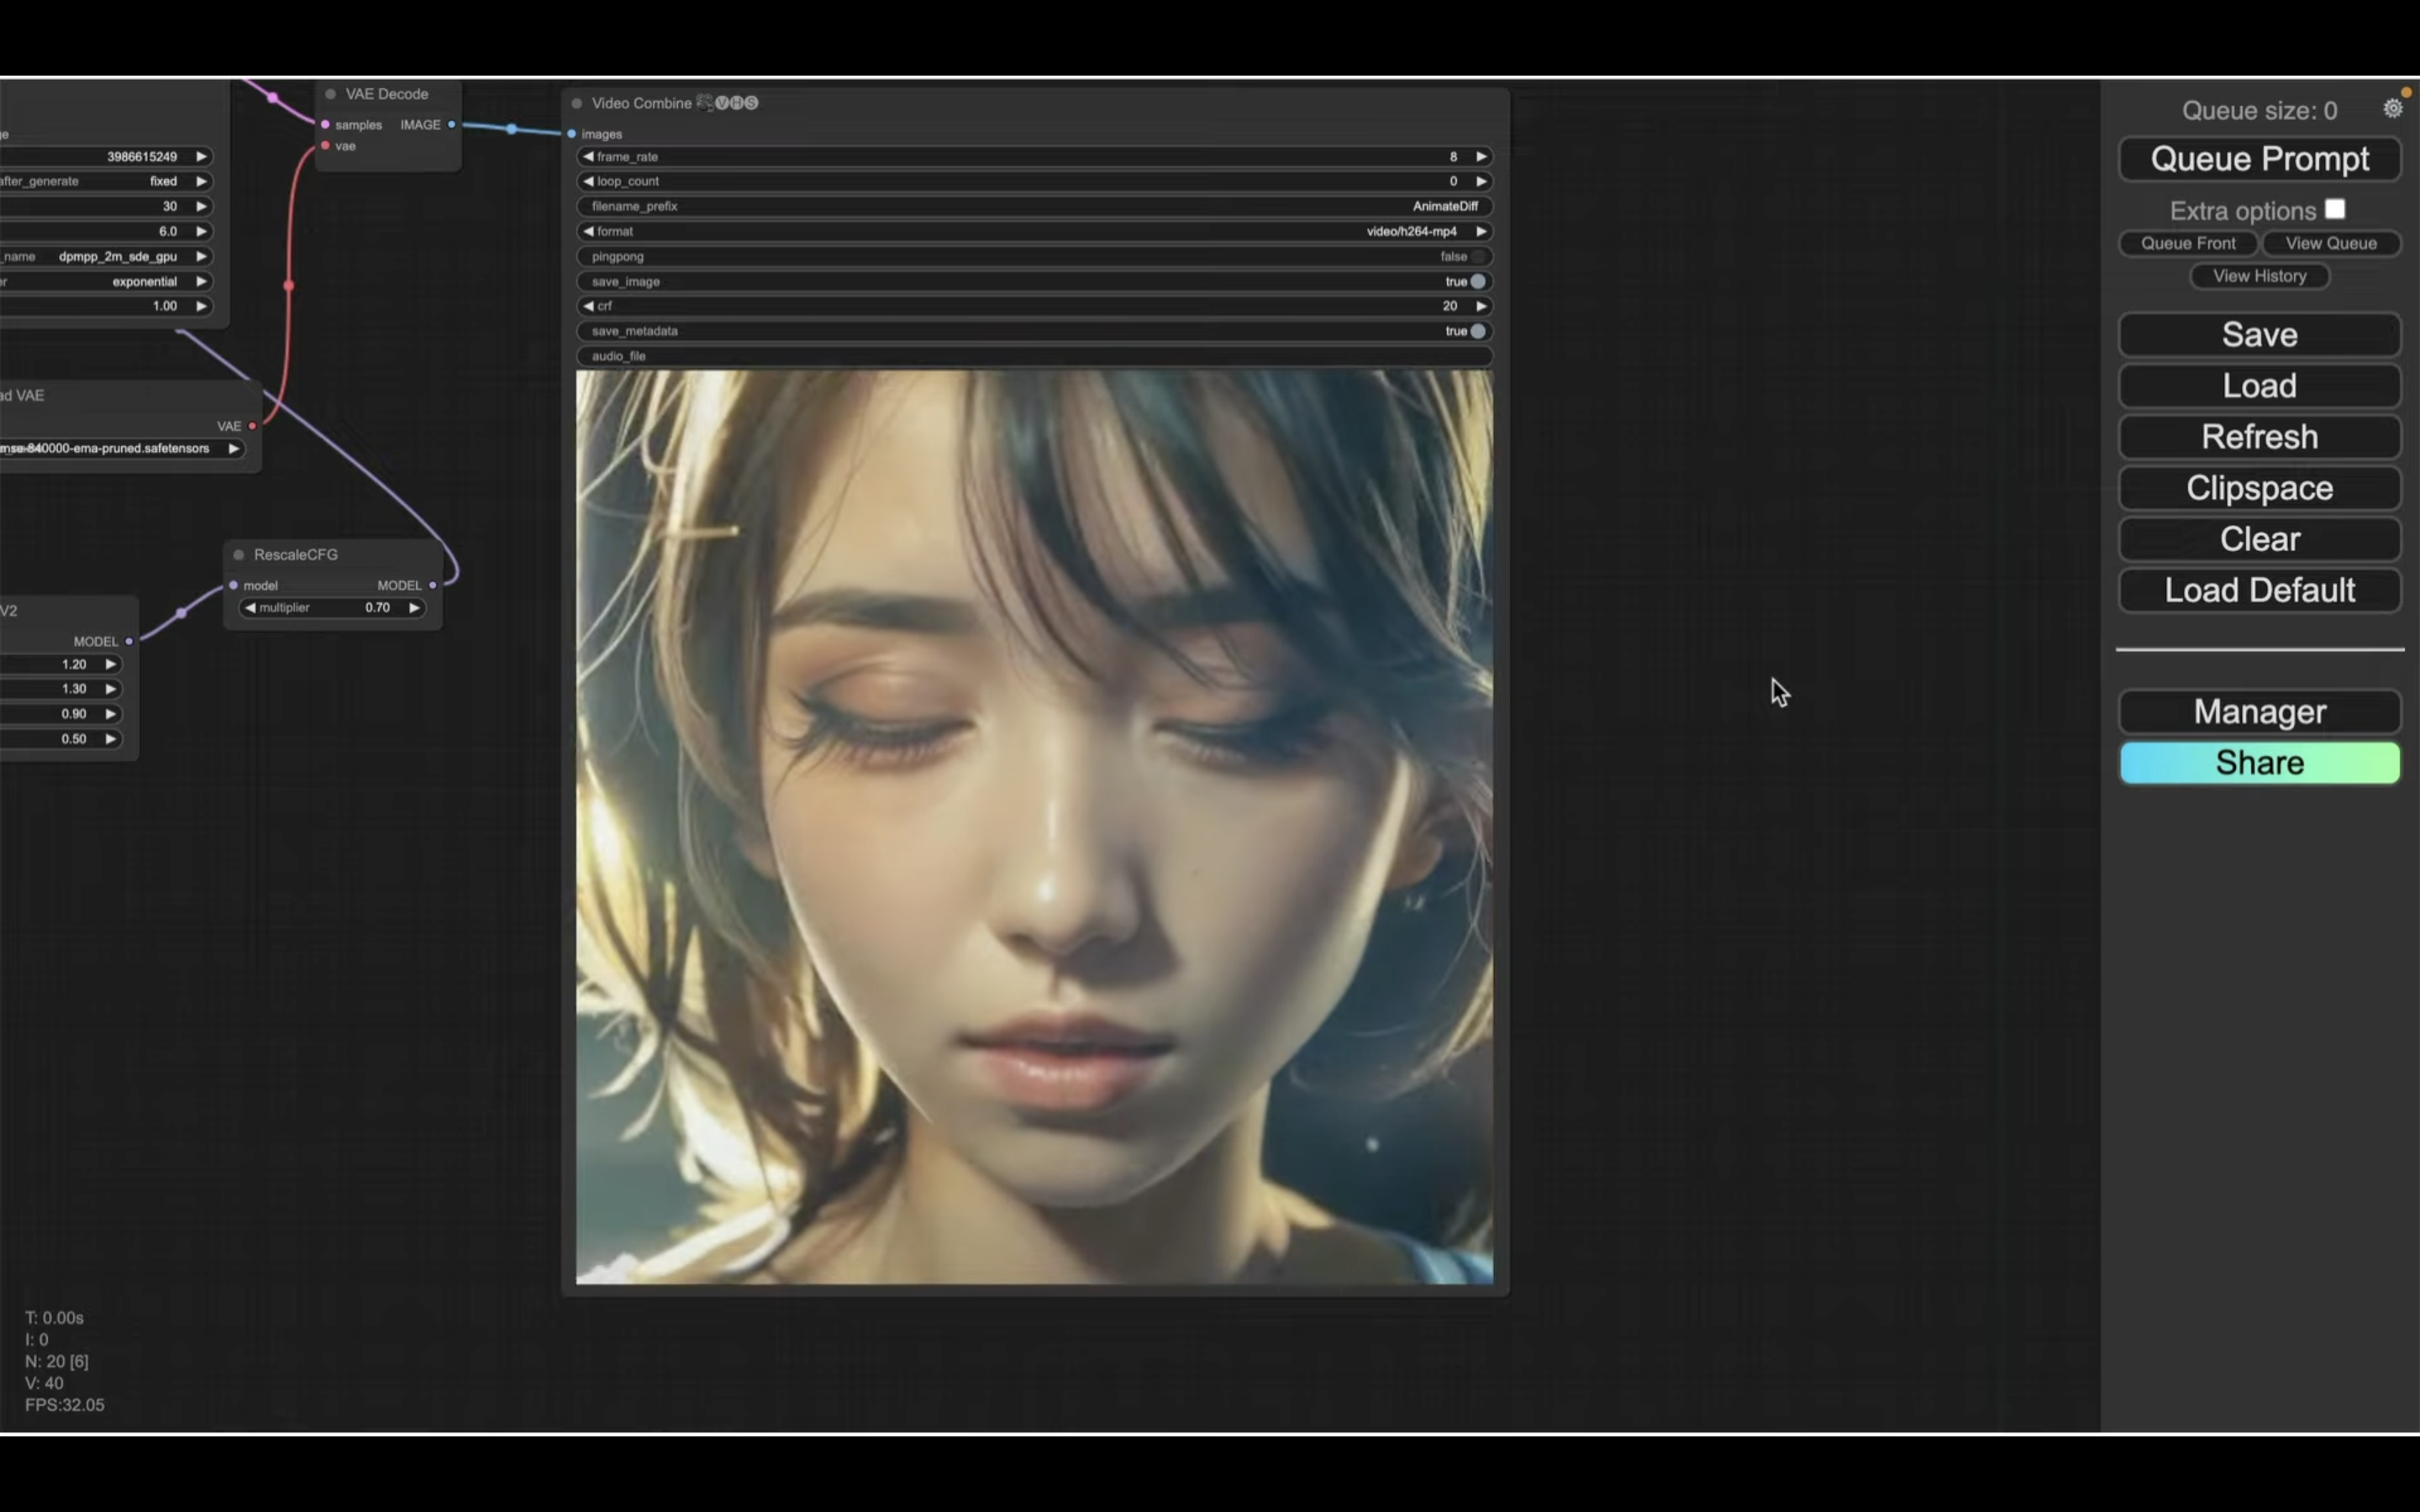
最終的に、この緑色で囲まれている線が「Video Combine」と書かれているブロックに移動します。
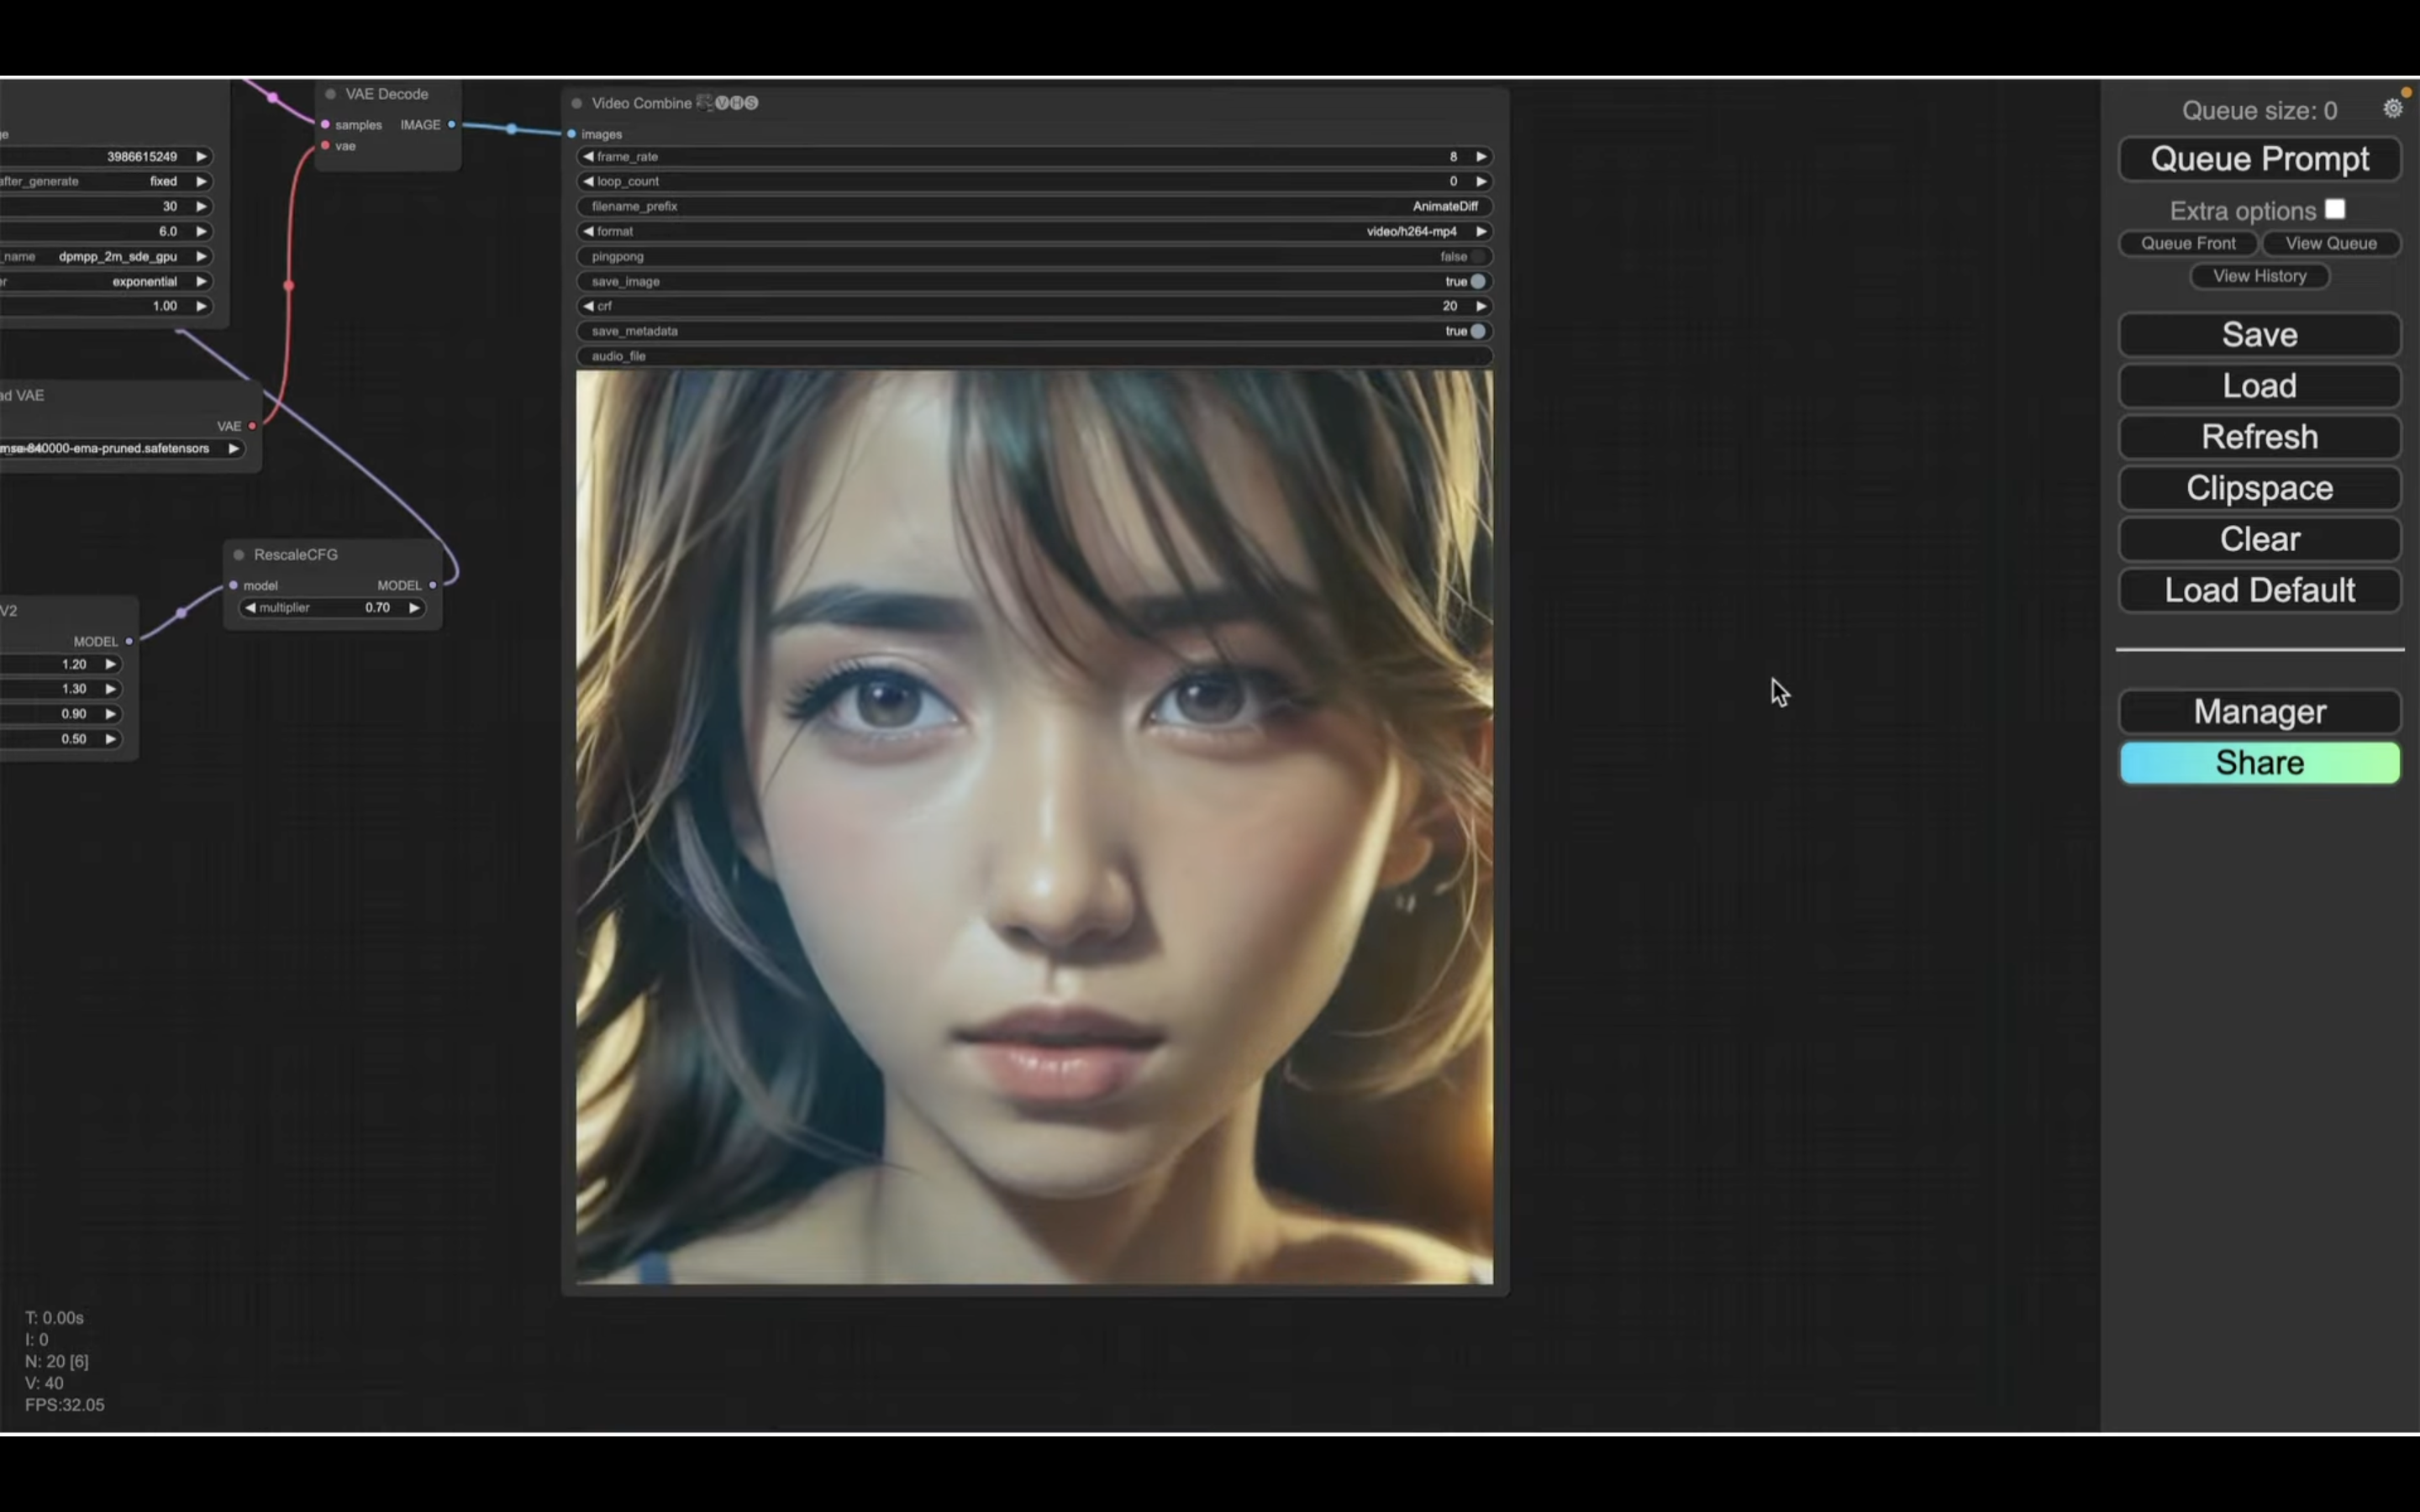
そして、生成された動画のプレビューがそのブロックに表示されます。
期待した通り、目を閉じる様子の動画が生成されました。
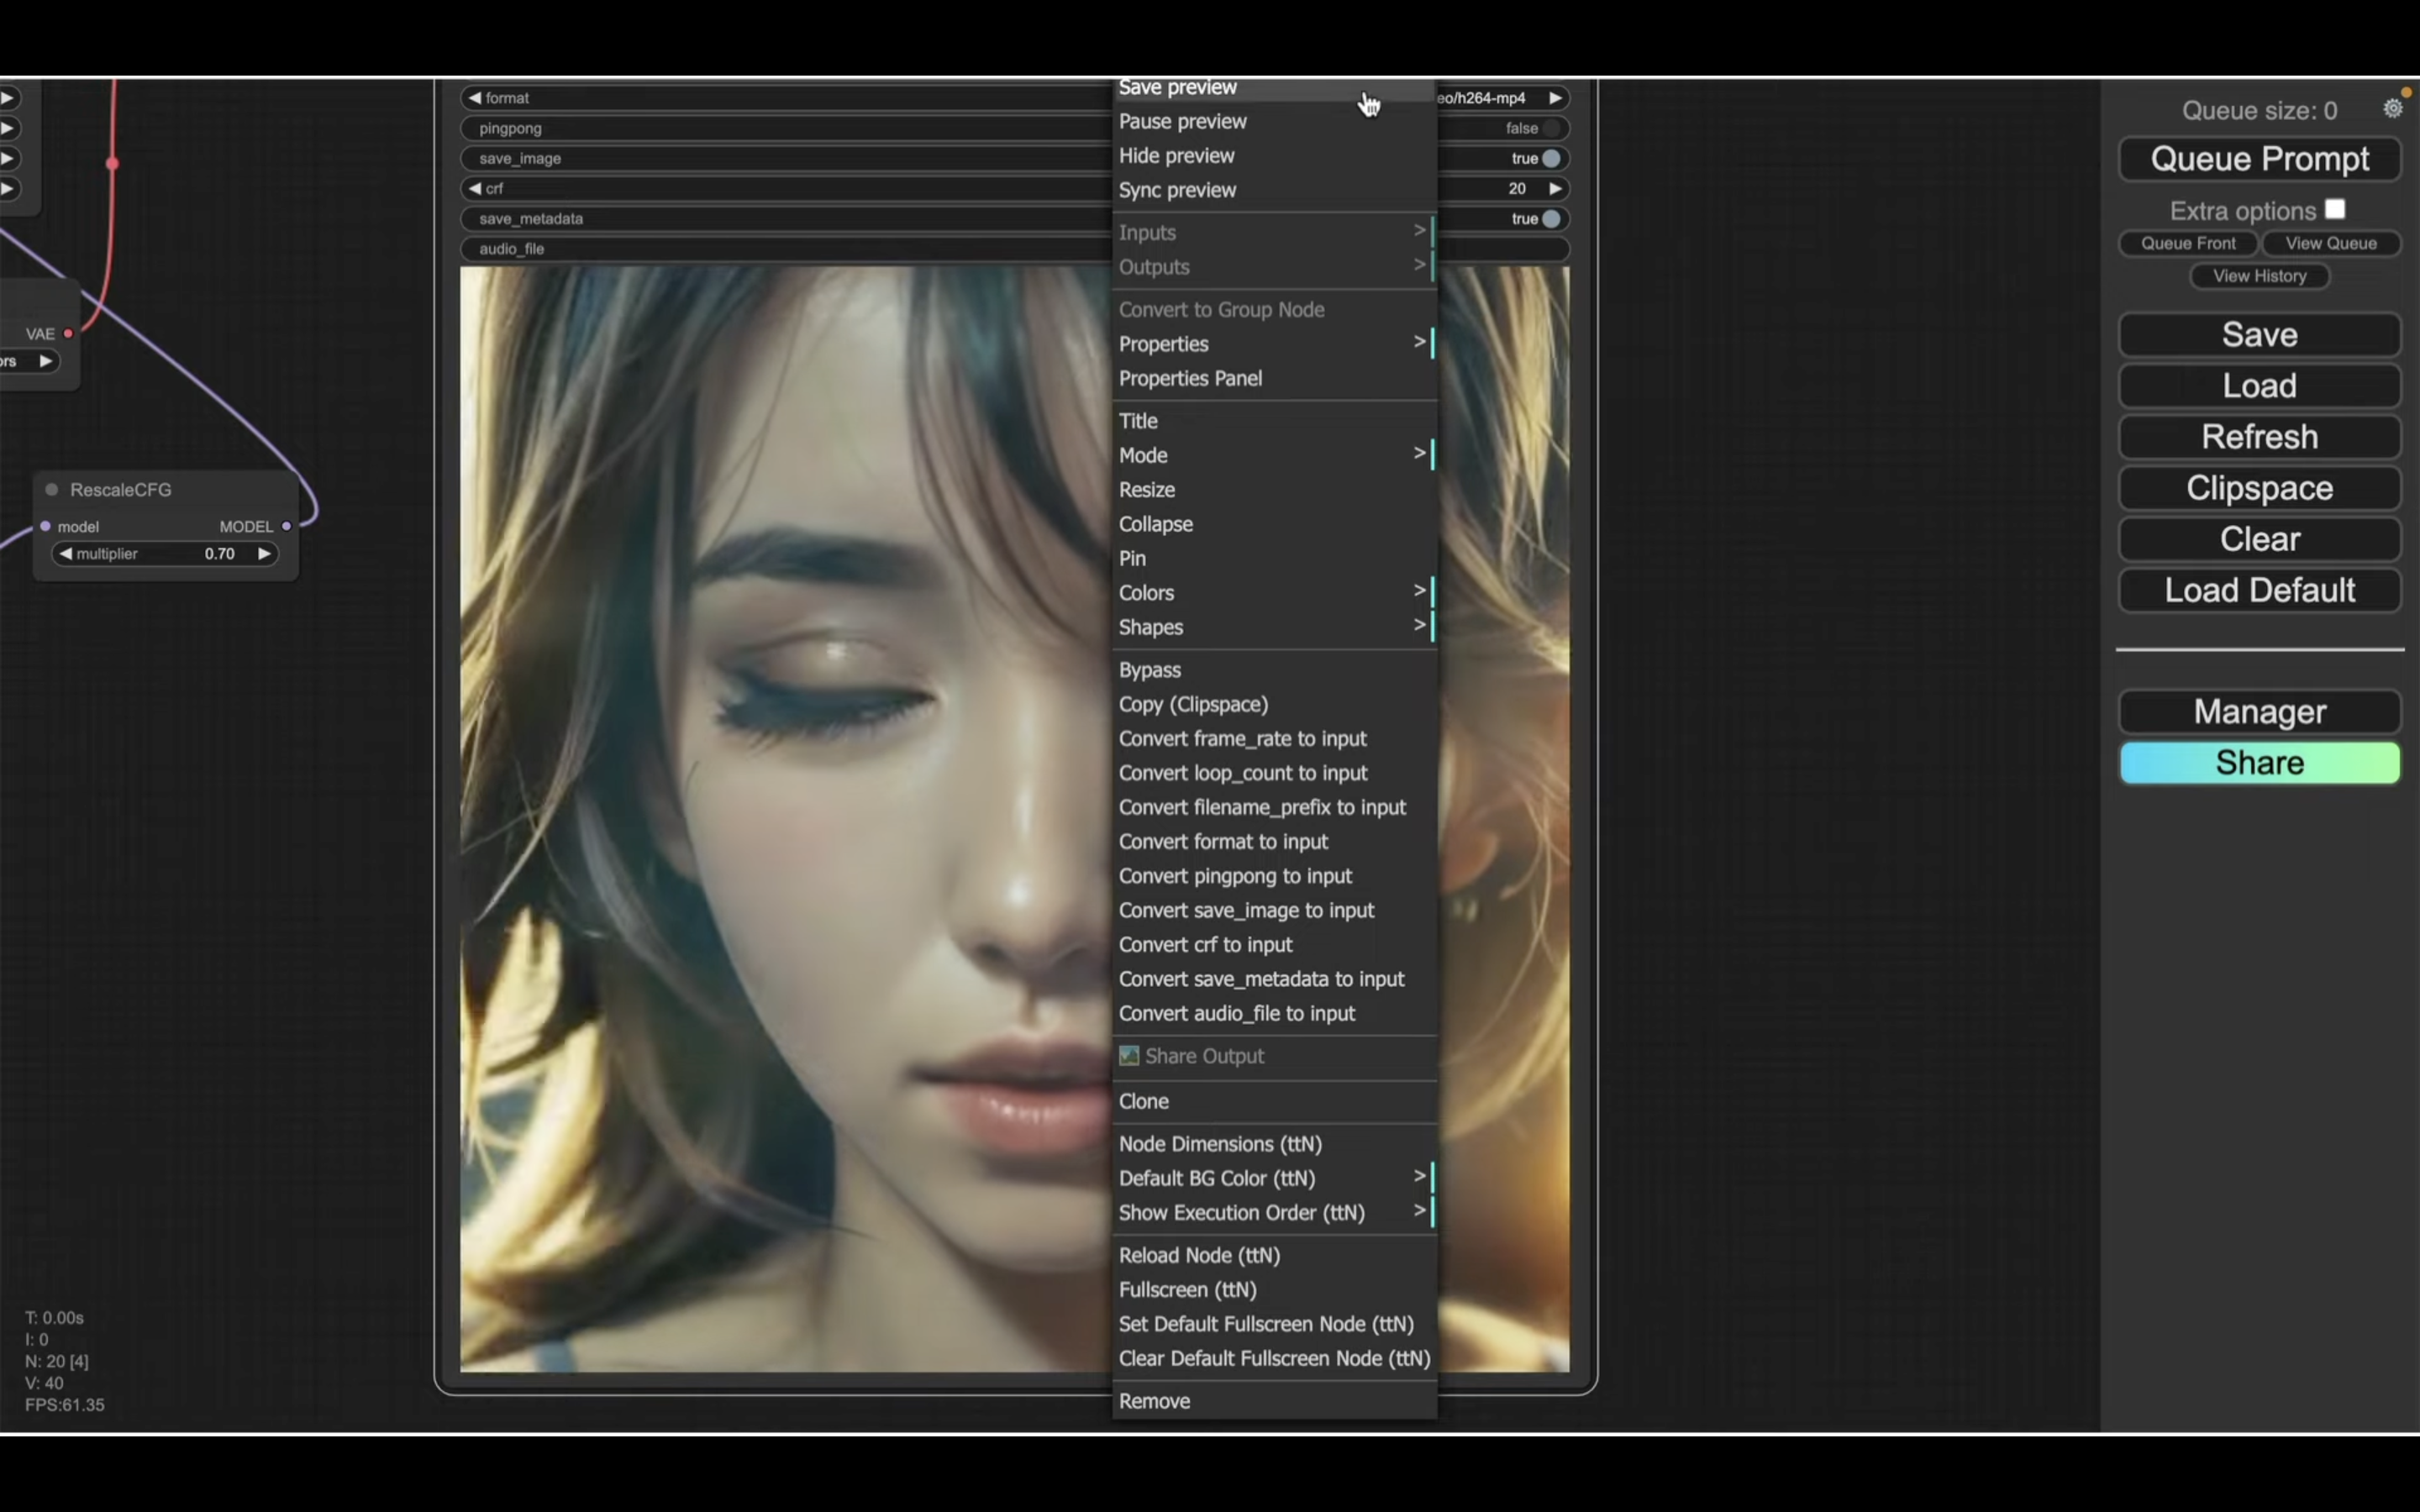
生成された動画をダウンロードするには、プレビュー画面を右クリックします。
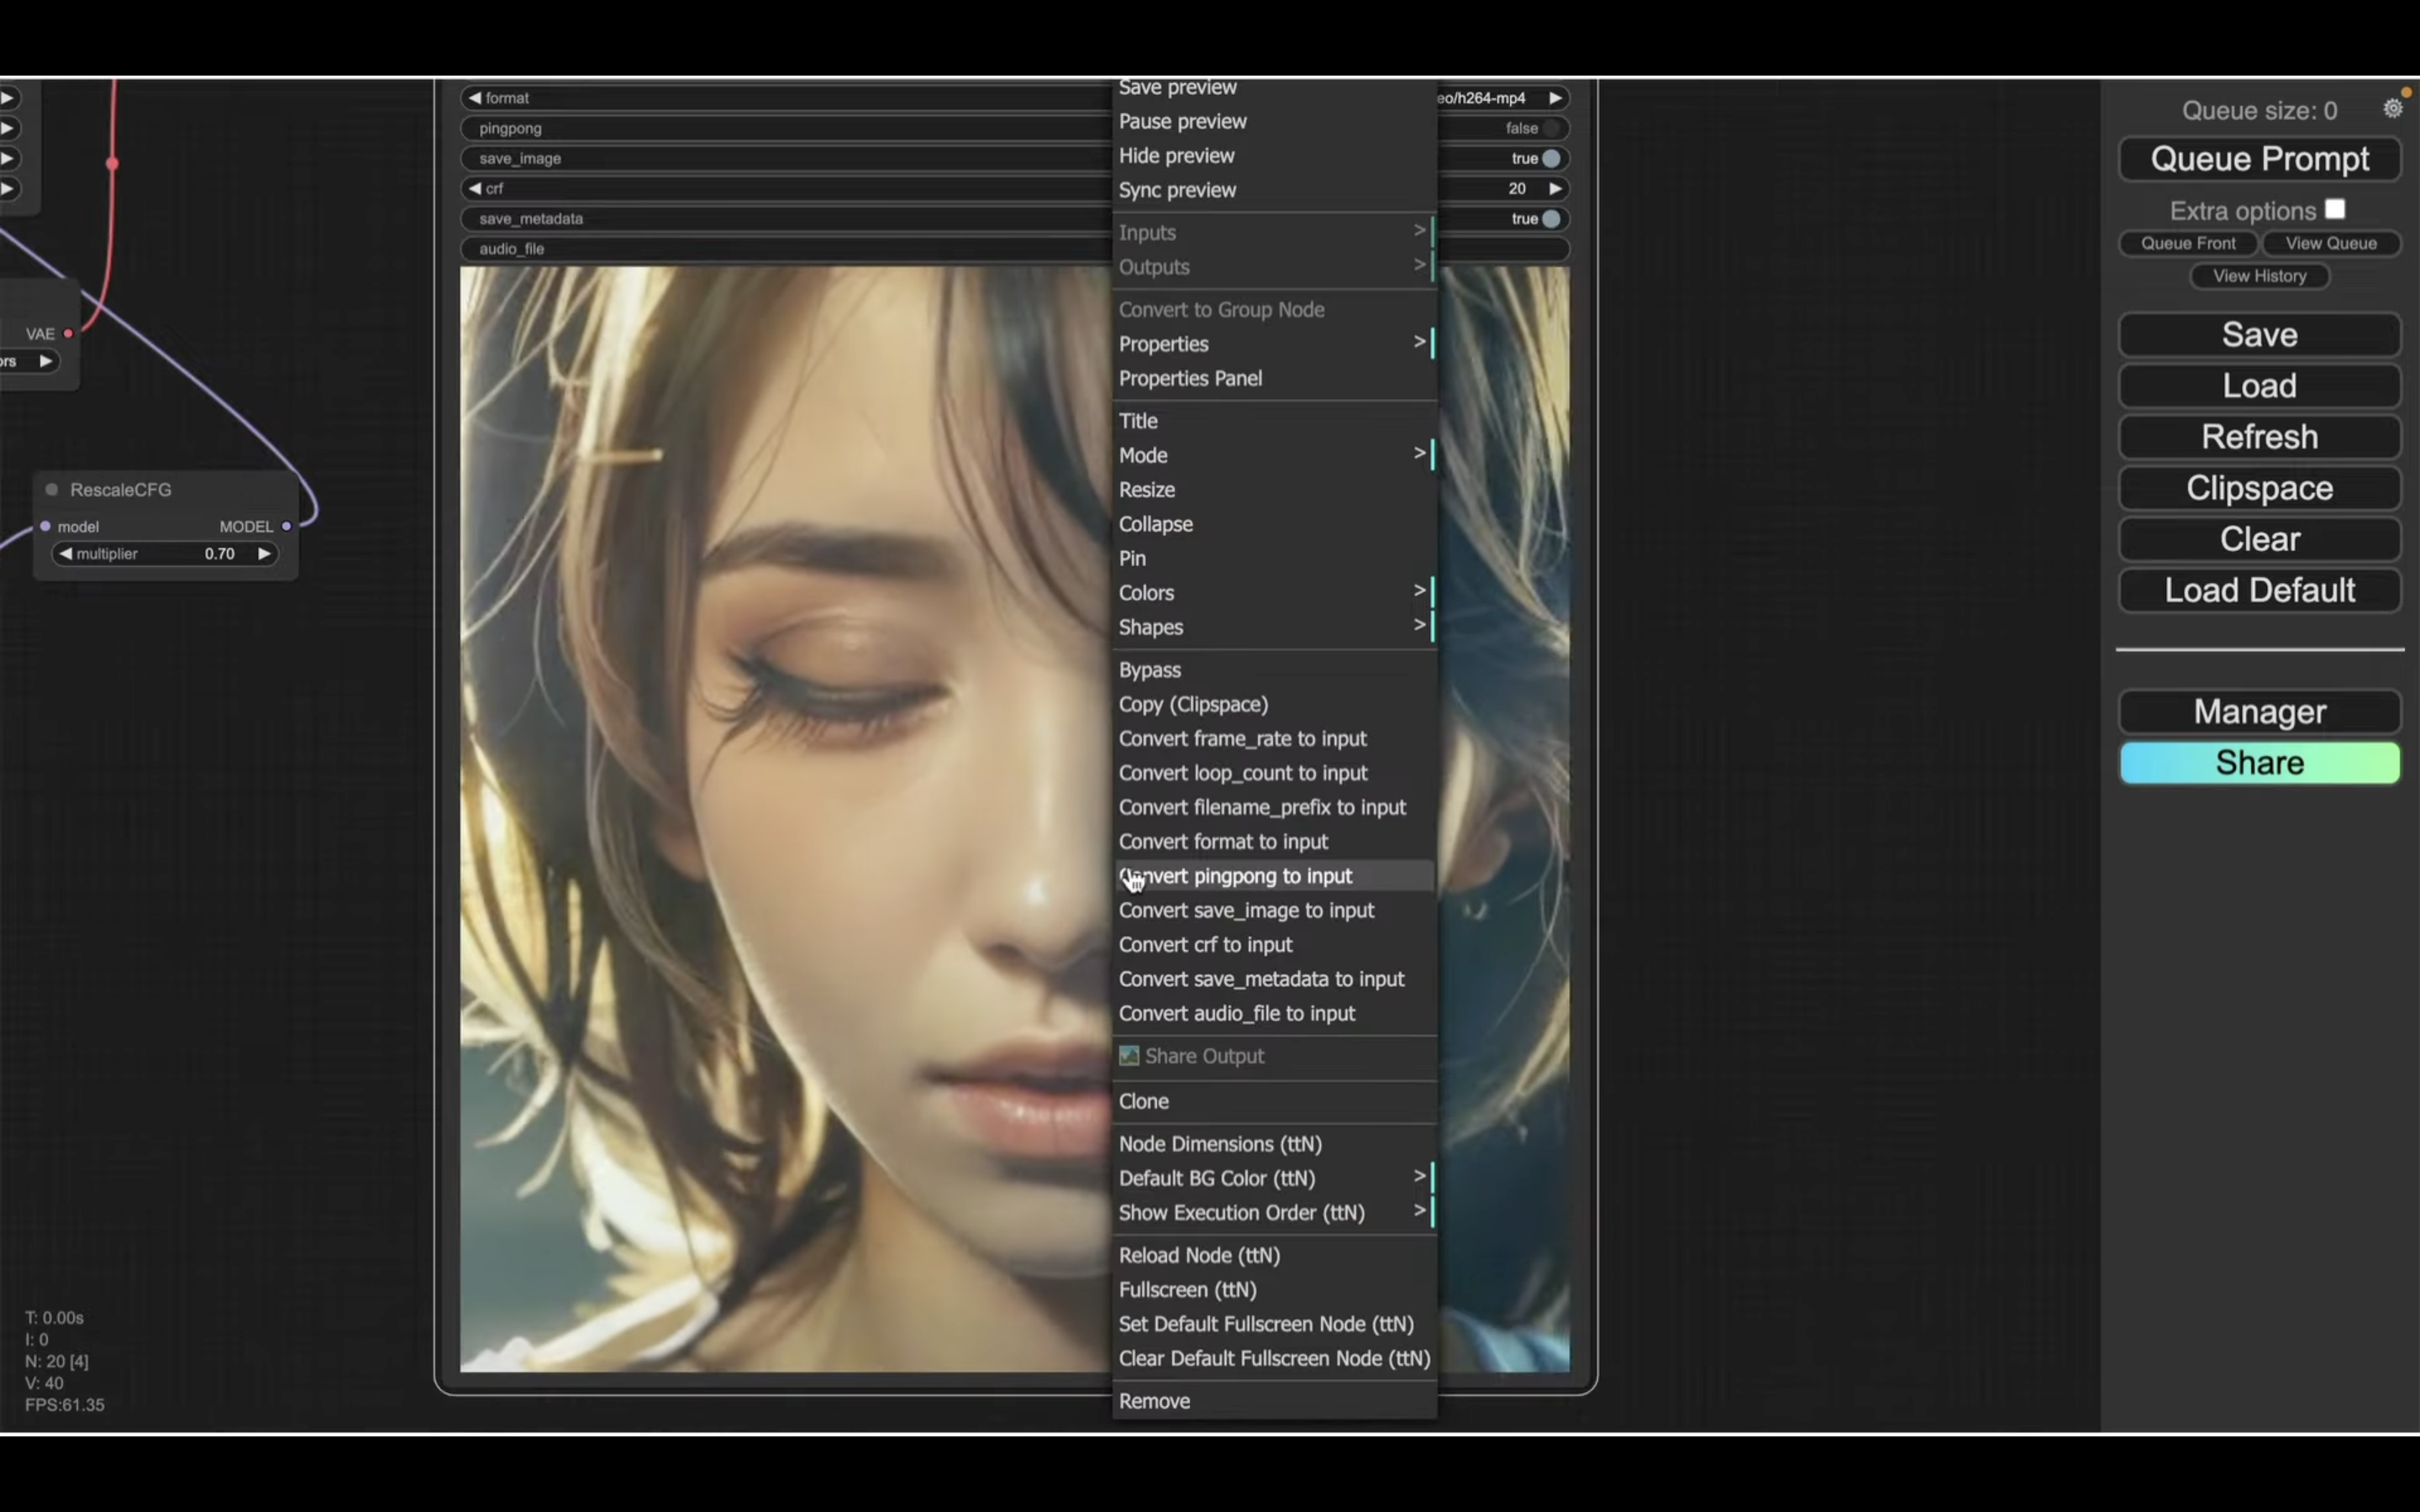
そして、表示されたメニューの中から「Save preview」を選択します。
そうすると、生成された動画がダウンロードされます。
それでは、次に別の動画を生成してみましょう。
まず、画像ファイルを変更します。
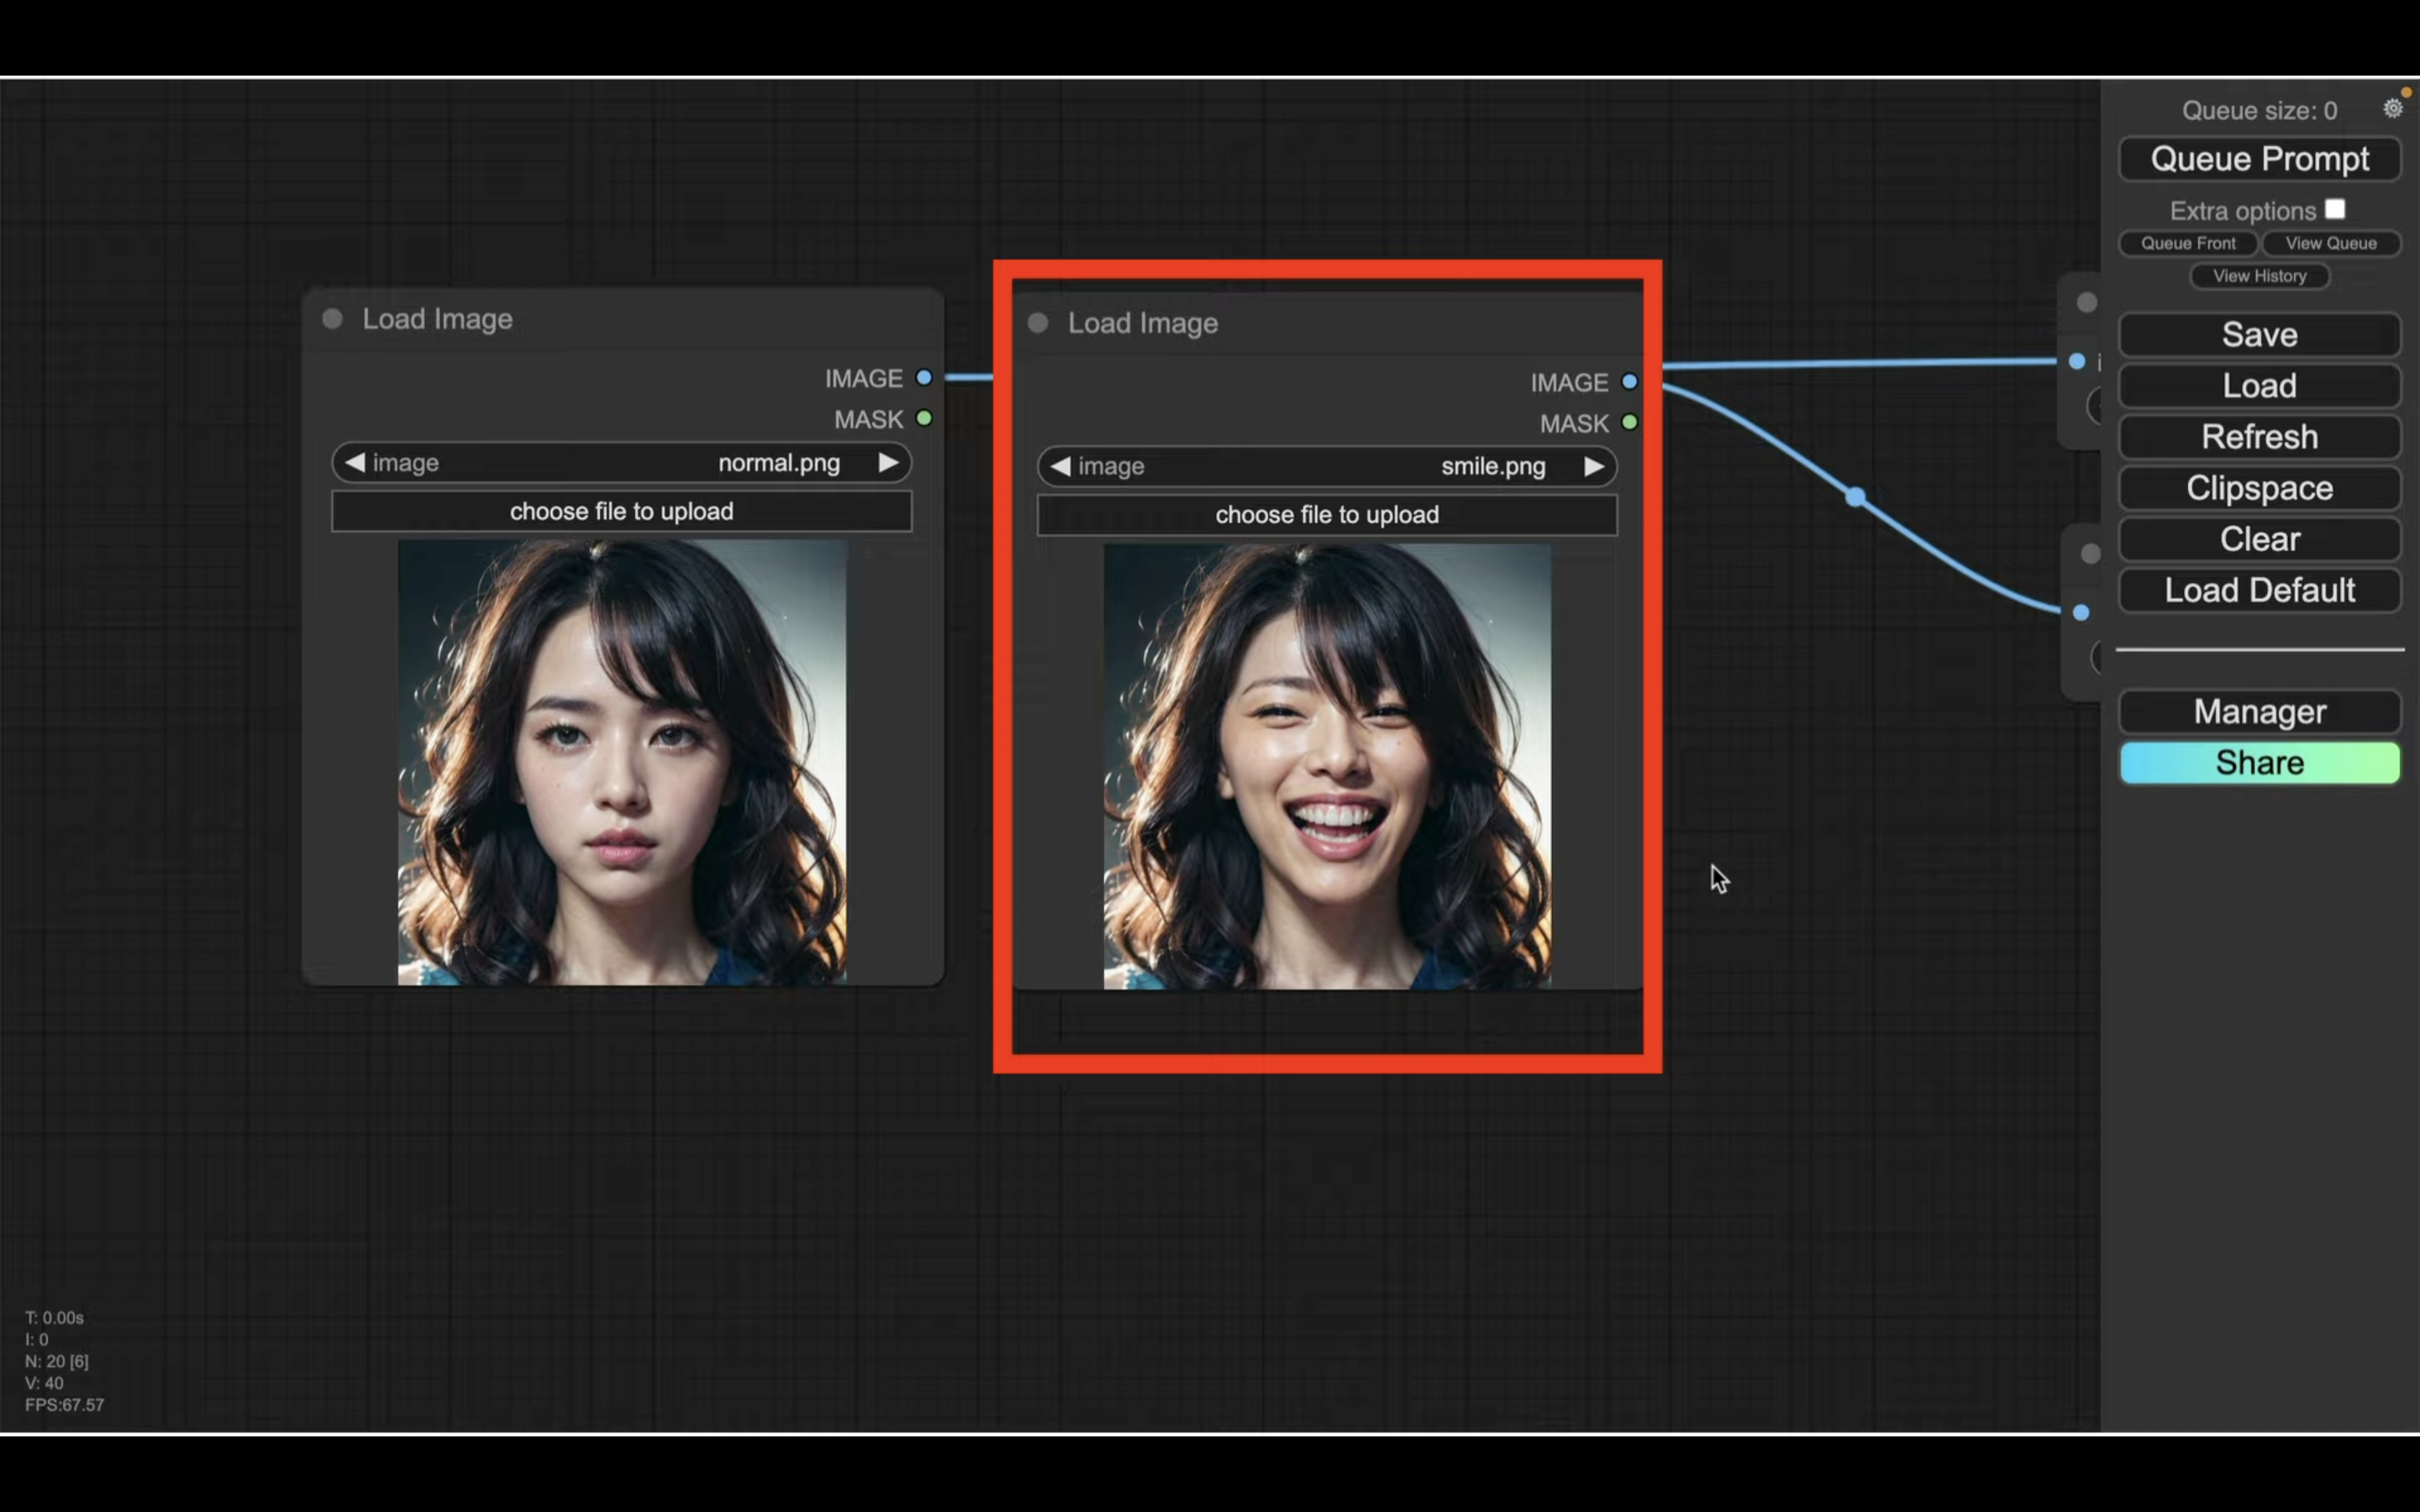
今度は右側の画像を笑顔の写真に変更してみます。
次に、プロンプトを変更します。
今回は通常の表情から笑顔の表情に変更したいため、プロンプトの内容をこのように変更します。
画像とプロンプトを変更したら、「Queue Prompt」と書かれているボタンをクリックします。
動画の生成が開始されるので、しばらく待ちます。
しばらく待っていると、このような動画が生成されました。

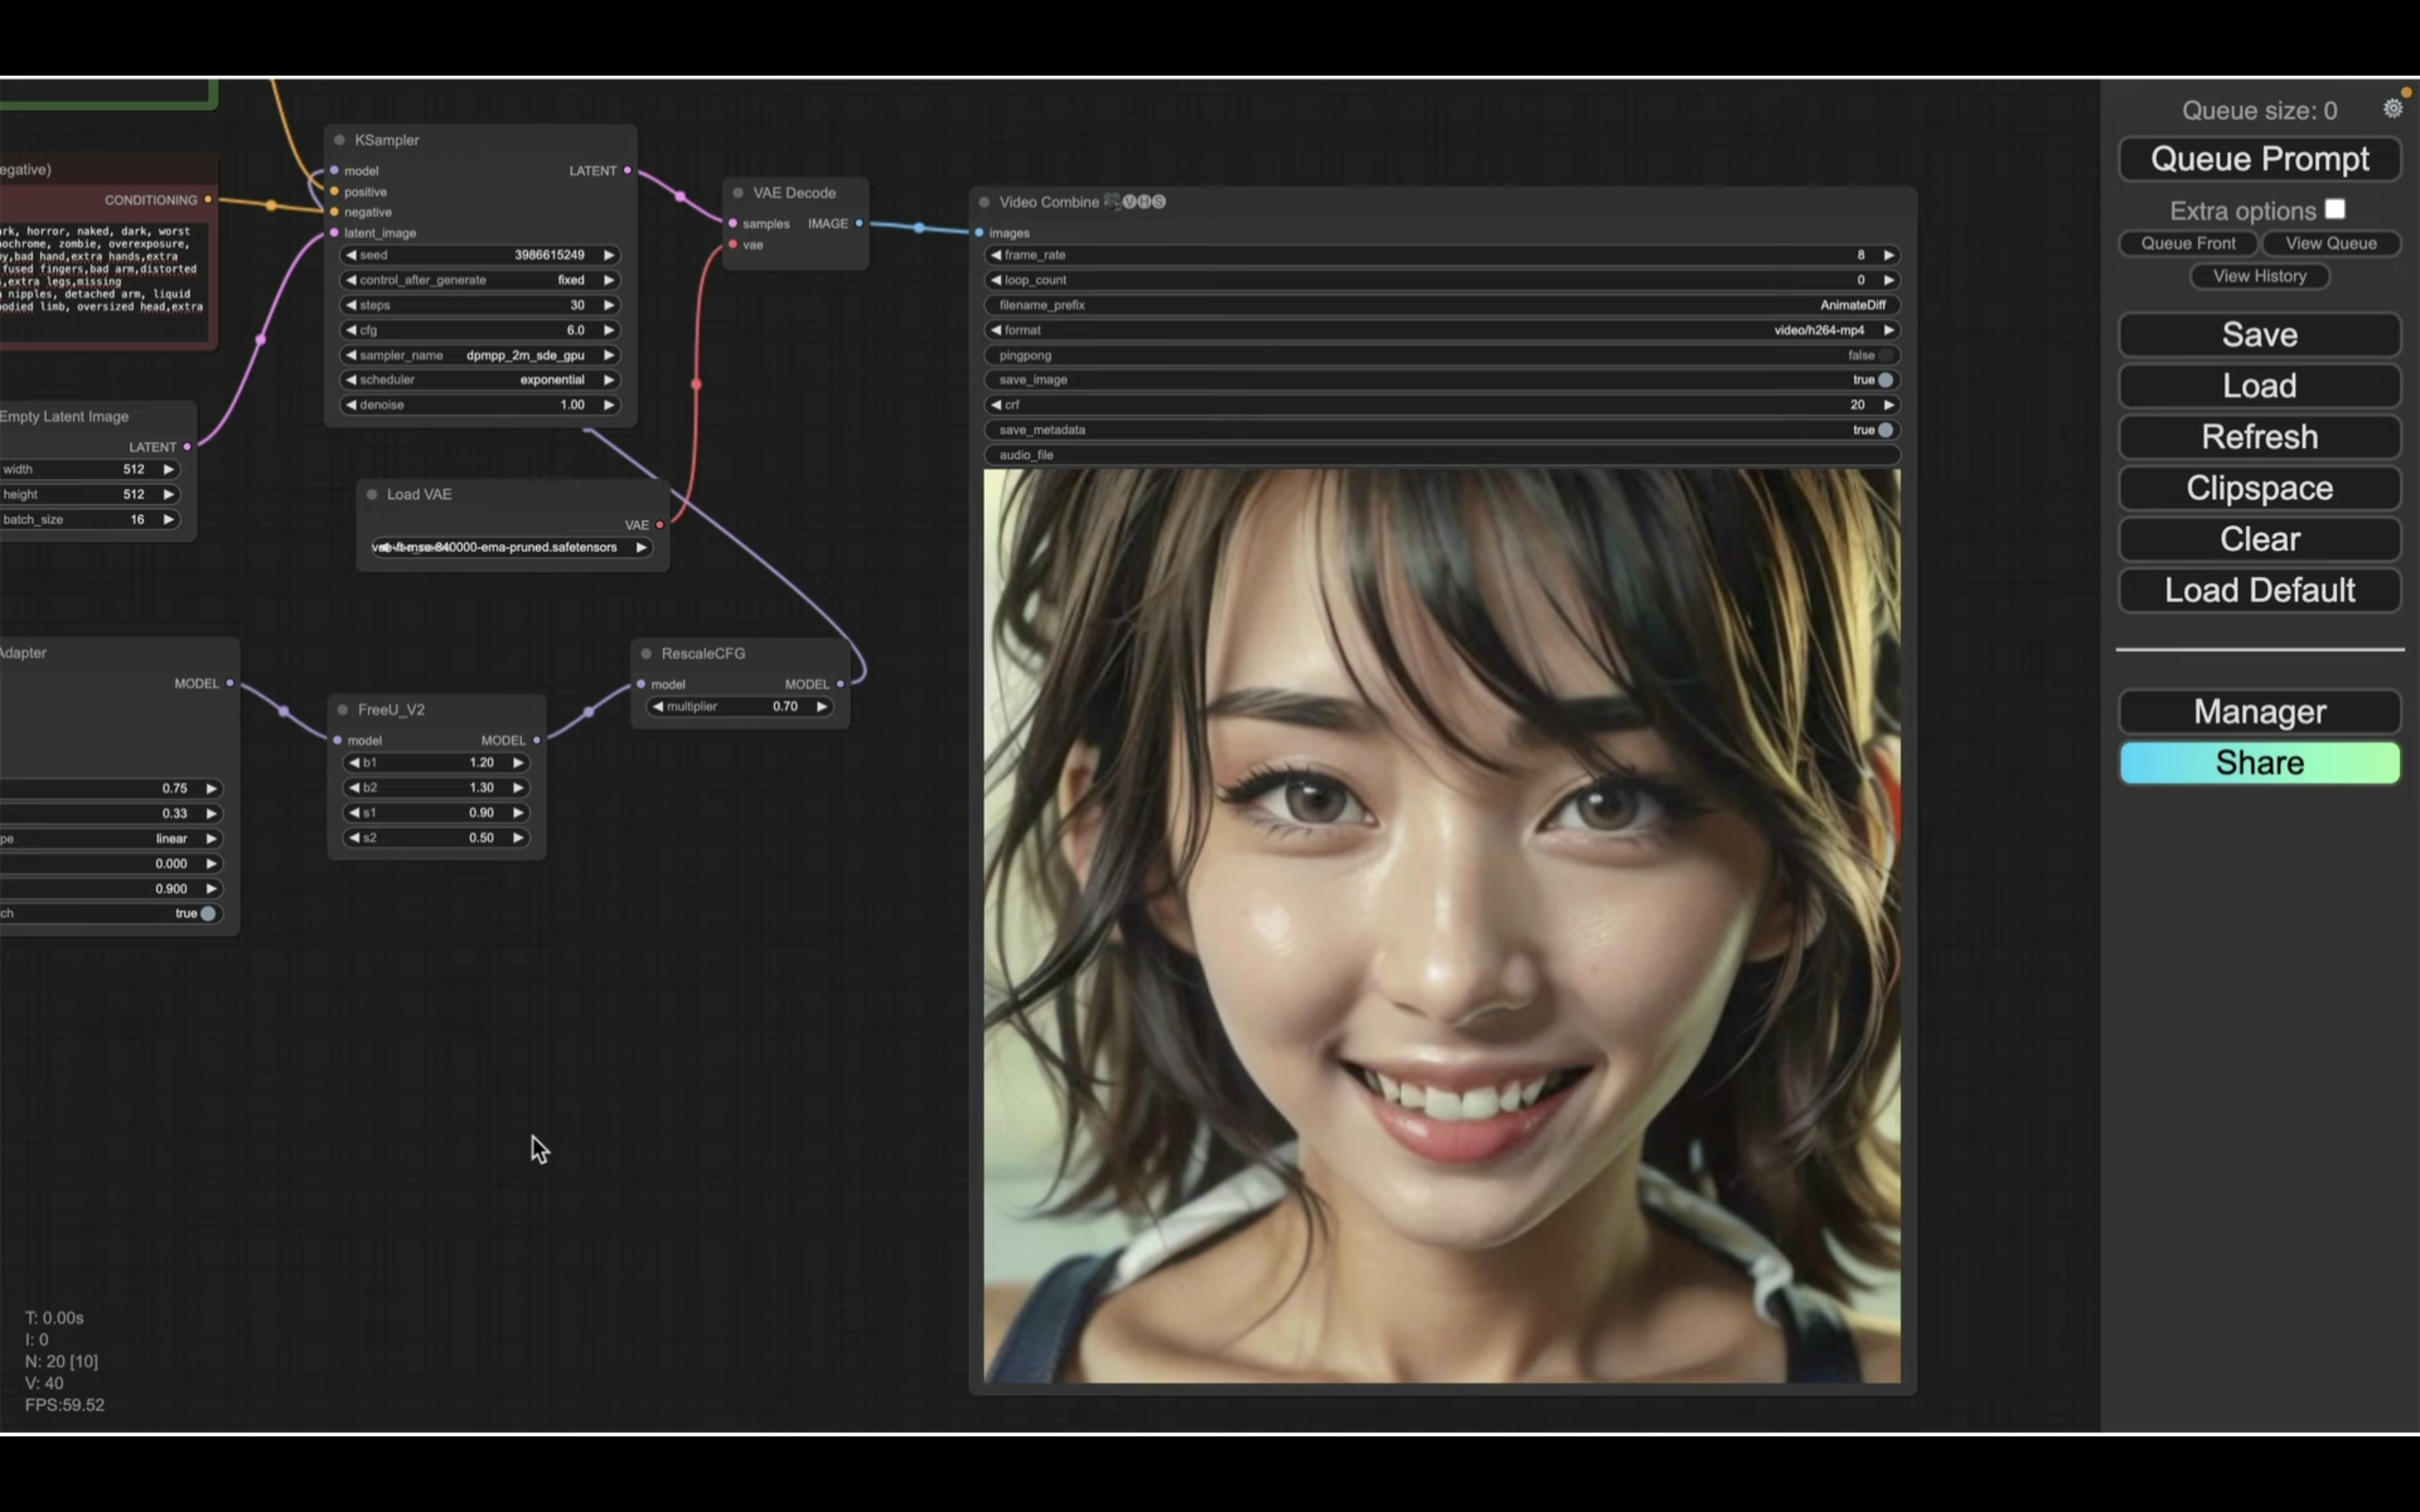
期待した通り、笑顔の表情に変化する動画になっています。
このように、画像とプロンプトを指定するだけで簡単に動画を生成することができます。
是非お試しください。