▶︎動画でも話してるので、文章読むのが面倒な方はこちらをみてもらえればと思います。
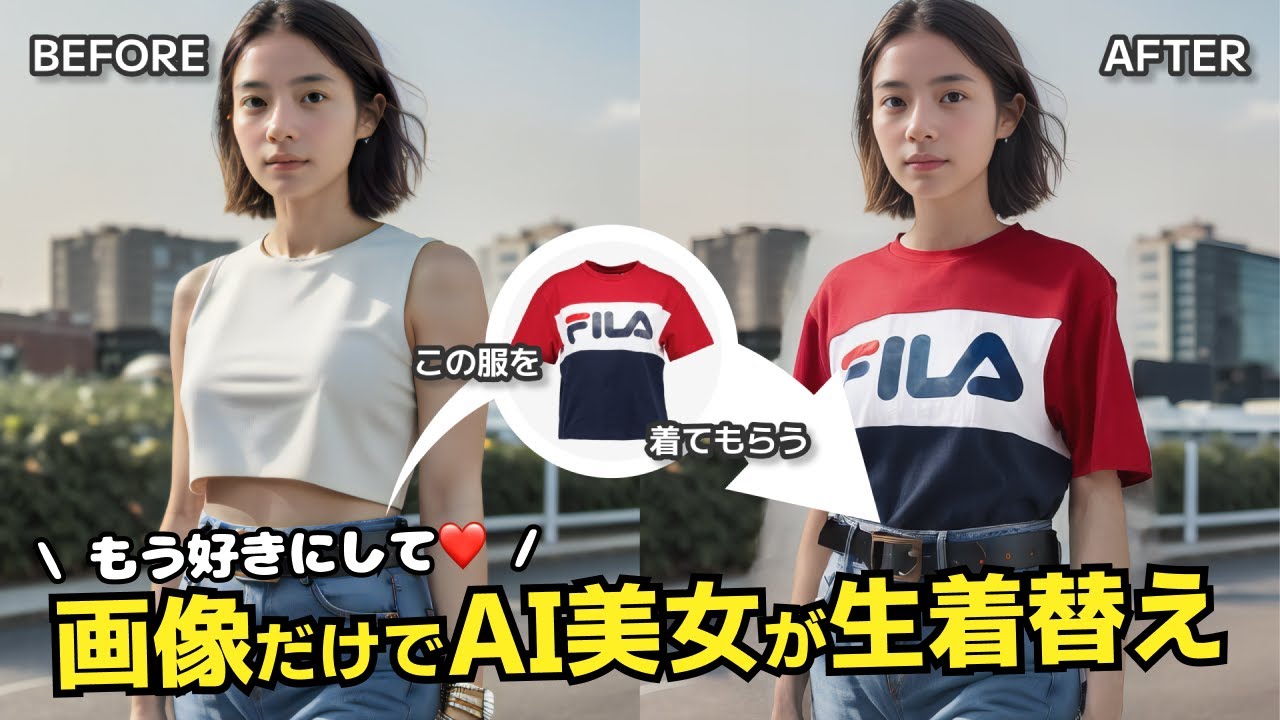
今回はOOTDiffusionを使って、指定の画像の服装を変更する方法について解説します。

これを読めば誰でも簡単にクオリティーの高いAI美女が作れるようになっているので興味がある人は、下のバナーをクリックして購入してみてね🎶
目次
ポーズと服装、そして顔の画像からAI美女画像を生成する方法について
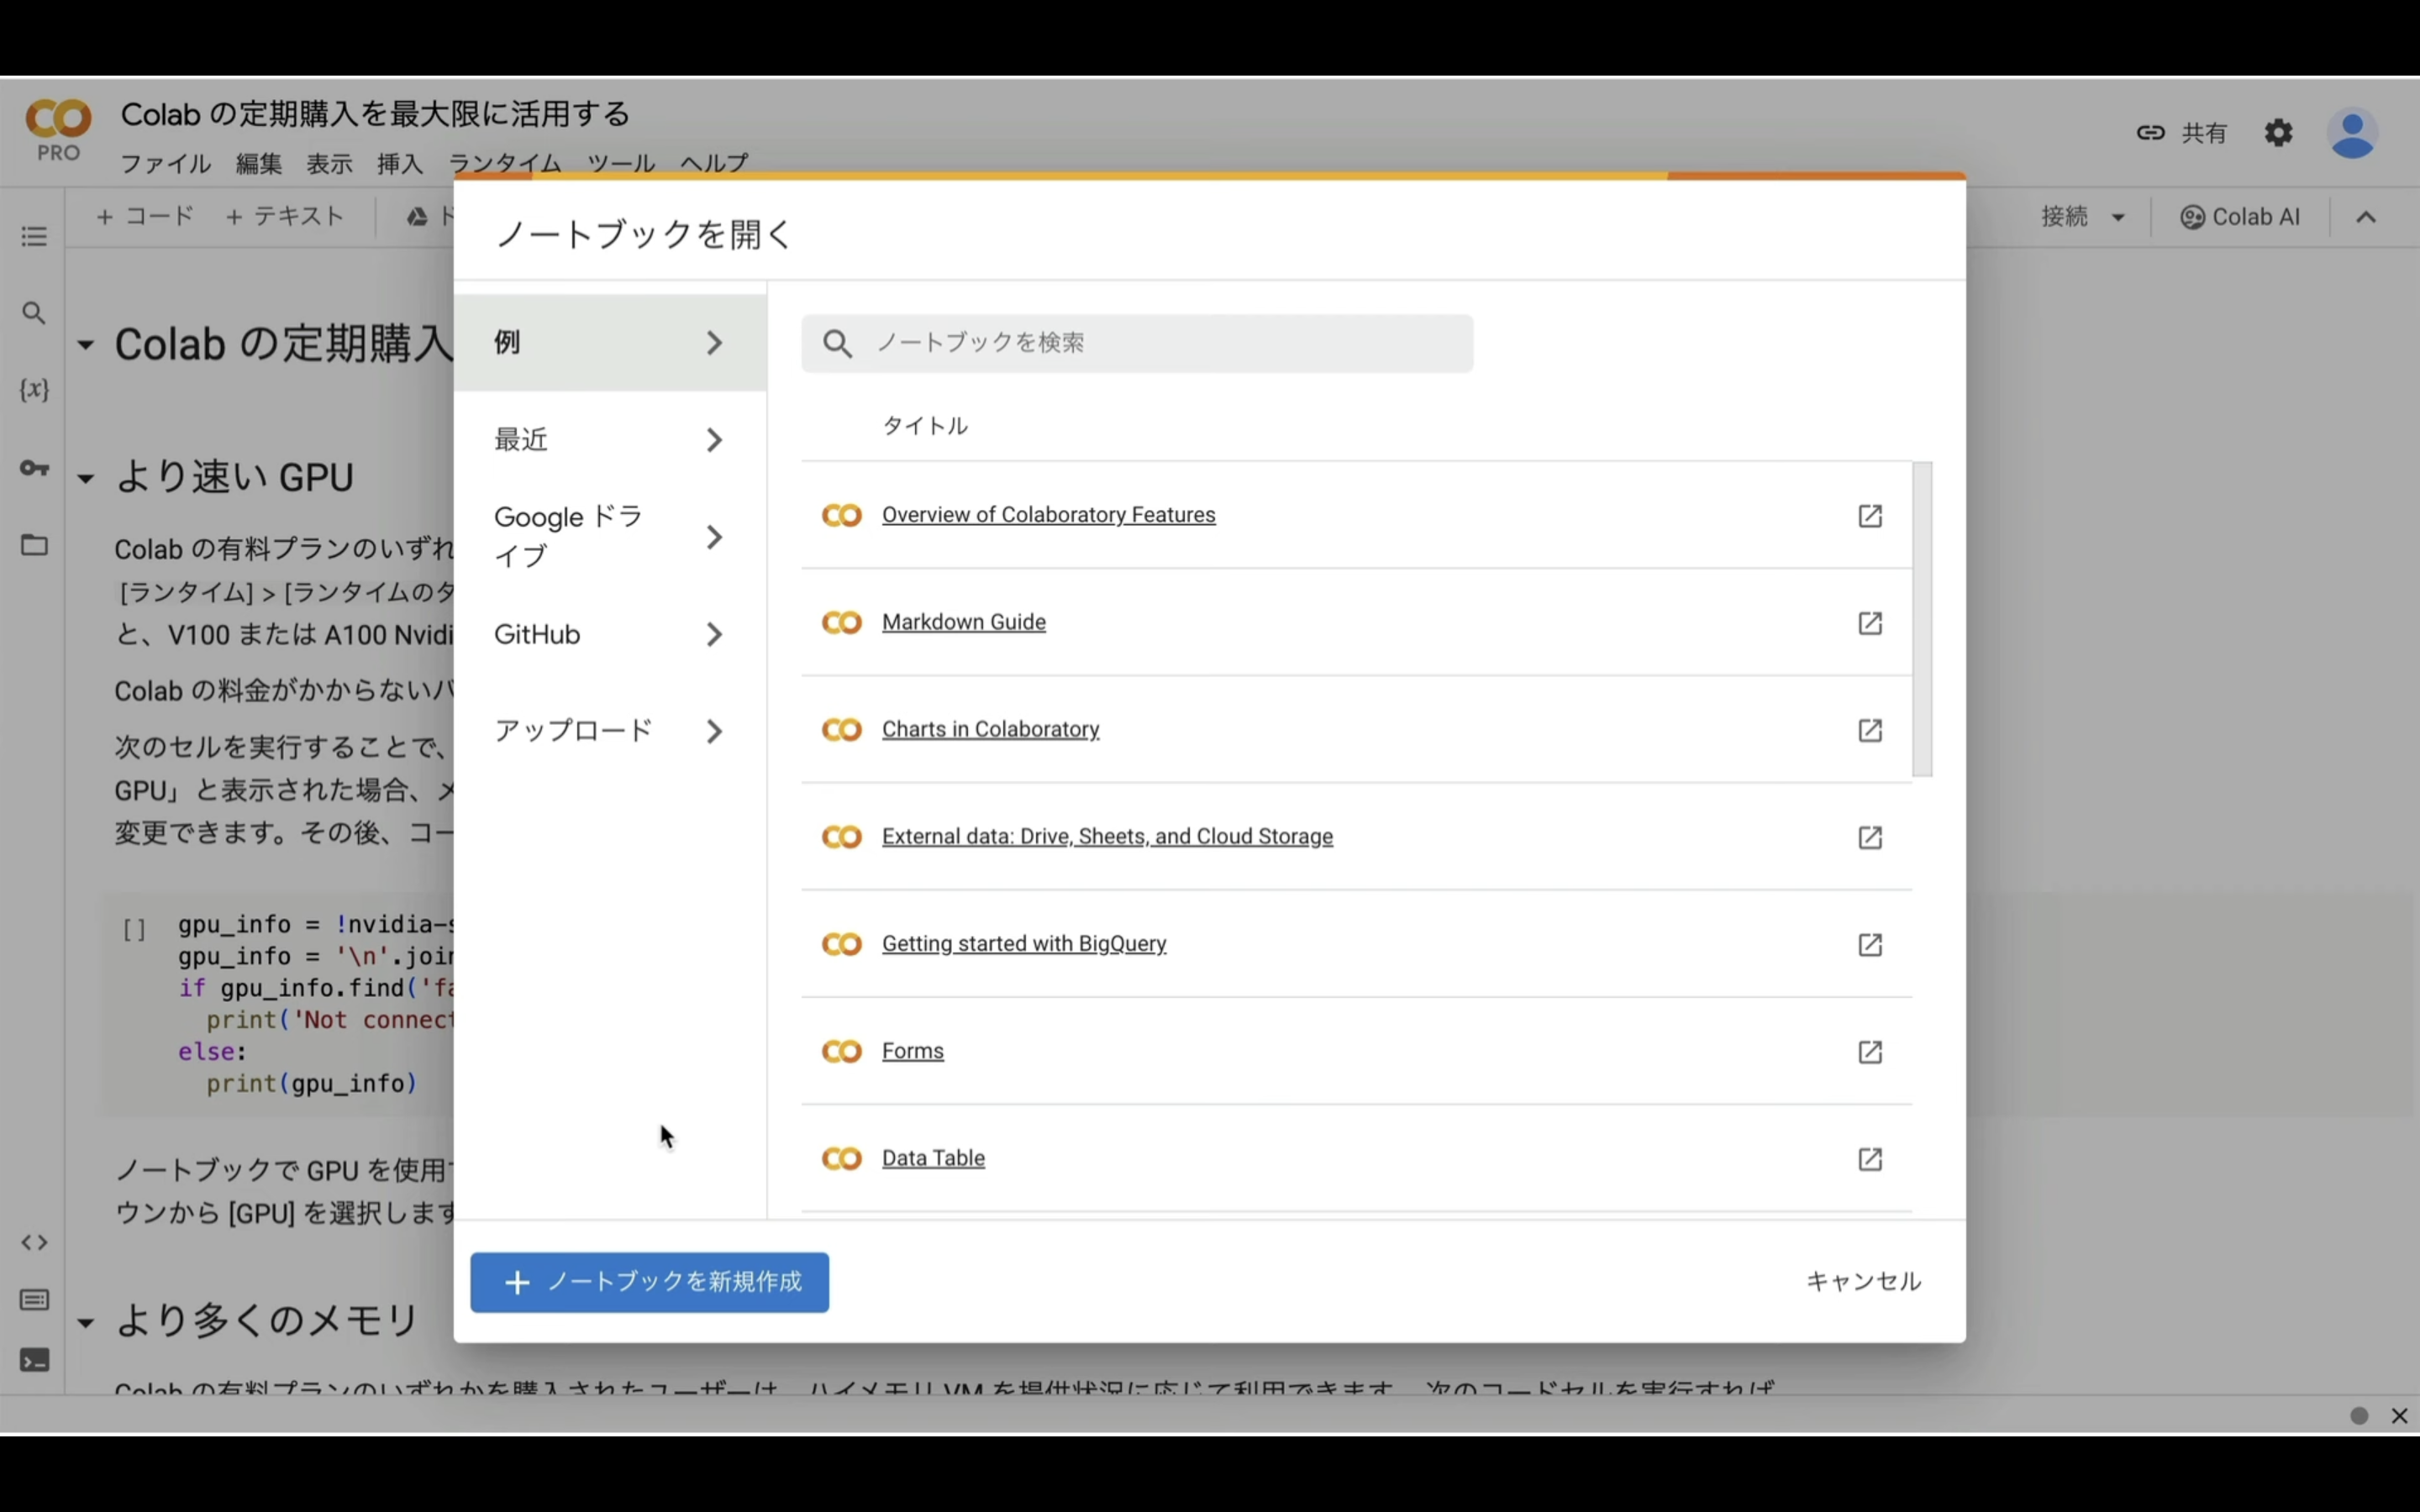
この動画ではGoogleコラボを利用して解説を進めます。
そのため、もしGoogleコラボというキーワードが分からない場合は、詳細を解説している記事のリンクを以下に貼っておきますので、そちらをご確認ください。
Google Colabのサイトにアクセス
ここからの流れは下記に詳細リンクを貼っておきますので、そちらからご参照ください。
これで、Google Colabでコードを実行するための準備が整いました。
Google Colabでコードを実行
下記に貼ってあるテキストをコピーします。
%cd /content
!git clone -b dev https://github.com/camenduru/OOTDiffusion
%cd /content/OOTDiffusion

!apt -y install -qq aria2
!aria2c --console-log-level=error -c -x 16 -s 16 -k 1M https://huggingface.co/camenduru/OOTDiffusion/resolve/main/images/demo.png -d /content/OOTDiffusion/images -o demo.png
!aria2c --console-log-level=error -c -x 16 -s 16 -k 1M https://huggingface.co/camenduru/OOTDiffusion/resolve/main/checkpoints/humanparsing/exp-schp-201908261155-lip.pth -d /content/OOTDiffusion/checkpoints/humanparsing -o exp-schp-201908261155-lip.pth
!aria2c --console-log-level=error -c -x 16 -s 16 -k 1M https://huggingface.co/camenduru/OOTDiffusion/resolve/main/checkpoints/humanparsing/exp-schp-201908301523-atr.pth -d /content/OOTDiffusion/checkpoints/humanparsing -o exp-schp-201908301523-atr.pth
!aria2c --console-log-level=error -c -x 16 -s 16 -k 1M https://huggingface.co/camenduru/OOTDiffusion/resolve/main/checkpoints/openpose/ckpts/body_pose_model.pth -d /content/OOTDiffusion/checkpoints/openpose/ckpts -o body_pose_model.pth
!aria2c --console-log-level=error -c -x 16 -s 16 -k 1M https://huggingface.co/camenduru/OOTDiffusion/raw/main/checkpoints/ootd/feature_extractor/preprocessor_config.json -d /content/OOTDiffusion/checkpoints/ootd/feature_extractor -o preprocessor_config.json
!aria2c --console-log-level=error -c -x 16 -s 16 -k 1M https://huggingface.co/camenduru/OOTDiffusion/raw/main/checkpoints/ootd/ootd_hd/checkpoint-36000/unet_garm/config.json -d /content/OOTDiffusion/checkpoints/ootd/ootd_hd/checkpoint-36000/unet_garm -o config.json
!aria2c --console-log-level=error -c -x 16 -s 16 -k 1M https://huggingface.co/camenduru/OOTDiffusion/resolve/main/checkpoints/ootd/ootd_hd/checkpoint-36000/unet_garm/diffusion_pytorch_model.safetensors -d /content/OOTDiffusion/checkpoints/ootd/ootd_hd/checkpoint-36000/unet_garm -o diffusion_pytorch_model.safetensors
!aria2c --console-log-level=error -c -x 16 -s 16 -k 1M https://huggingface.co/camenduru/OOTDiffusion/raw/main/checkpoints/ootd/ootd_hd/checkpoint-36000/unet_vton/config.json -d /content/OOTDiffusion/checkpoints/ootd/ootd_hd/checkpoint-36000/unet_vton -o config.json
!aria2c --console-log-level=error -c -x 16 -s 16 -k 1M https://huggingface.co/camenduru/OOTDiffusion/resolve/main/checkpoints/ootd/ootd_hd/checkpoint-36000/unet_vton/diffusion_pytorch_model.safetensors -d /content/OOTDiffusion/checkpoints/ootd/ootd_hd/checkpoint-36000/unet_vton -o diffusion_pytorch_model.safetensors
!aria2c --console-log-level=error -c -x 16 -s 16 -k 1M https://huggingface.co/camenduru/OOTDiffusion/raw/main/checkpoints/ootd/scheduler/scheduler_config.json -d /content/OOTDiffusion/checkpoints/ootd/scheduler -o scheduler_config.json
!aria2c --console-log-level=error -c -x 16 -s 16 -k 1M https://huggingface.co/camenduru/OOTDiffusion/raw/main/checkpoints/ootd/text_encoder/config.json -d /content/OOTDiffusion/checkpoints/ootd/text_encoder -o config.json
!aria2c --console-log-level=error -c -x 16 -s 16 -k 1M https://huggingface.co/camenduru/OOTDiffusion/resolve/main/checkpoints/ootd/text_encoder/pytorch_model.bin -d /content/OOTDiffusion/checkpoints/ootd/text_encoder -o pytorch_model.bin
!aria2c --console-log-level=error -c -x 16 -s 16 -k 1M https://huggingface.co/camenduru/OOTDiffusion/raw/main/checkpoints/ootd/tokenizer/merges.txt -d /content/OOTDiffusion/checkpoints/ootd/tokenizer -o merges.txt
!aria2c --console-log-level=error -c -x 16 -s 16 -k 1M https://huggingface.co/camenduru/OOTDiffusion/raw/main/checkpoints/ootd/tokenizer/special_tokens_map.json -d /content/OOTDiffusion/checkpoints/ootd/tokenizer -o special_tokens_map.json
!aria2c --console-log-level=error -c -x 16 -s 16 -k 1M https://huggingface.co/camenduru/OOTDiffusion/raw/main/checkpoints/ootd/tokenizer/tokenizer_config.json -d /content/OOTDiffusion/checkpoints/ootd/tokenizer -o tokenizer_config.json
!aria2c --console-log-level=error -c -x 16 -s 16 -k 1M https://huggingface.co/camenduru/OOTDiffusion/raw/main/checkpoints/ootd/tokenizer/vocab.json -d /content/OOTDiffusion/checkpoints/ootd/tokenizer -o vocab.json
!aria2c --console-log-level=error -c -x 16 -s 16 -k 1M https://huggingface.co/camenduru/OOTDiffusion/raw/main/checkpoints/ootd/vae/config.json -d /content/OOTDiffusion/checkpoints/ootd/vae -o config.json
!aria2c --console-log-level=error -c -x 16 -s 16 -k 1M https://huggingface.co/camenduru/OOTDiffusion/resolve/main/checkpoints/ootd/vae/diffusion_pytorch_model.bin -d /content/OOTDiffusion/checkpoints/ootd/vae -o diffusion_pytorch_model.bin
!aria2c --console-log-level=error -c -x 16 -s 16 -k 1M https://huggingface.co/camenduru/OOTDiffusion/raw/main/checkpoints/ootd/model_index.json -d /content/OOTDiffusion/checkpoints/ootd -o model_index.json
!aria2c --console-log-level=error -c -x 16 -s 16 -k 1M https://huggingface.co/camenduru/SUPIR/resolve/main/clip-vit-large-patch14.tar -d /content/OOTDiffusion/checkpoints -o clip-vit-large-patch14.tar

!pip install -q gradio config einops ninja diffusers==0.24.0 accelerate==0.26.1

%cd /content/OOTDiffusion/checkpoints
!mkdir clip-vit-large-patch14
%cd /content/OOTDiffusion/checkpoints/clip-vit-large-patch14
!tar -xvf ../clip-vit-large-patch14.tar

%cd /content/OOTDiffusion/run
!python gradio_ootd.py
テキストをコピーしたら、Google Colabの画面に戻り、テキストボックスに先ほどコピーしたテキストを貼り付け、再生ボタンを押します。
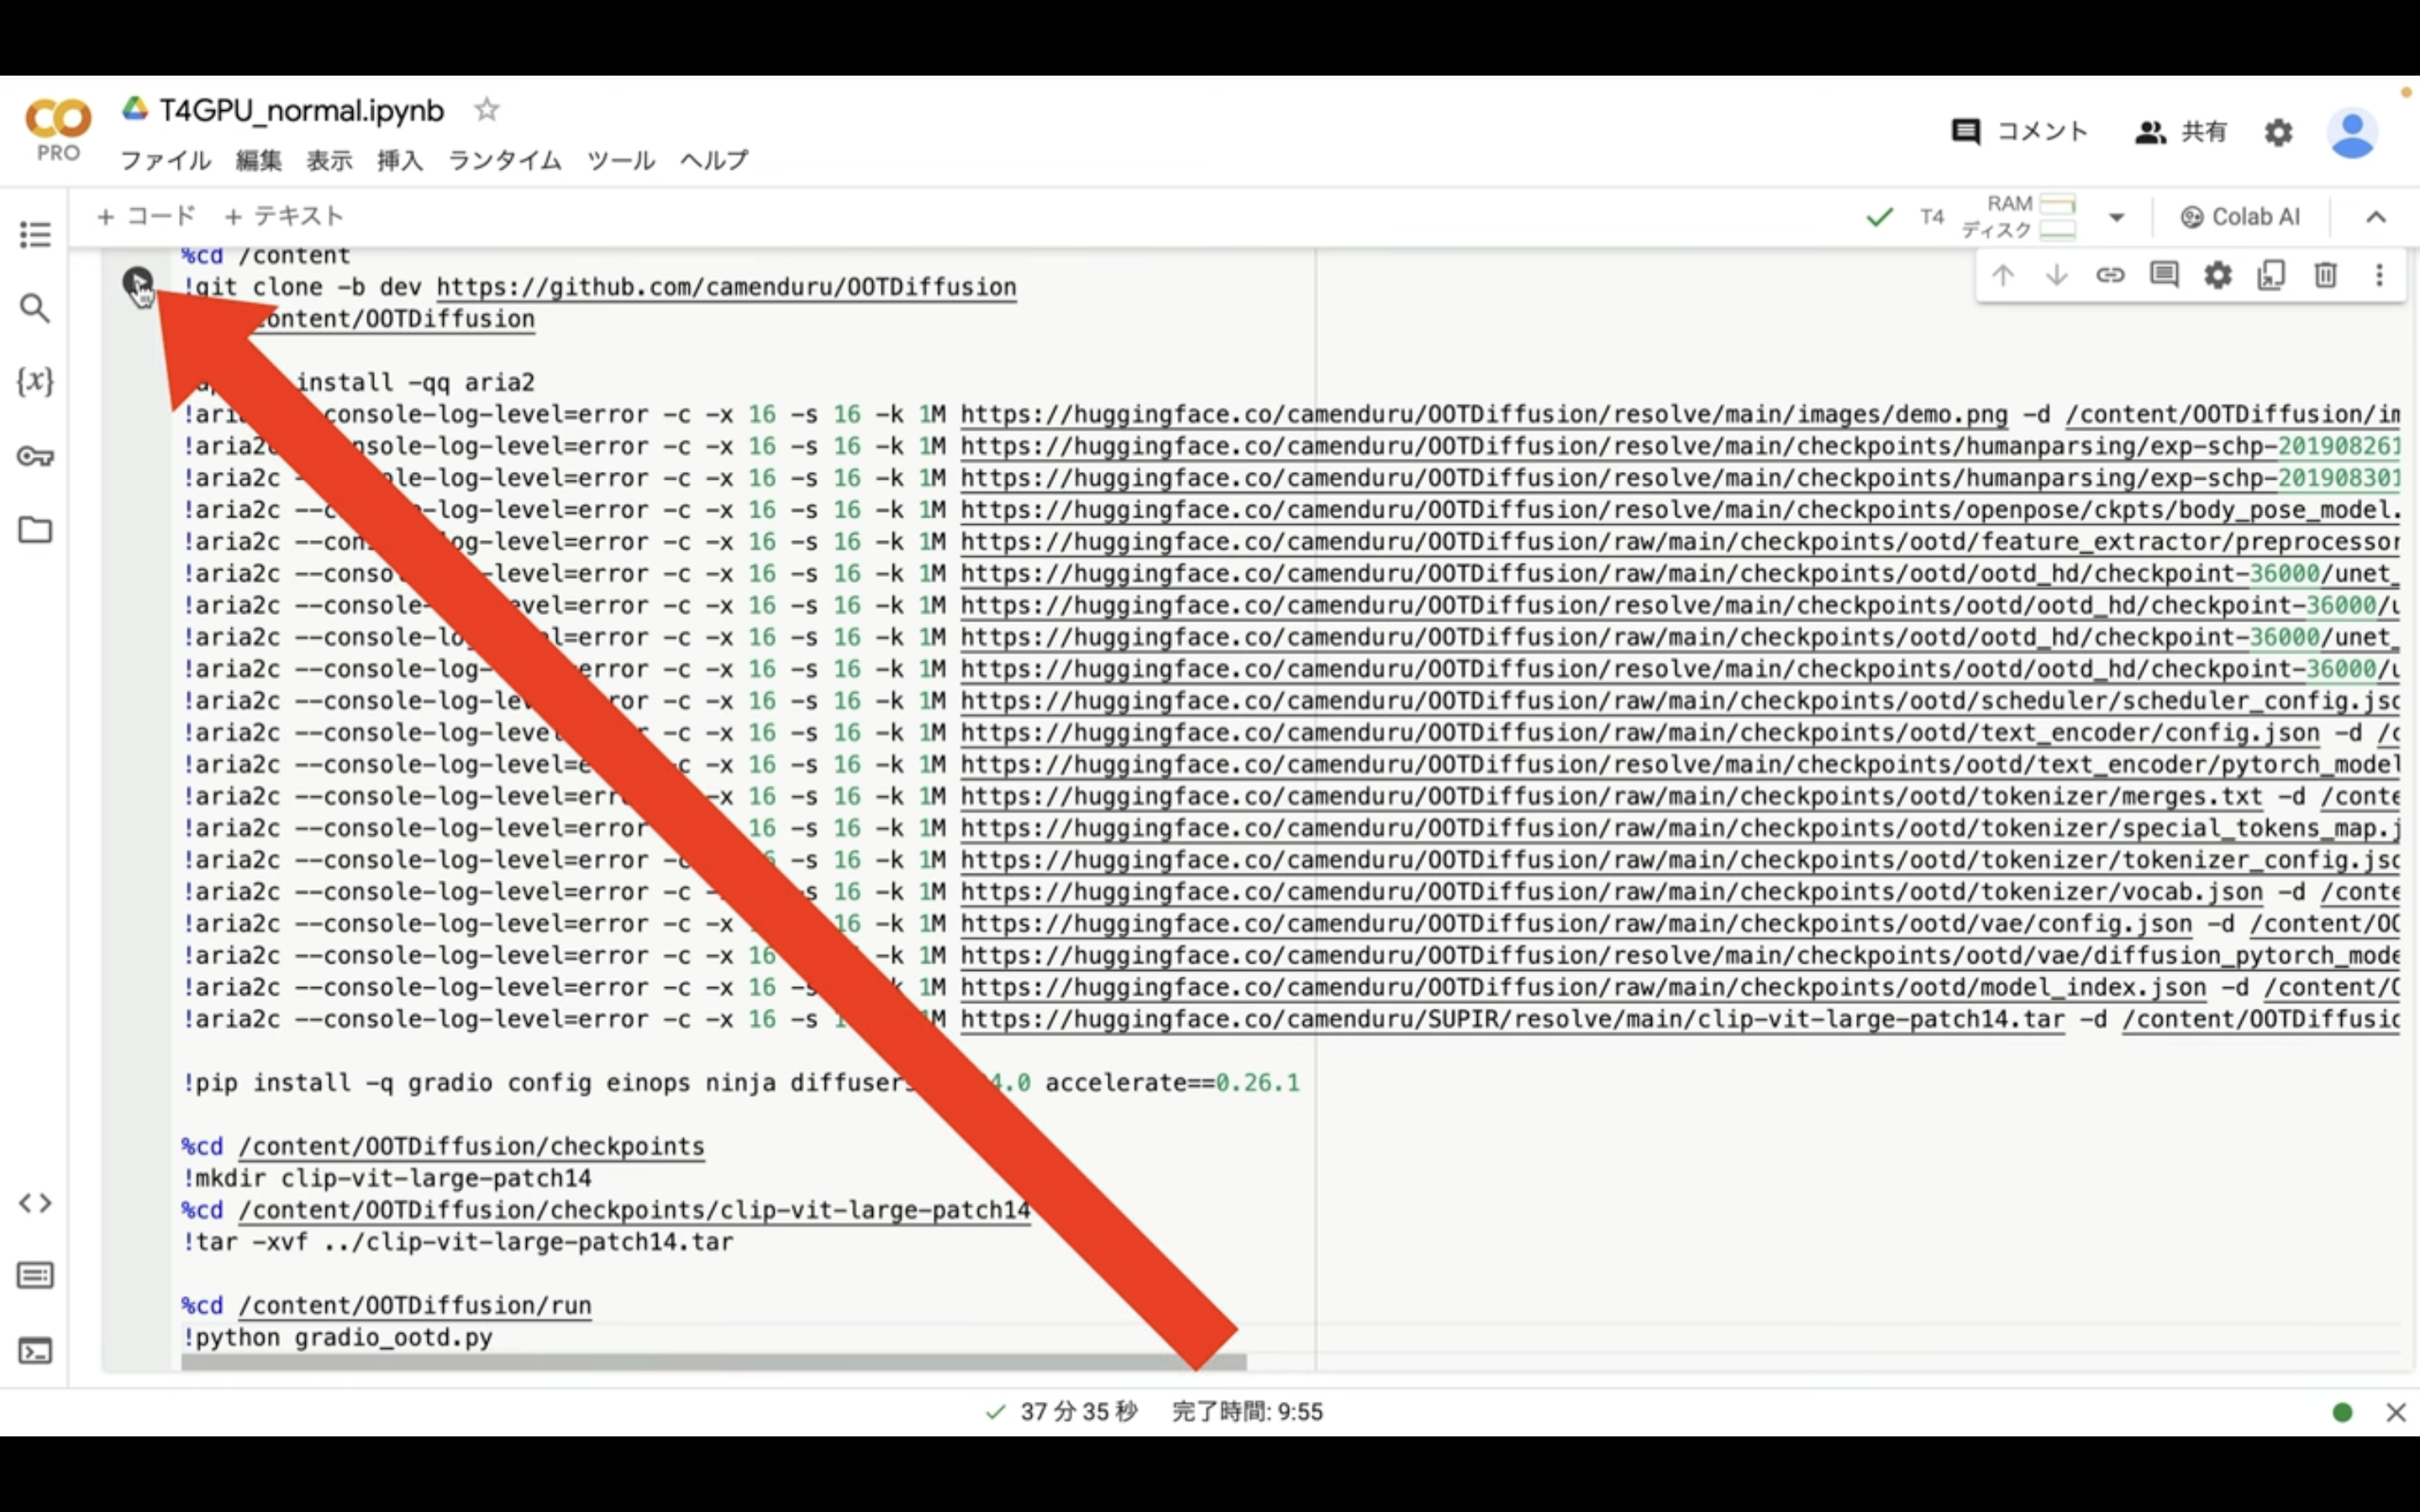
これで貼り付けたテキストの内容が実行されます。
この処理には5分以上かかると思います。
しばらく待っていると、このようなリンクが表示されます。
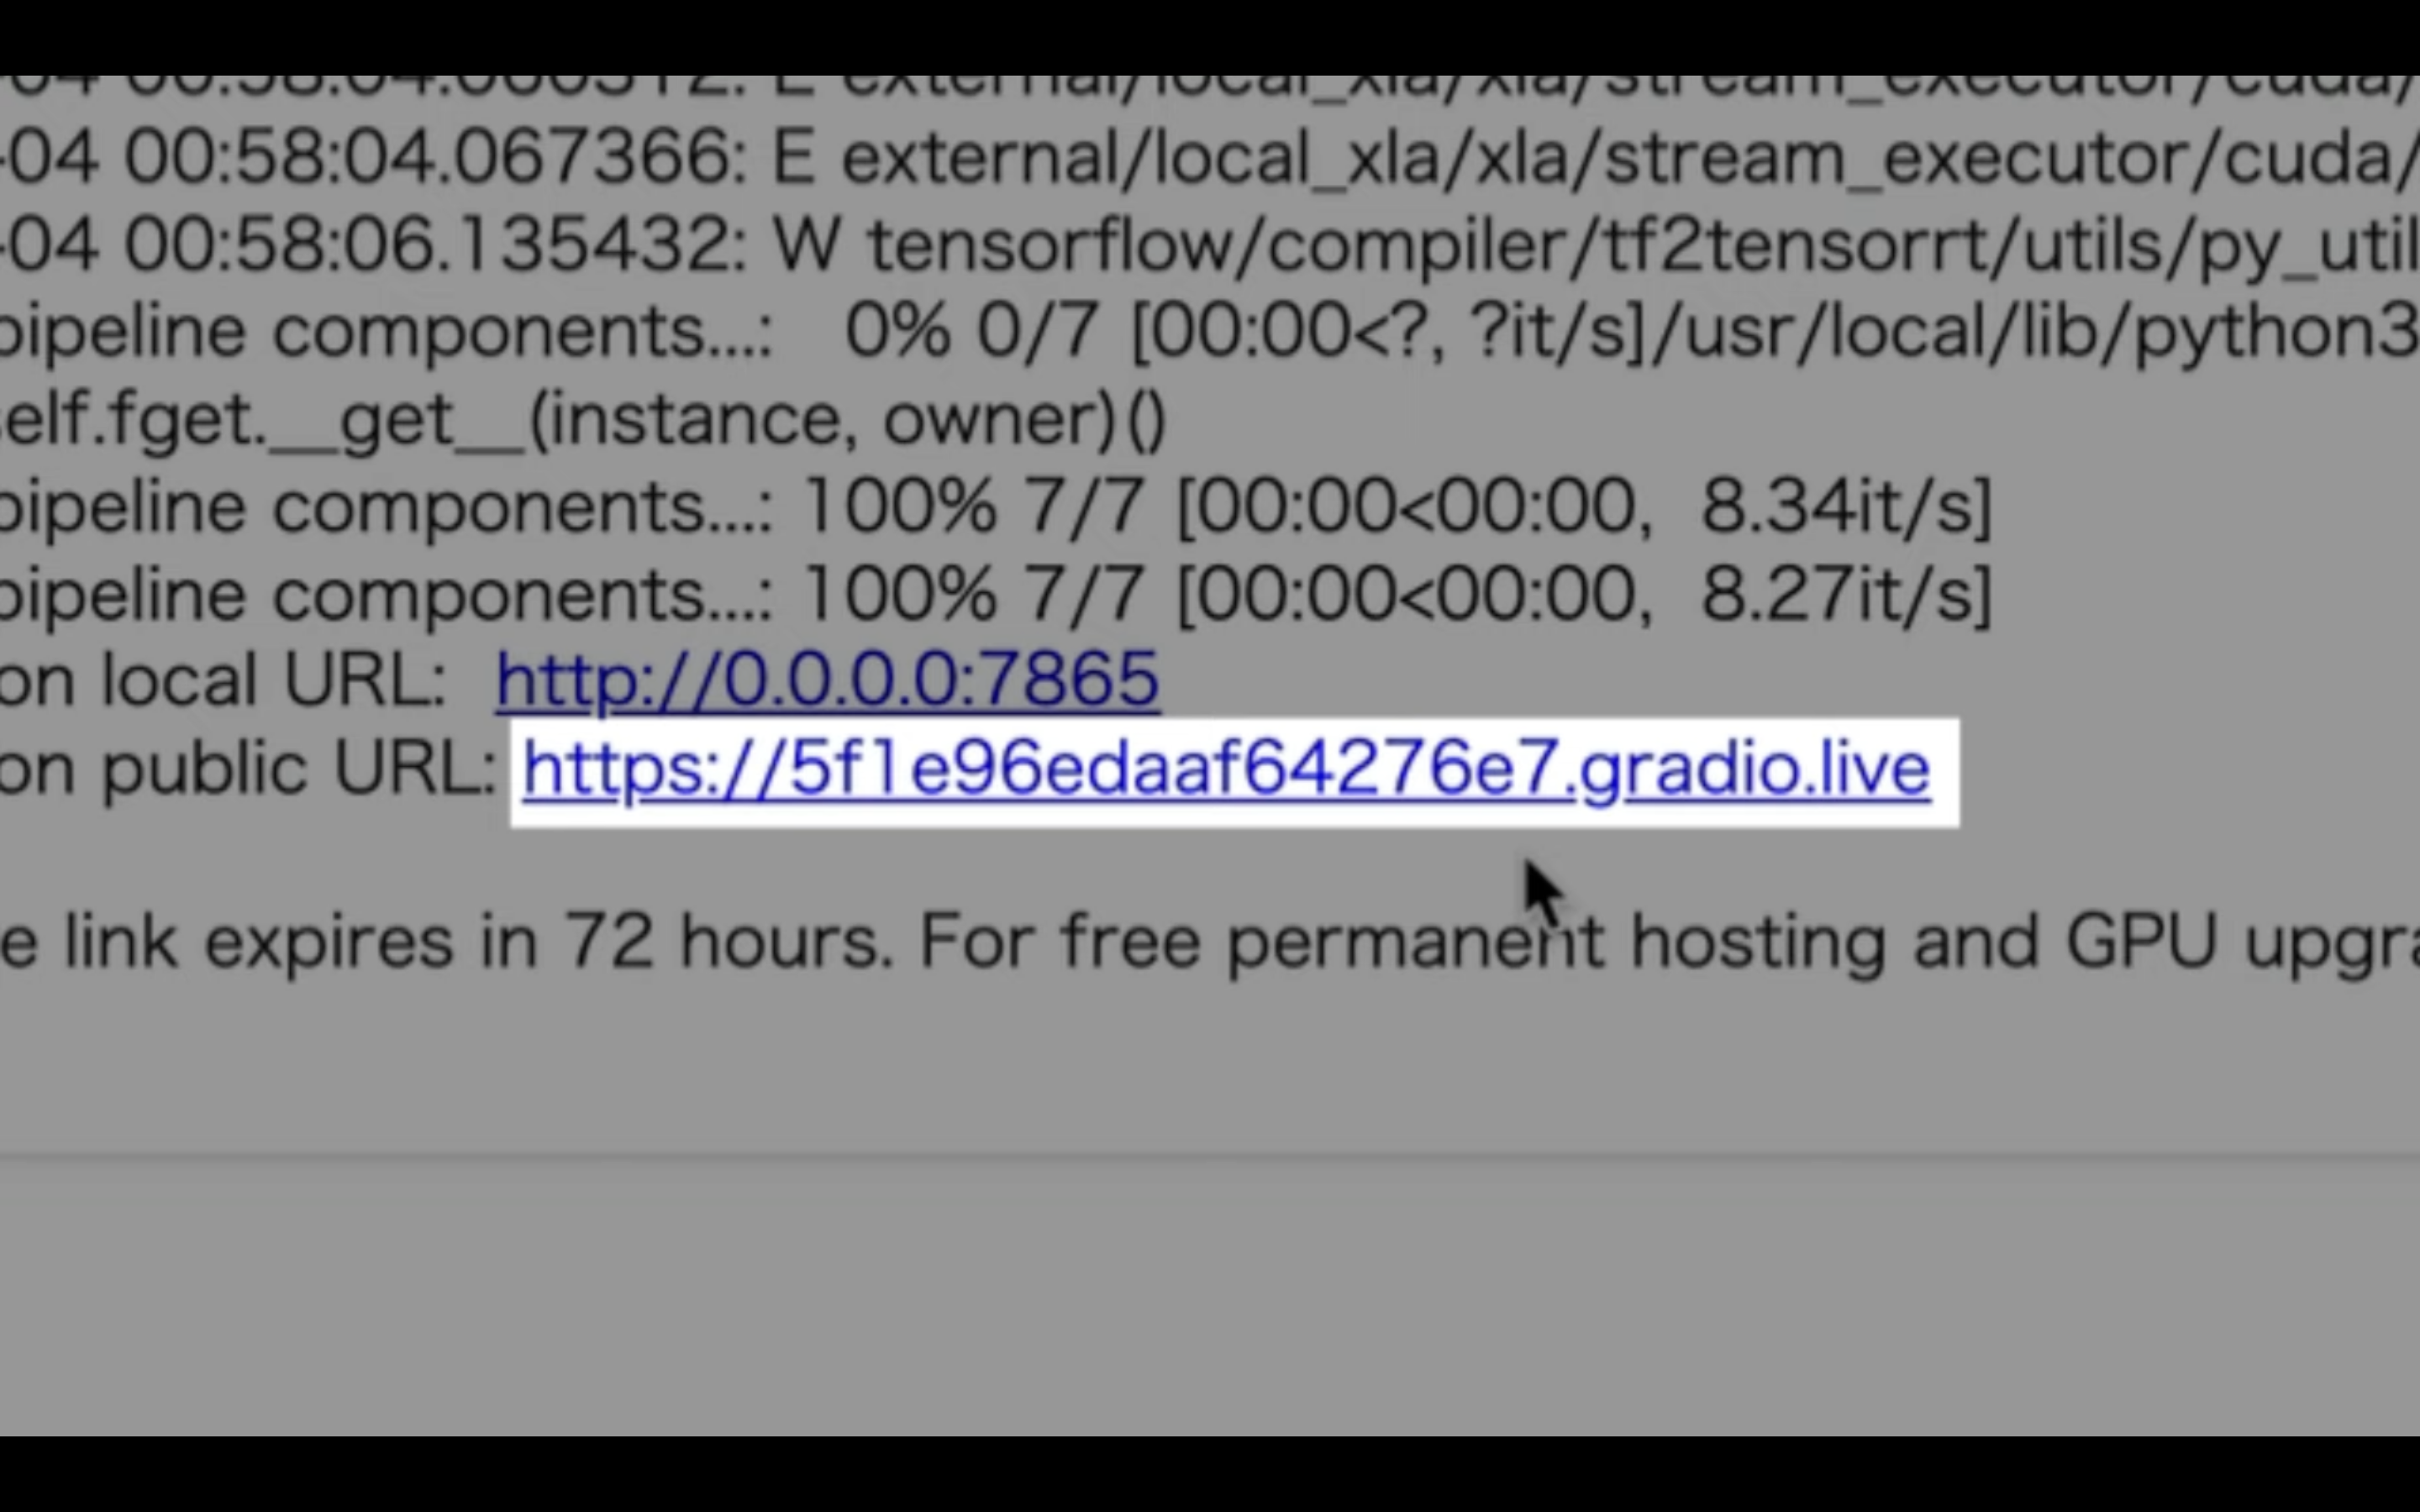
このリンクをクリックします。
そうするとOOTDiffusionの操作画面が表示されます。
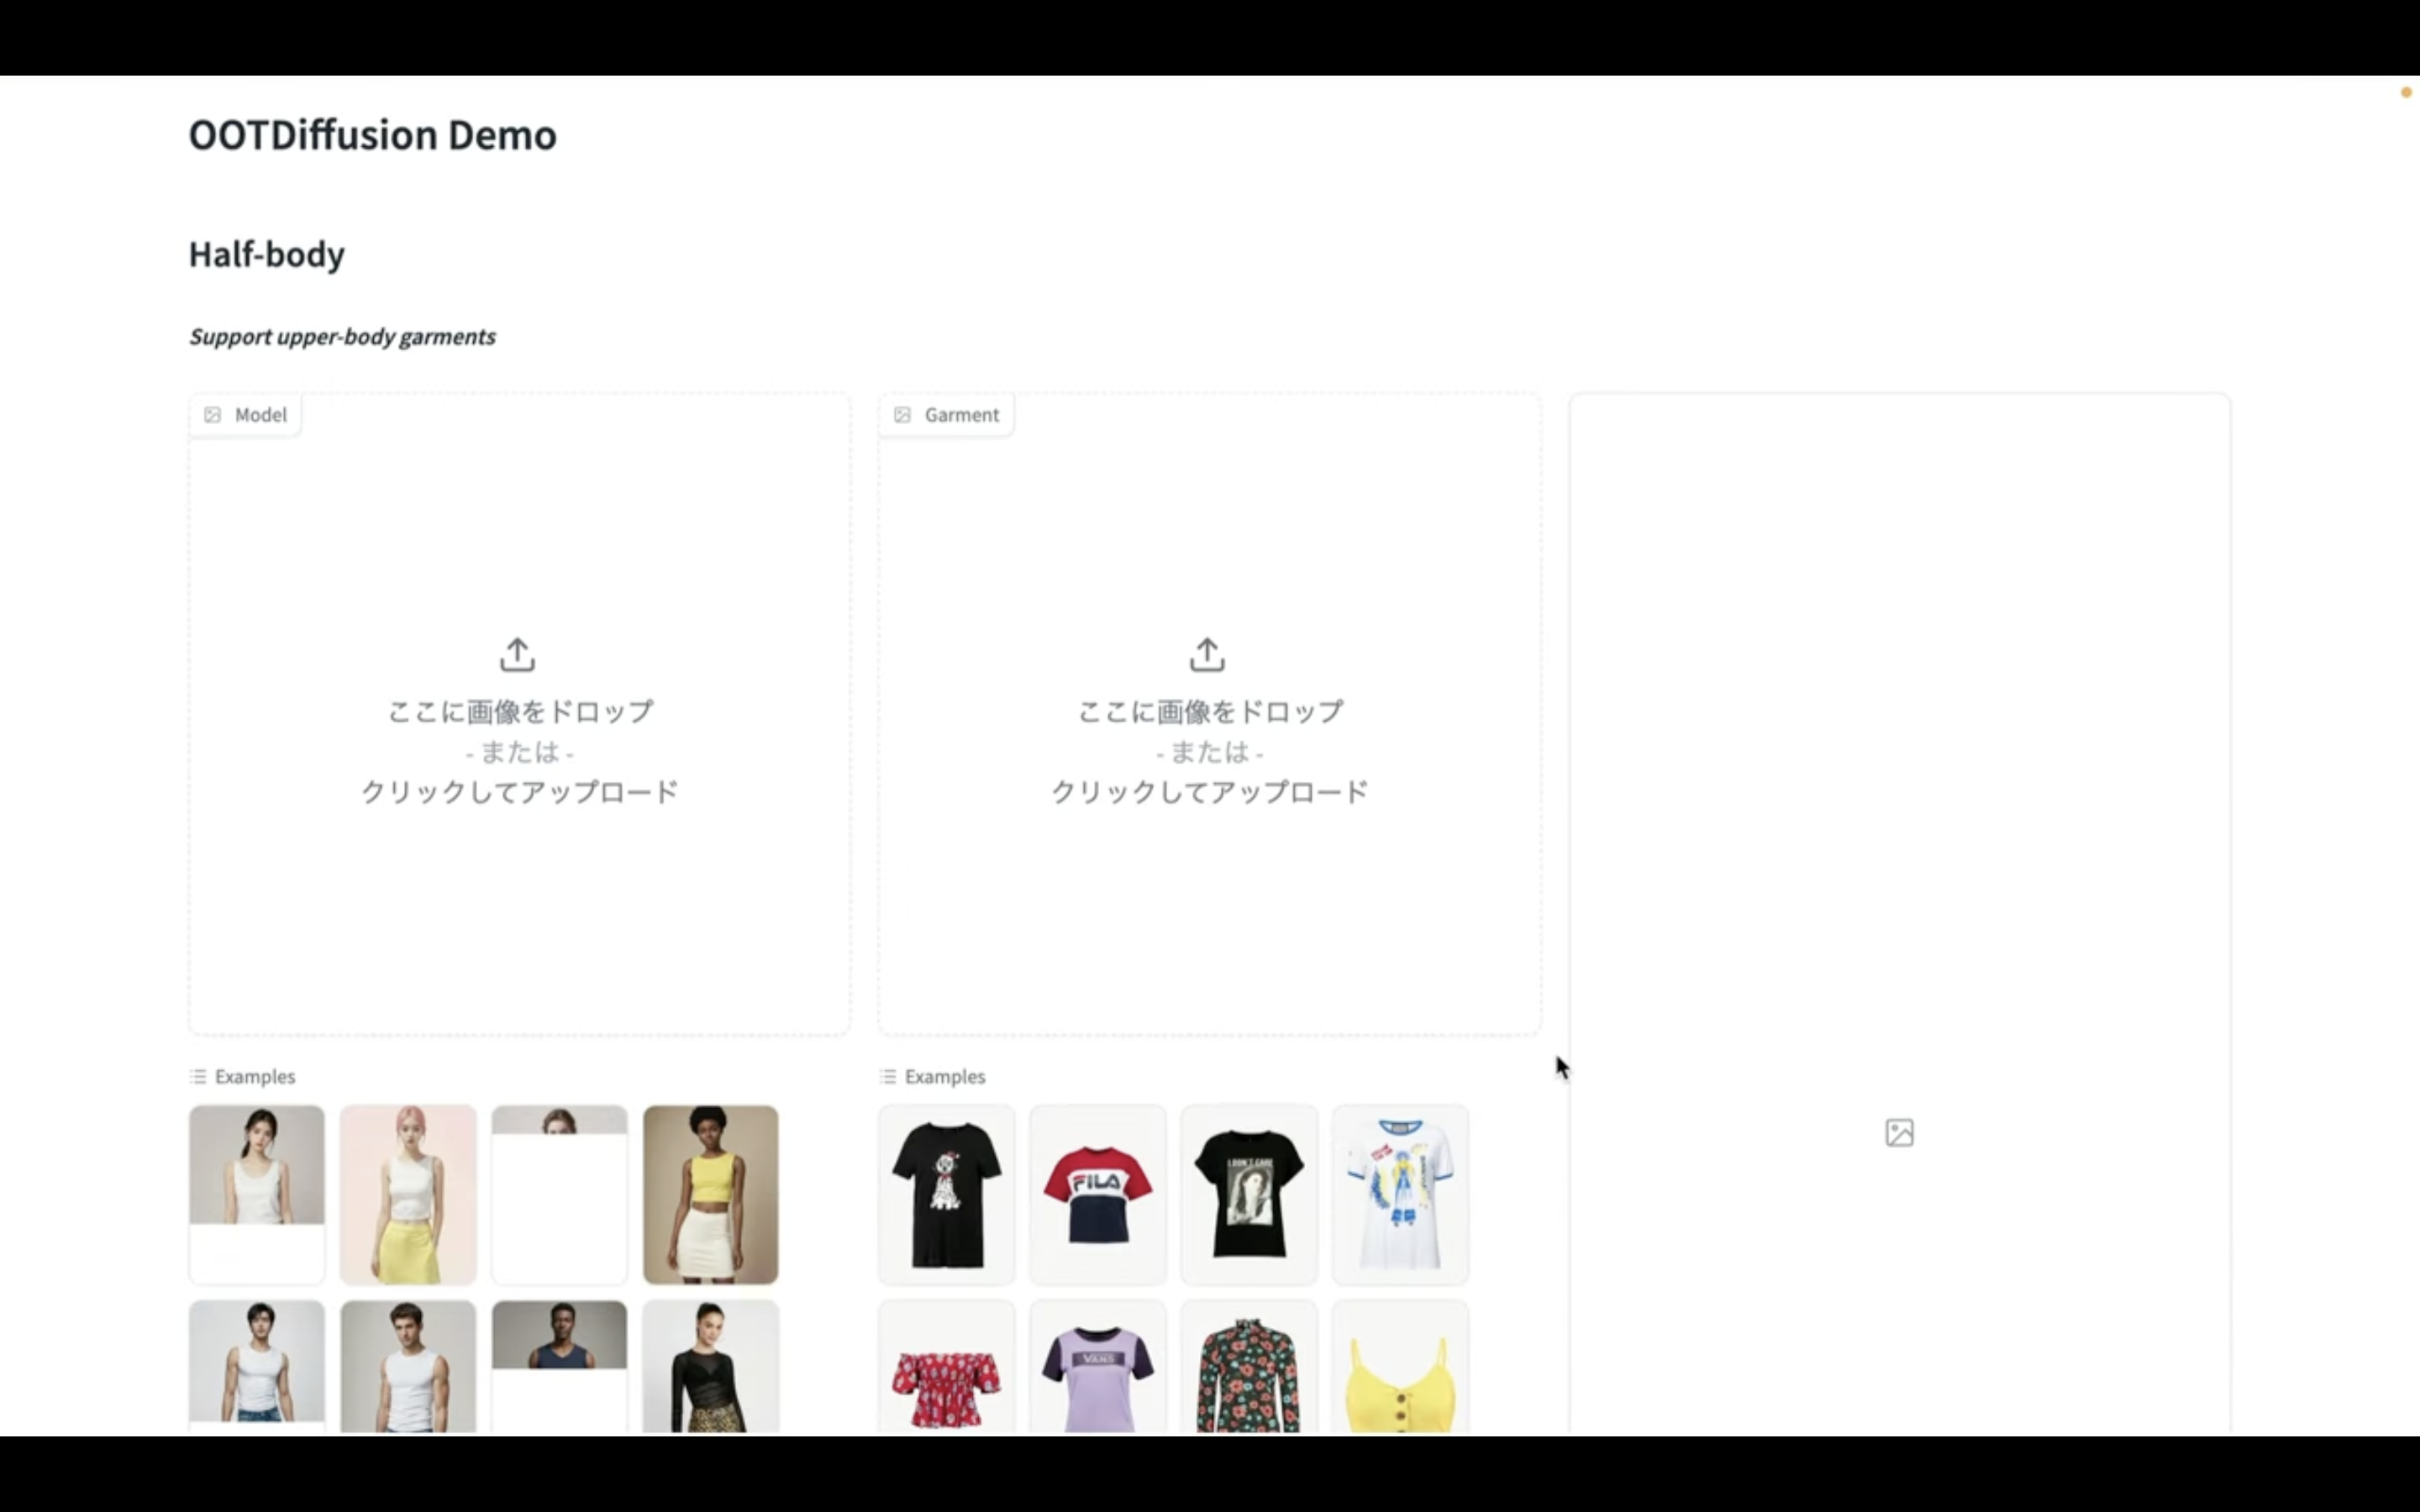
サンプル画像で動作を確認してみましょう
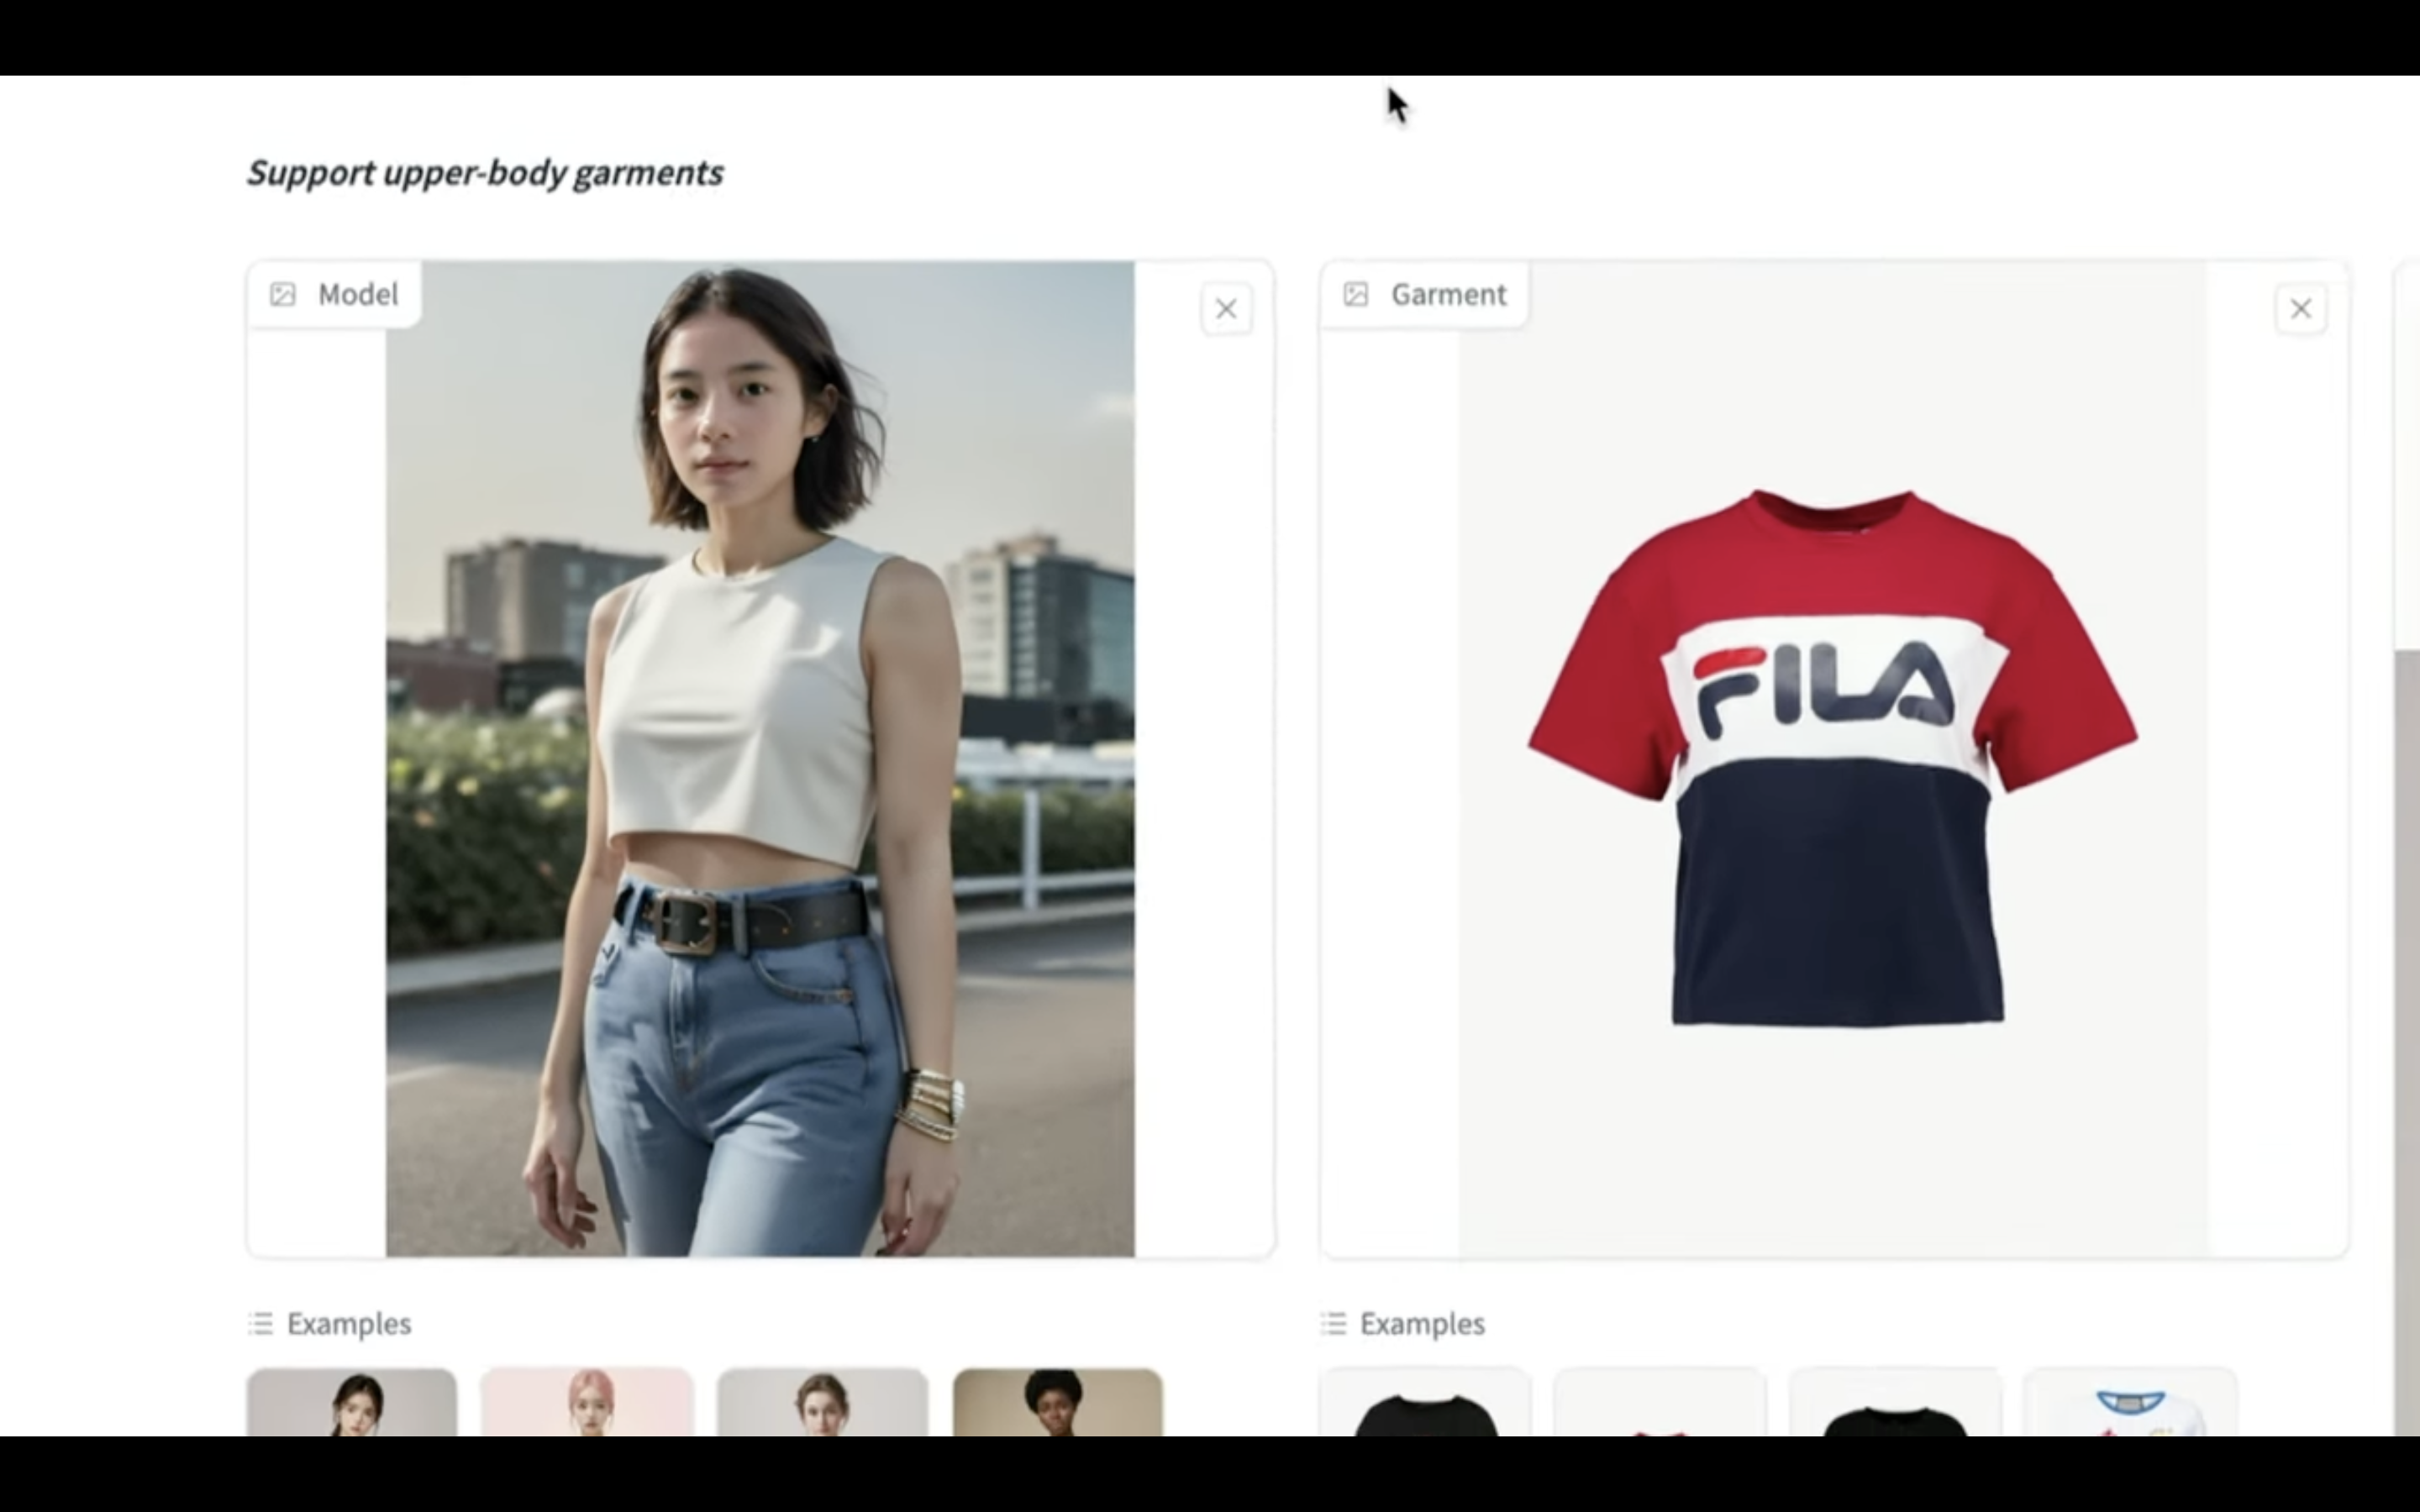
人物の画像を選択します。
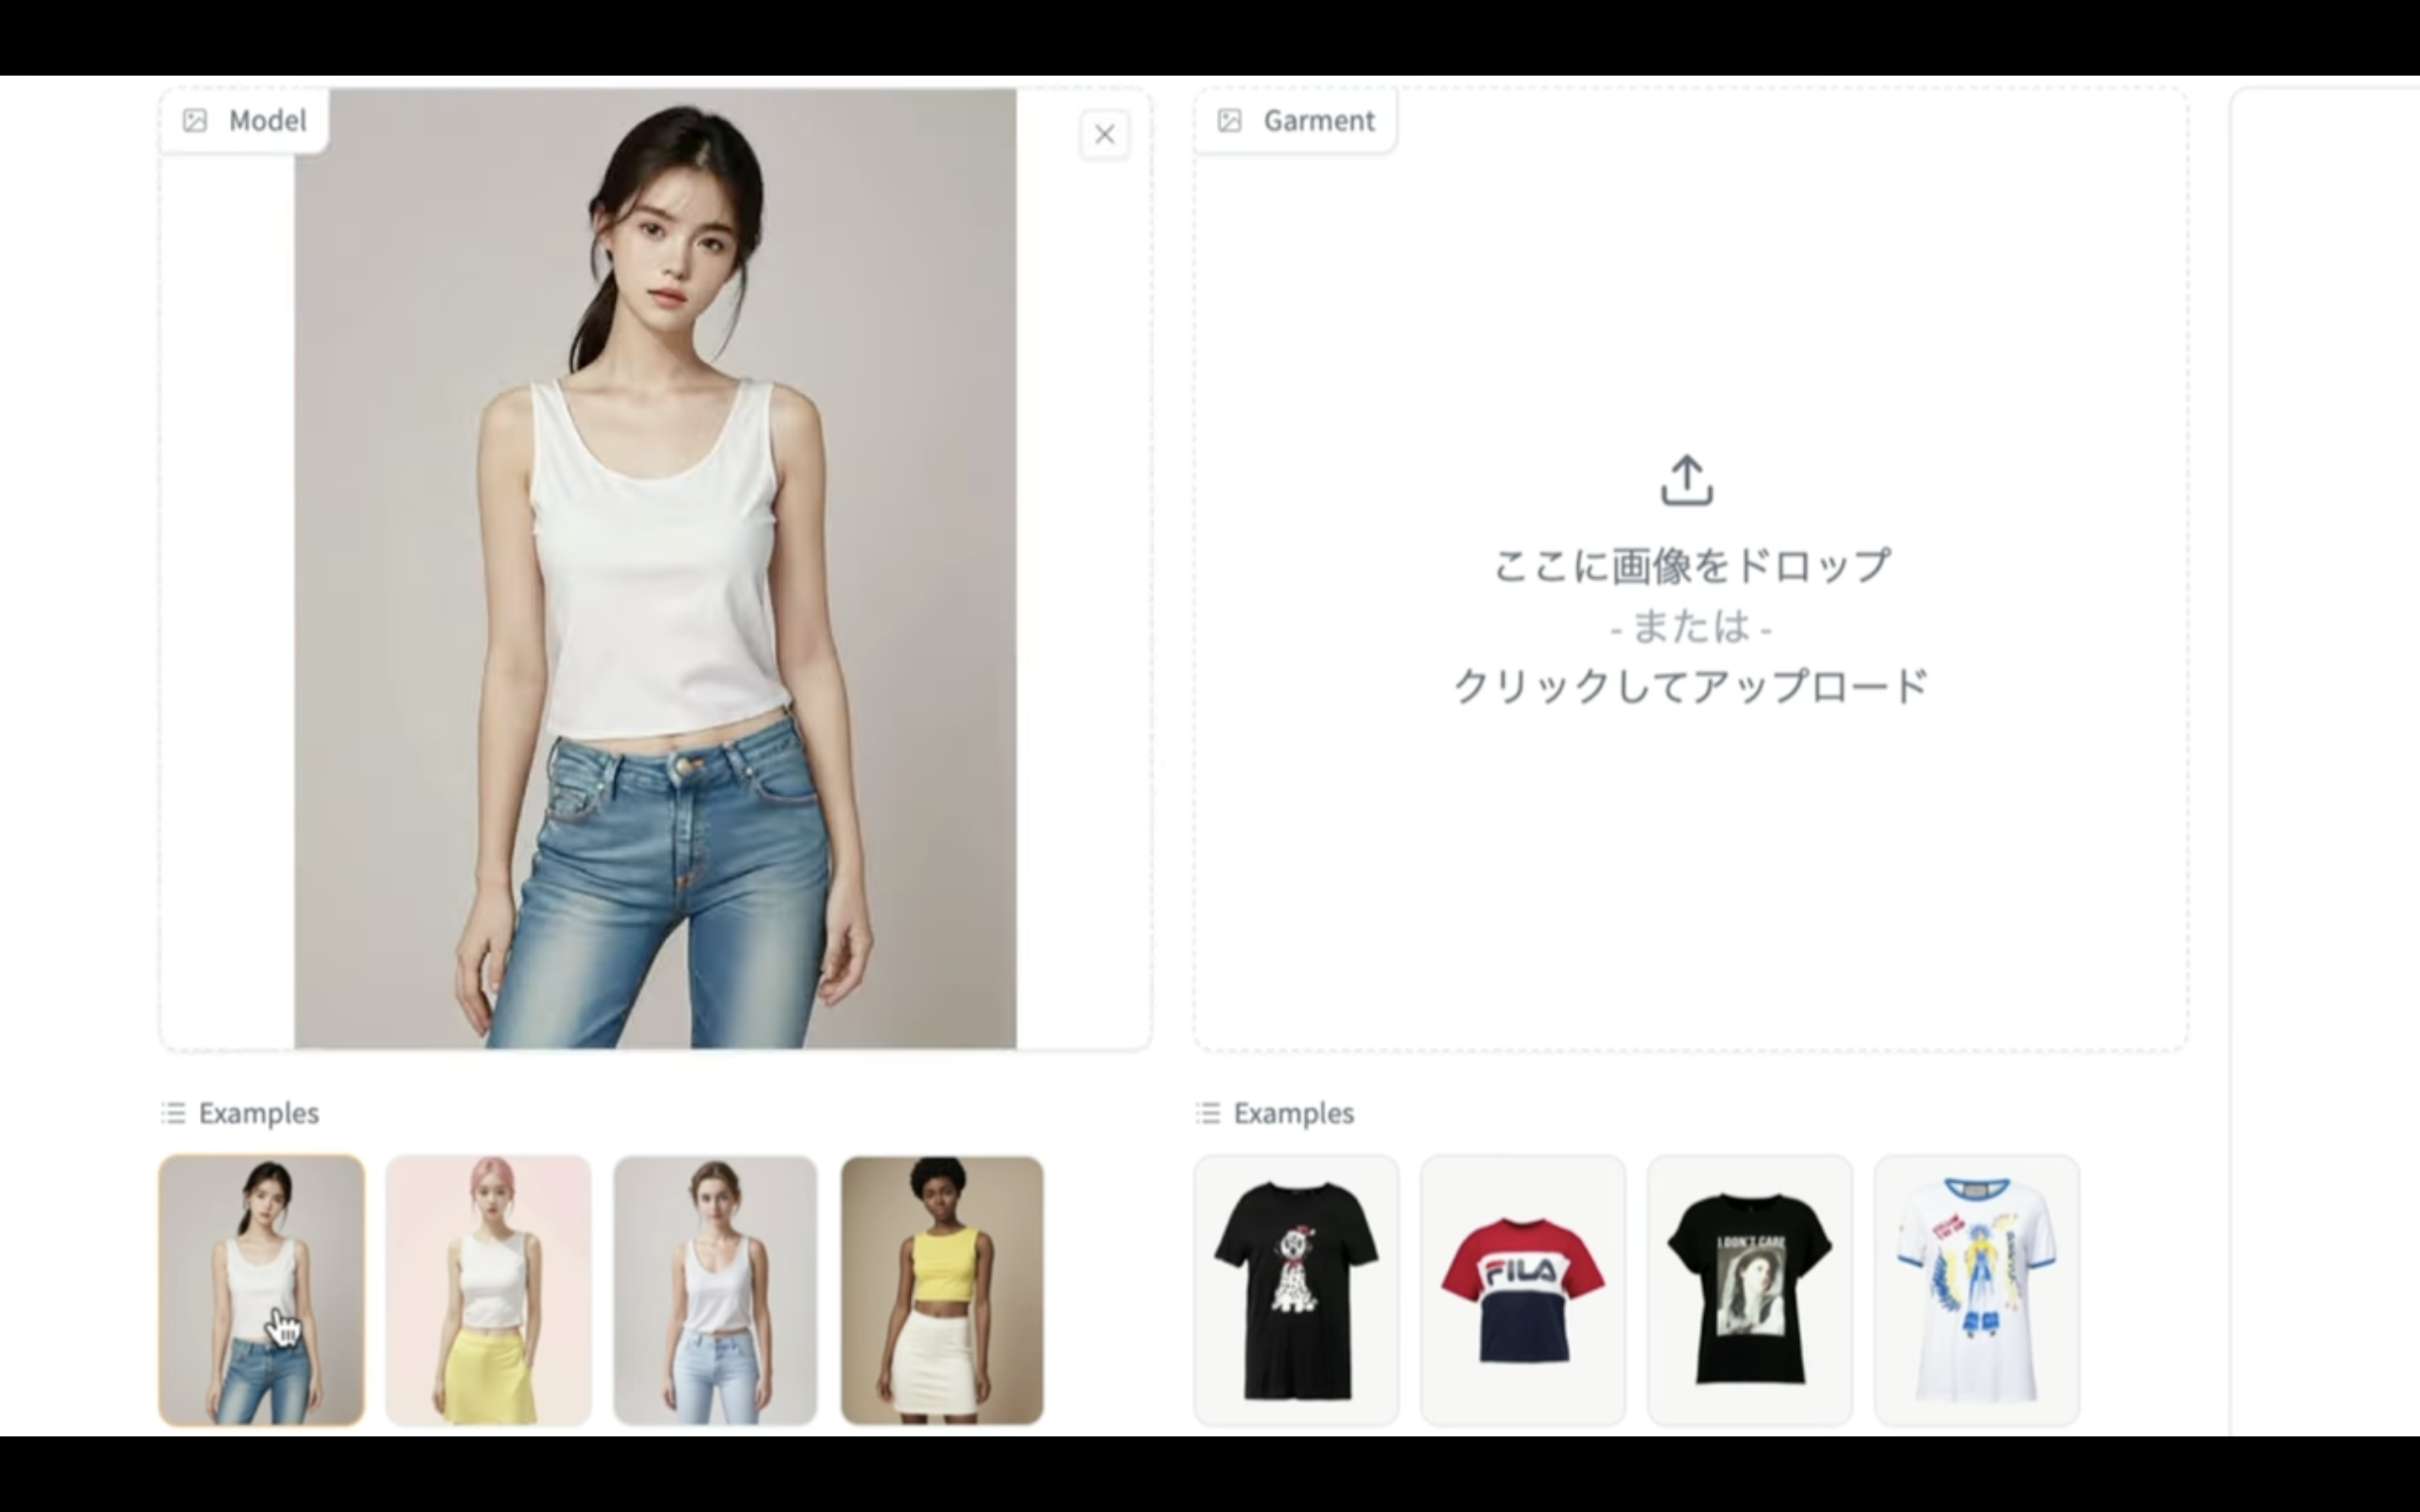
次に服装の画像を選択します。

これで服装を変更させるための準備が整いました。
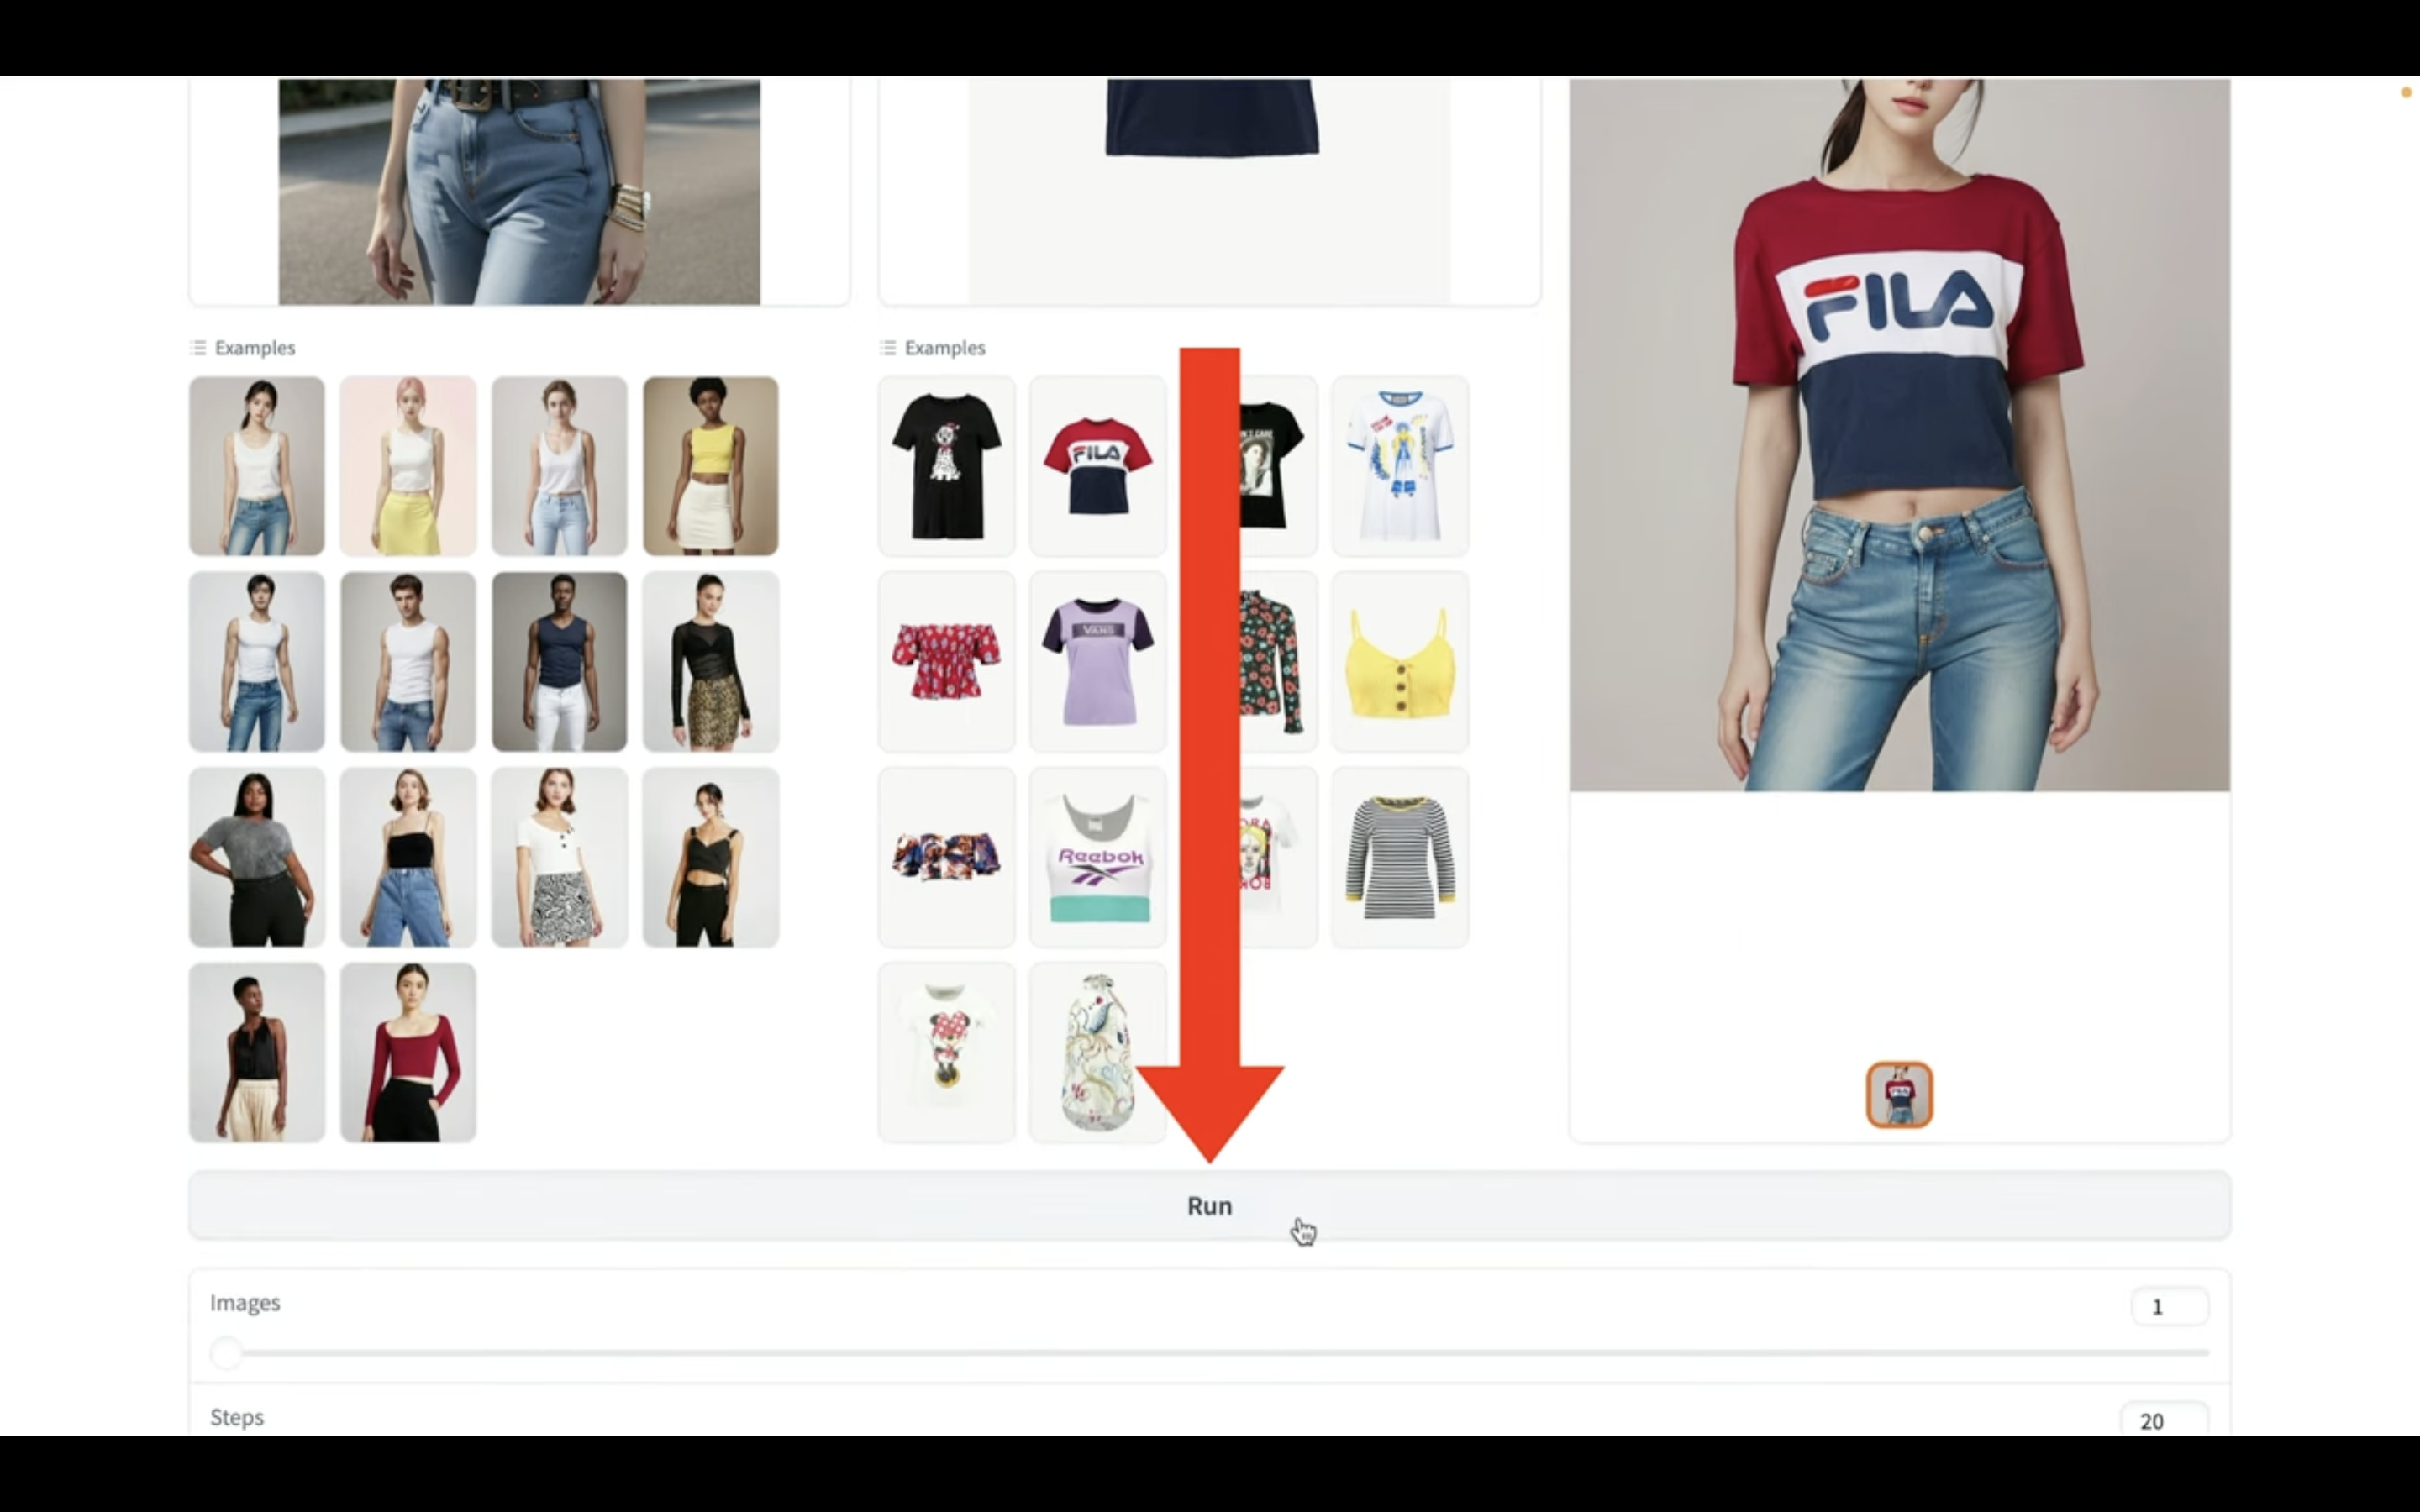
早速実行していきましょう
「Run」と書かれているボタンをクリックします。
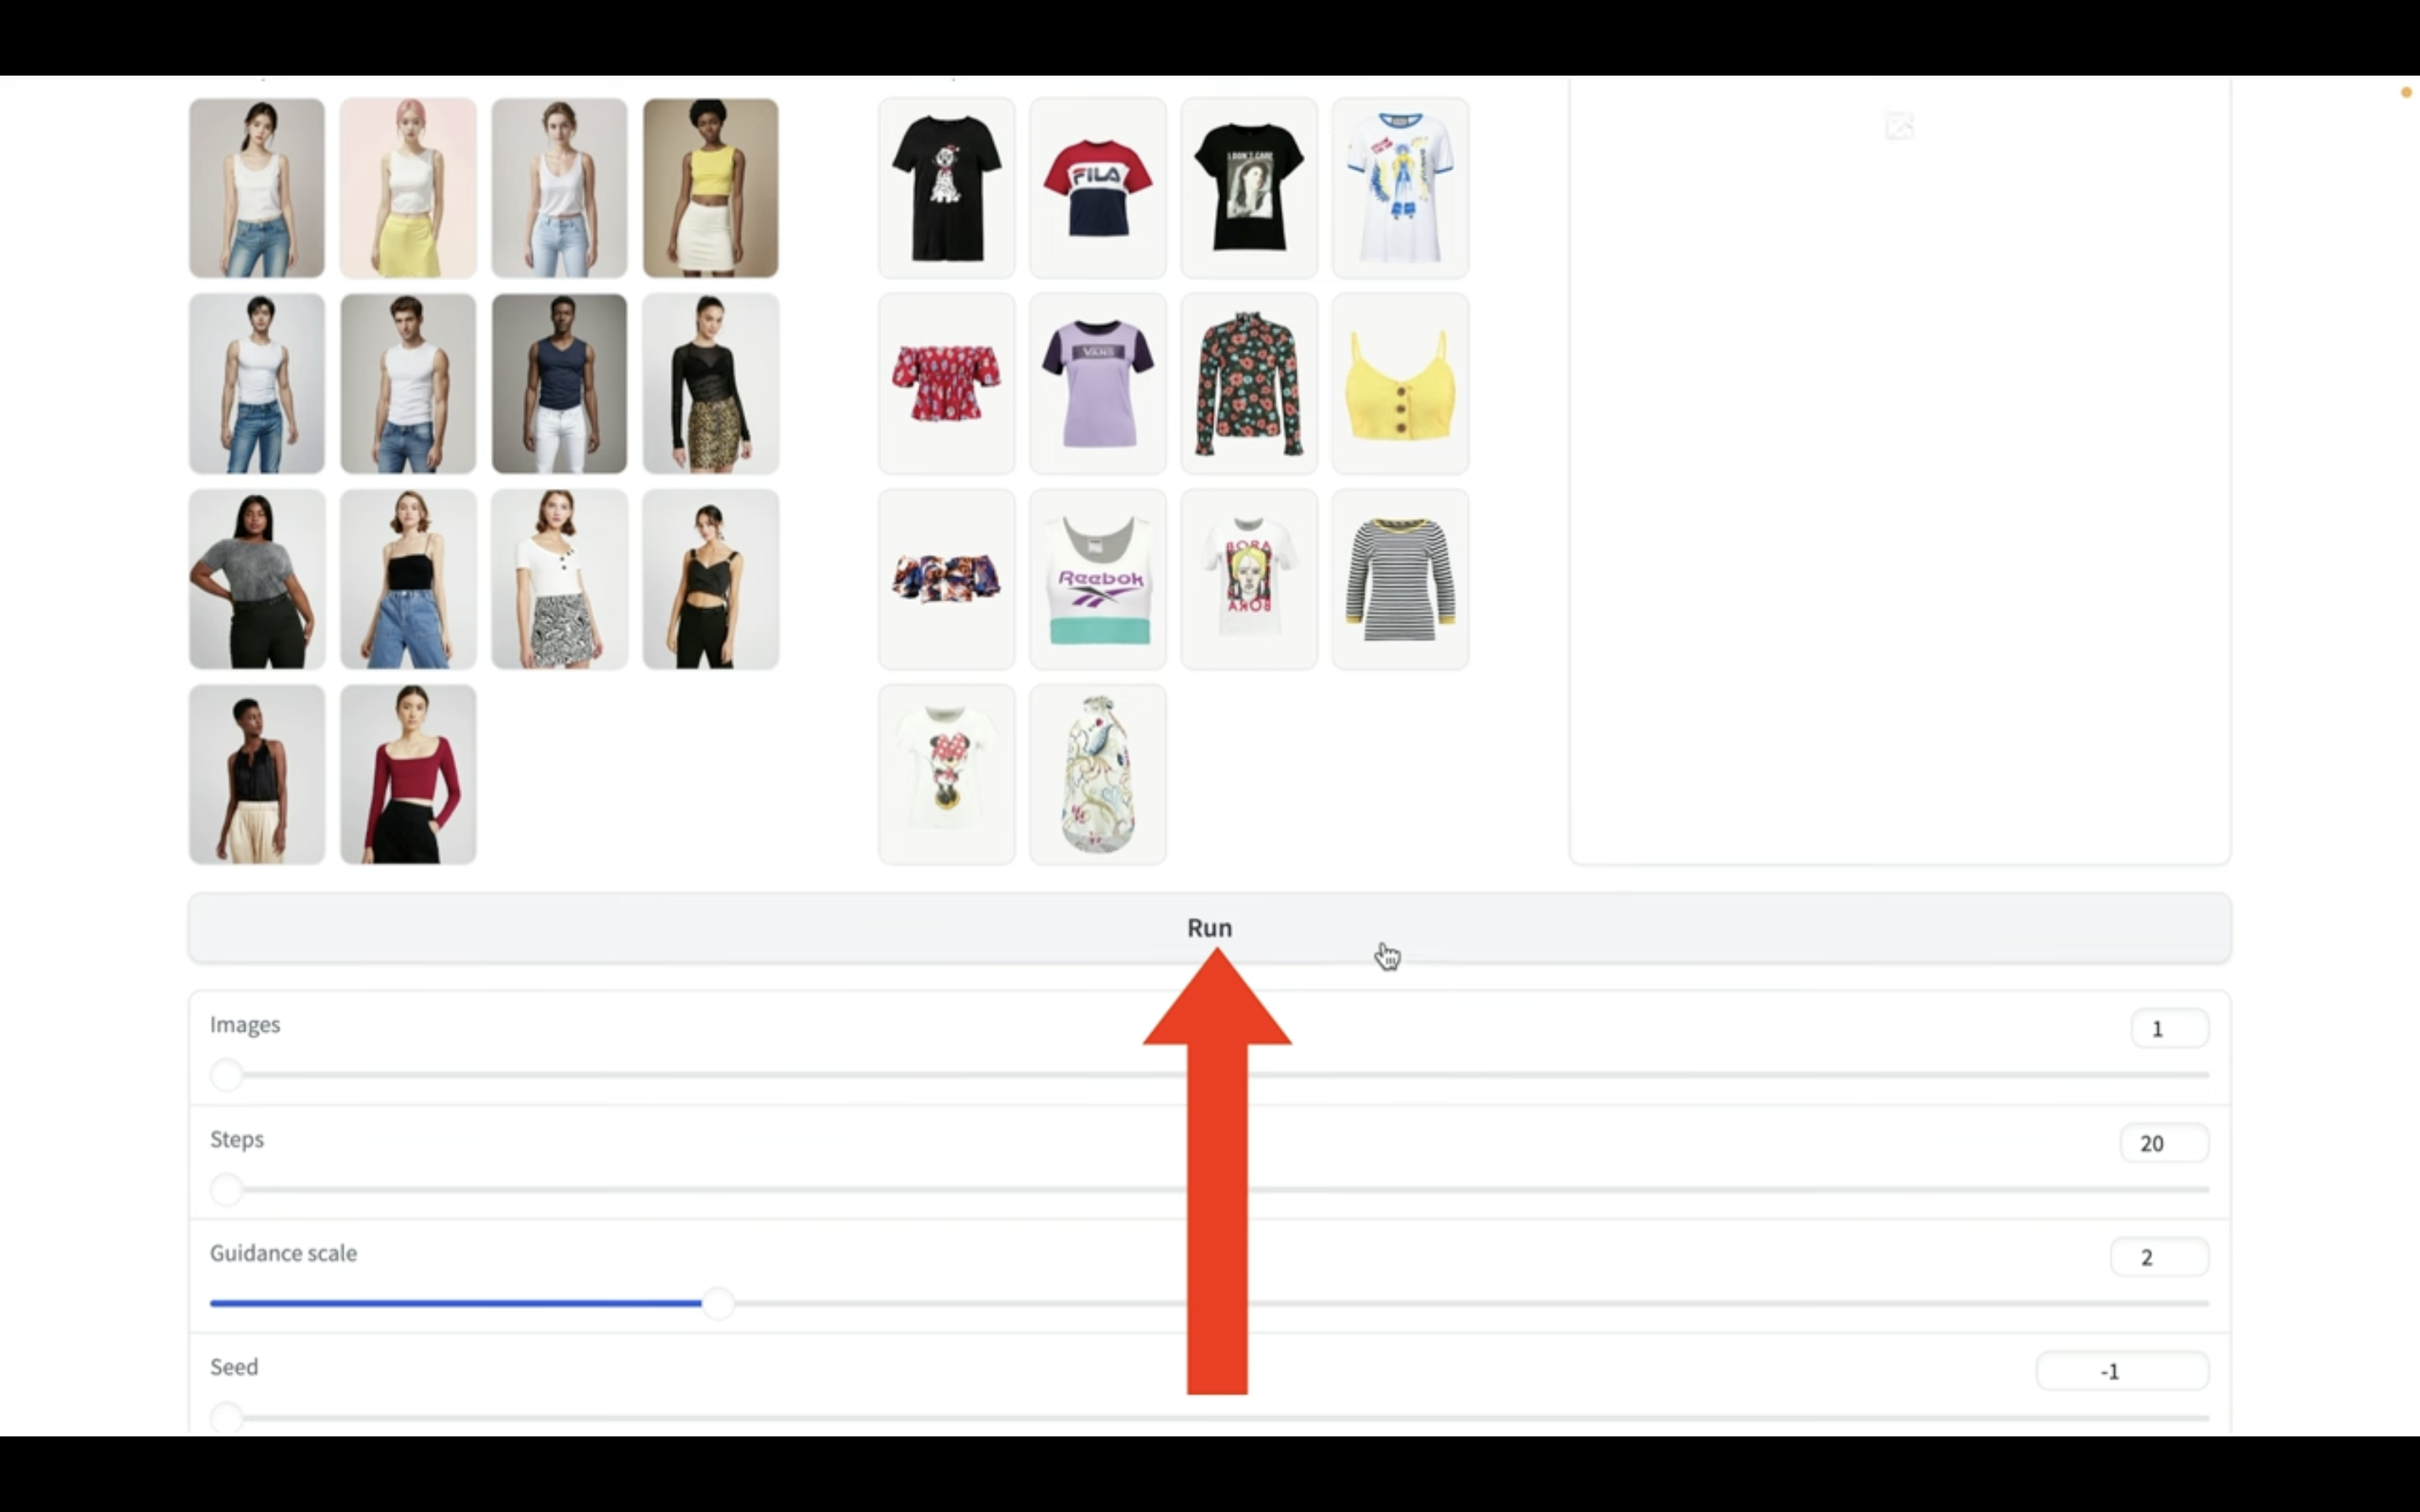
そうすると画像の生成処理が開始されるので、しばらく待ちます。
この処理には数分程度かかると思います。
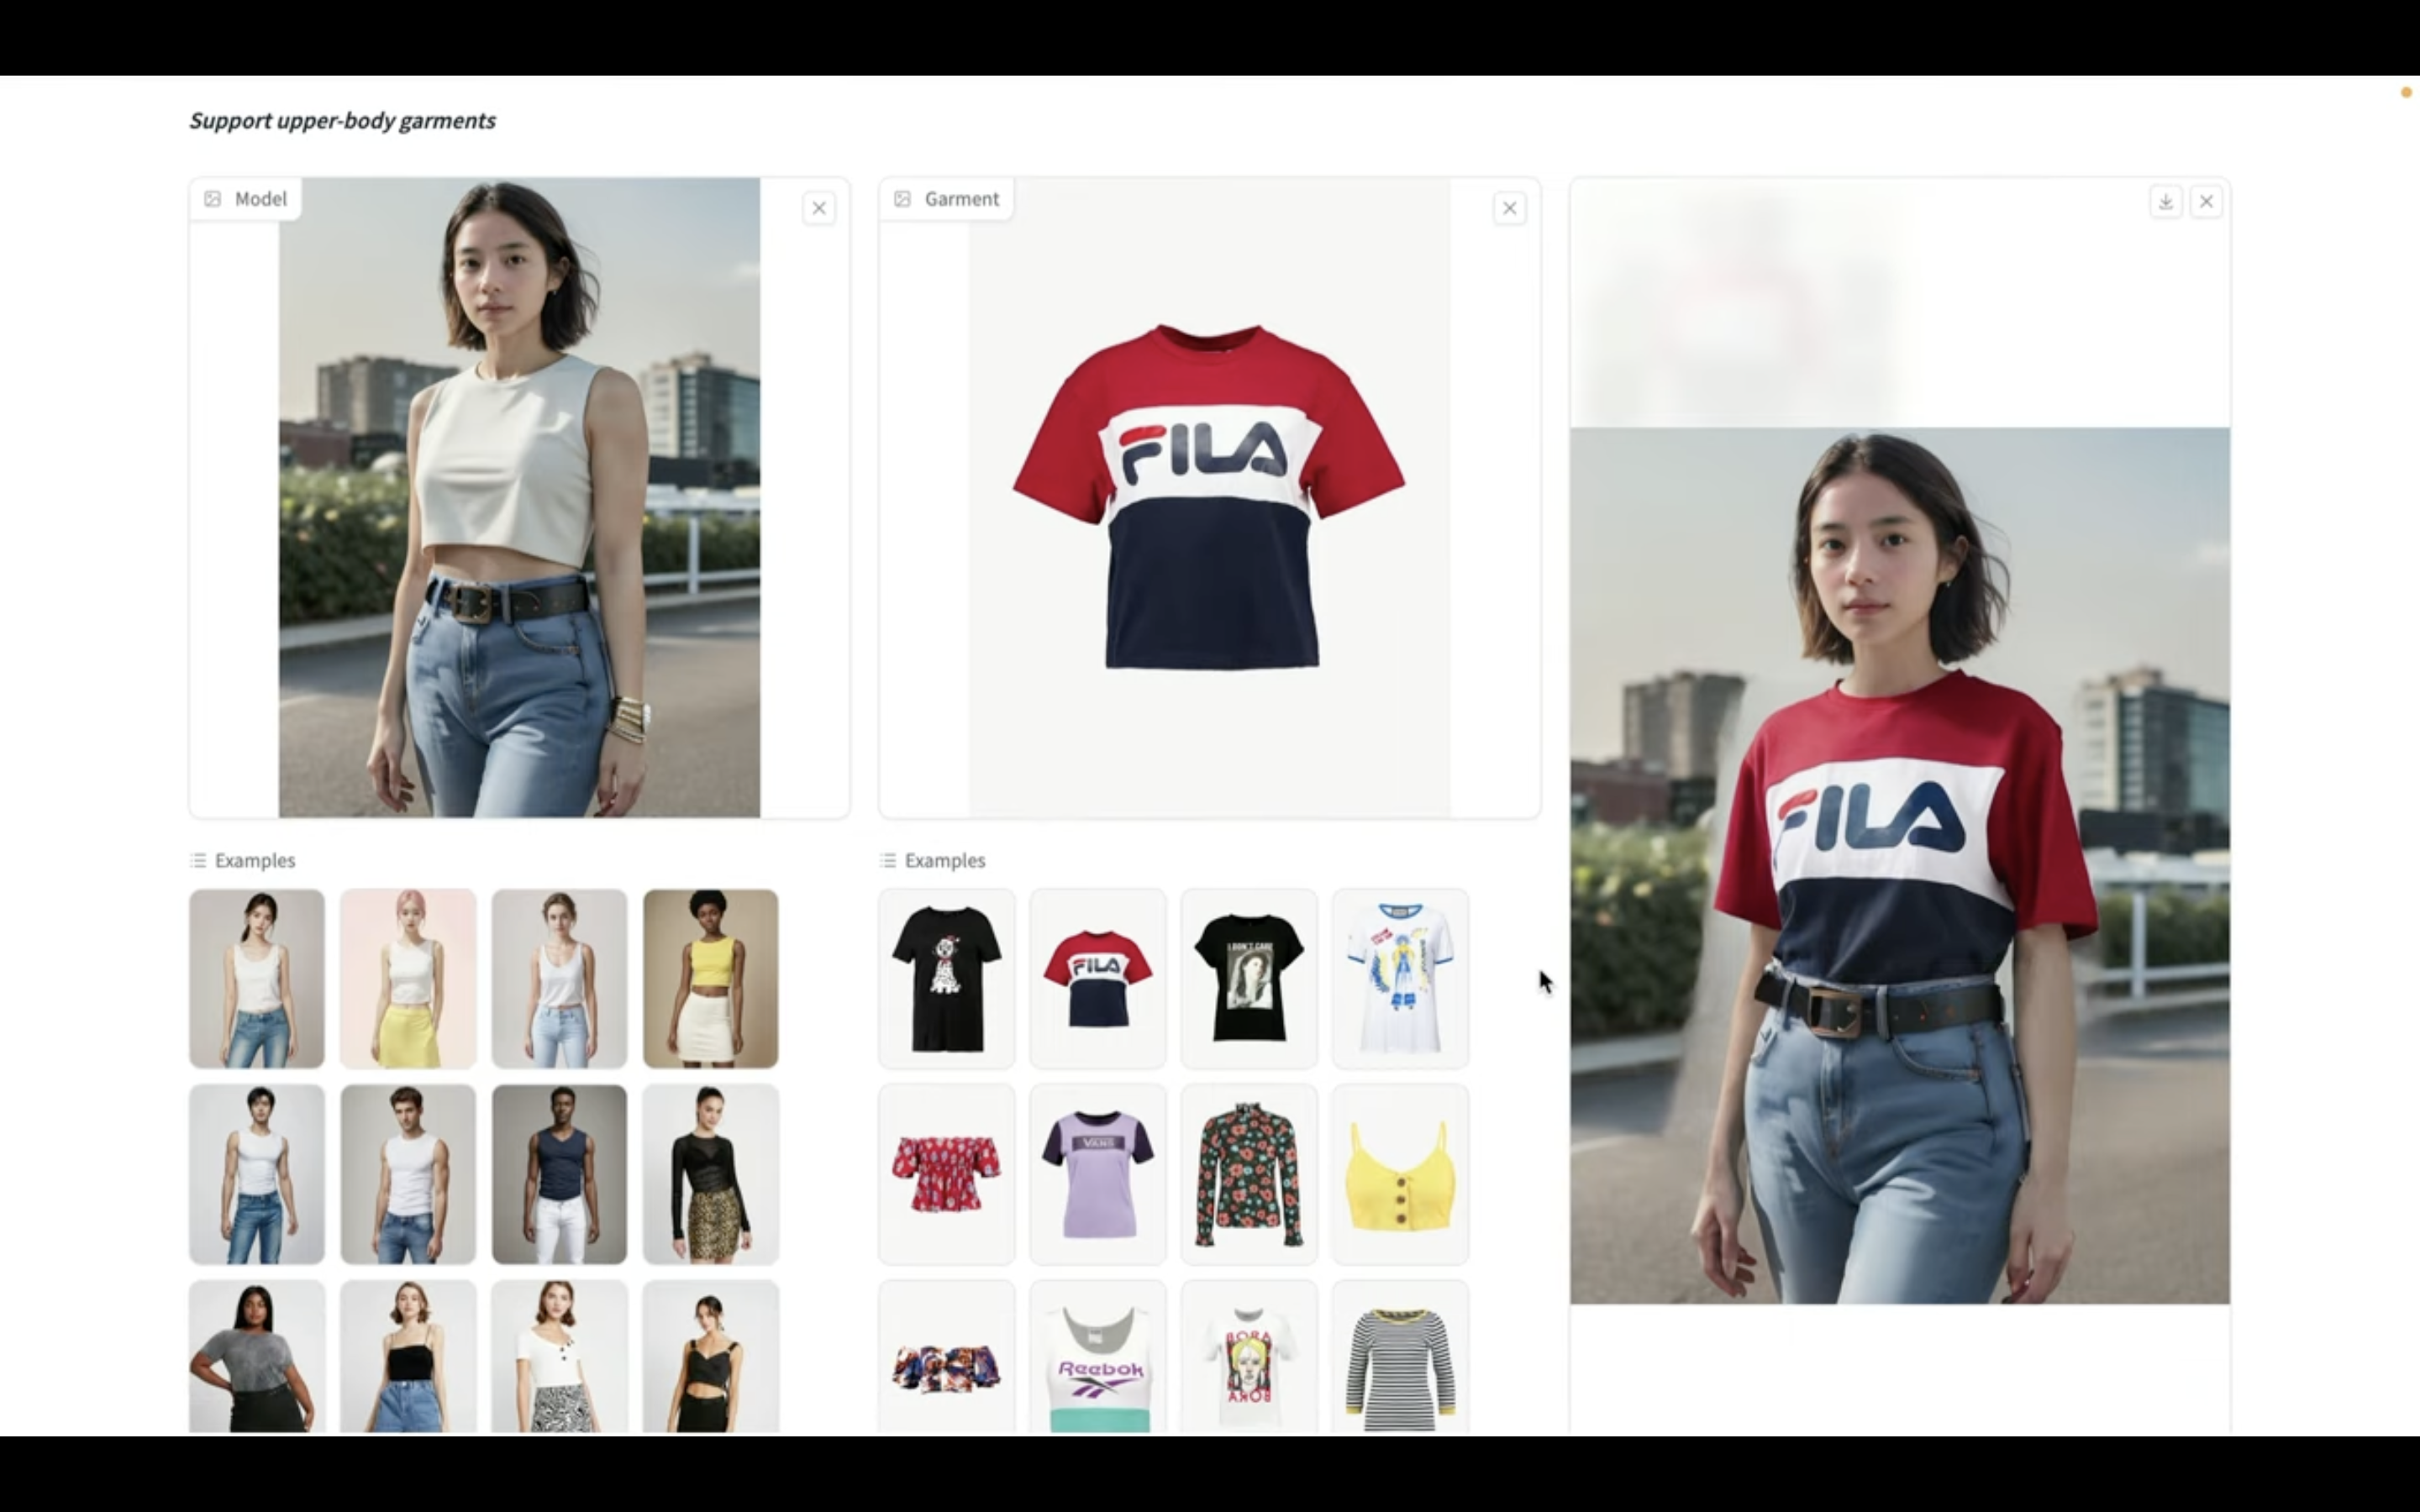
しばらく待っていると、このような画像が生成されました。
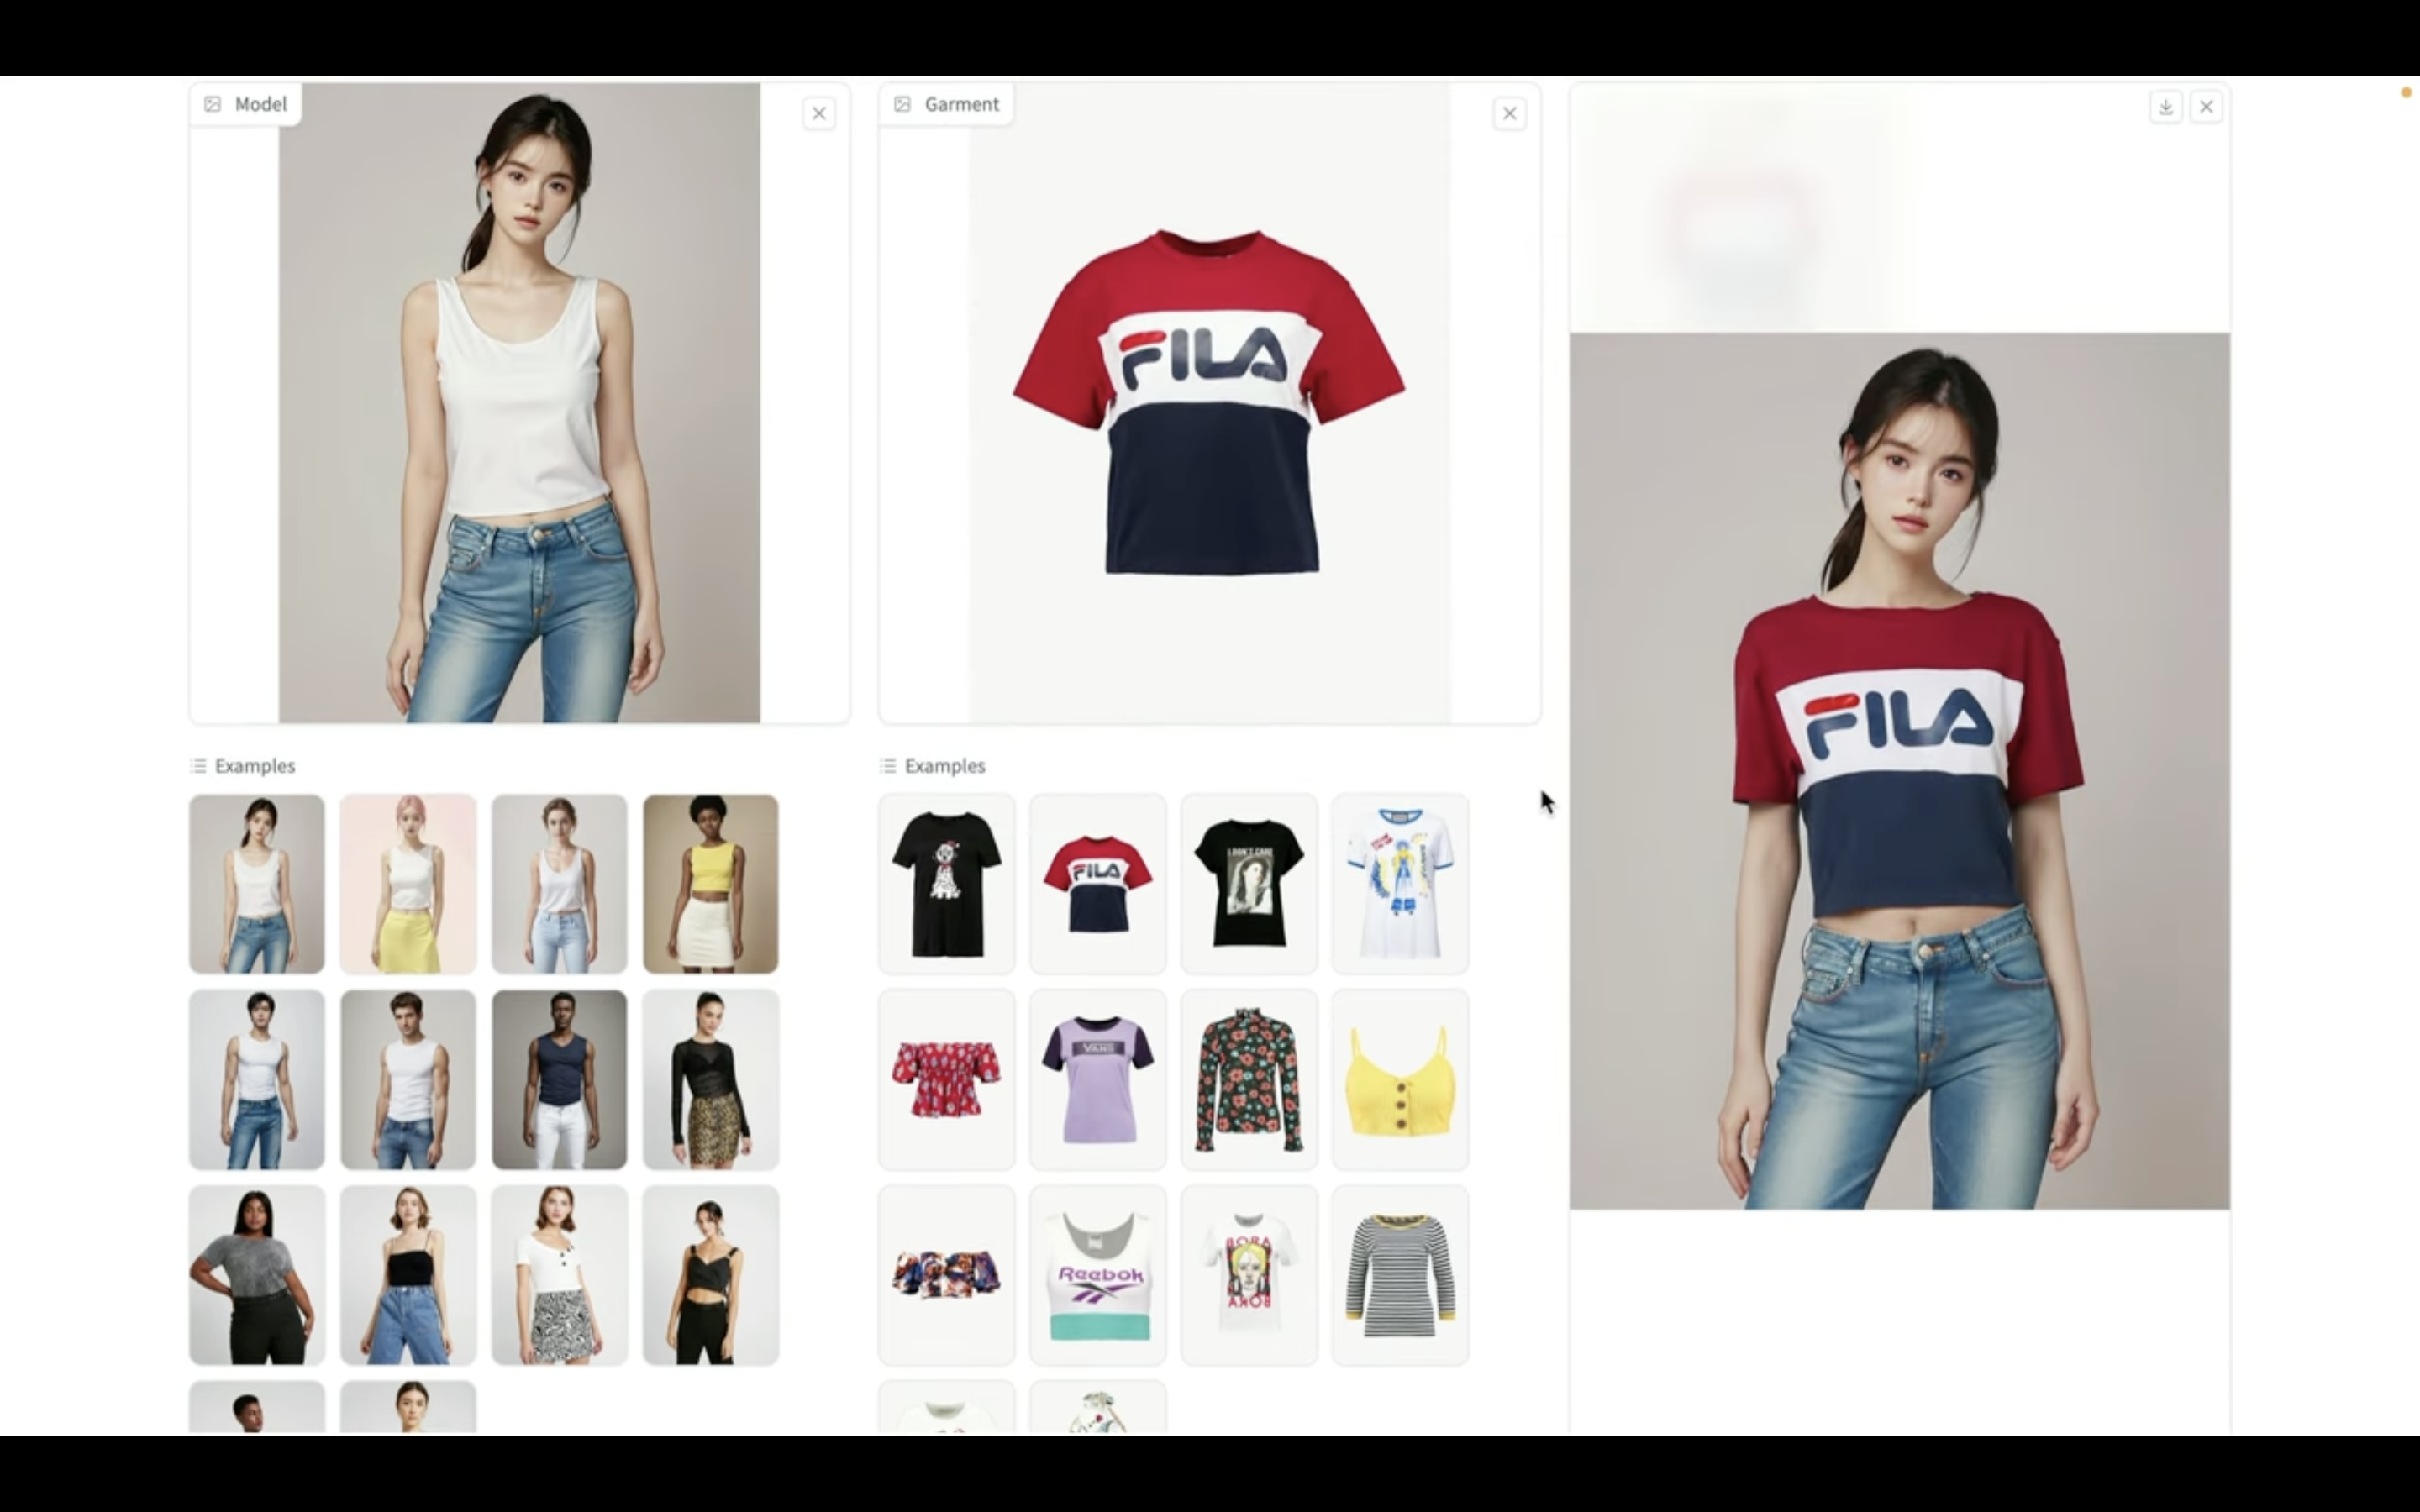
期待した通り、指定の画像の服装に変更されています。
次に人物の画像を変更してみましょう
現在選択されている人物の画像を削除します。
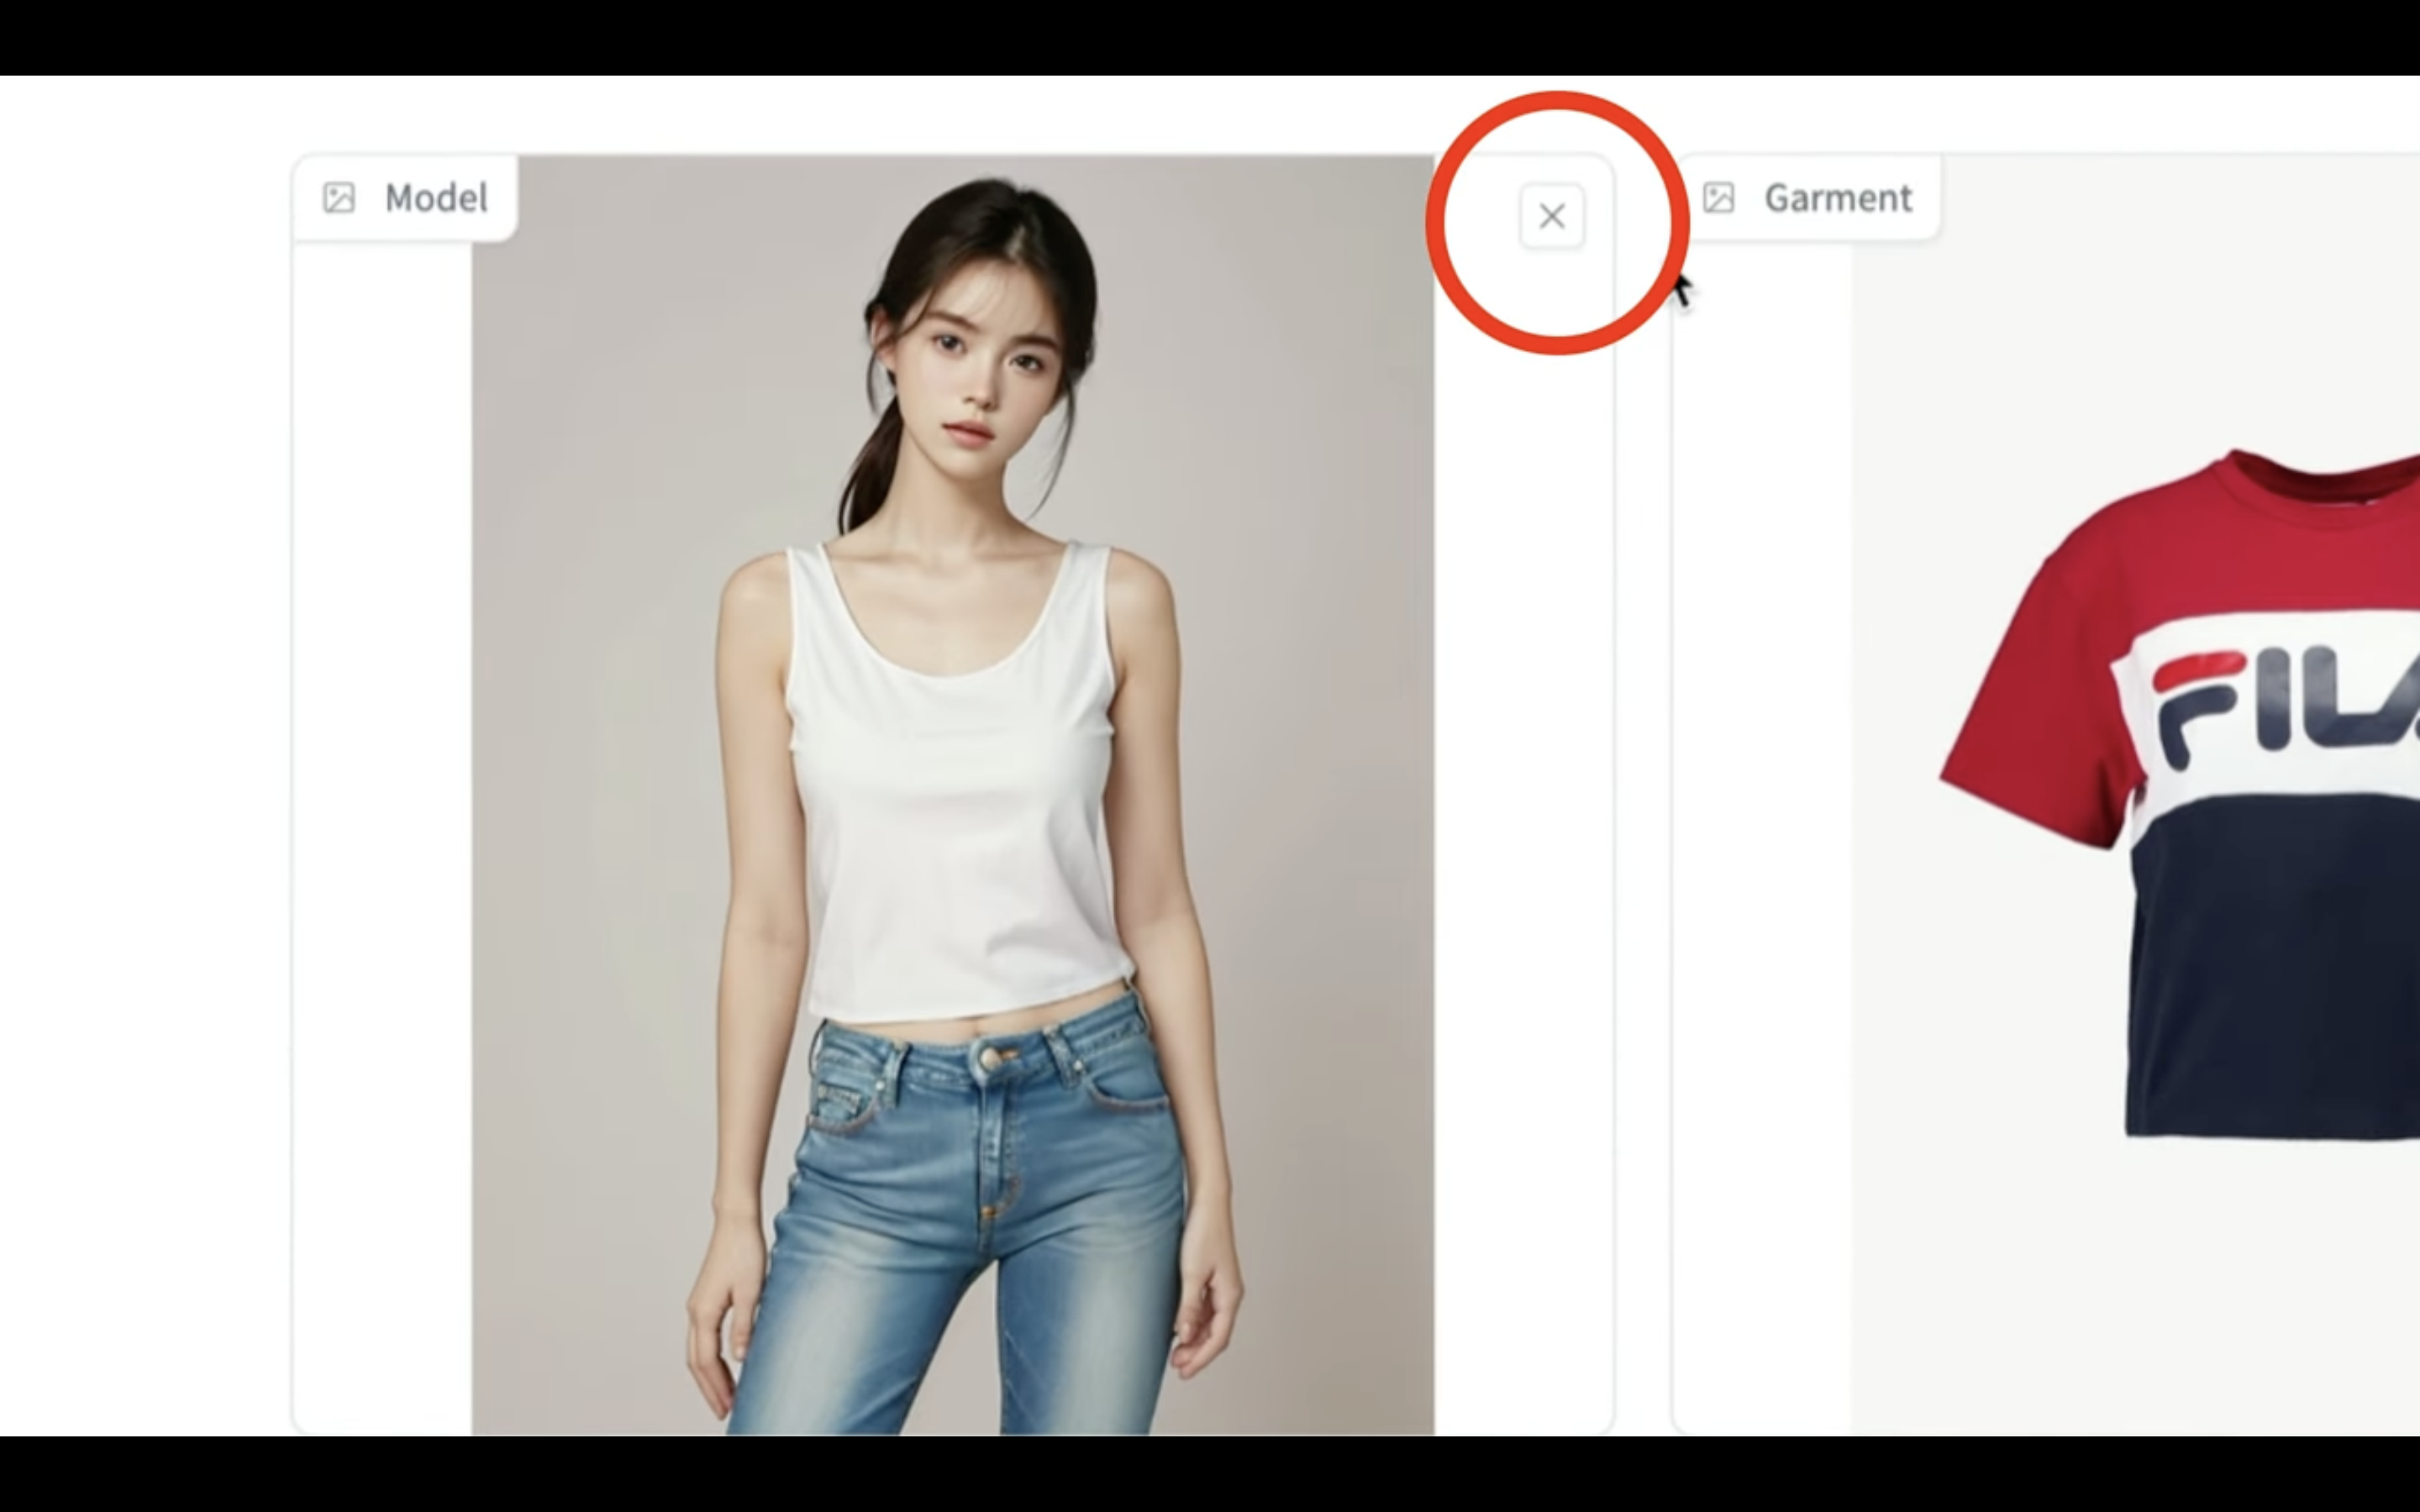
そしてこの部分に人物が映っている画像ファイルをドラッグアンドドロップします。
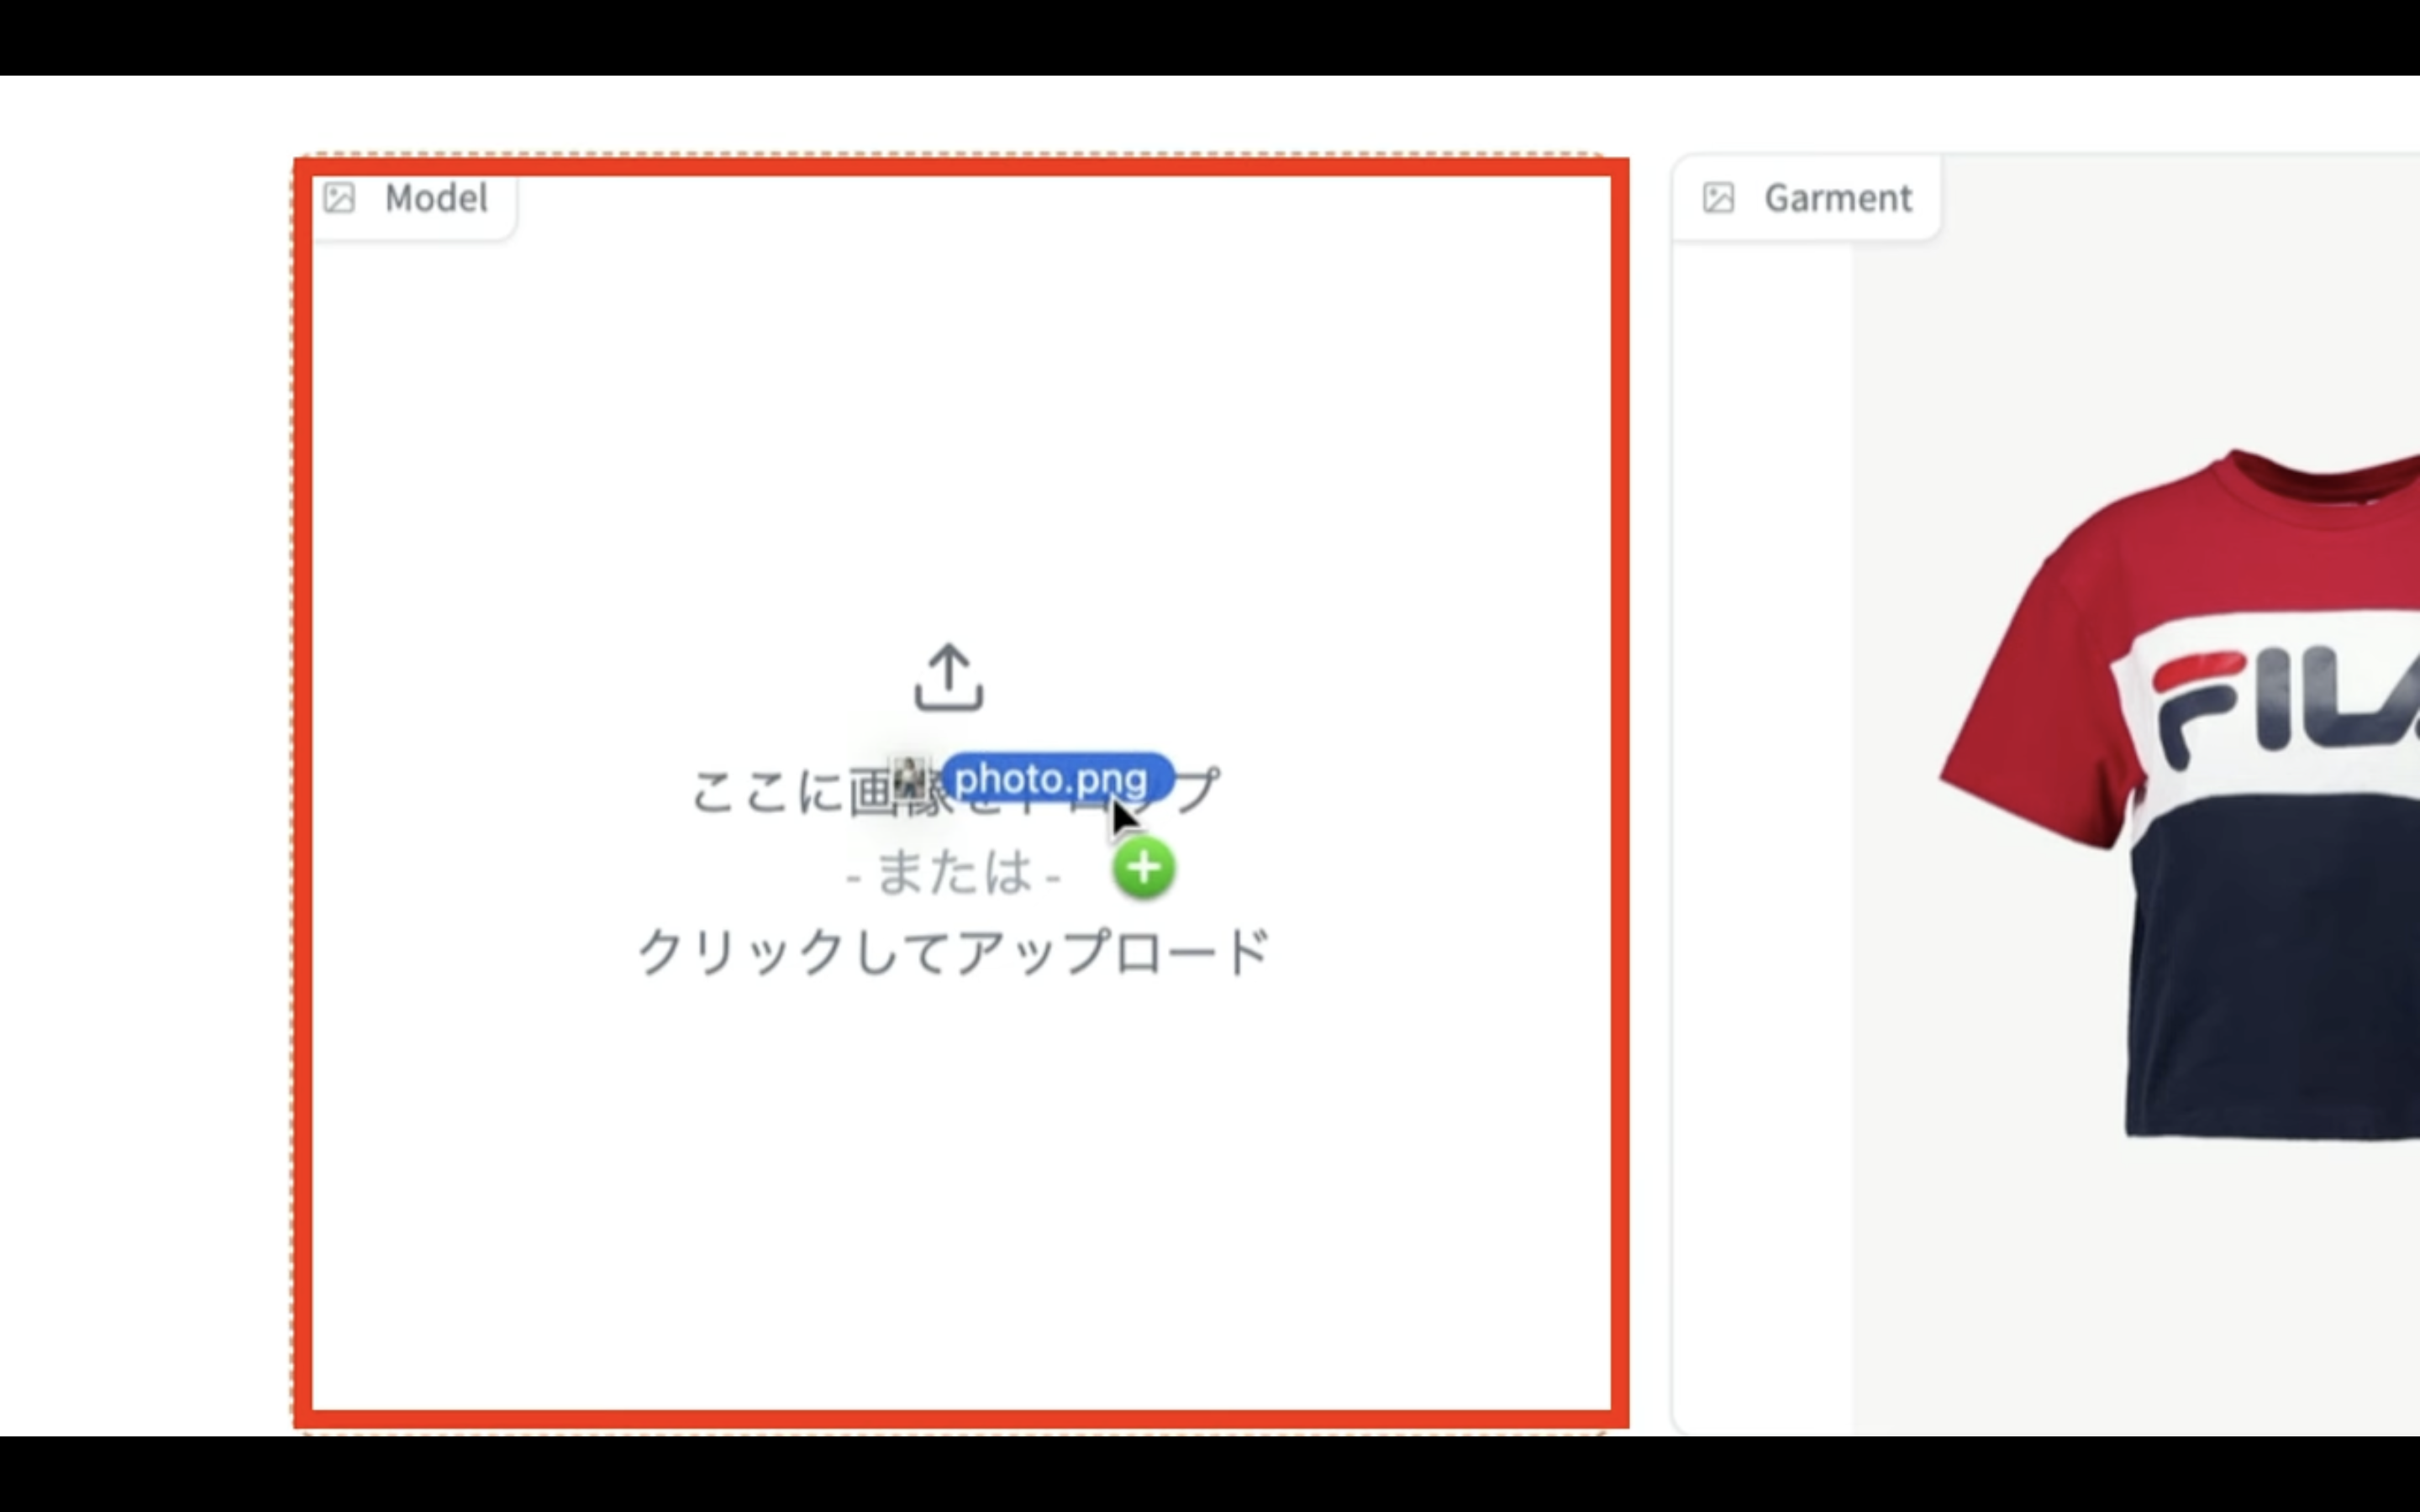
今回はこのような画像をアップロードしておきました。
この動画では服装はこのままにして解説を進めます。
「Run」と書かれているボタンをクリックします。
画像の生成処理が開始されるので、しばらく待ちます。
しばらく待っていると、このような画像が生成されました。
服装を変更したい人物の画像を利用できるのは便利ですね。
ボトムスの服装の変更を試してみましょう
人物の画像を選択します。
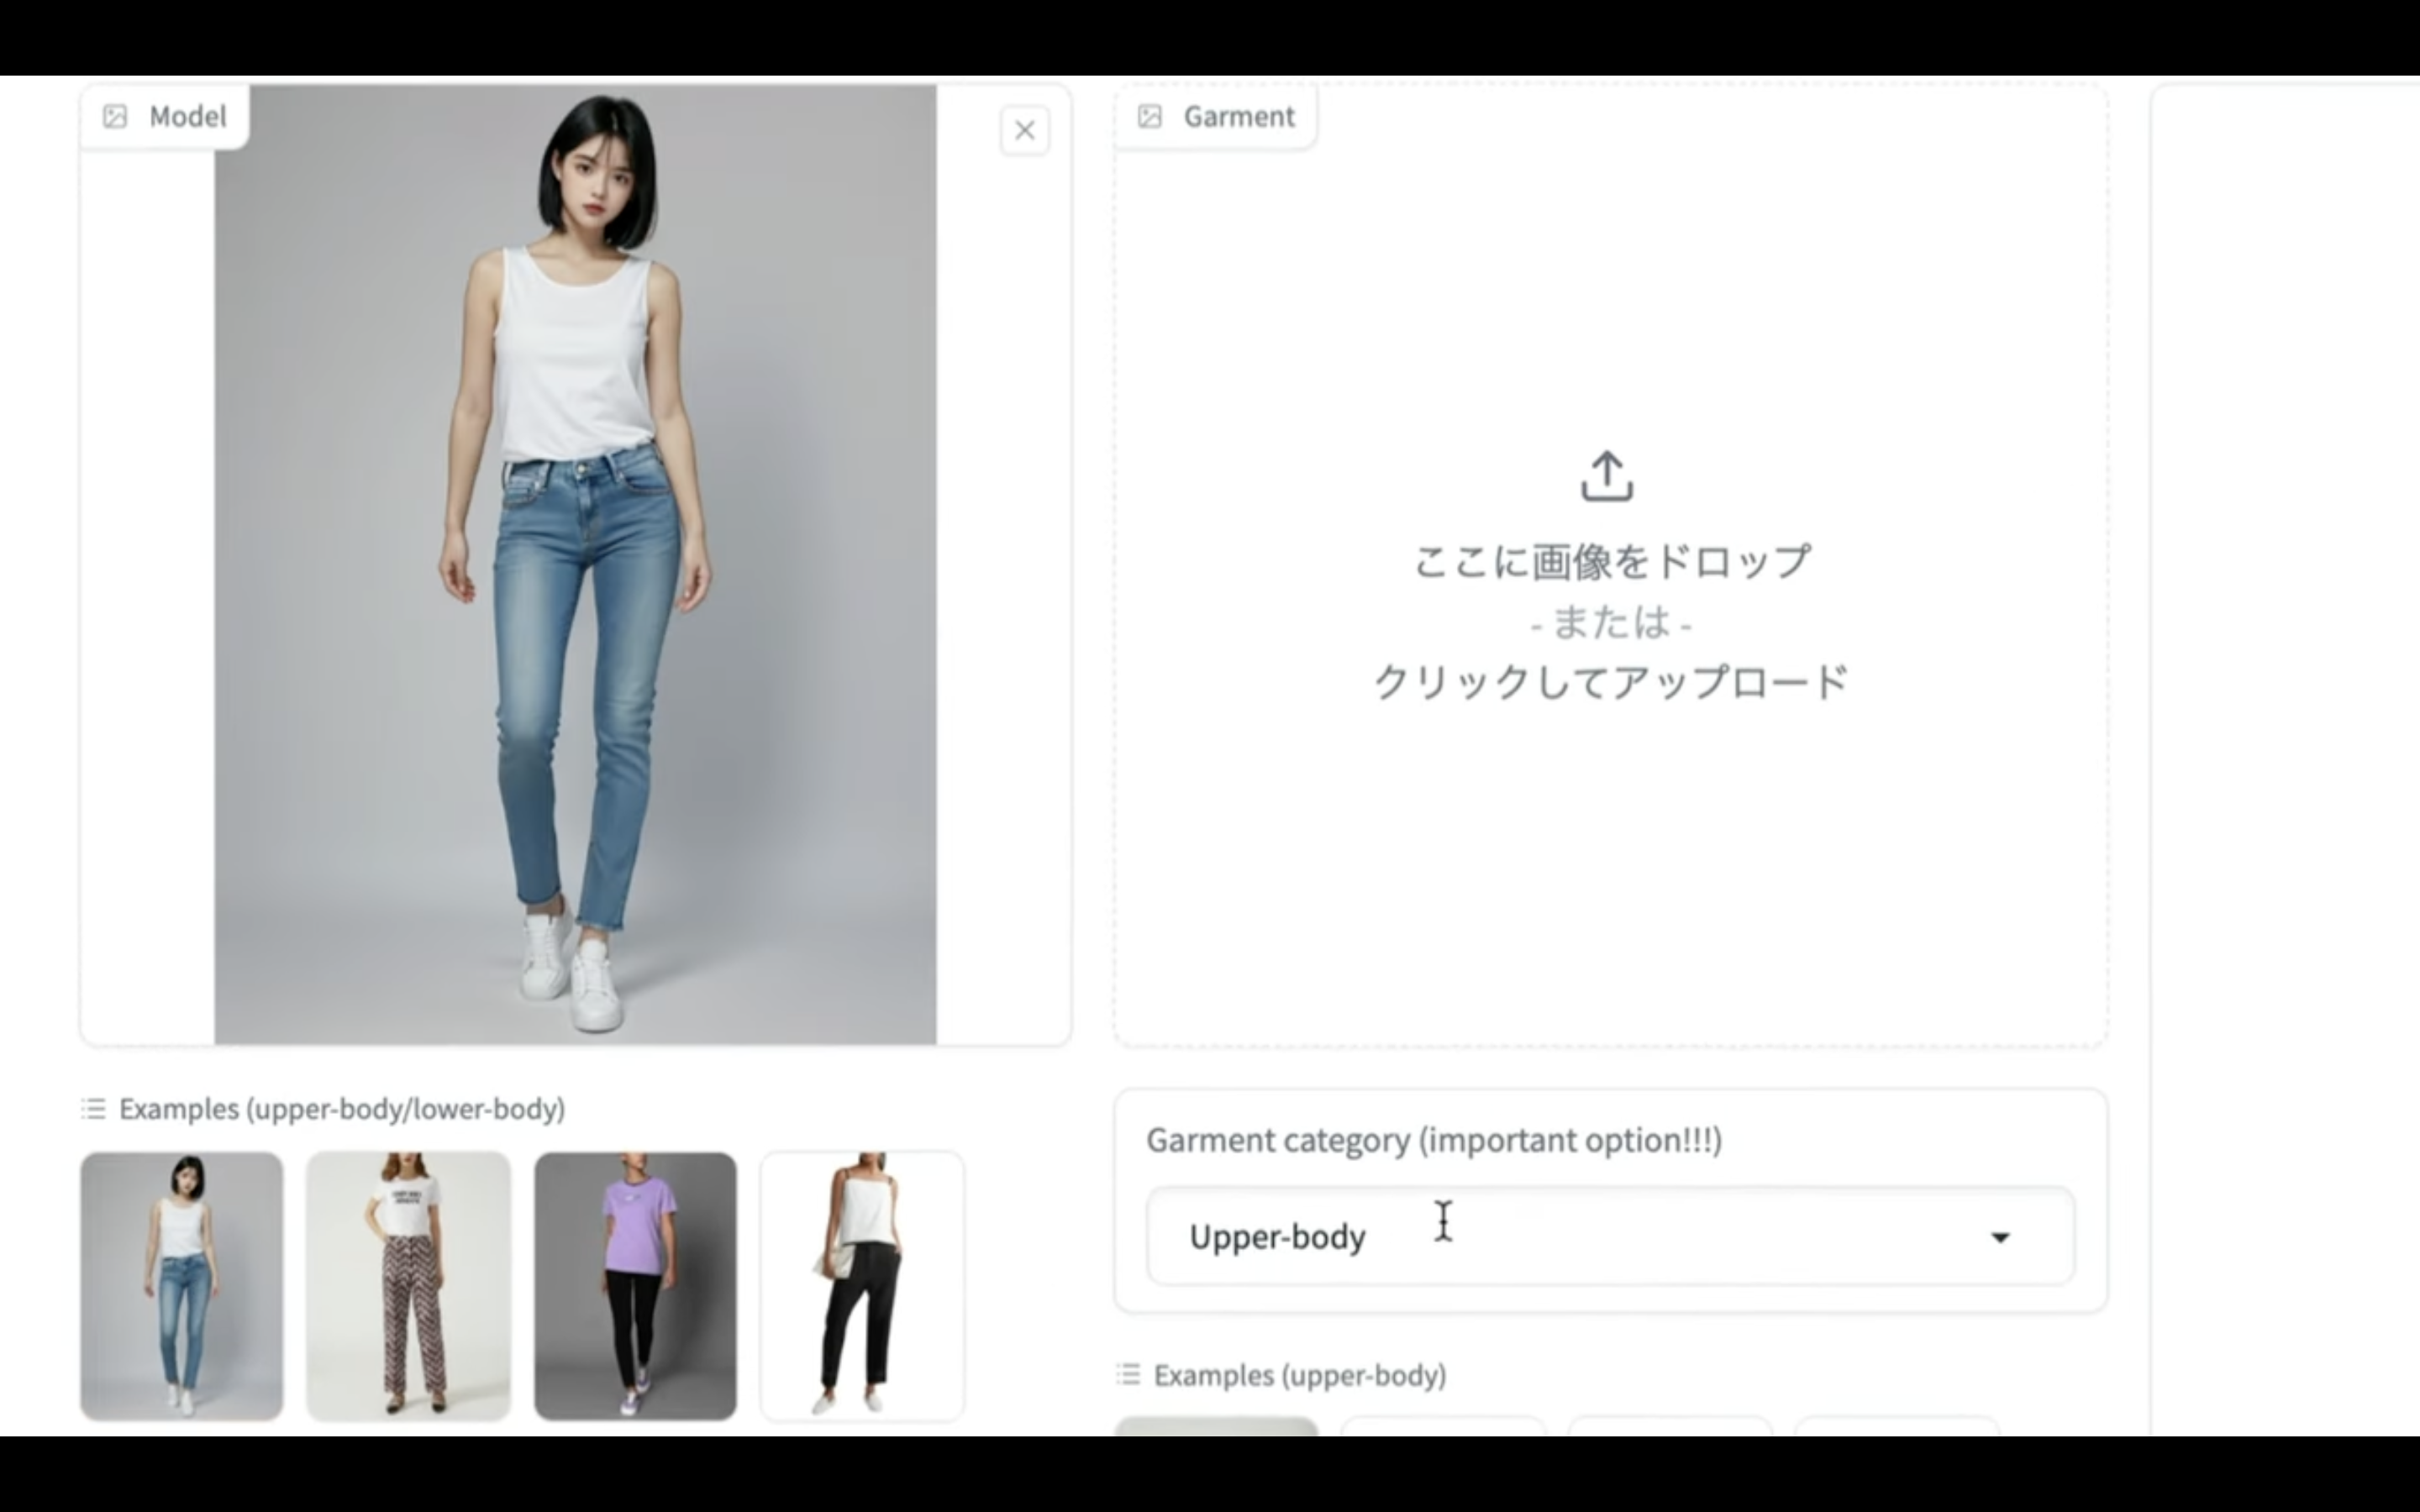
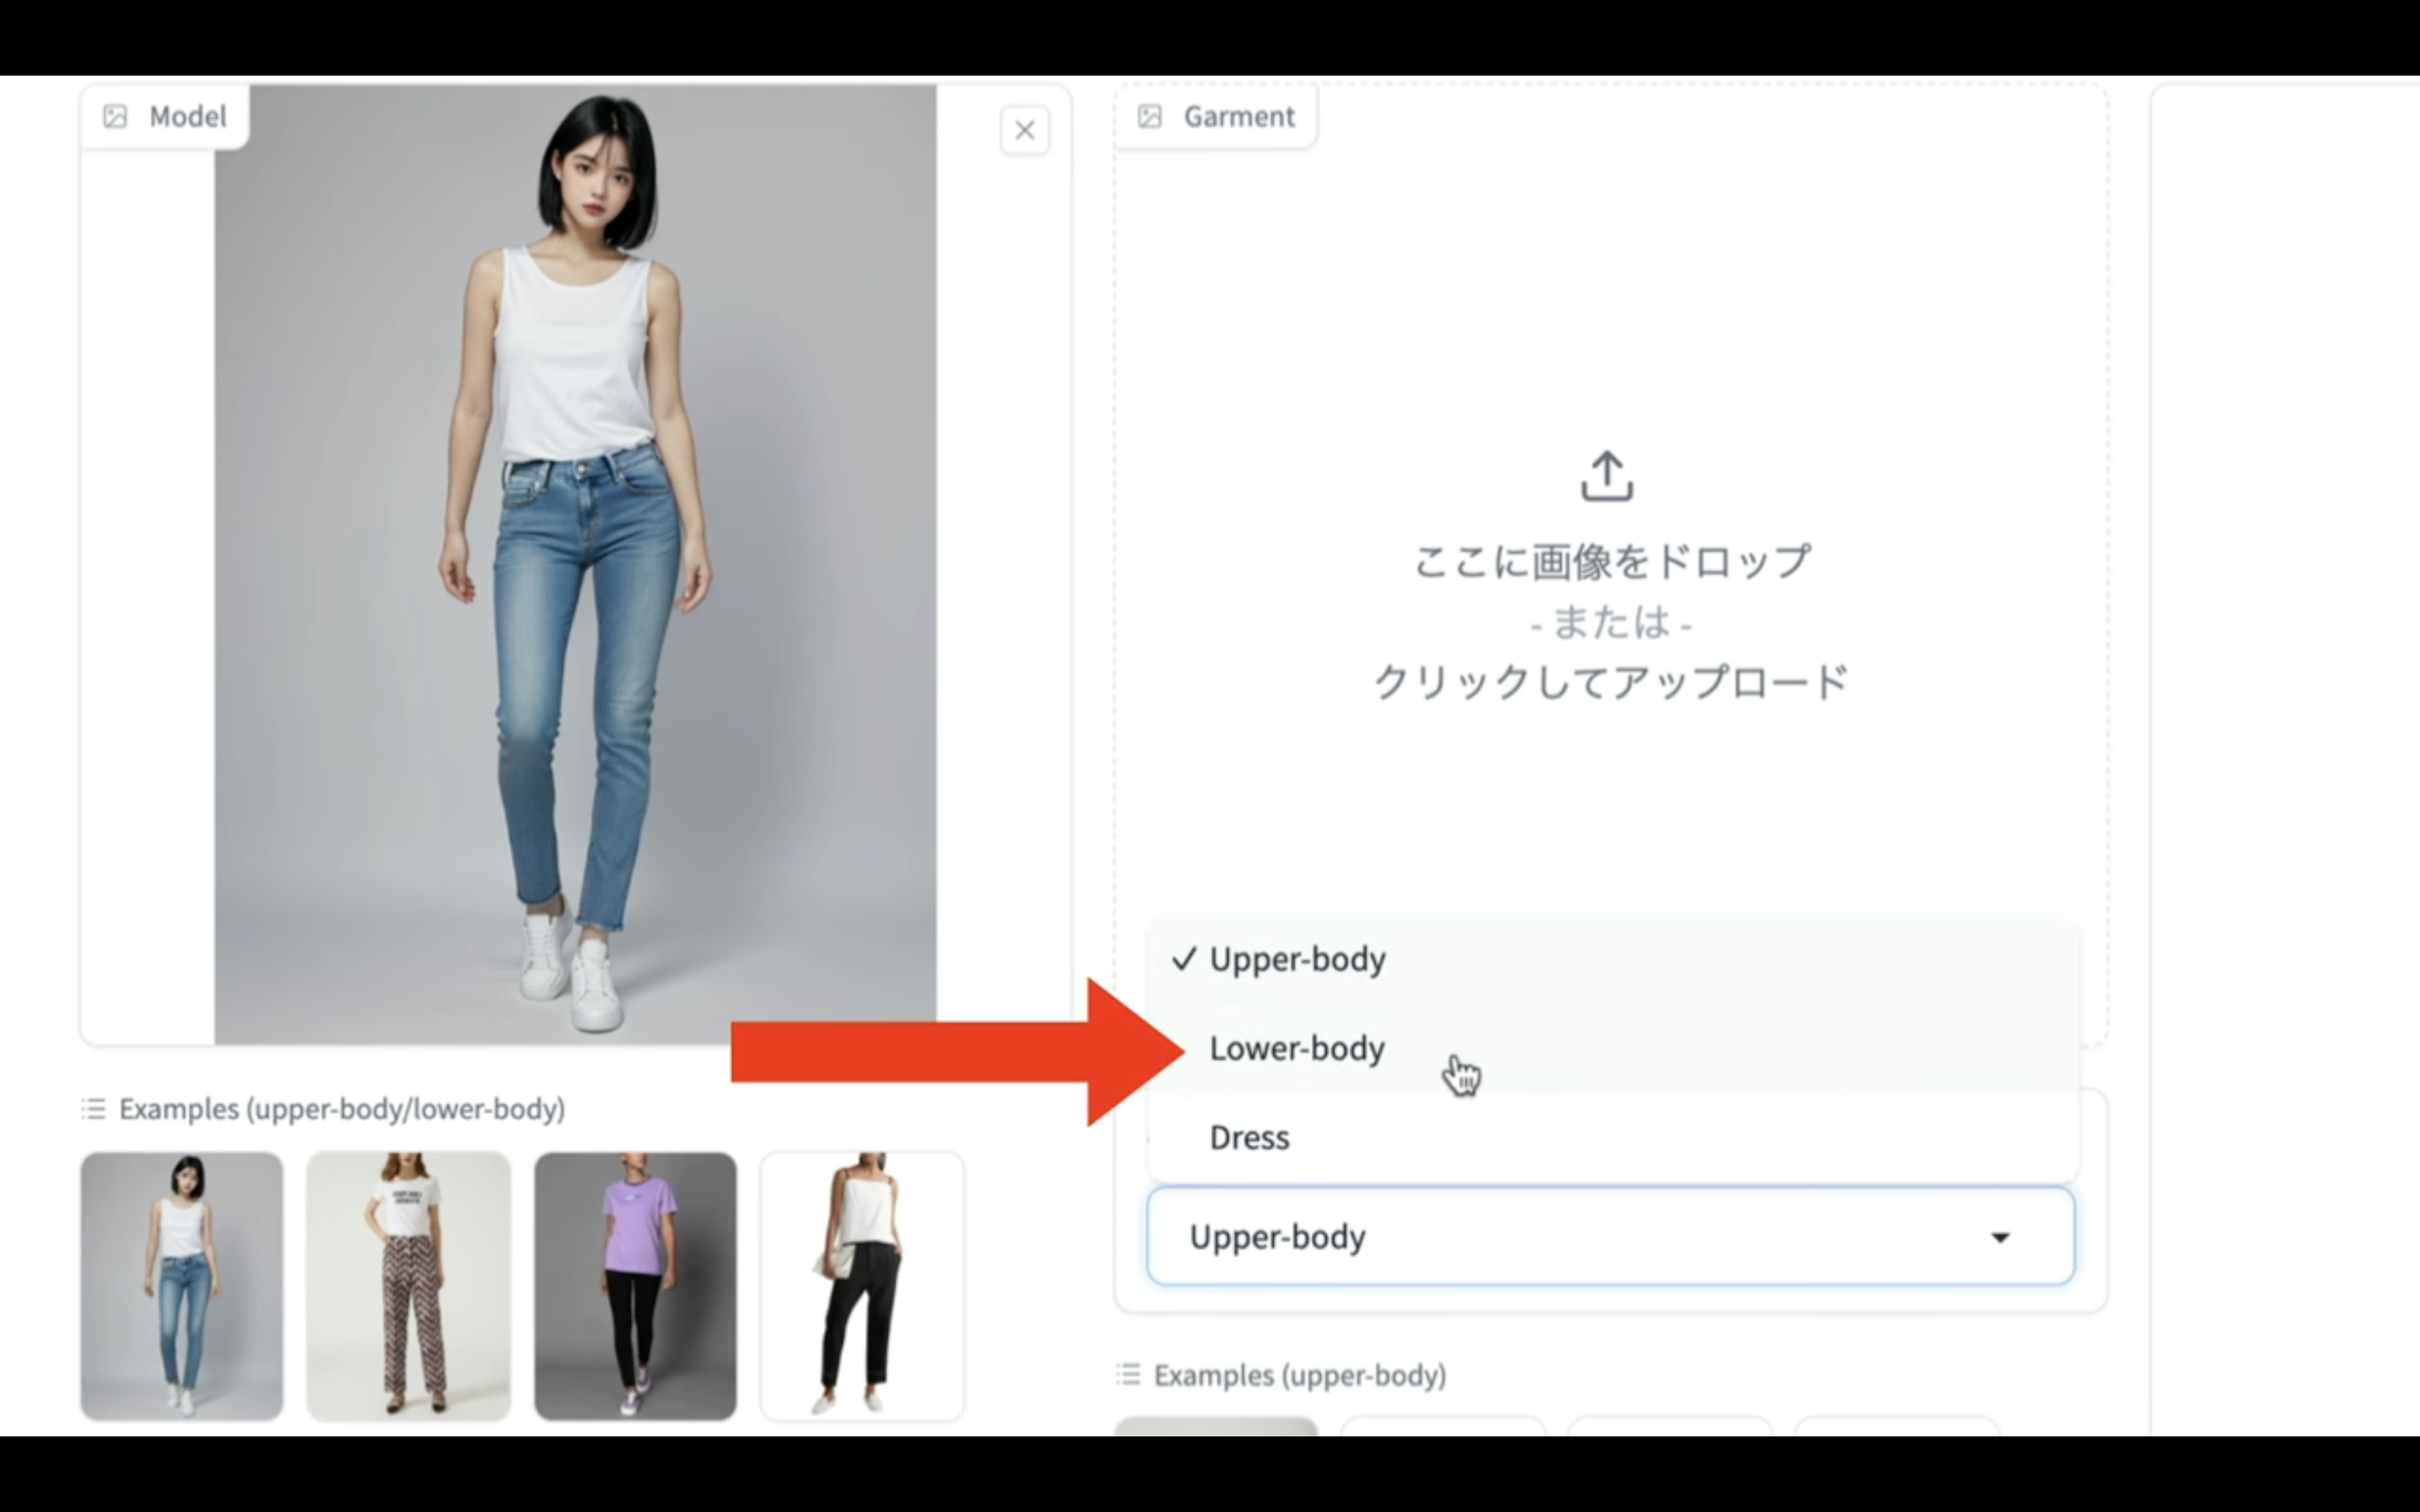
次に服装のカテゴリーを変更します。
今回はボトムスの服装を変更したいので、「Lower body」を選択します。
服装のカテゴリーを変更したら、服装の画像を選択します。
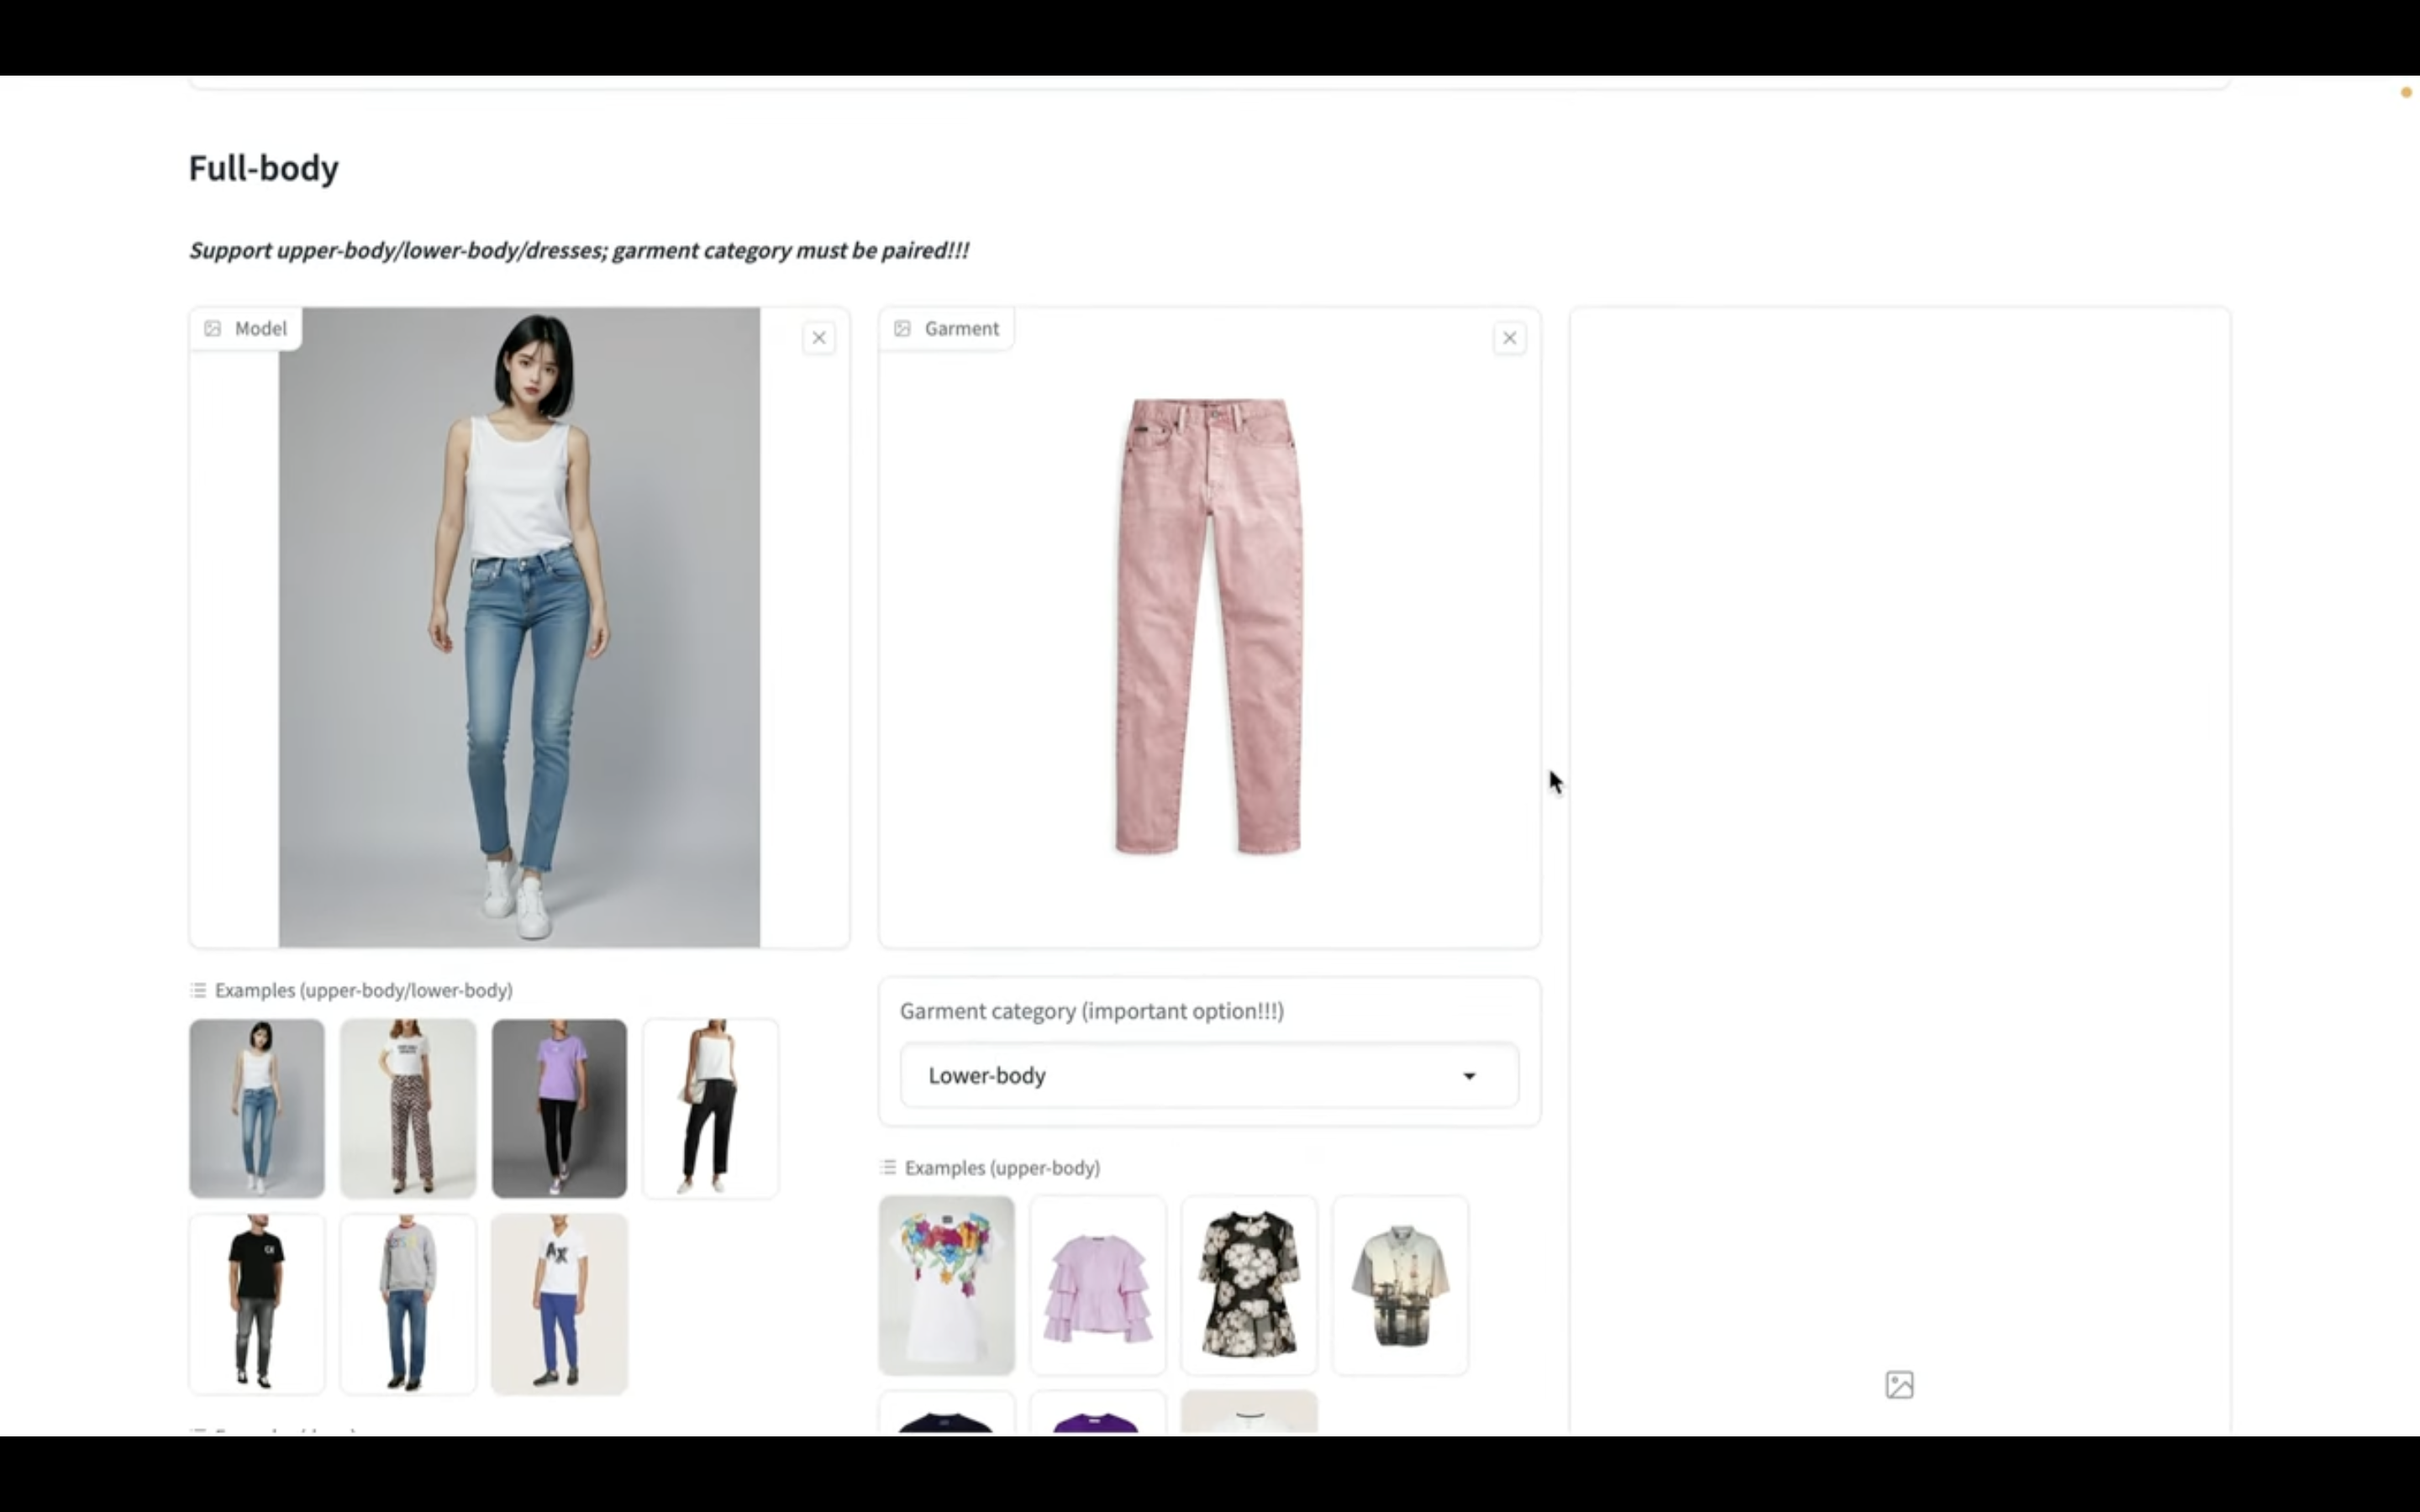
これでボトムスの服装を変更するための準備が整いました。
それでは早速実行していきます。
「Run」と書かれているボタンをクリックします。
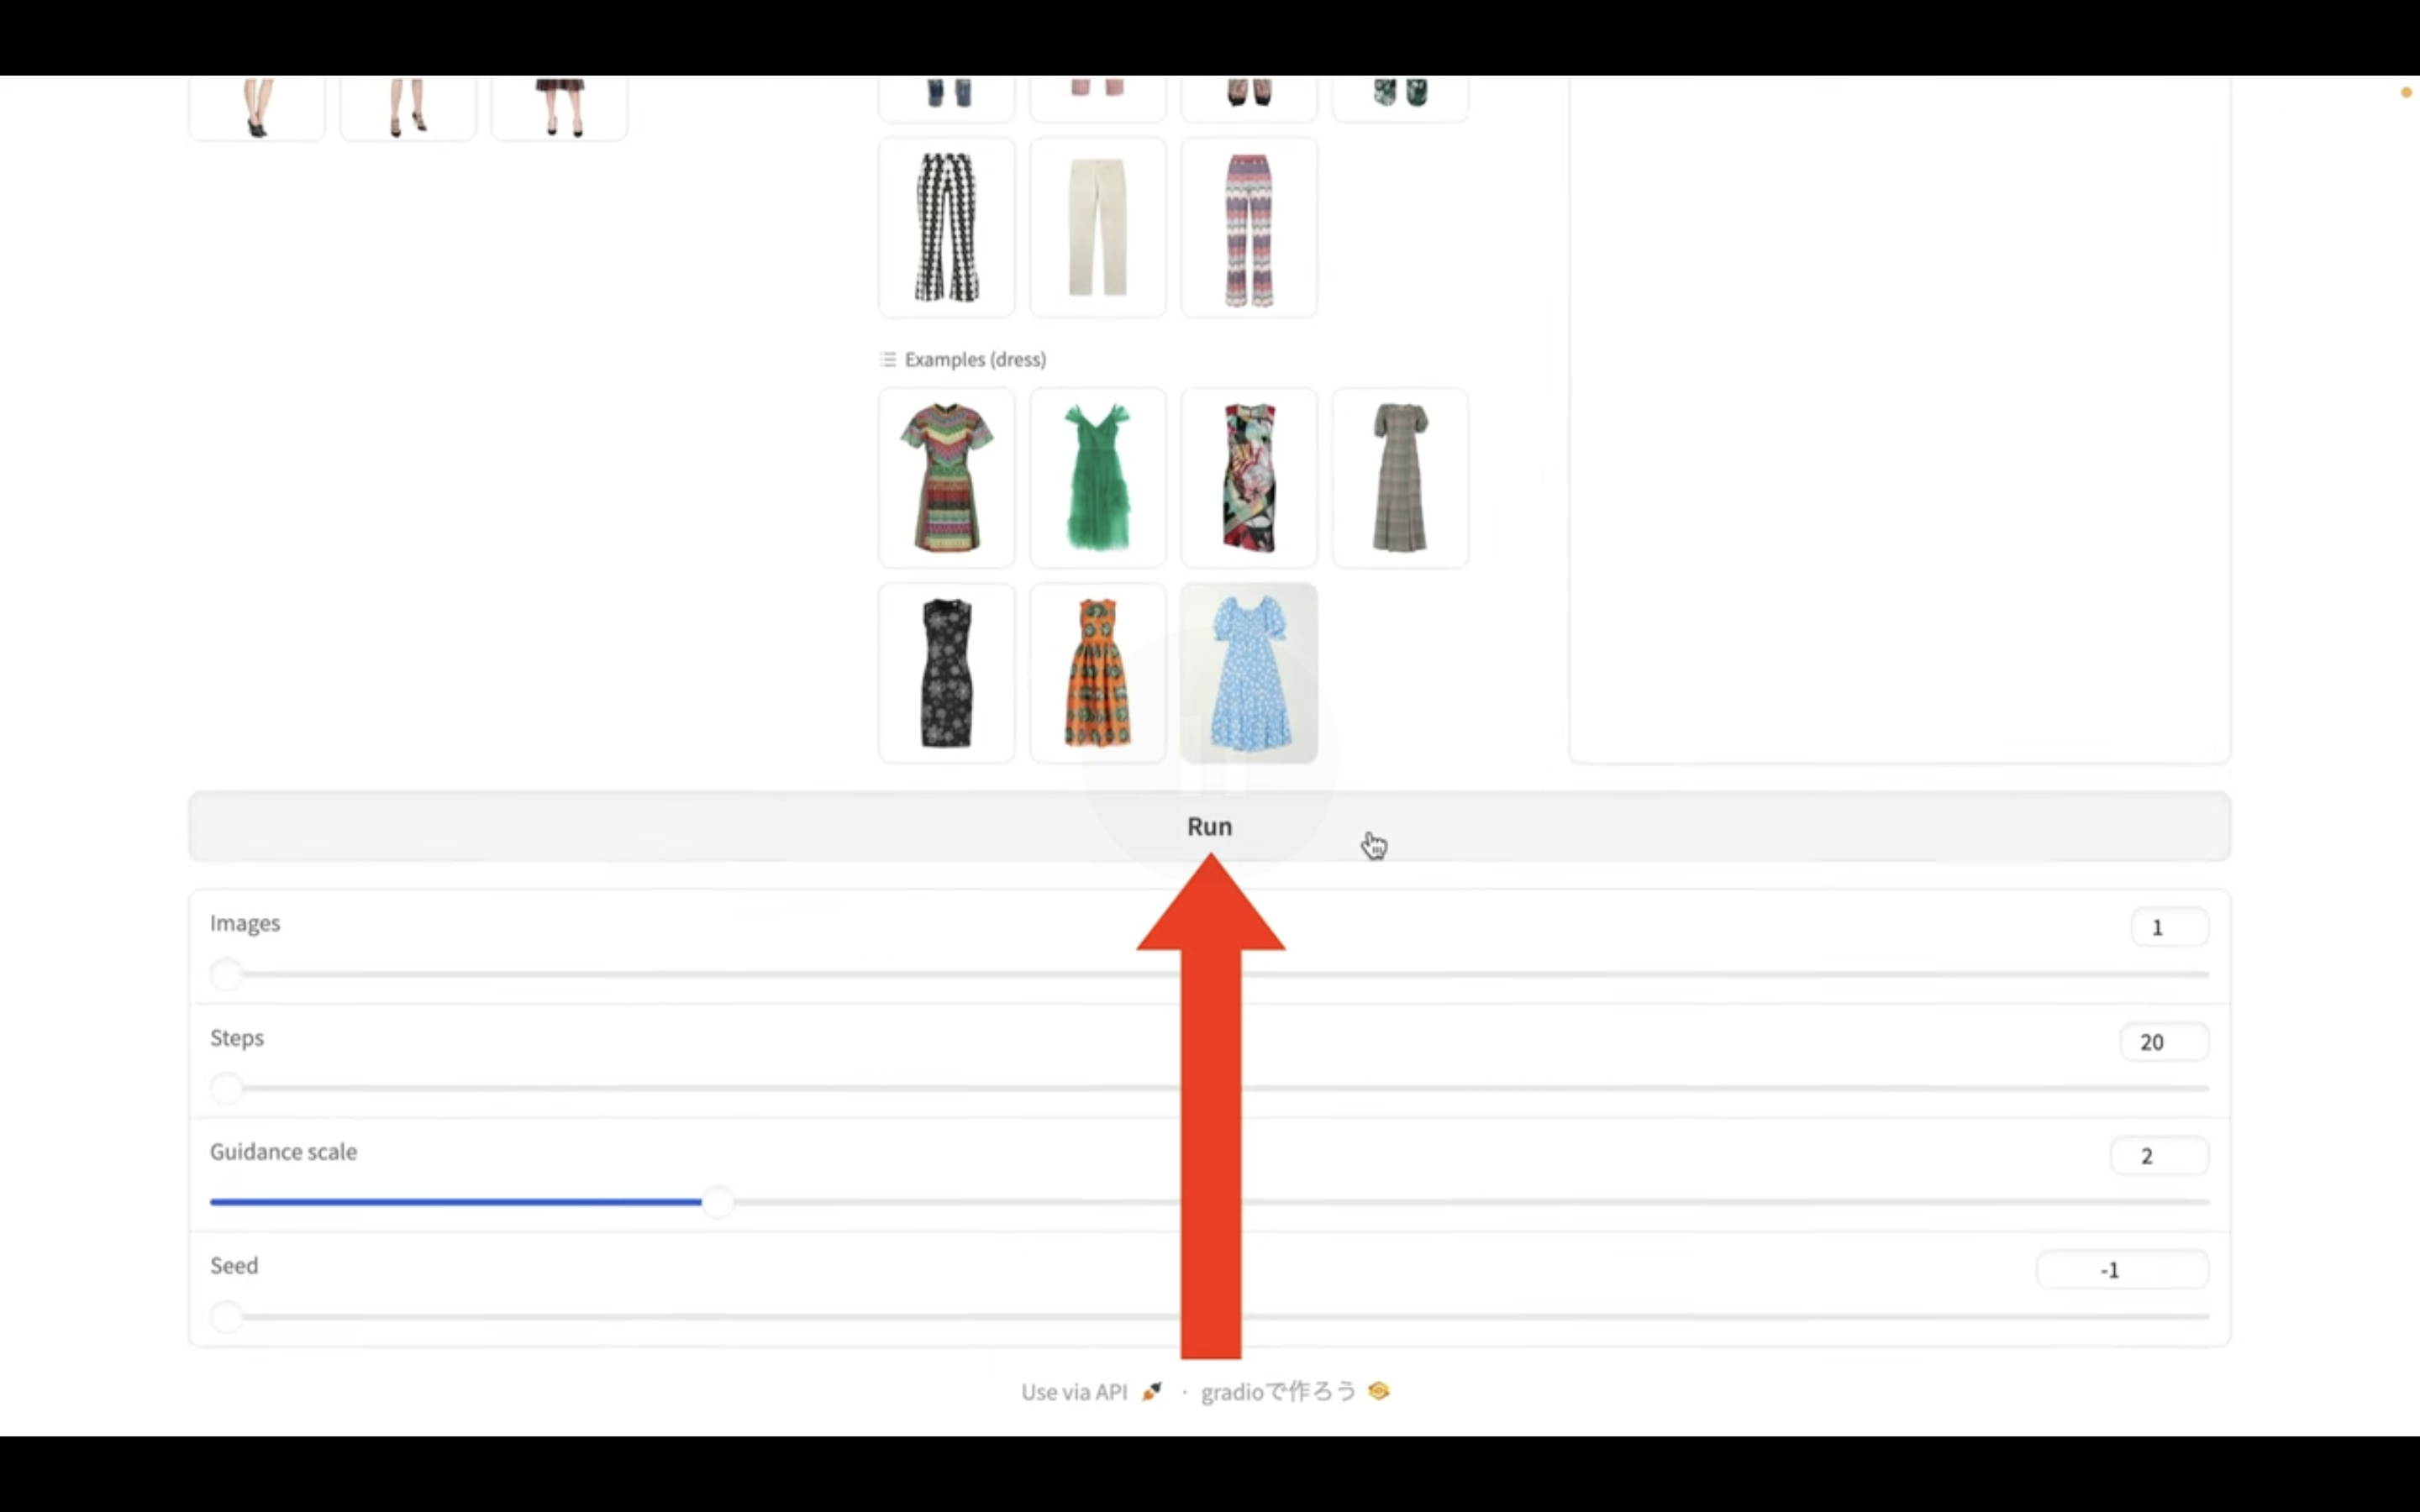
画像の生成処理が開始されるので、しばらく待ちます。
しばらく待っていると、このような画像が生成されました。

このようにOOTDiffusionを利用すると、簡単に服装を変更することができます。
是非お試しください。