

▶︎動画でも話してるので、文章読むのが面倒な方はこちらをみてもらえればと思います。
今回は高機能なFaceSwapLabについて解説します。
今回紹介する方法は決して悪用しないでくださいね。

これを読めば誰でも簡単にクオリティーの高いAI美女が作れるようになっているので興味がある人は、下のバナーをクリックして購入してみてね🎶

FaceswapLabを使ったDeepFake画像の生成方法
FaceSwapLabはAutomatic1111で動作するツールです。
この動画ではGoogleColabでAutomatic1111を動作させて解説します。
ここまでの解説でGoogleColab、Automatic1111というキーワードが分からない場合は、詳細を解説しているjの概要欄に貼っておきますので、そちらをご確認ください。
まずGoogleColabのサイトを表示します。
上記に貼ってあるGoogleColabのリンクをクリックすると、このような画面が表示されると思います。
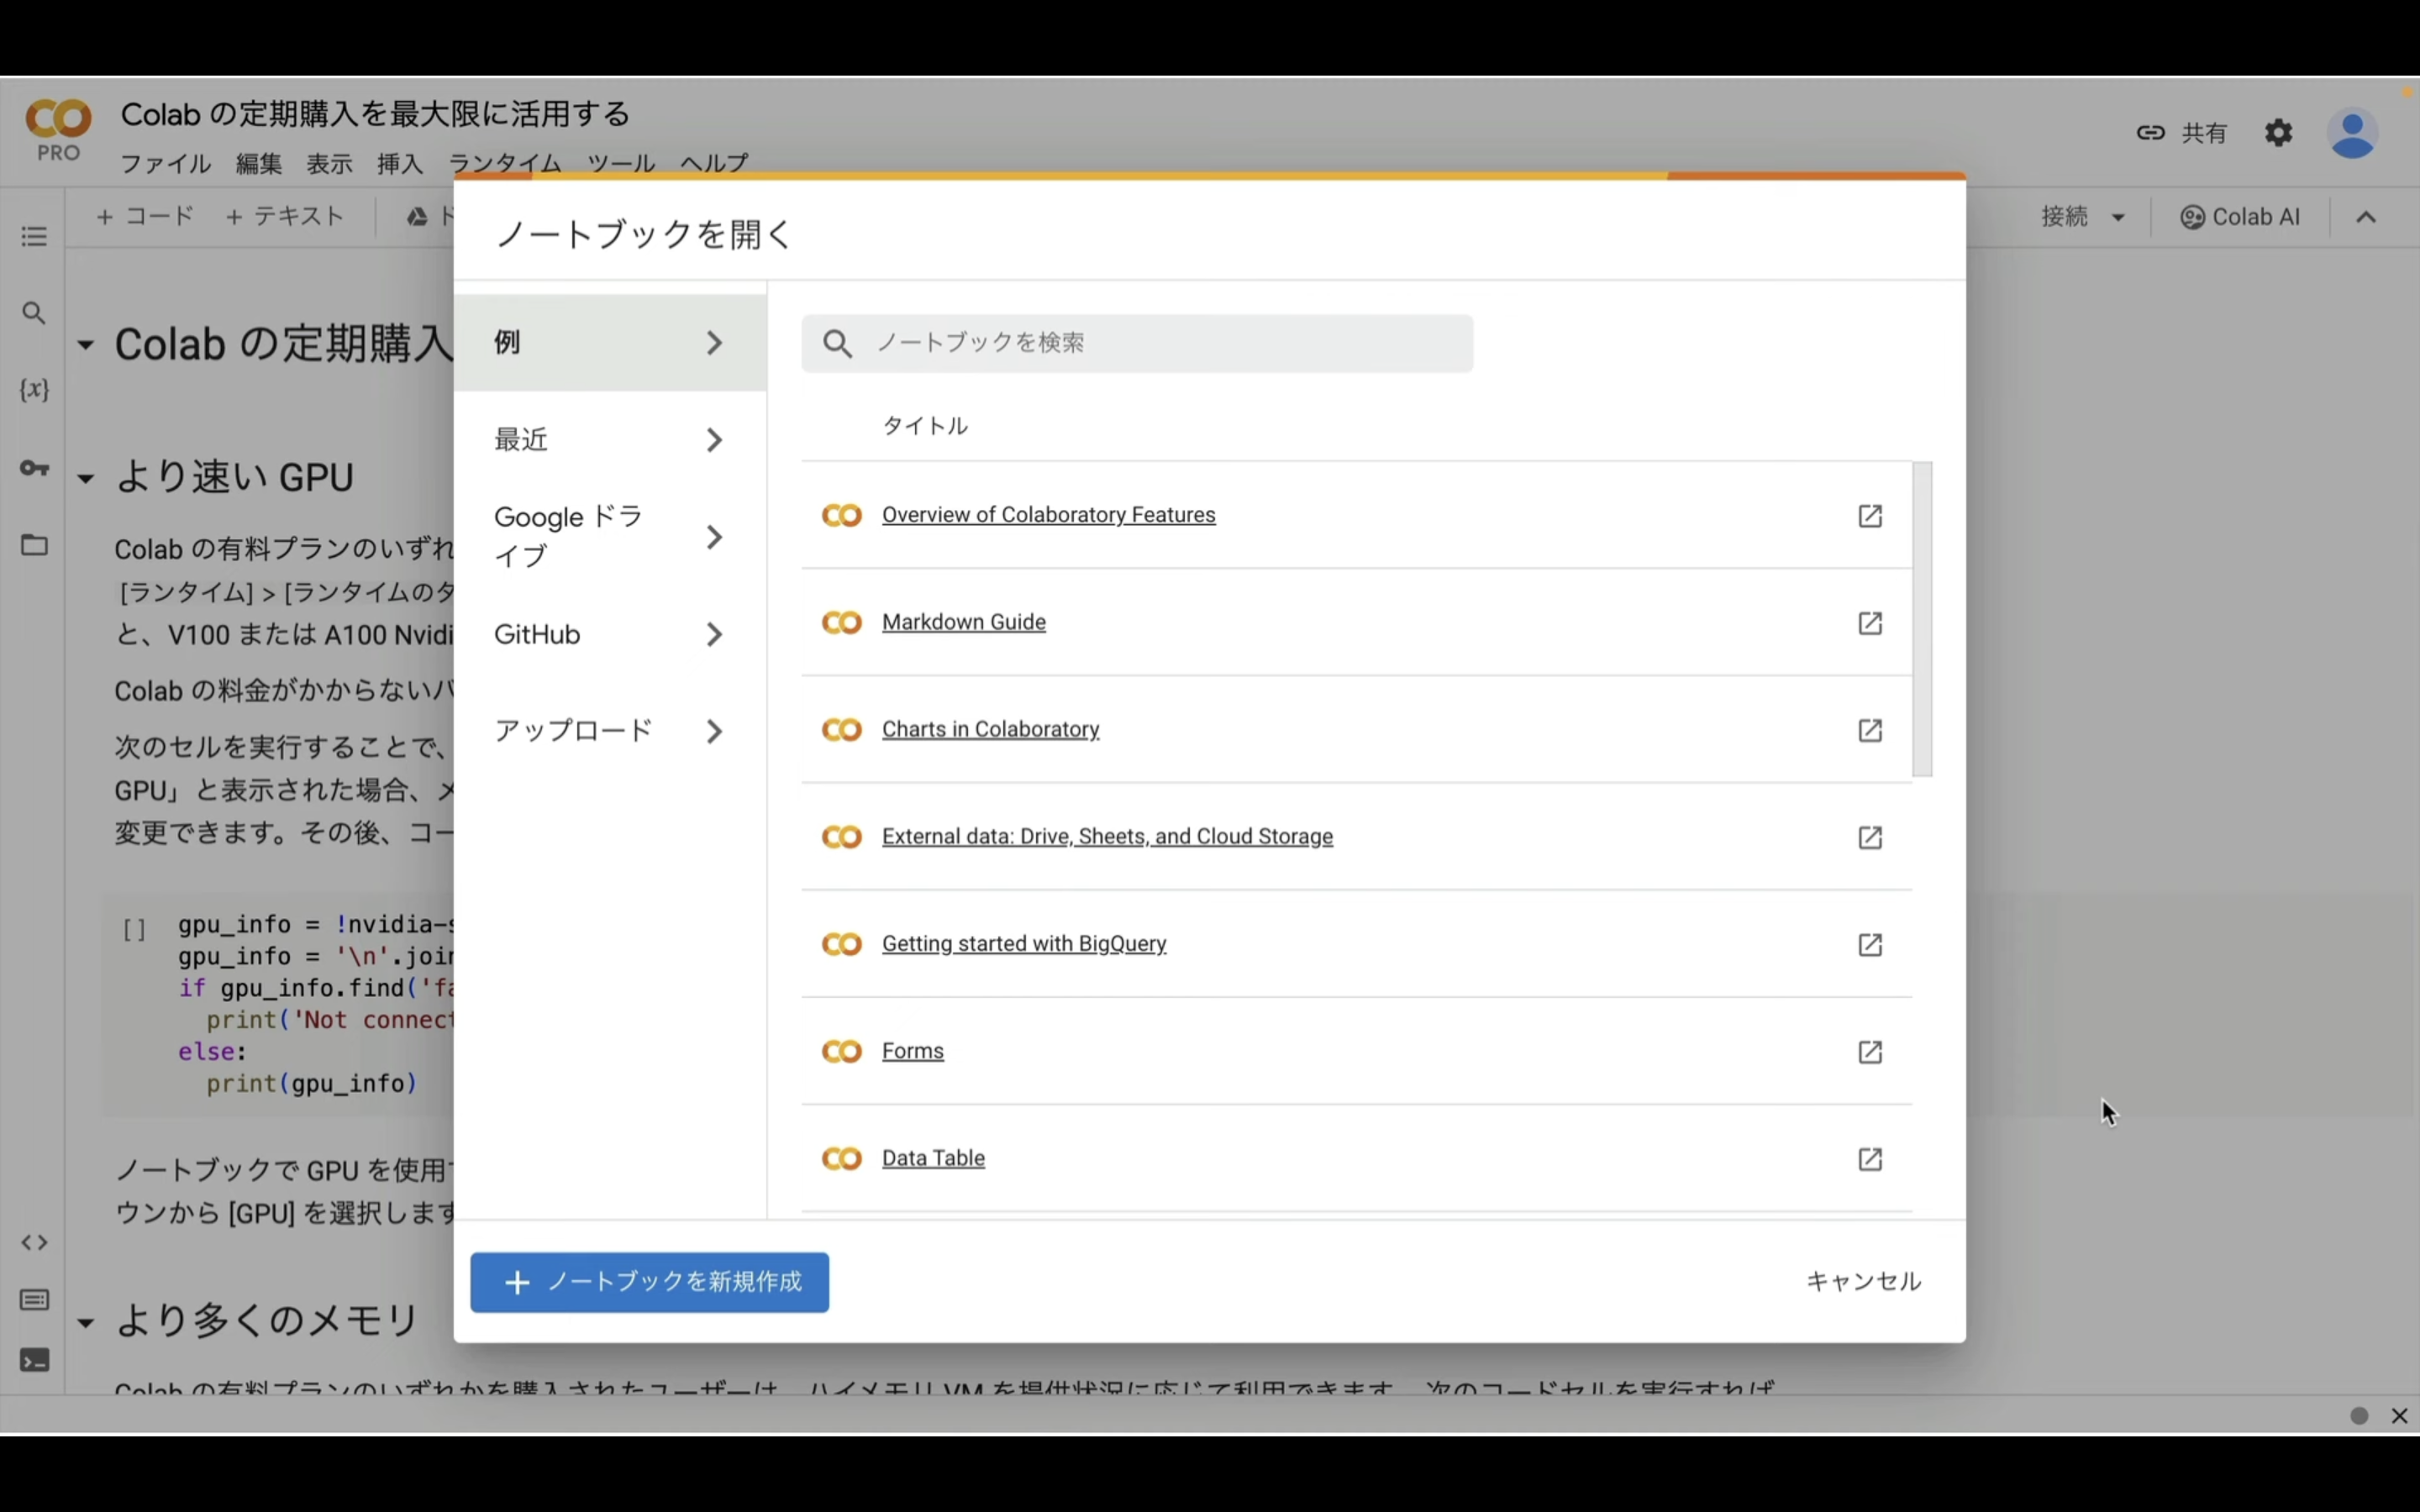
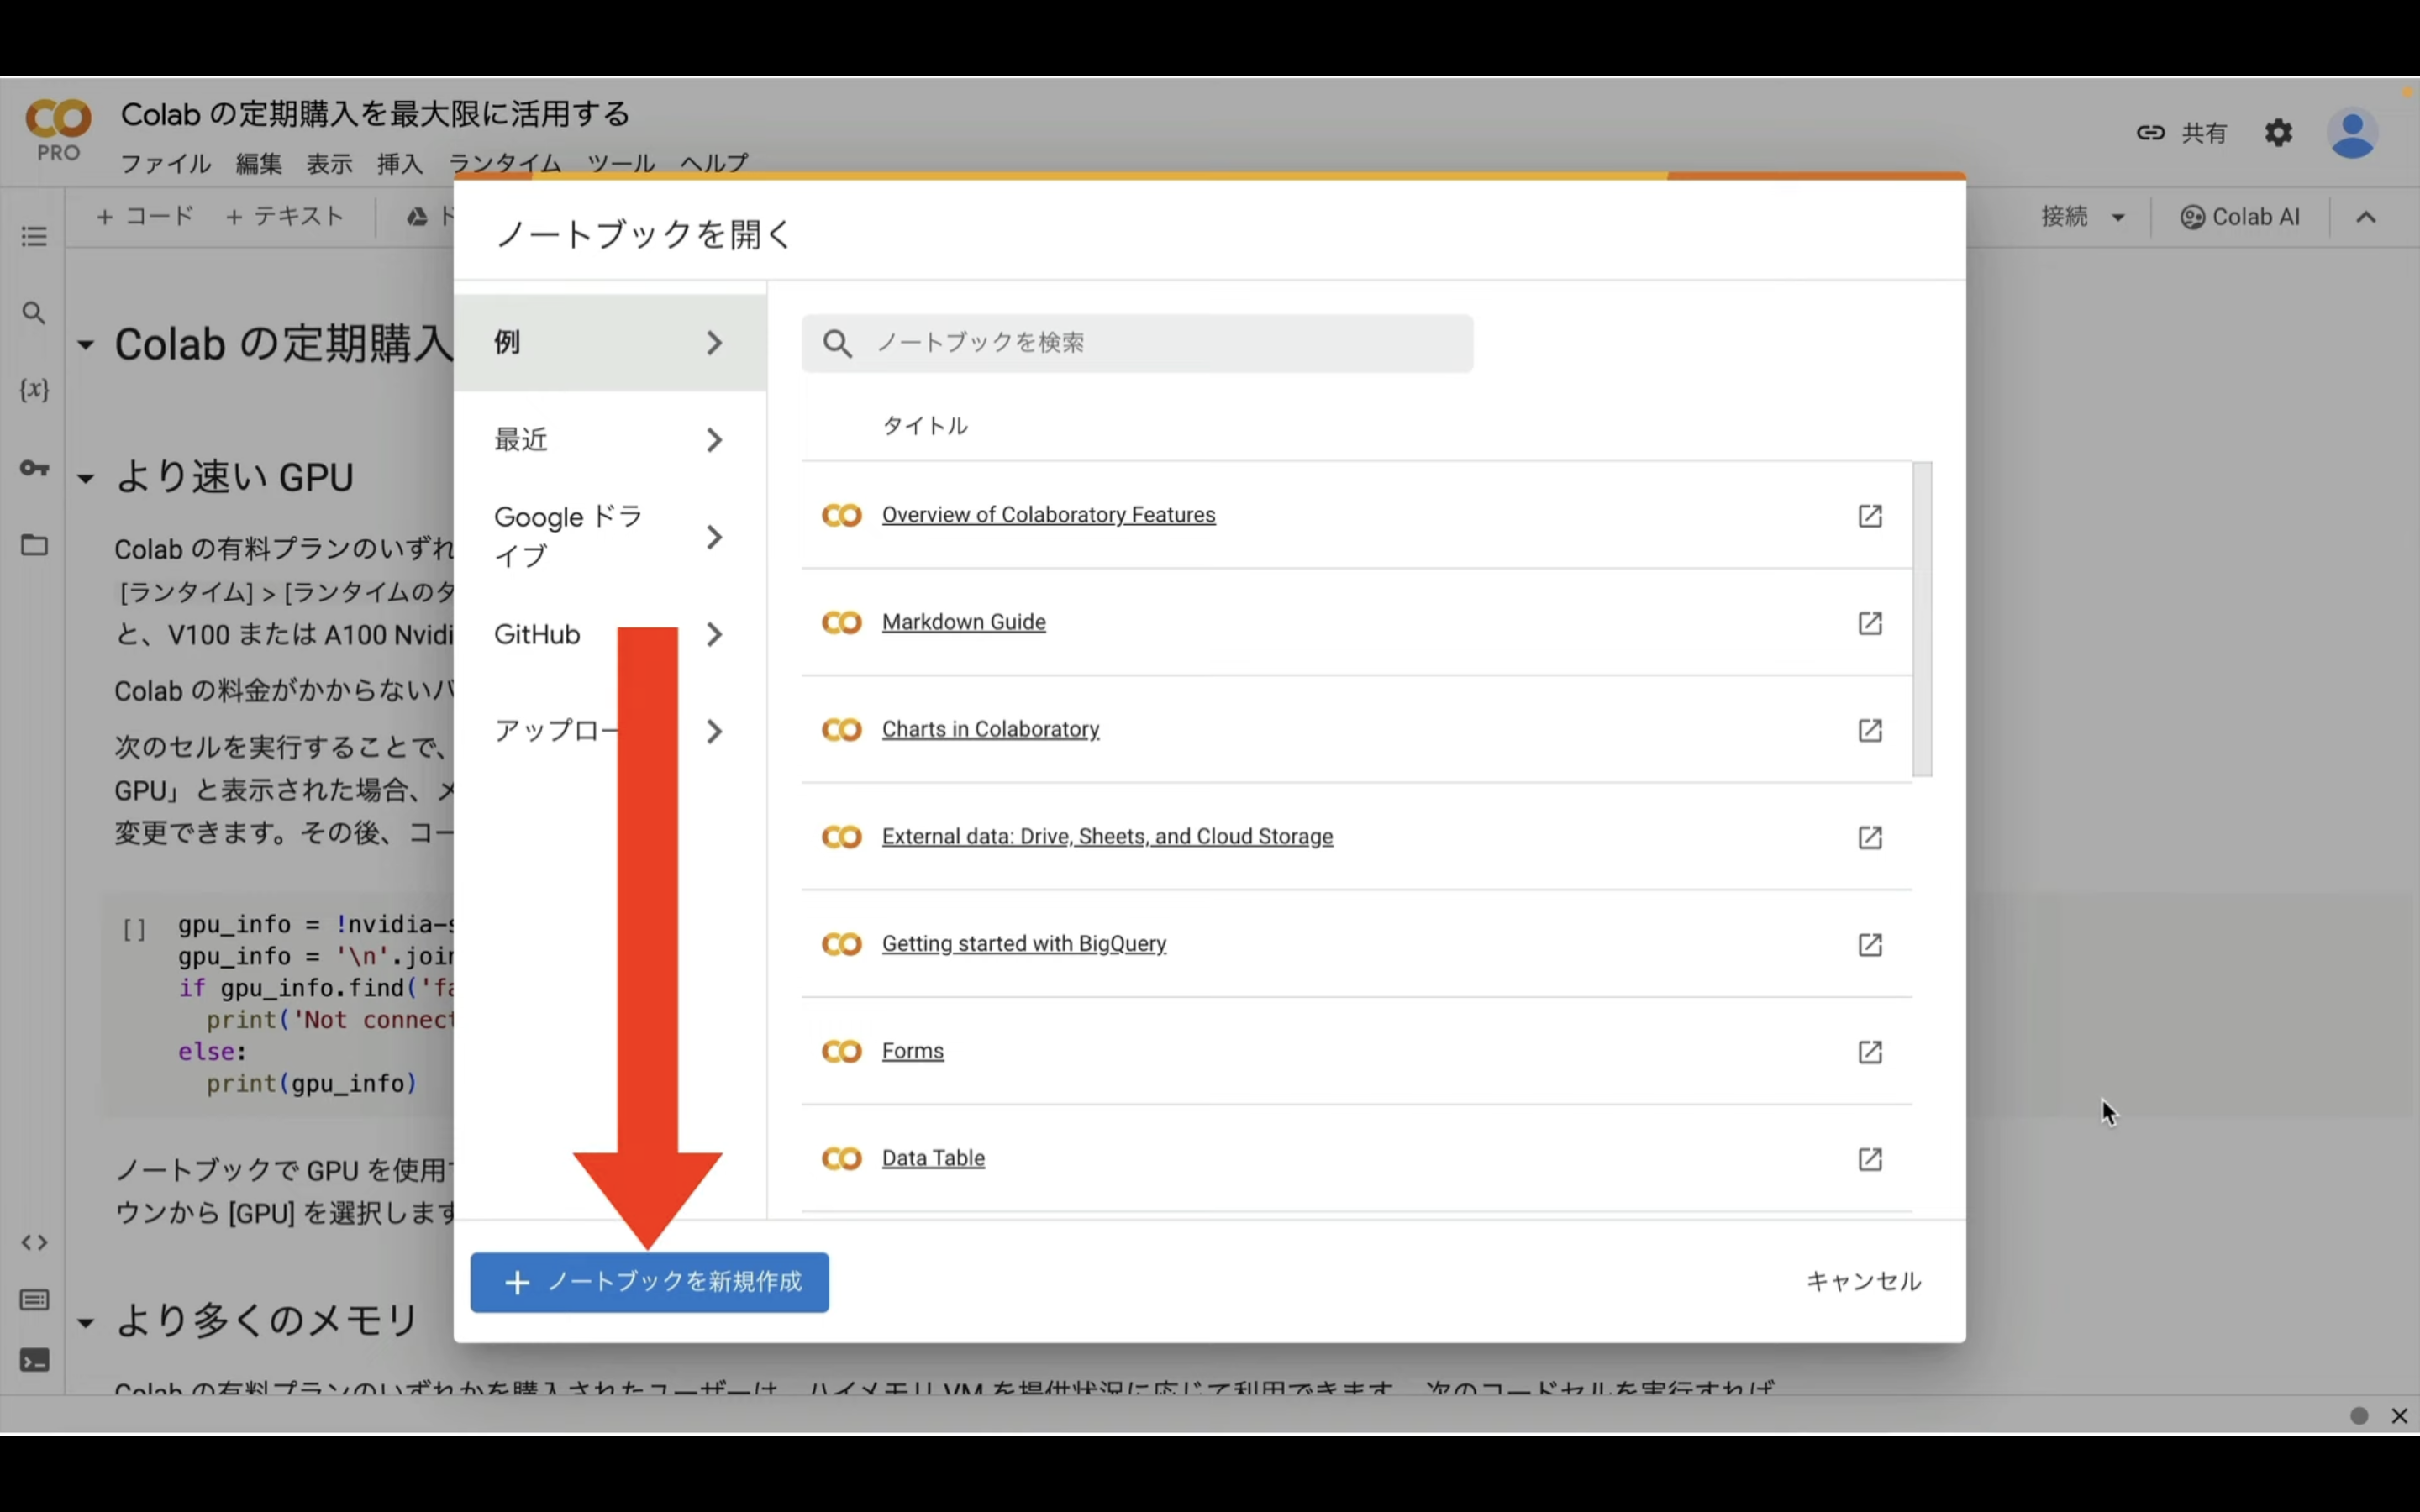
このポップアップ画面が表示されたら、ノートブックを新規作成と書かれているボタンをクリックします。
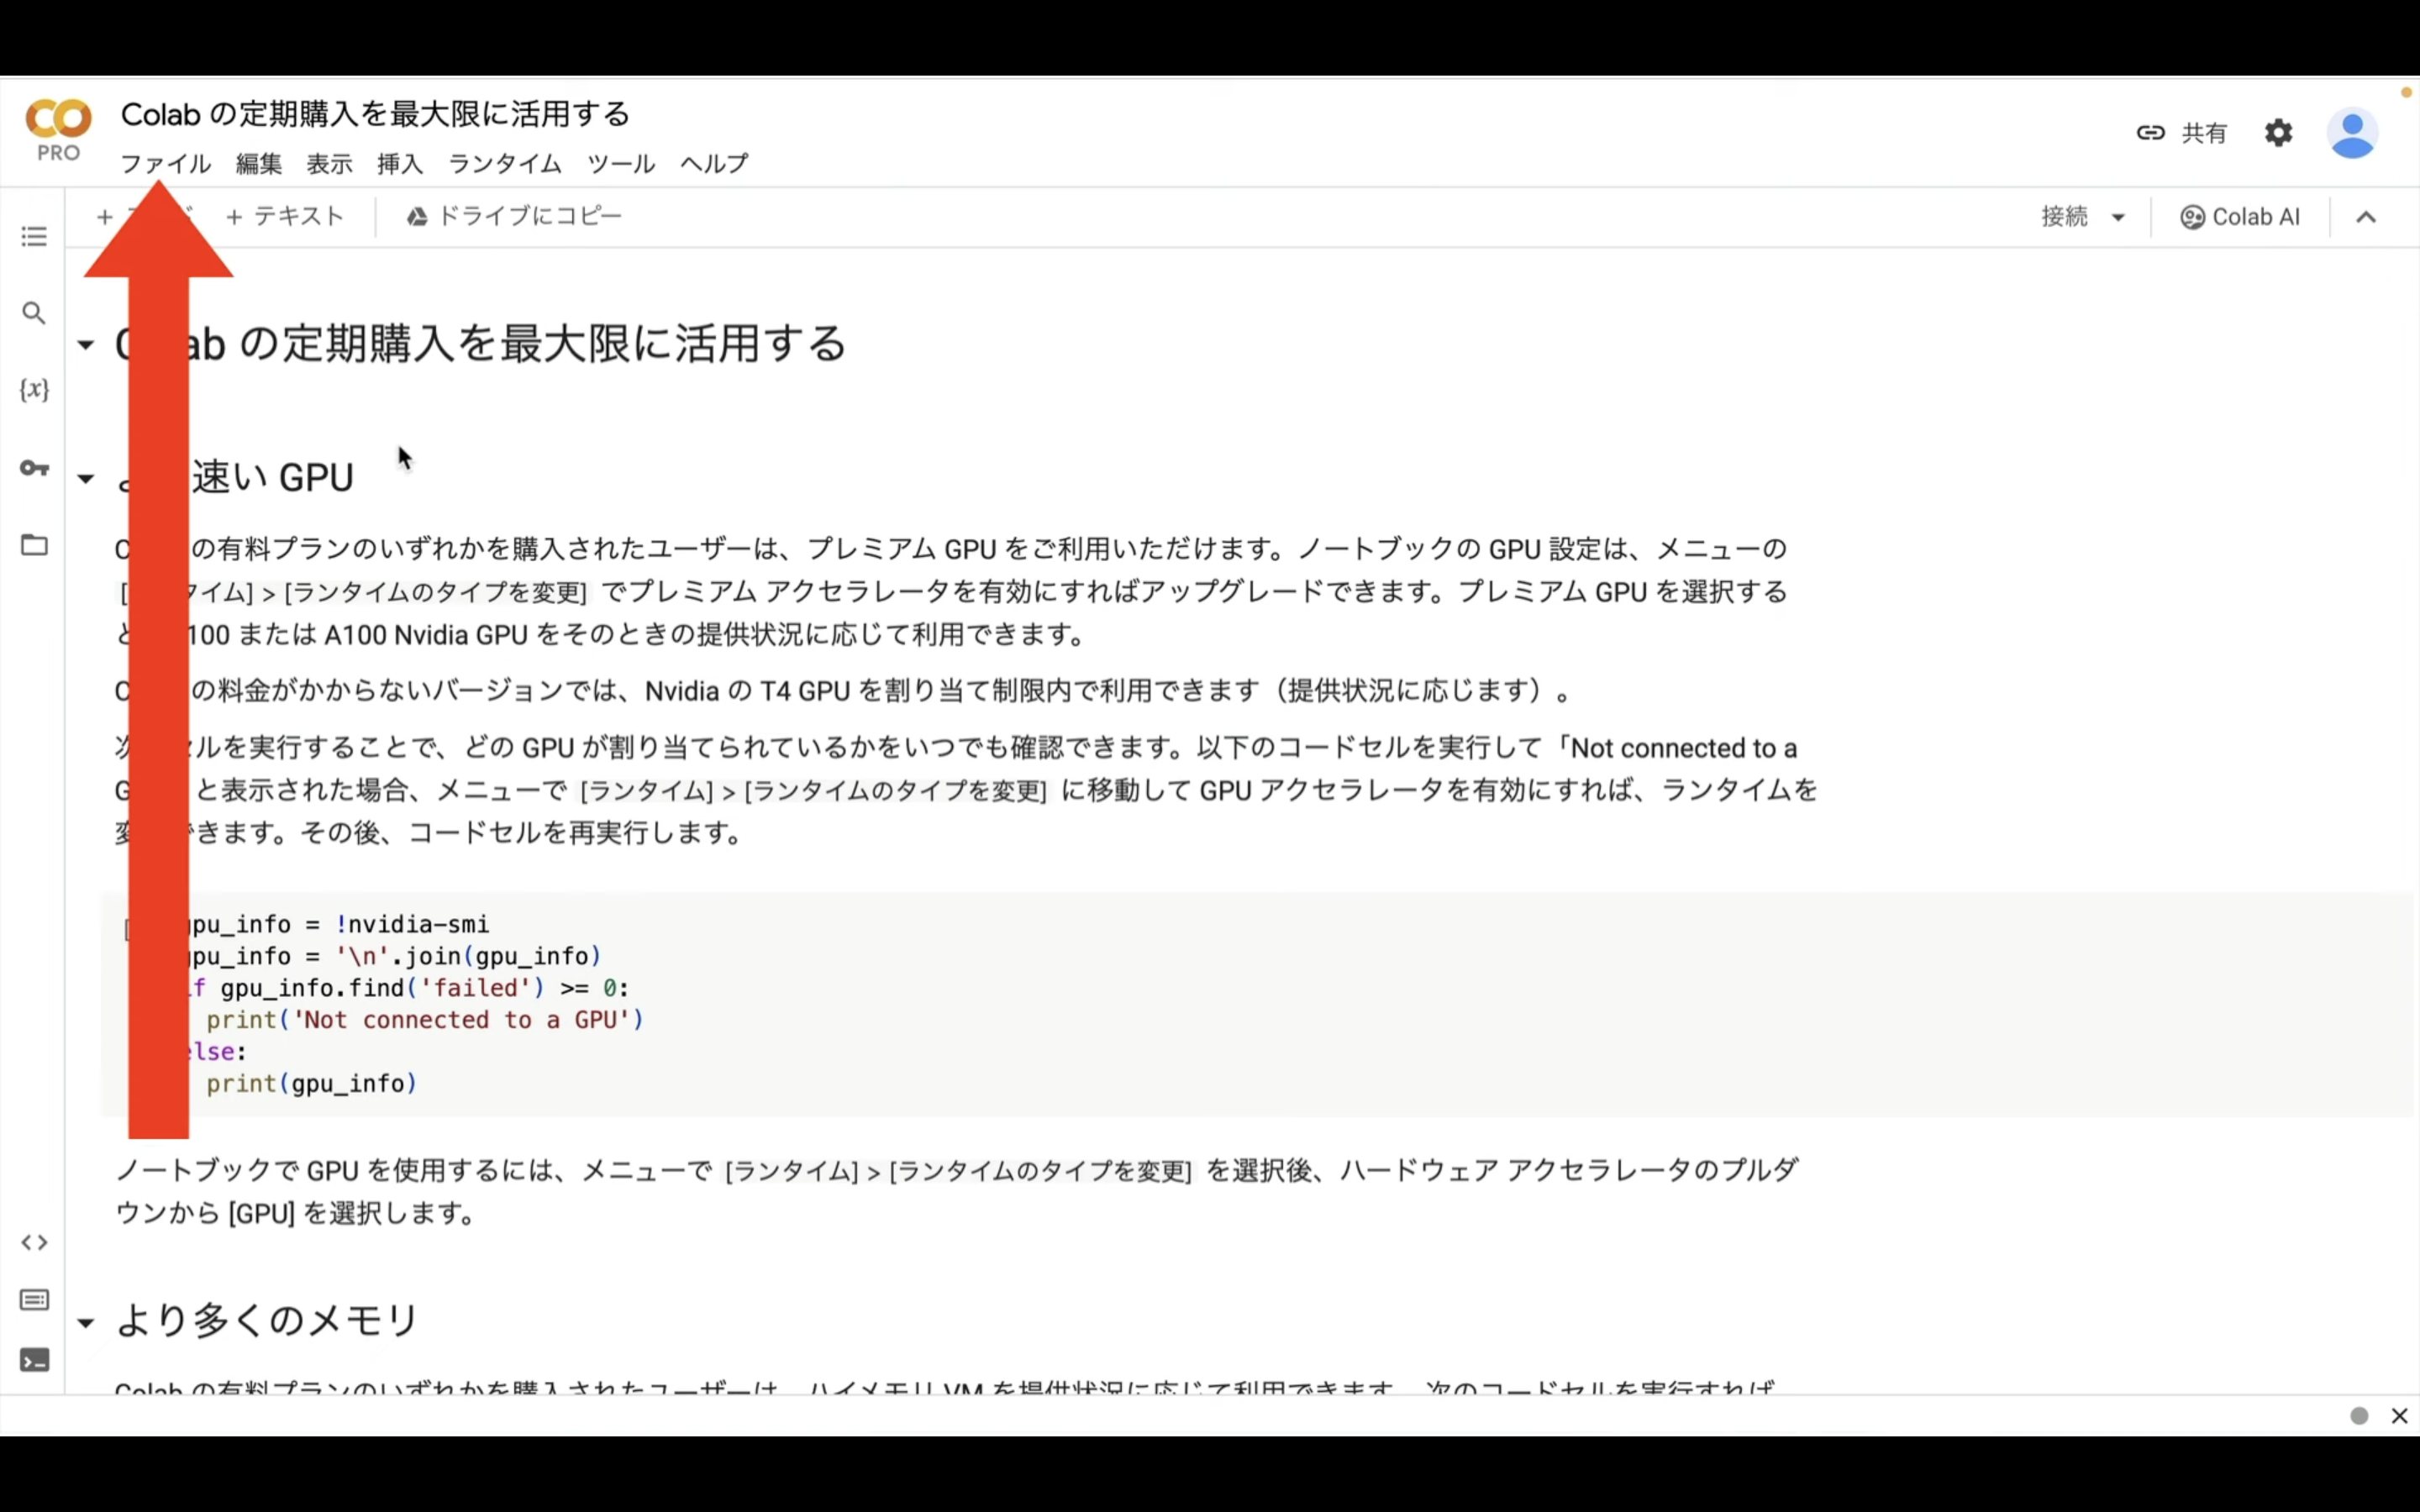
もしもこのようなポップアップ画面が表示されていない場合は、このような表示になっていると思います。
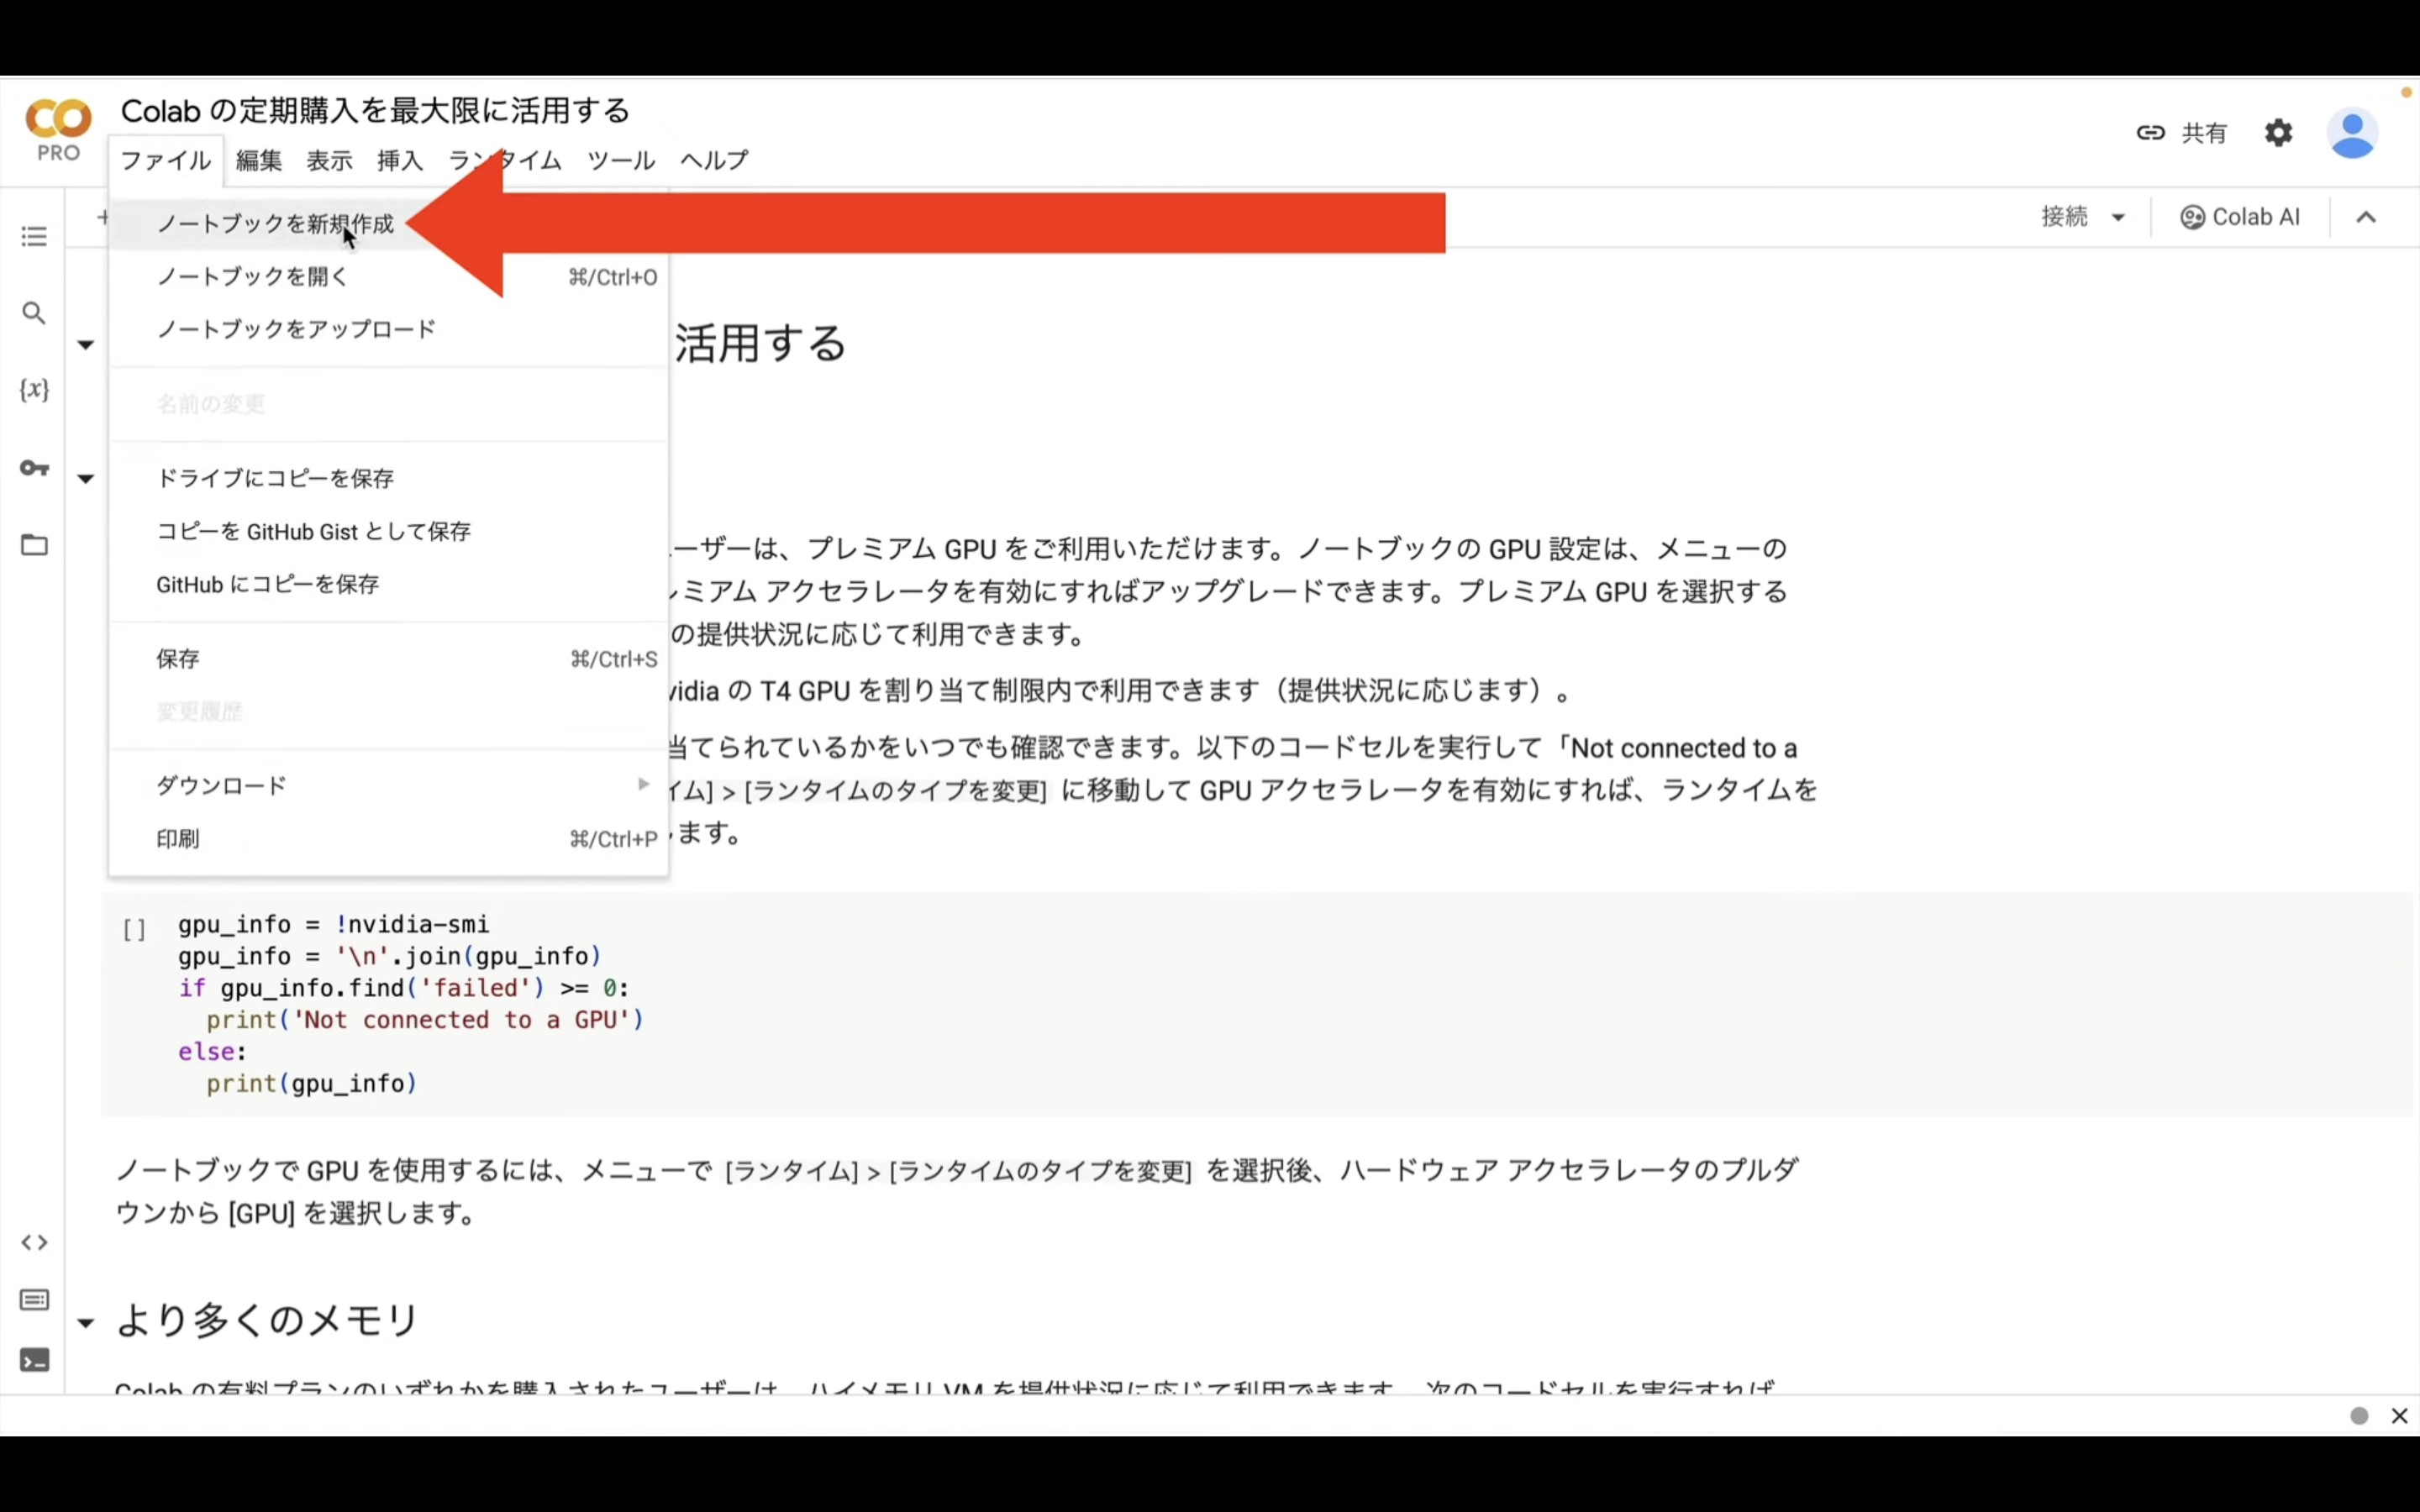
この場合は、メニューの中からファイルを選択します。
そして表示されたメニューの中からノートブックを新規作成という項目を選択します。
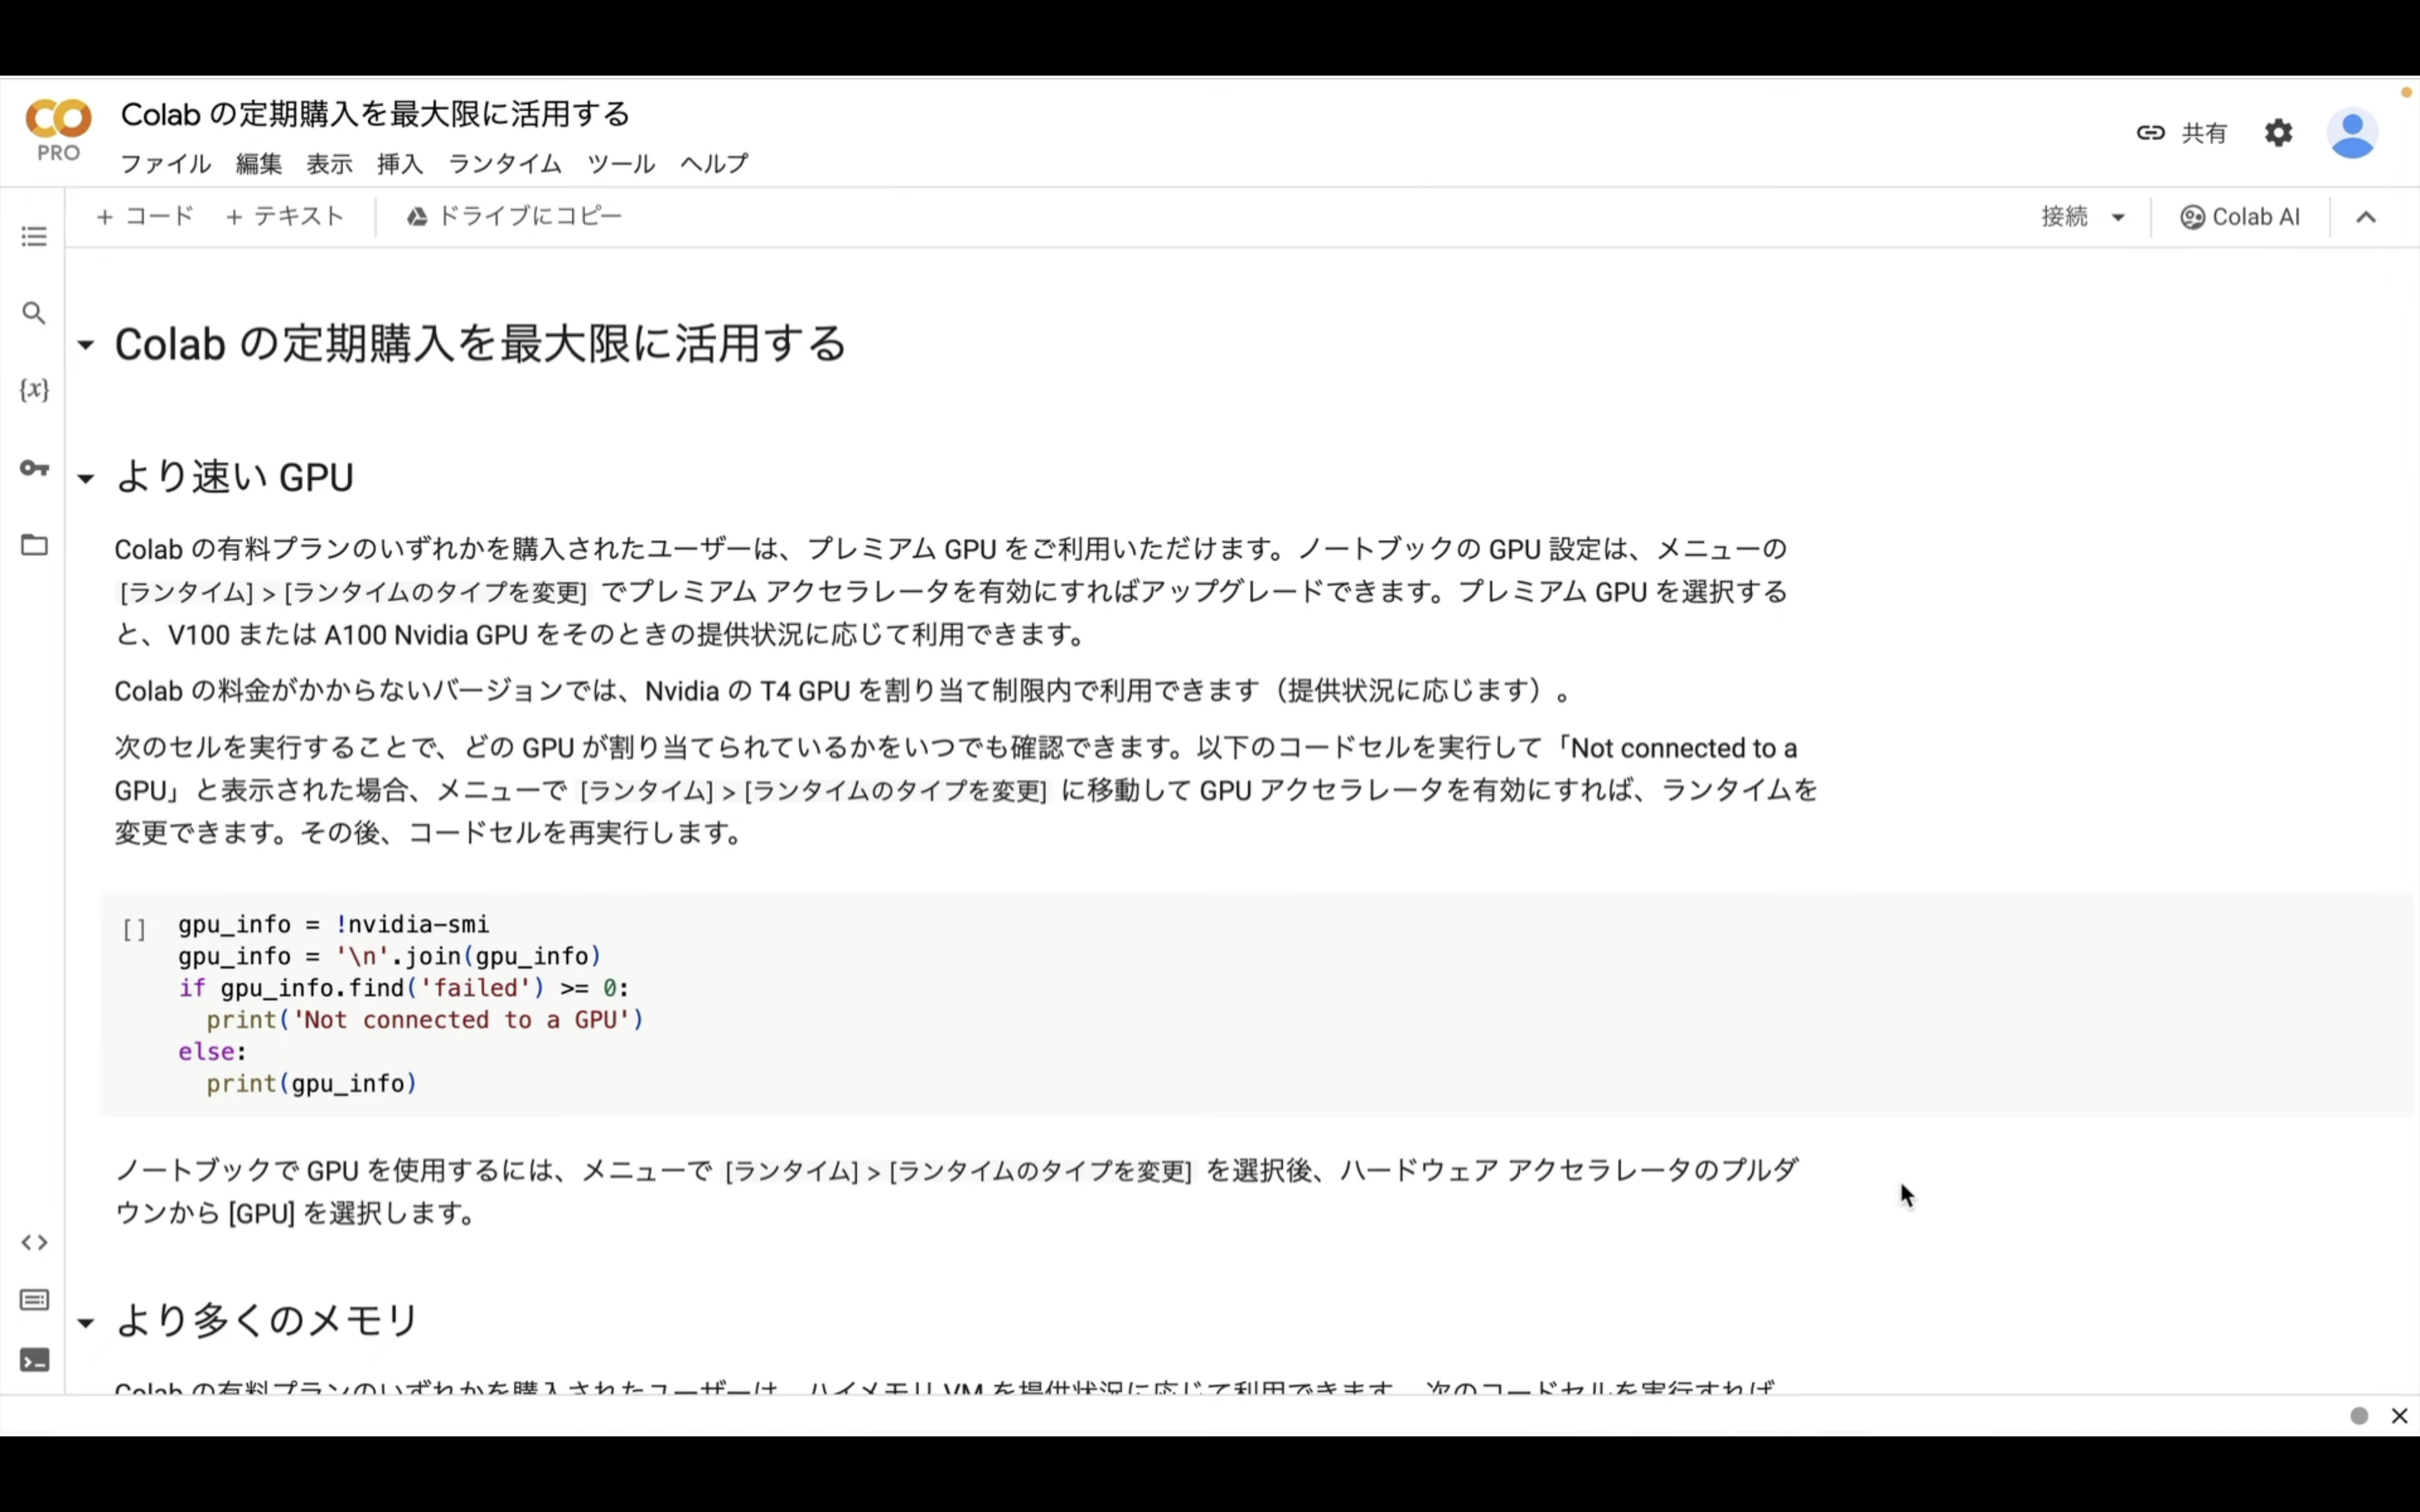
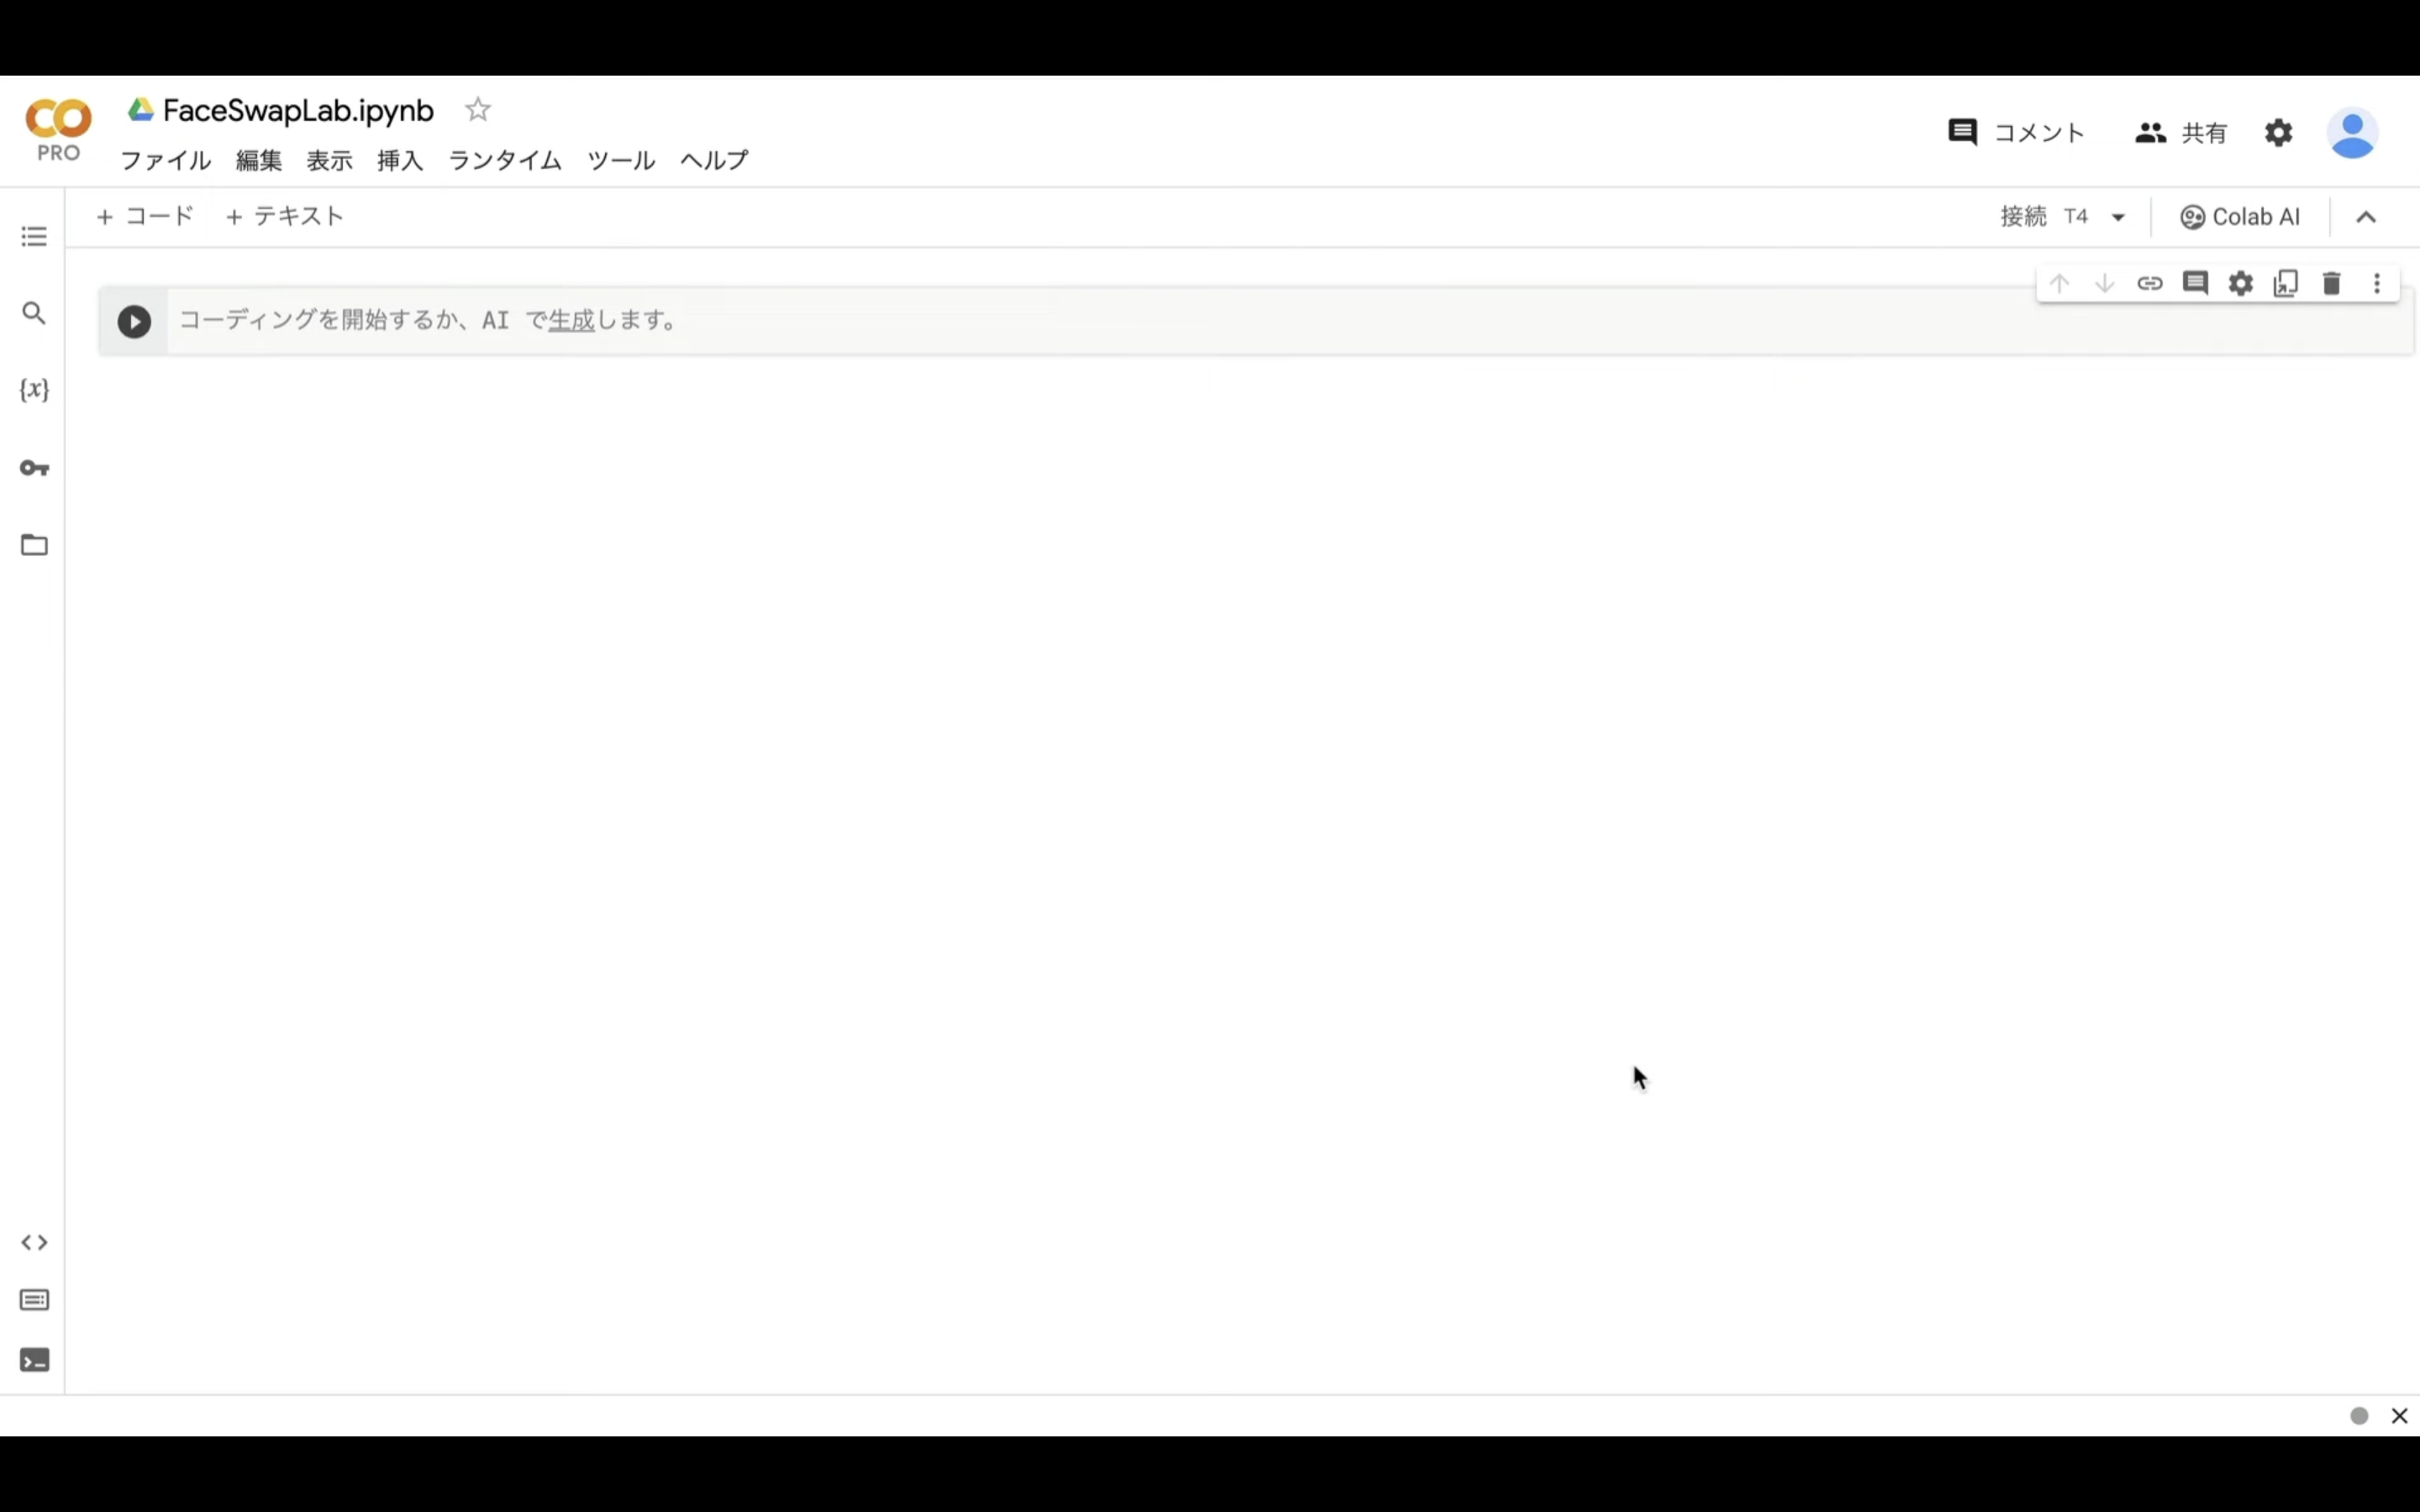
そうするとGoogleColabでソースコードを実行できる画面に移動します。
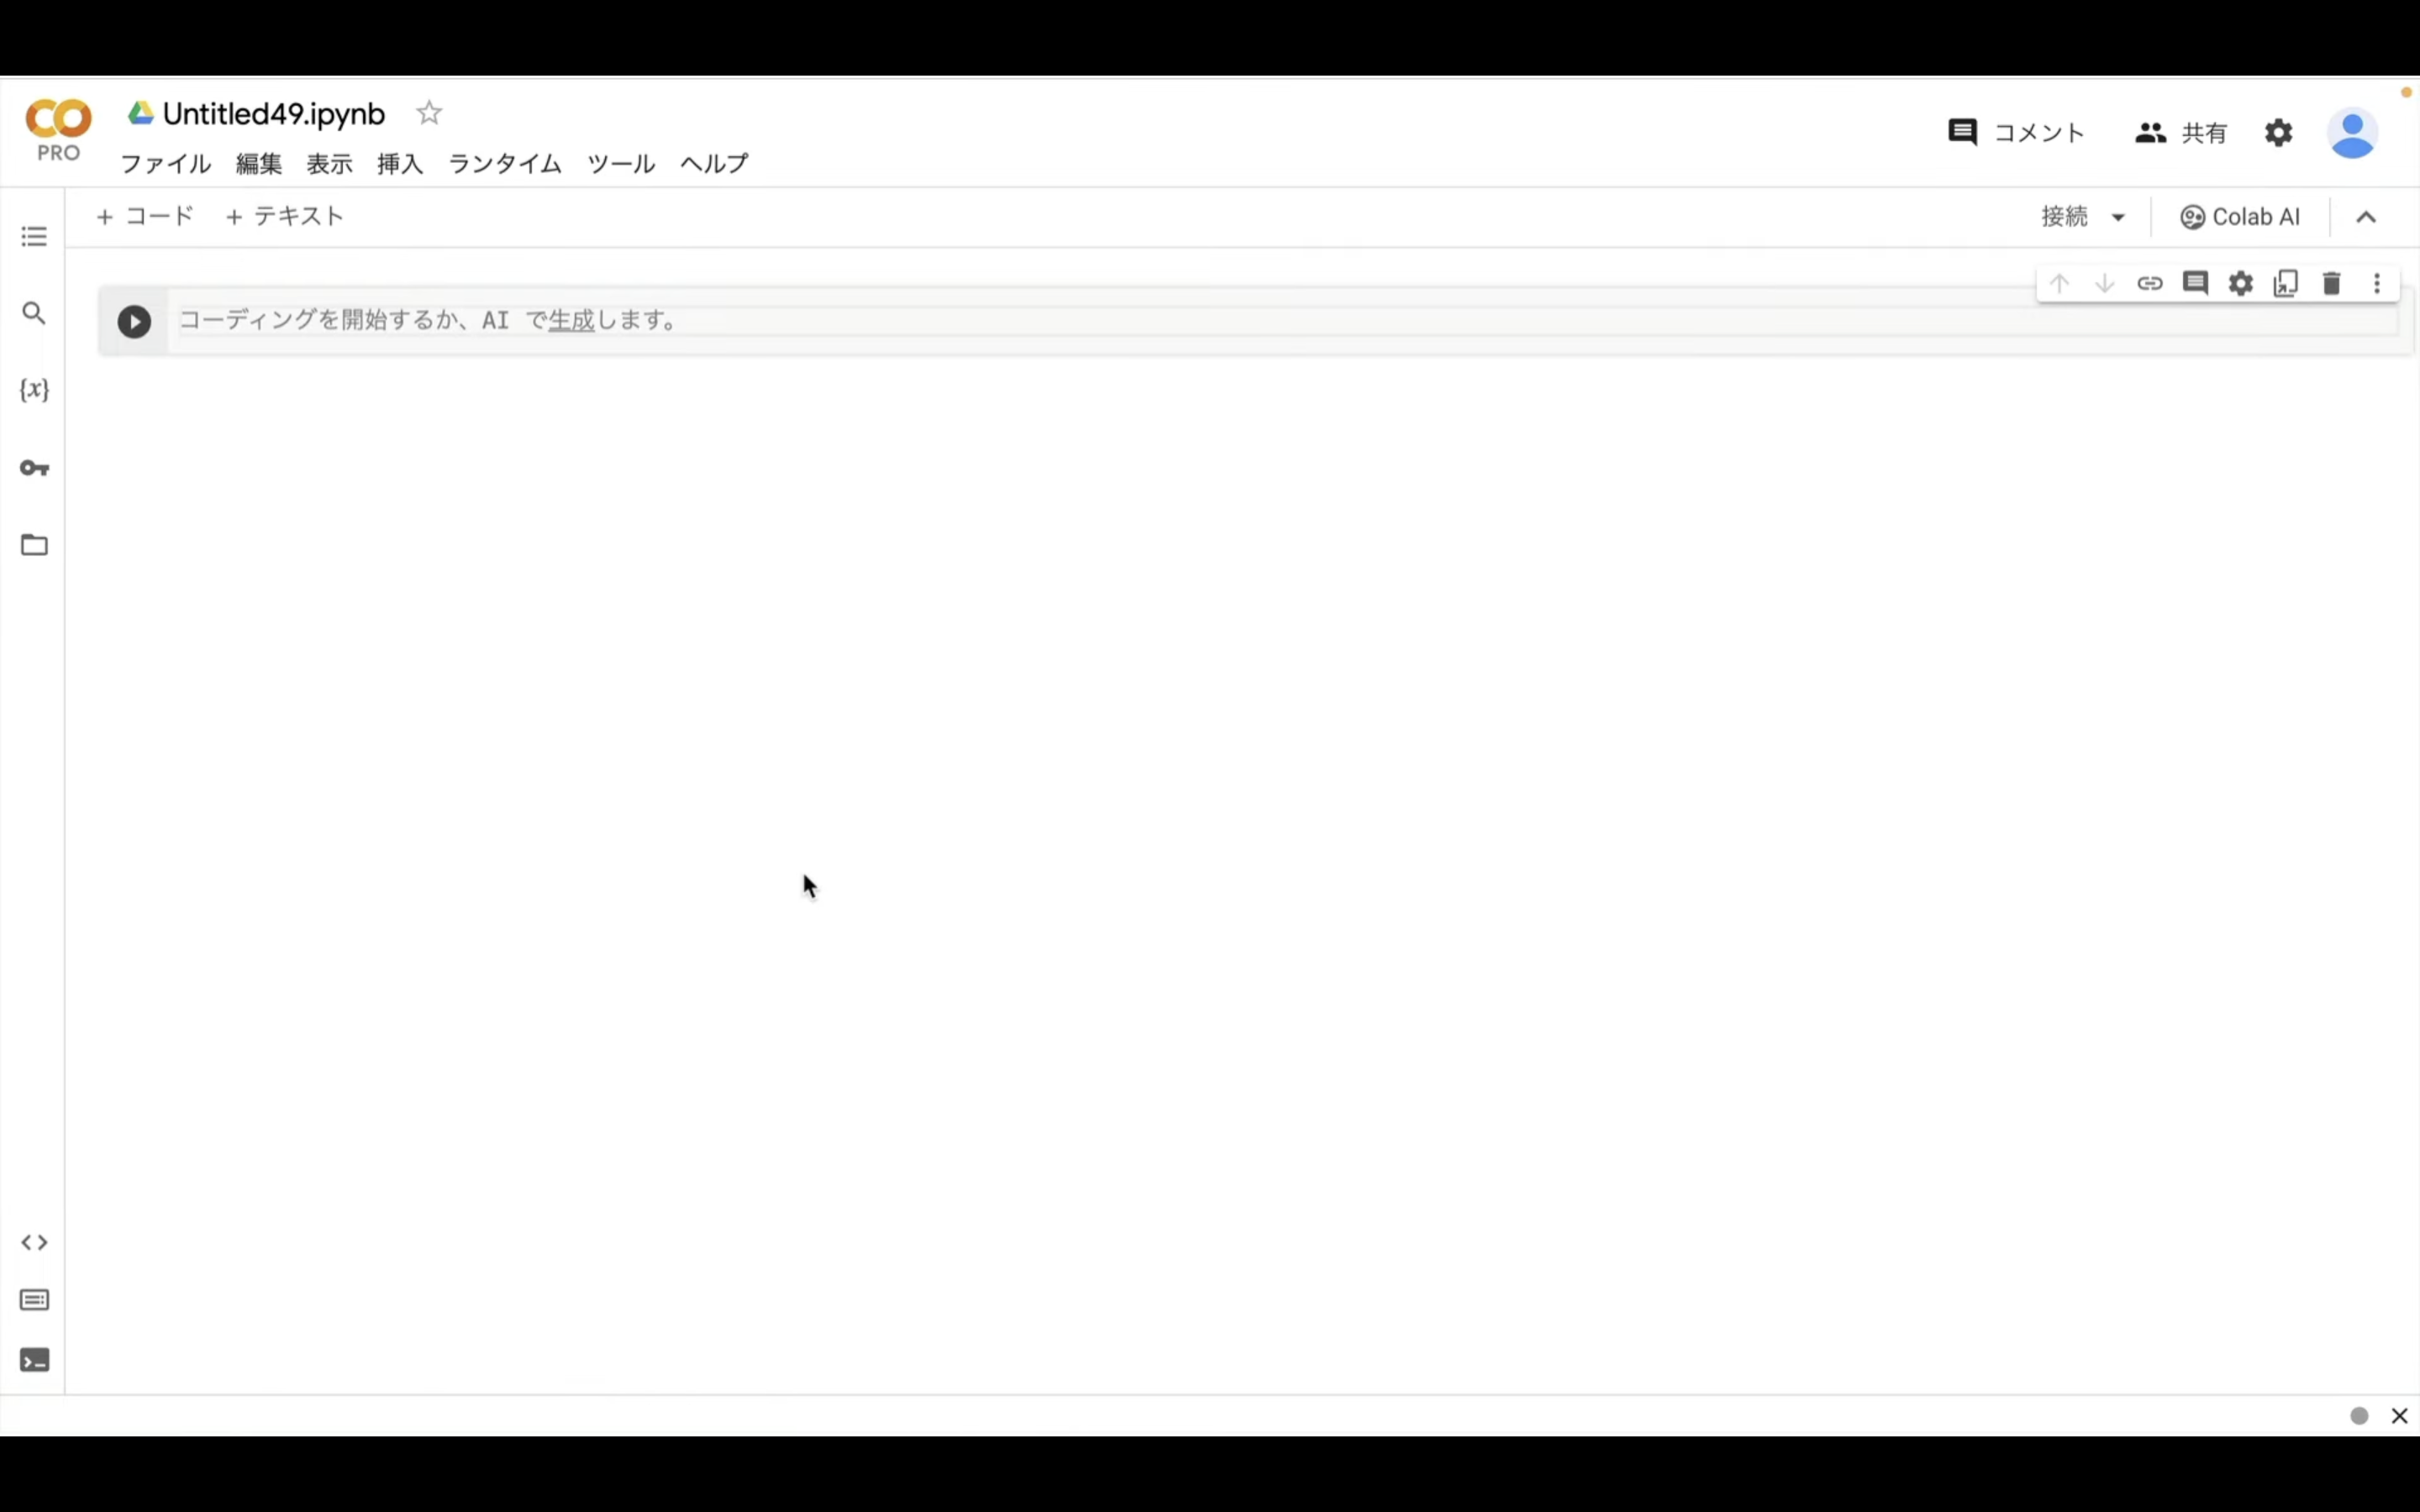
この画面はノートブックと呼ばれる単位で管理されています。
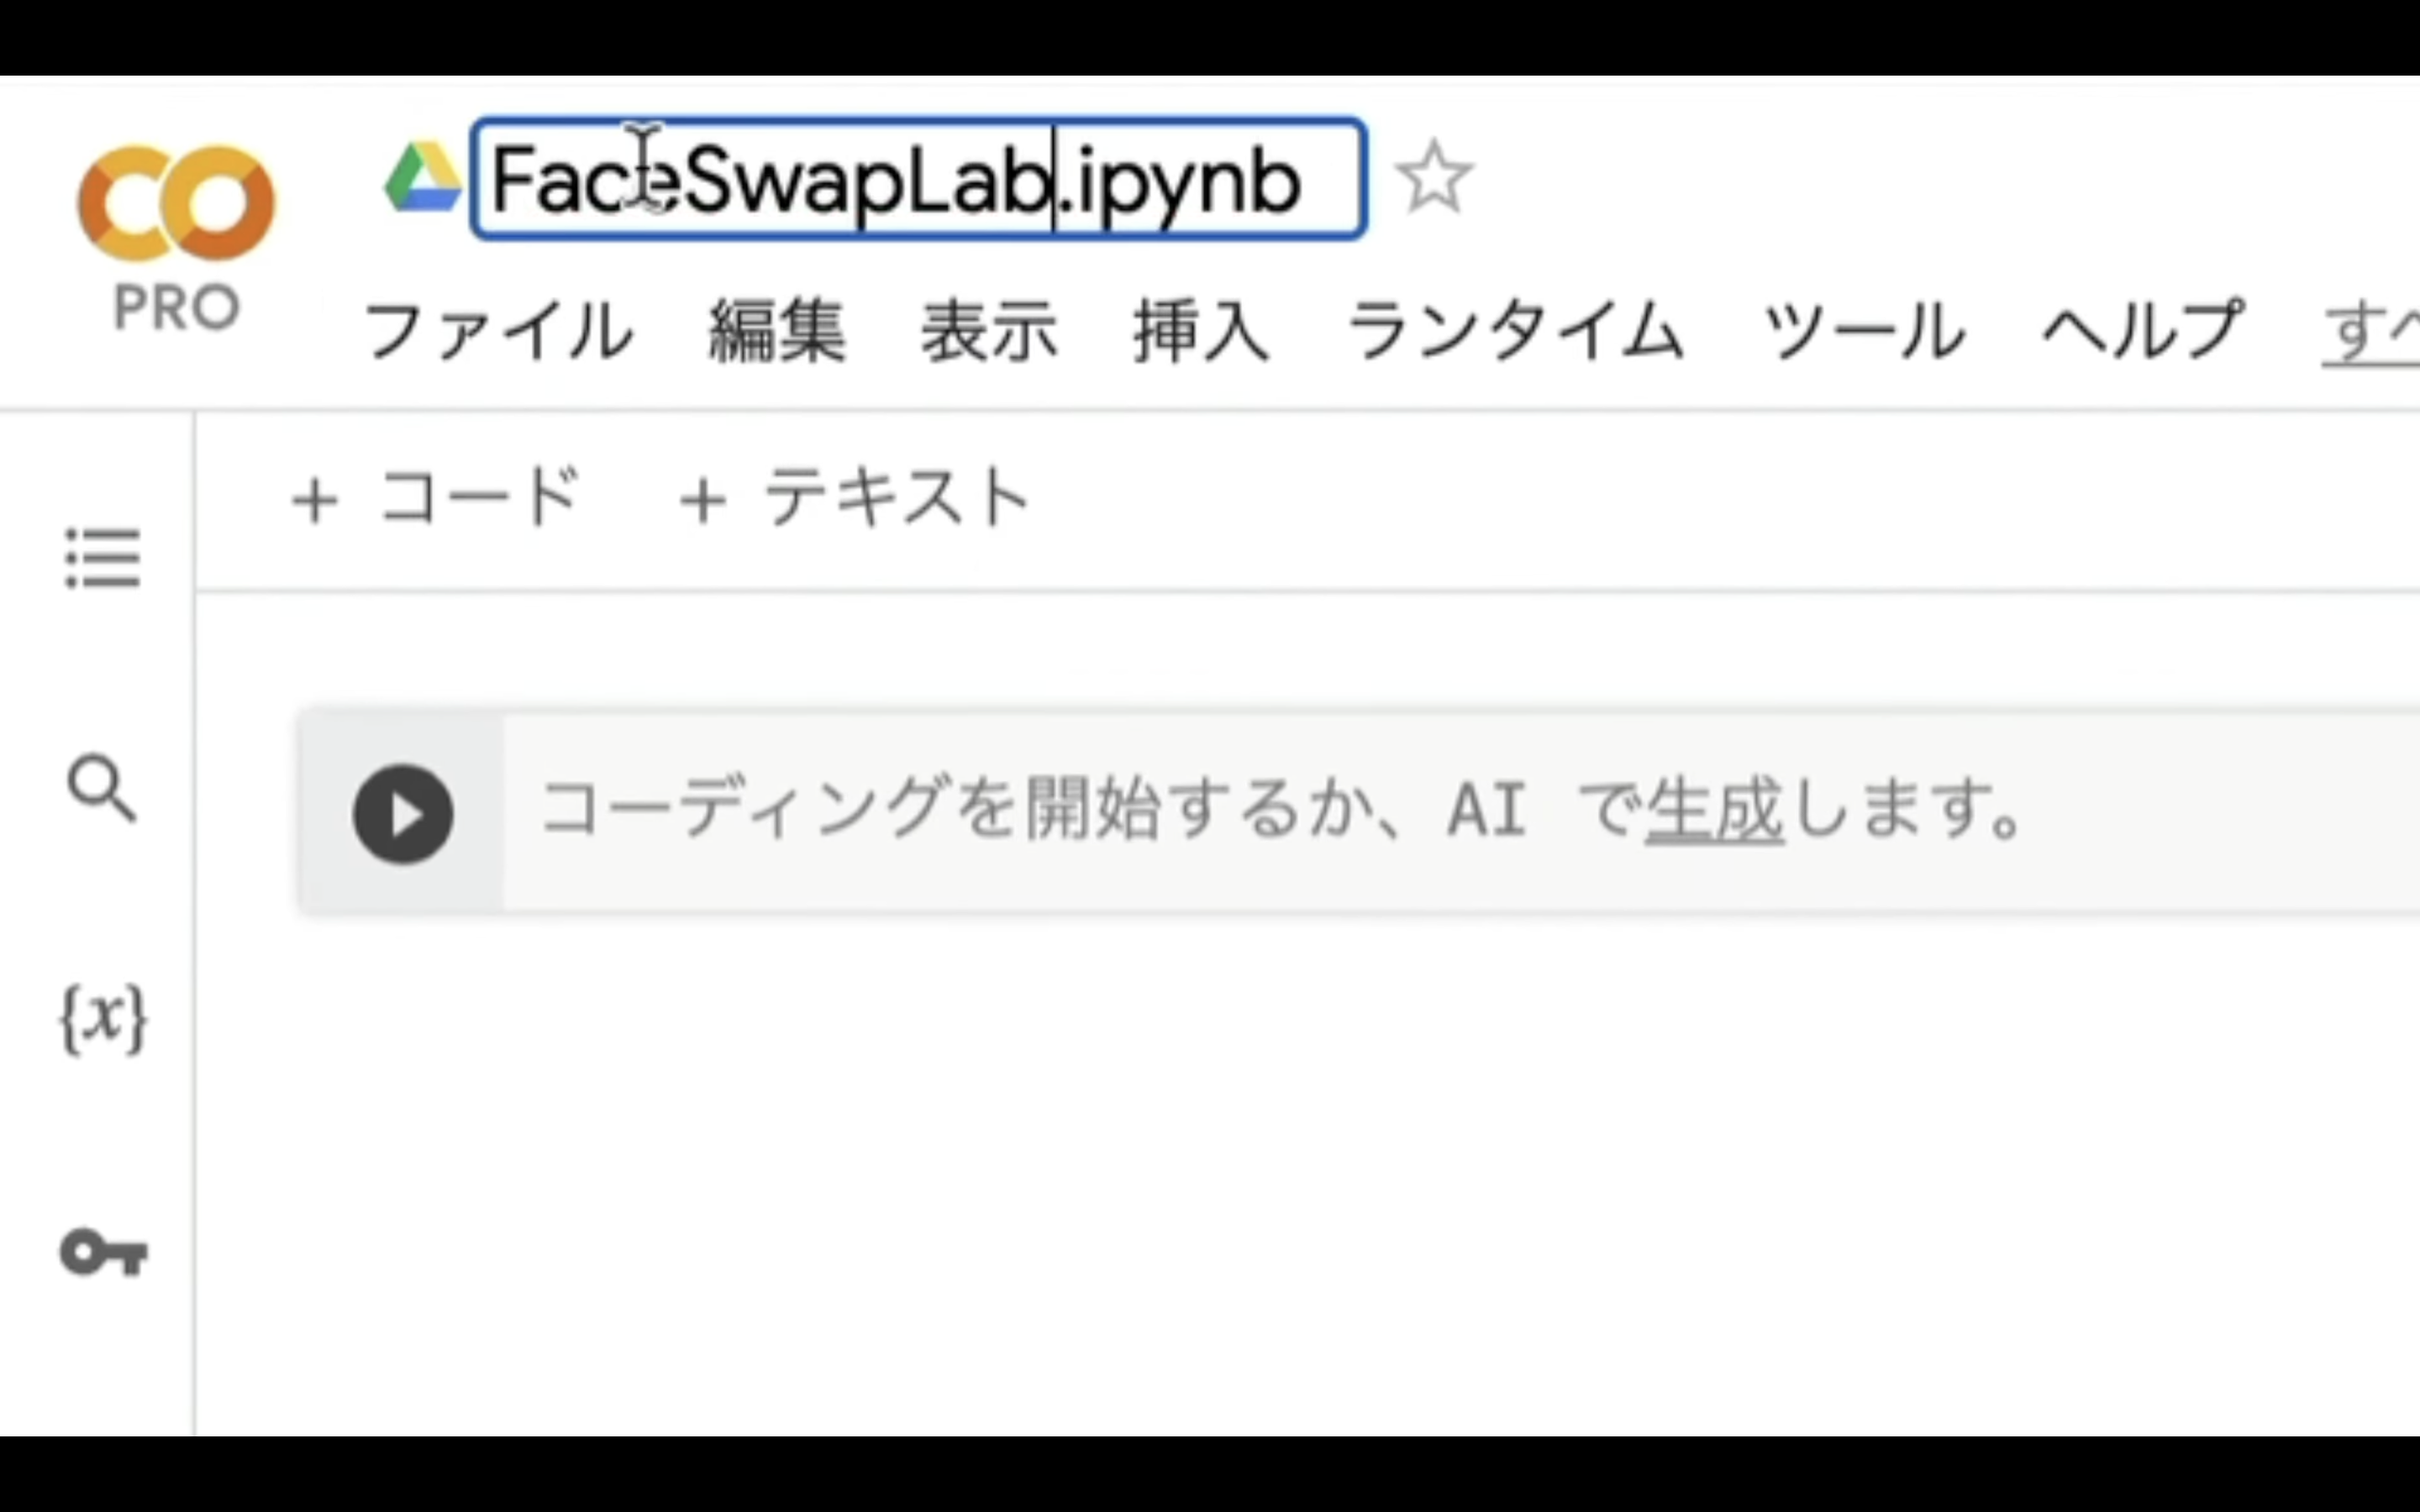
そのため、ファイルに名前を付けるように適切な名前に変更しておきましょう。
今回はこのような名前にしておきました。
ノートブックの名前を変更したら、次にランタイムのタイプを変更します。
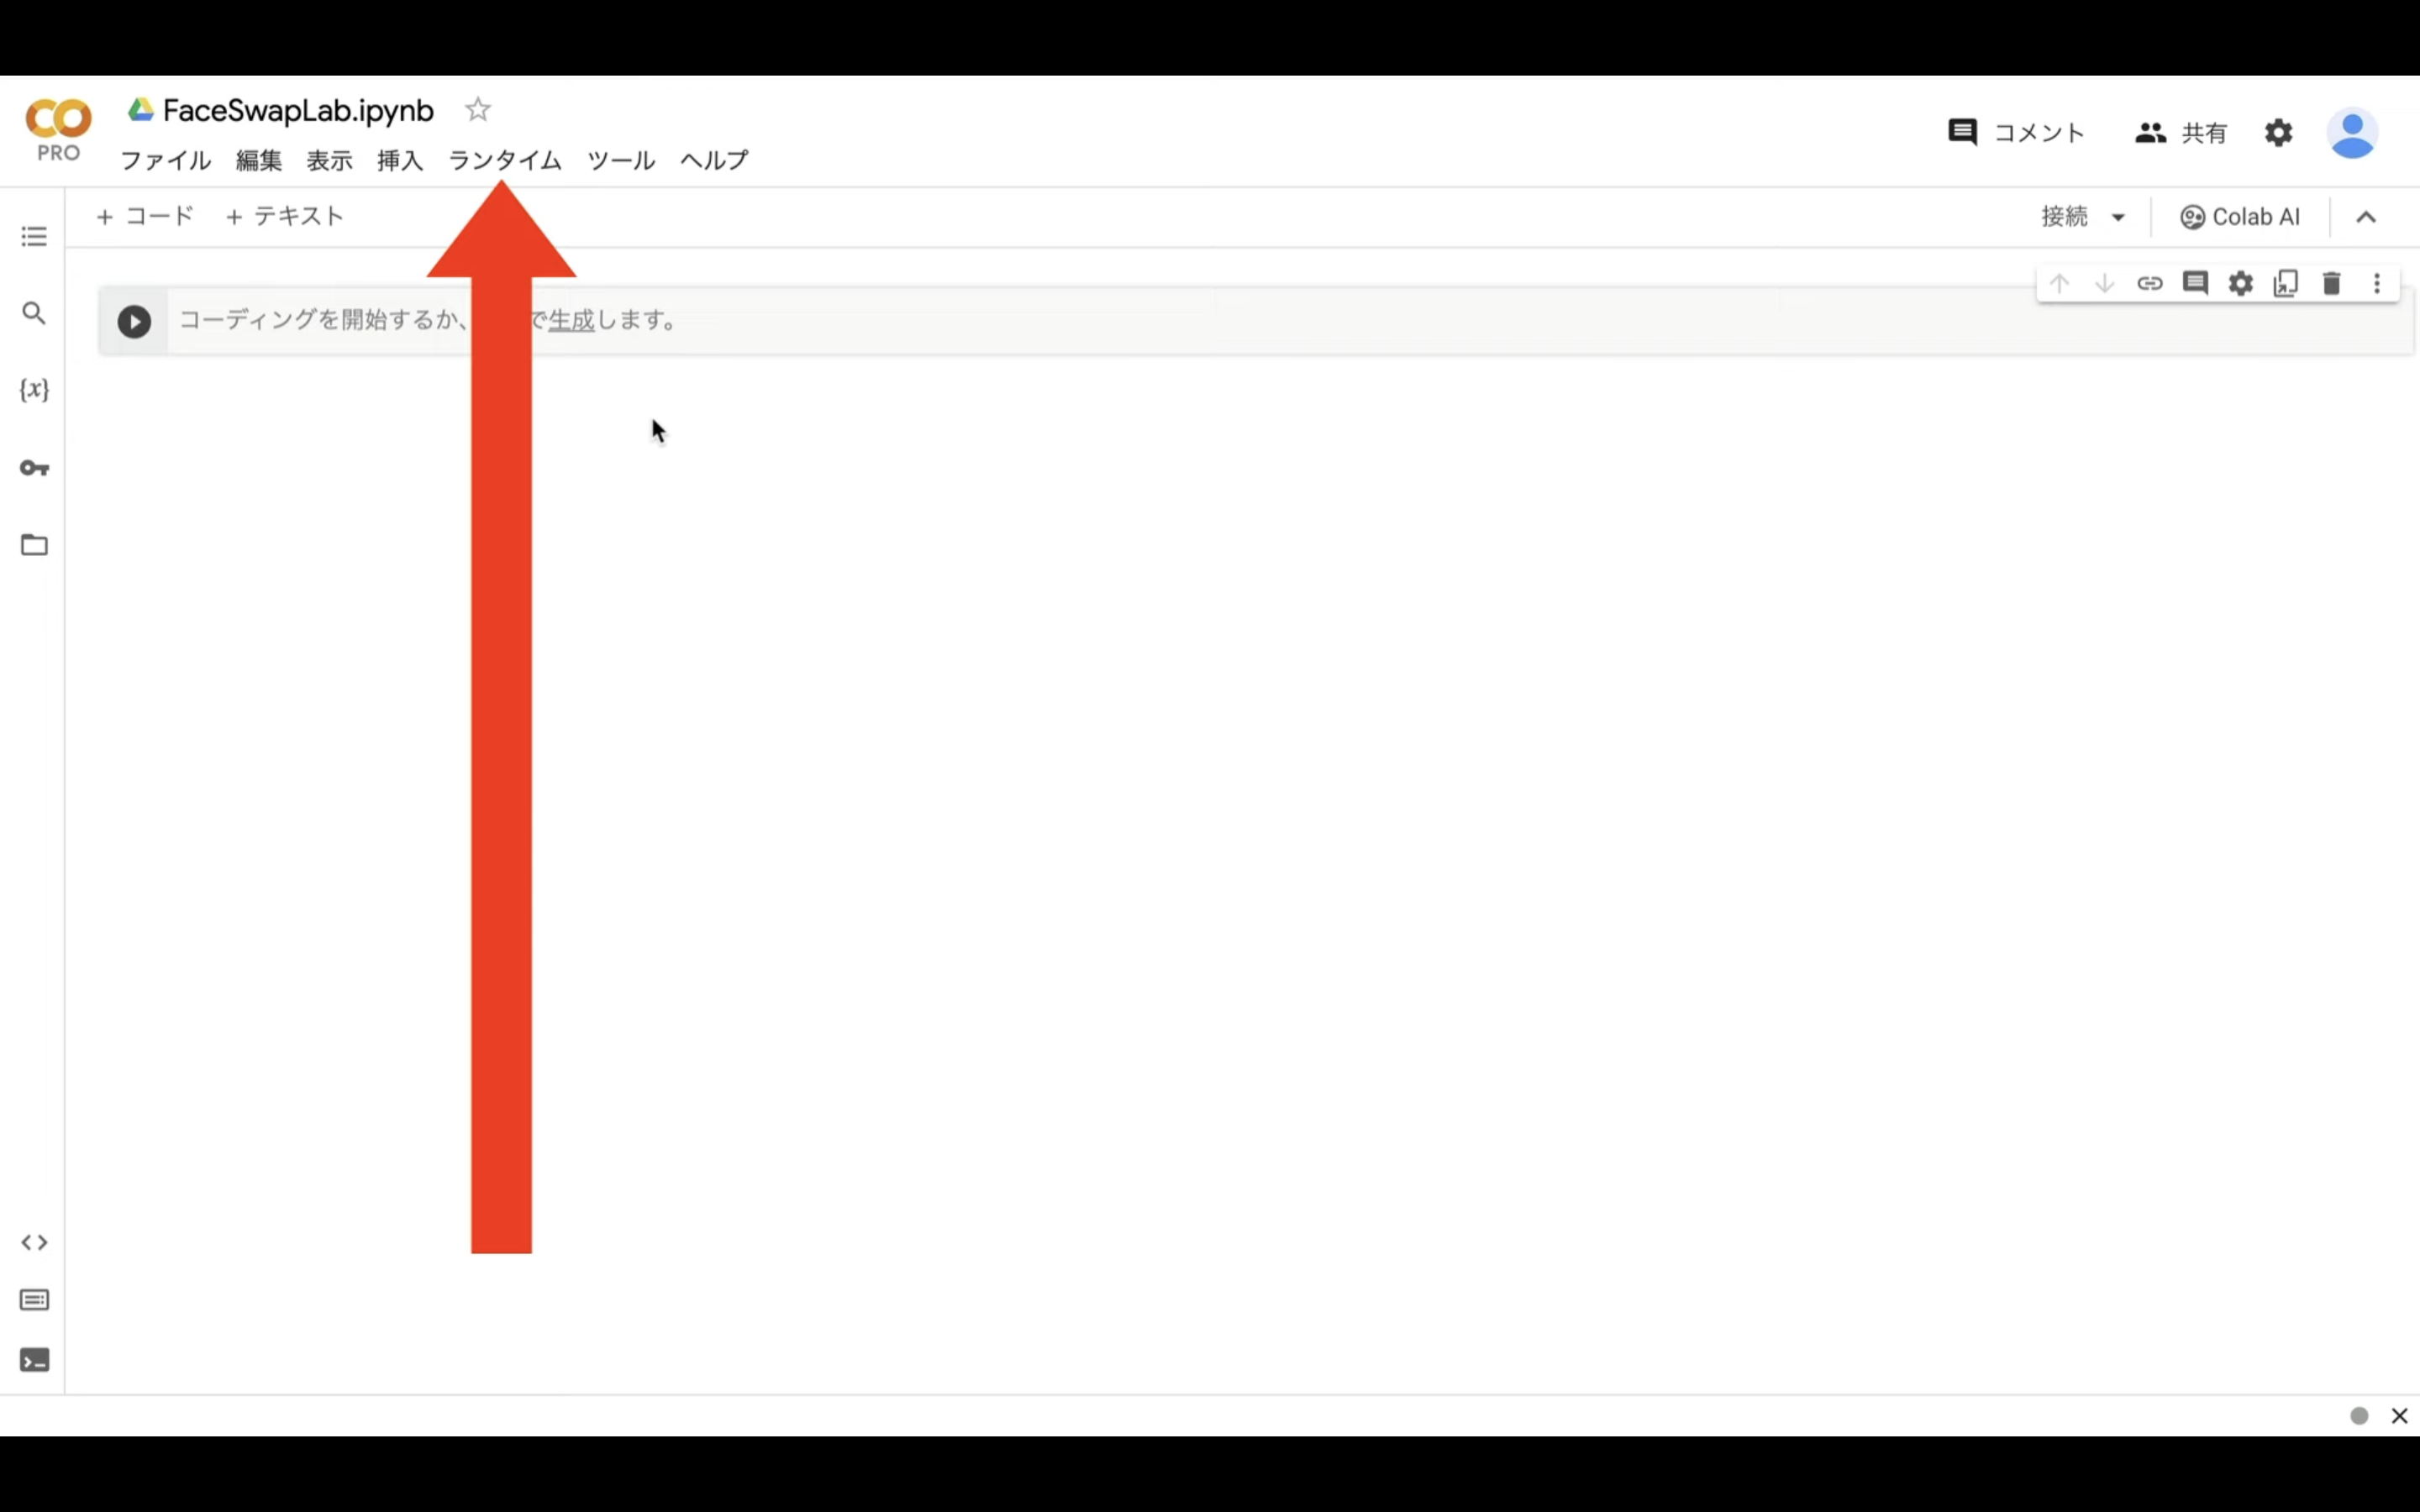
具体的には、メニューの中からランタイムを選択します。
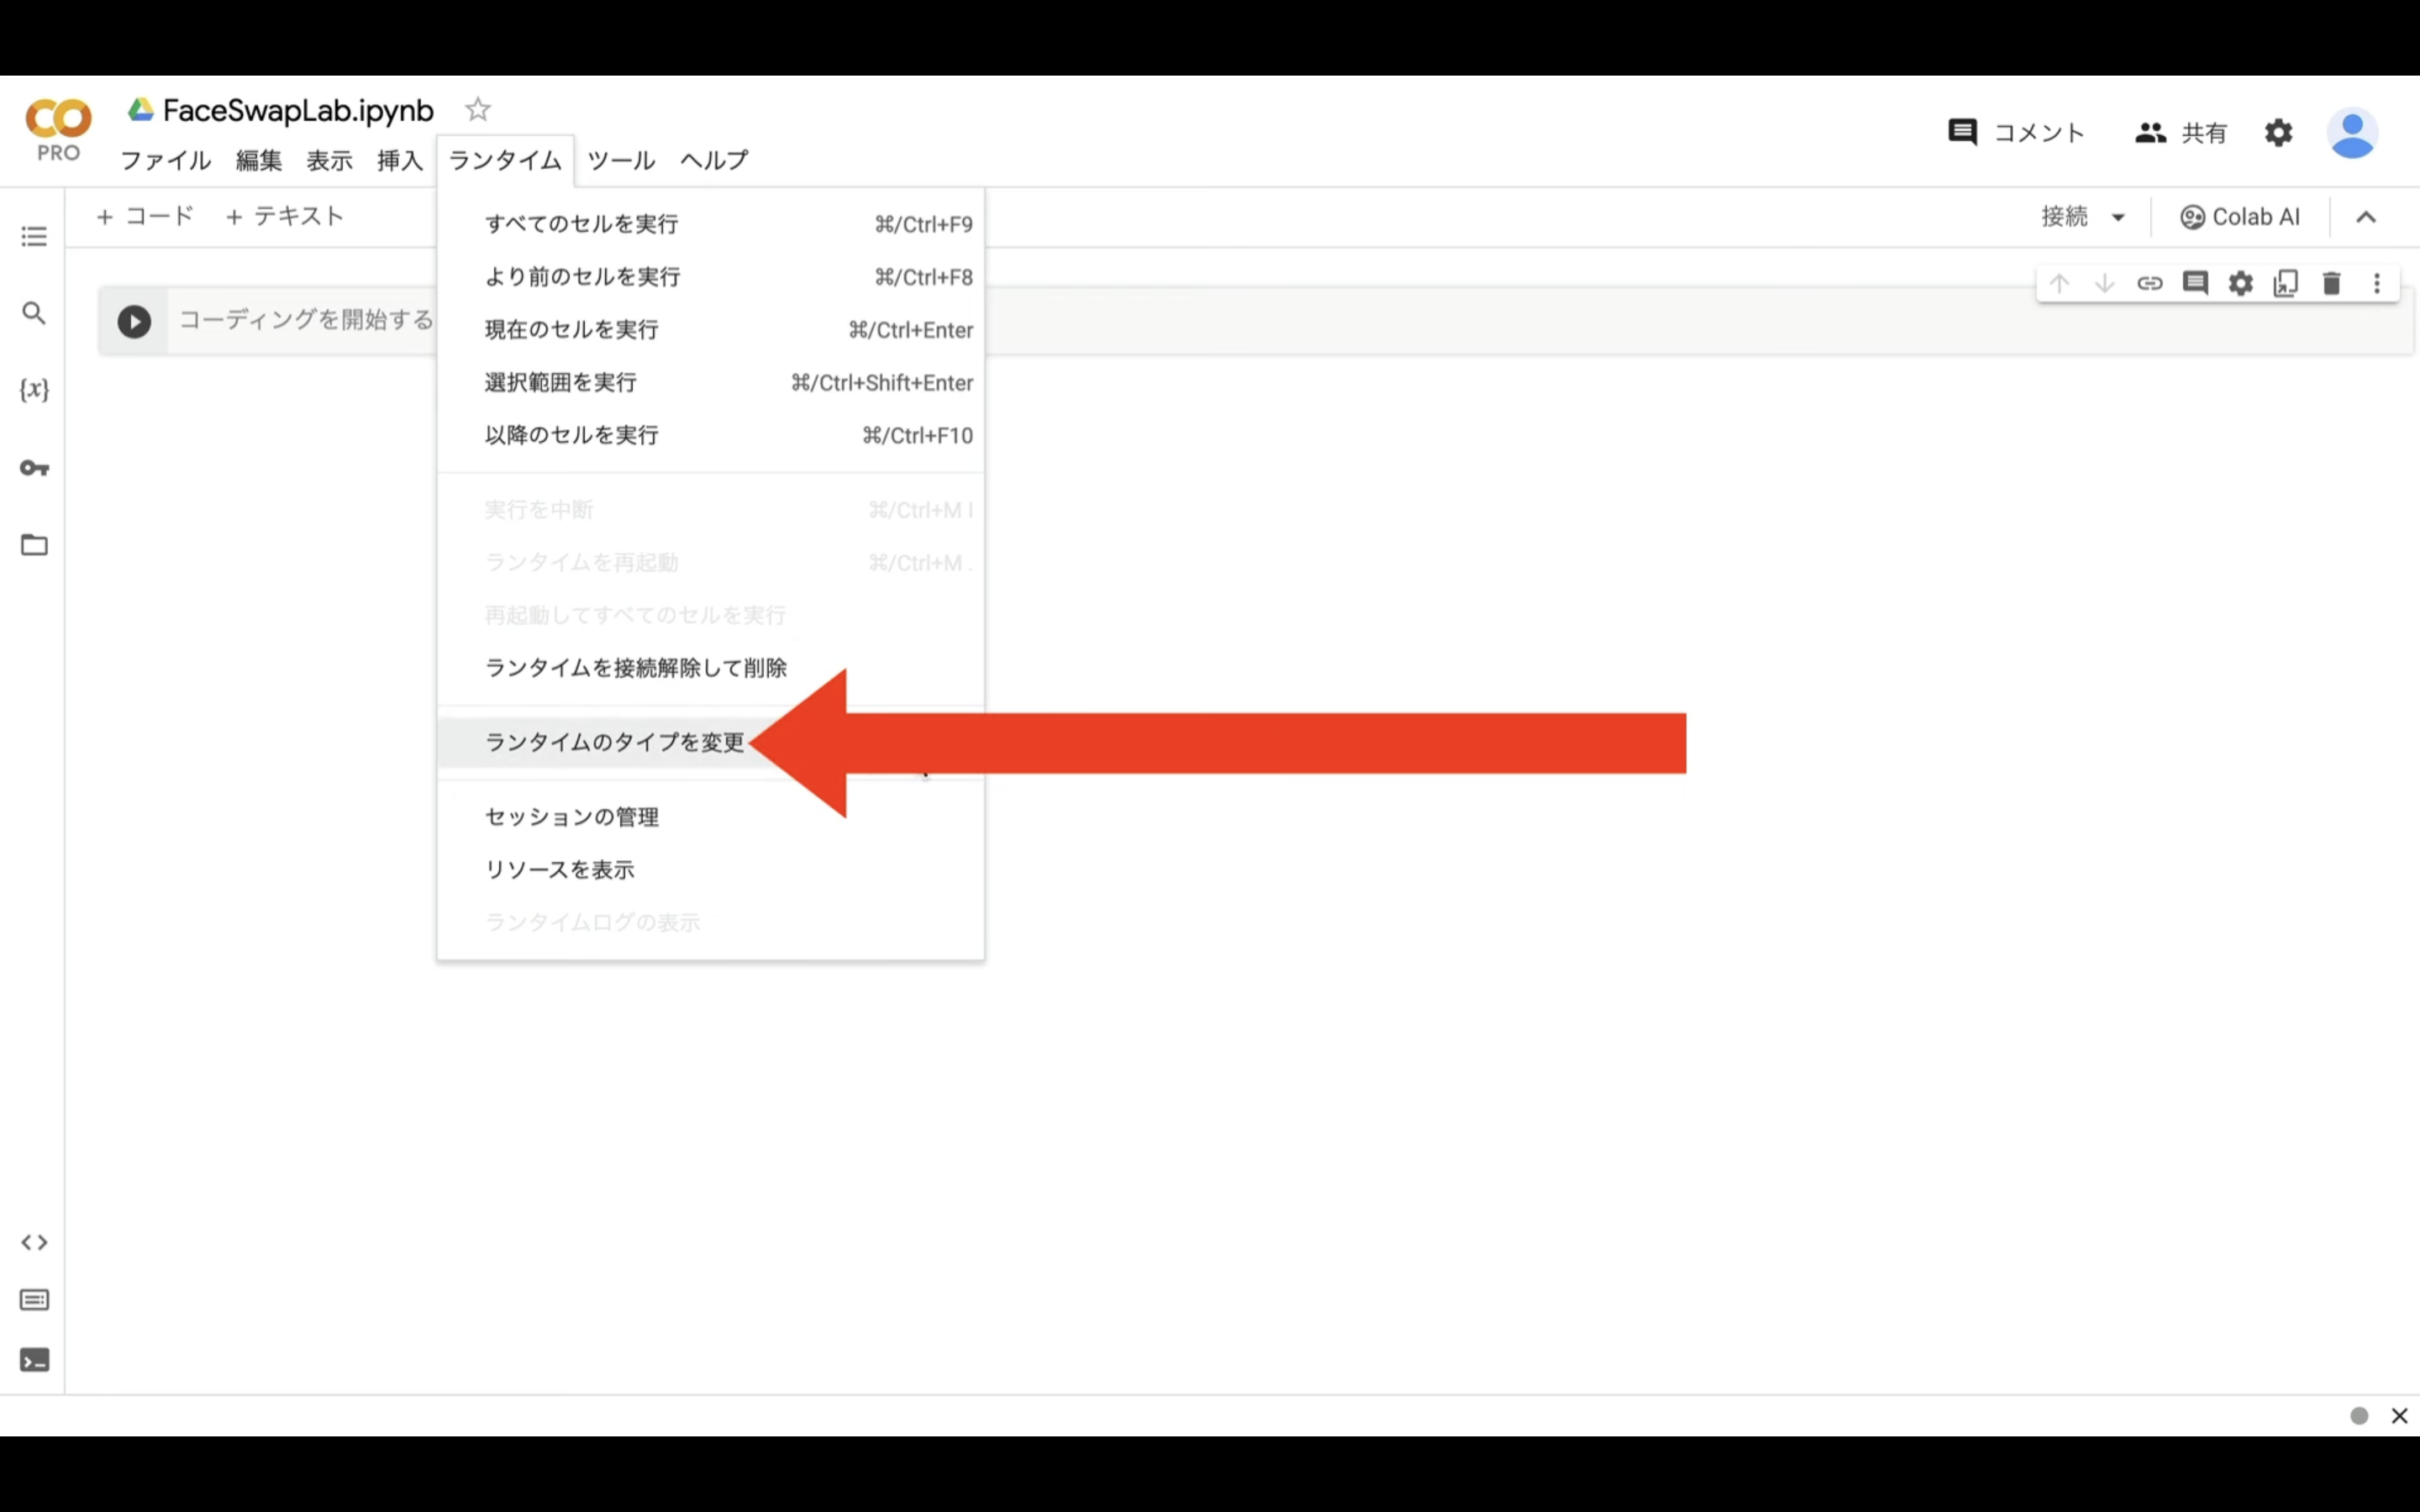
次に表示されたメニューの中からランタイムのタイプを変更と書かれている項目をクリックします。
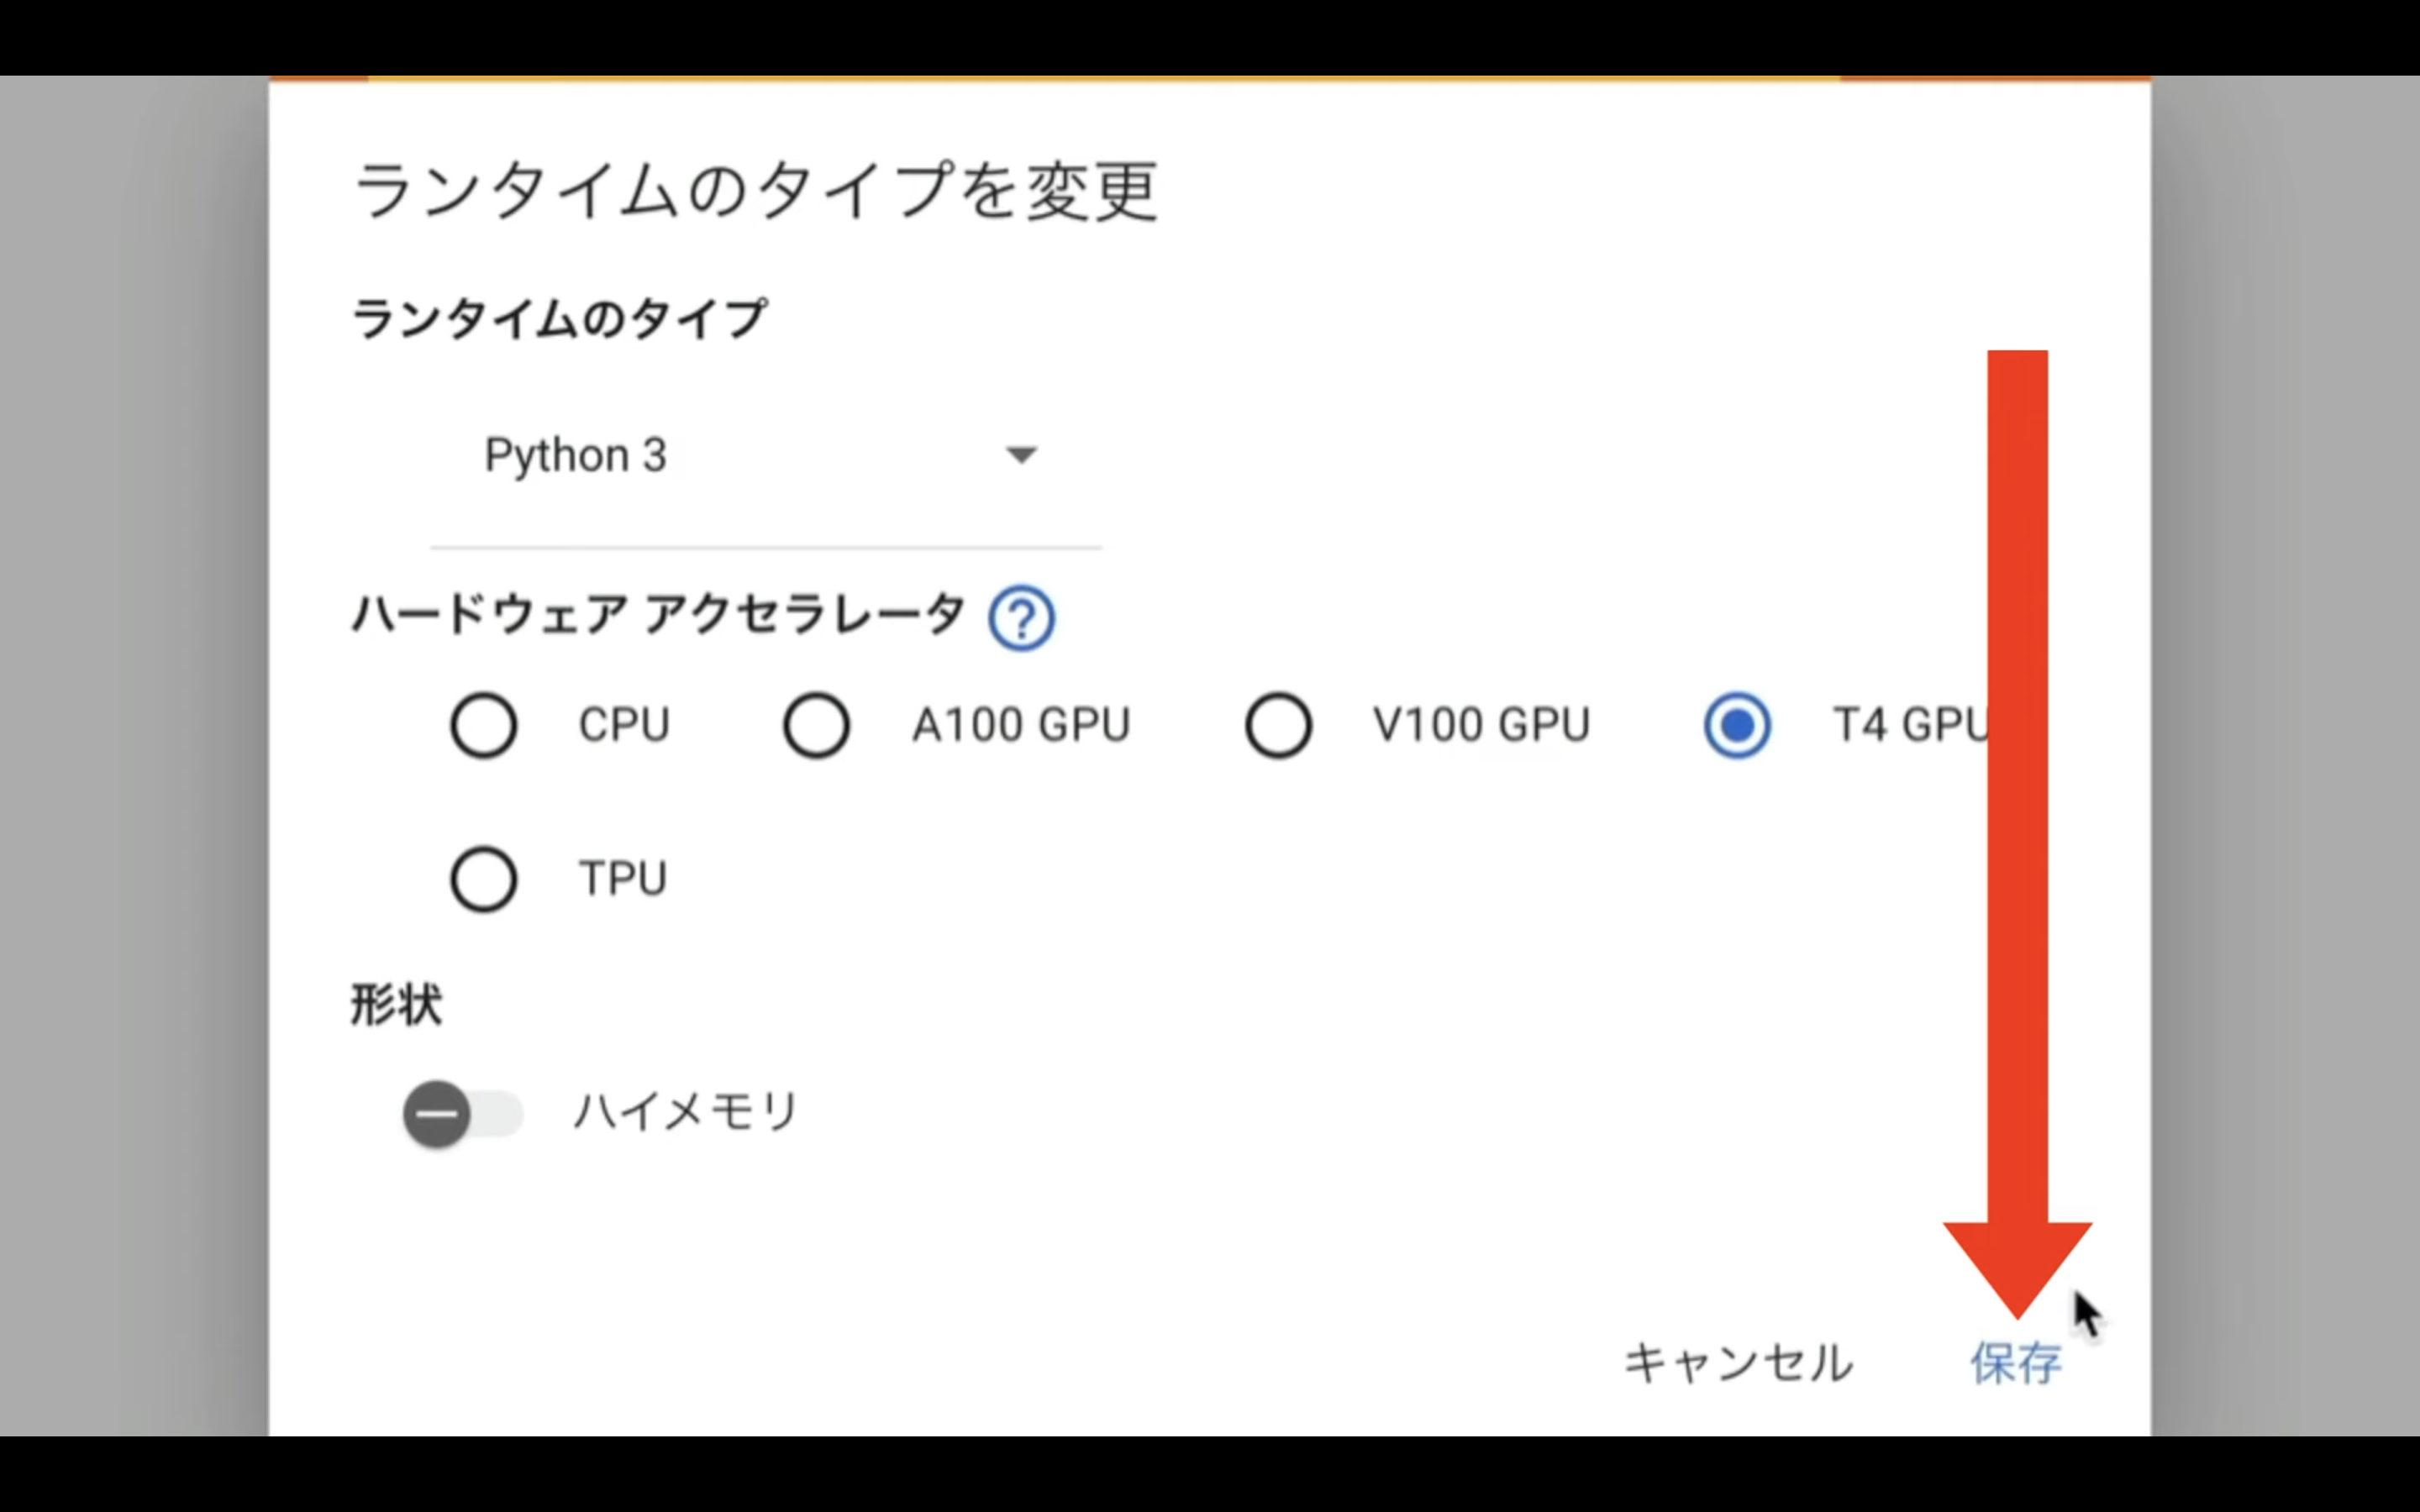
ランタイムのタイプはPython3のままで大丈夫です。
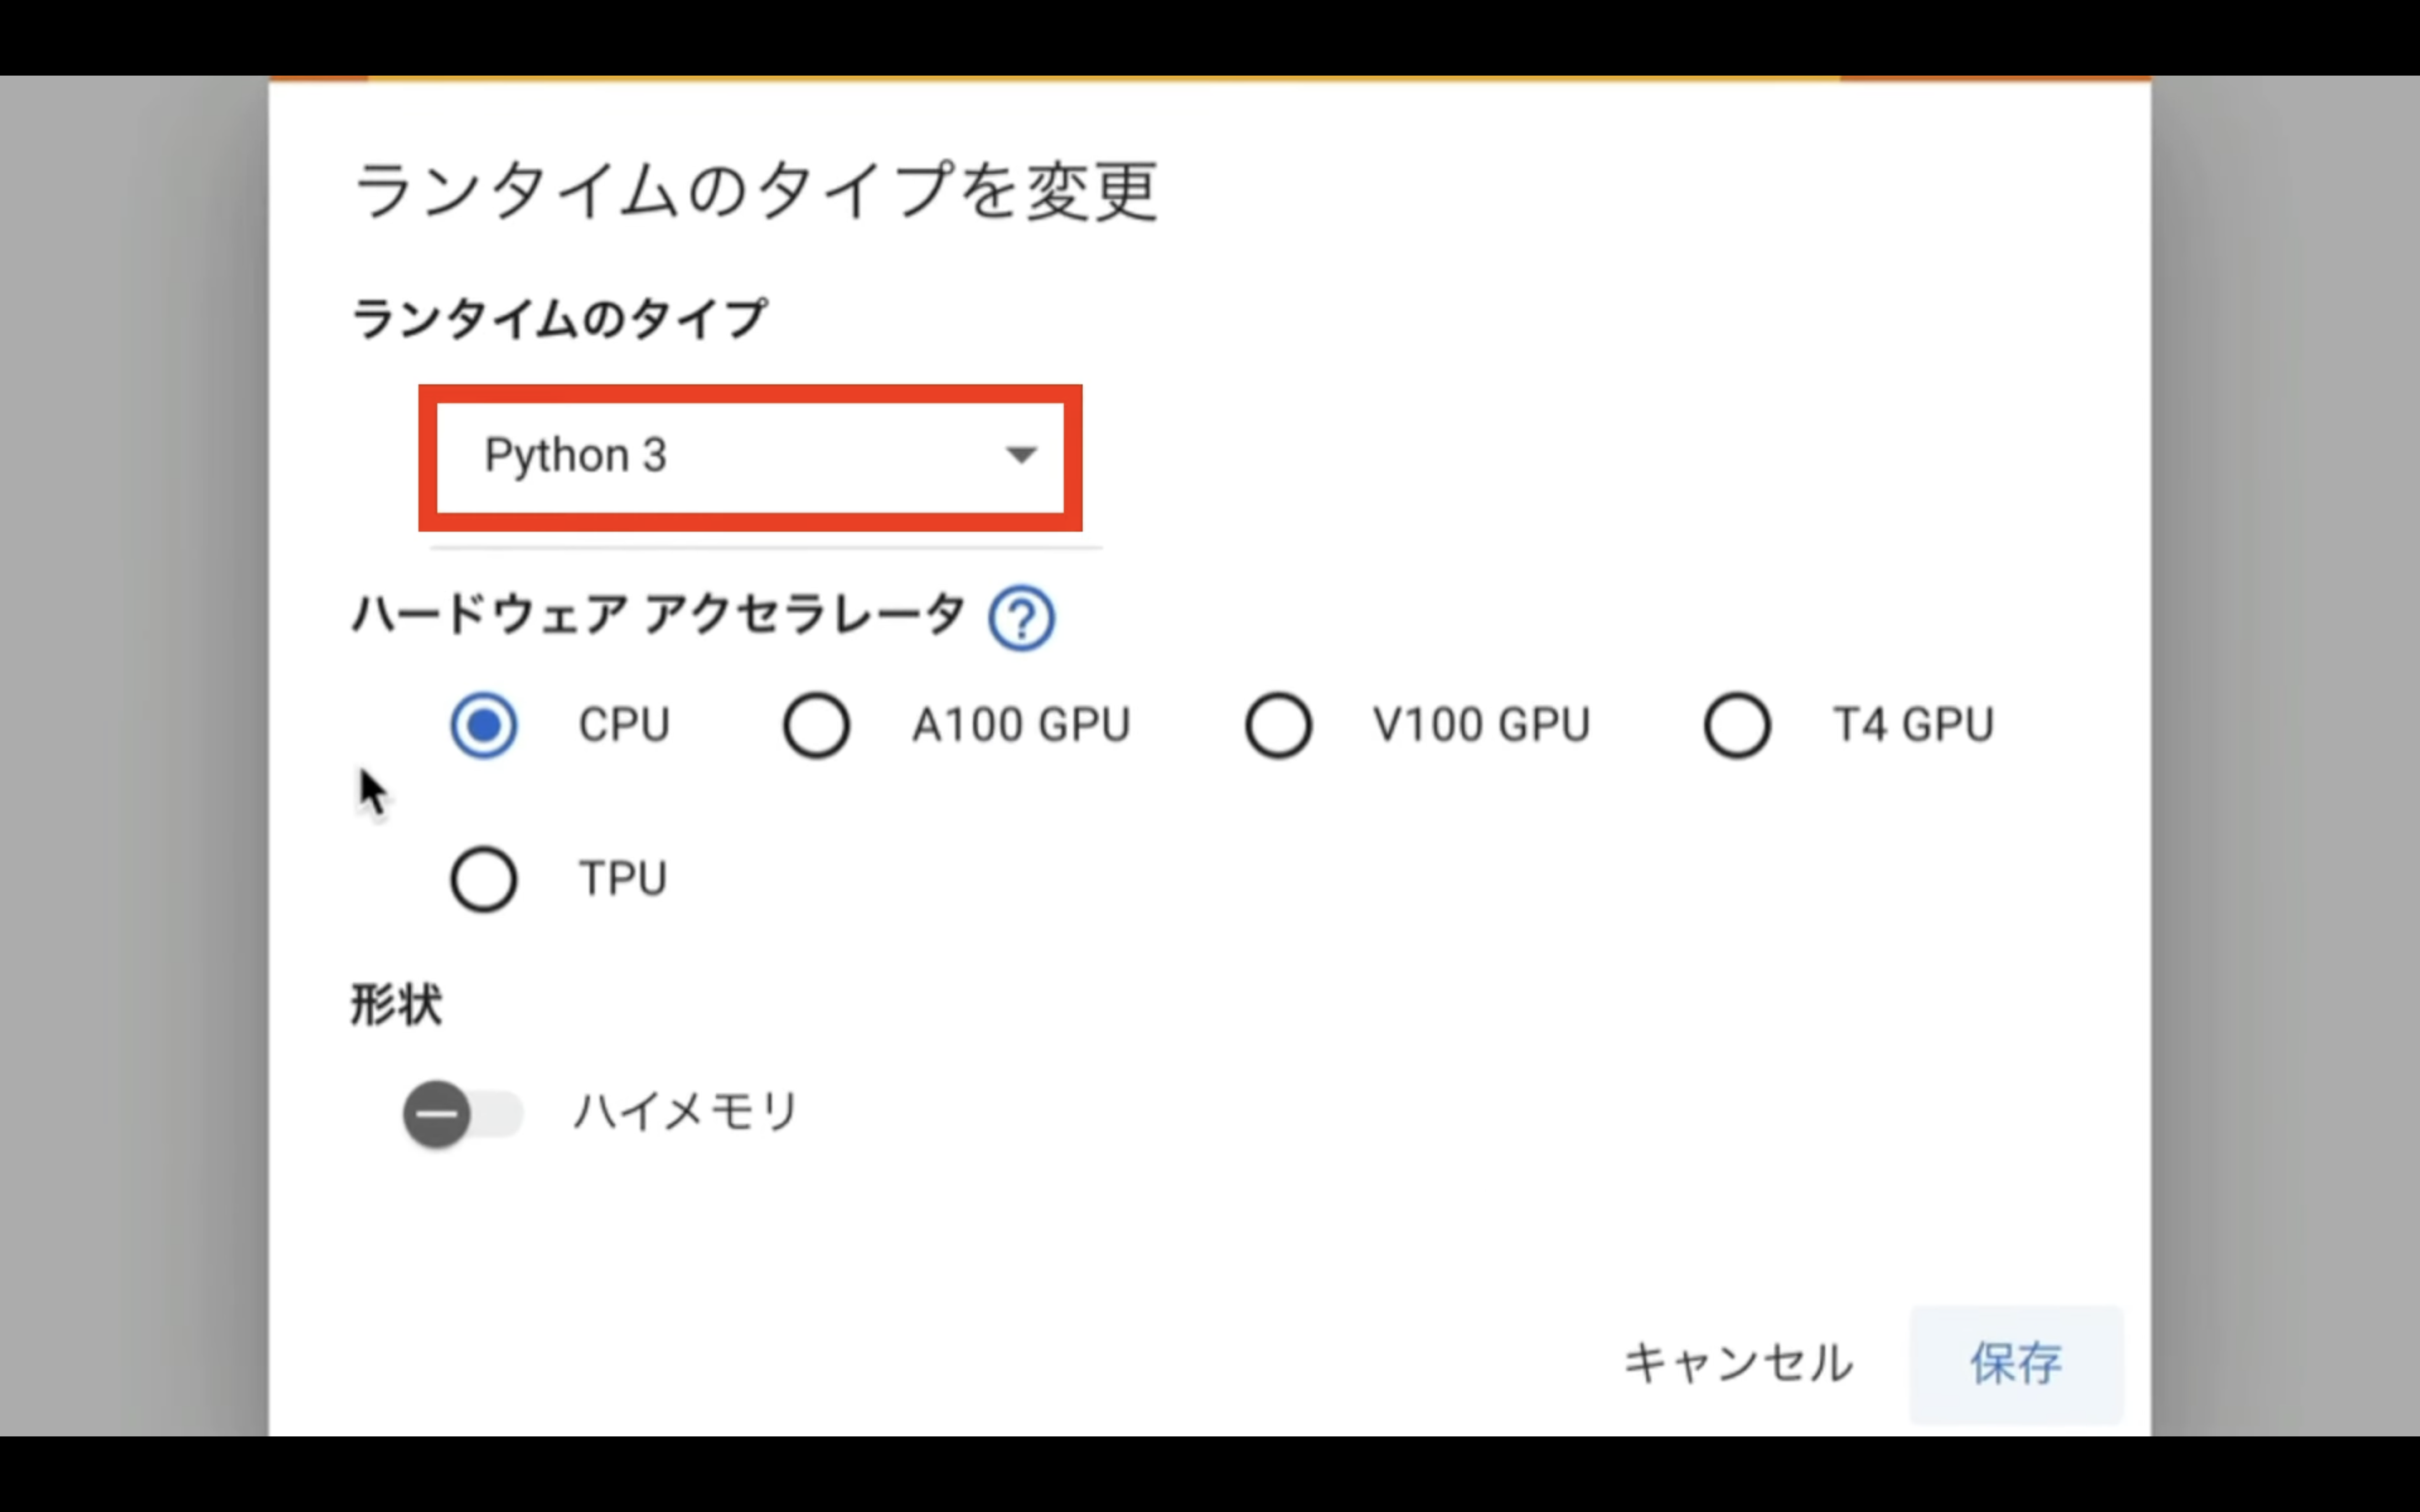
ハードウェアアクセラレーターはT4 GPUを選択します。
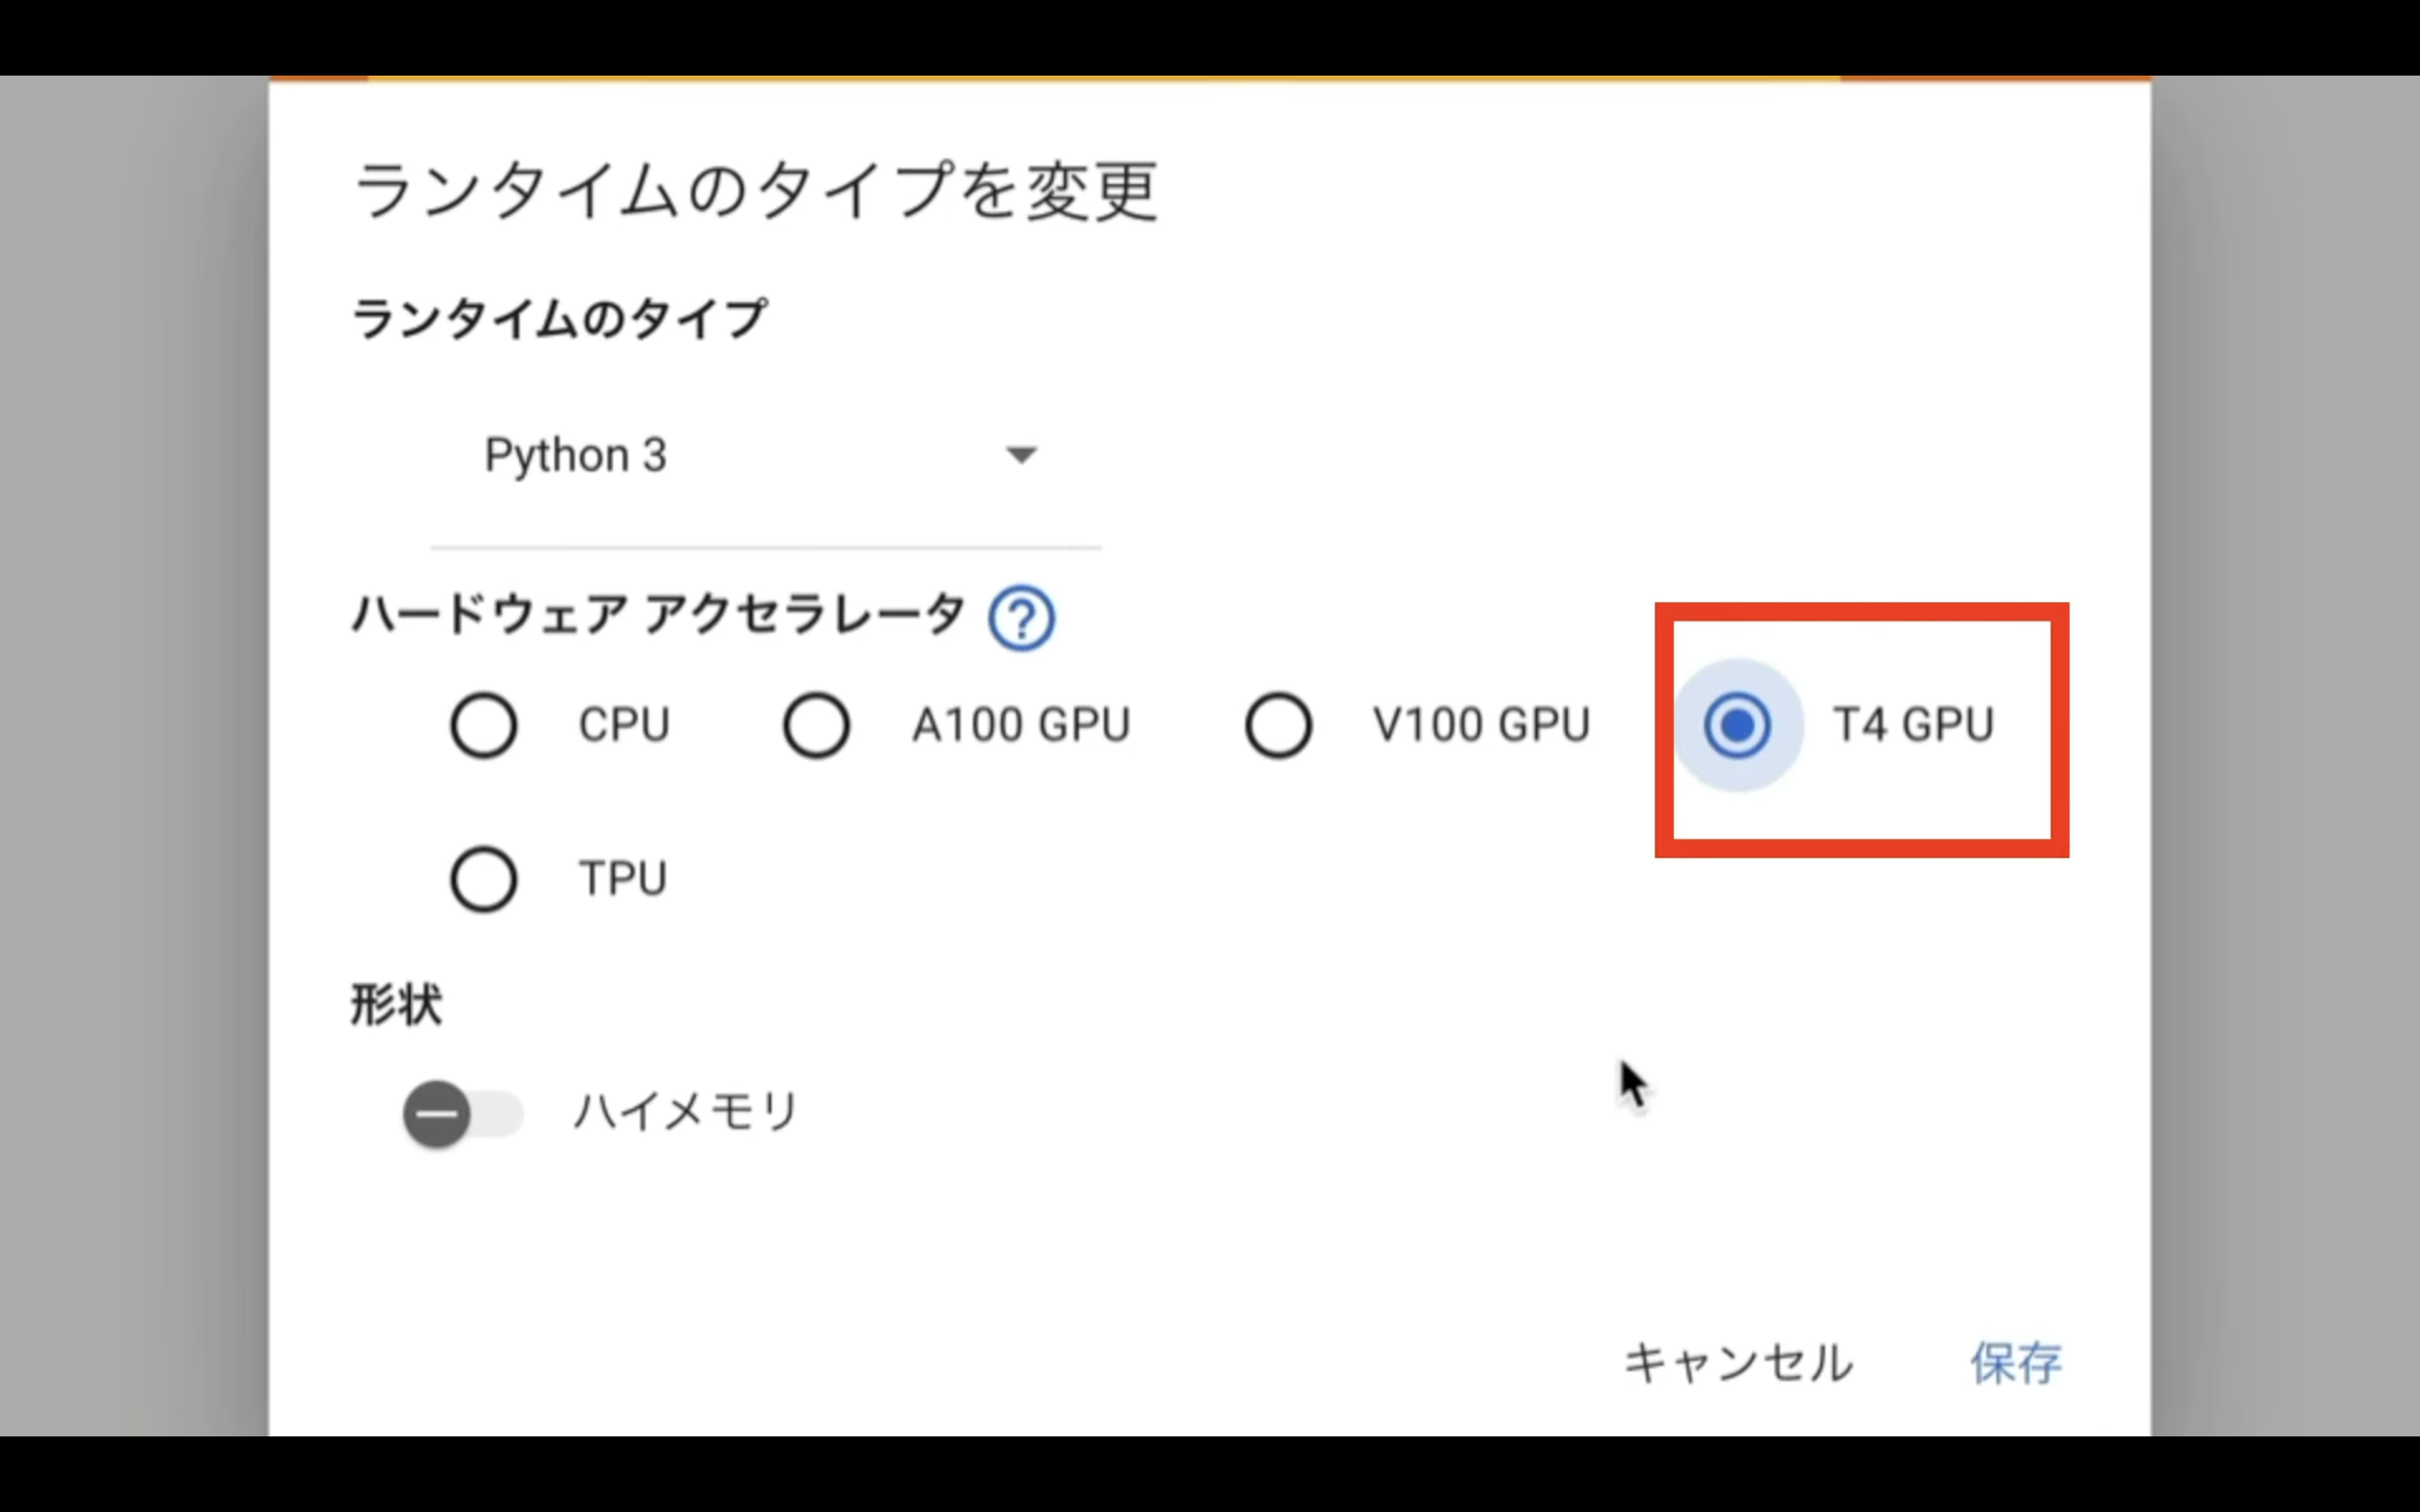
T4 GPUは無料版のGoogle Colabでも選択できます。
しかし、無料版の場合はリソースの割当てが保証されていません。
そのため、コードが強制終了されてしまう可能性があります。
確実に動作させるためには有料版に切り替えなければいけません。
この動画では有料版のGoogle Colabで解説を進めます。
ランタイムのタイプを変更したら、保存ボタンをクリックします。
これでAutomatic1111を実行するための準備が整いました。
それでは早速Automatic1111を動かしていきましょう。
以下に貼ってあるテキストをコピーします。
%cd /content

%env TF_CPP_MIN_LOG_LEVEL=1

!apt -y update -qq
!wget https://github.com/camenduru/gperftools/releases/download/v1.0/libtcmalloc_minimal.so.4 -O /content/libtcmalloc_minimal.so.4
%env LD_PRELOAD=/content/libtcmalloc_minimal.so.4

!apt -y install -qq aria2 libcairo2-dev pkg-config python3-dev
!pip install -q torch==2.0.1+cu118 torchvision==0.15.2+cu118 torchaudio==2.0.2+cu118 torchtext==0.15.2 torchdata==0.6.1 --extra-index-url https://download.pytorch.org/whl/cu118 -U
!pip install -q xformers==0.0.20 triton==2.0.0 gradio_client==0.2.7 httpx==0.24.1 -U

!git clone -b v2.4 https://github.com/camenduru/stable-diffusion-webui /content/sd-webui
!git clone https://huggingface.co/embed/negative /content/sd-webui/embeddings/negative
!git clone https://huggingface.co/embed/lora /content/sd-webui/models/Lora/positive
!aria2c --console-log-level=error -c -x 16 -s 16 -k 1M https://huggingface.co/embed/upscale/resolve/main/4x-UltraSharp.pth -d /content/sd-webui/models/ESRGAN -o 4x-UltraSharp.pth
!wget https://raw.githubusercontent.com/camenduru/stable-diffusion-webui-scripts/main/run_n_times.py -O /content/sd-webui/scripts/run_n_times.py
!git clone https://github.com/deforum-art/deforum-for-automatic1111-webui /content/sd-webui/extensions/deforum-for-automatic1111-webui
!git clone https://github.com/camenduru/stable-diffusion-webui-images-browser /content/sd-webui/extensions/stable-diffusion-webui-images-browser
!git clone https://github.com/camenduru/stable-diffusion-webui-huggingface /content/sd-webui/extensions/stable-diffusion-webui-huggingface
!git clone https://github.com/camenduru/sd-civitai-browser /content/sd-webui/extensions/sd-civitai-browser
!git clone https://github.com/kohya-ss/sd-webui-additional-networks /content/sd-webui/extensions/sd-webui-additional-networks
!git clone https://github.com/Mikubill/sd-webui-controlnet /content/sd-webui/extensions/sd-webui-controlnet
!git clone https://github.com/fkunn1326/openpose-editor /content/sd-webui/extensions/openpose-editor
!git clone https://github.com/jexom/sd-webui-depth-lib /content/sd-webui/extensions/sd-webui-depth-lib
!git clone https://github.com/hnmr293/posex /content/sd-webui/extensions/posex
!git clone https://github.com/nonnonstop/sd-webui-3d-open-pose-editor /content/sd-webui/extensions/sd-webui-3d-open-pose-editor
!git clone https://github.com/camenduru/sd-webui-tunnels /content/sd-webui/extensions/sd-webui-tunnels
!git clone https://github.com/etherealxx/batchlinks-webui /content/sd-webui/extensions/batchlinks-webui
!git clone https://github.com/camenduru/stable-diffusion-webui-catppuccin /content/sd-webui/extensions/stable-diffusion-webui-catppuccin
!git clone https://github.com/AUTOMATIC1111/stable-diffusion-webui-rembg /content/sd-webui/extensions/stable-diffusion-webui-rembg
!git clone https://github.com/ashen-sensored/stable-diffusion-webui-two-shot /content/sd-webui/extensions/stable-diffusion-webui-two-shot
!git clone https://github.com/thomasasfk/sd-webui-aspect-ratio-helper /content/sd-webui/extensions/sd-webui-aspect-ratio-helper
!git clone https://github.com/tjm35/asymmetric-tiling-sd-webui /content/sd-webui/extensions/asymmetric-tiling-sd-webui
%cd /content/sd-webui
!git reset --hard
!git -C /content/sd-webui/repositories/stable-diffusion-stability-ai reset --hard

# モデル:BRA7を追加
!aria2c --console-log-level=error -c -x 16 -s 16 -k 1M https://civitai.com/api/download/models/177164 -d /content/sd-webui/models/Stable-diffusion/ -o braBeautifulRealistic_v70.safetensors

# あらかじめFaceSwapLabで利用するinswapper_128.onnxをダウンロードしておく
!mkdir /content/sd-webui/models/faceswaplab
!curl -Lo /content/sd-webui/models/faceswaplab/inswapper_128.onnx https://github.com/facefusion/facefusion-assets/releases/download/models/inswapper_128.onnx

!sed -i -e '''/from modules import launch_utils/a\import os''' /content/sd-webui/launch.py
!sed -i -e '''/        prepare_environment()/a\        os.system\(f\"""sed -i -e ''\"s/dict()))/dict())).cuda()/g\"'' /content/sd-webui/repositories/stable-diffusion-stability-ai/ldm/util.py""")''' /content/sd-webui/launch.py
!sed -i -e 's/\["sd_model_checkpoint"\]/\["sd_model_checkpoint","sd_vae","CLIP_stop_at_last_layers"\]/g' /content/sd-webui/modules/shared.py

!python launch.py --listen --xformers --enable-insecure-extension-access  --theme dark --gradio-queue --multiple
テキストをコピーしたらGoogleColabの画面に戻ります。
そしてテキストボックスに先ほどコピーしたテキストを貼り付けます。
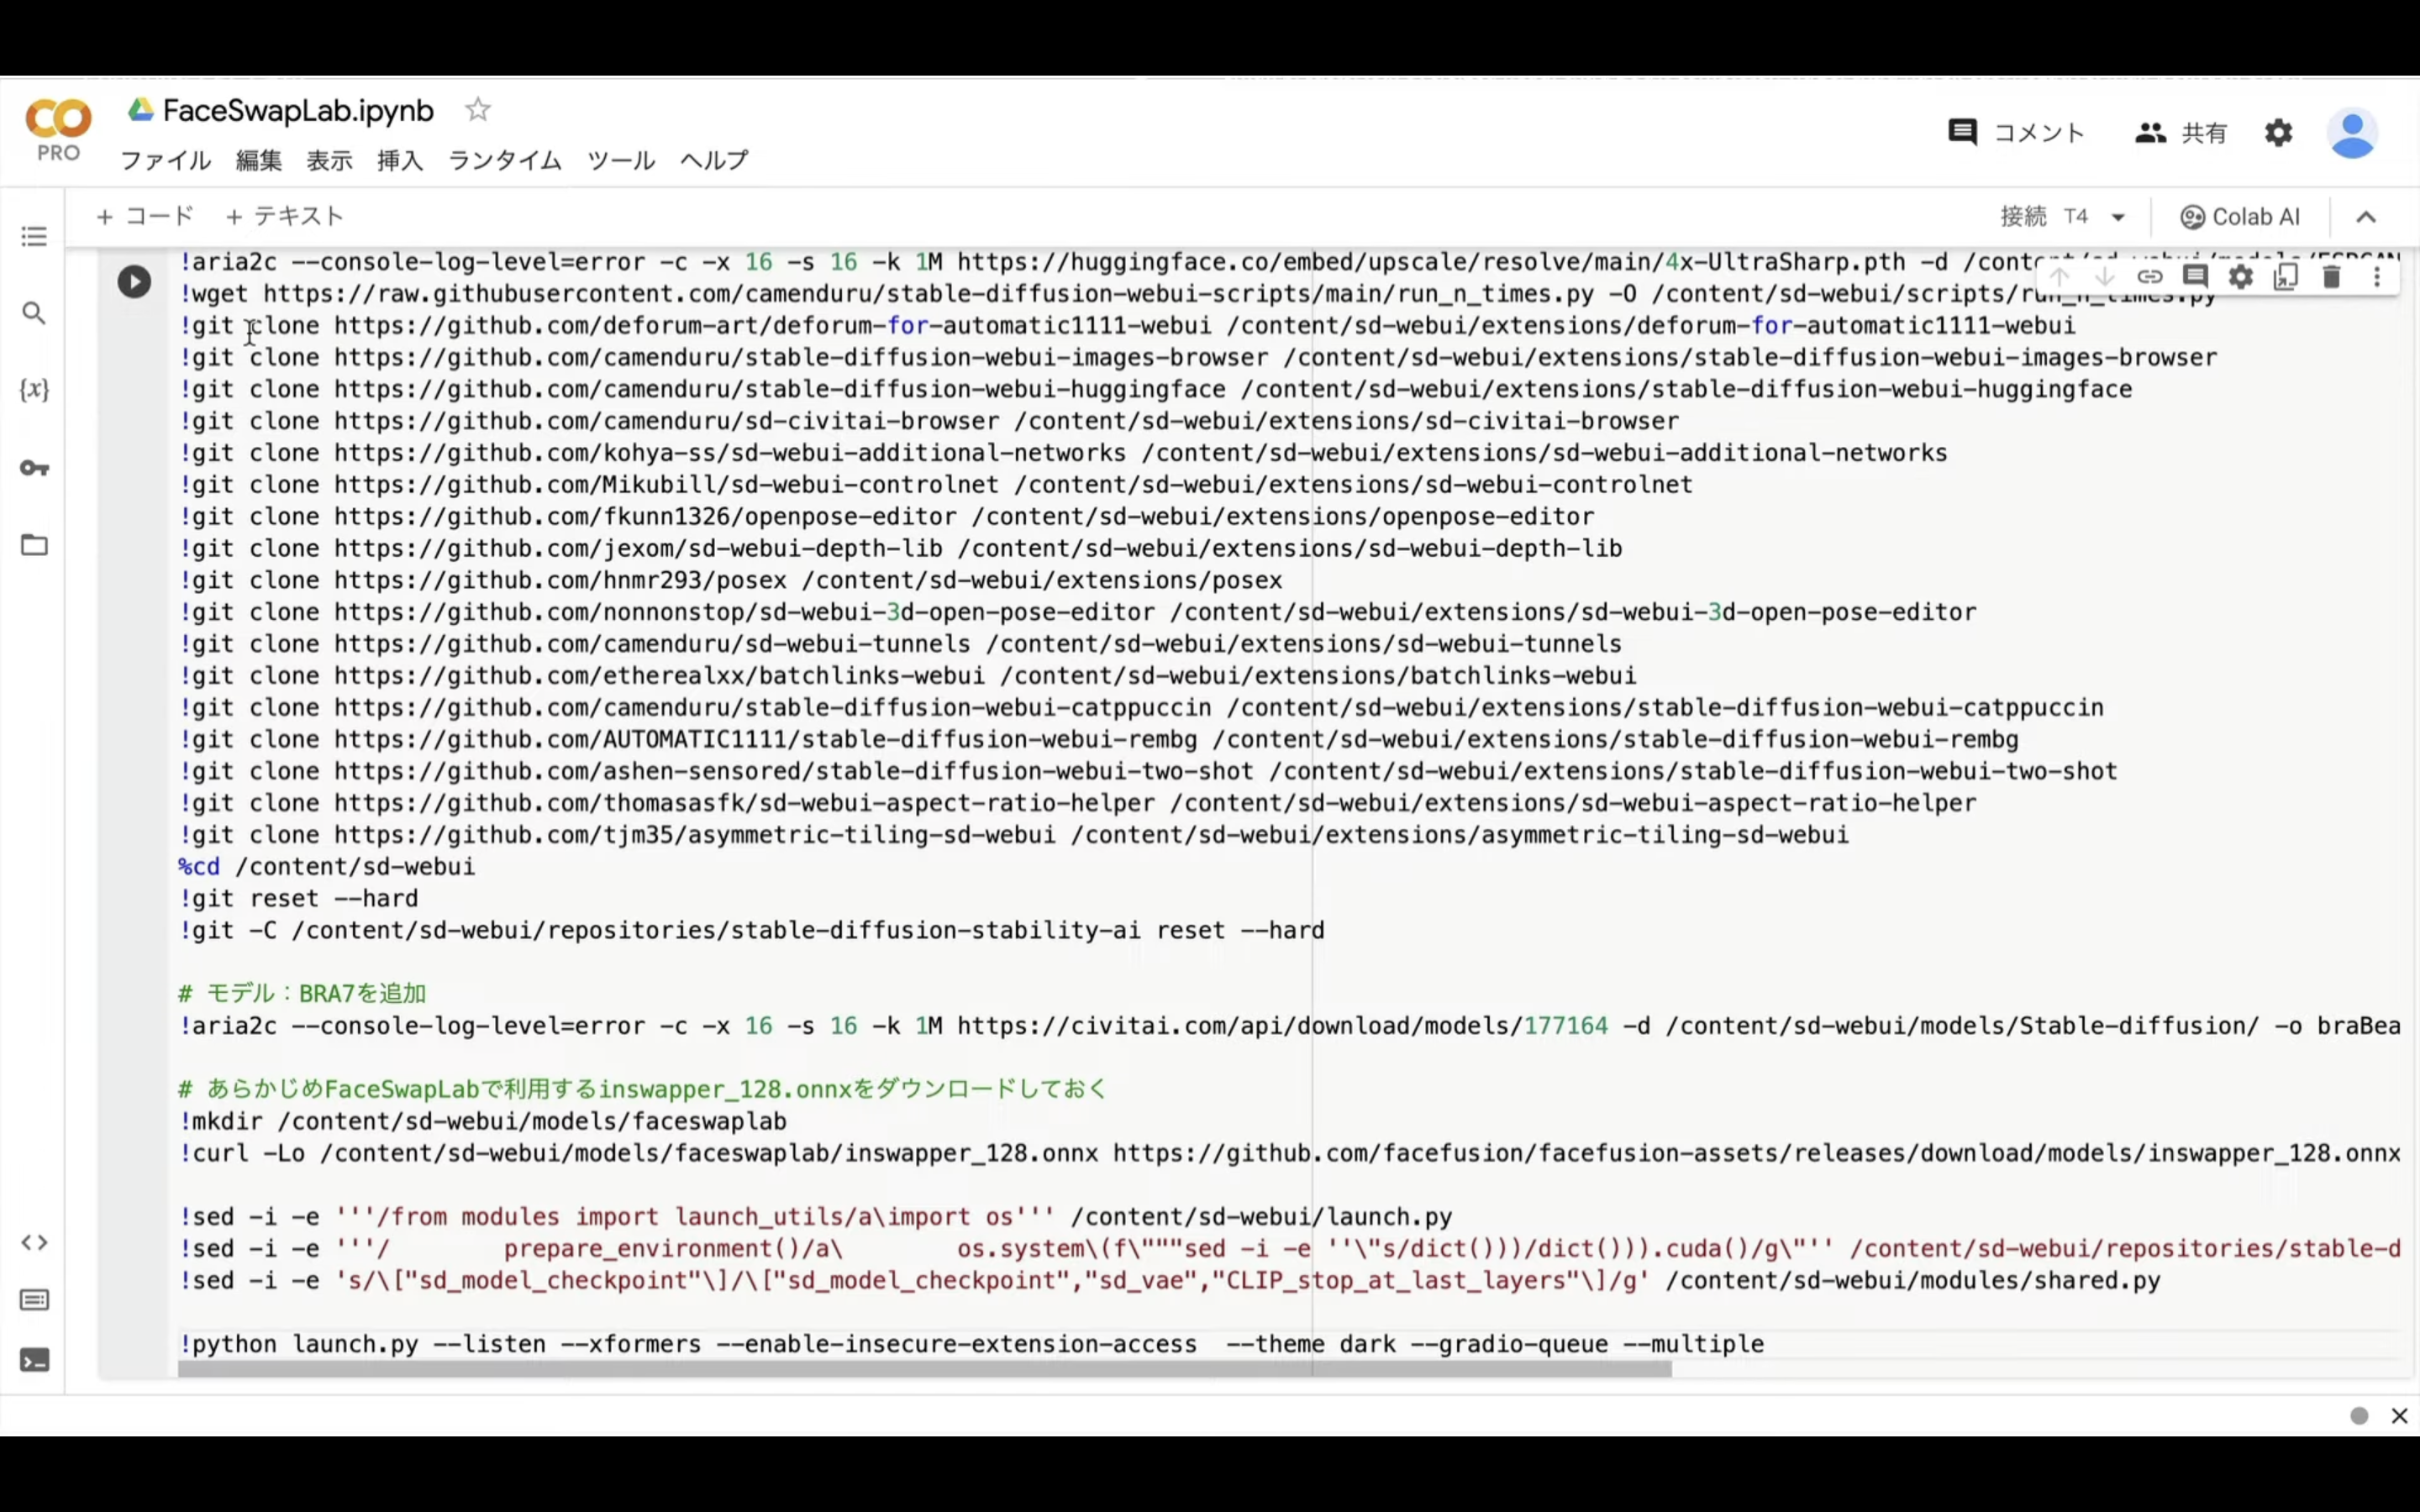
テキストを貼り付けたら左上にある再生ボタンを押します。
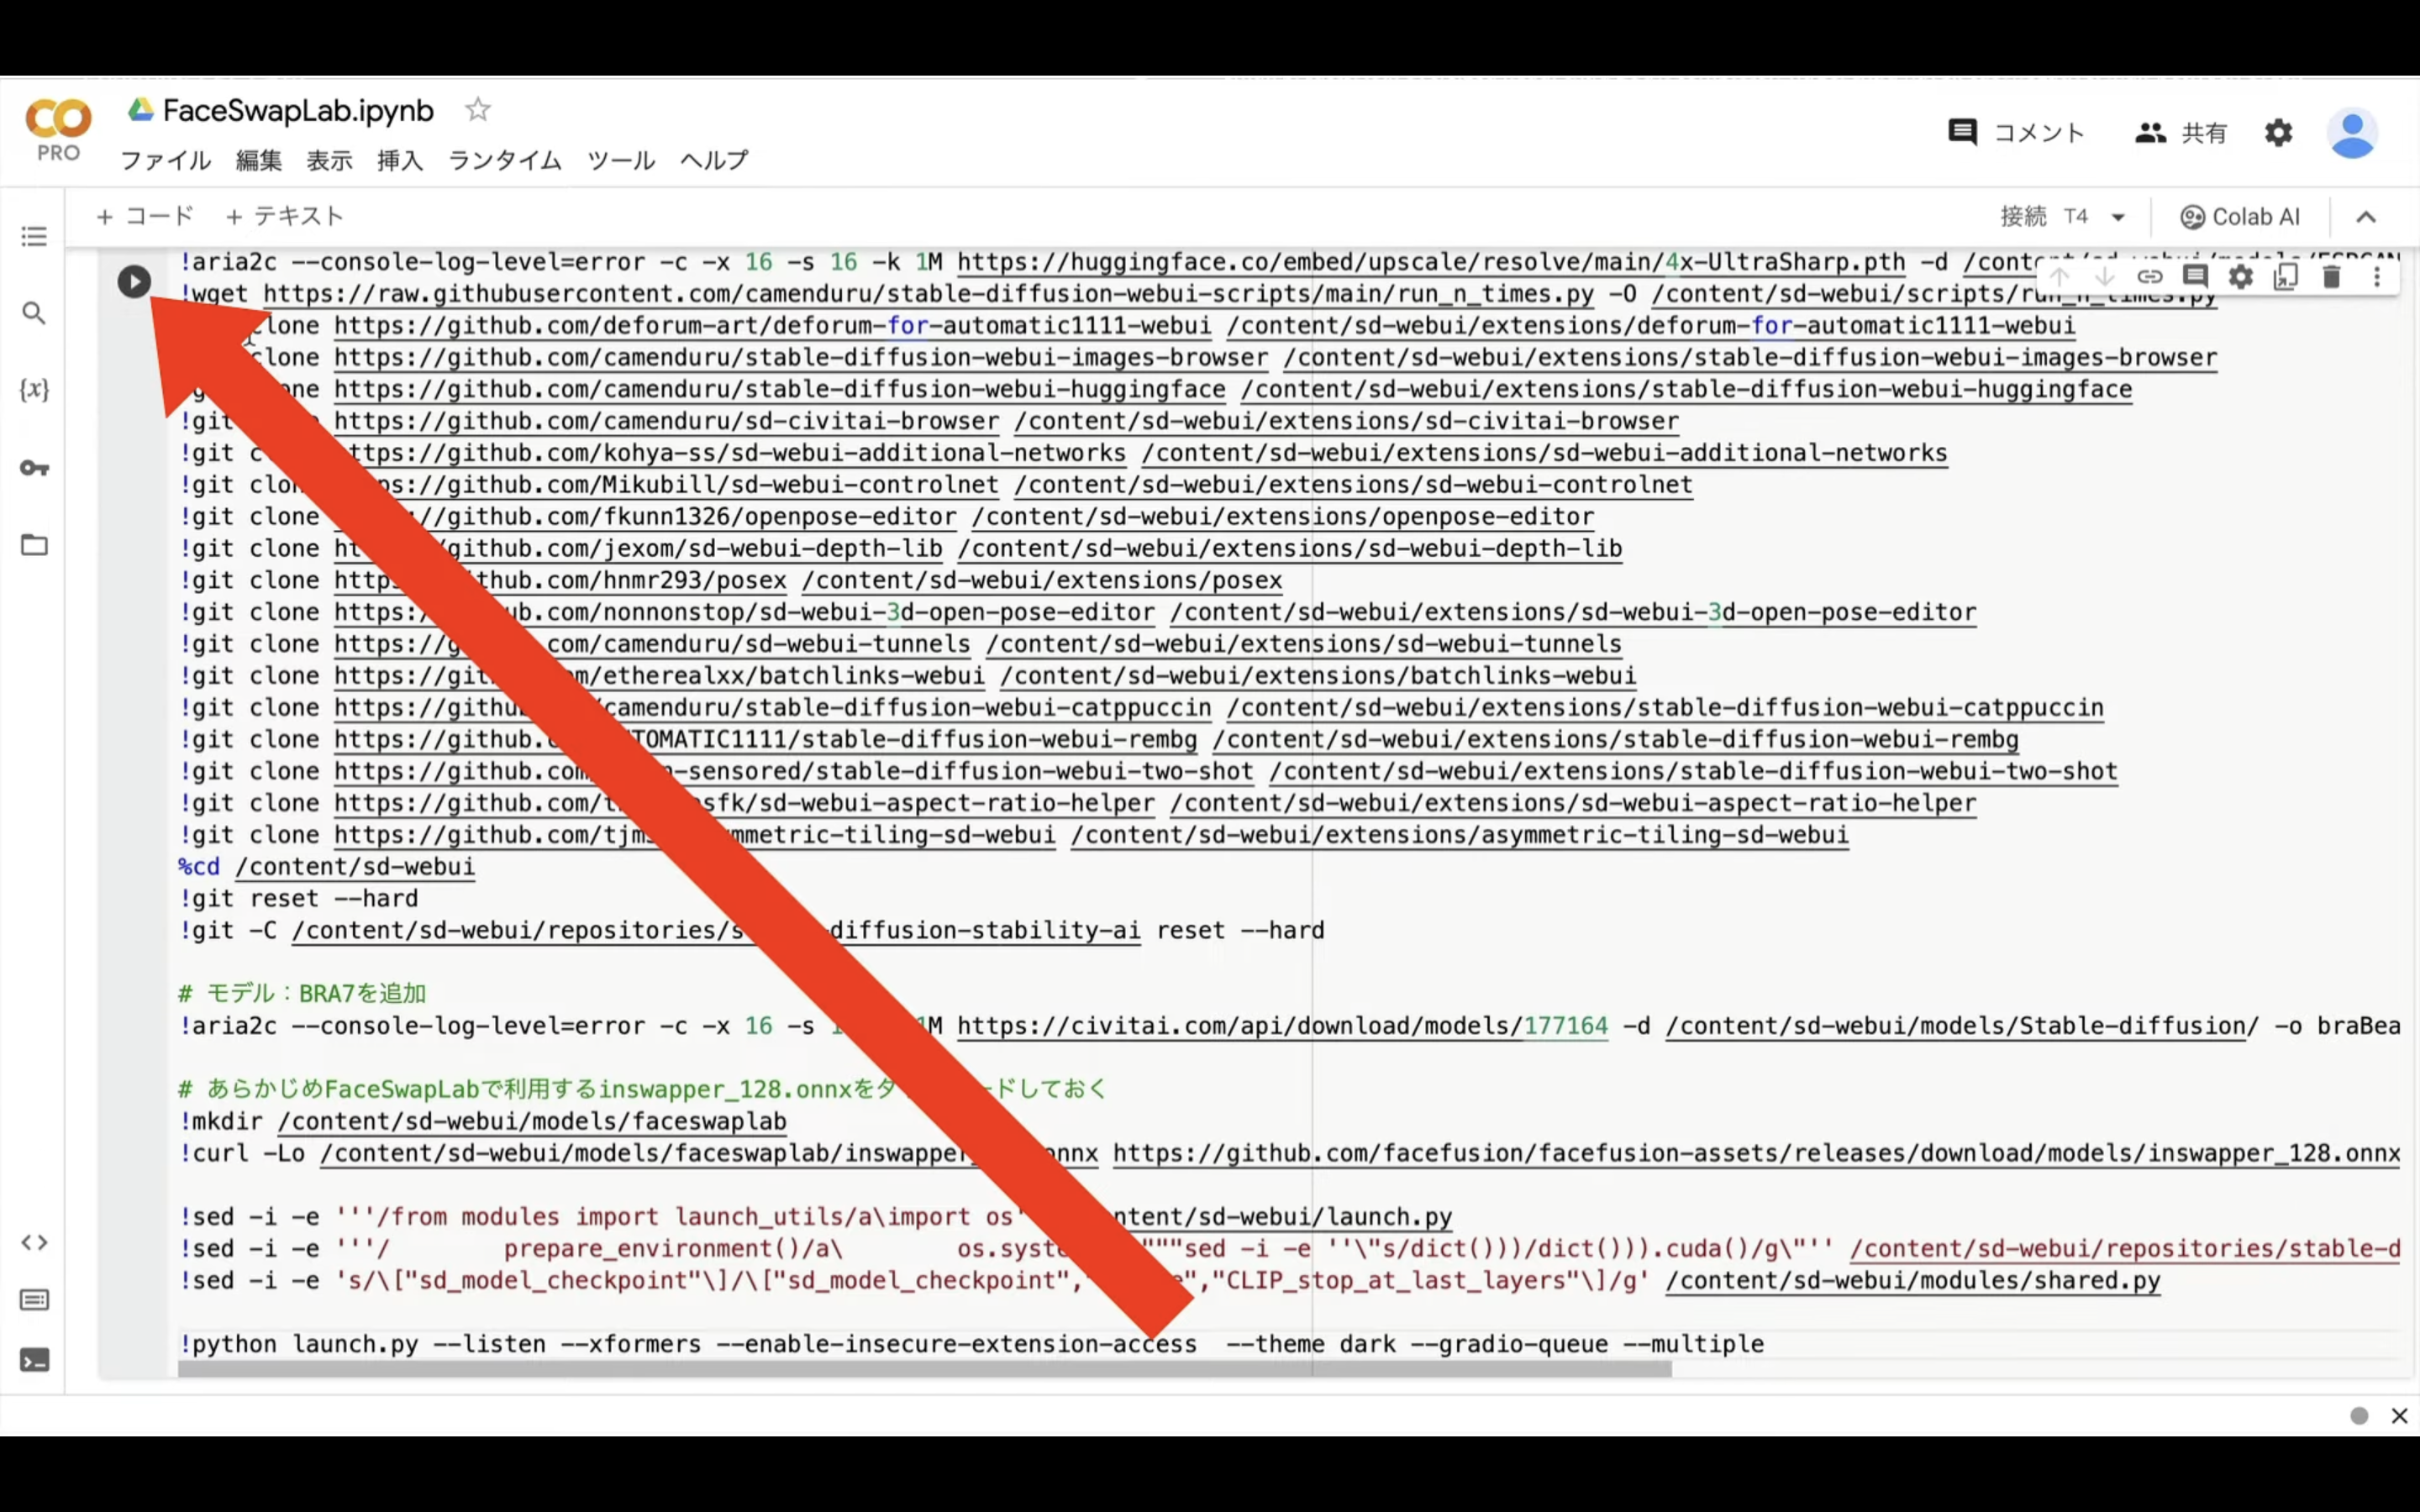
これでコマンドが実行されます。コマンドの実行には5分以上かかると思います。
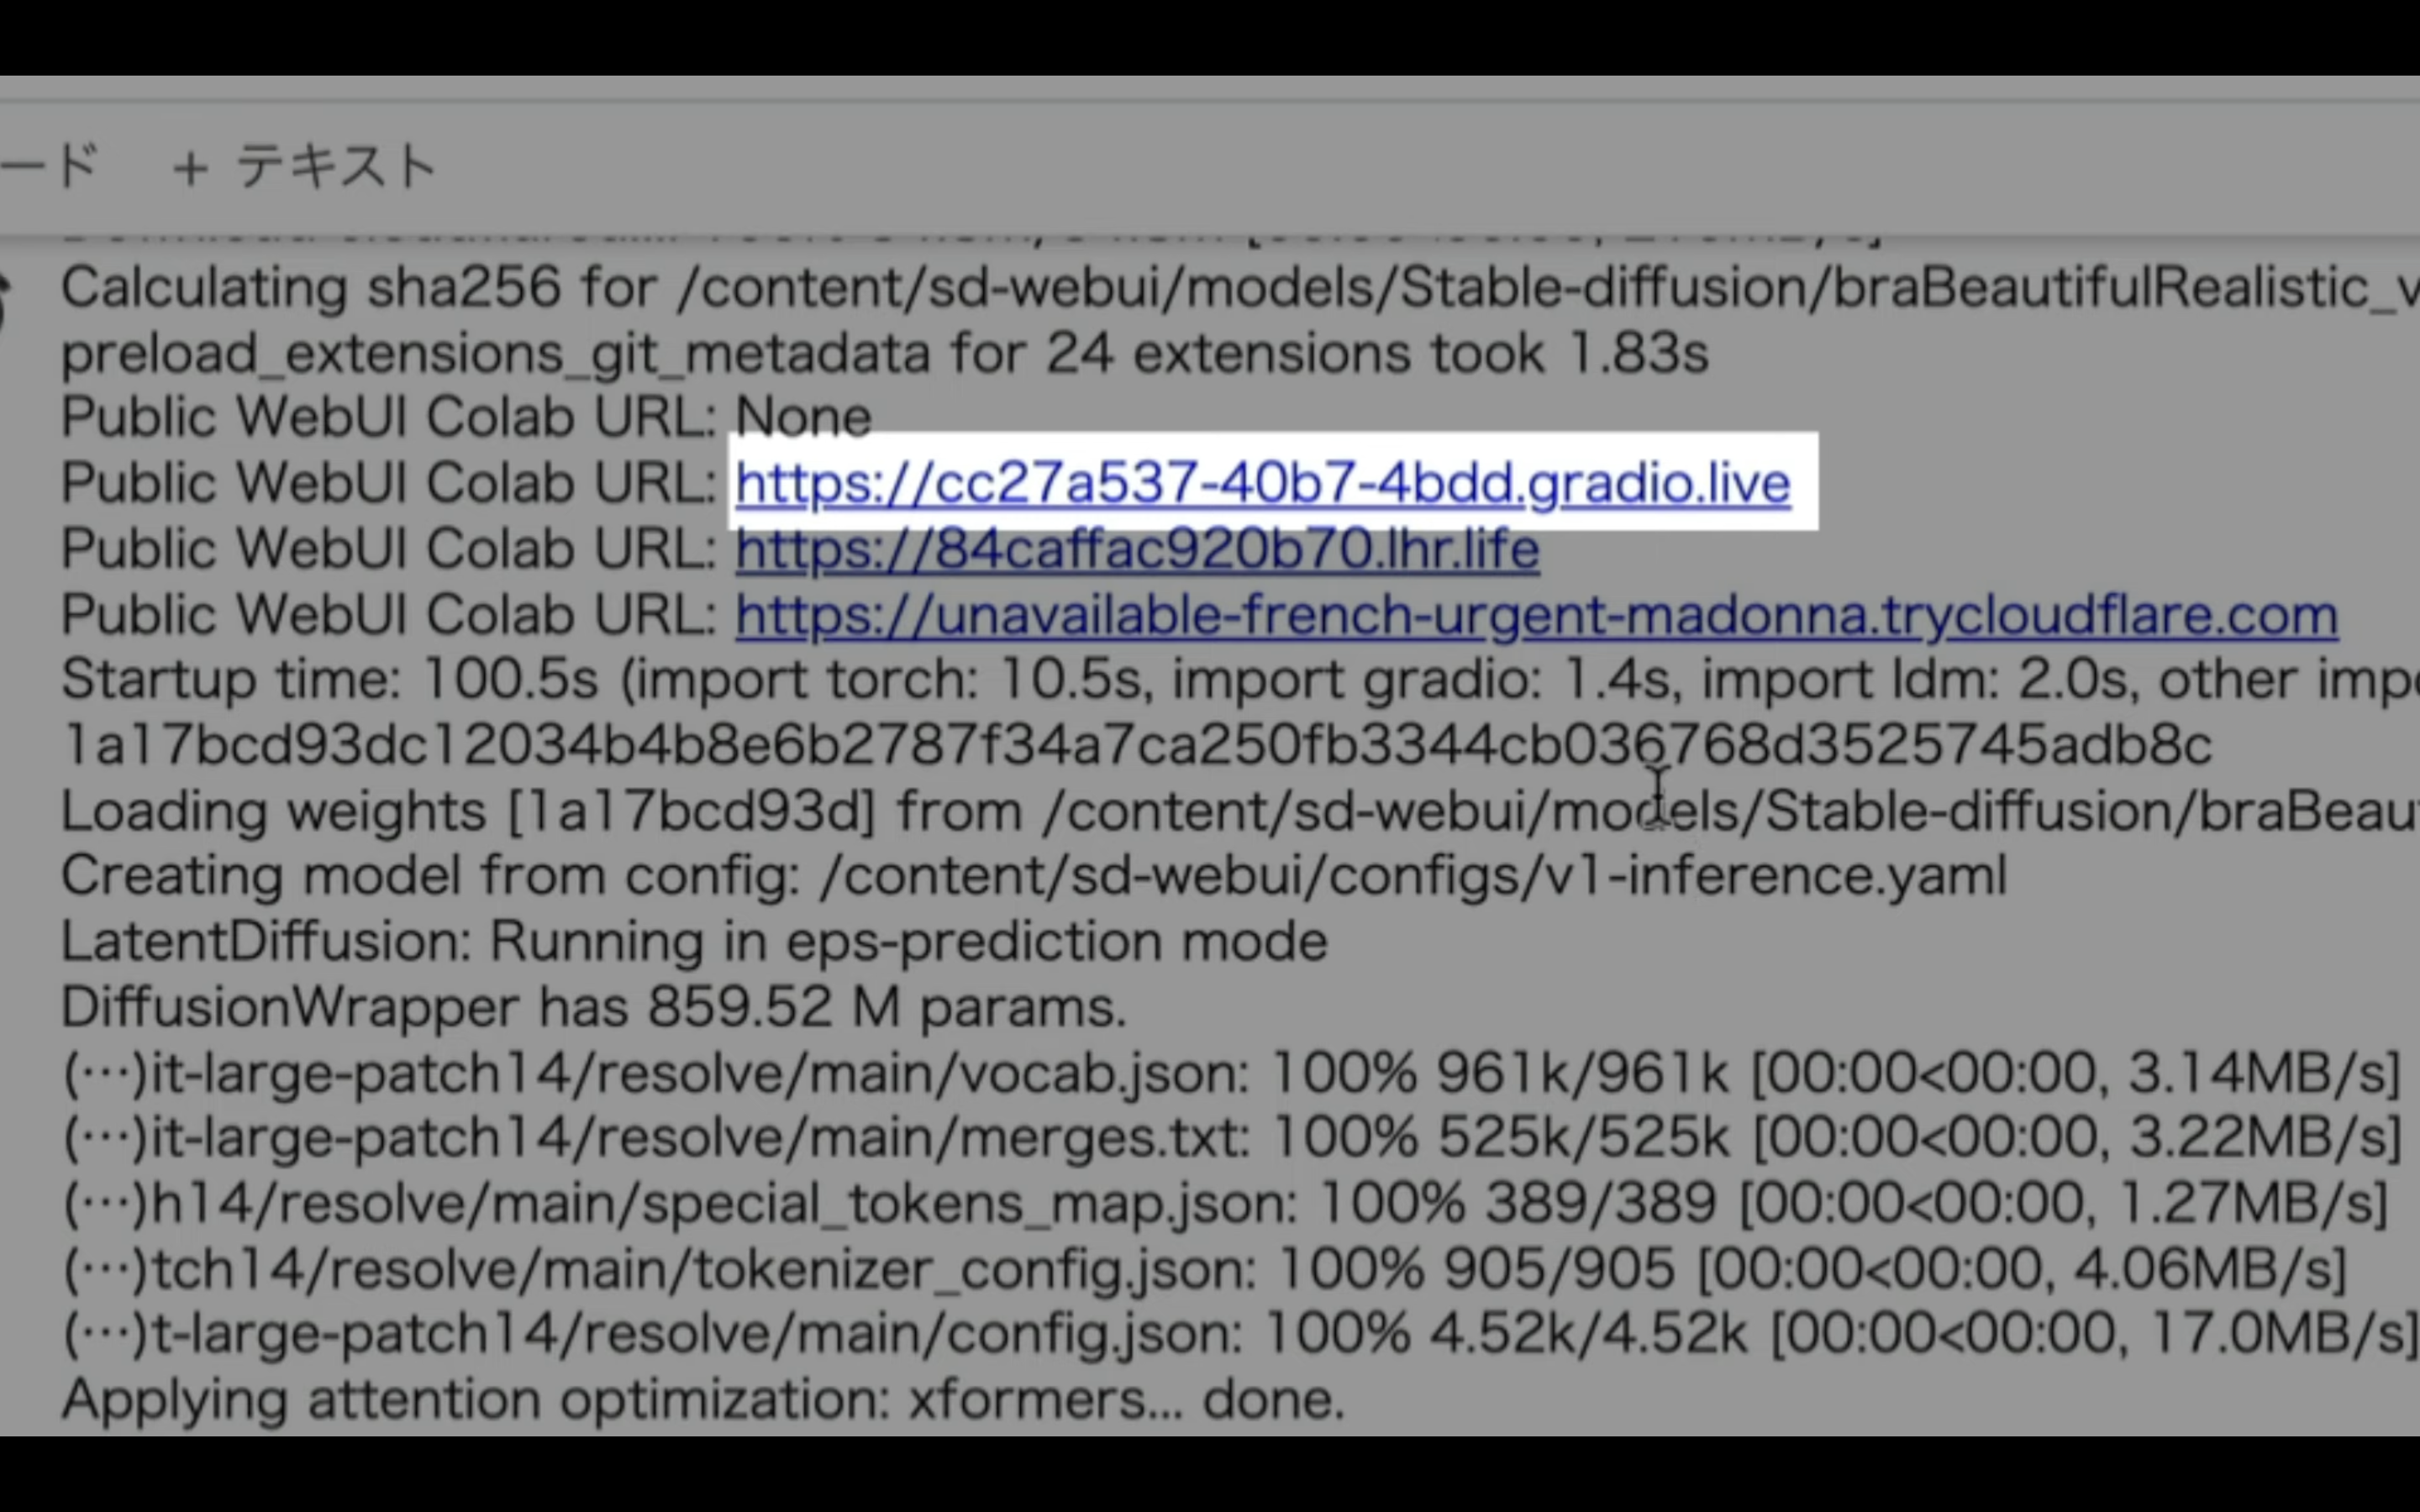
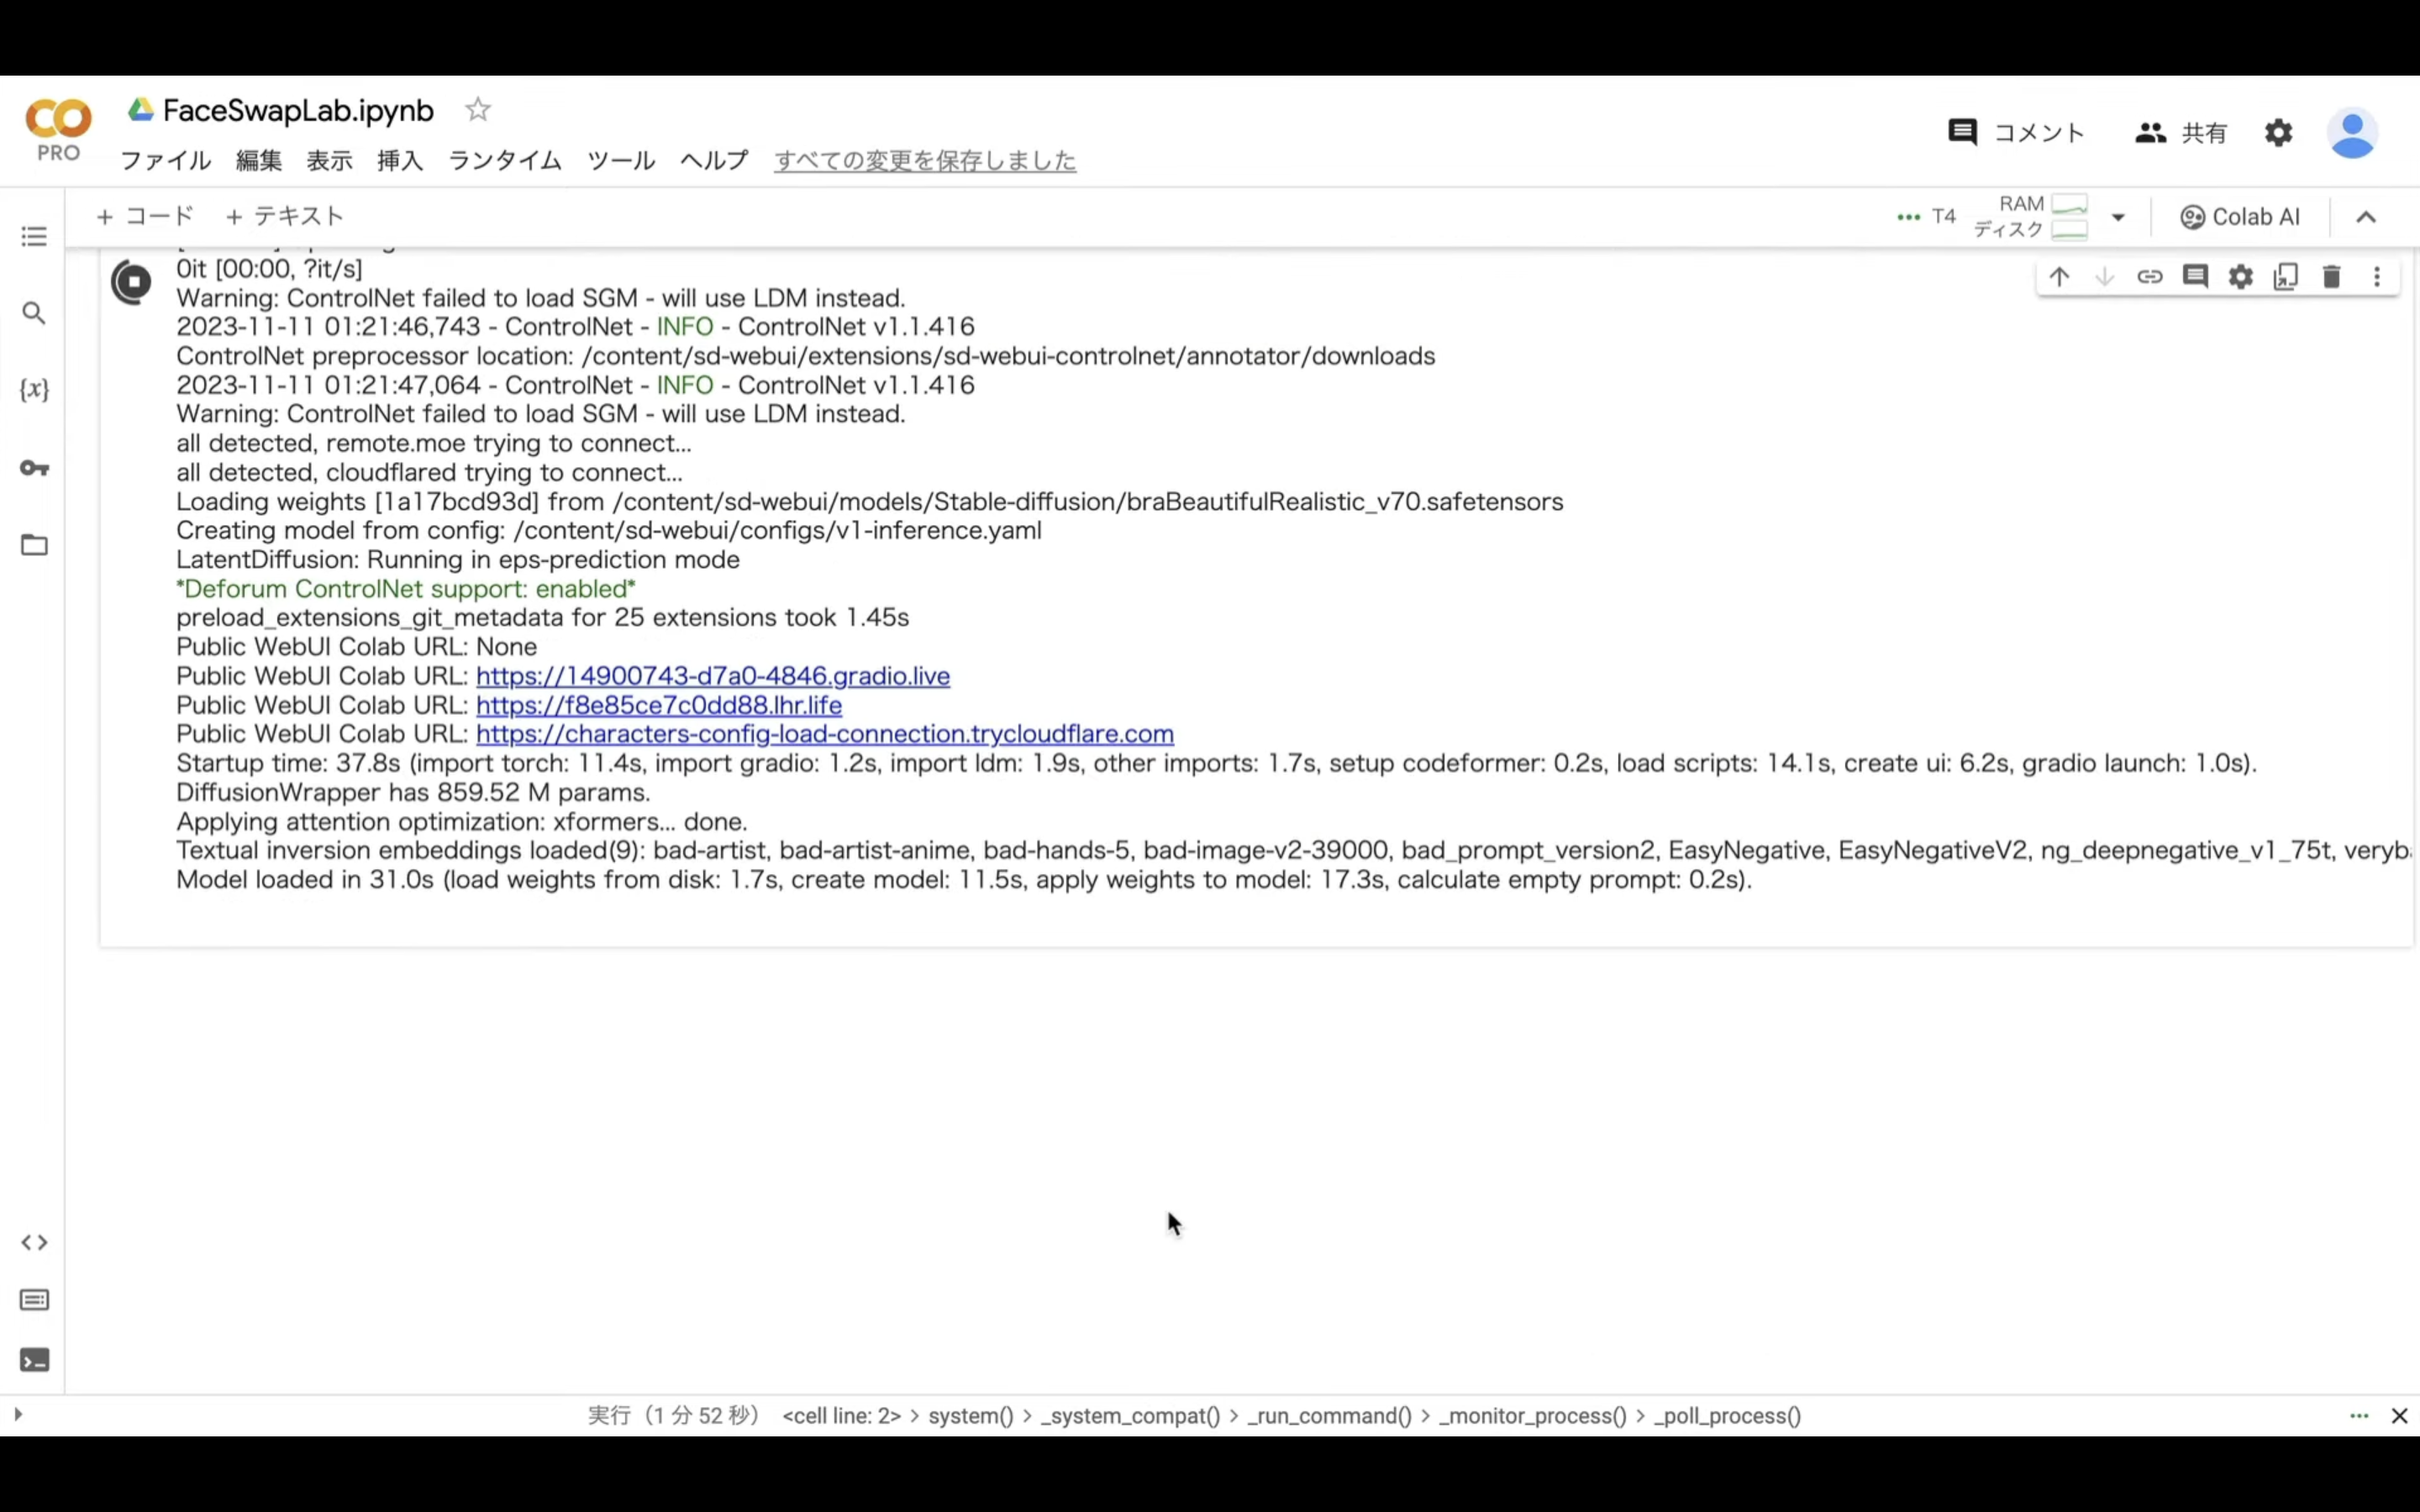
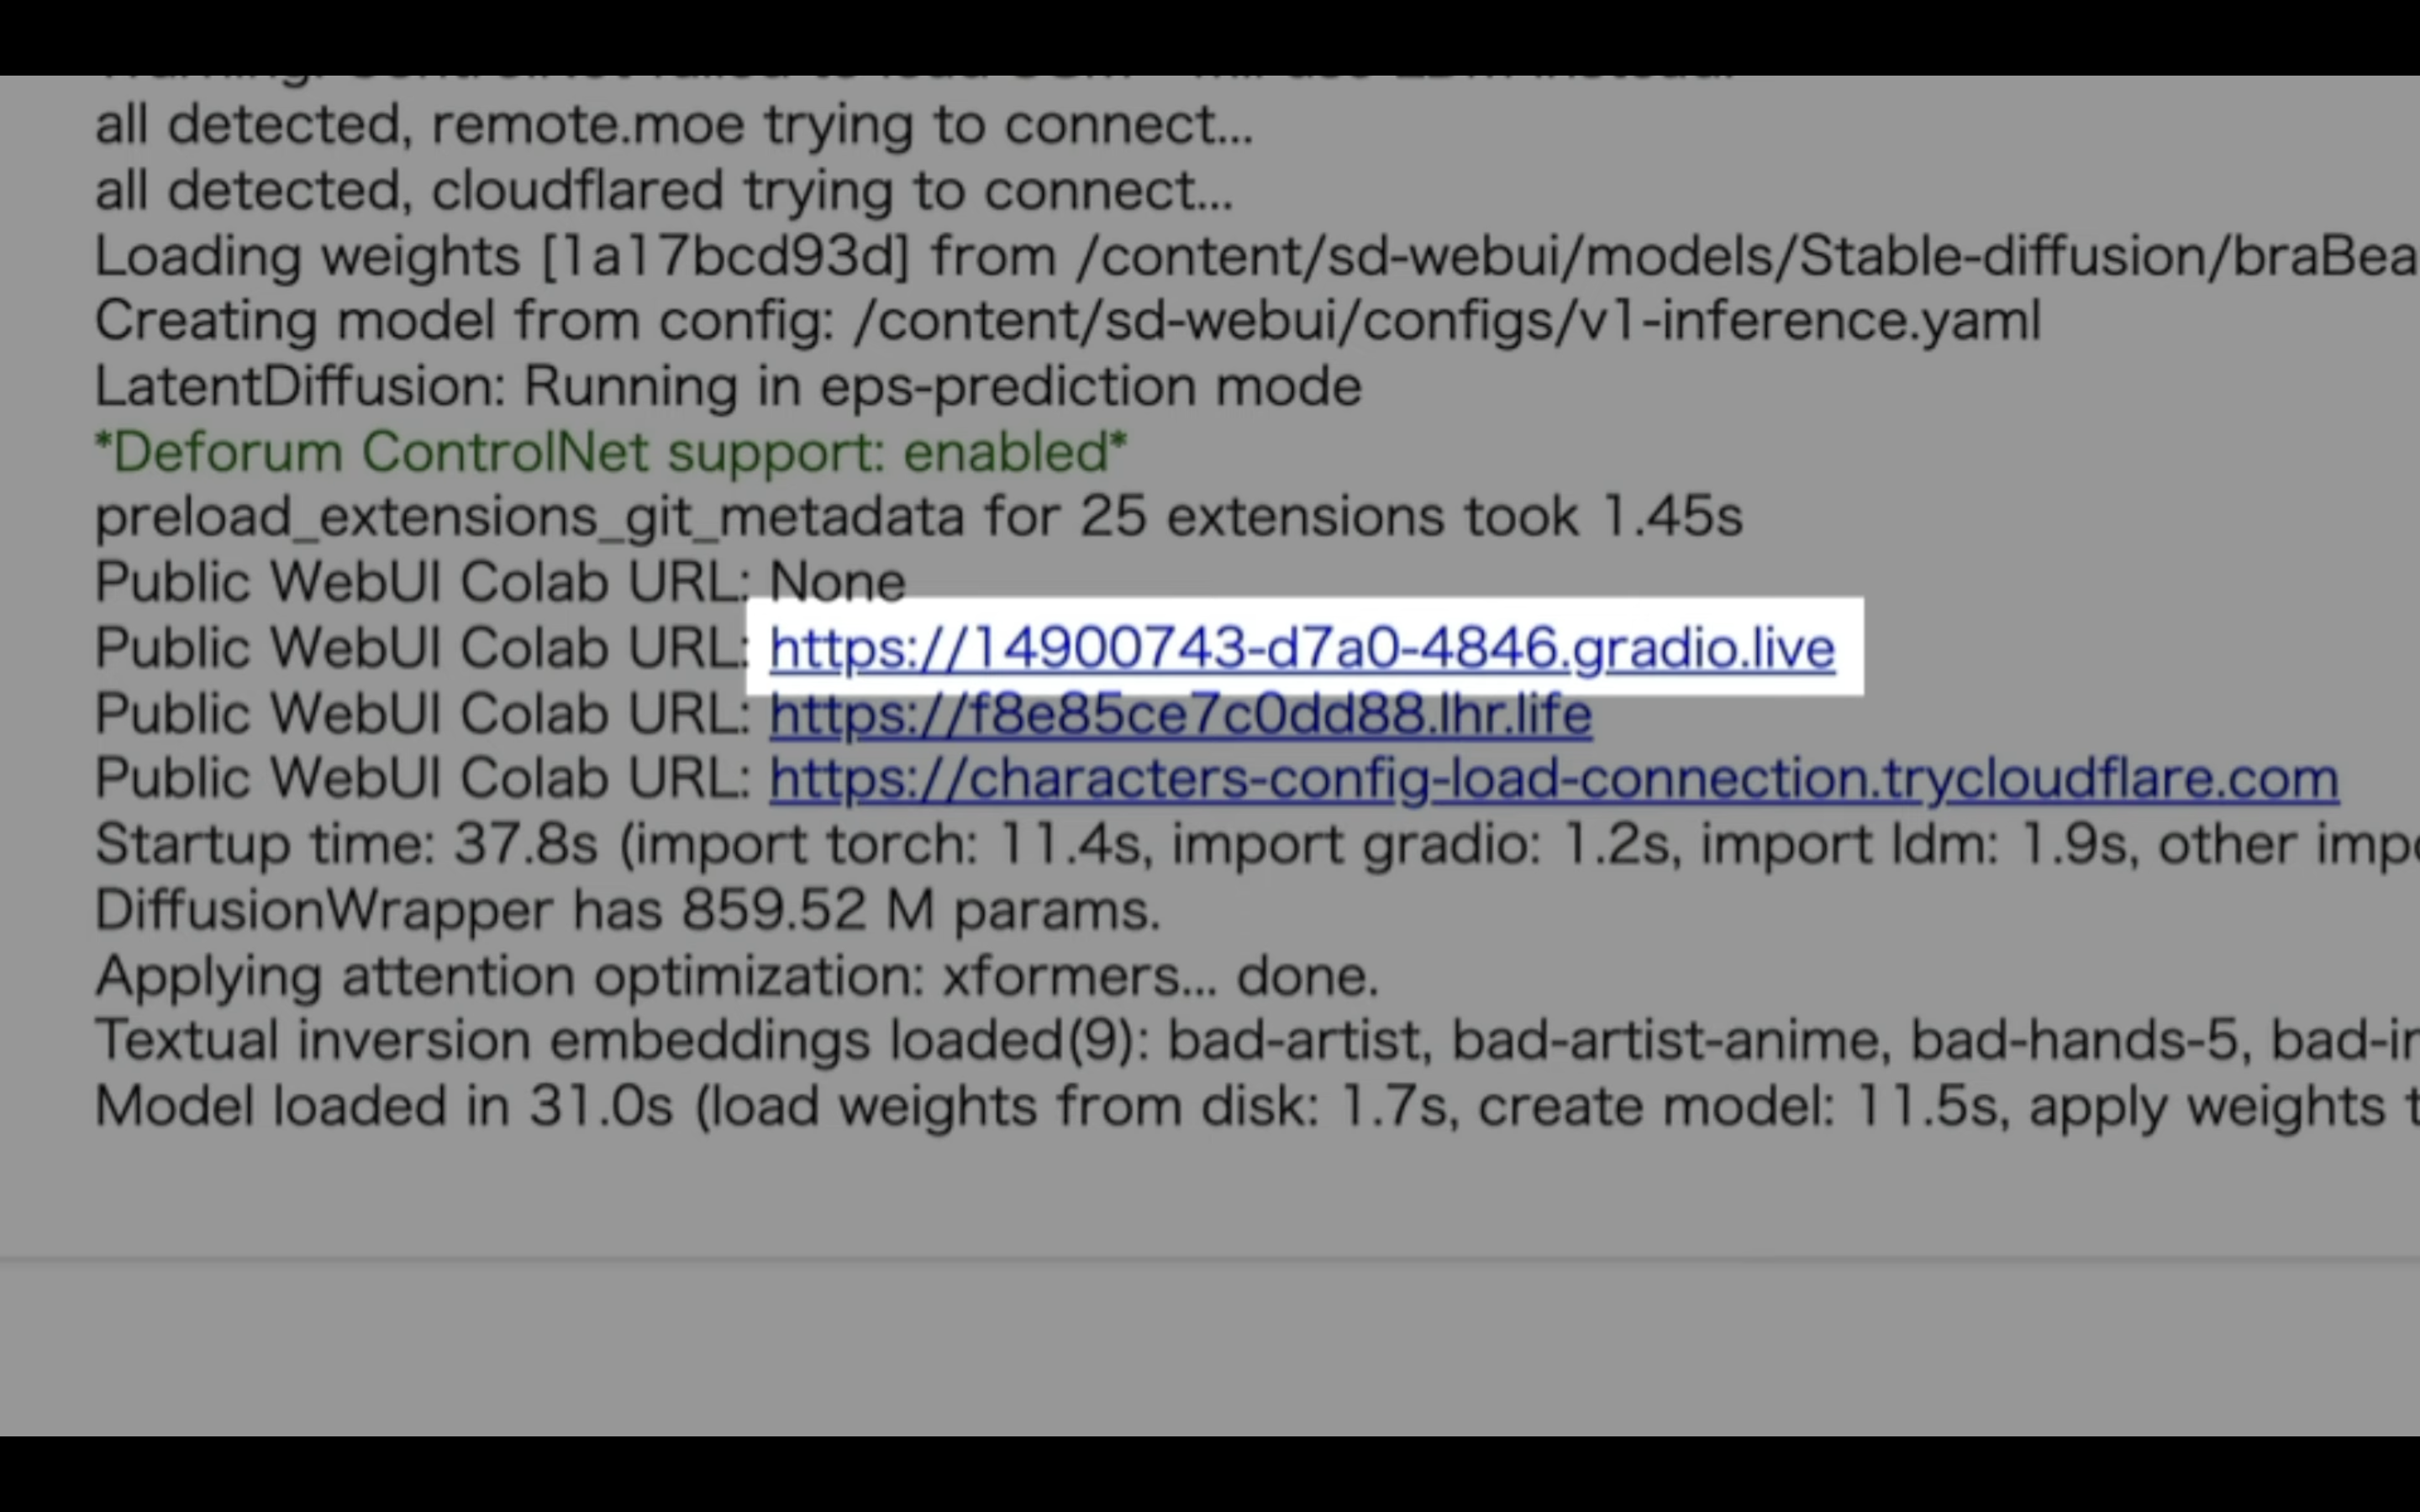
しばらく待っていると、このようなURLが表示されます。
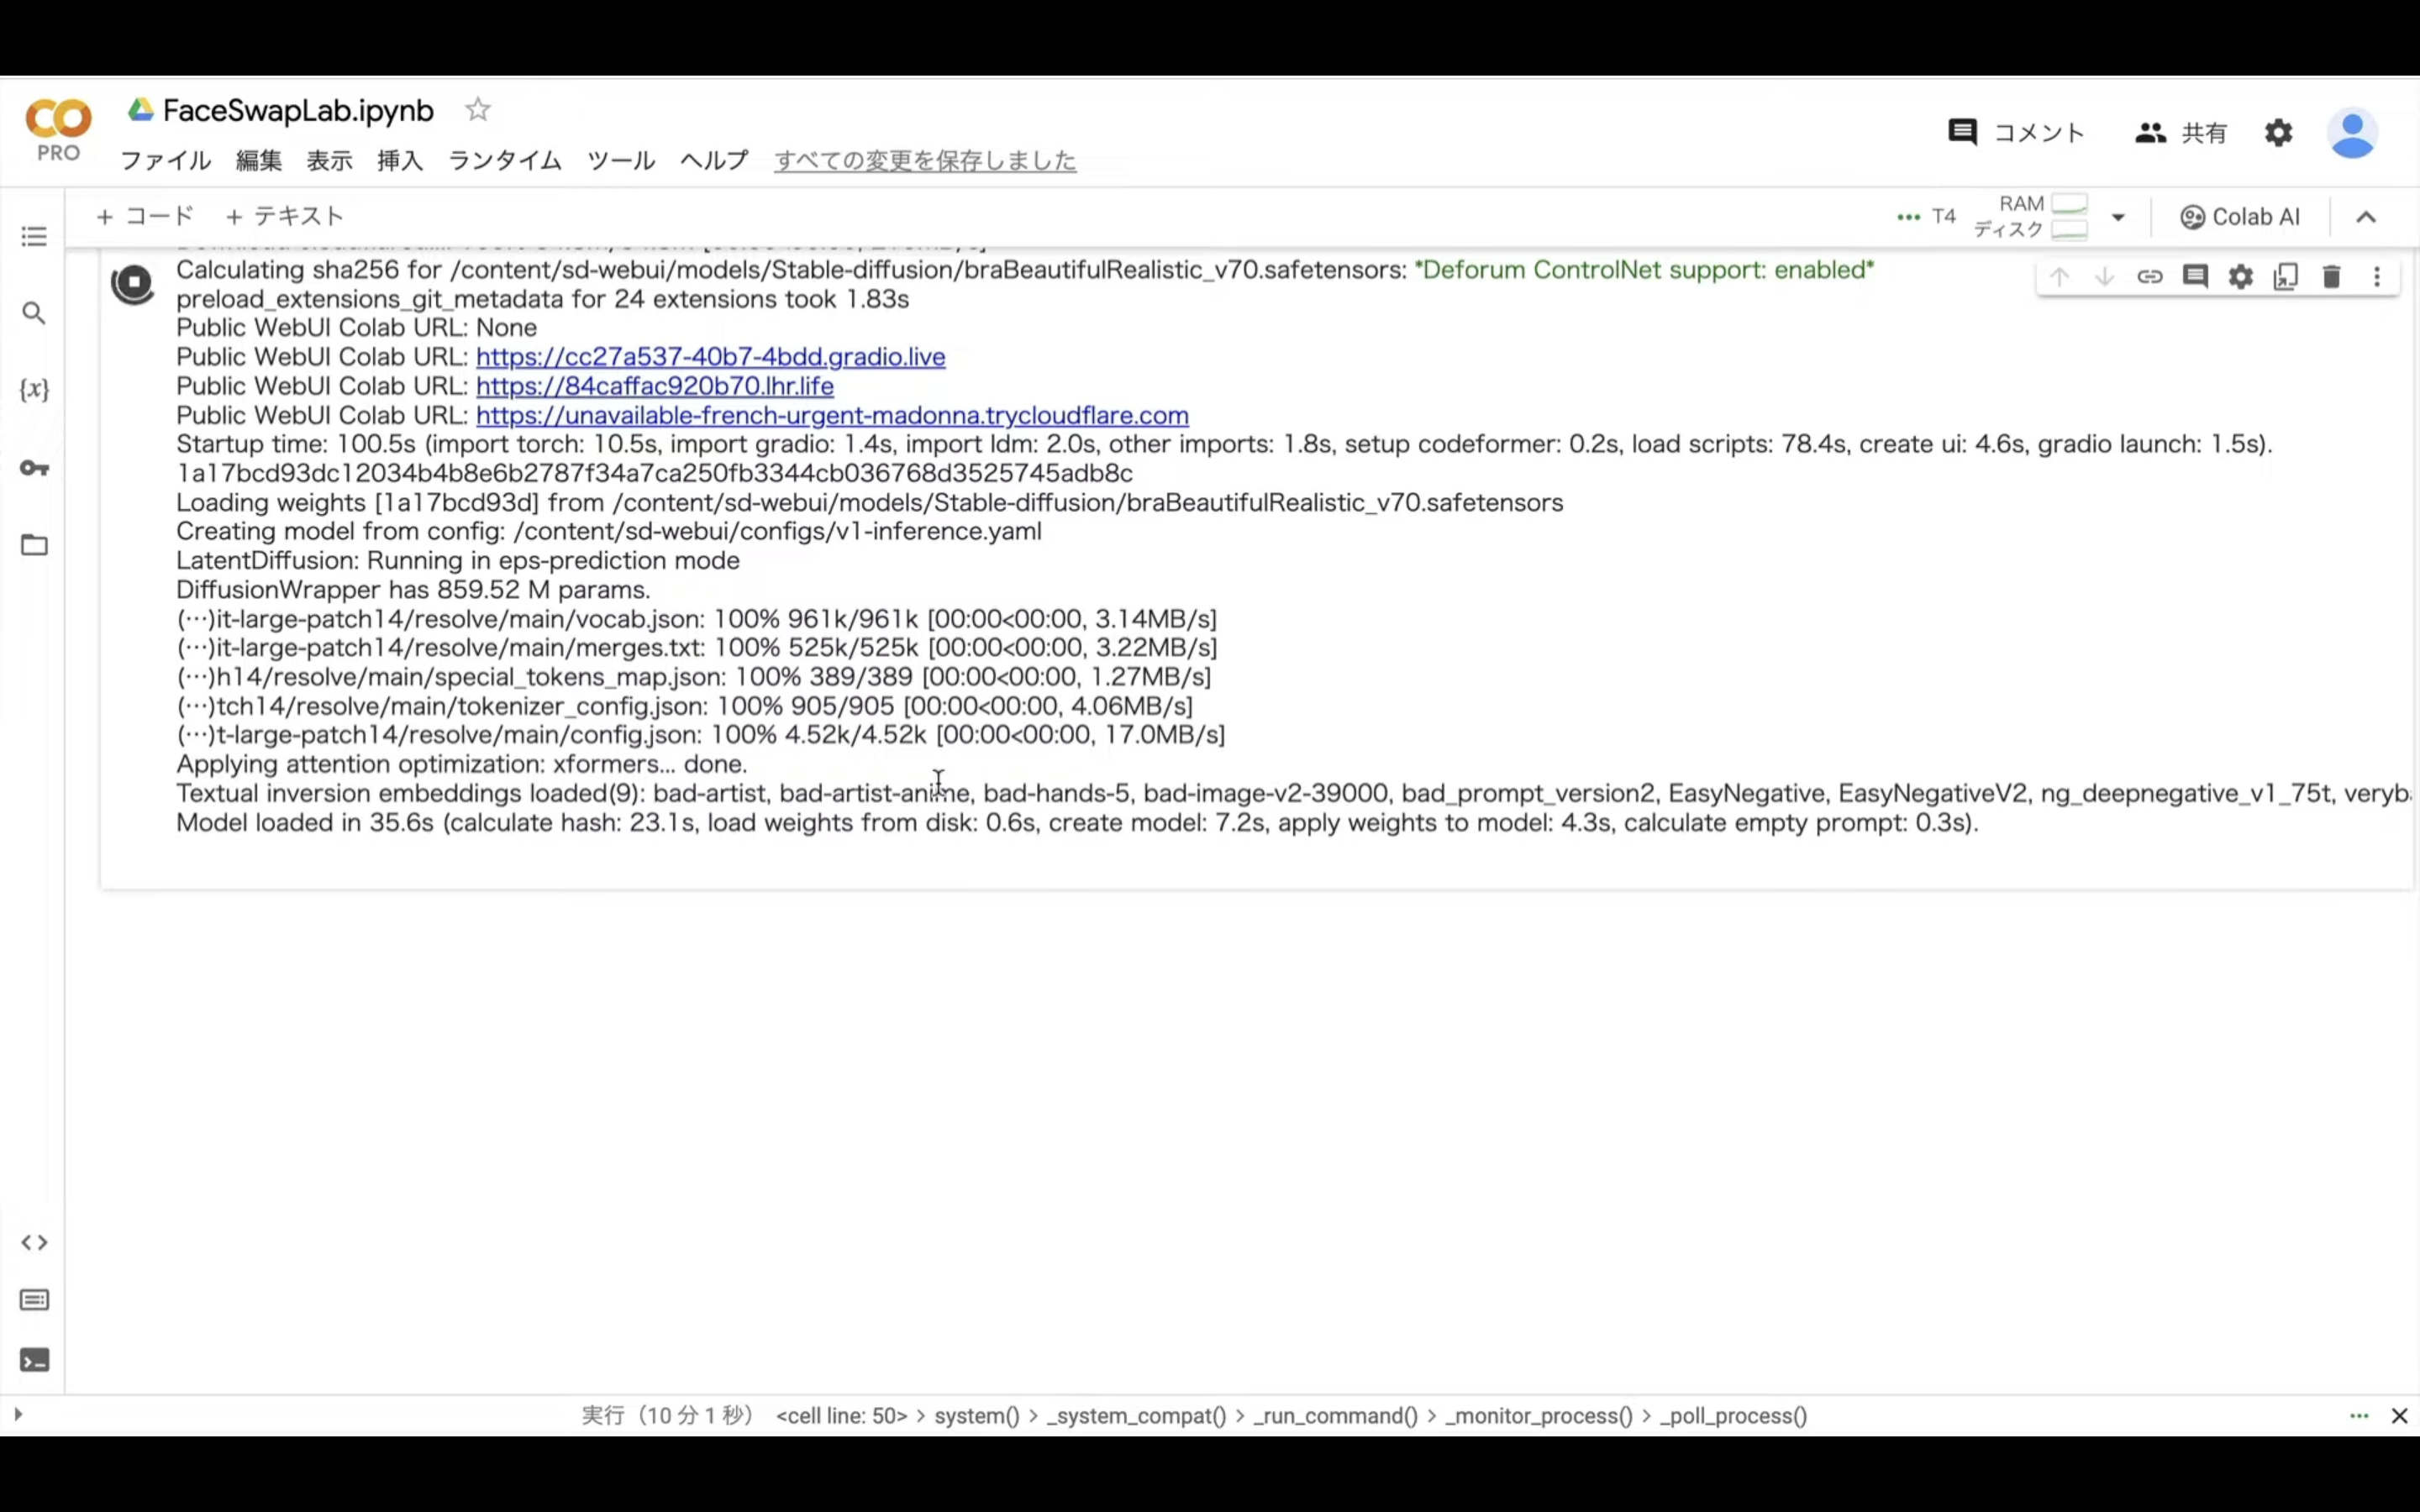
表示されたURLの中からgradioというテキストが含まれているリンクをクリックします。
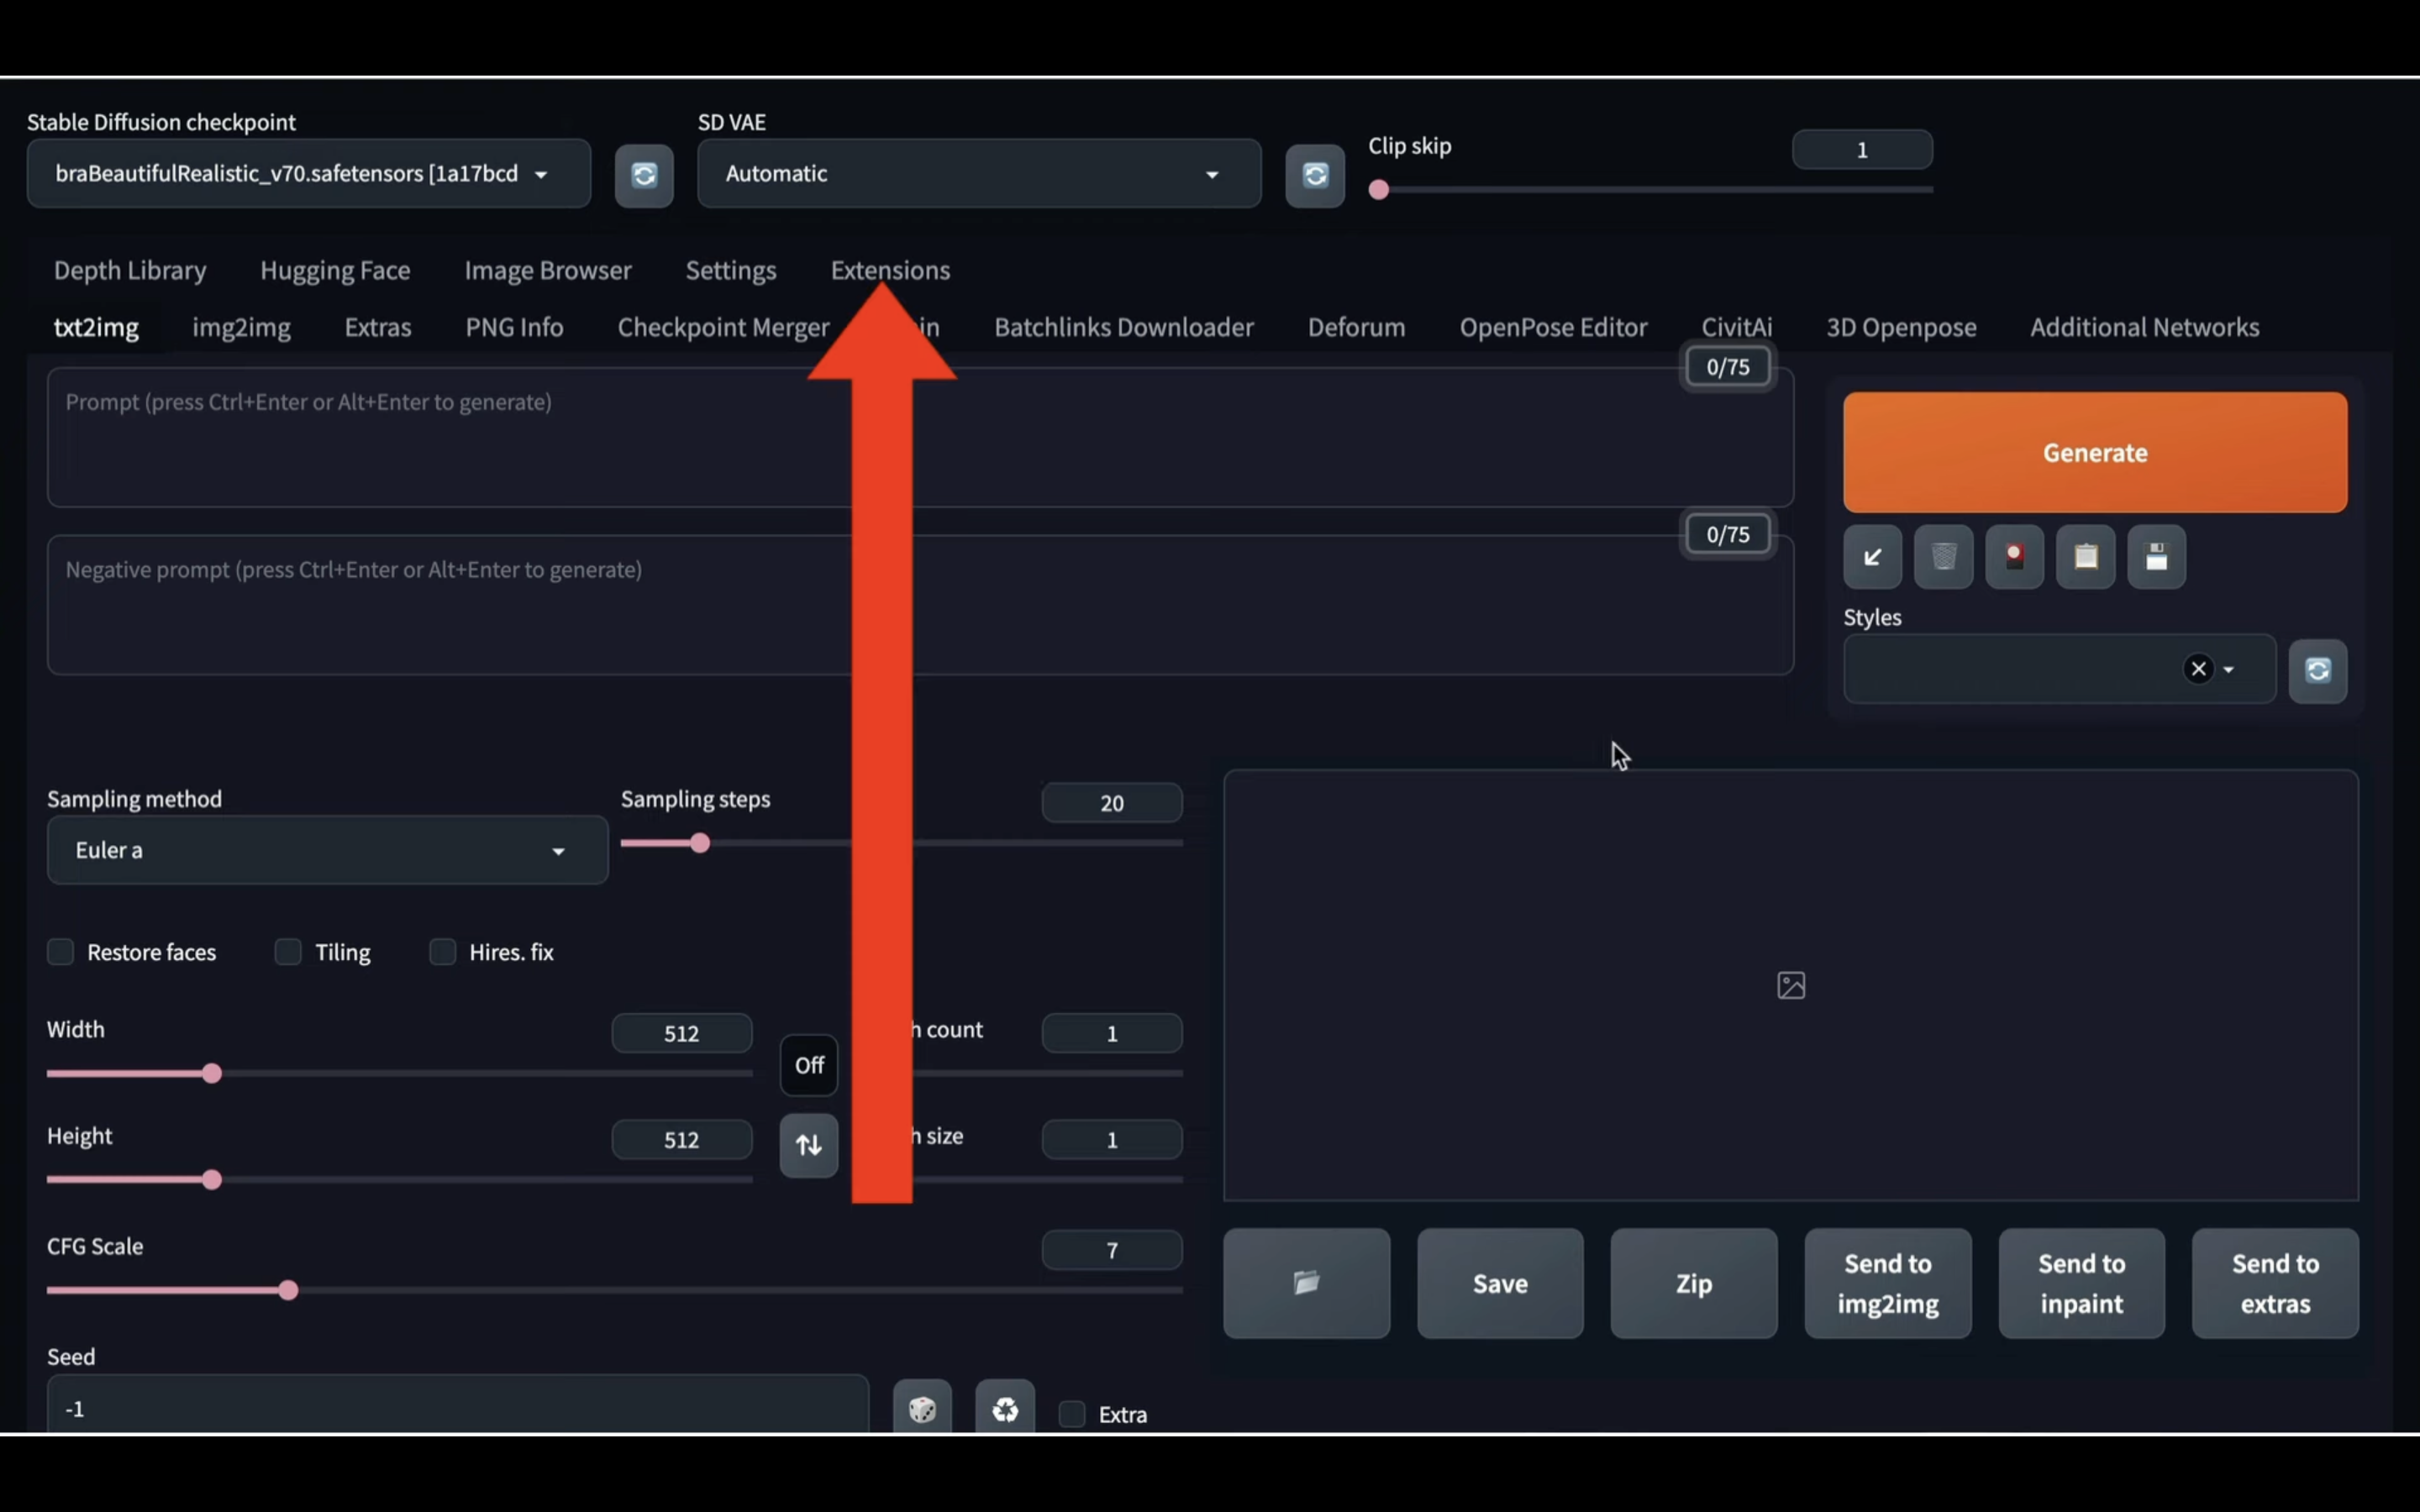
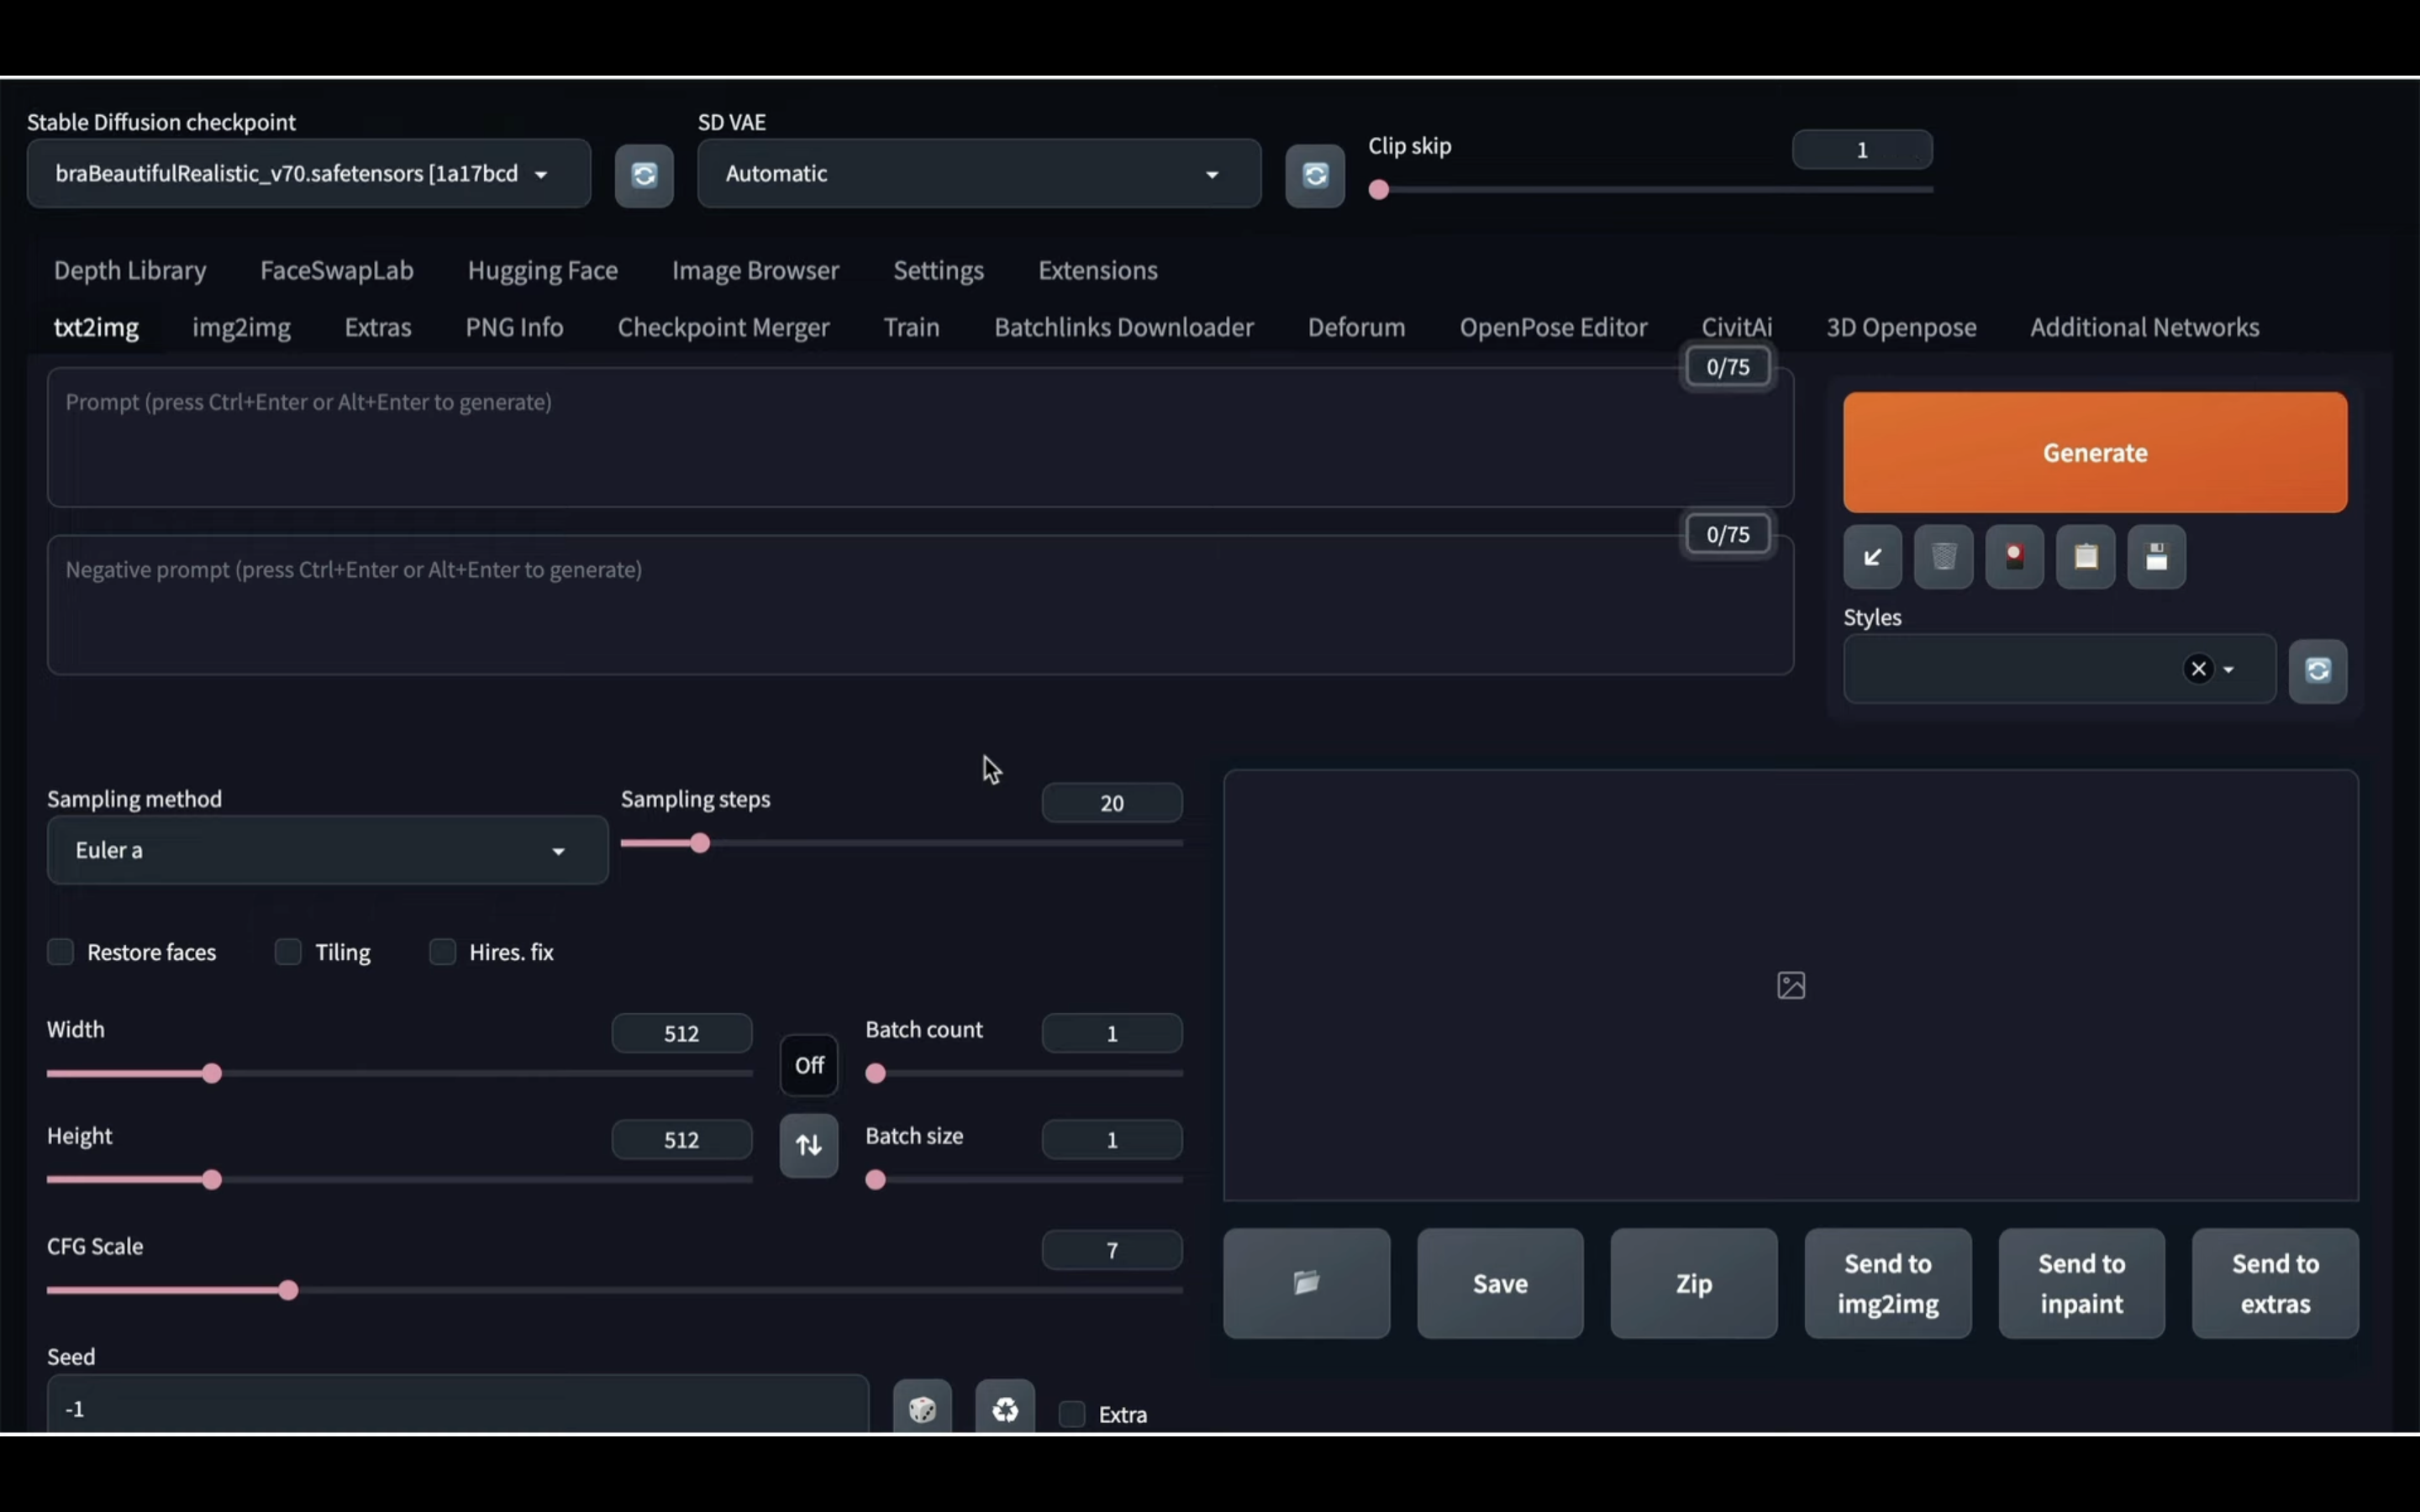
そうするとAutomatic1111の操作画面が表示されます。
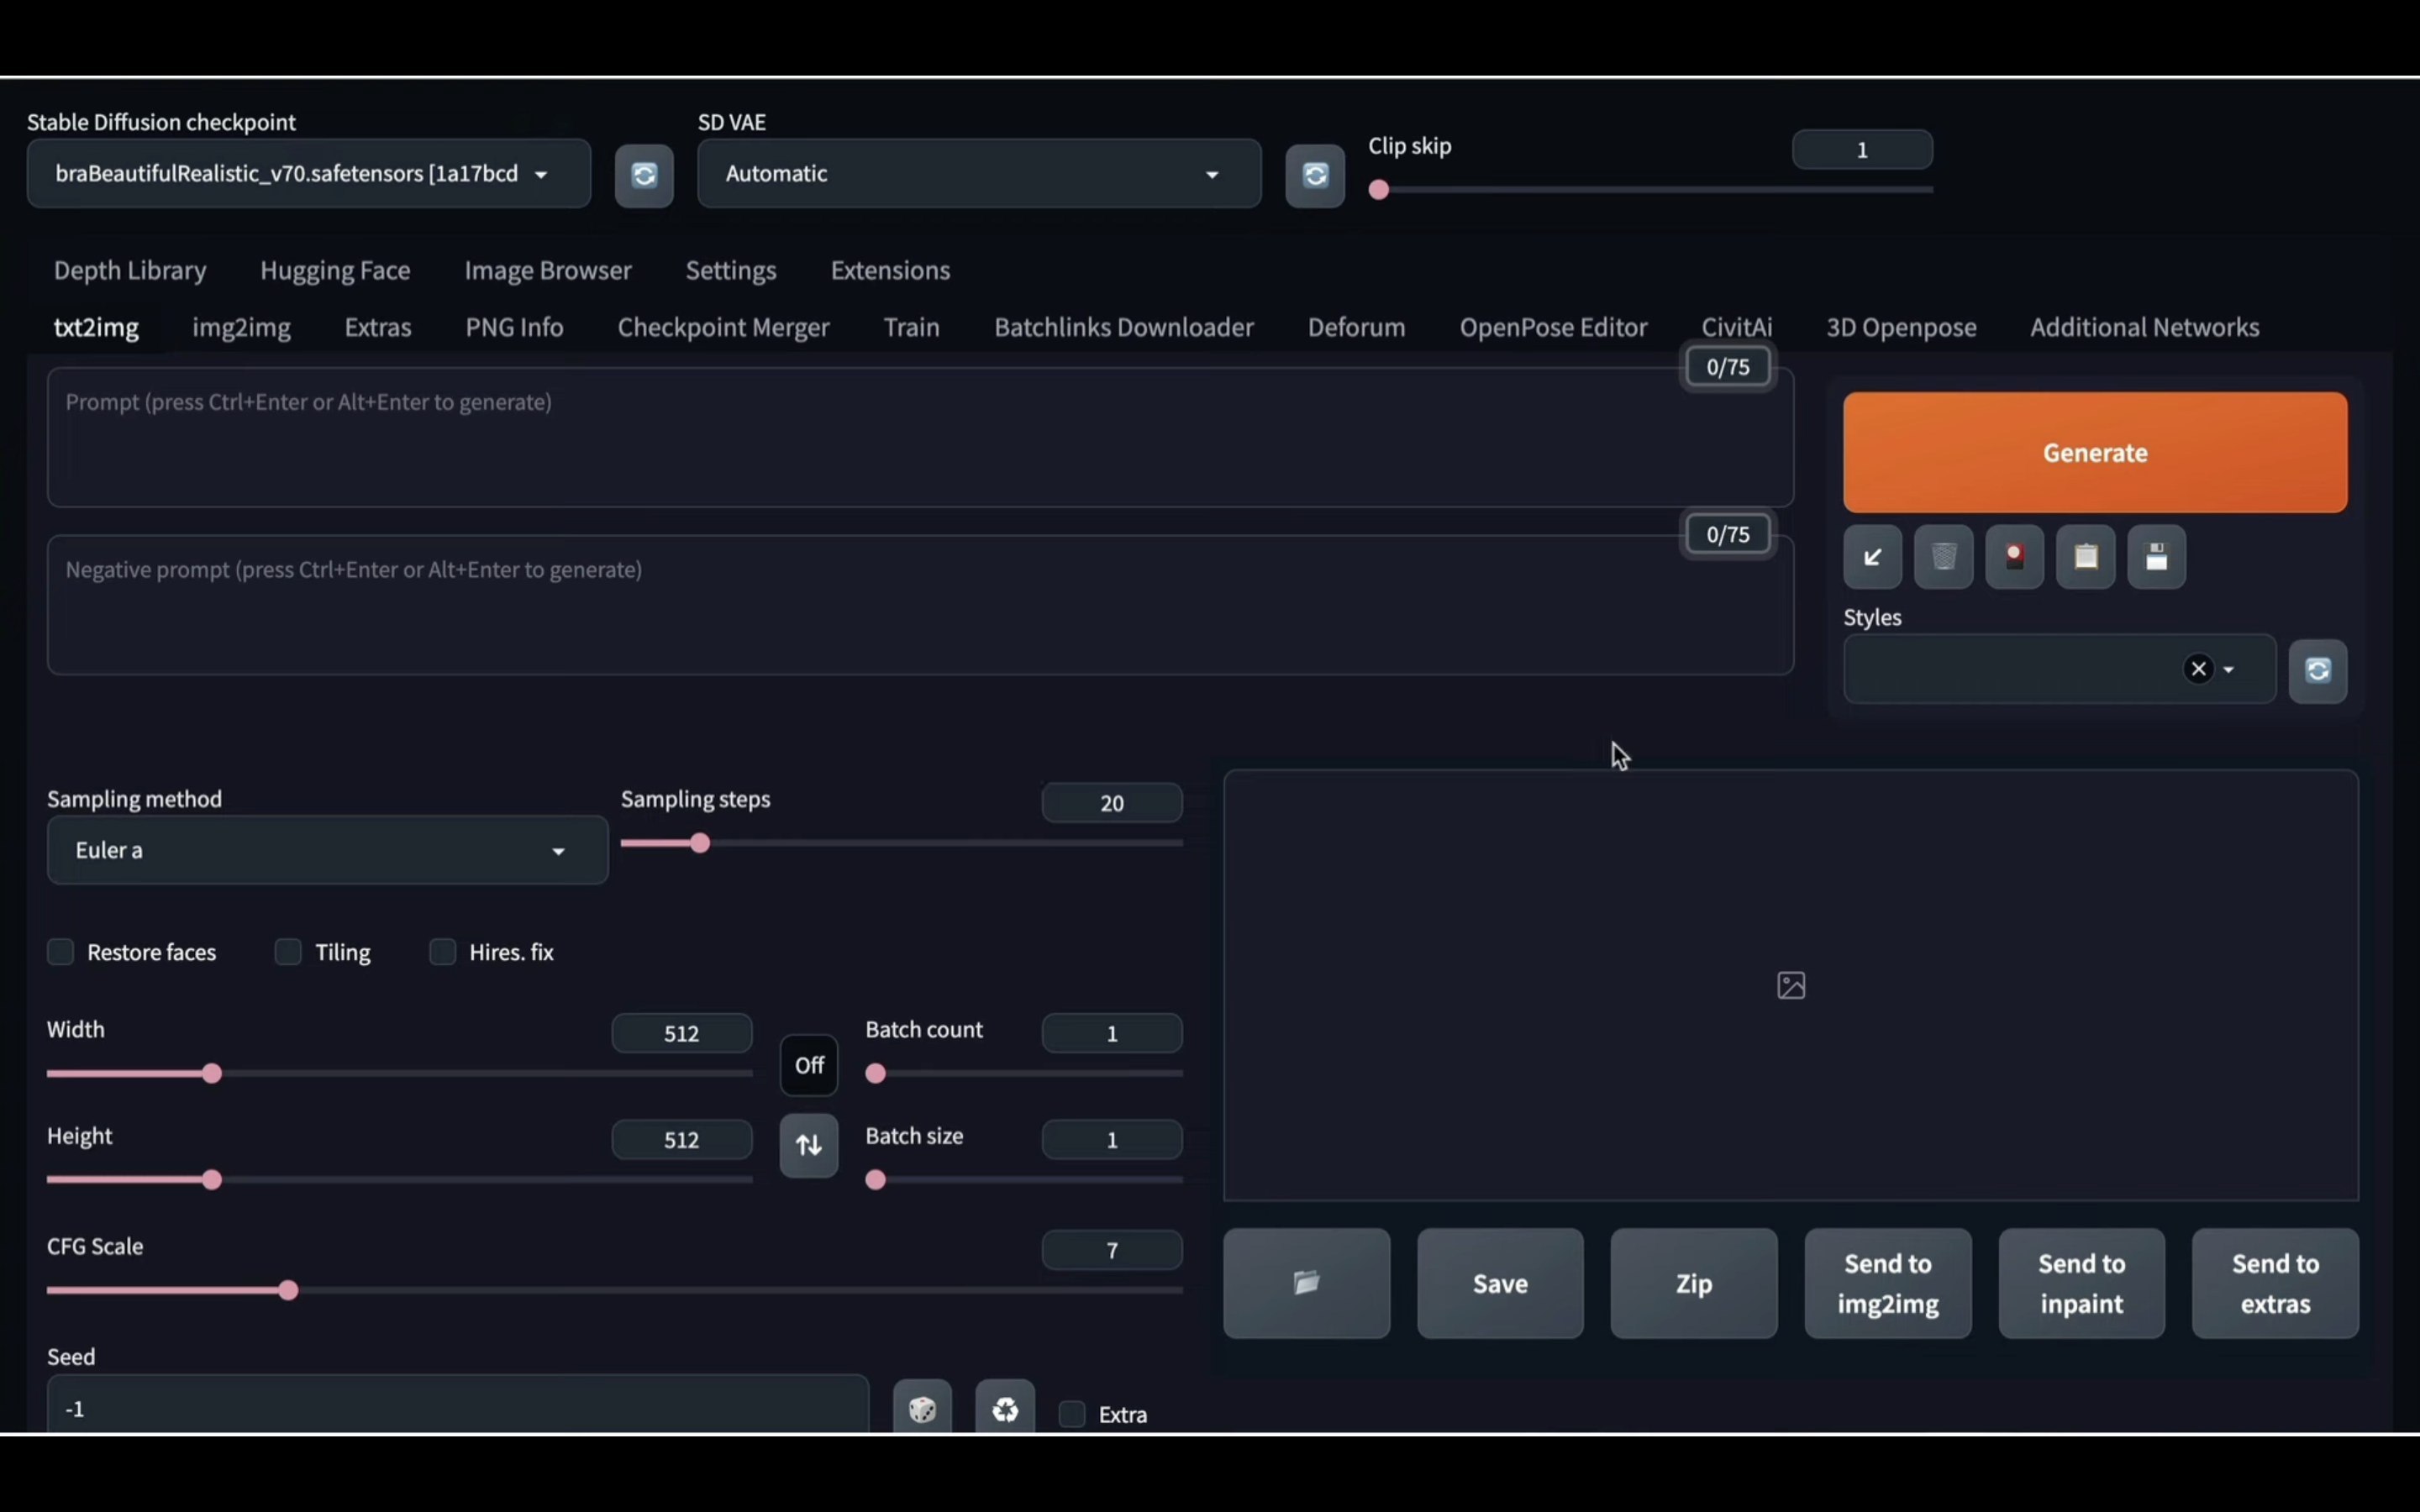
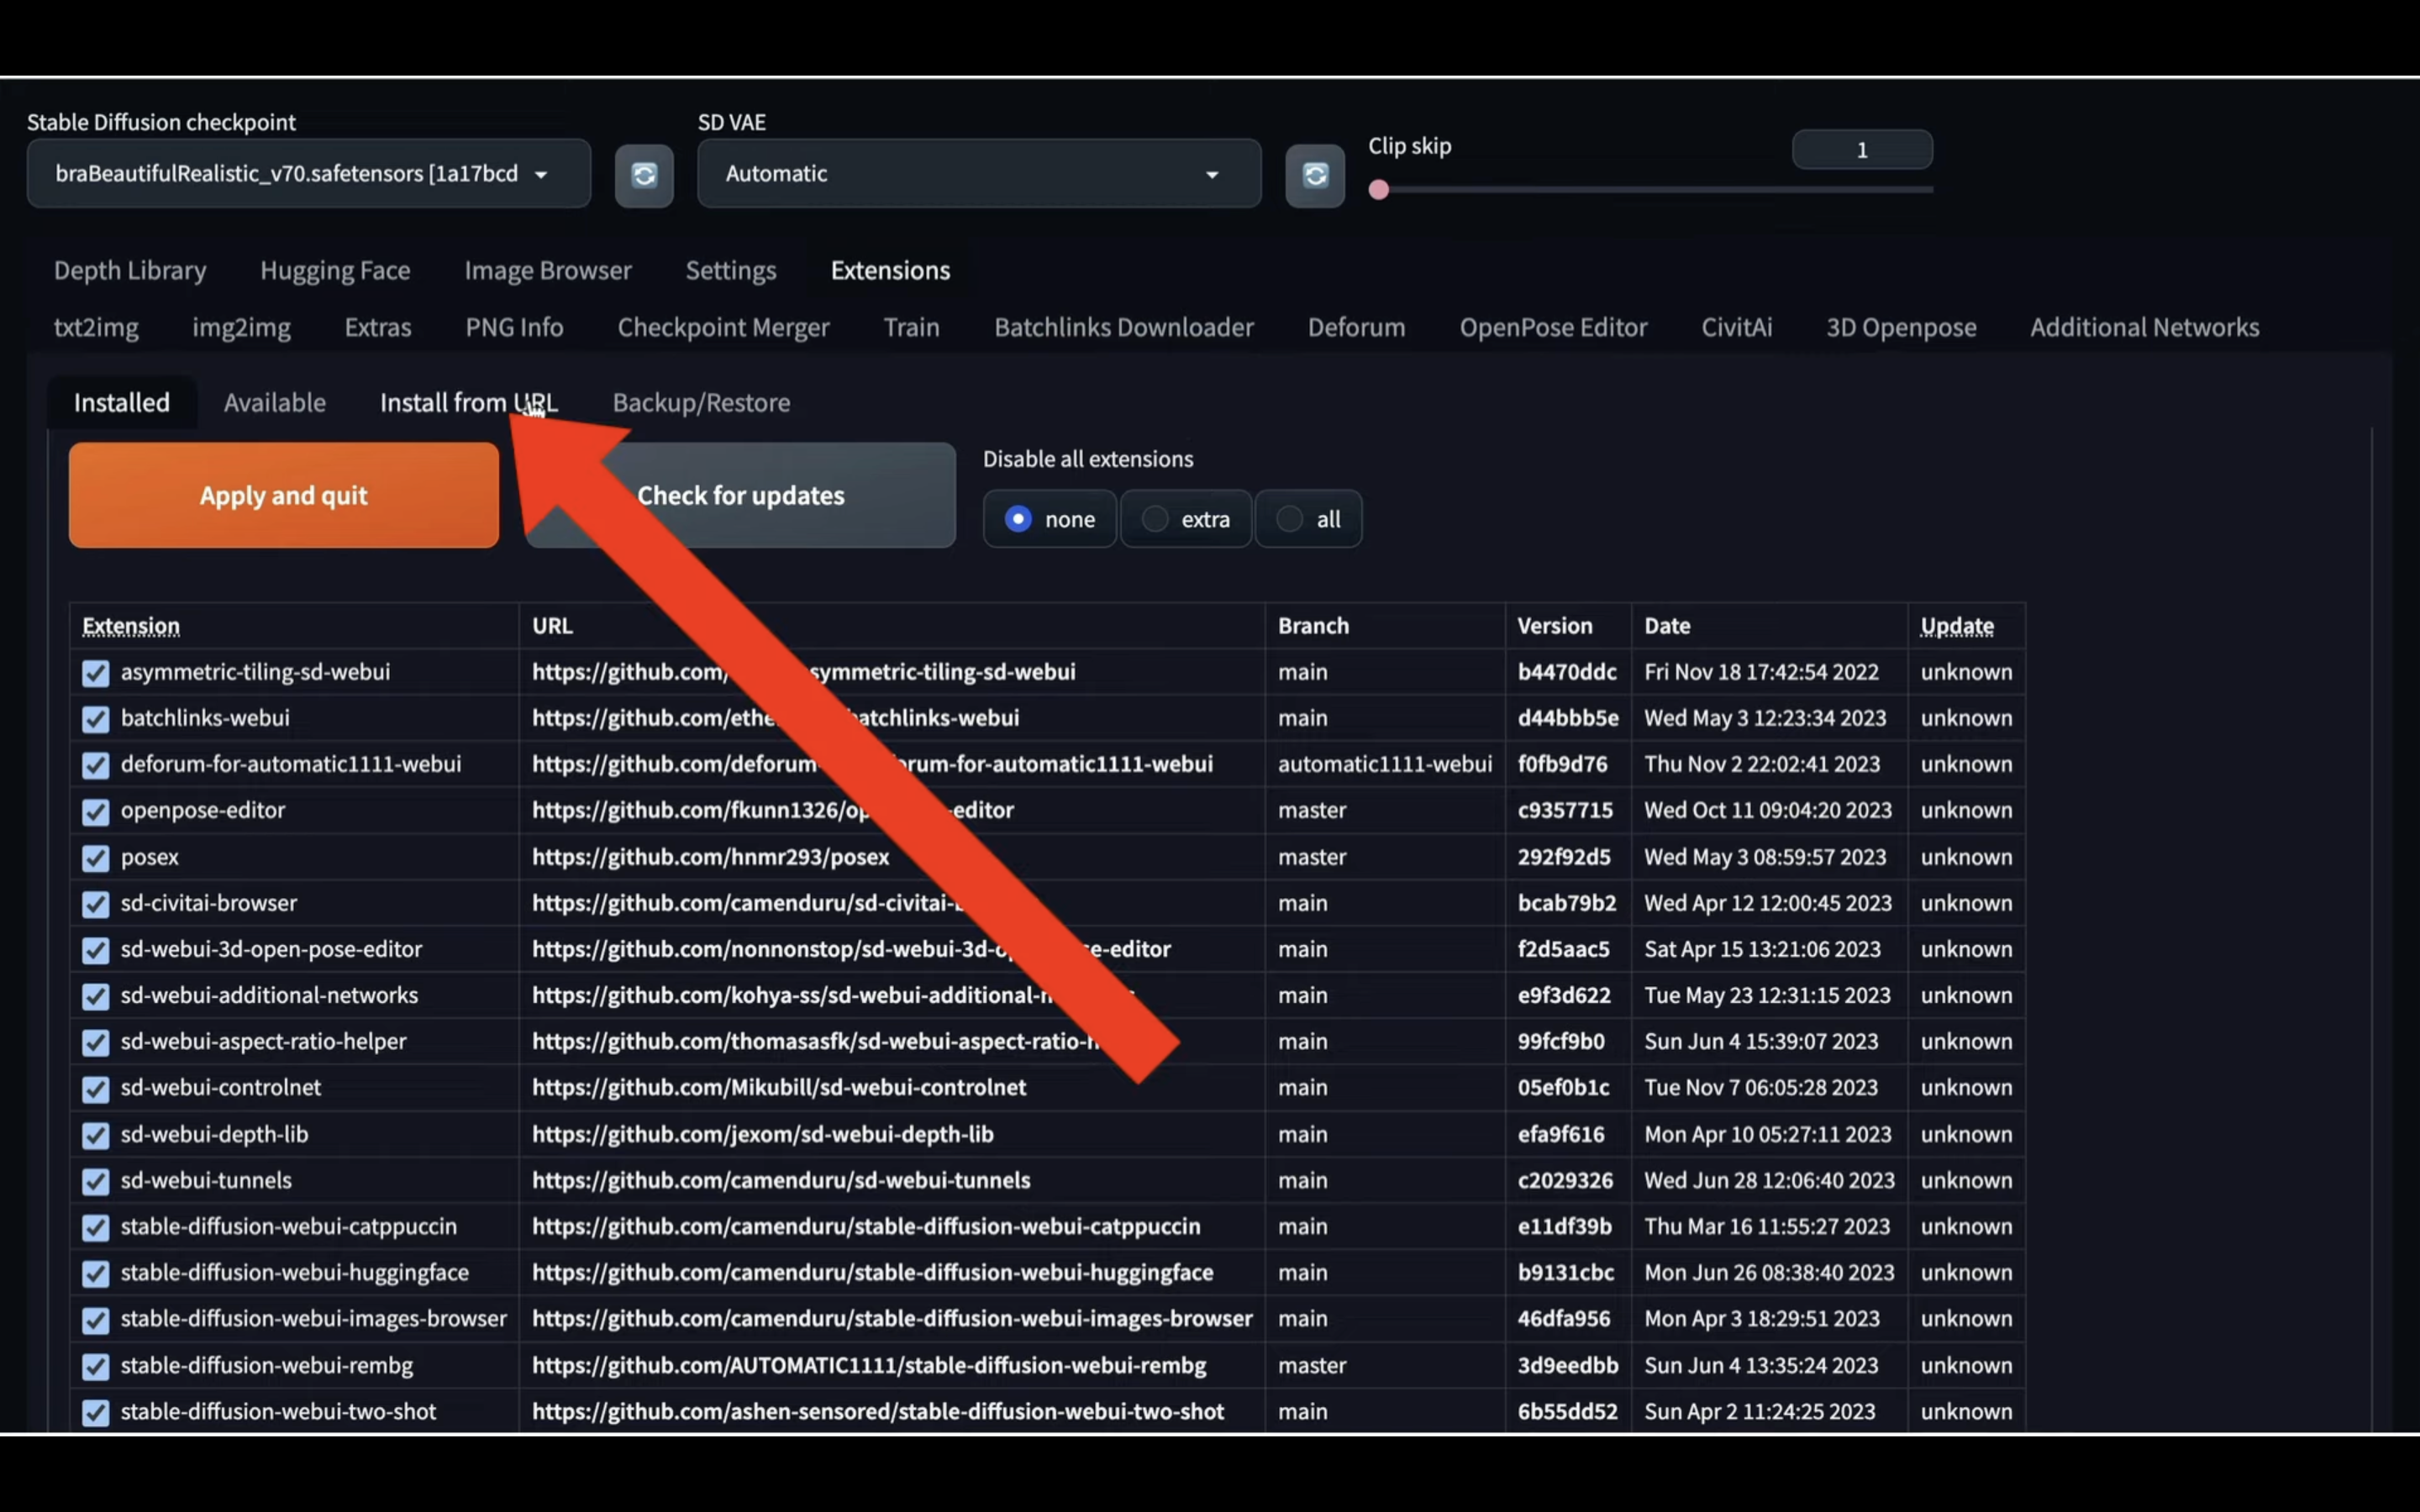
この画面が表示されたら、Extensionsと書かれているタブをクリックします。
Extensionsの設定画面が表示されたら、Install from URLと書かれているタブをクリックします。
貼り付けるURLは以下のテキストなのでコピーします。
https://github.com/glucauze/sd-webui-faceswaplab
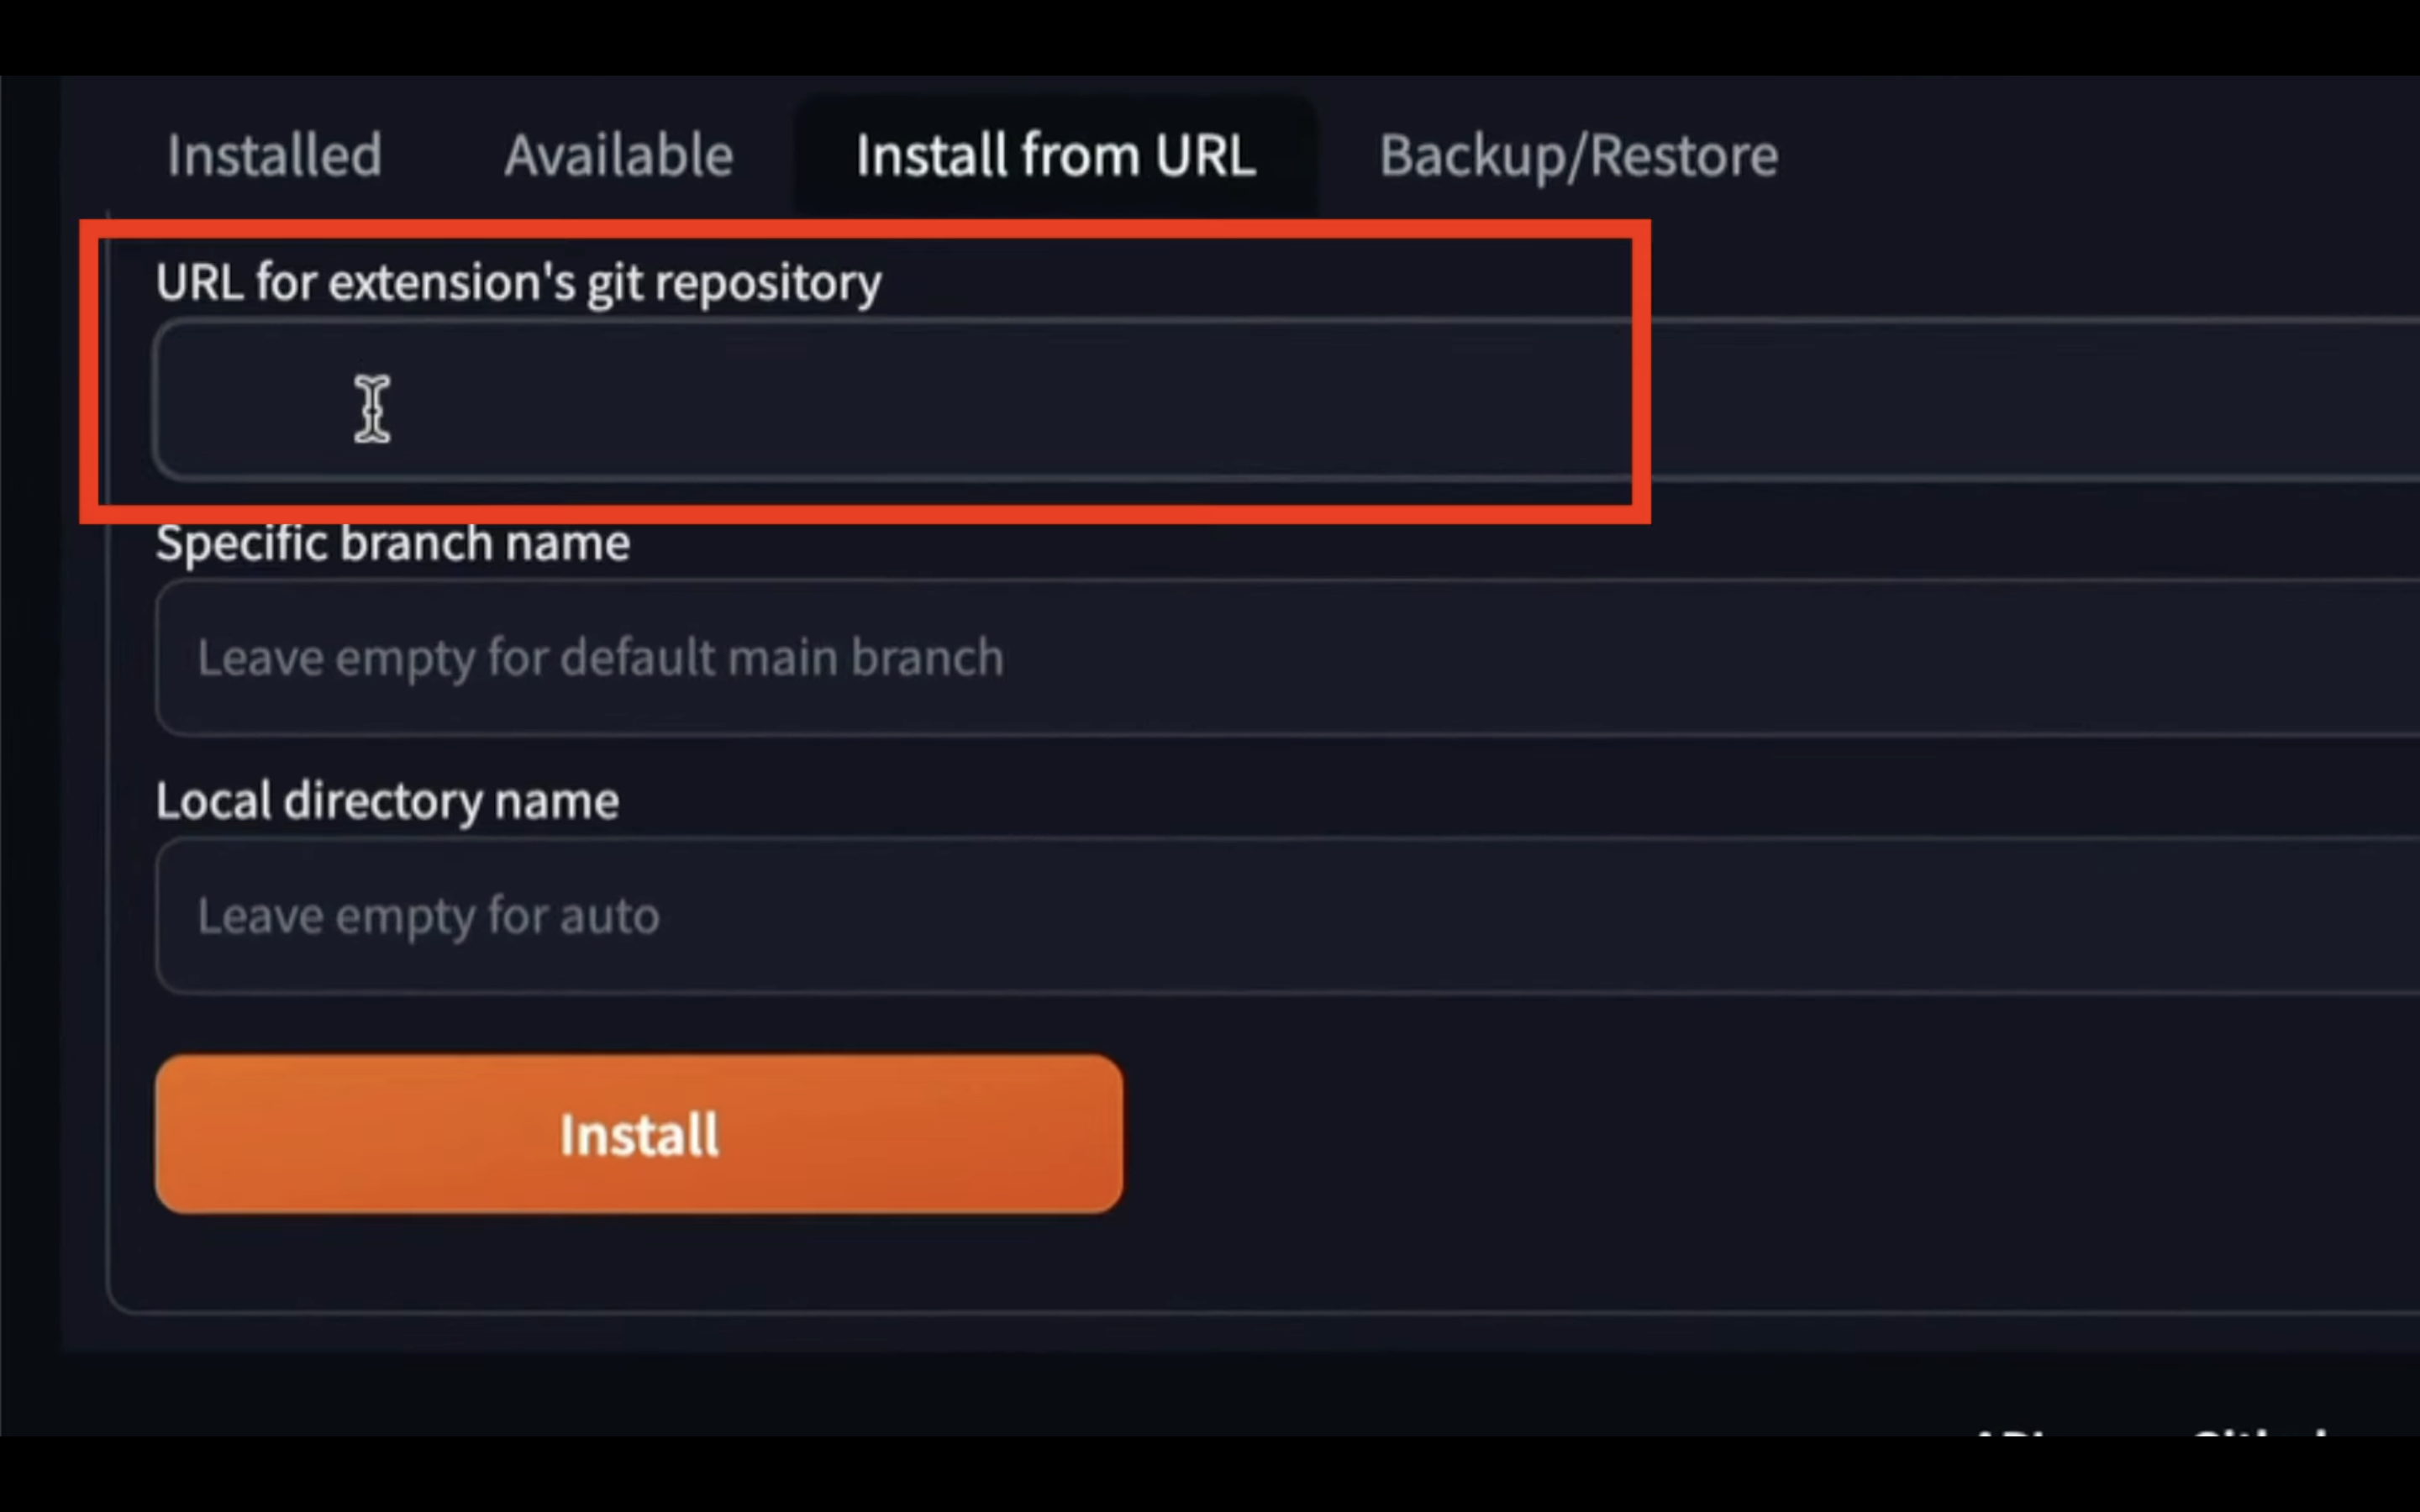
テキストをコピーしたらAutomatic1111の画面に戻ります。
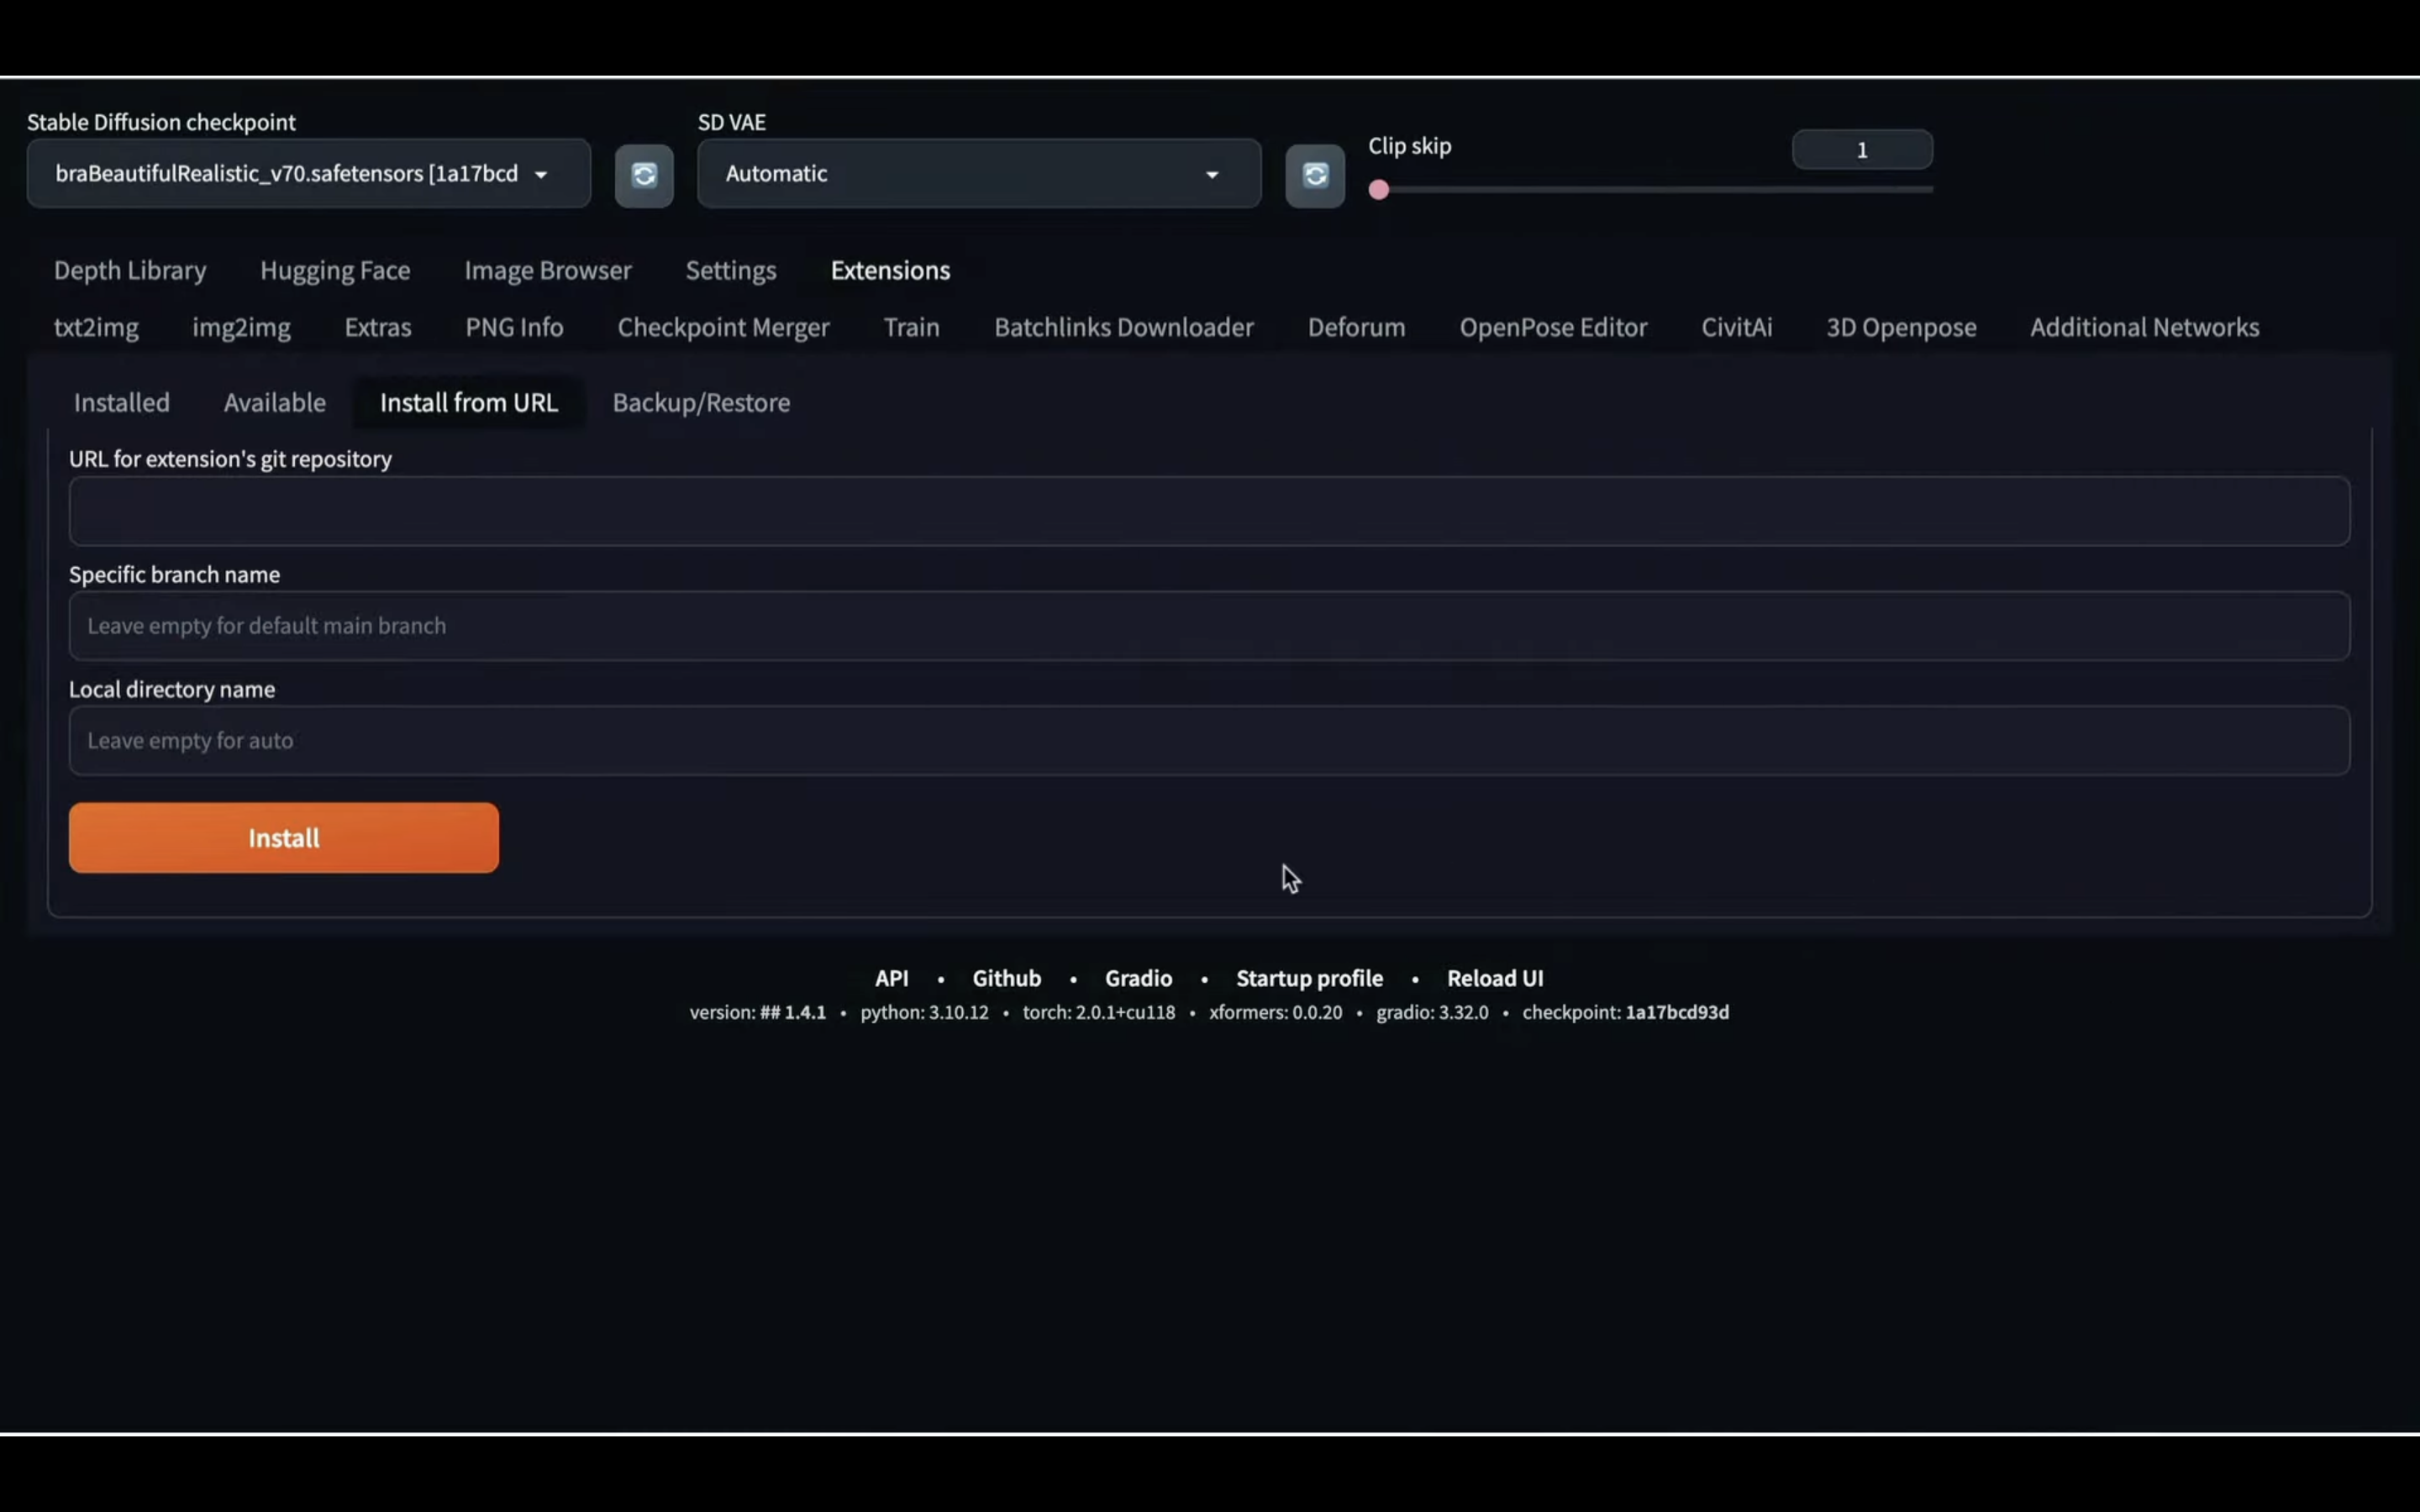
そしてこのテキストボックスにコピーしたURLを貼り付けます。
テキストを貼り付けたらインストールボタンをクリックします。
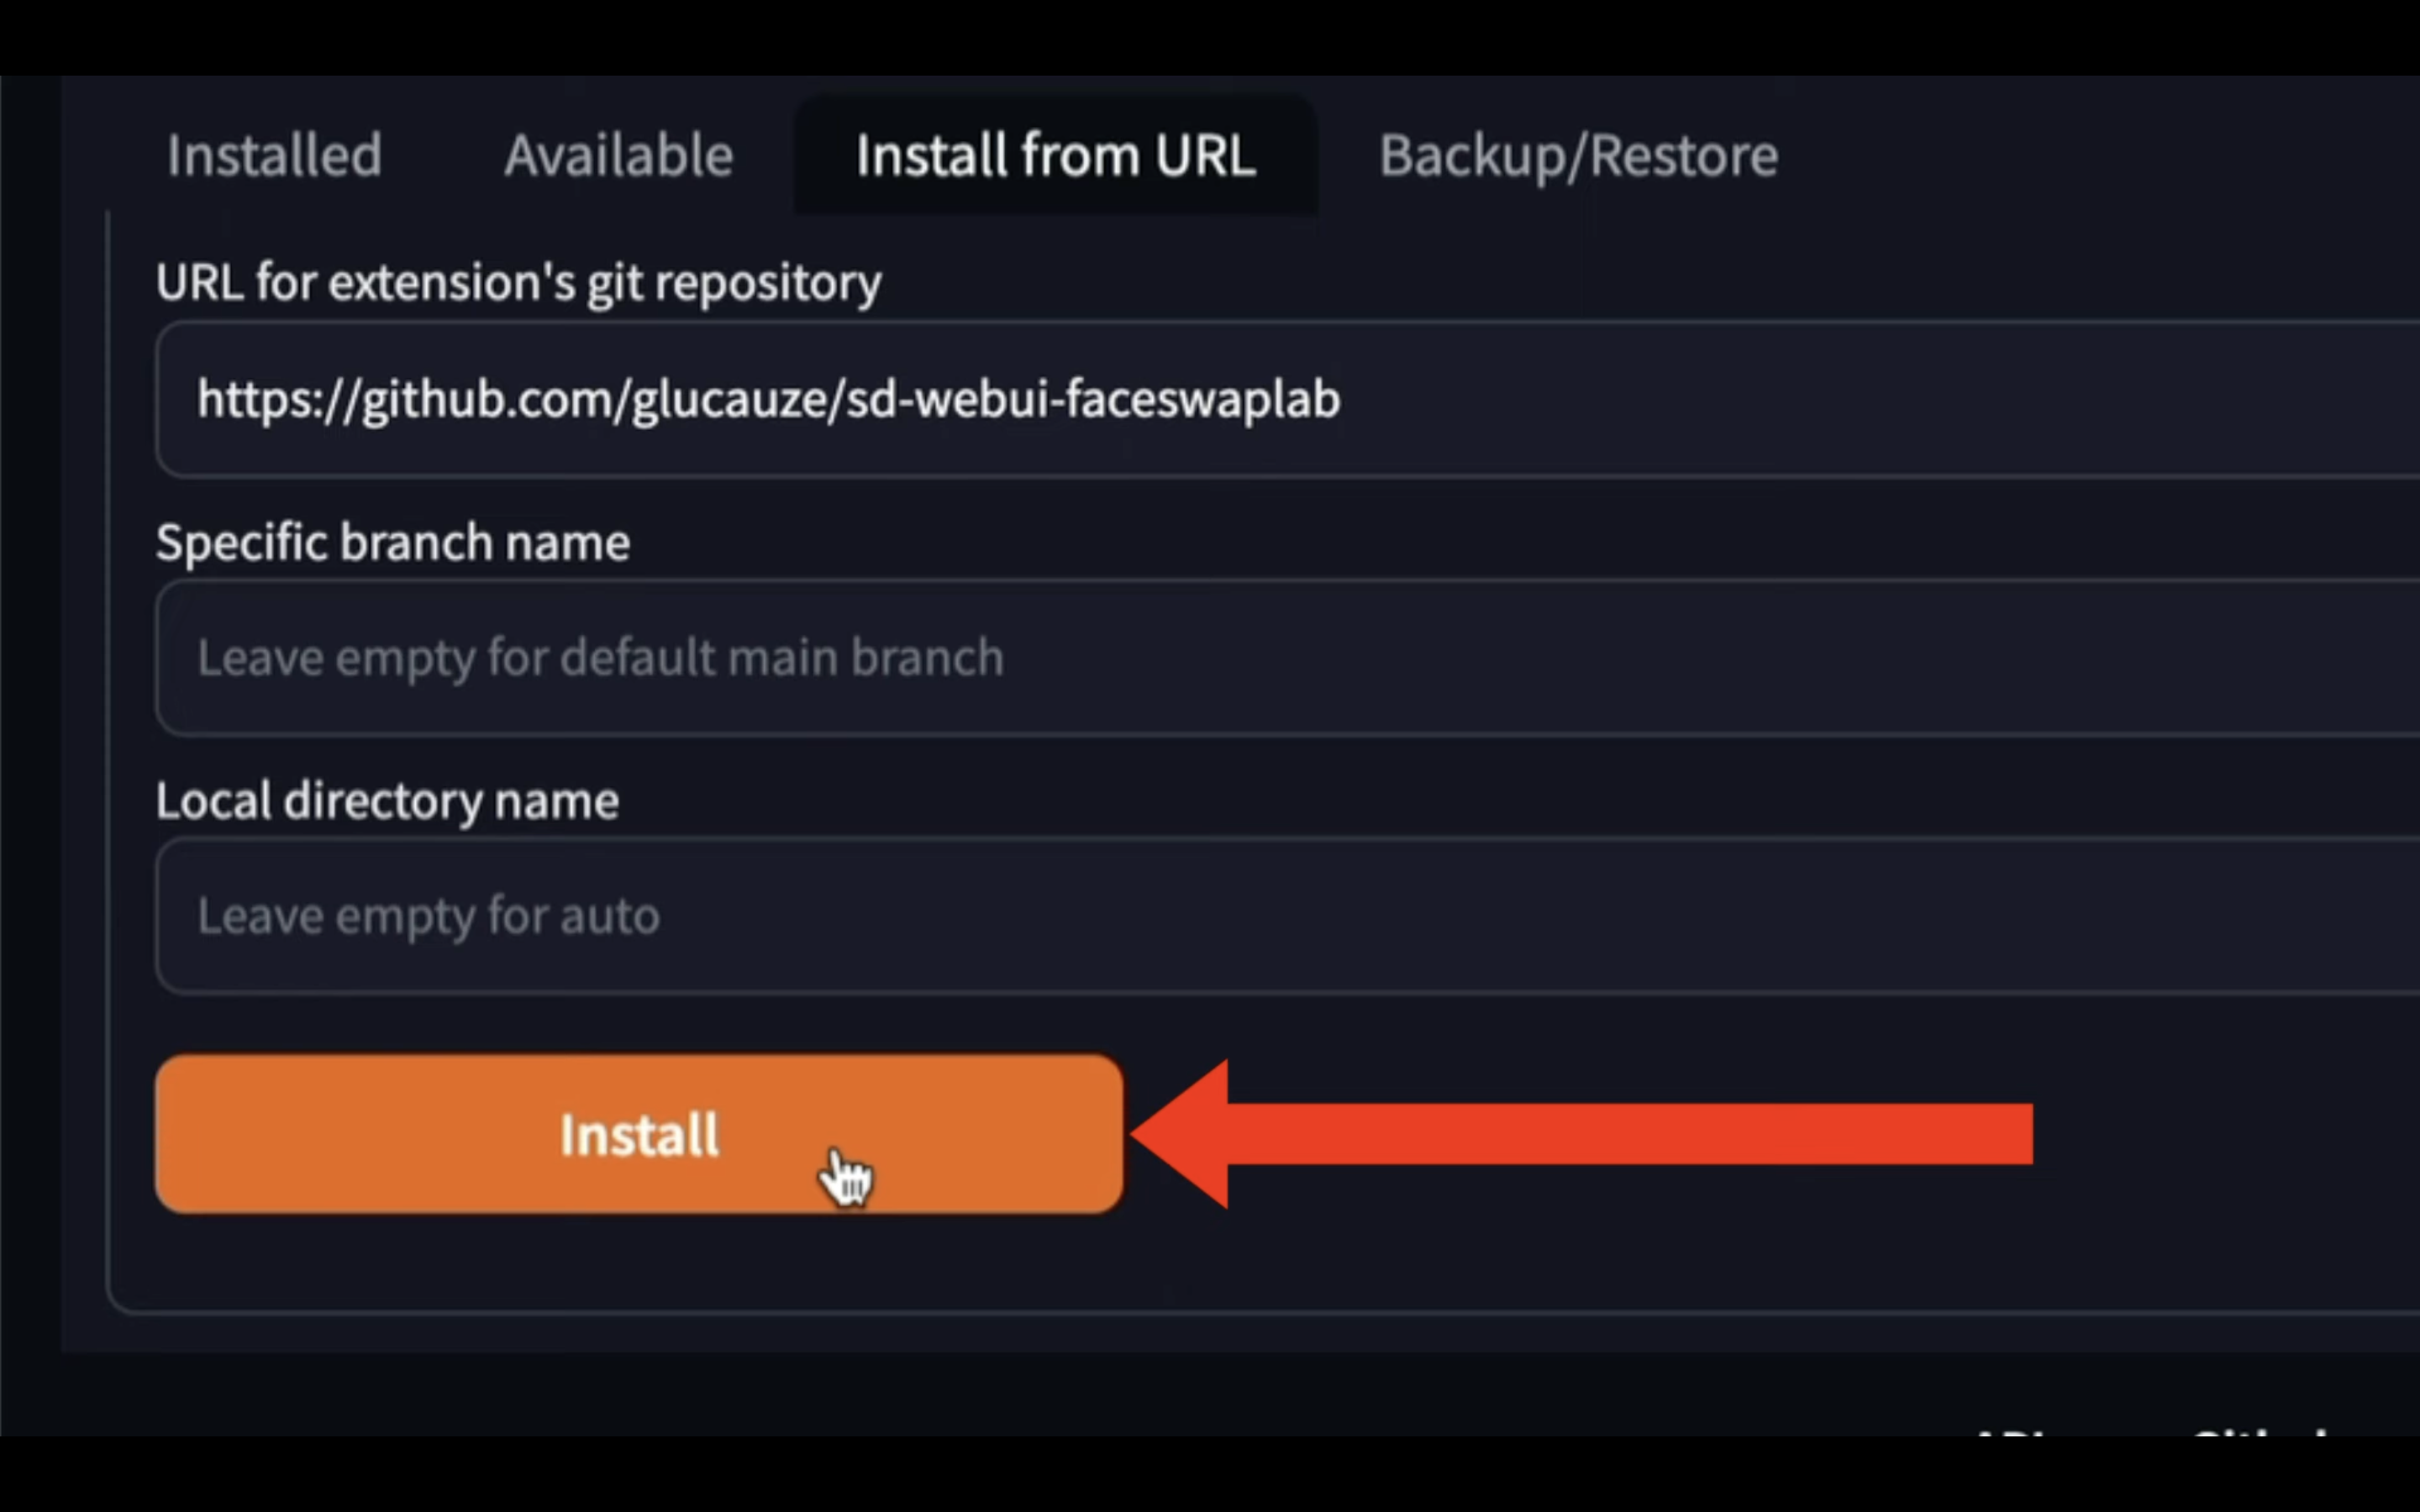
そうするとFaceSwapLabのExtensionsのインストールが開始されます。
しばらく待っていると、このようなメッセージが表示されます。
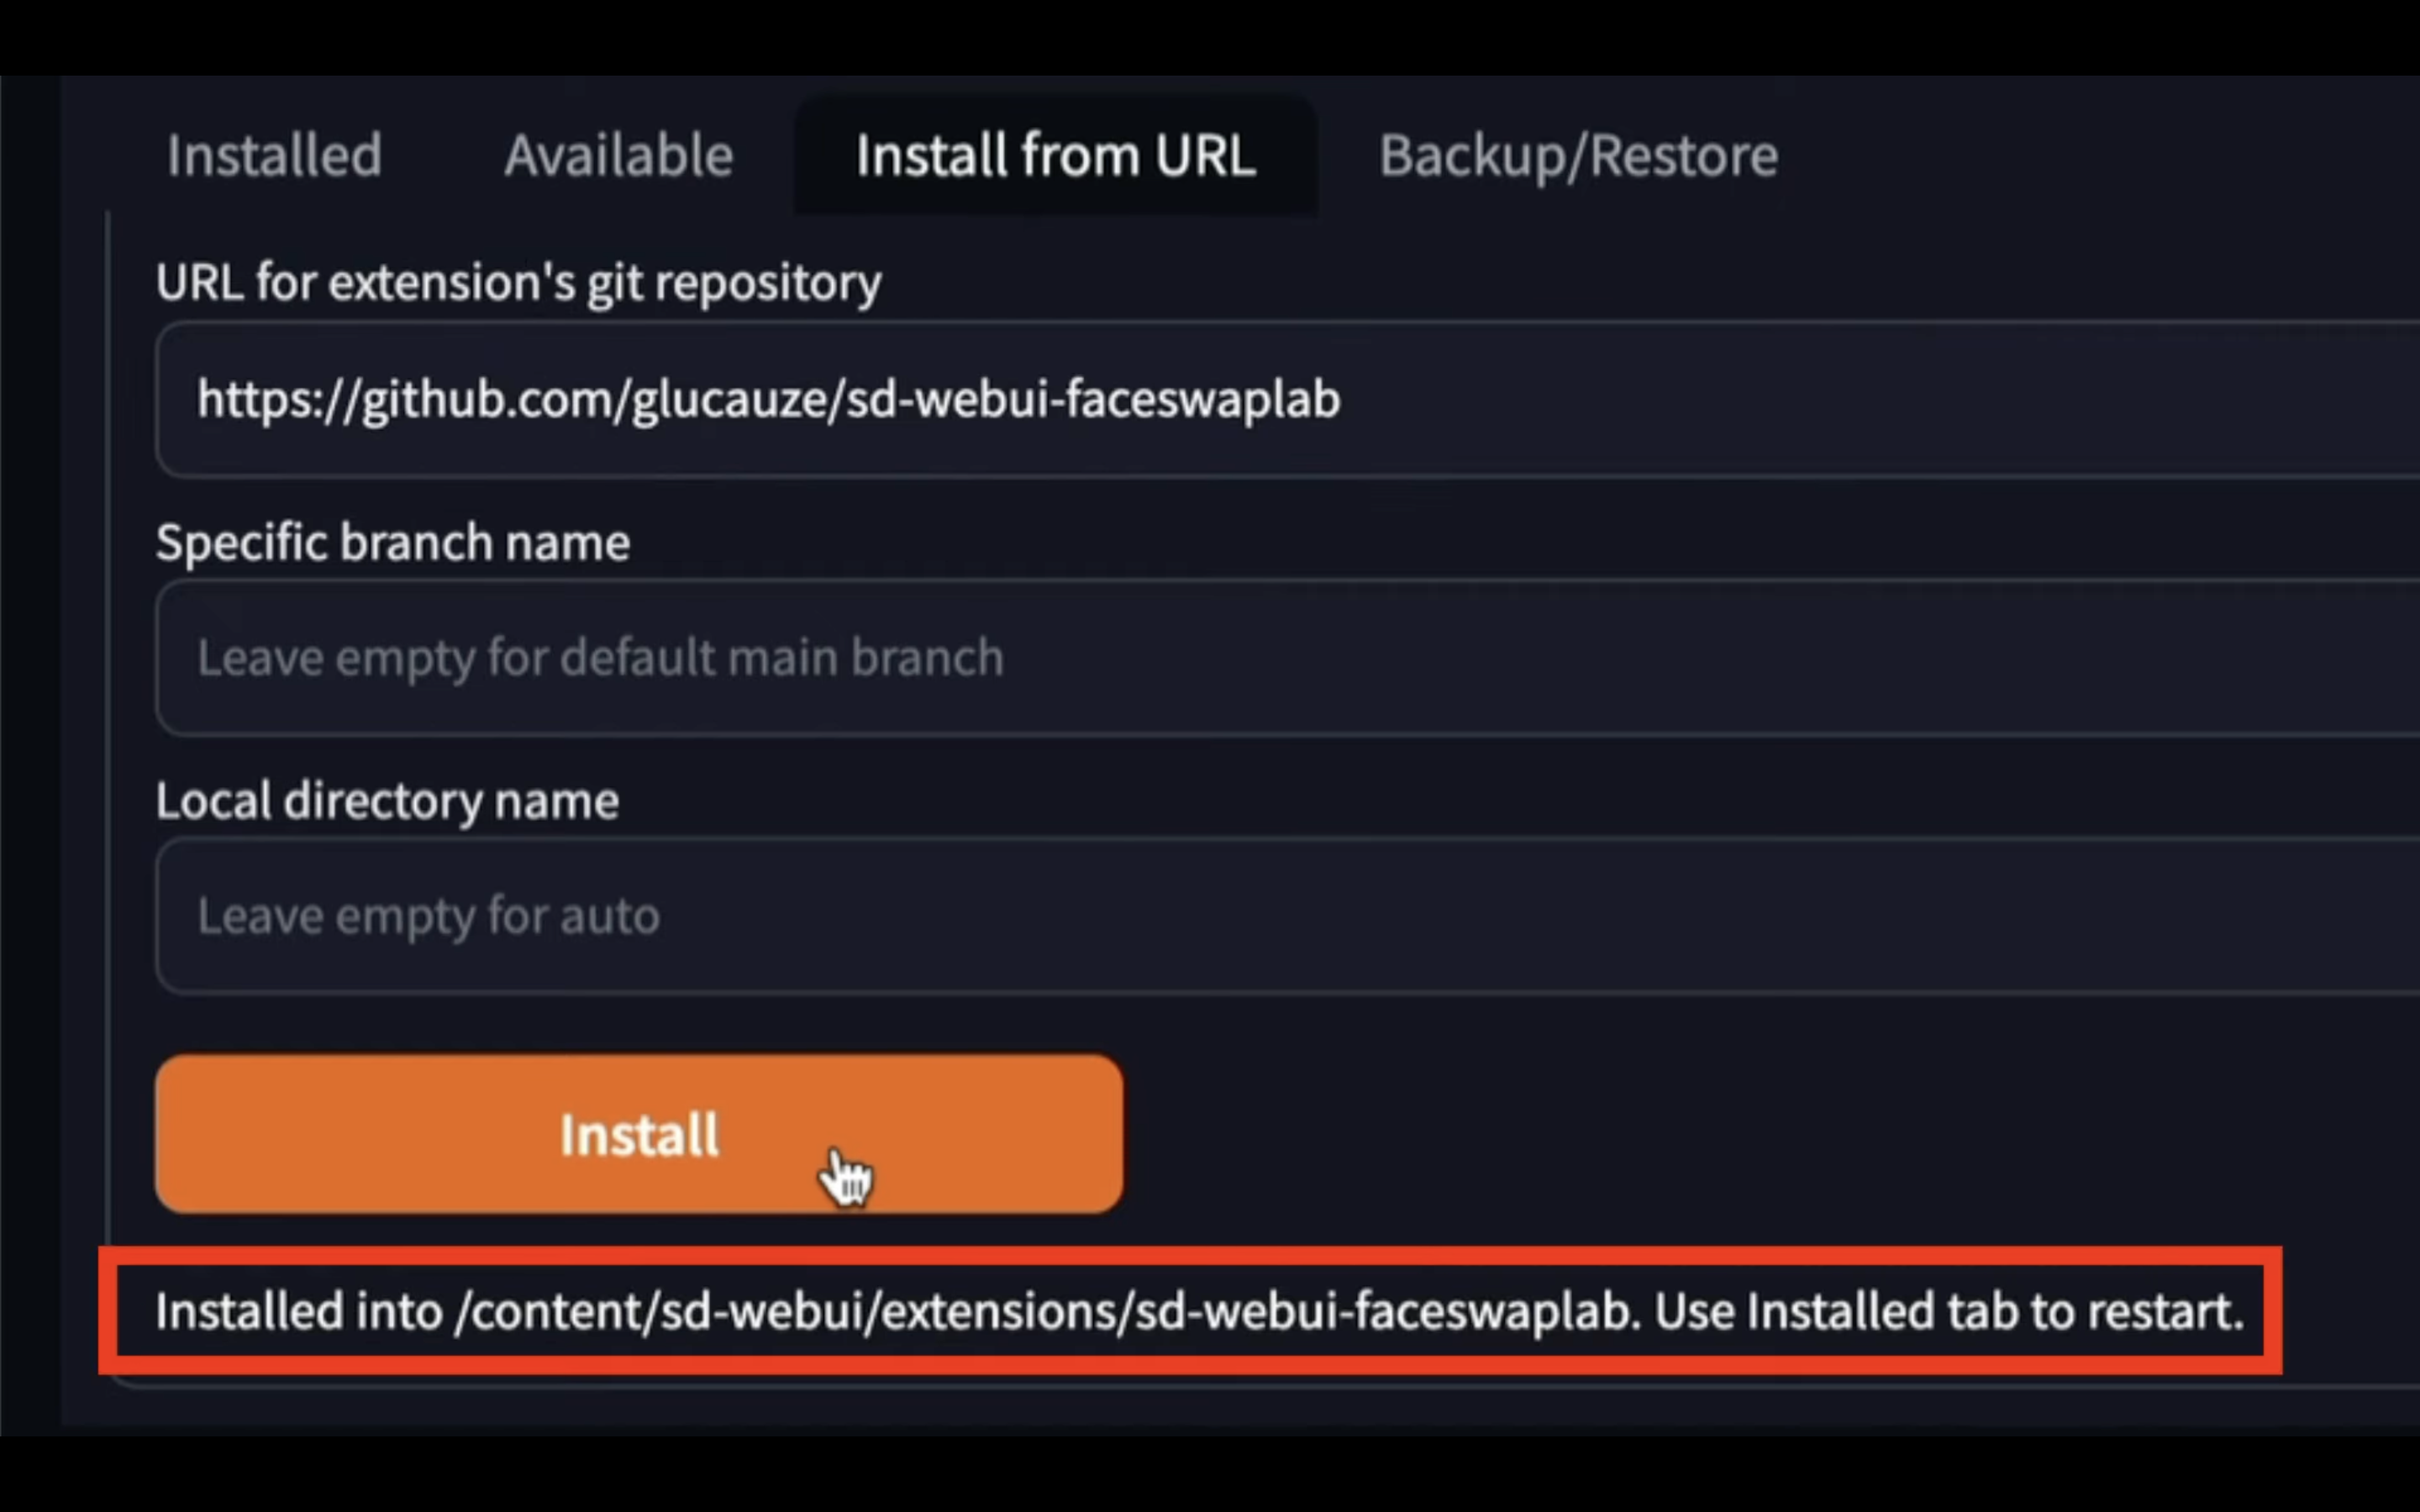
これでFaceSwapLabのエクステンションのインストールが完了しました。
FaceSwapLabのエクステンションを有効にするためには、一旦オートマティックイイを停止させます。
Google Colabの画面に切り替えます。
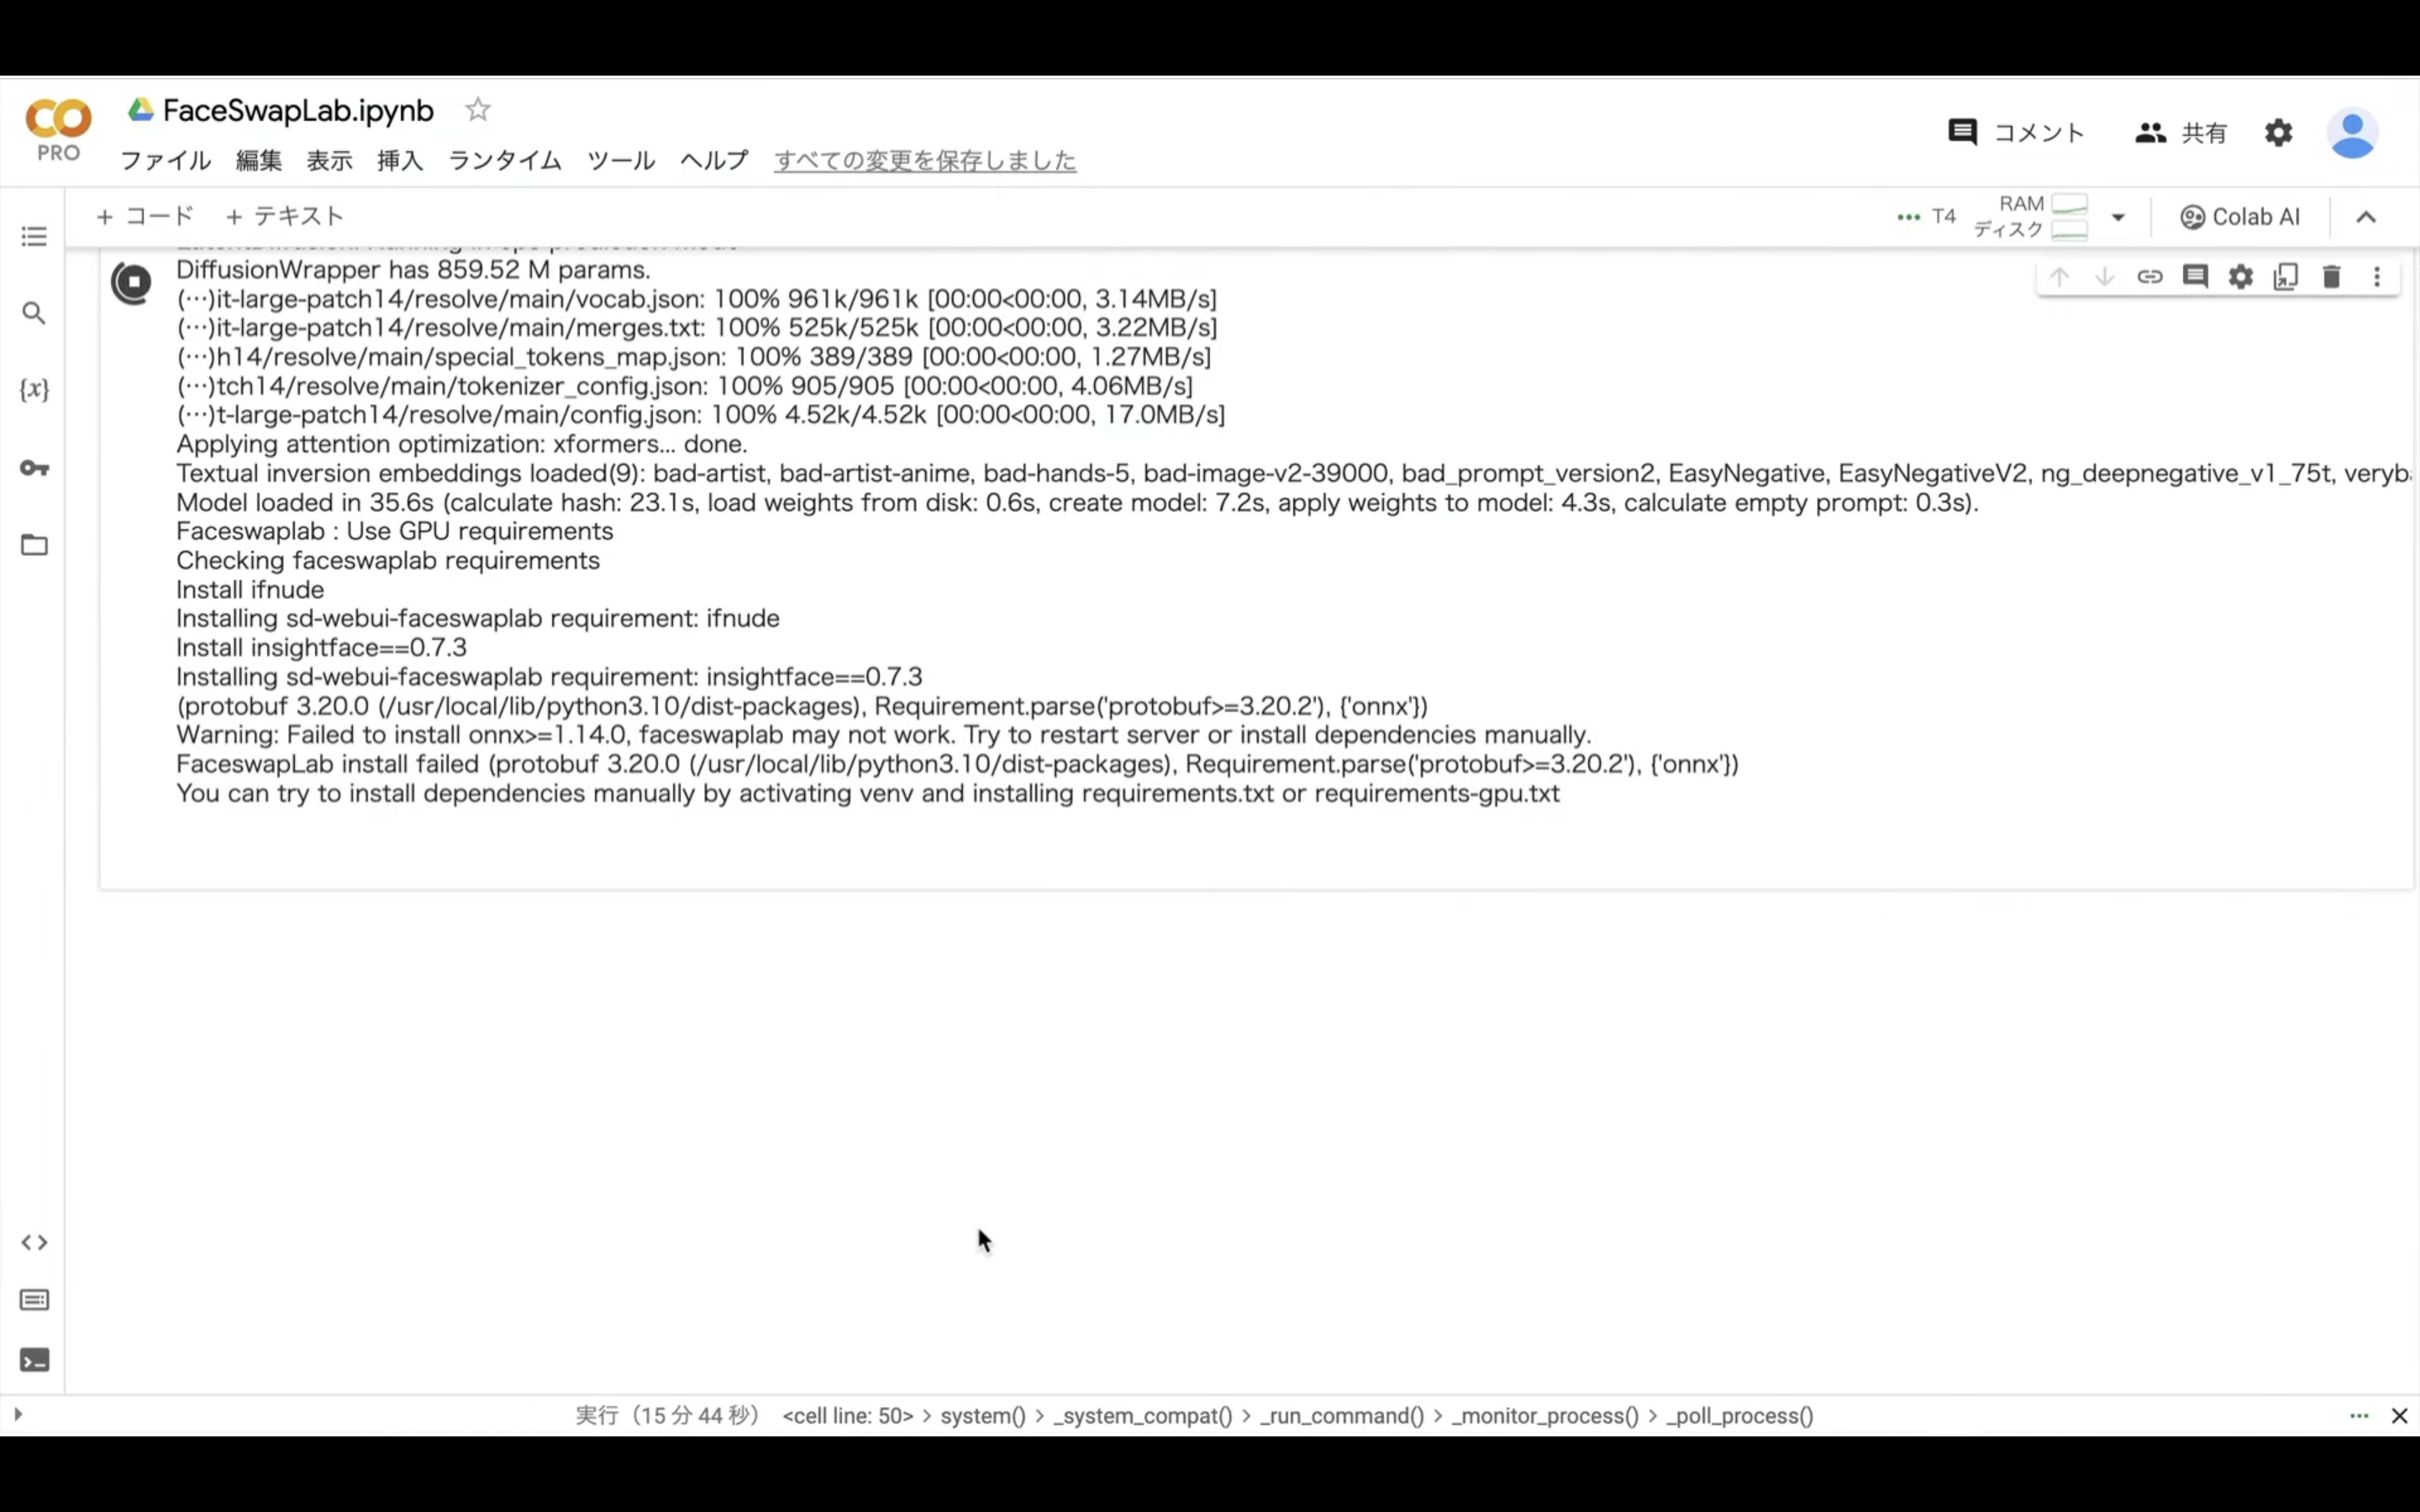
この画面に切り替えたら、停止ボタンをクリックします。
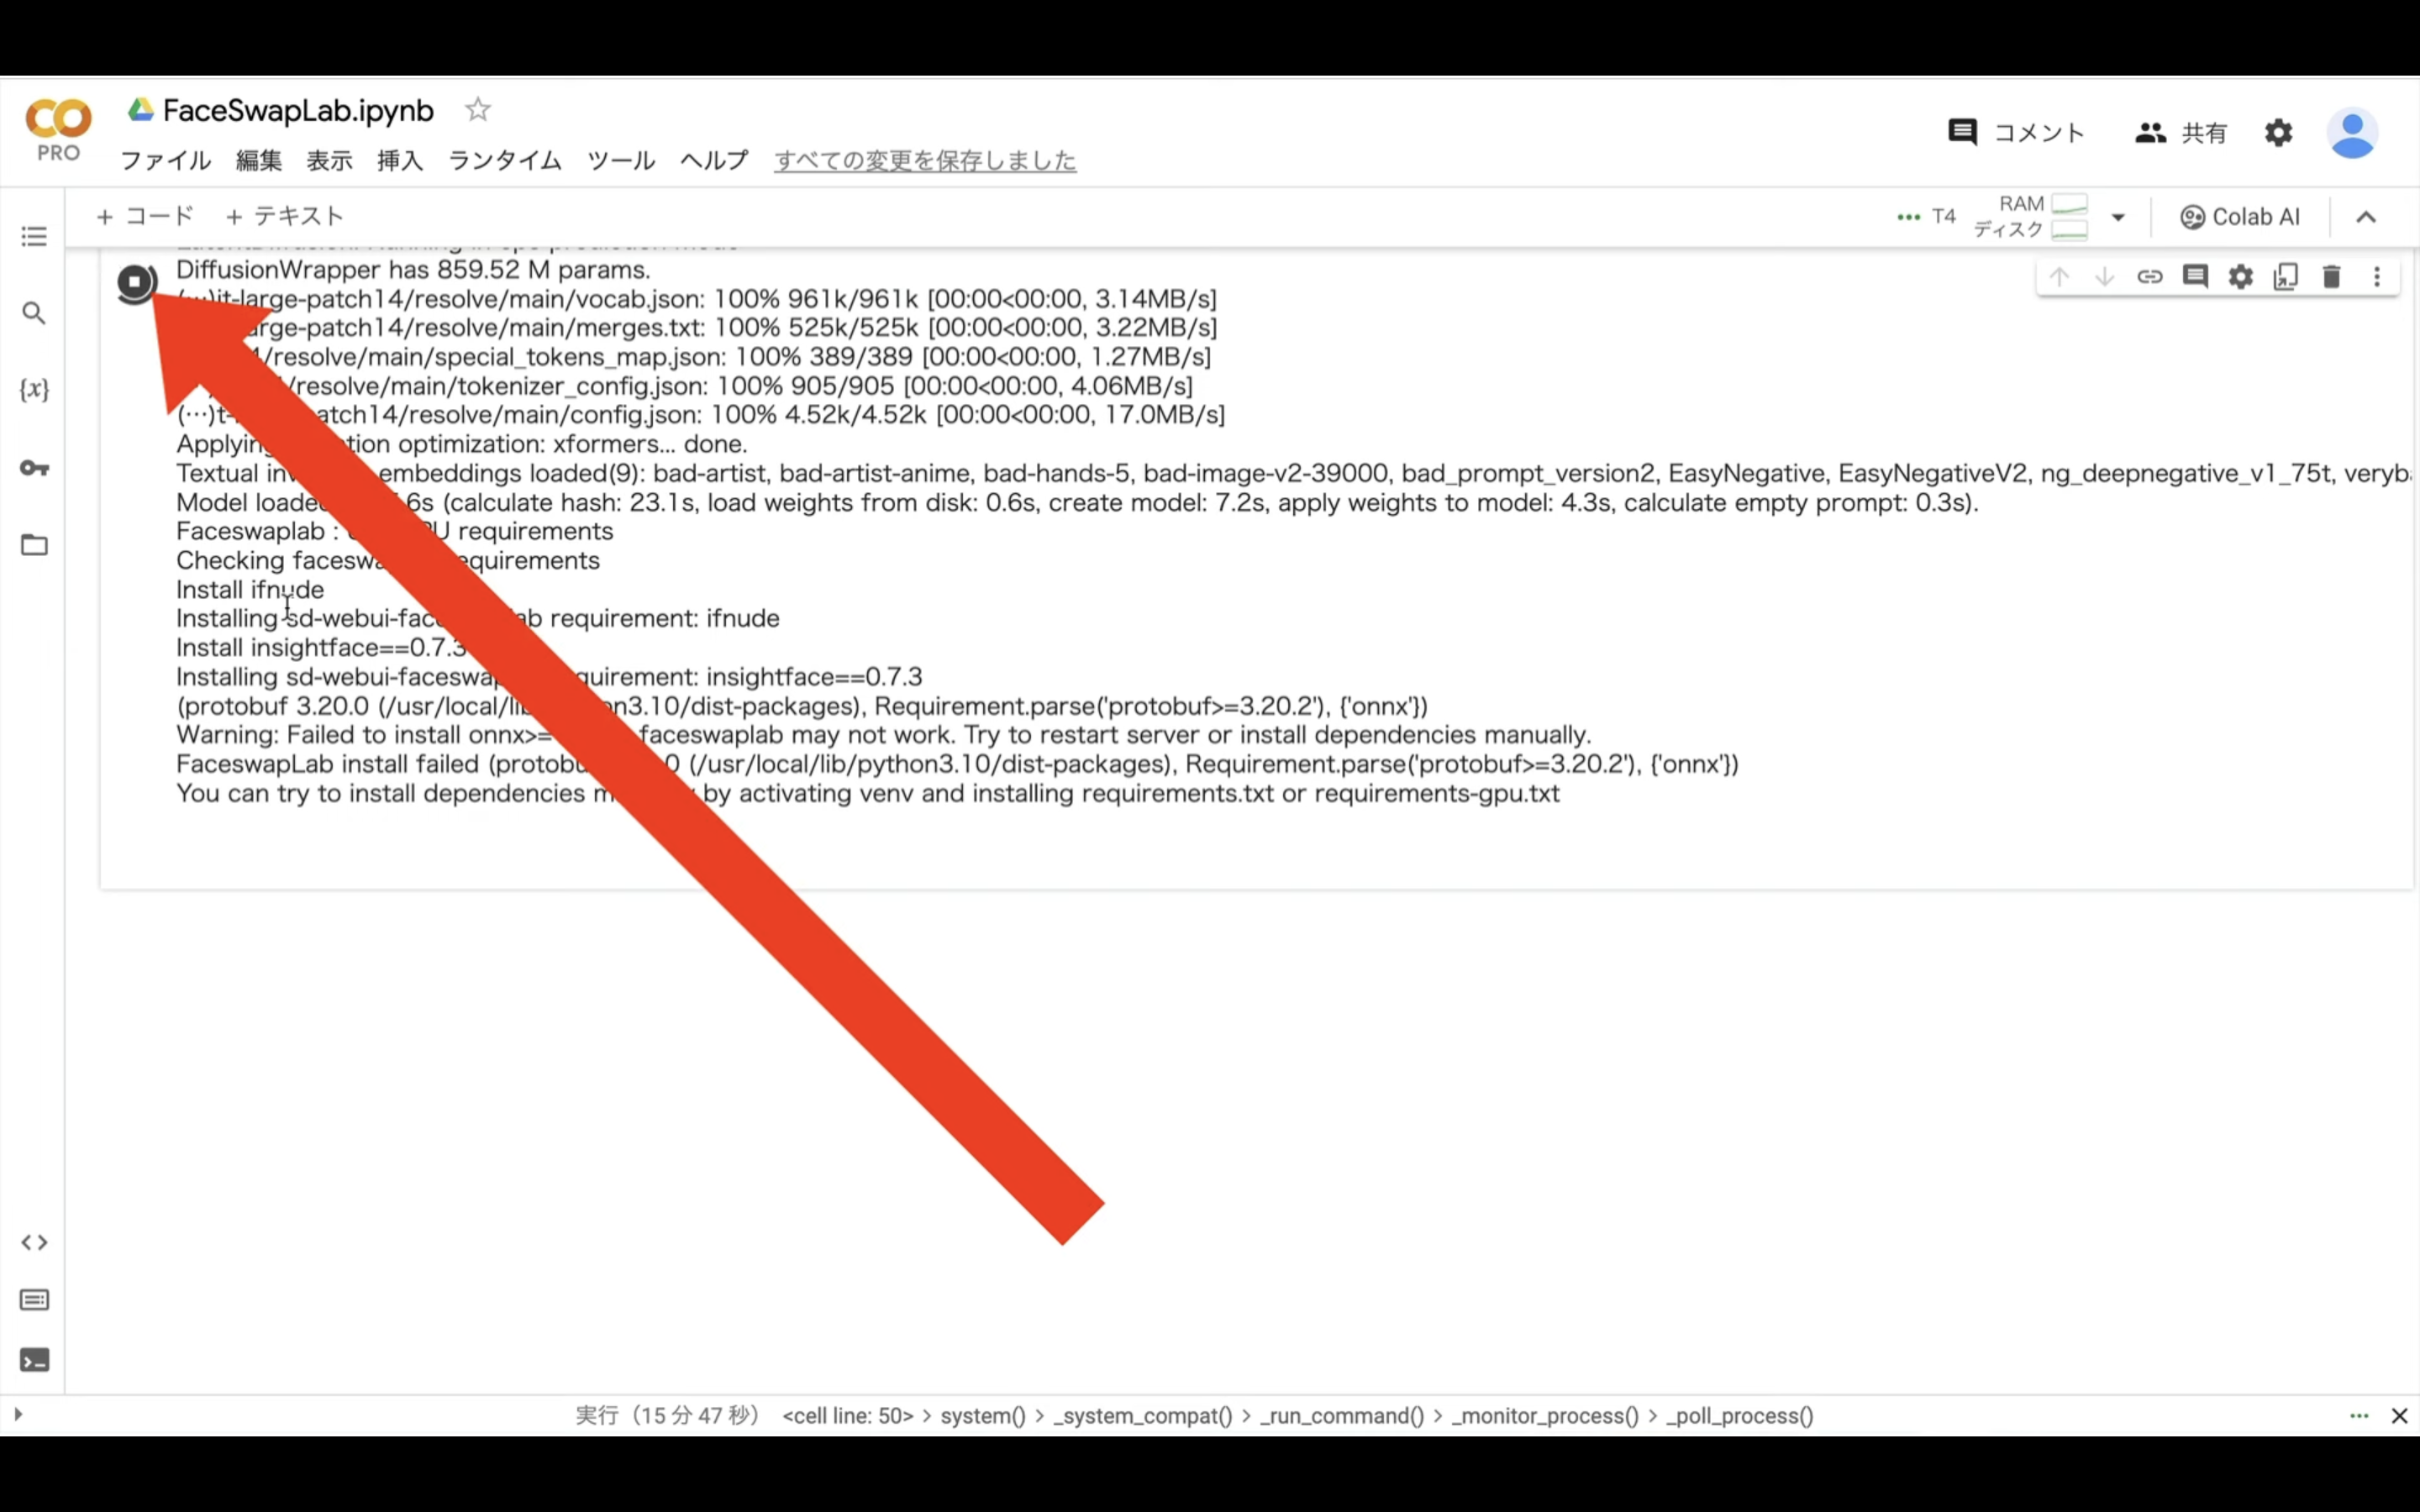
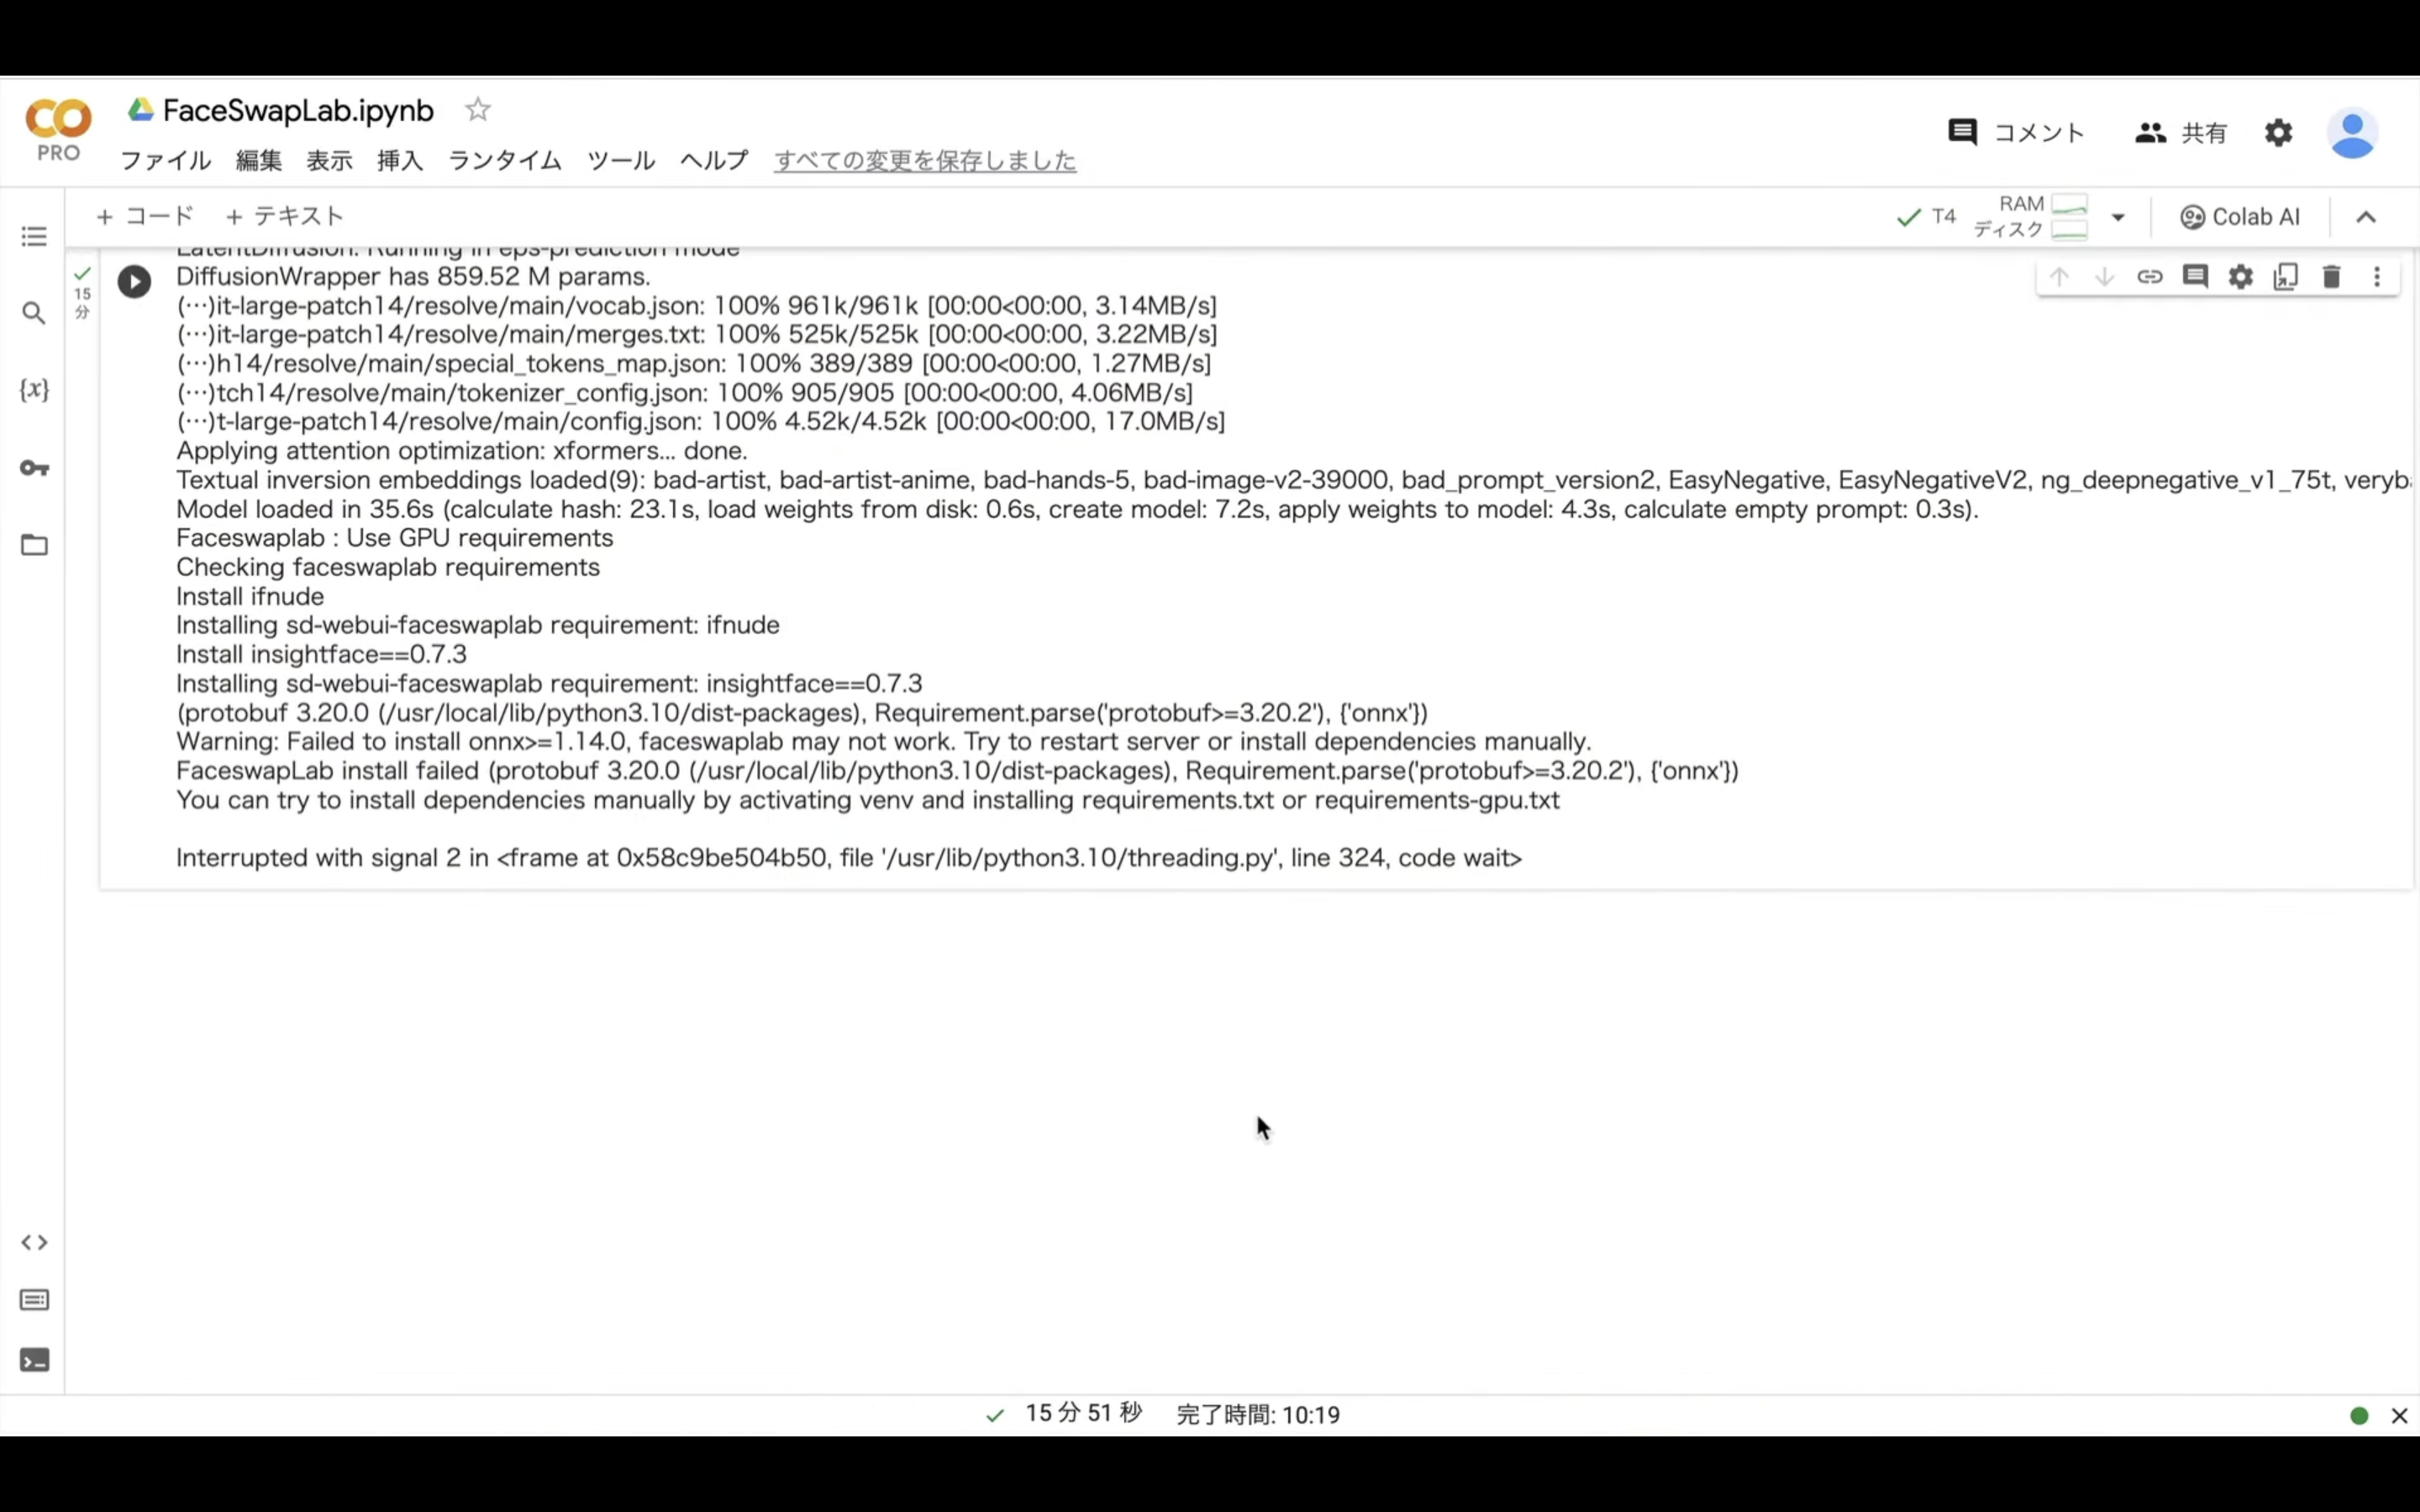
これでAutomatic1111を停止することができました。
Automatic1111をもう一度起動するためには、一旦以下に貼ってあるテキストをコピーします。
%cd /content/sd-webui
!python launch.py --listen --xformers --enable-insecure-extension-access  --theme dark --gradio-queue --multiple
テキストをコピーしたらGoogle Colabの画面に戻ります。
Google Colabの画面に戻ったら、コードと書かれているテキストをクリックします。
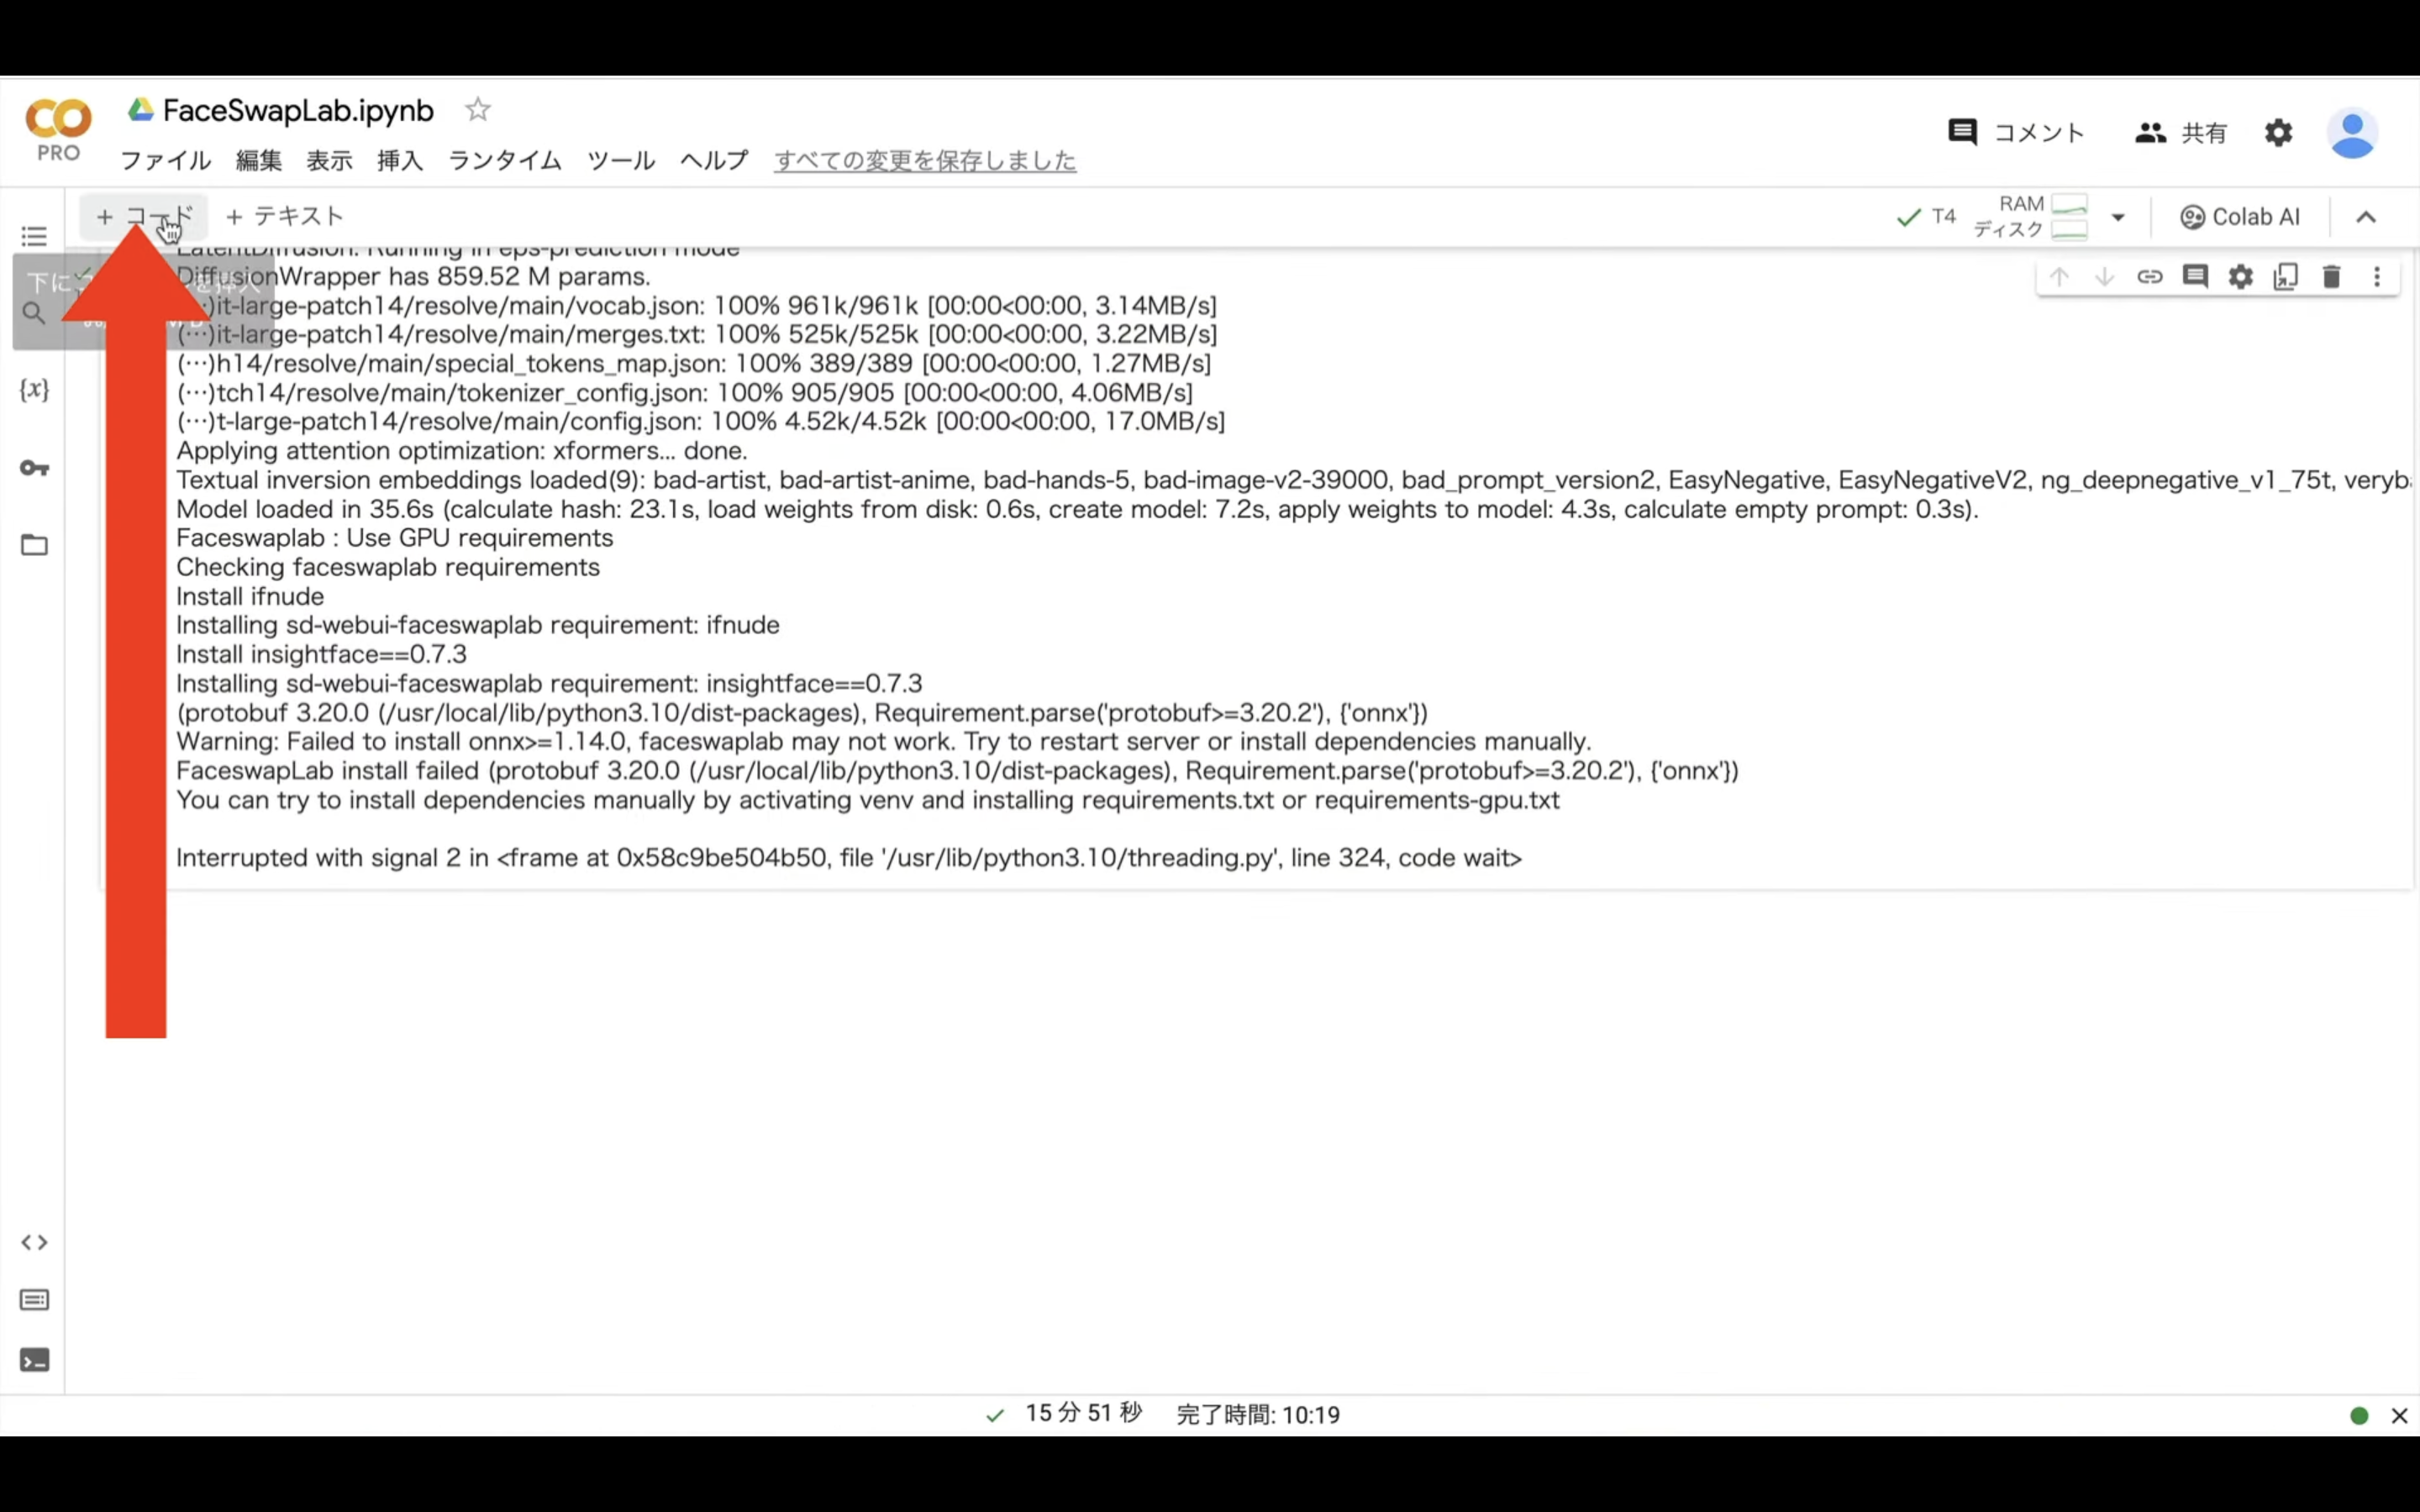
そうすると新しいテキストボックスが追加されます。
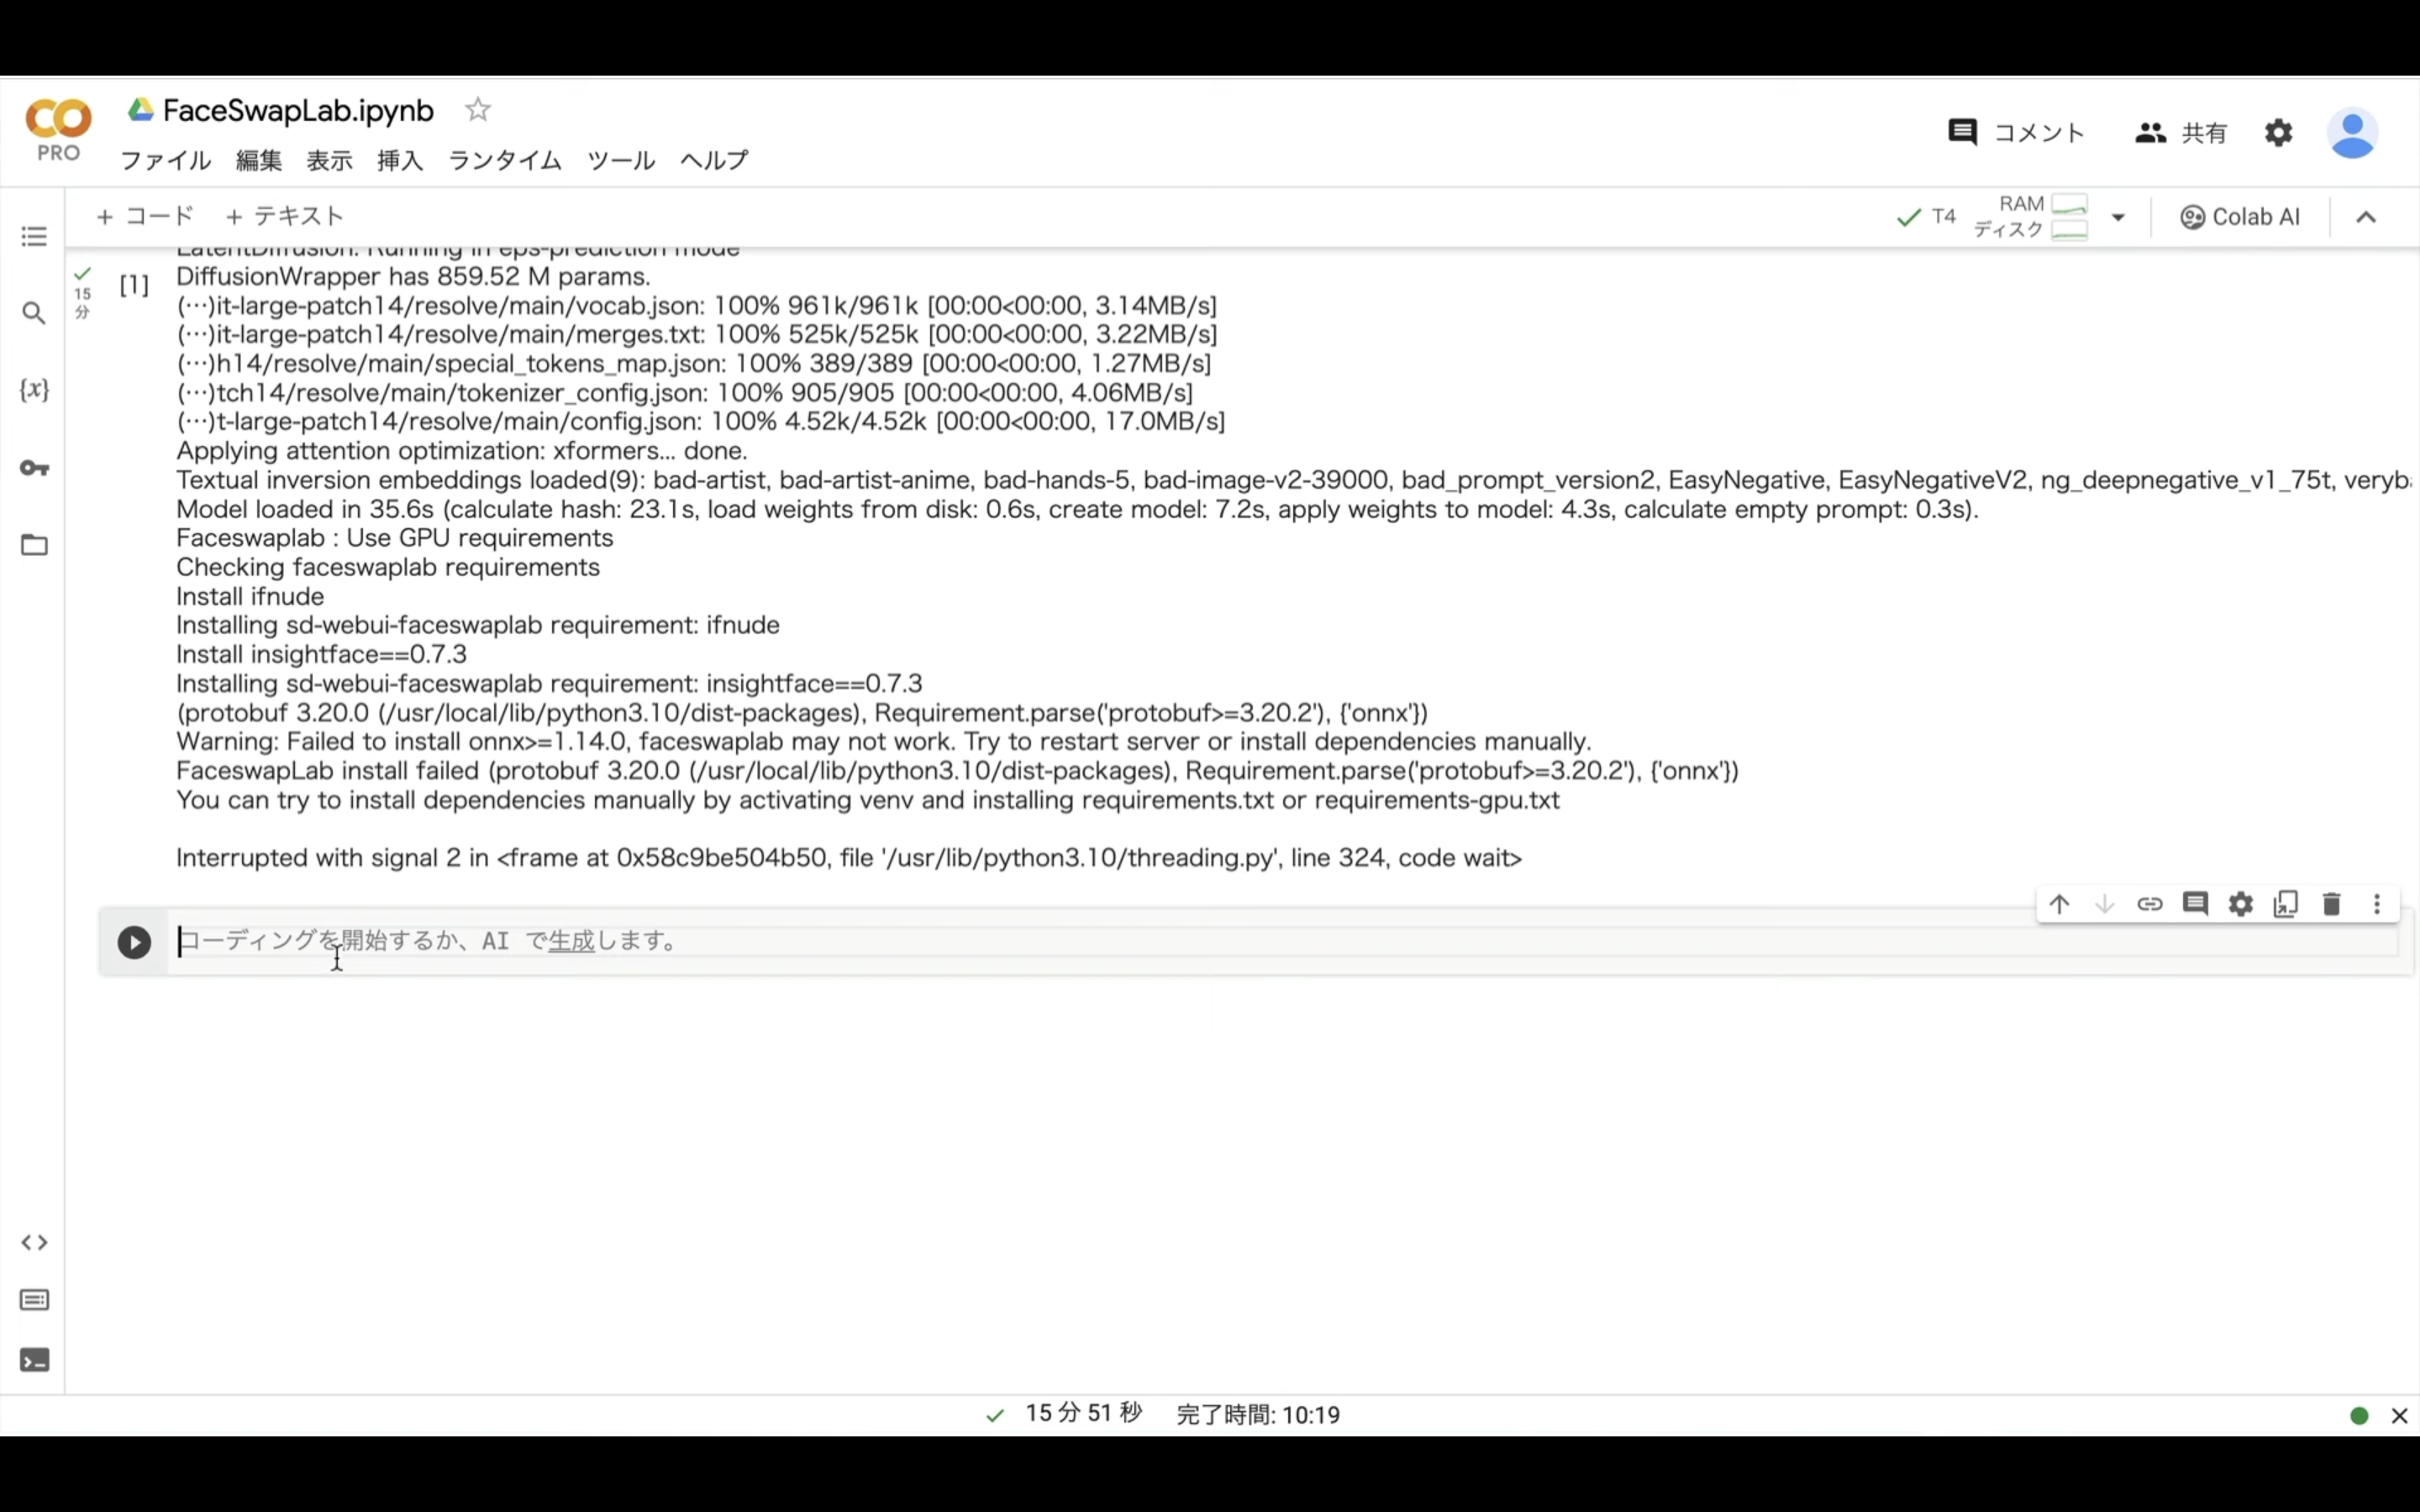
この追加されたテキストボックスに先ほどコピーしたテキストを貼り付けます。

テキストを貼り付けたら再生ボタンを押します。
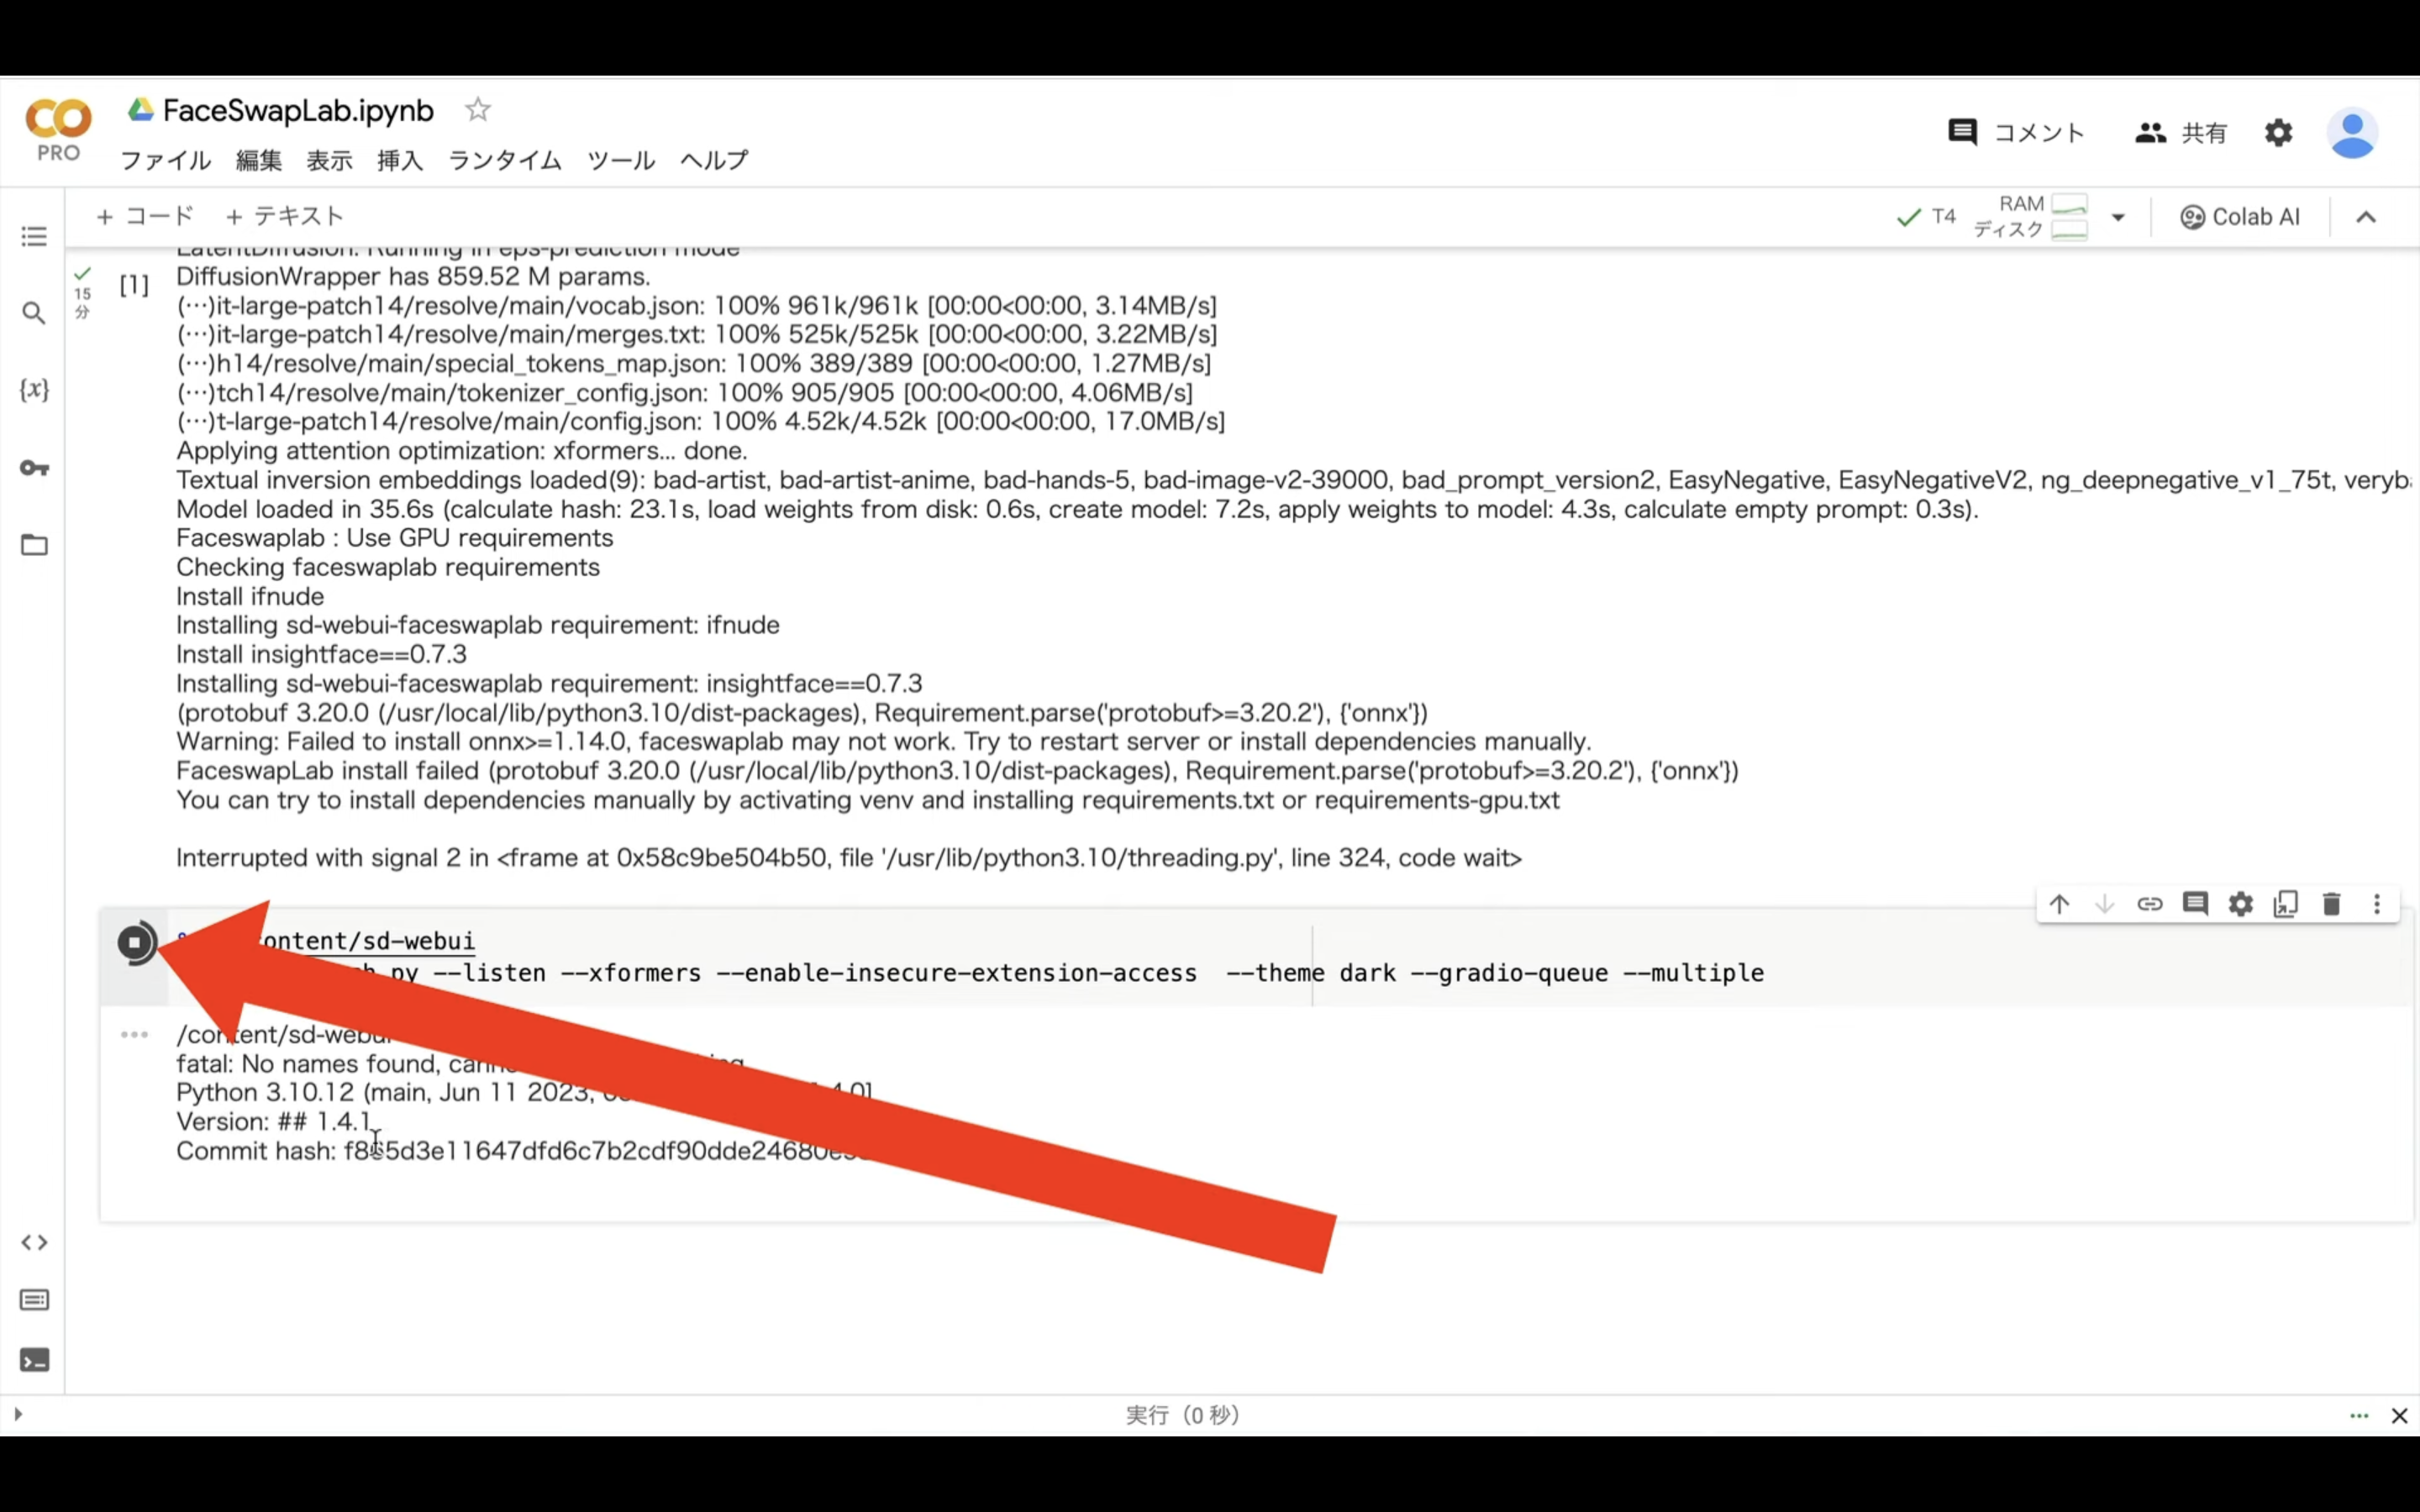
そうするとAutomatic1111の起動コマンドが実行されます。
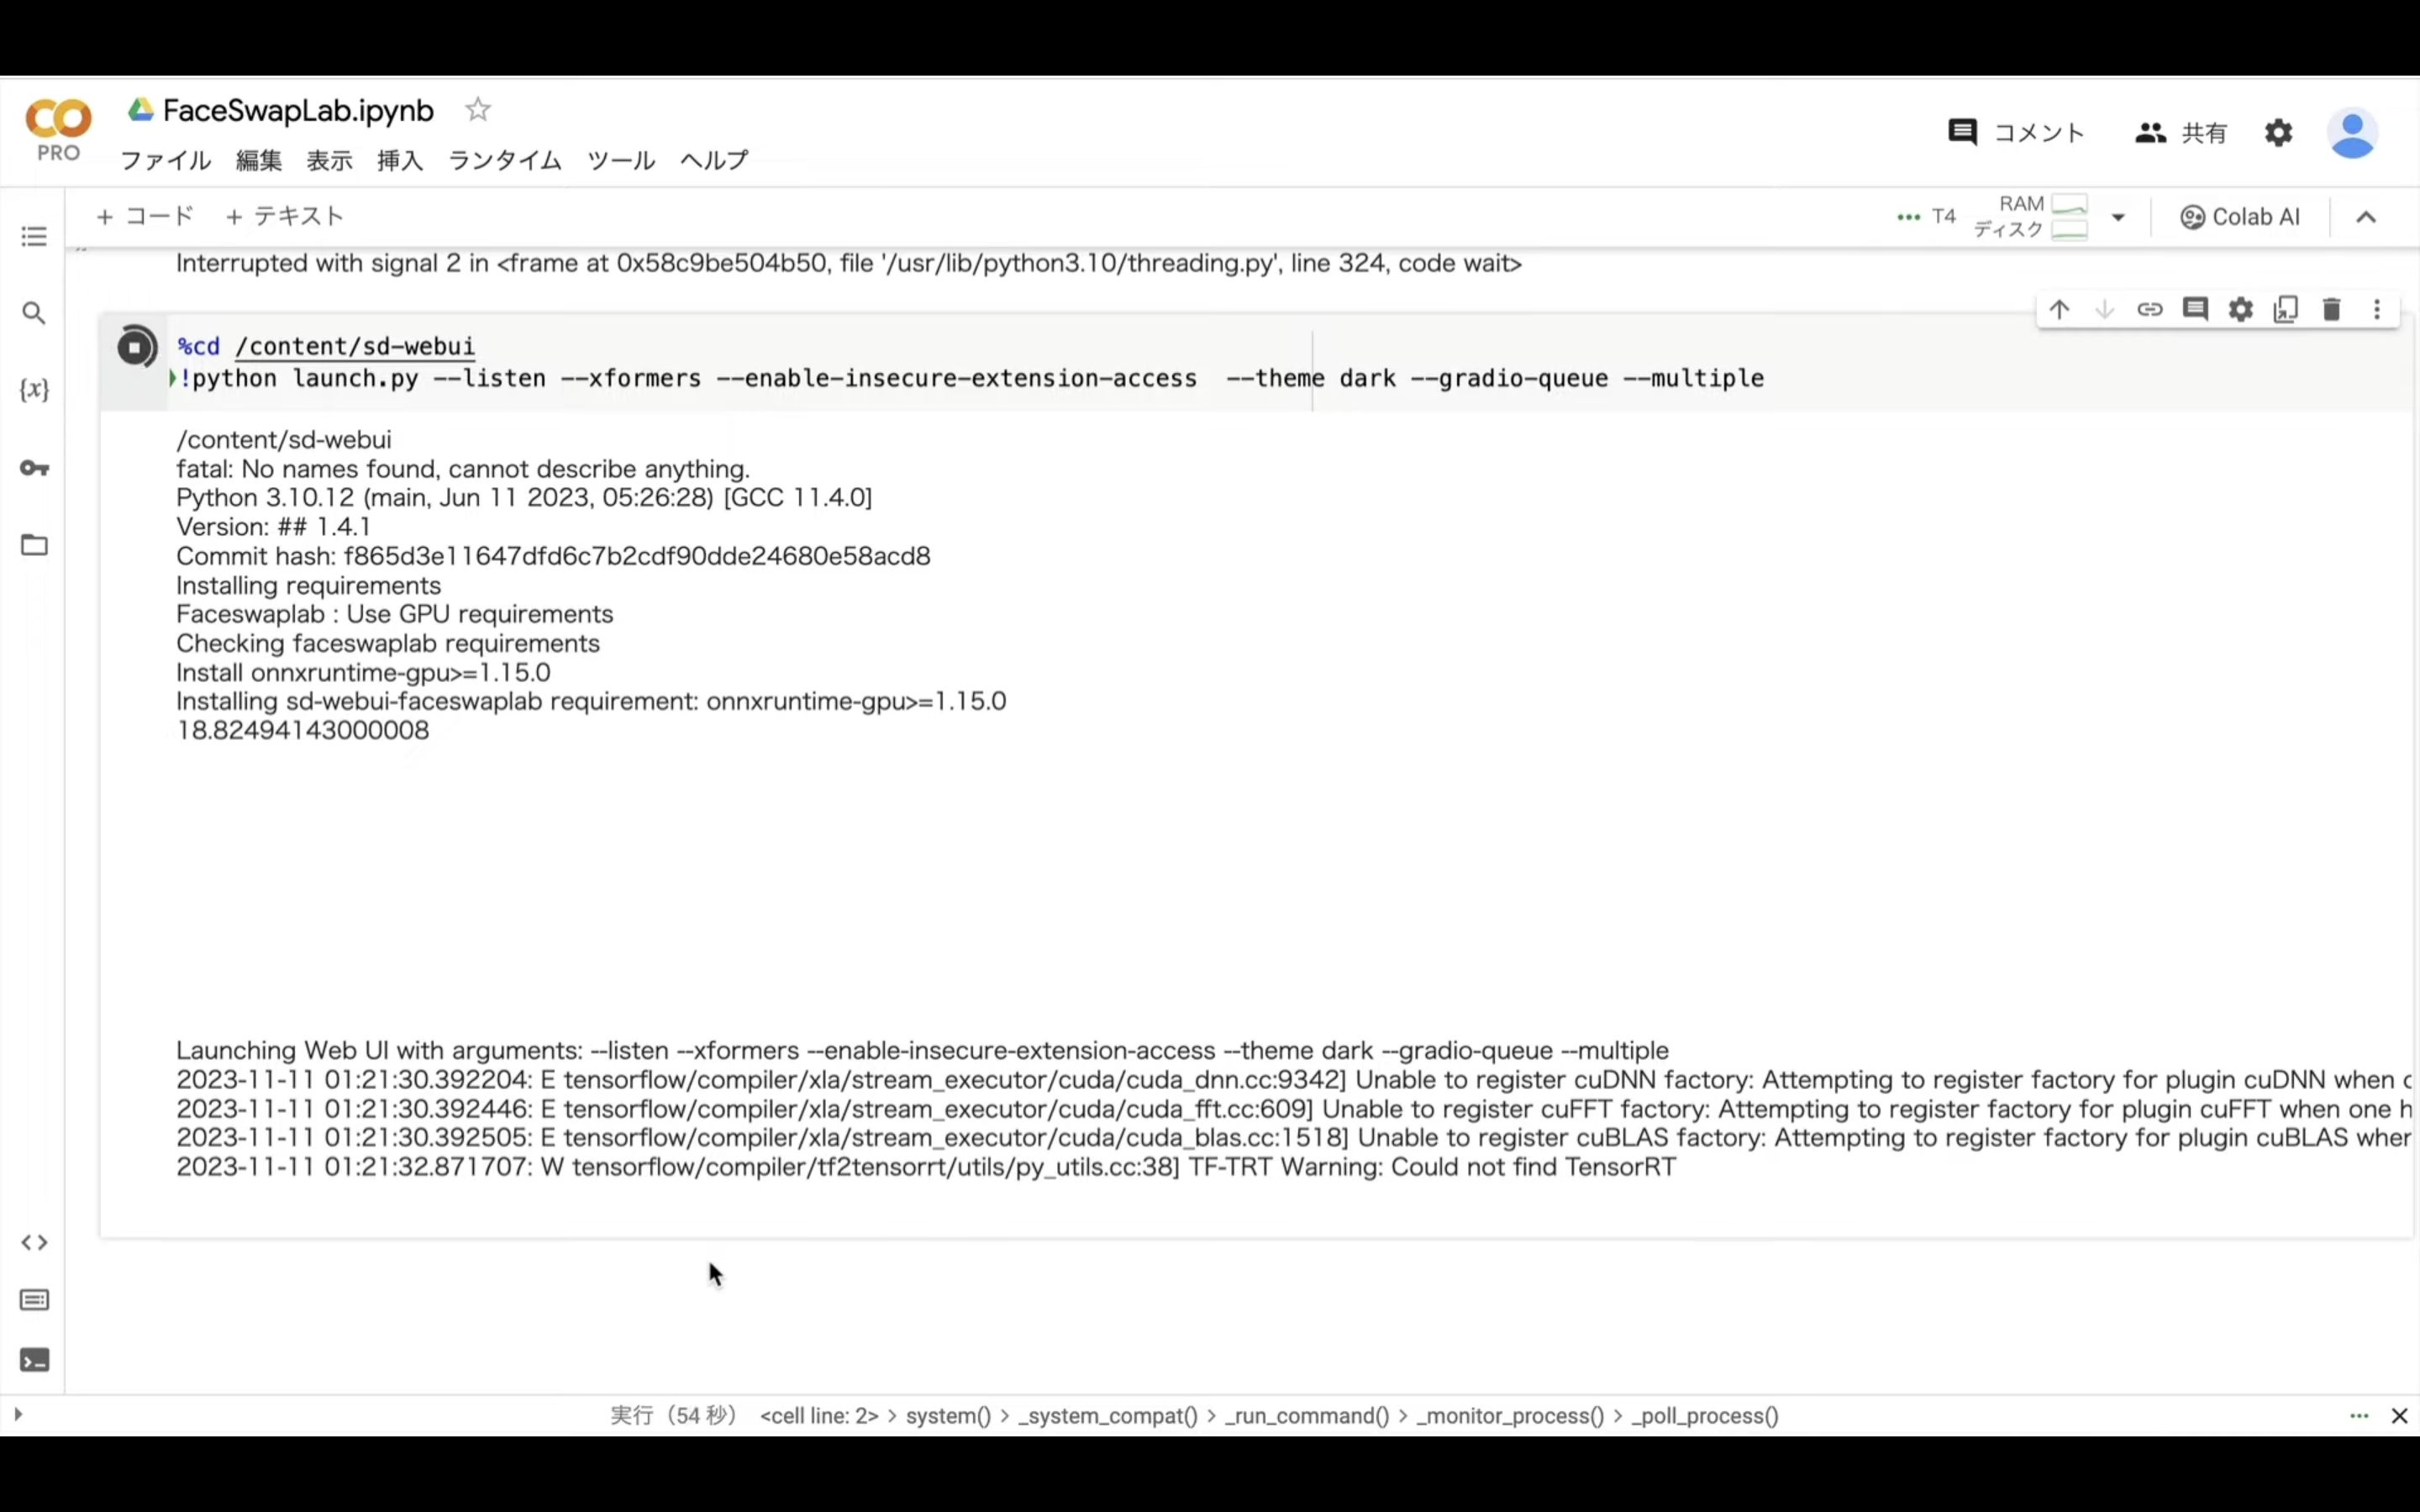
コマンドが実行されるまでしばらく待ちます。
しばらく待っているとこのようなリンクが表示されると思います。
このようなリンクが表示されたら、gradioと書かれているリンクをクリックします。
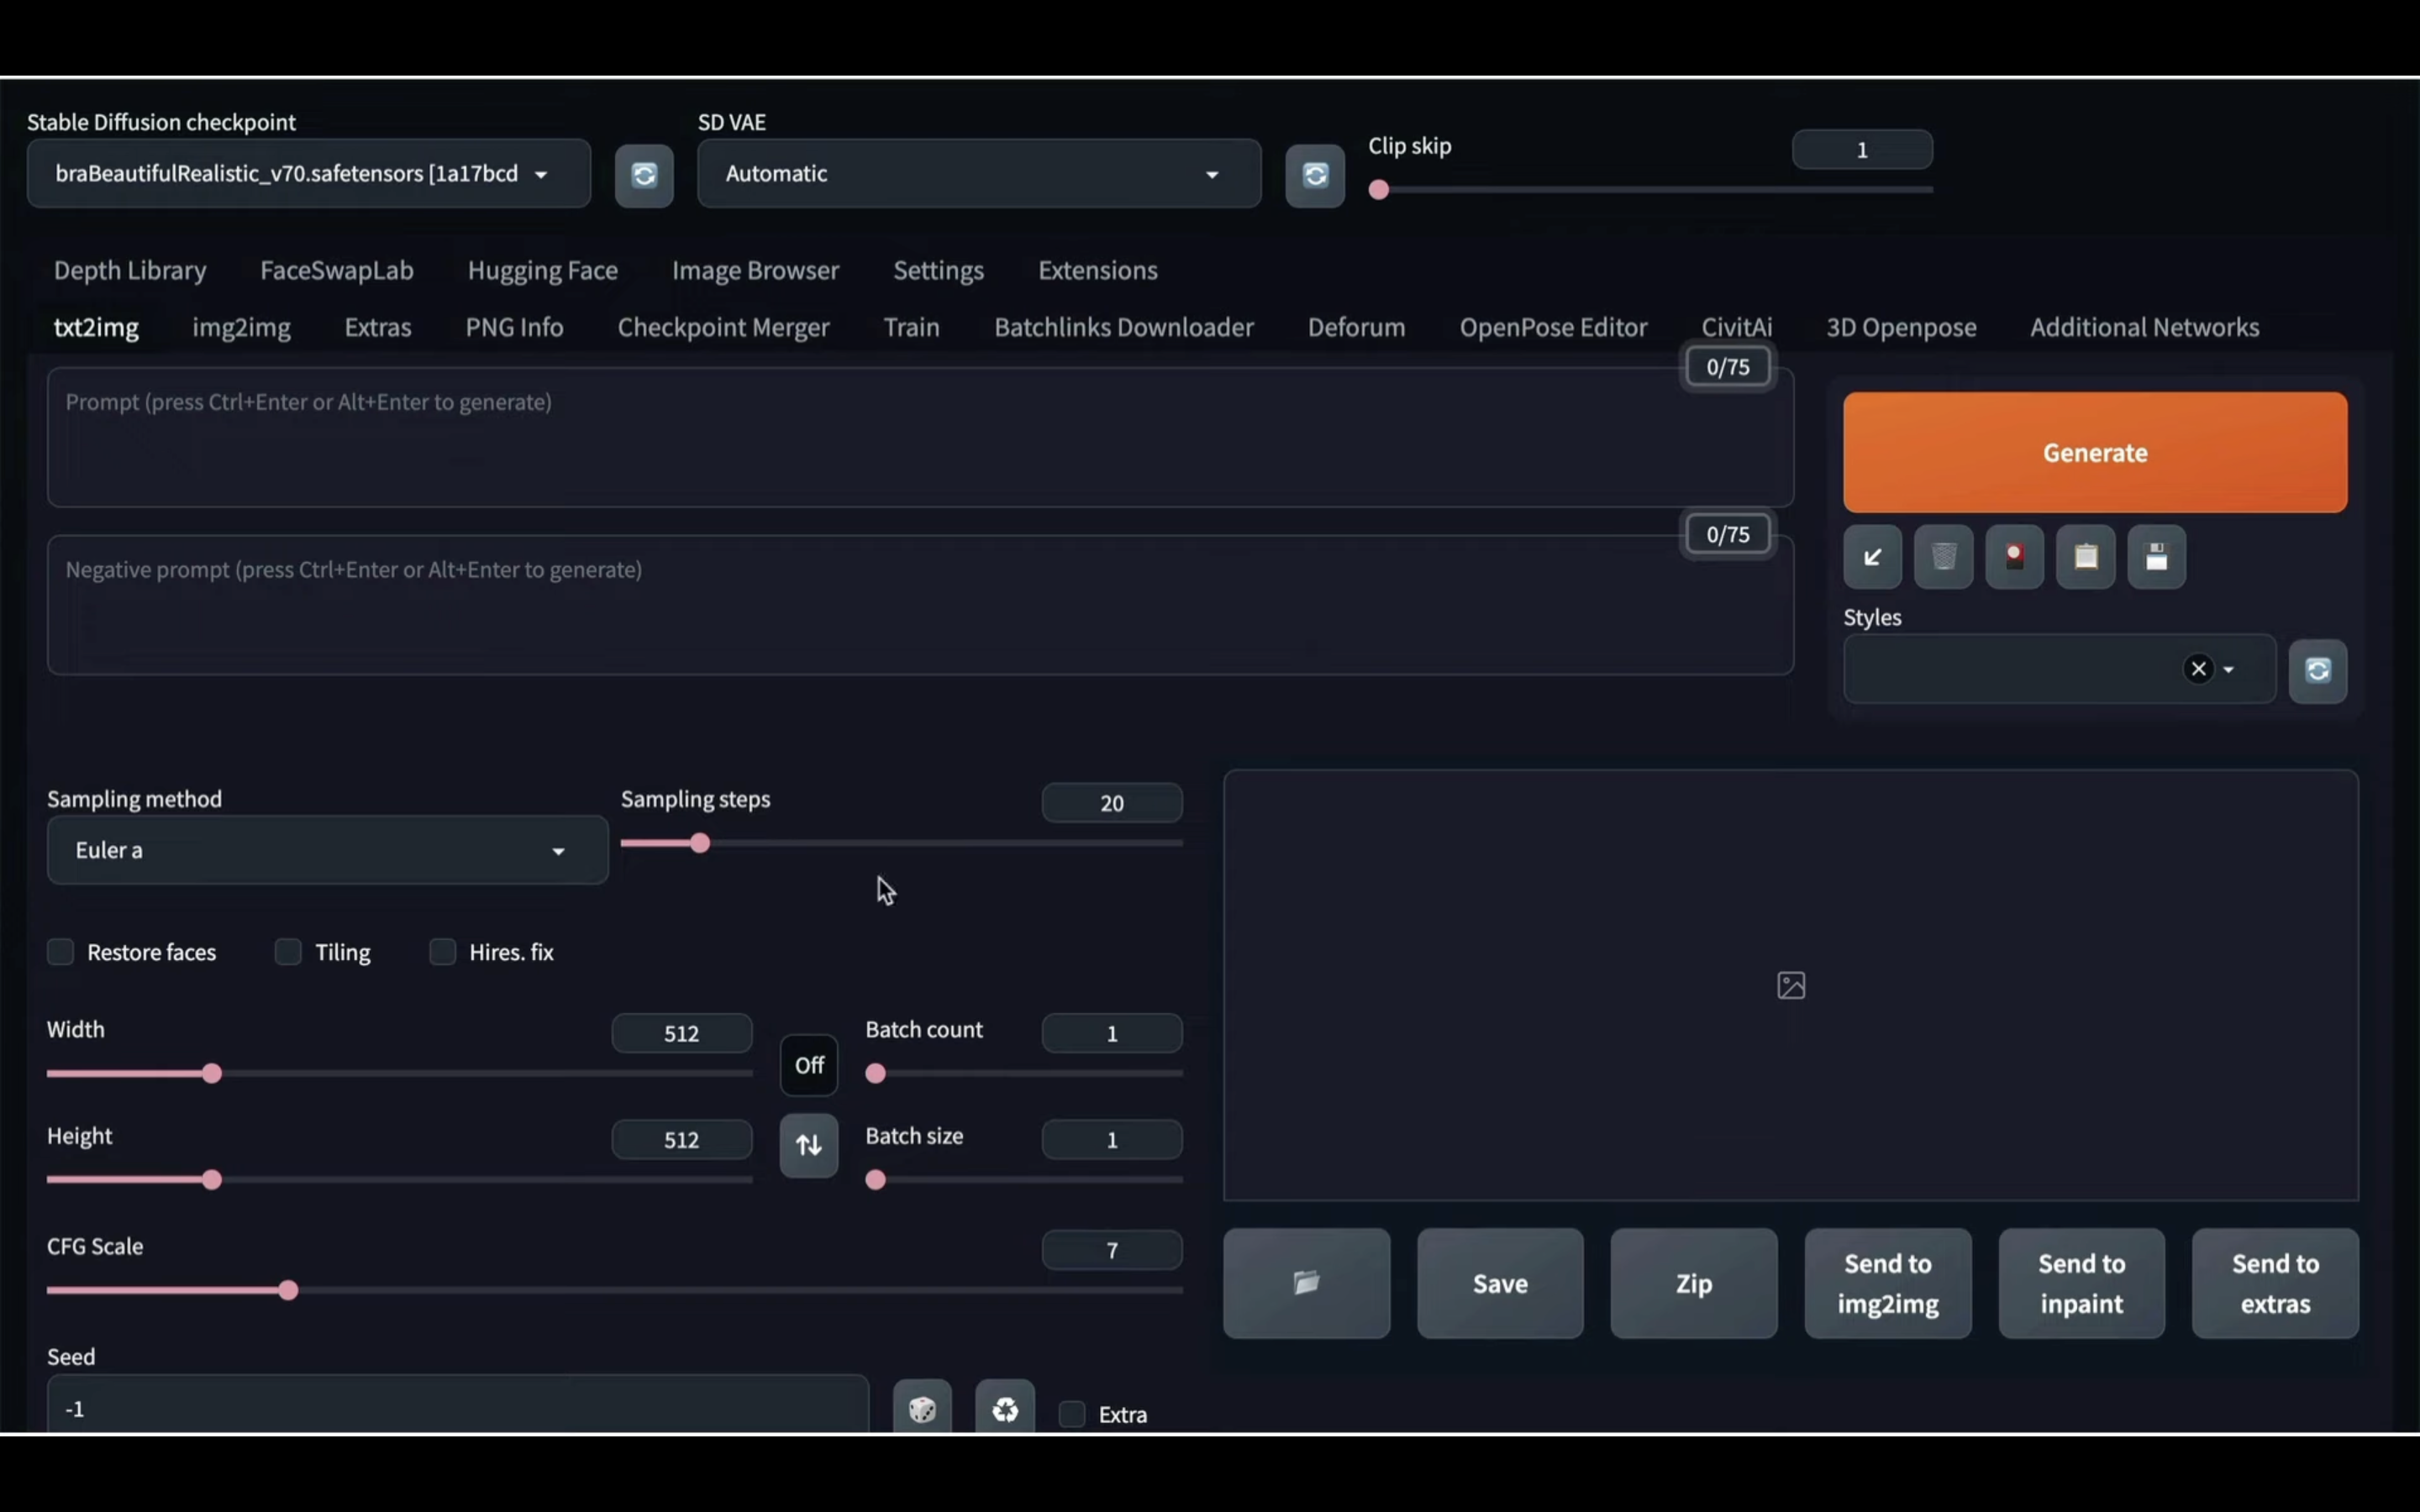
そうするとAutomatic1111の画面が表示されます。
それでは早速ディープフェイクの画像を生成していきましょう。
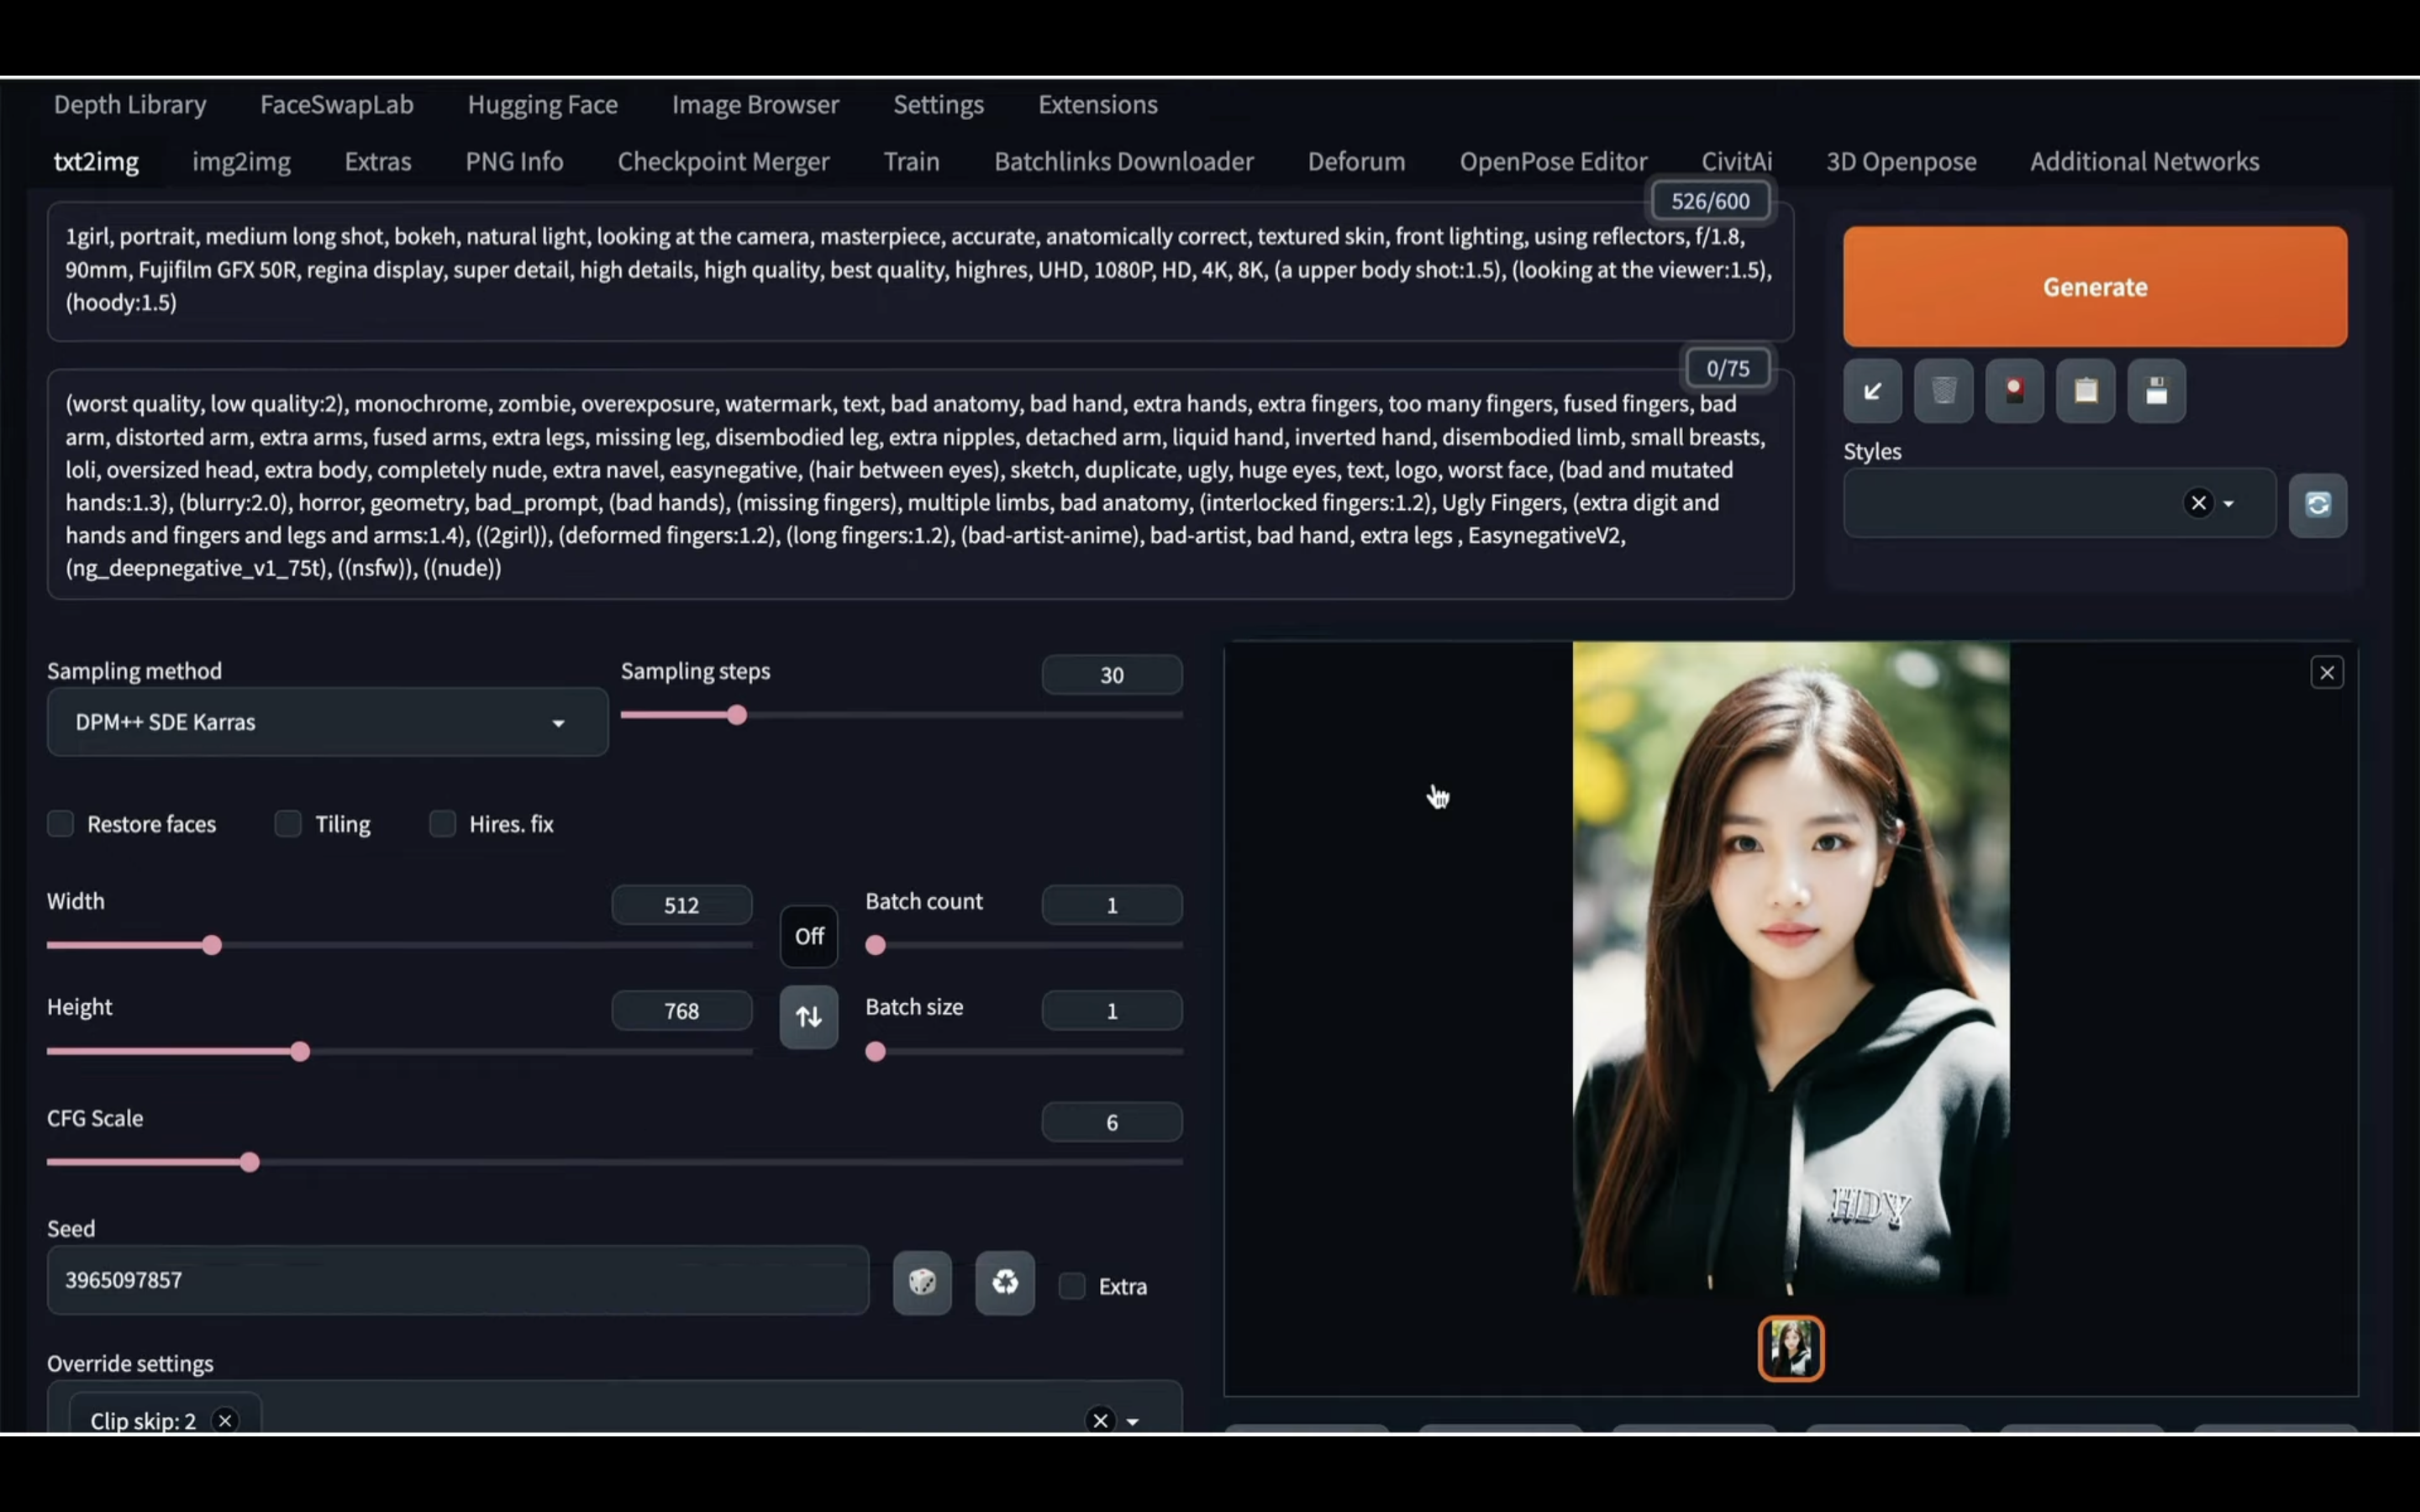
まずは通常通り画像を生成します。
以下に貼ってあるテキストをコピーします。
1girl, portrait, medium long shot, bokeh, natural light, looking at the camera, masterpiece, accurate, anatomically correct, textured skin, front lighting, using reflectors, f/1.8, 90mm, Fujifilm GFX 50R, regina display, super detail, high details, high quality, best quality, highres, UHD, 1080P, HD, 4K, 8K, (a upper body shot:1.5), (looking at the viewer:1.5), (hoody:1.5)
Negative prompt: (worst quality, low quality:2), monochrome, zombie, overexposure, watermark, text, bad anatomy, bad hand, extra hands, extra fingers, too many fingers, fused fingers, bad arm, distorted arm, extra arms, fused arms, extra legs, missing leg, disembodied leg, extra nipples, detached arm, liquid hand, inverted hand, disembodied limb, small breasts, loli, oversized head, extra body, completely nude, extra navel, easynegative, (hair between eyes), sketch, duplicate, ugly, huge eyes, text, logo, worst face, (bad and mutated hands:1.3), (blurry:2.0), horror, geometry, bad_prompt, (bad hands), (missing fingers), multiple limbs, bad anatomy, (interlocked fingers:1.2), Ugly Fingers, (extra digit and hands and fingers and legs and arms:1.4), ((2girl)), (deformed fingers:1.2), (long fingers:1.2), (bad-artist-anime), bad-artist, bad hand, extra legs , EasynegativeV2, (ng_deepnegative_v1_75t), ((nsfw)), ((nude))
Steps: 30, Sampler: DPM++ SDE Karras, CFG scale: 6, Seed: 3965097857, Size: 512x768, Model hash: 1a17bcd93d, Model: braBeautifulRealistic_v70, Clip skip: 2,
テキストをコピーしたらAutomatic1111の画面に戻ります。
この画面に戻ったら、先ほどコピーしたテキストを1番上のテキストボックスに貼り付けます。
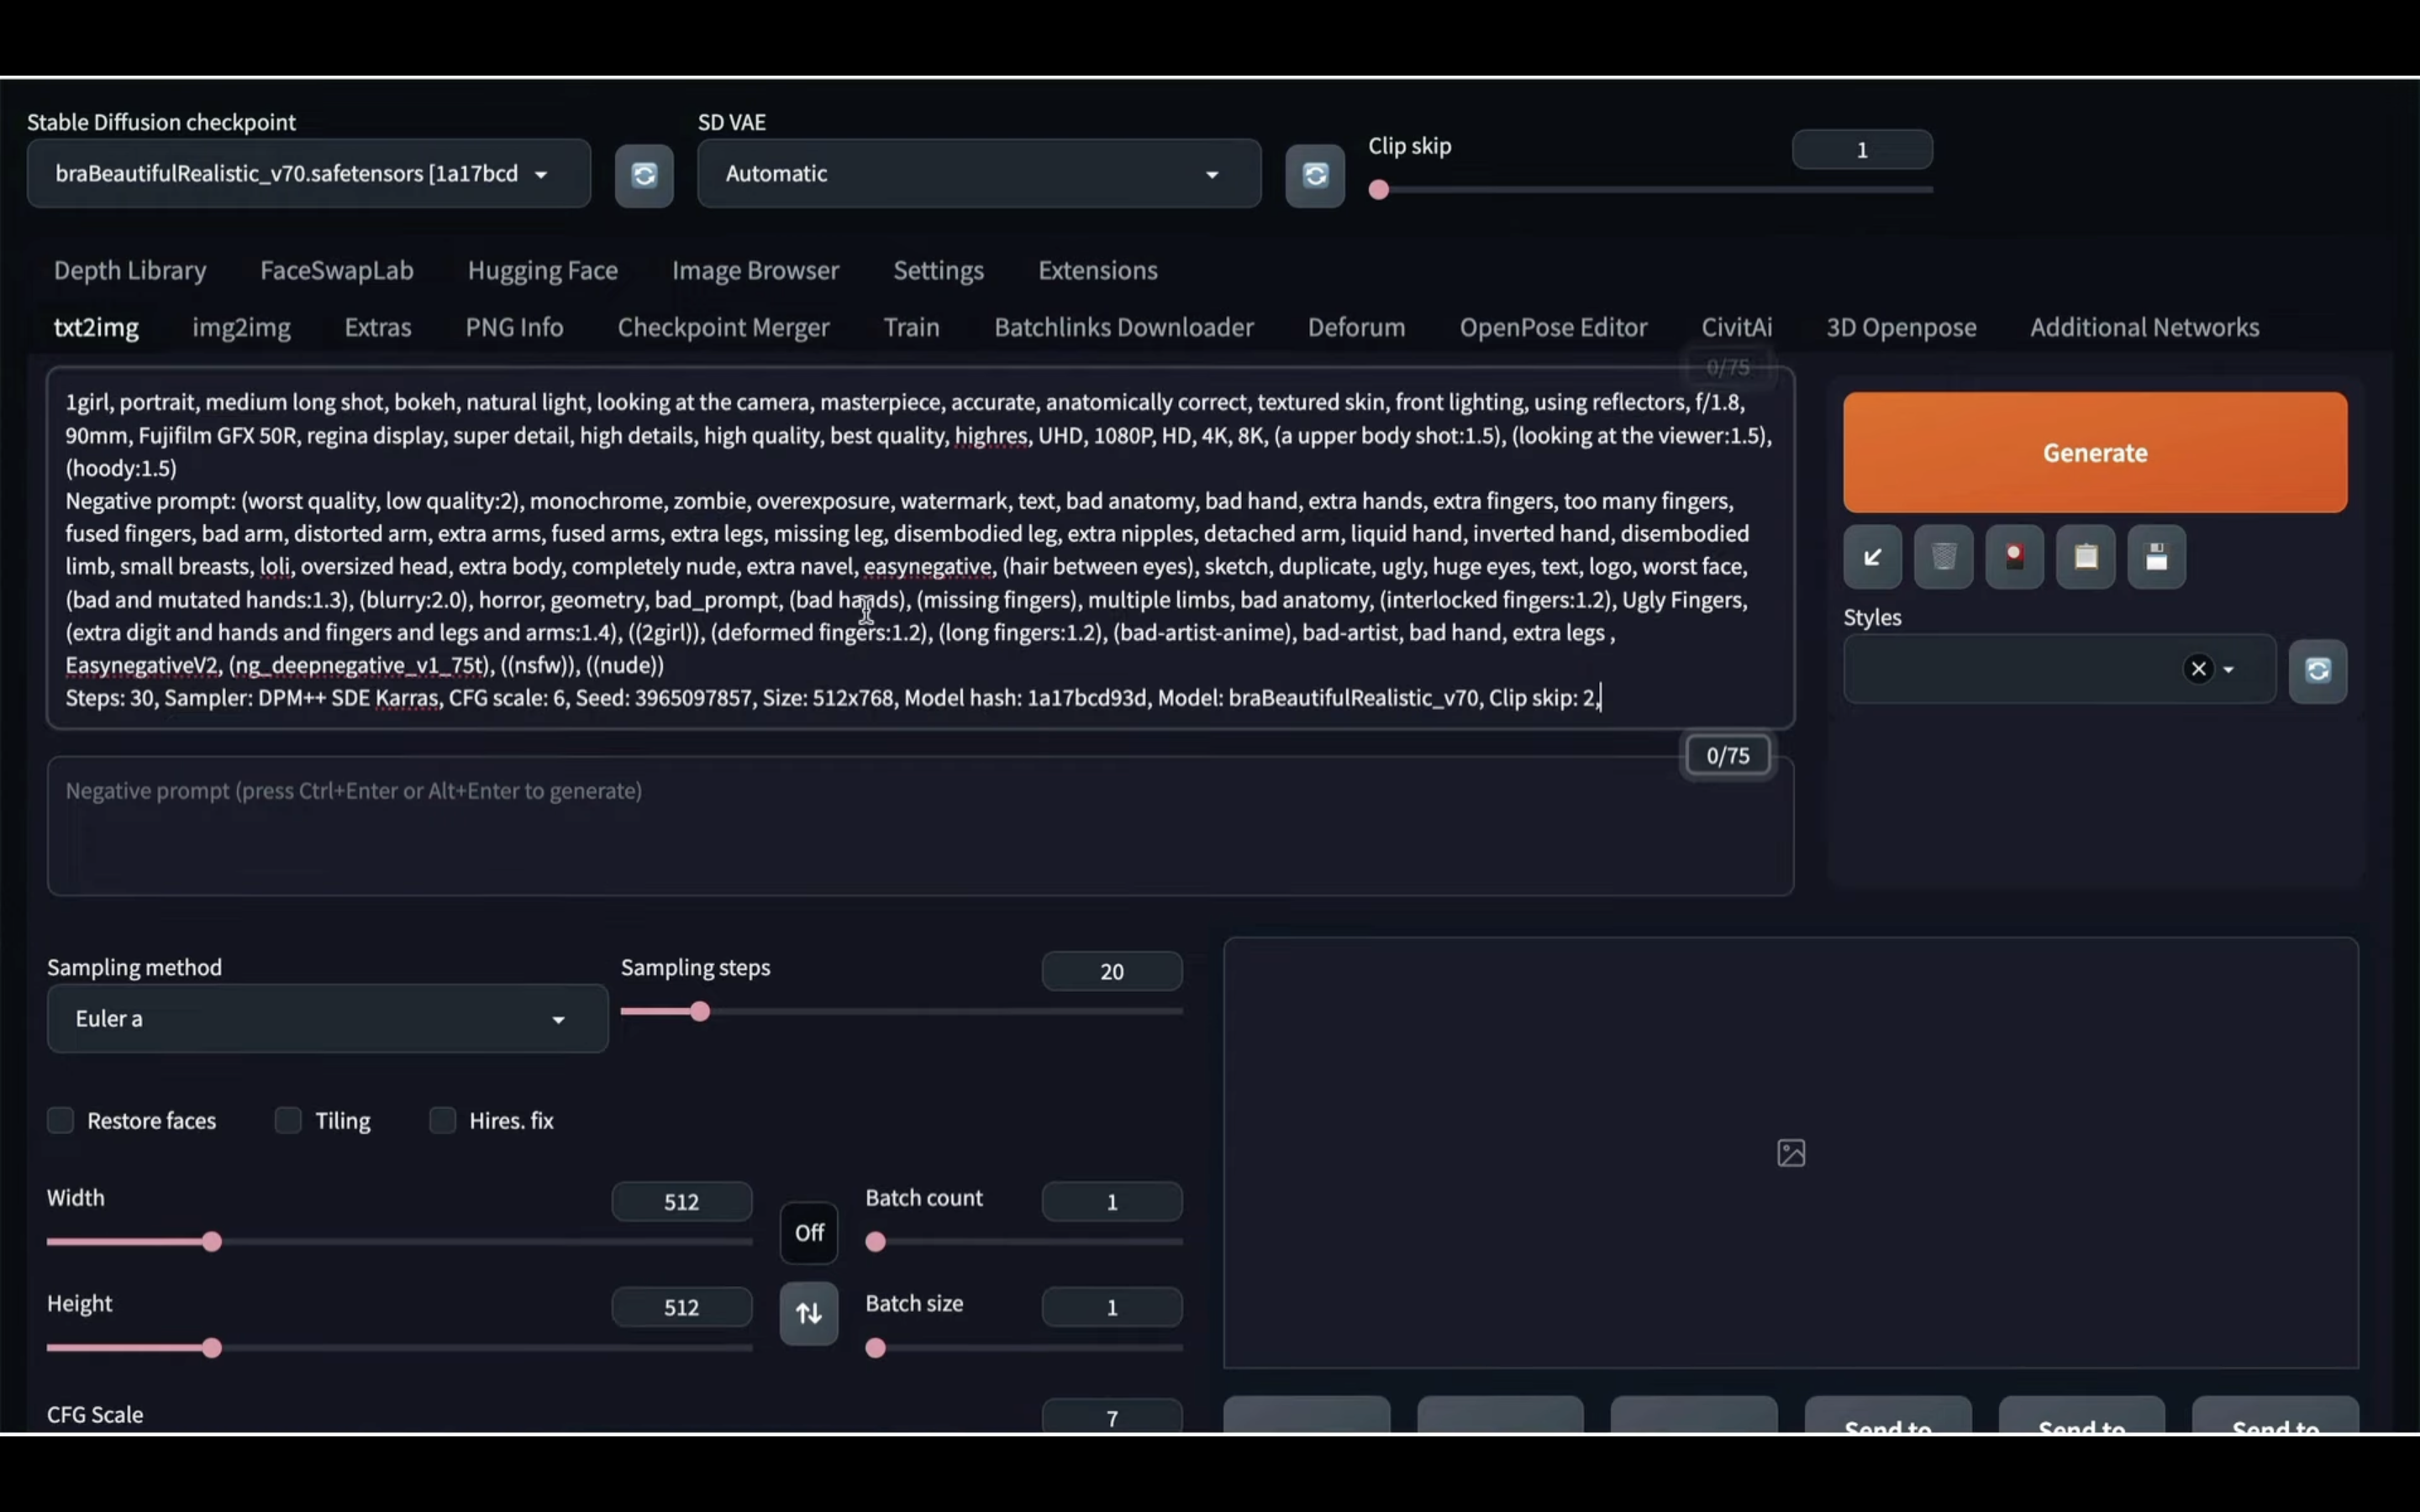
テキストはプロンプトやその他の設定が混ざった状態で貼り付けられています。
これらの設定をそれぞれの項目に反映させるためには、Generateボタンの下にある左下向きの矢印のマークをクリックします。
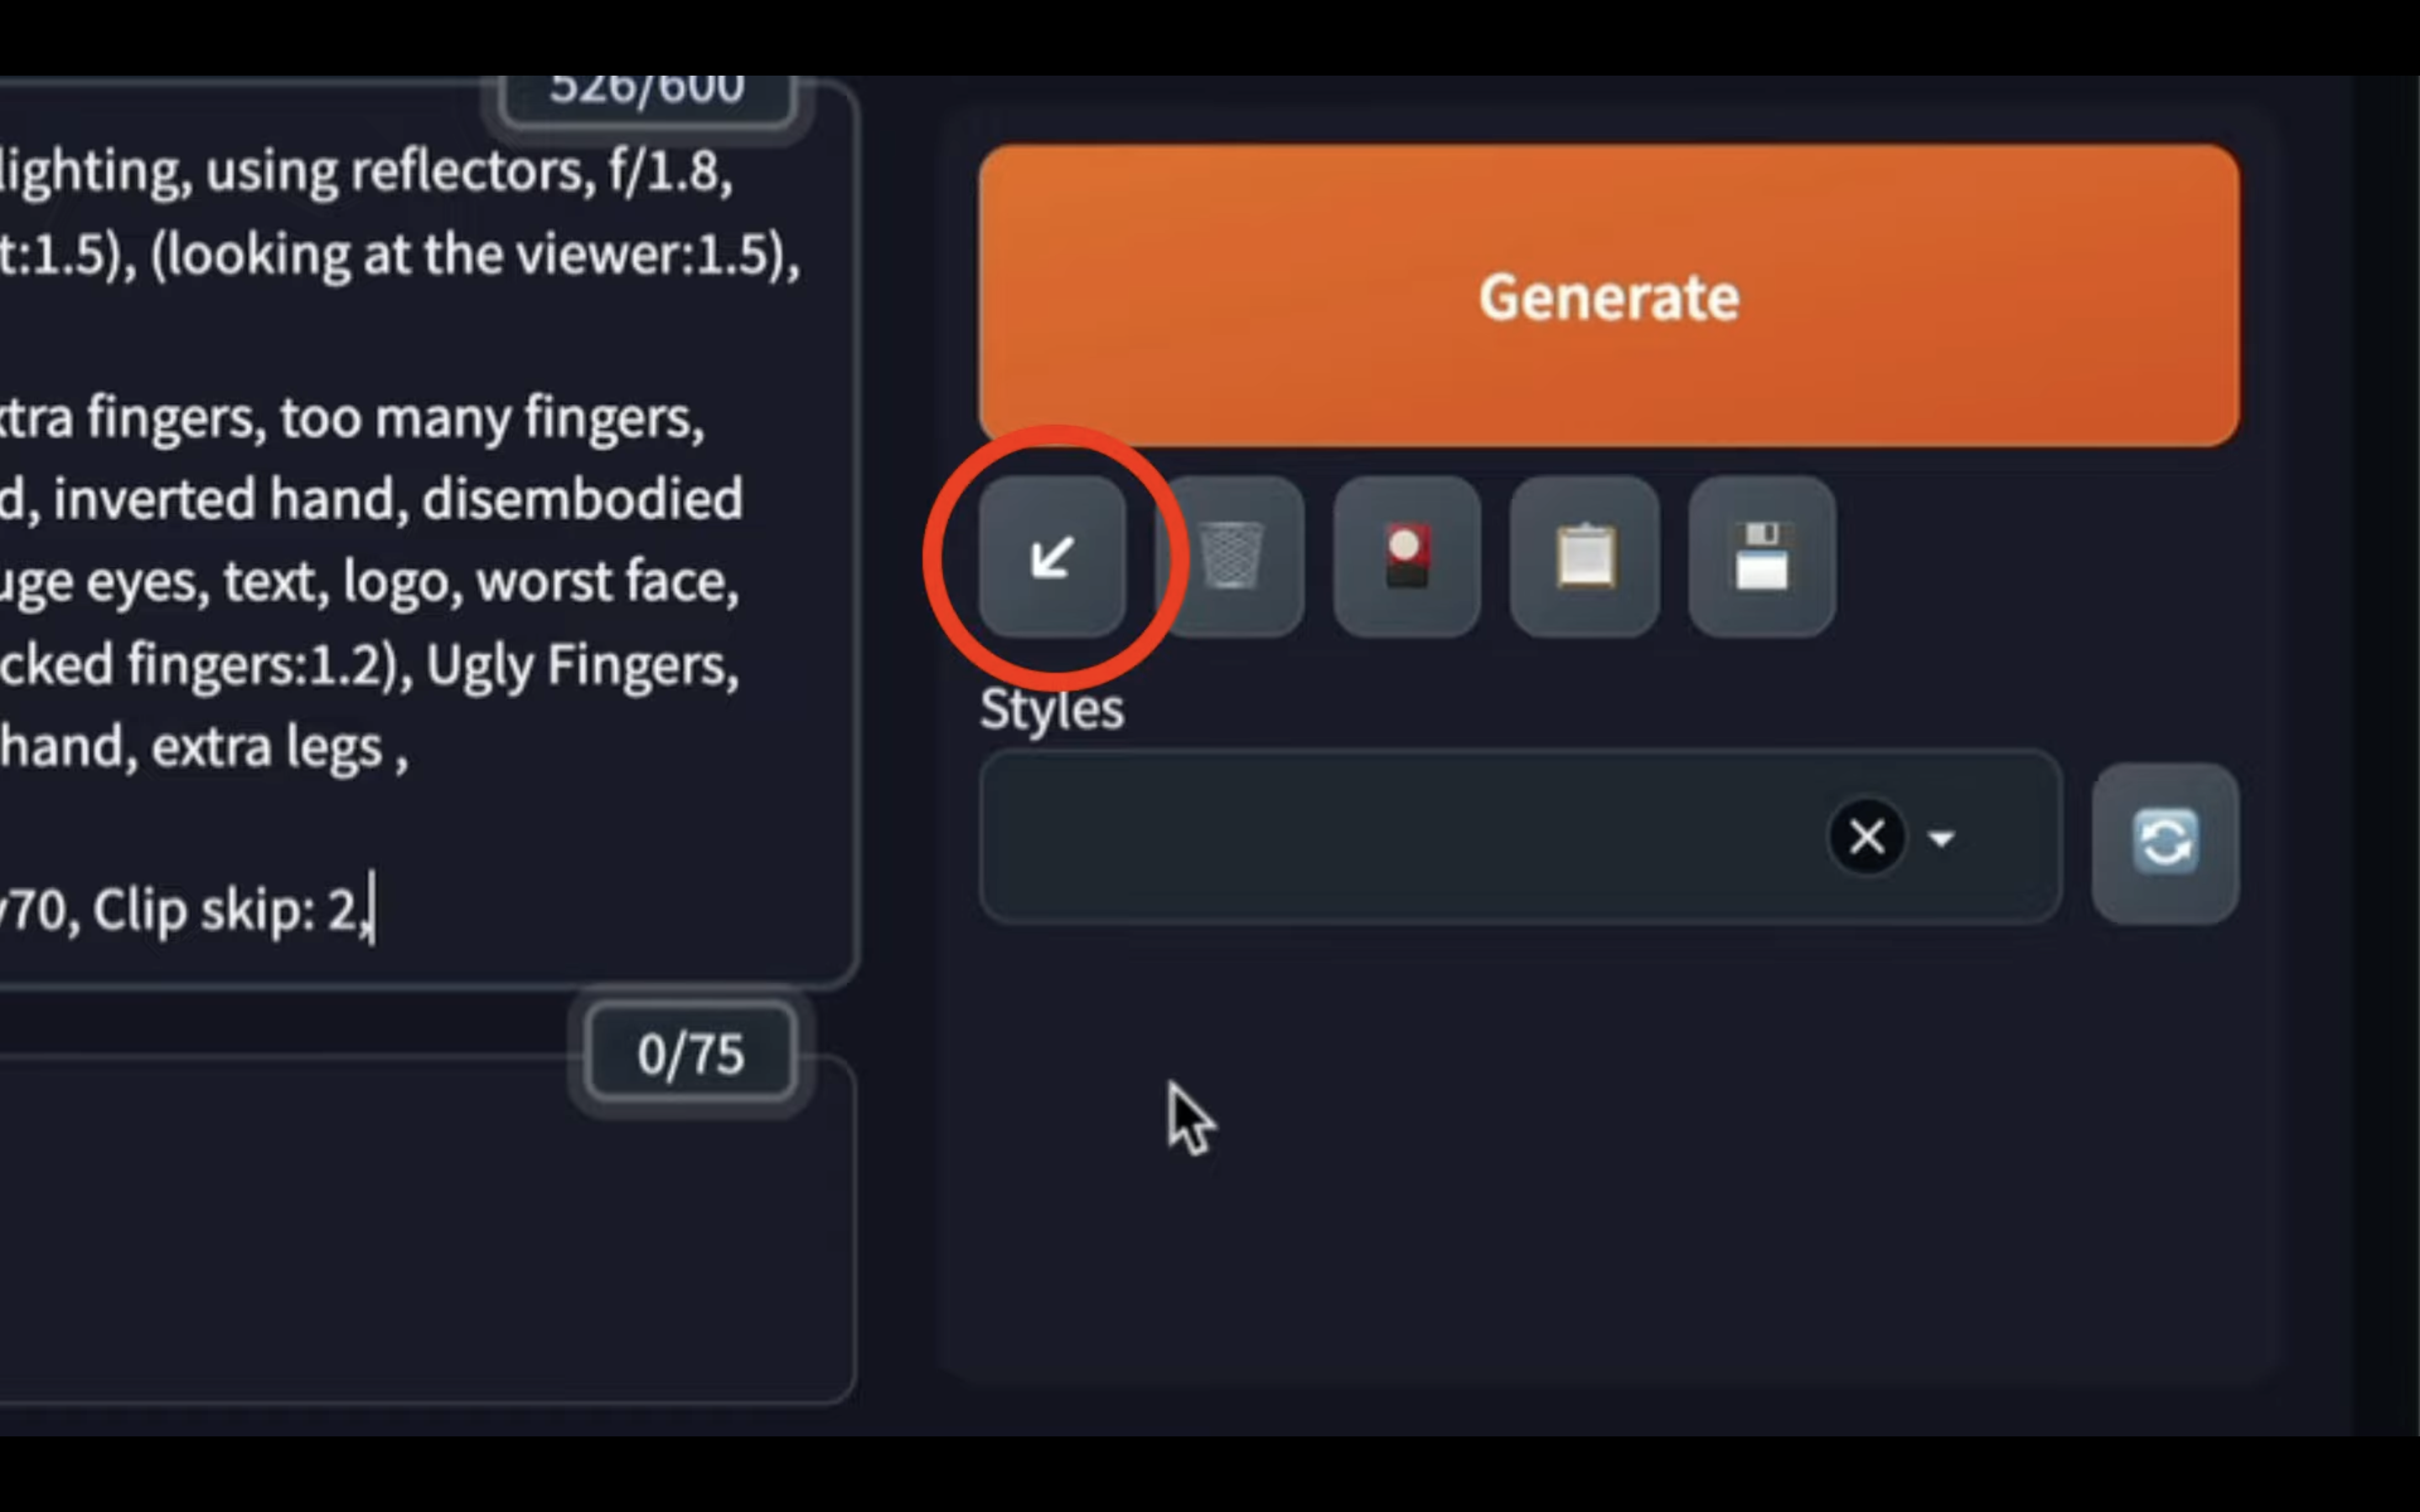
そうするとテキストで指定している内容がそれぞれの項目に反映されます。
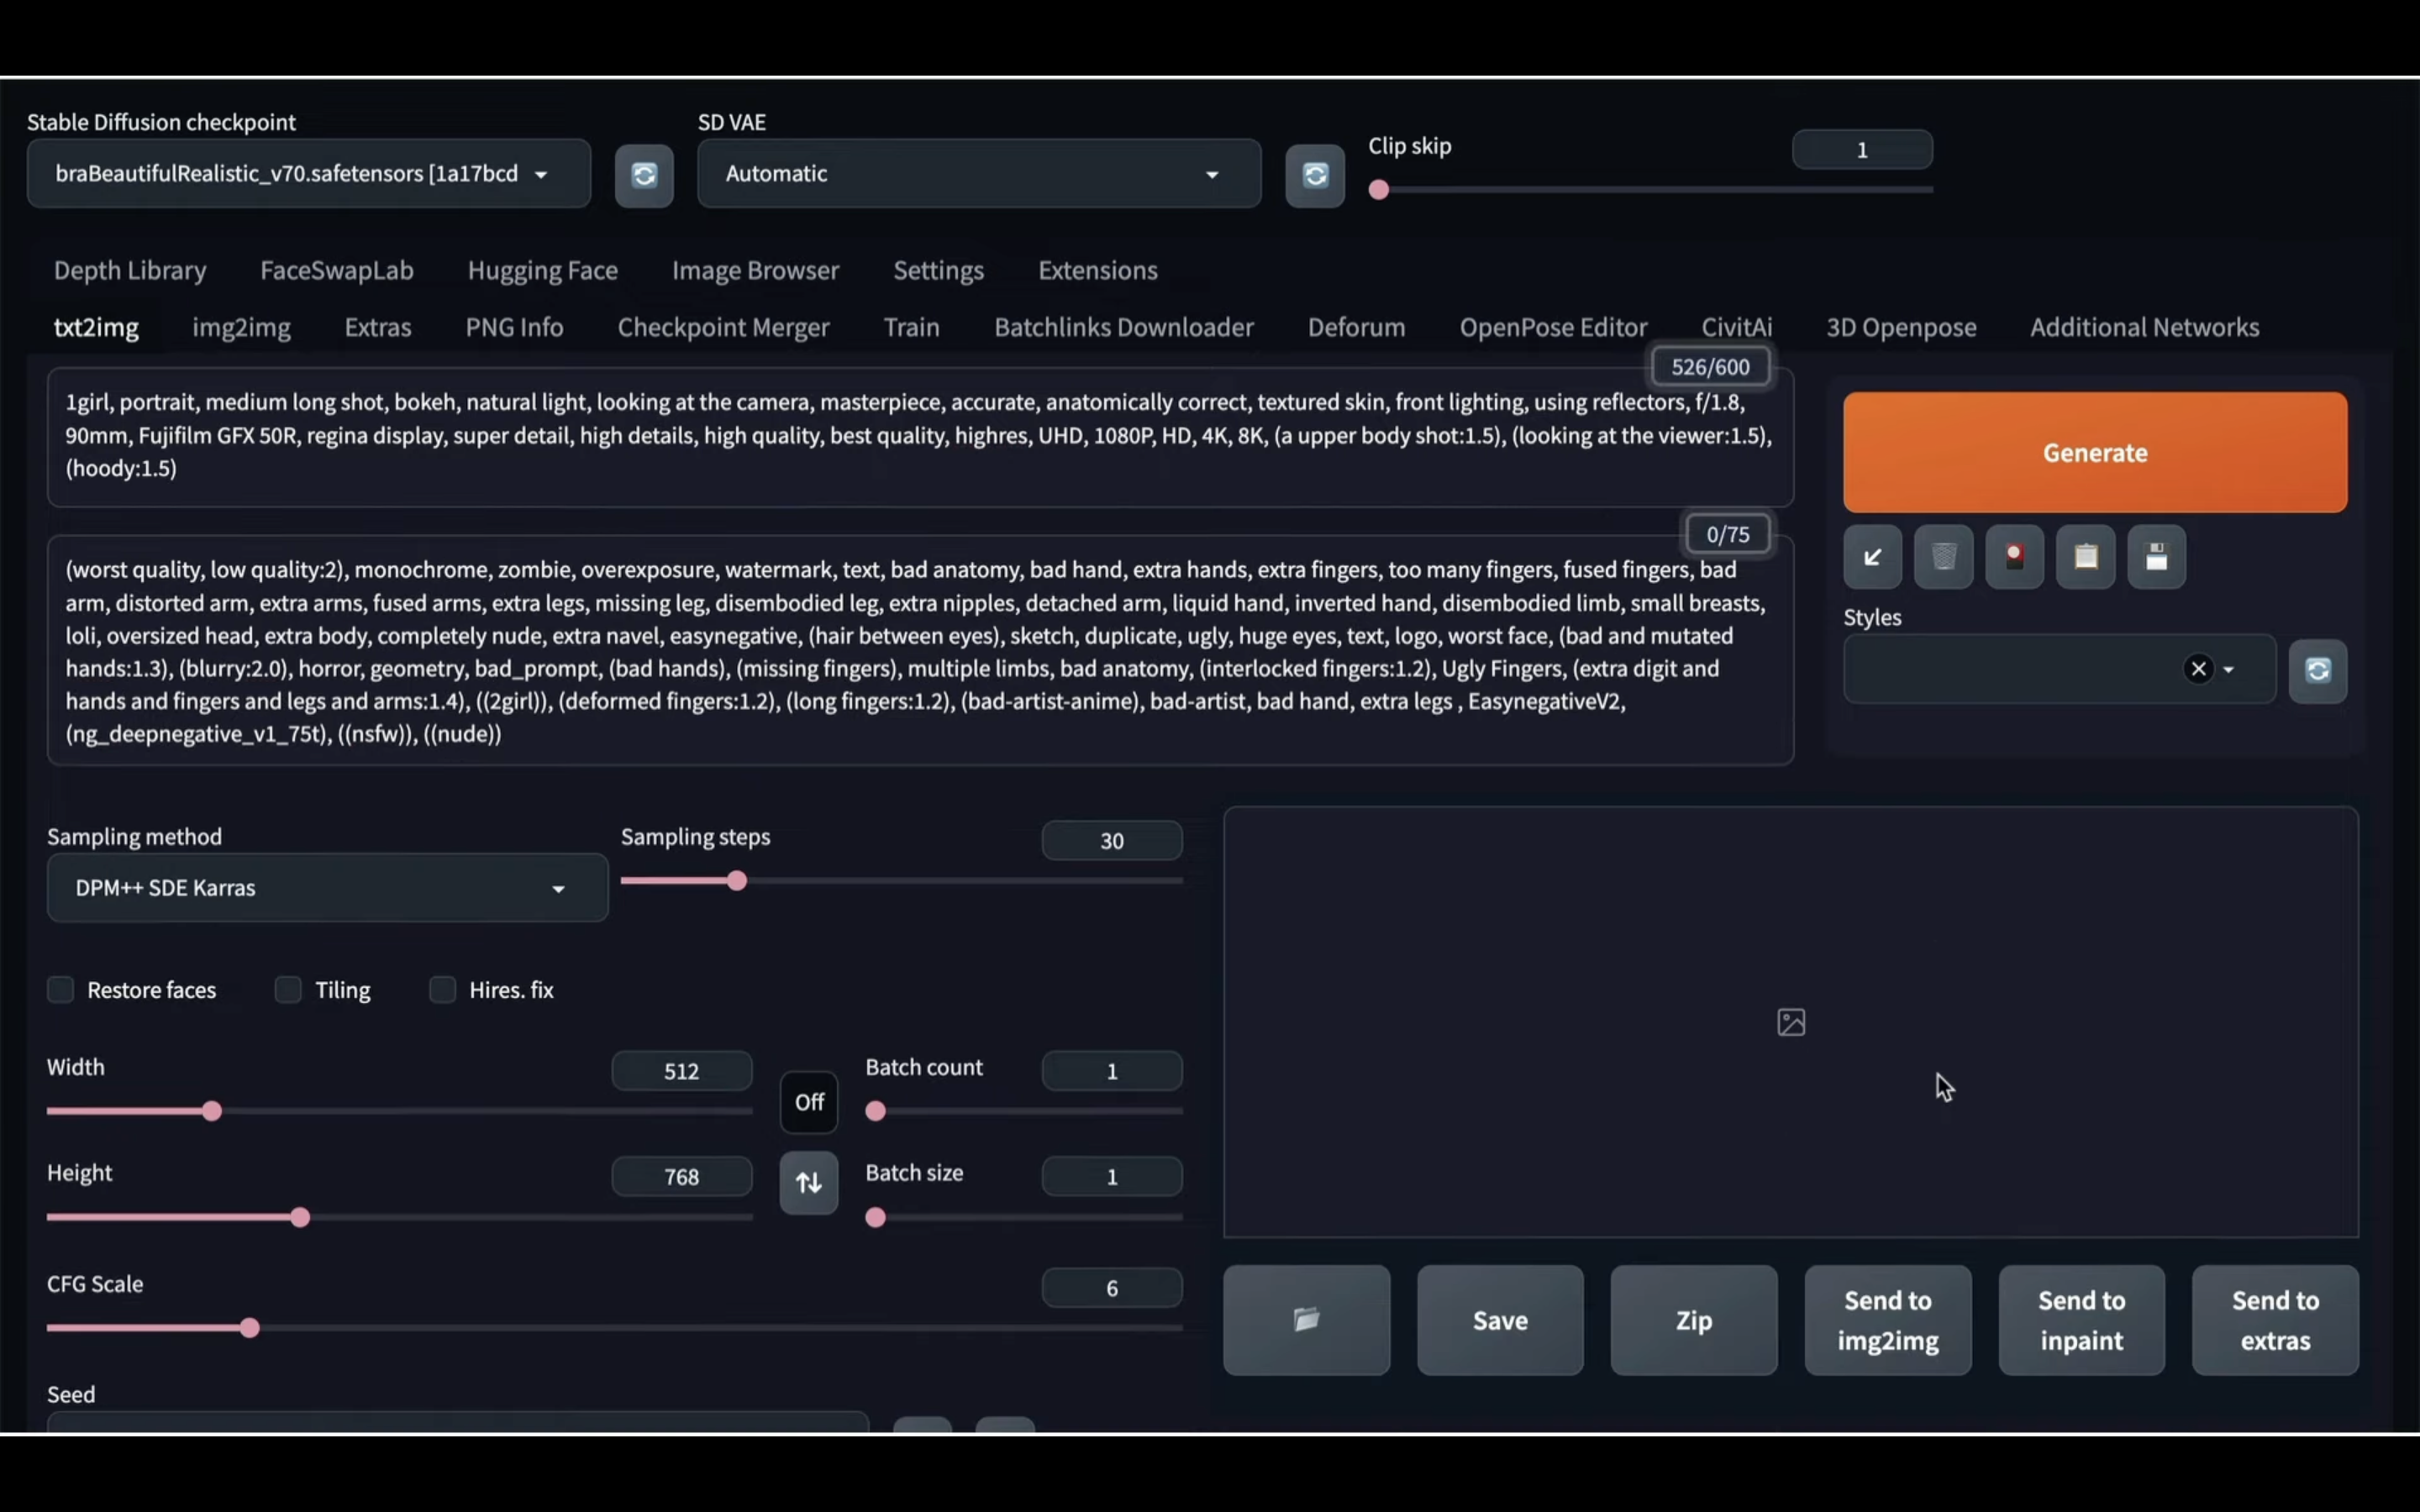
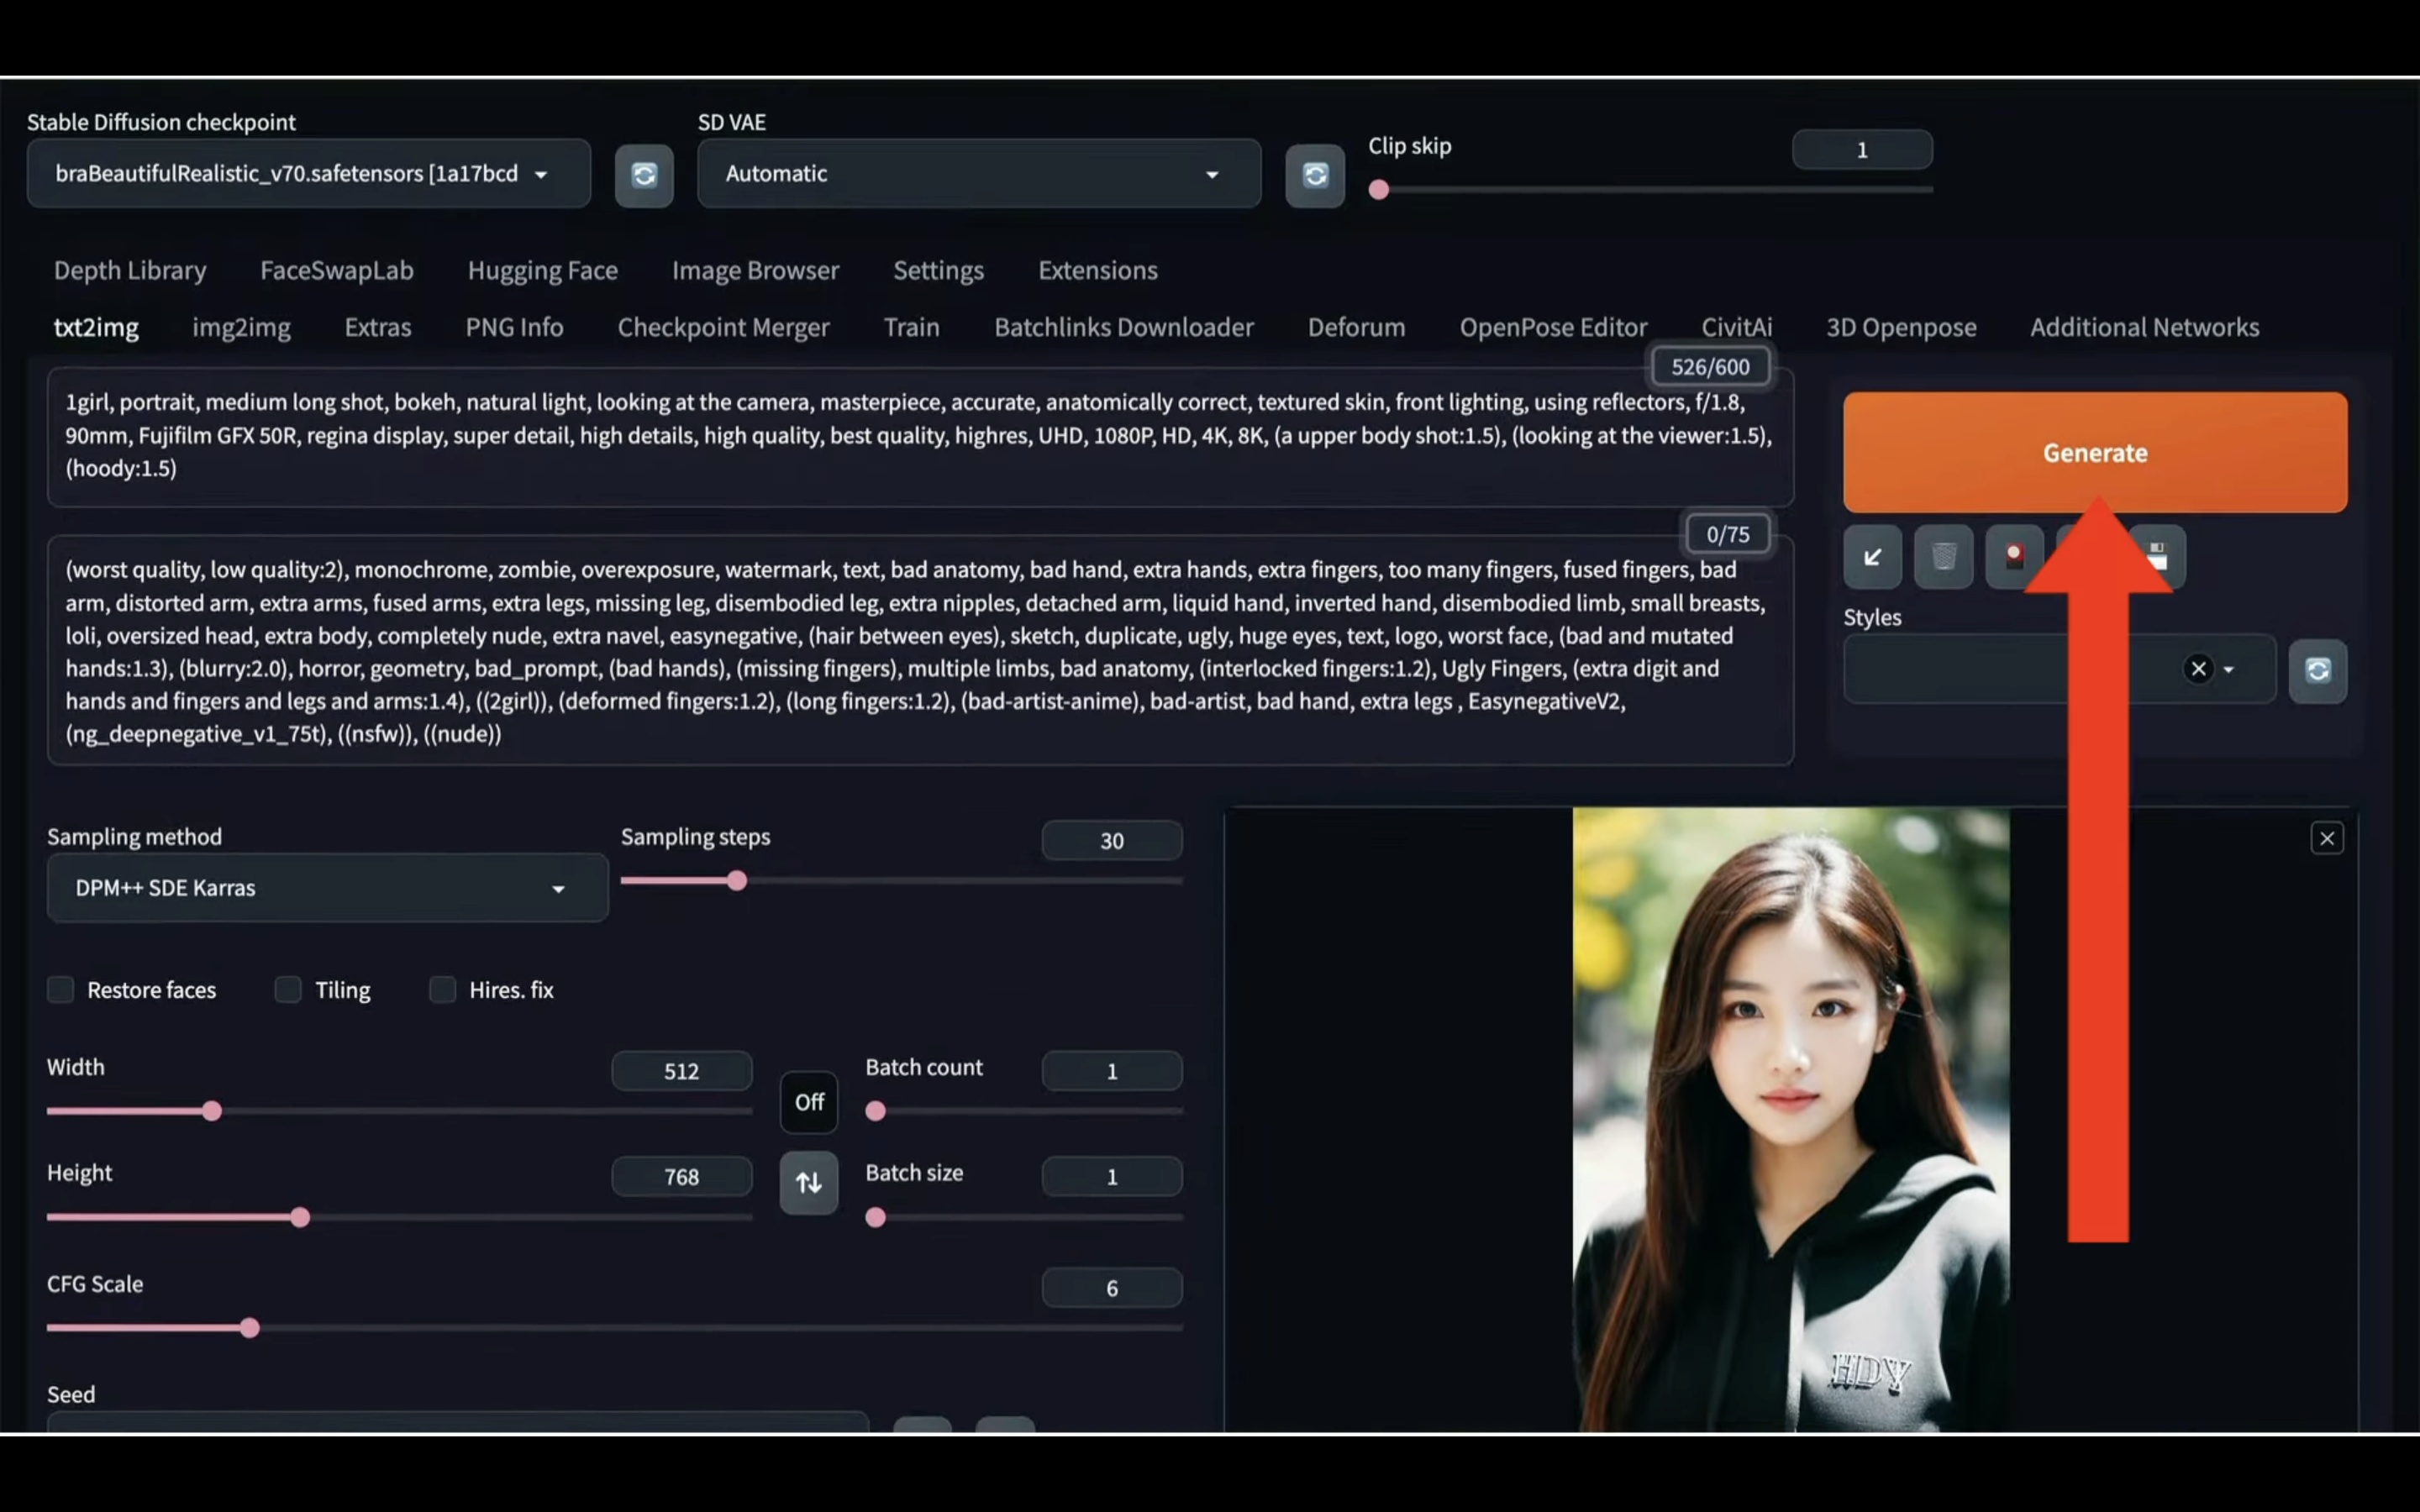
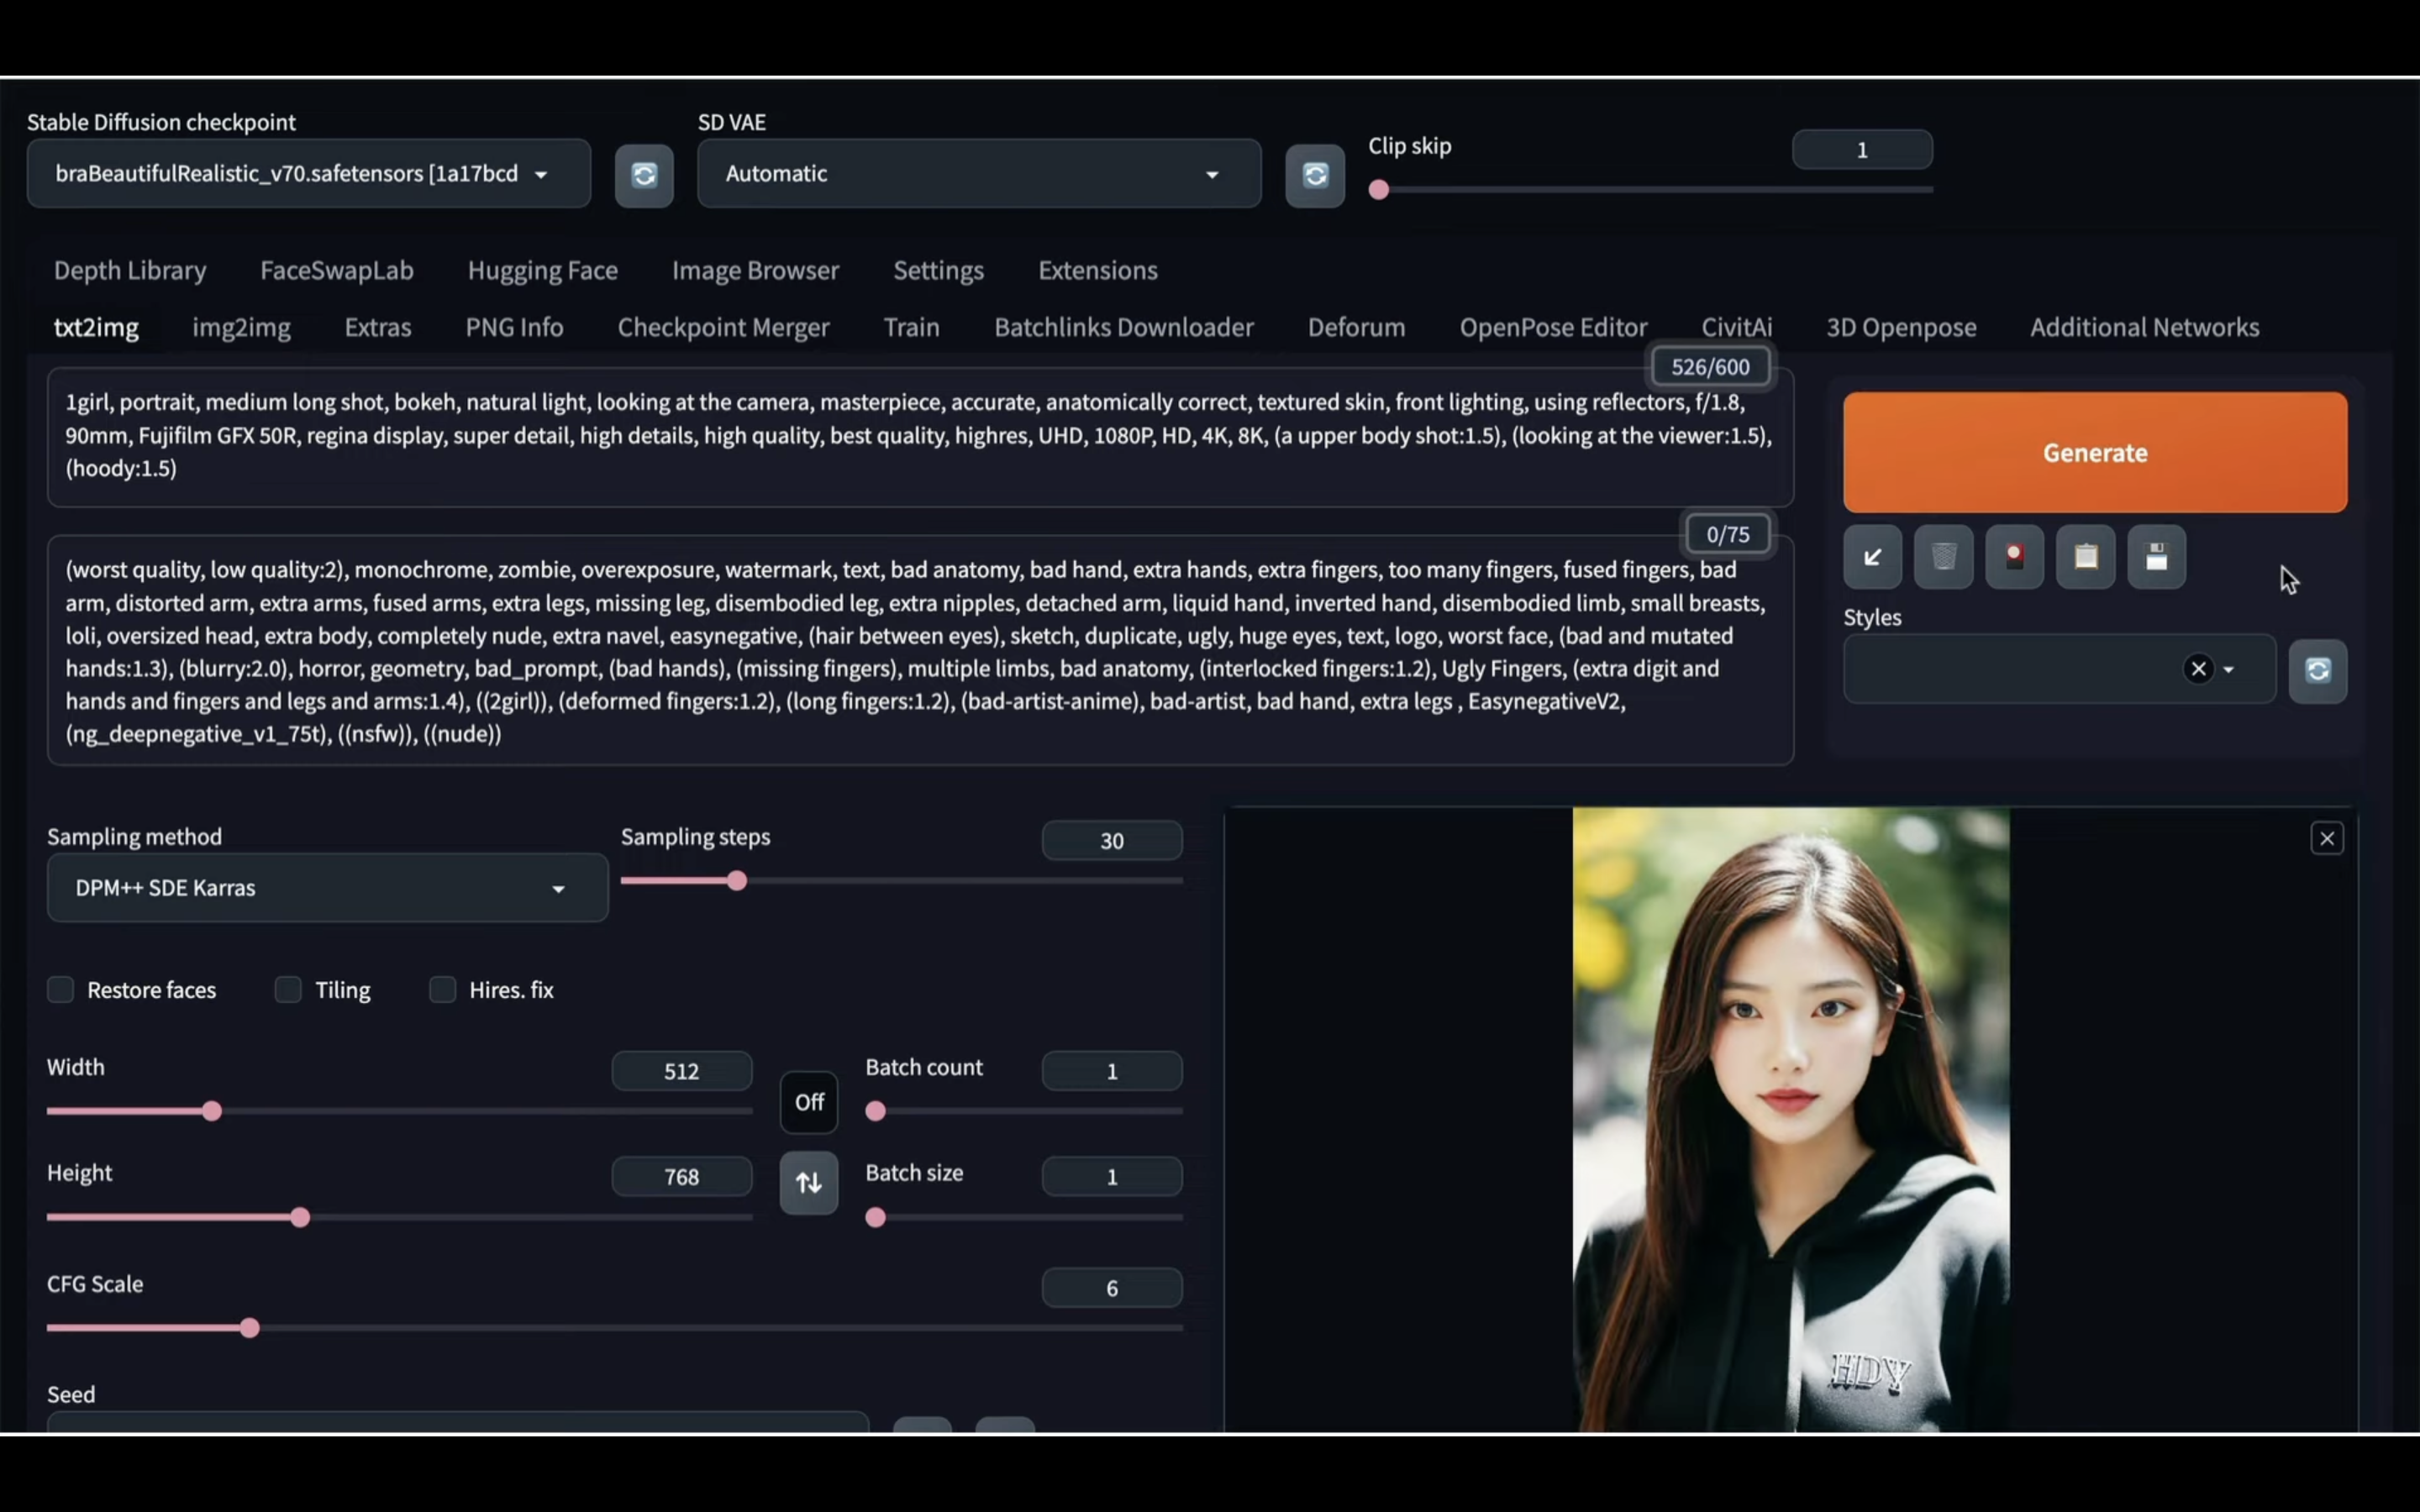
これで画像を生成するための準備が整いました。
画像を生成するためにはGenerateボタンを押します。
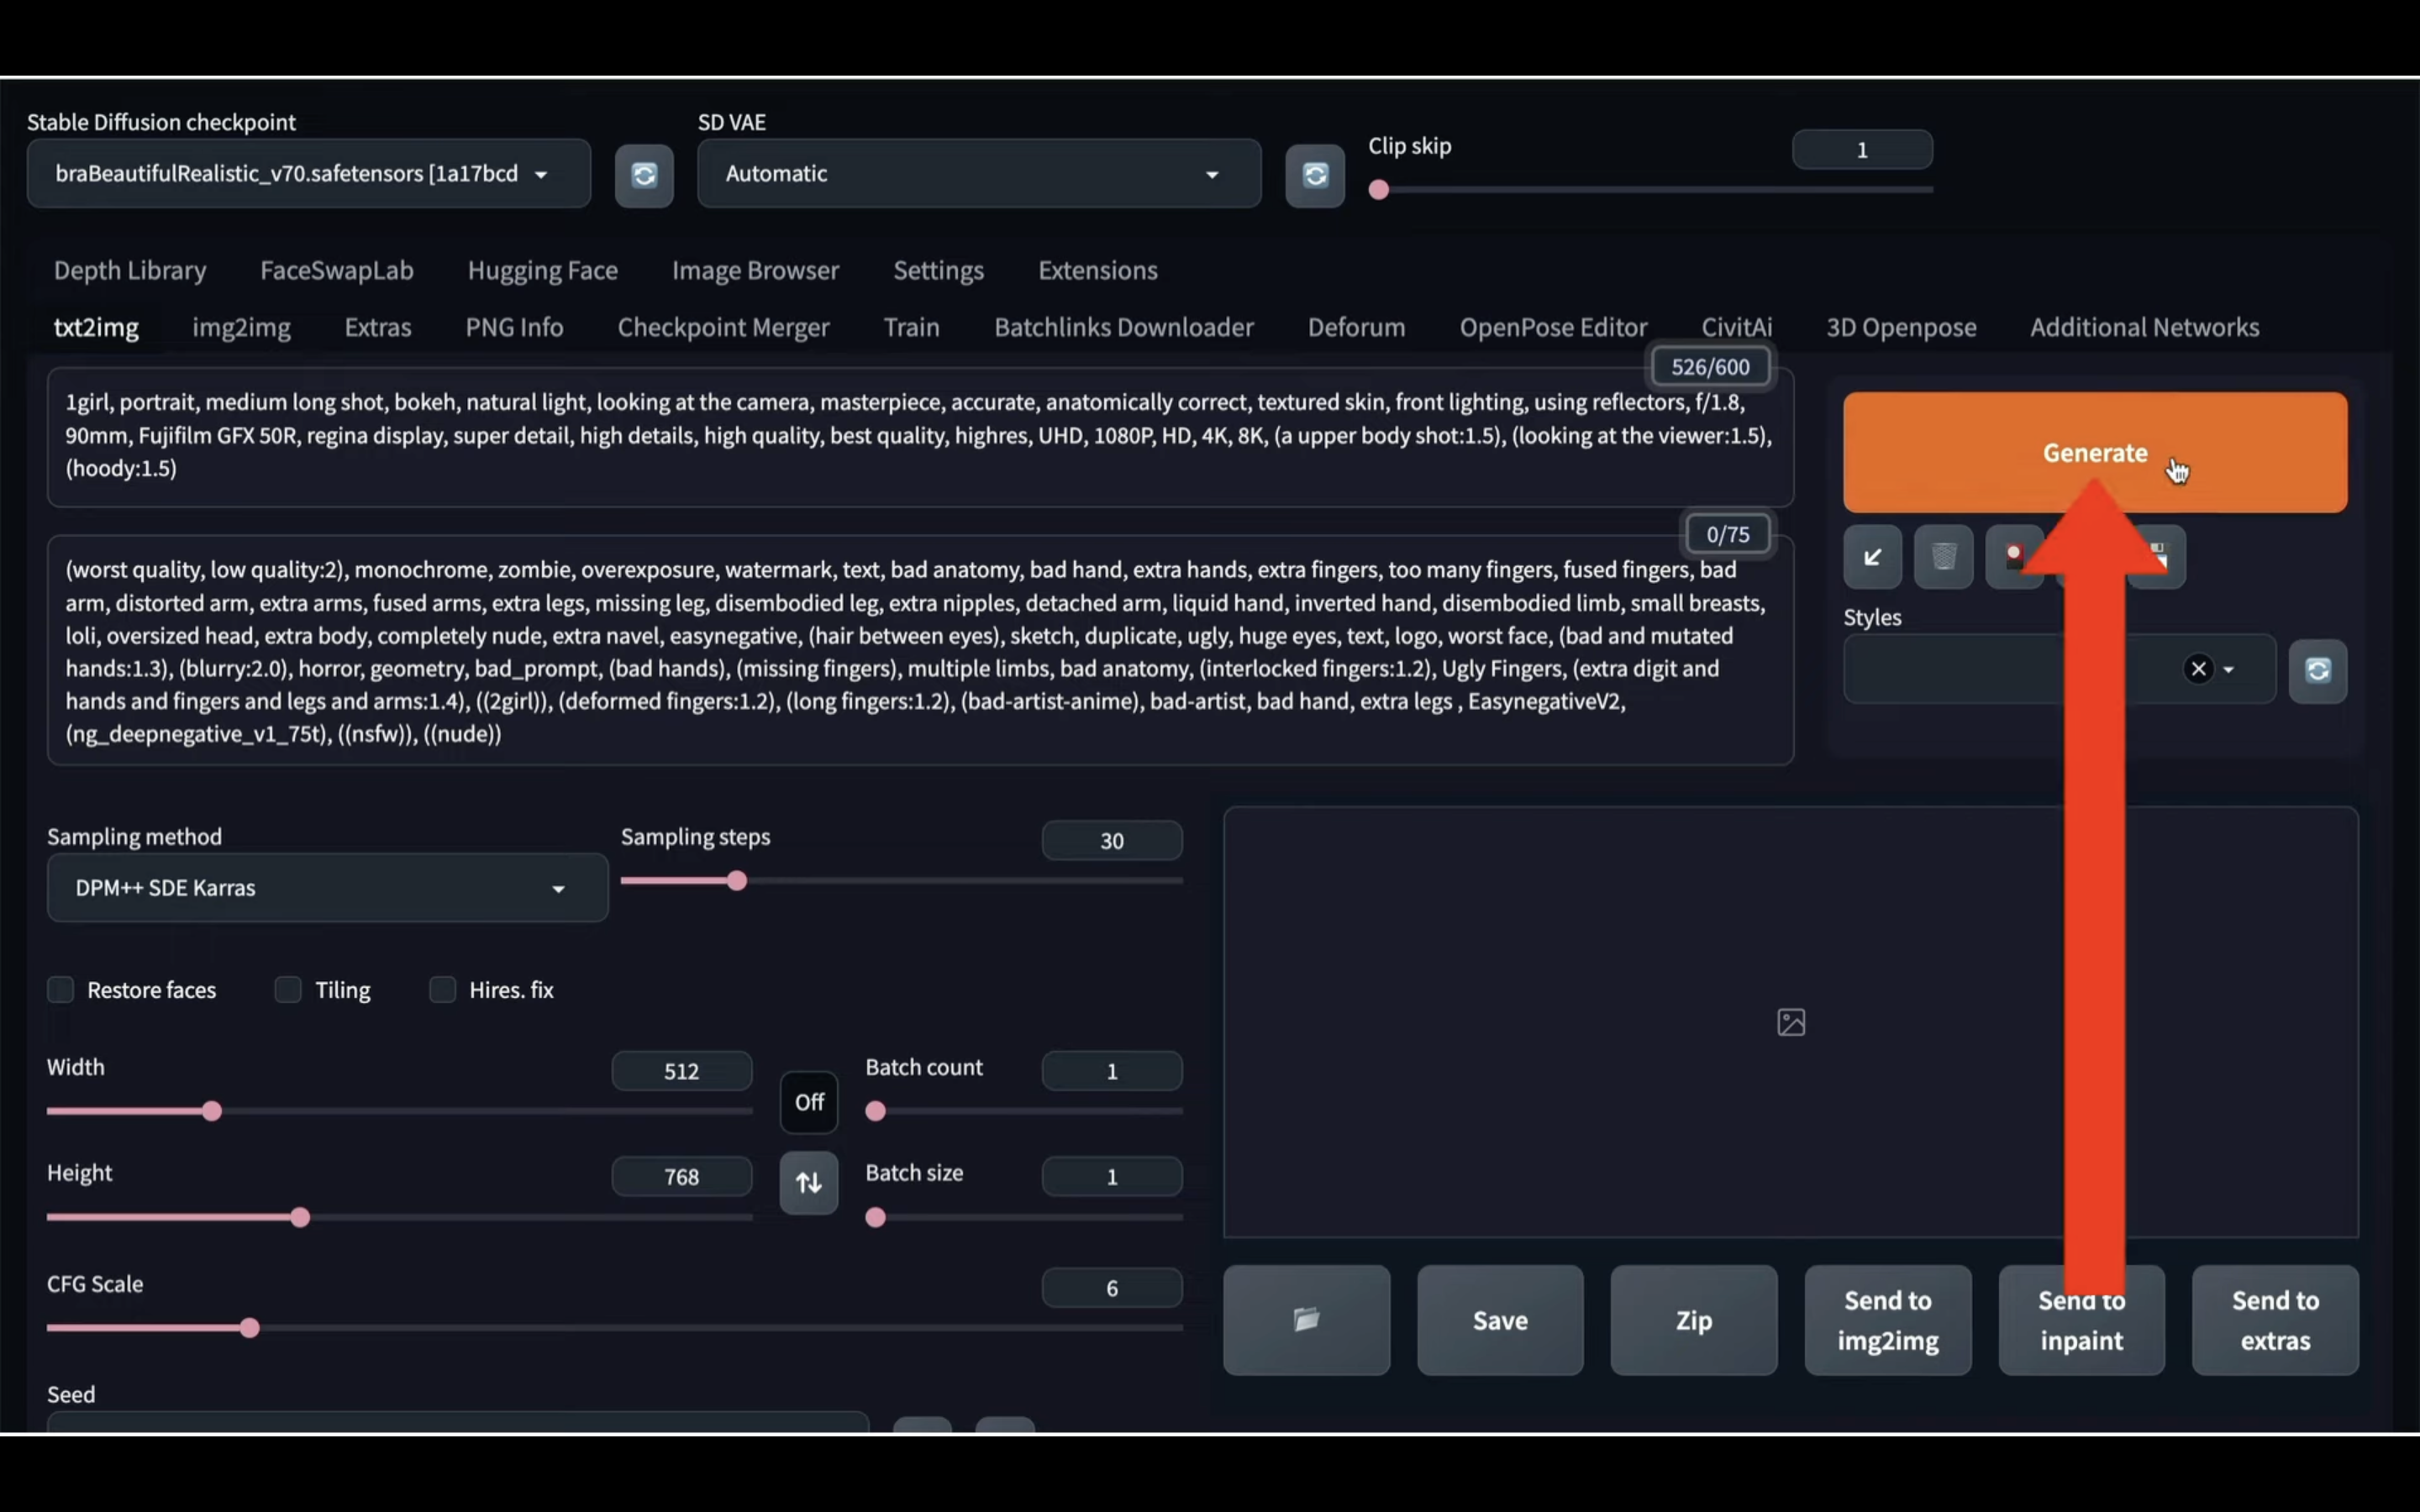
そうすると画像の生成が開始されます。
しばらく待っているとこのような画像が生成されました。
それでは次にこの画像の顔を入れ替えてみましょう。
FaceSwapLabと書かれているタイトルをクリックします。
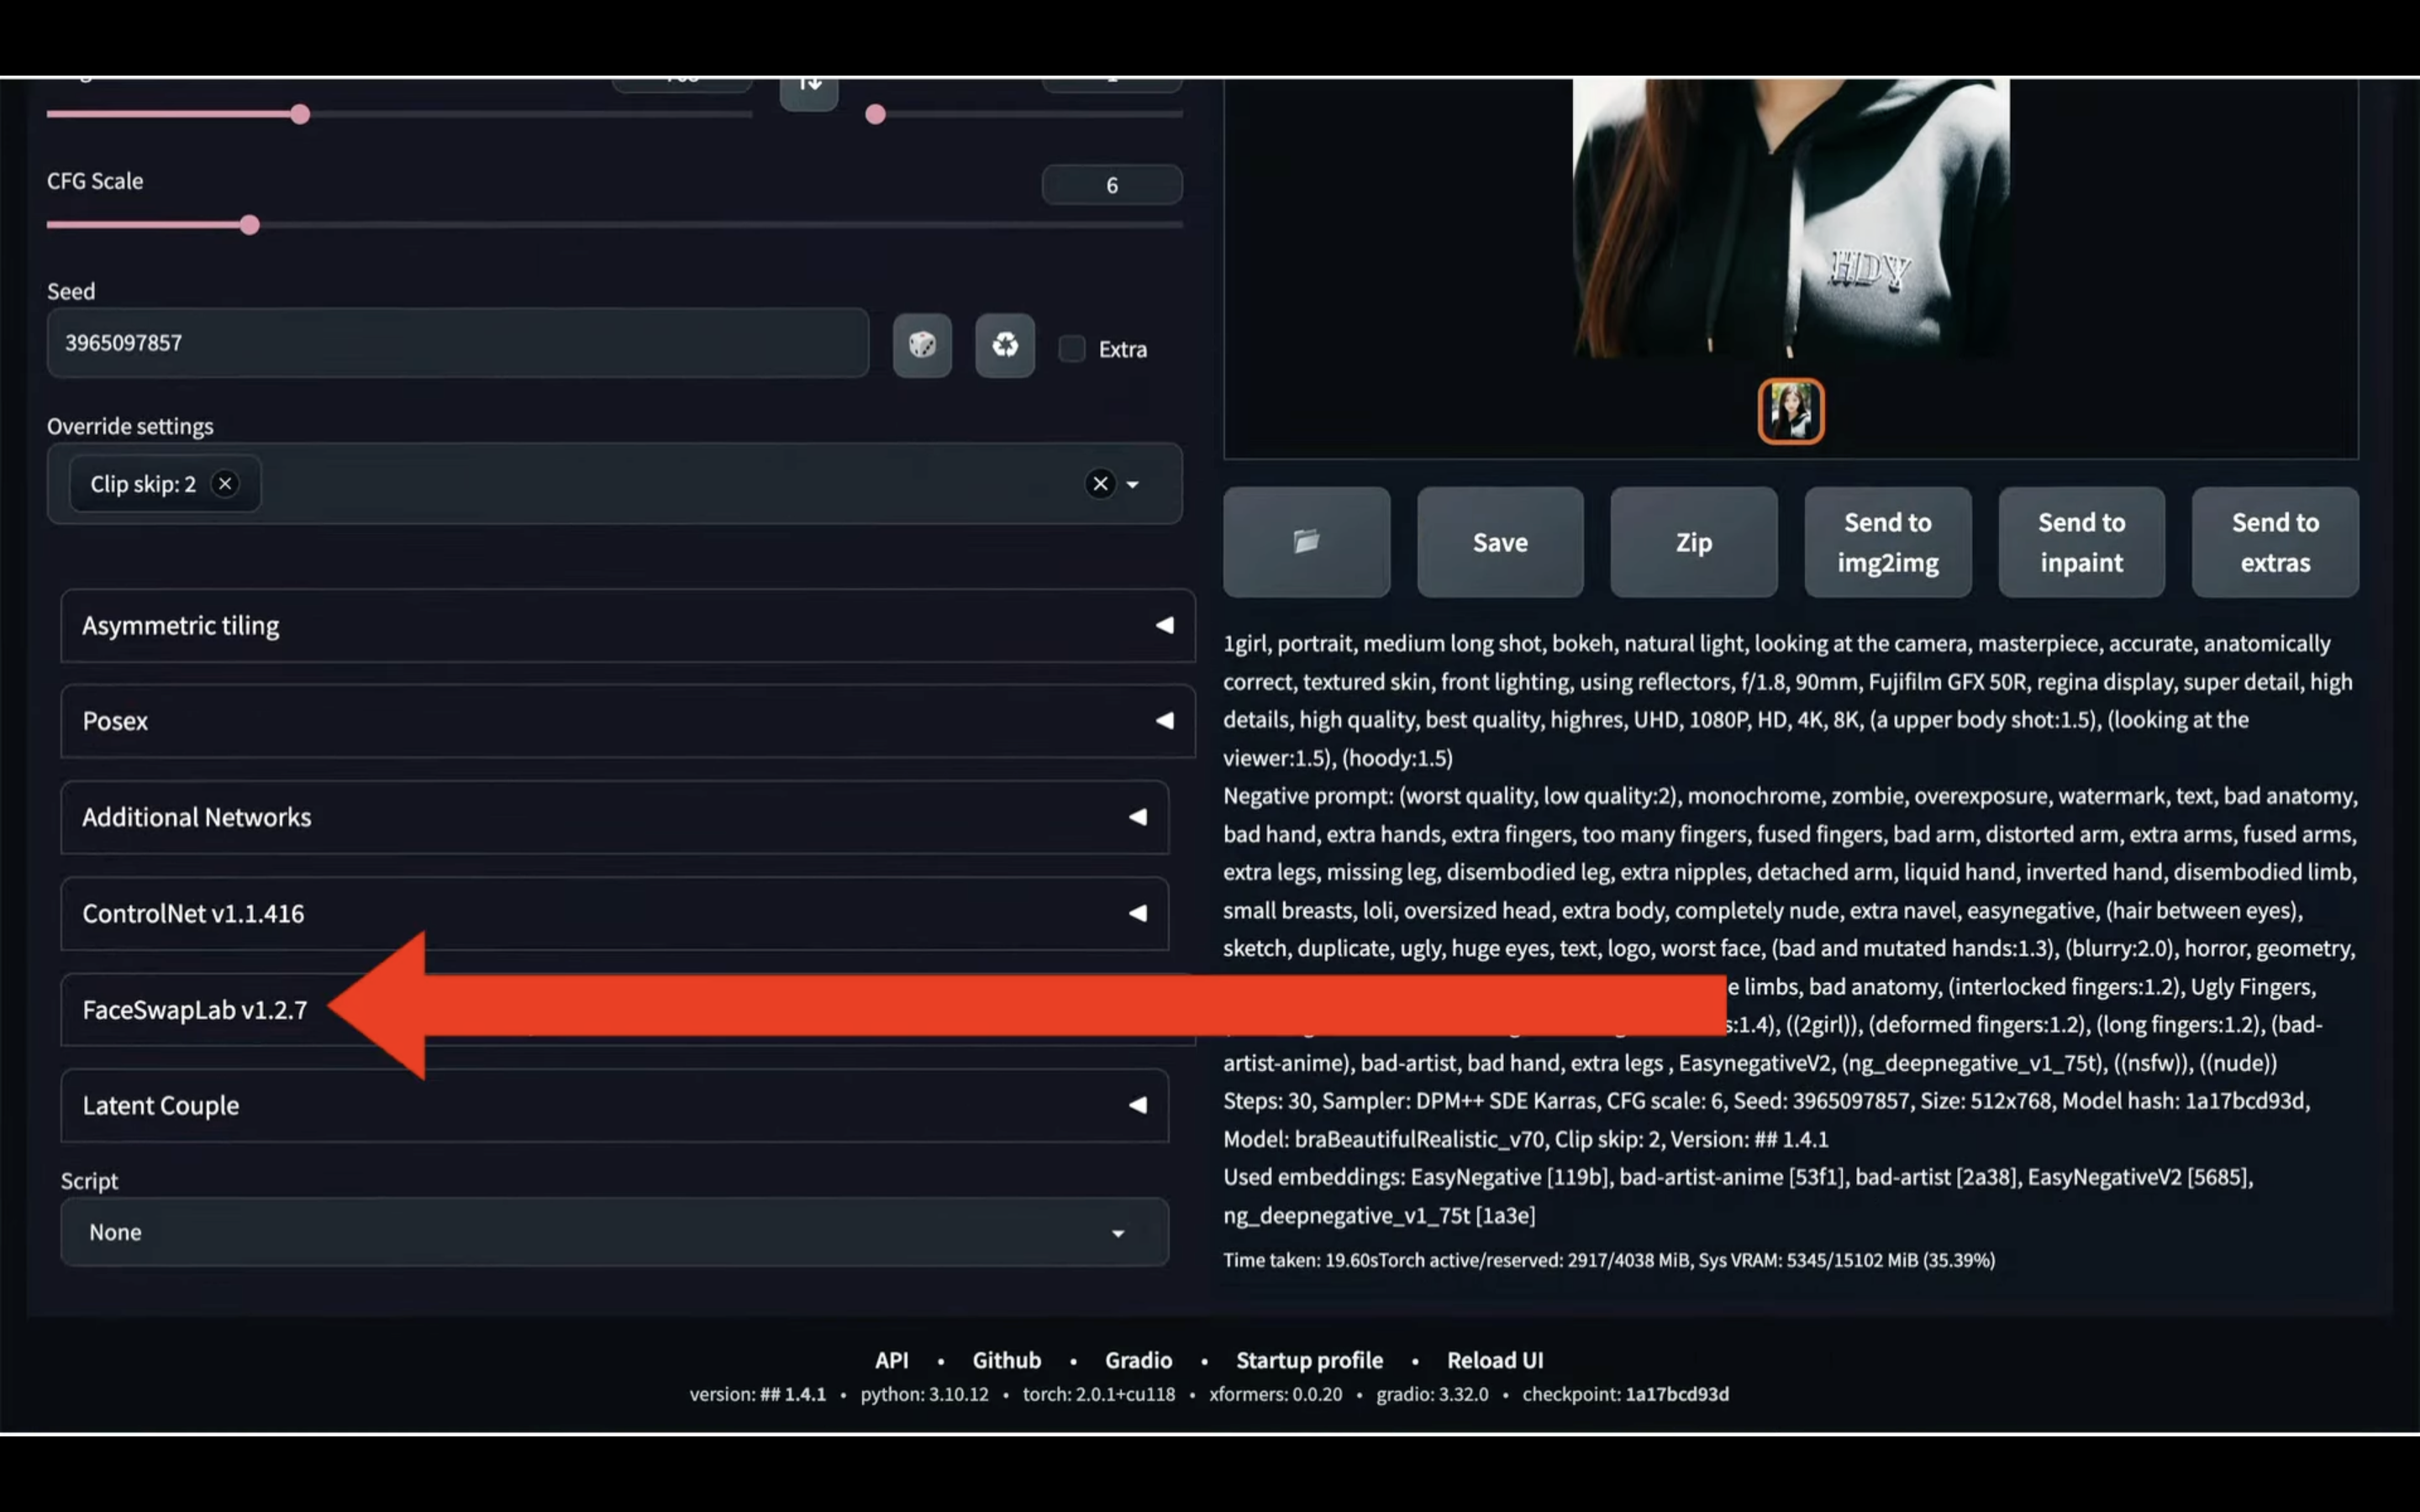
そうすると画像をアップロードするブロックが表示されます。
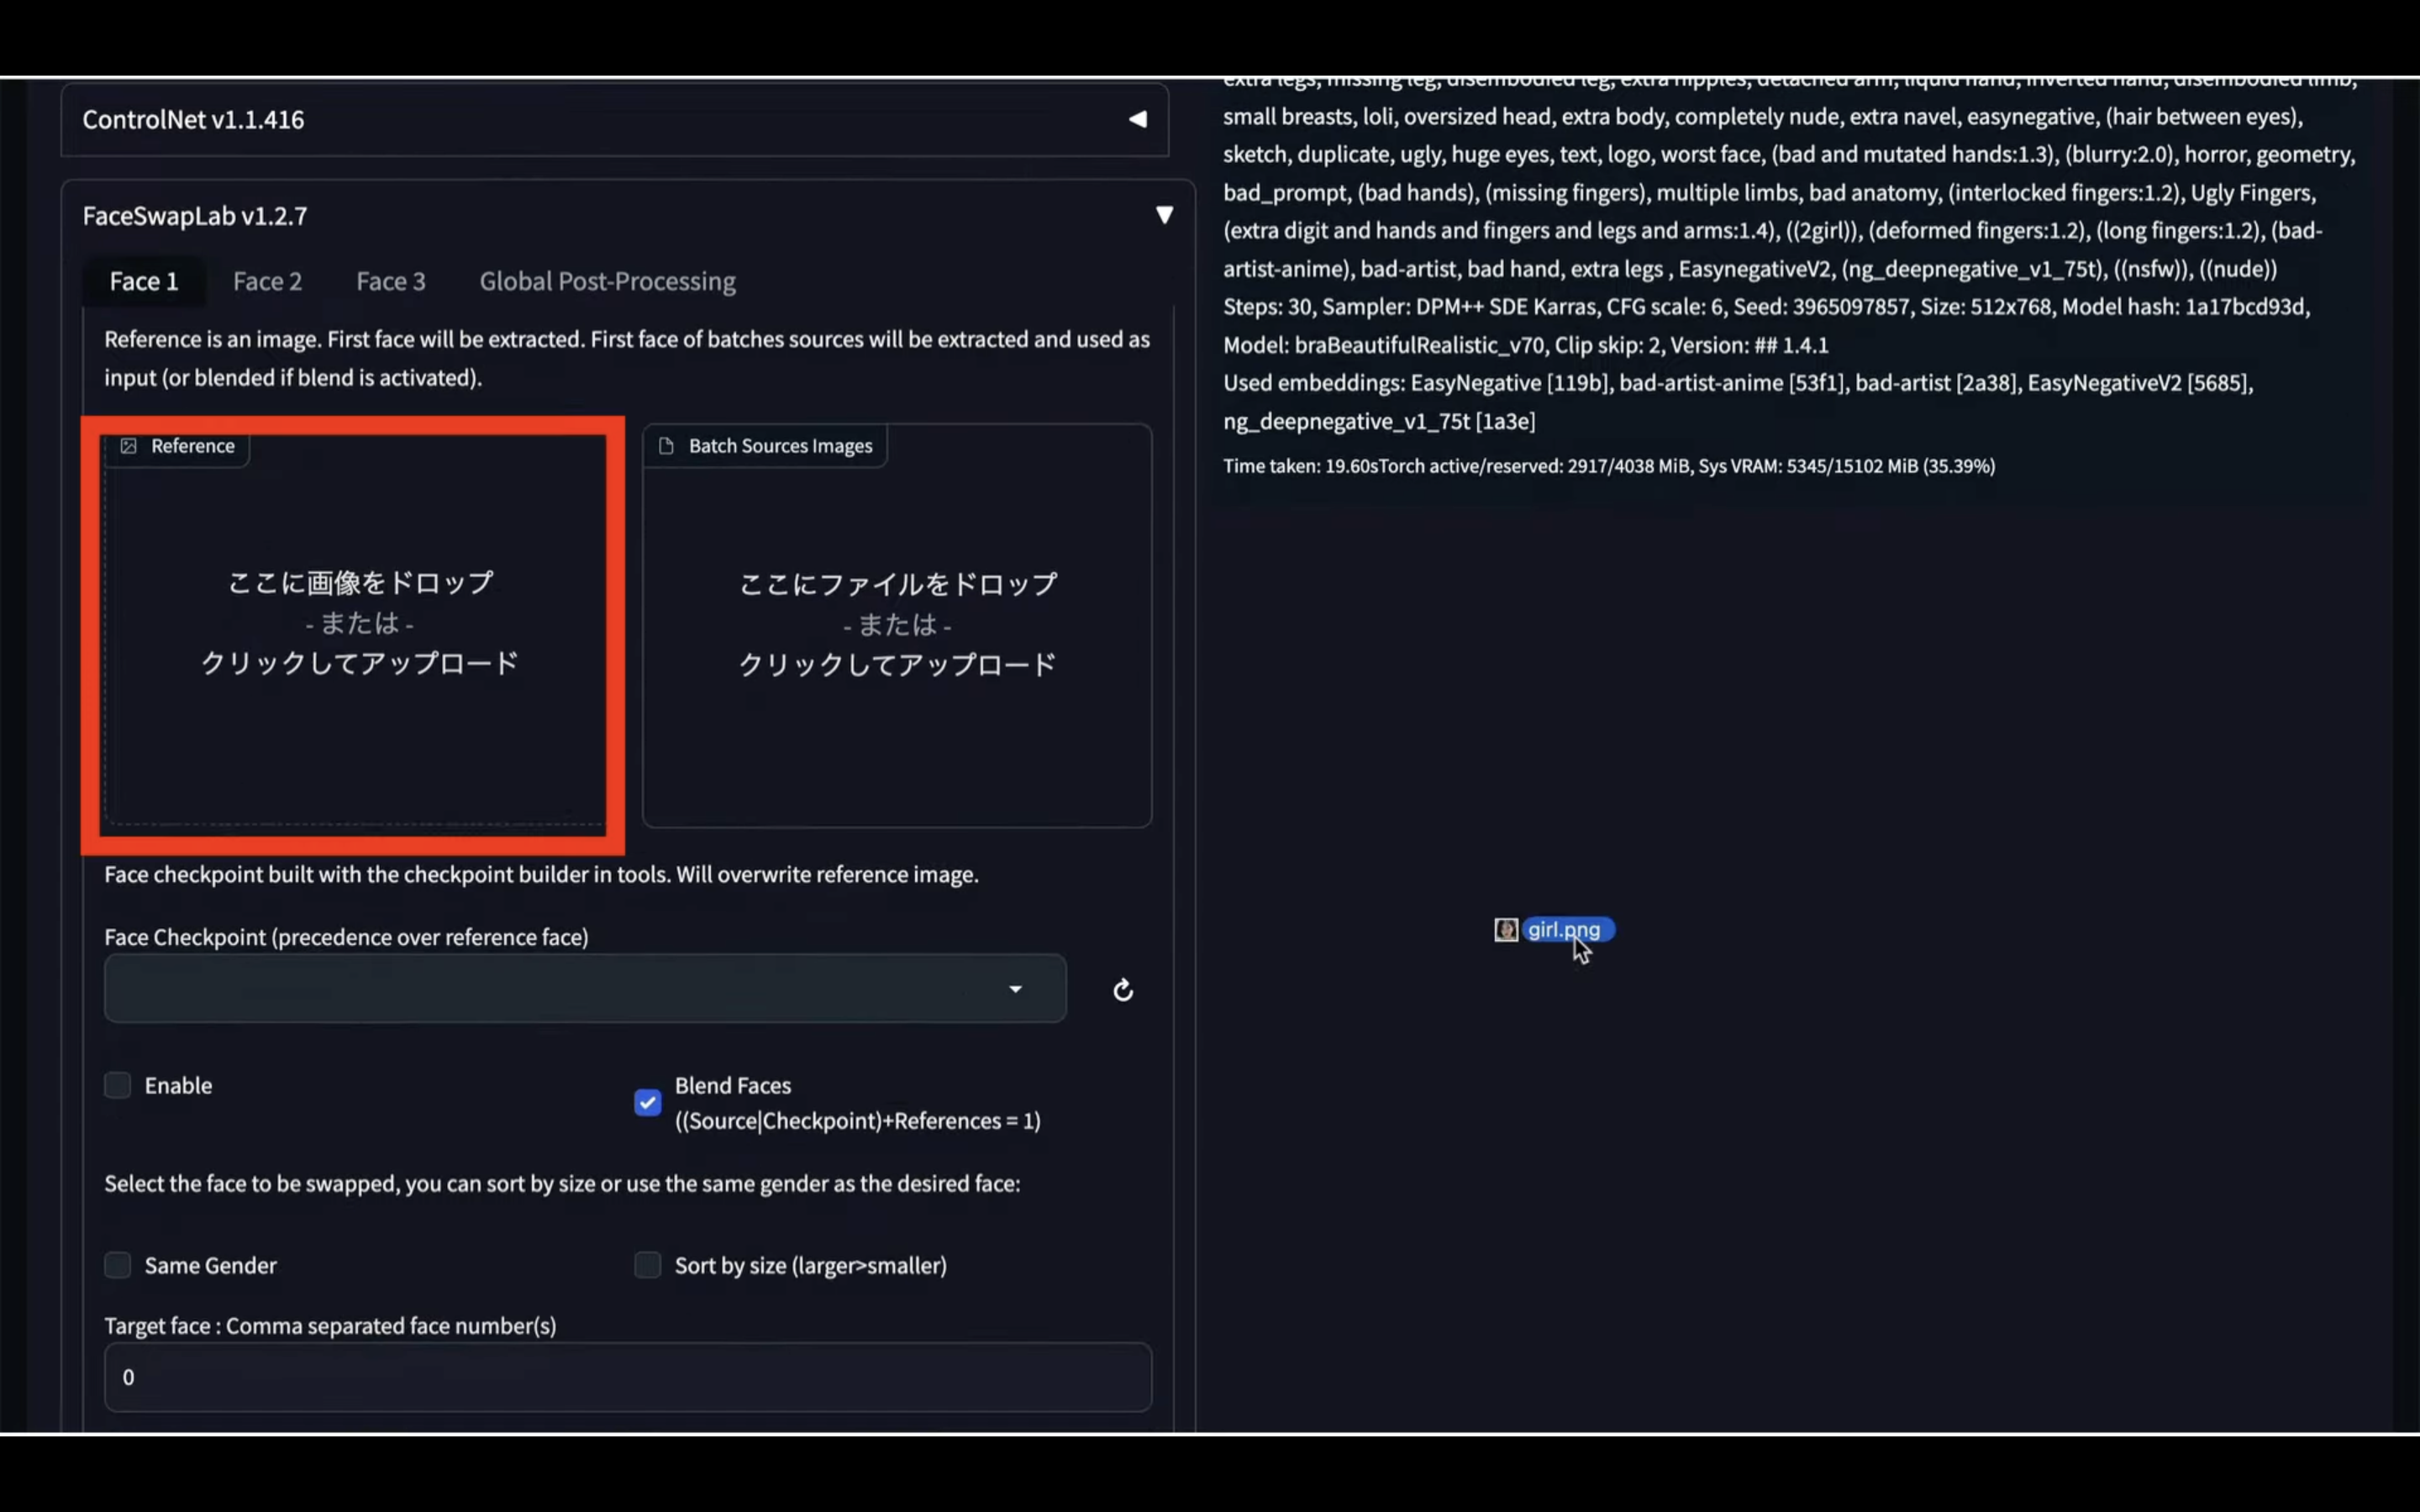
この部分に置き換える顔の画像をドラッグアンドドロップします。
今回はこの画像にしてみました。
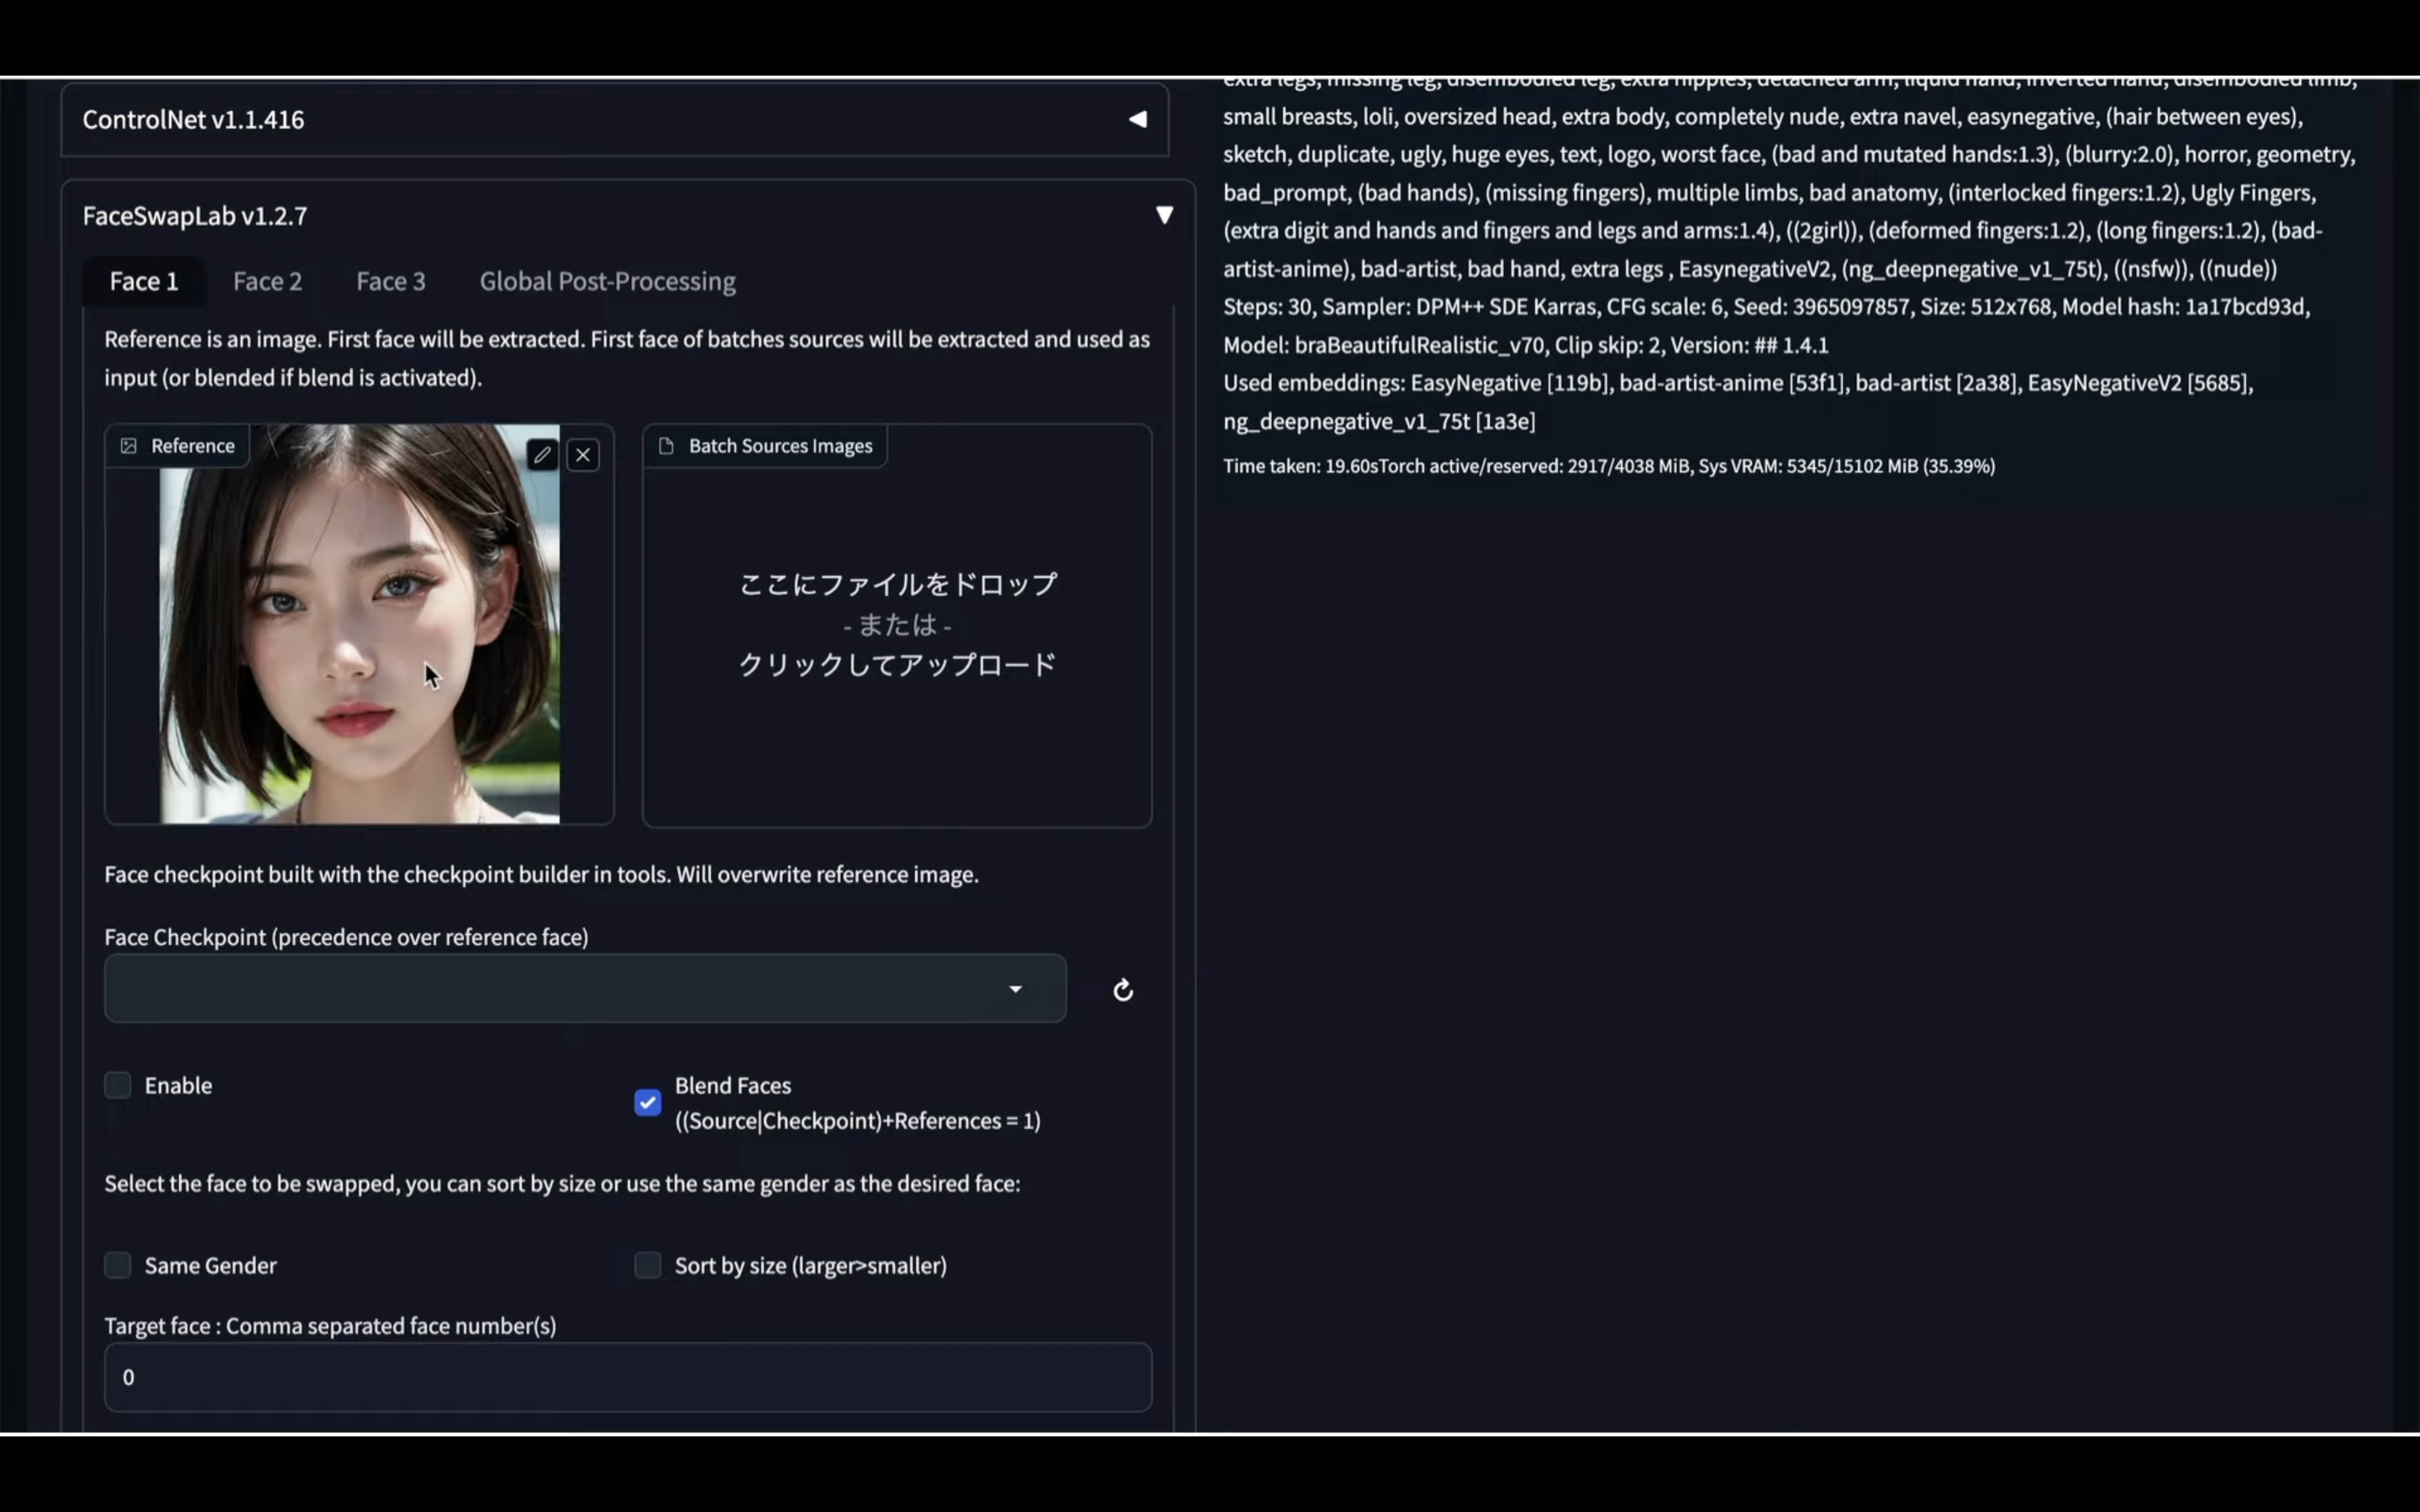
画像をアップロードしたら、Enableと書かれているチェックボックスにチェックを入れます。
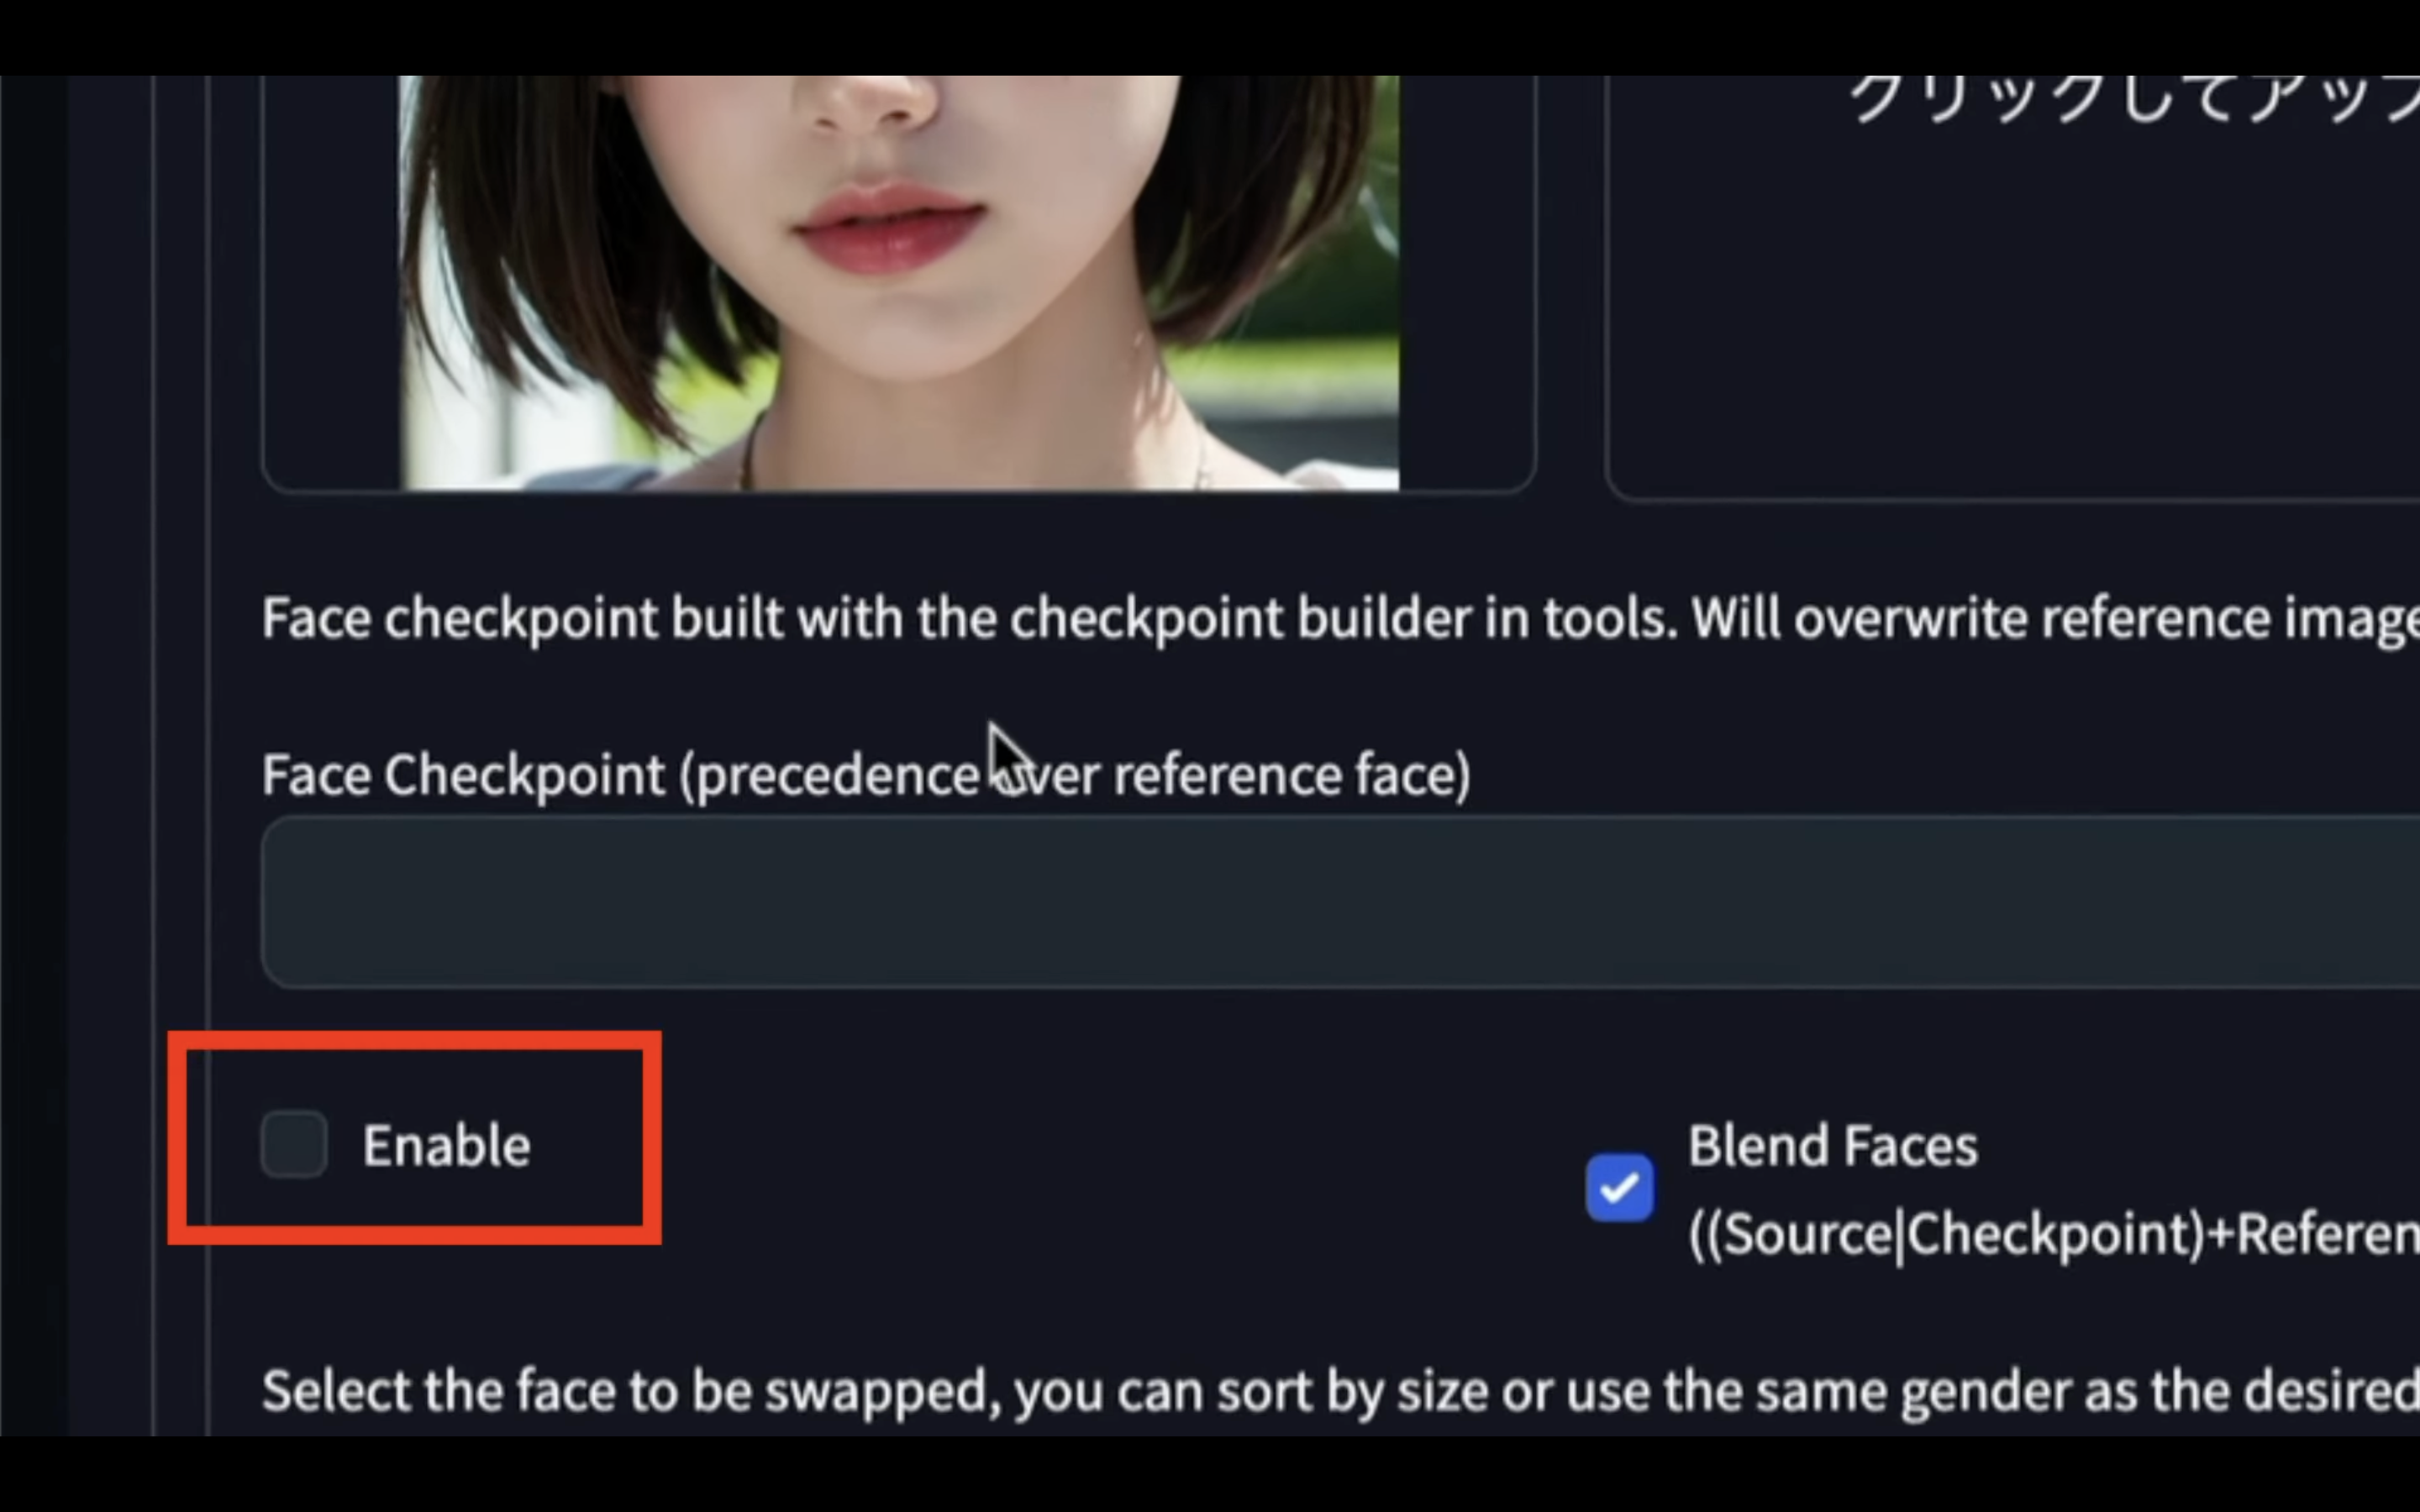
これでFaceSwapLabの設定が有効になります。

あとはGenerateボタンをクリックして画像を生成します。
しばらく待っているとこのような画像が生成されました。
元の画像と指定した顔写真、そして作成された画像を比較してみましょう。
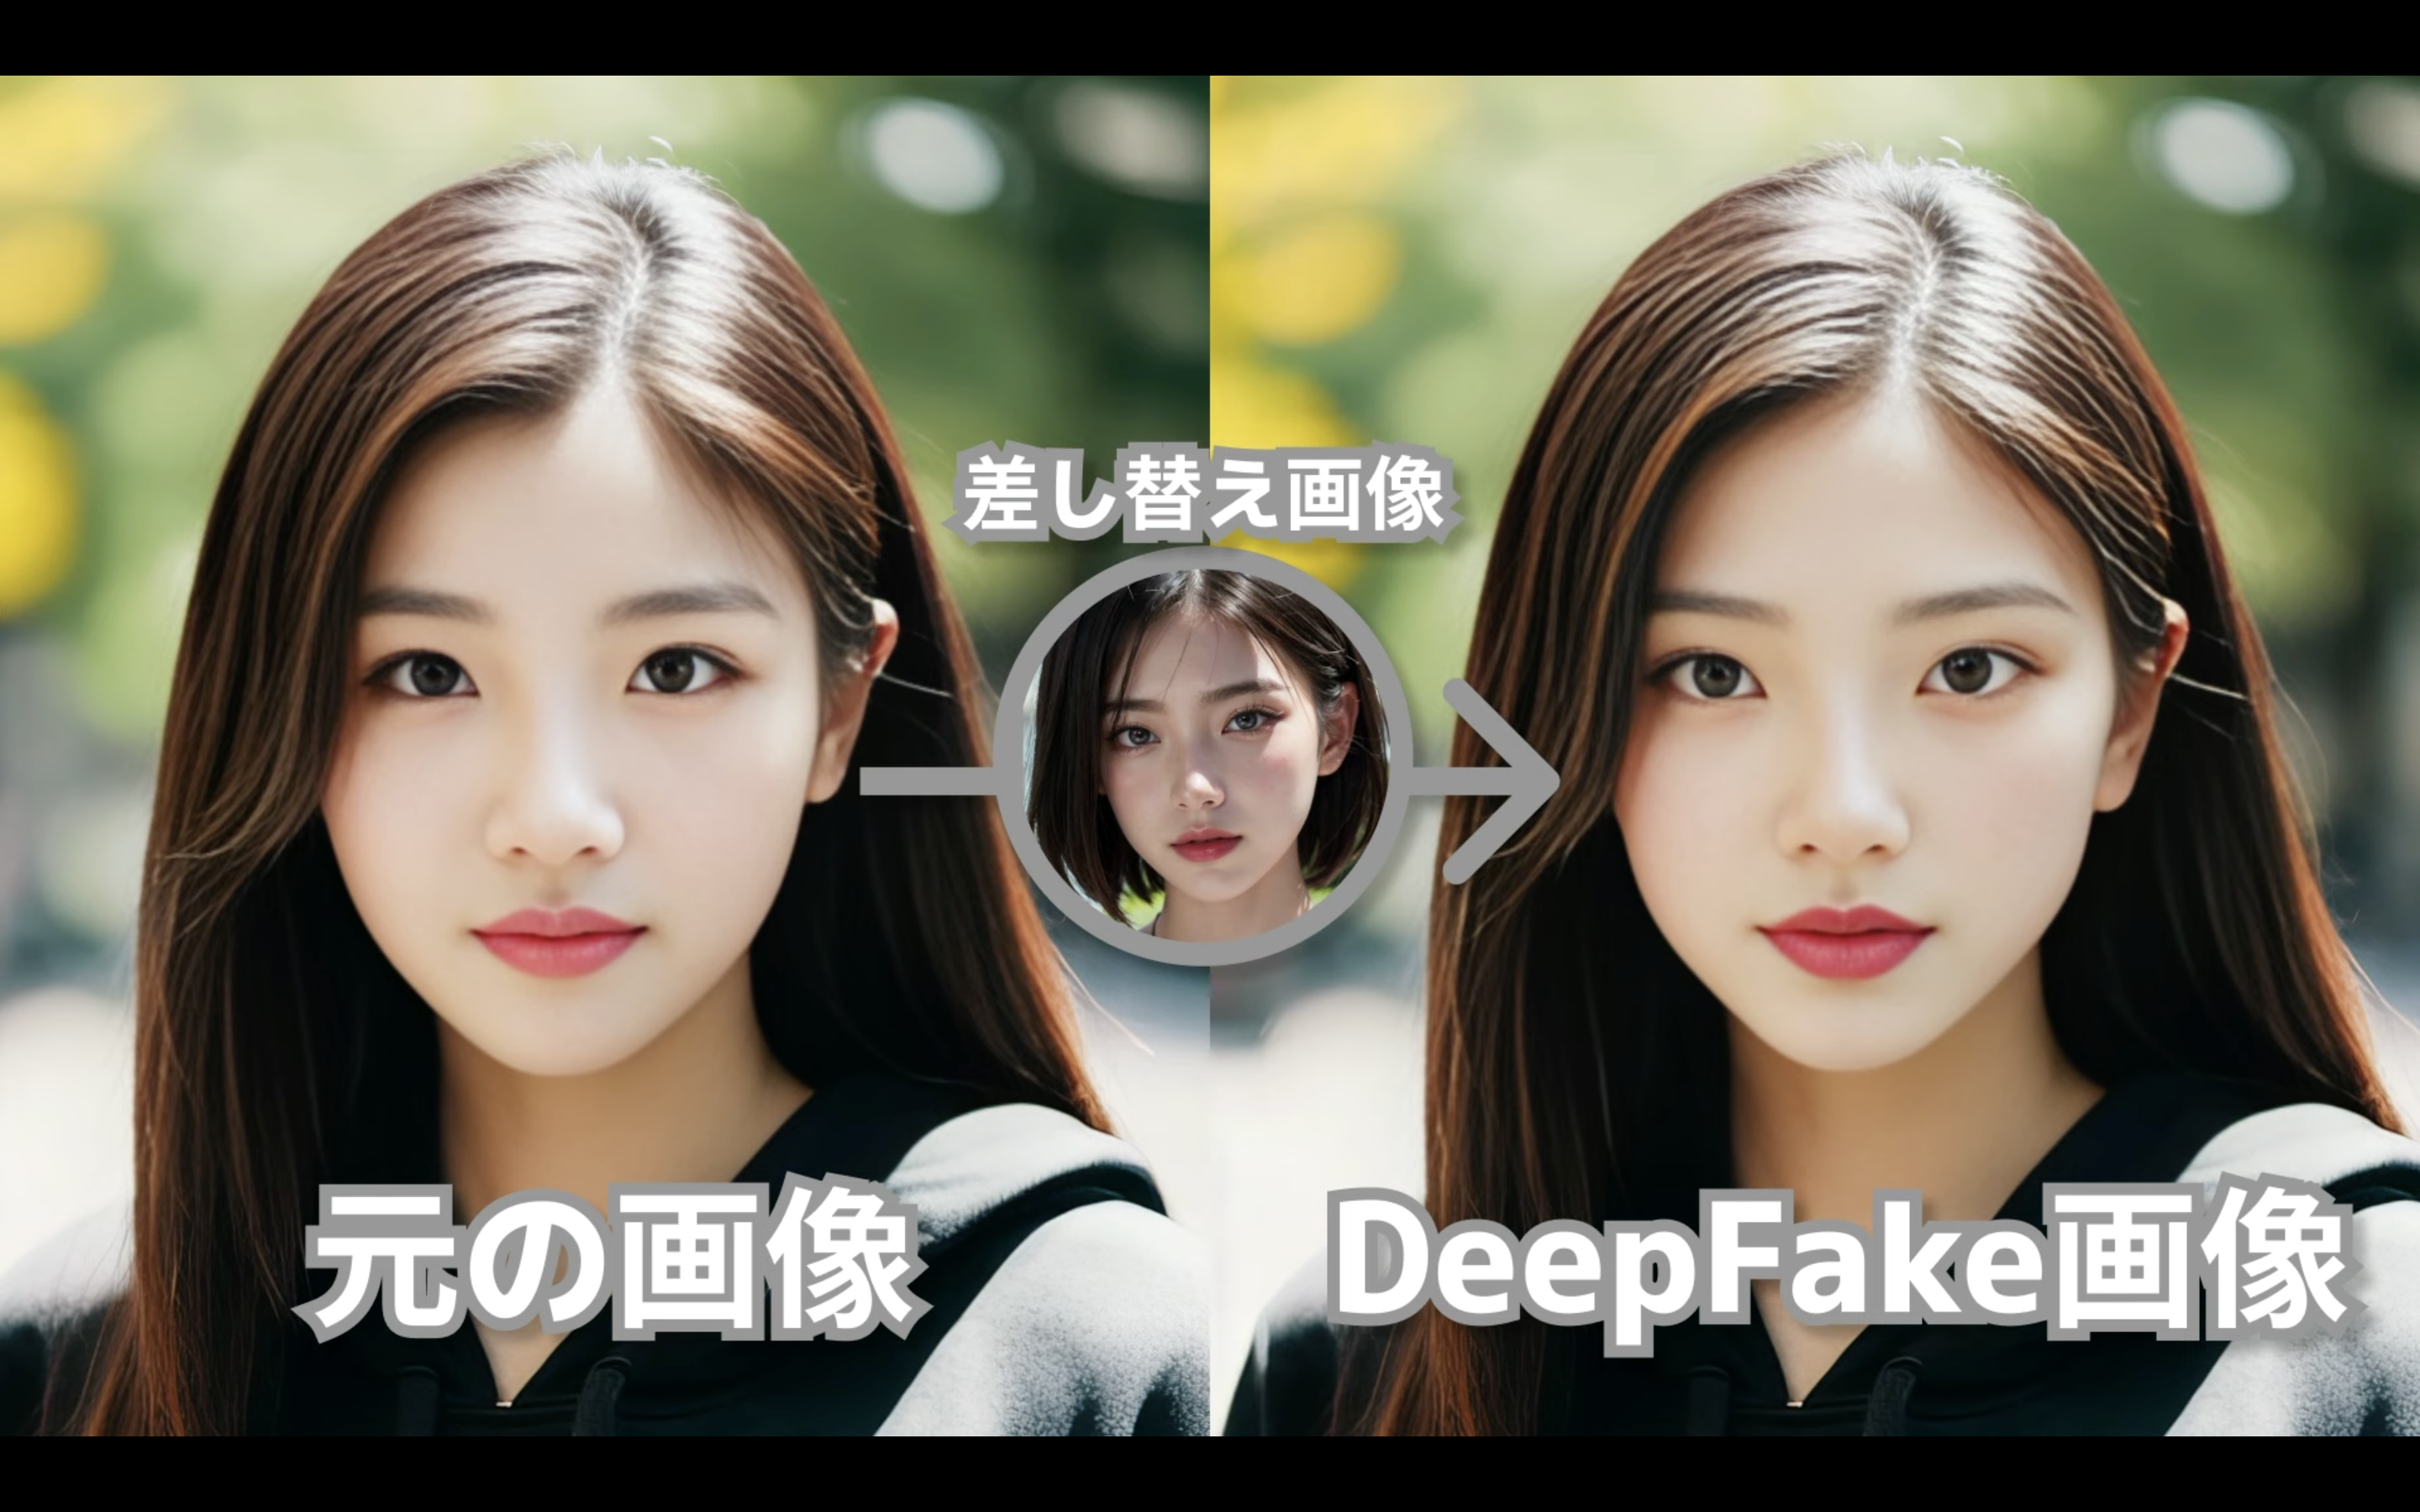
期待した通りディープフェイクの画像が生成されています。
このようにFaceSwapLabを利用すると、簡単にディープフェイクの画像を生成することができます。
悪用は厳禁ですが、是非試してみてください。