
▶︎動画でも話してるので、文章読むのが面倒な方はこちらをみてもらえればと思います。
今回はIPAdapterのFACE IDモデルを利用して、同じ顔のAI美女を生成する方法について解説します。

これを読めば誰でも簡単にクオリティーの高いAI美女が作れるようになっているので興味がある人は、下のバナーをクリックして購入してみてね🎶

目次
IPAdapterのFaceIDモデルを使って同一人物のAI美女を生成する方法とは?
ComfyUIでIPアダプタを利用するには、カスタムノードと呼ばれるエクステンションを利用します。
カスタムノードは、ComfyUI専用のアプリのものだと考えてください。
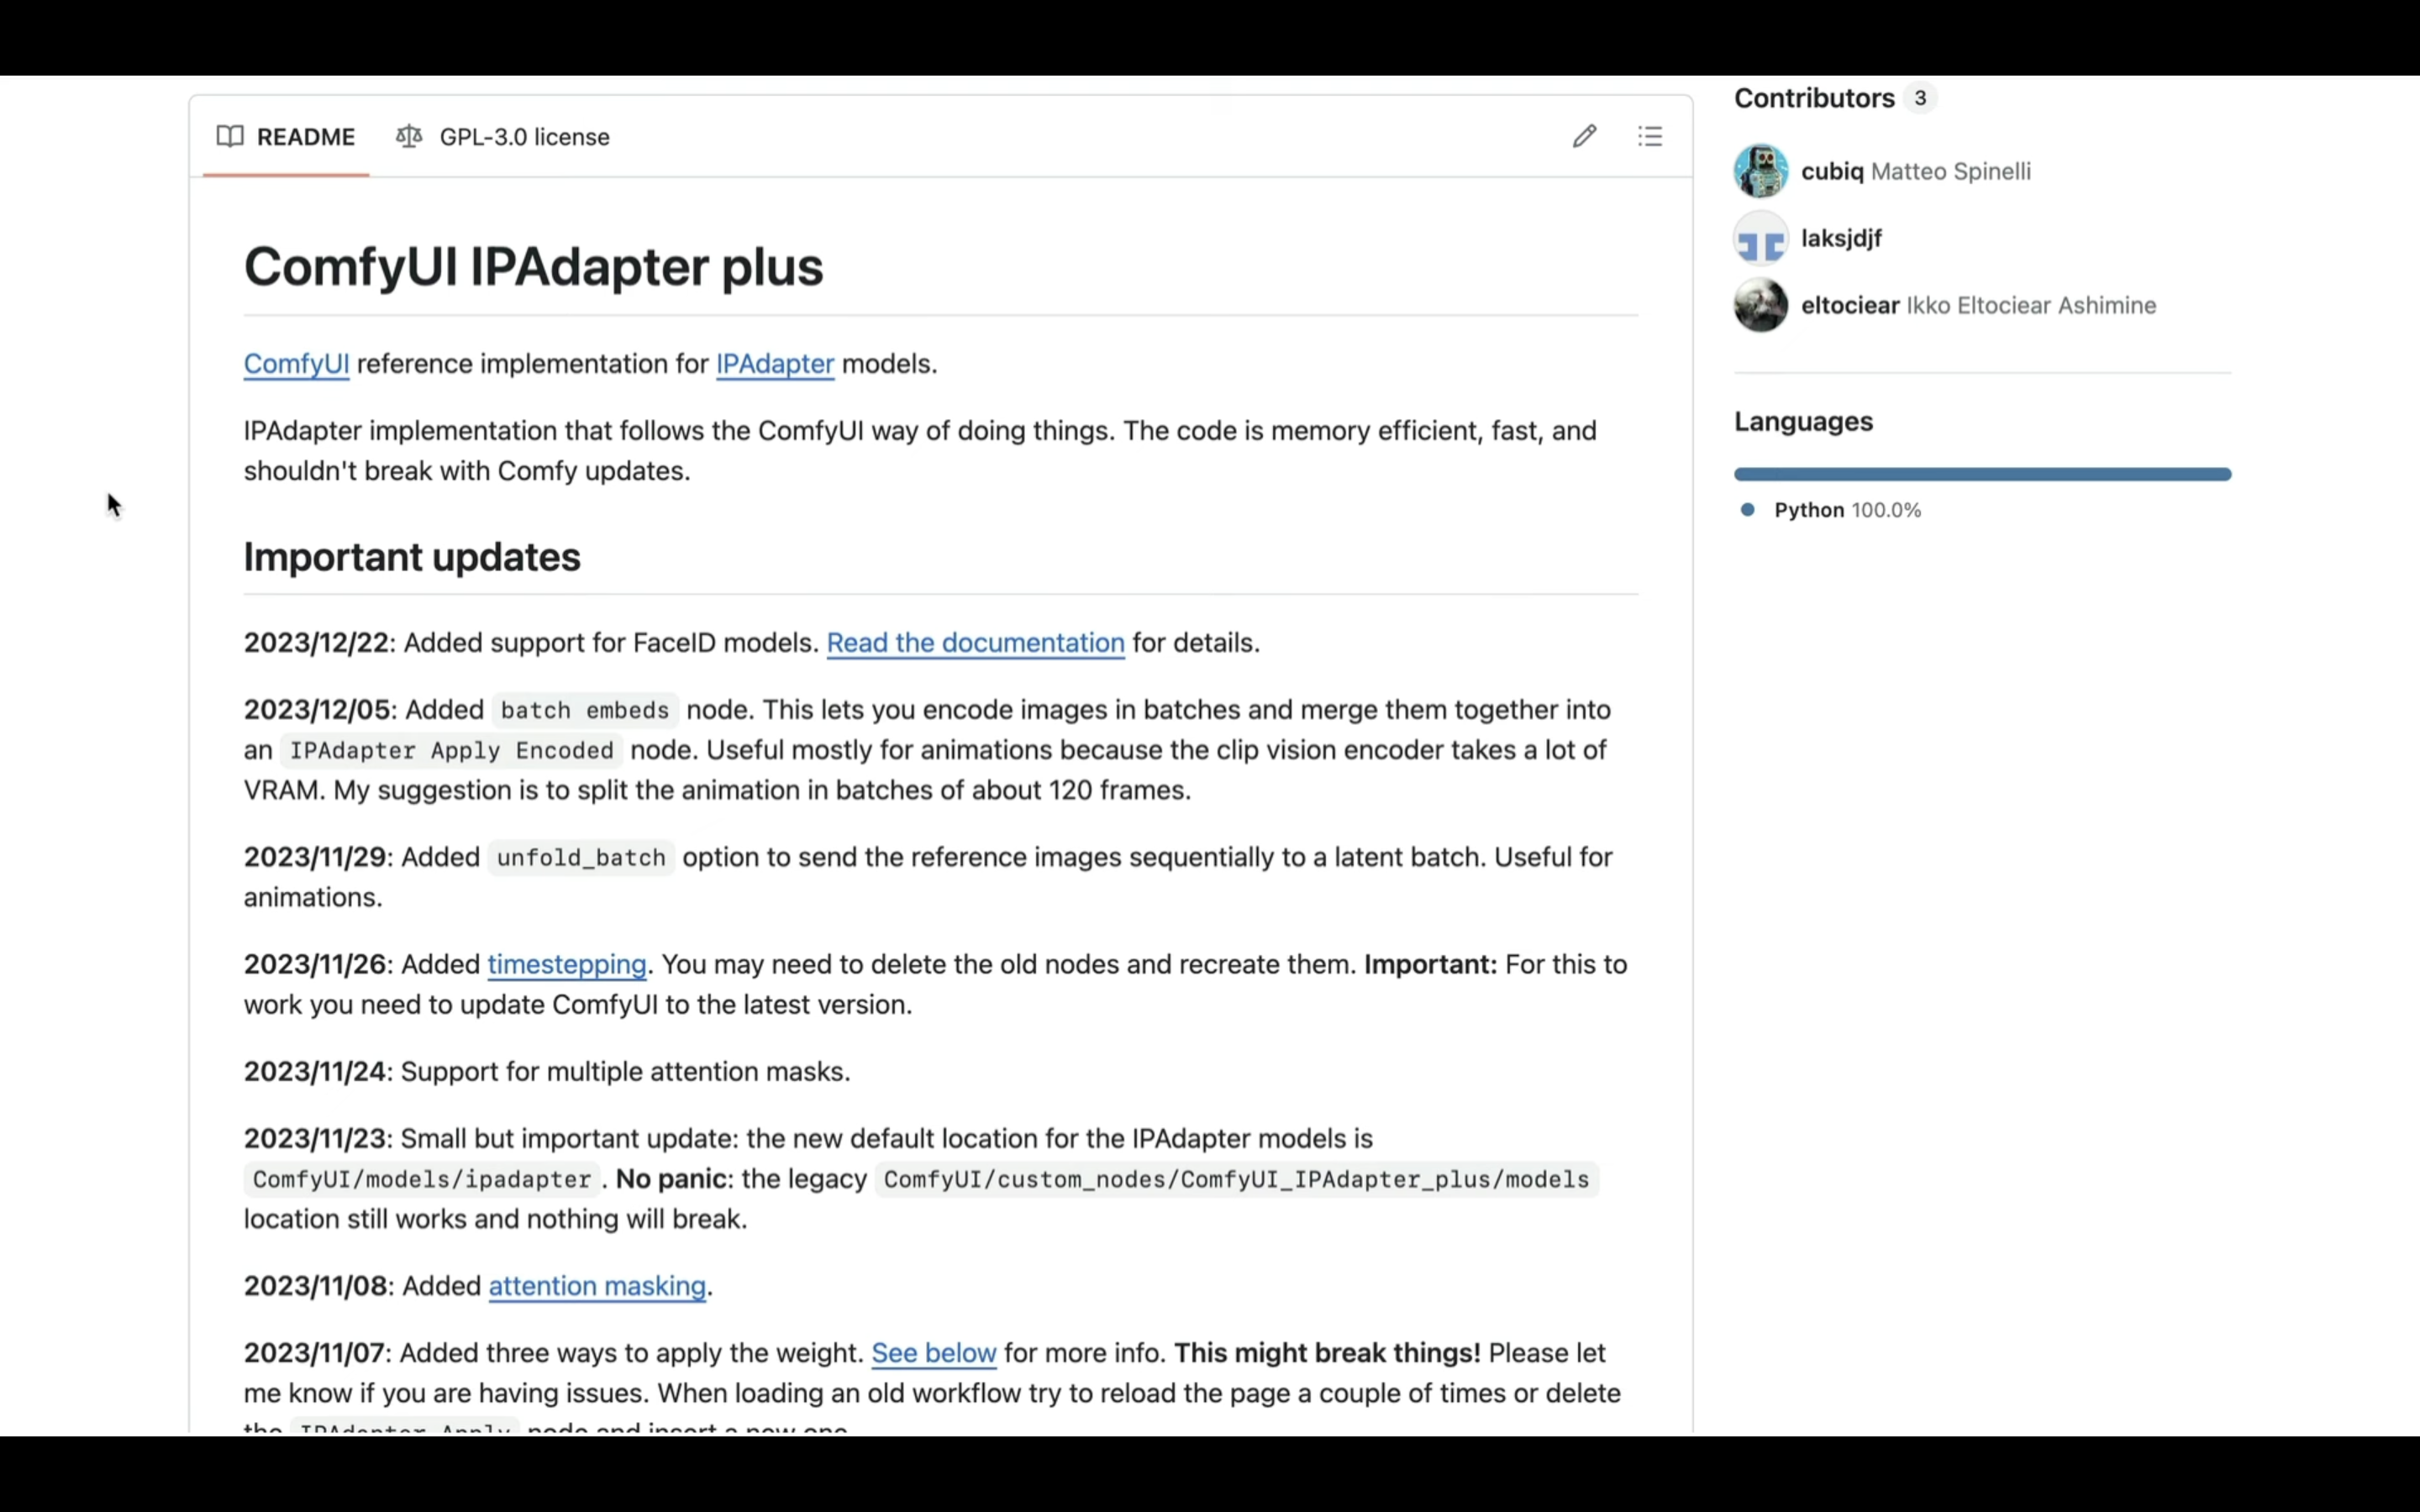
この解説では、ComfyUIでIPAdapterPlusという名前のカスタムノードを利用しています。
ComfyUIの動作を実行する
それでは早速、ComfyUIを動作させていきましょう。
この動画では、このソースコードをGoogle Colabを利用して動かしていきます。
もしもここまでの解説で、ComfyUI、Google Colabというキーワードが分からない場合は、解説している記事のリンクを以下に貼っておきますので、そちらをご確認ください。
Google Colabのサイトにアクセス
まずは、Google Colabのサイトにアクセスします。
ここからの流れは下記に詳細リンクを貼っておきますので、そちらからご参照ください。
これでComfyUIのソースコードを実行するための準備が整いました。
ComfyUIのソースコードを実行
下記に貼ってあるテキストをコピーします。
from pathlib import Path
import subprocess
import threading
import time
import socket
!pip install -q torch==2.0.1+cu118 torchvision==0.15.2+cu118 torchaudio==2.0.2+cu118 torchtext==0.15.2 torchdata==0.6.1 --extra-index-url https://download.pytorch.org/whl/cu118 -U
!pip install -q xformers==0.0.20 triton==2.0.0 gradio_client==0.2.7 -U
!apt -y install -qq aria2
!pip install controlnet-aux==0.0.7 onnxruntime onnxruntime-gpu insightface lpips
# 定数と設定
WORKSPACE = '/content/ComfyUI'
UPDATE_COMFY_UI = True
# ComfyUIのセットアップと更新
if not Path(WORKSPACE).exists():
%cd /content
print("-= Initial setup ComfyUI =-")
!git clone https://github.com/comfyanonymous/ComfyUI
else:
%cd $WORKSPACE
print("-= Updating ComfyUI =-")
!git pull
%cd $WORKSPACE/custom_nodes
!git clone https://github.com/ltdrdata/ComfyUI-Manager.git
!git clone https://github.com/melMass/comfy_mtb
!git clone https://github.com/cubiq/ComfyUI_IPAdapter_plus
!git clone https://github.com/mav-rik/facerestore_cf
!git clone https://github.com/rgthree/rgthree-comfy
!git clone https://github.com/WASasquatch/was-node-suite-comfyui
# facerestore_cfの対応
!mkdir /content/ComfyUI/models/facerestore_models
!aria2c --console-log-level=error -c -x 16 -s 16 -k 1M https://github.com/sczhou/CodeFormer/releases/download/v0.1.0/codeformer.pth -d /content/ComfyUI/models/facerestore_models -o codeformer.pth
!aria2c --console-log-level=error -c -x 16 -s 16 -k 1M https://github.com/TencentARC/GFPGAN/releases/download/v1.3.4/GFPGANv1.4.pth -d /content/ComfyUI/models/facerestore_models -o GFPGANv1.4.pth
# Upscaleのモデルをダウンロード
!aria2c --console-log-level=error -c -x 16 -s 16 -k 1M https://huggingface.co/embed/upscale/resolve/main/4x-UltraSharp.pth -d /content/ComfyUI/models/upscale_models -o 4x-UltraSharp.pth
# IP-Adapterのモデルをダウンロード
## models
!aria2c --console-log-level=error -c -x 16 -s 16 -k 1M https://huggingface.co/h94/IP-Adapter/resolve/main/models/image_encoder/pytorch_model.bin -d /content/ComfyUI/models/clip_vision/SD1.5 -o pytorch_model.bin
!aria2c --console-log-level=error -c -x 16 -s 16 -k 1M https://huggingface.co/h94/IP-Adapter/resolve/main/models/image_encoder/model.safetensors -d /content/ComfyUI/models/clip_vision -o models.safetensors
!aria2c --console-log-level=error -c -x 16 -s 16 -k 1M https://huggingface.co/h94/IP-Adapter-FaceID/resolve/main/ip-adapter-faceid_sd15.bin -d /content/ComfyUI/models/ipadapter -o ip-adapter-faceid_sd15.bin
!aria2c --console-log-level=error -c -x 16 -s 16 -k 1M https://huggingface.co/h94/IP-Adapter-FaceID/resolve/main/ip-adapter-faceid_sd15_lora.safetensors -d /content/ComfyUI/models/loras -o ip-adapter-faceid_sd15_lora.safetensors
!aria2c --console-log-level=error -c -x 16 -s 16 -k 1M https://huggingface.co/h94/IP-Adapter-FaceID/resolve/main/ip-adapter-faceid_sd15_lora.safetensors -d /content/ComfyUI/models/ipadapter -o ip-adapter-faceid_sd15_lora.safetensors
# ComfyUI_IPAdapter_plusで利用するモデルをダウンロード
!aria2c --console-log-level=error -c -x 16 -s 16 -k 1M https://huggingface.co/h94/IP-Adapter/resolve/main/models/ip-adapter-full-face_sd15.safetensors -d /content/ComfyUI/models/ipadapter -o ip-adapter-full-face_sd15.safetensors
!aria2c --console-log-level=error -c -x 16 -s 16 -k 1M https://huggingface.co/h94/IP-Adapter/resolve/main/models/ip-adapter-plus-face_sd15.safetensors -d /content/ComfyUI/models/ipadapter -o ip-adapter-plus-face_sd15.safetensors
!aria2c --console-log-level=error -c -x 16 -s 16 -k 1M https://huggingface.co/h94/IP-Adapter/resolve/main/models/ip-adapter-plus_sd15.safetensors -d /content/ComfyUI/models/ipadapter -o ip-adapter-plus_sd15.safetensors
!aria2c --console-log-level=error -c -x 16 -s 16 -k 1M https://huggingface.co/h94/IP-Adapter/resolve/main/models/ip-adapter_sd15.safetensors -d /content/ComfyUI/models/ipadapter -o ip-adapter_sd15.safetensors
!aria2c --console-log-level=error -c -x 16 -s 16 -k 1M https://huggingface.co/h94/IP-Adapter/resolve/main/models/ip-adapter_sd15_light.safetensors -d /content/ComfyUI/models/ipadapter -o ip-adapter_sd15_light.safetensors
!aria2c --console-log-level=error -c -x 16 -s 16 -k 1M https://huggingface.co/h94/IP-Adapter/resolve/main/models/ip-adapter_sd15_vit-G.safetensors -d /content/ComfyUI/models/ipadapter -o ip-adapter_sd15_vit-G.safetensors
# ネガティブプロンプト
!git clone https://huggingface.co/embed/negative $WORKSPACE/models/embeddings/negative
!wget -c -P $WORKSPACE/models/embeddings/negative/
%cd $WORKSPACE
# 依存関係のインストール
print("-= Install dependencies =-")
!pip install xformers!=0.0.18 -r requirements.txt --extra-index-url https://download.pytorch.org/whl/cu118 --extra-index-url https://download.pytorch.org/whl/cu118
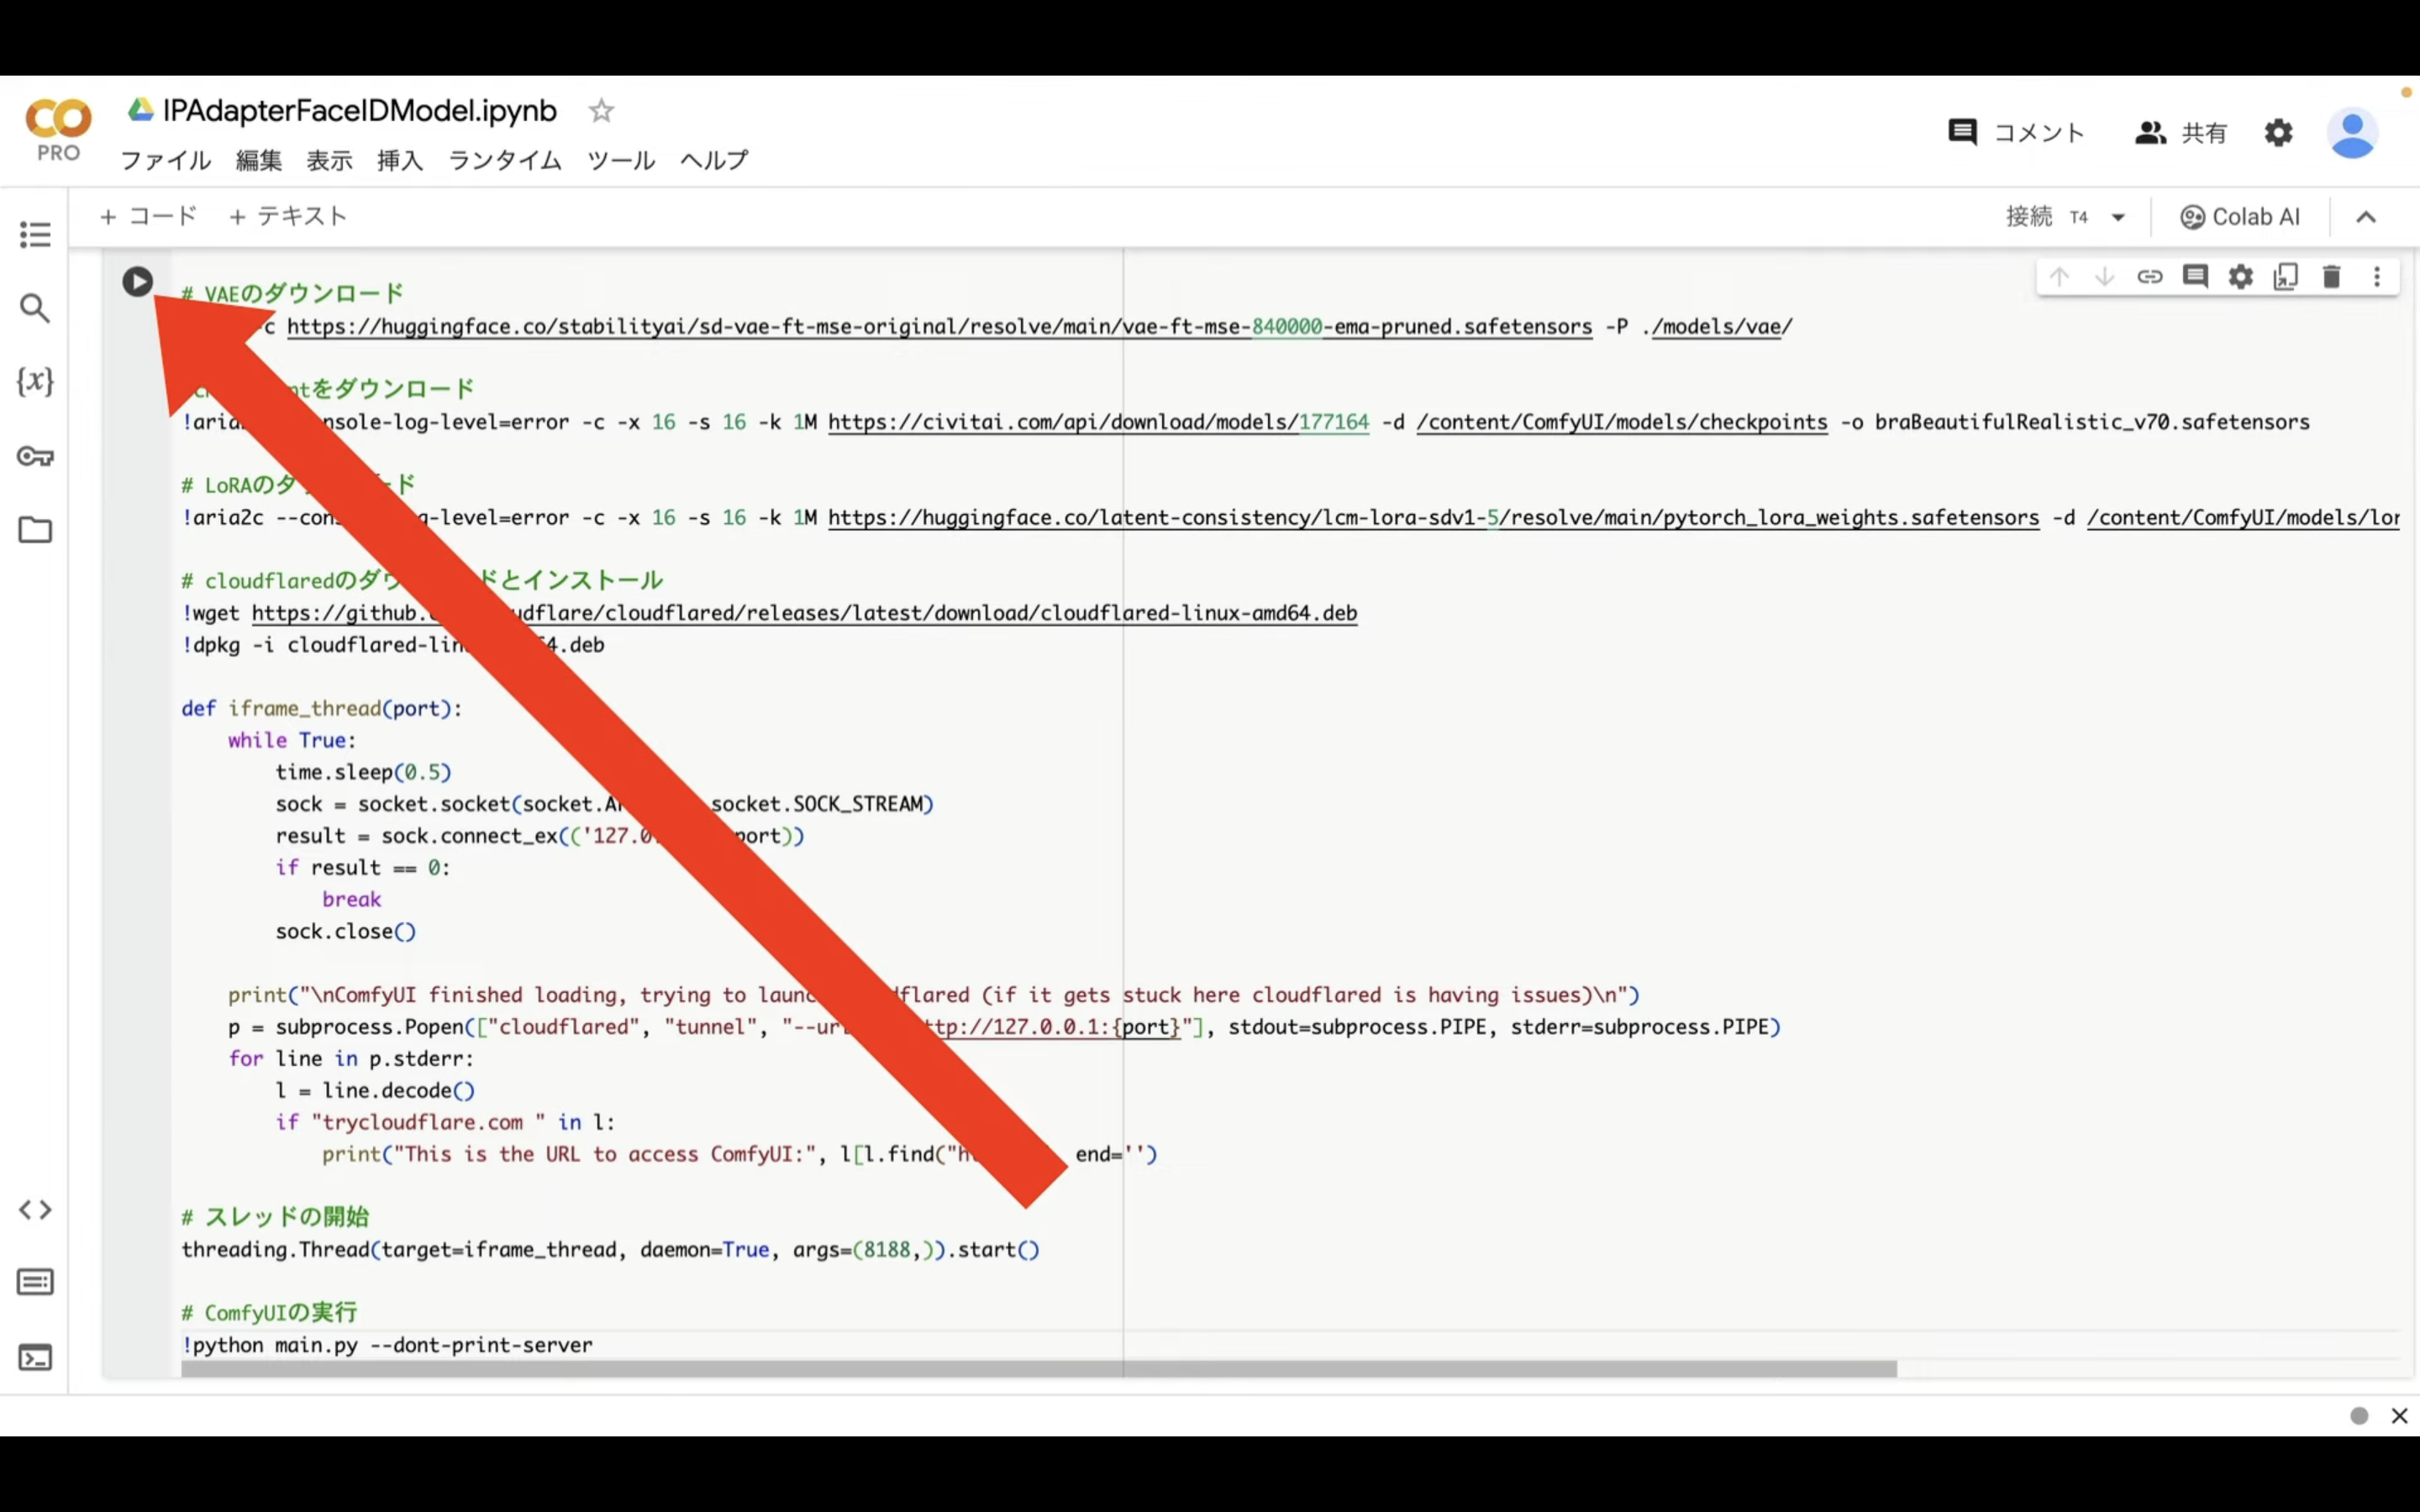
# VAEのダウンロード
!wget -c https://huggingface.co/stabilityai/sd-vae-ft-mse-original/resolve/main/vae-ft-mse-840000-ema-pruned.safetensors -P ./models/vae/
#checkpointをダウンロード
!aria2c --console-log-level=error -c -x 16 -s 16 -k 1M https://civitai.com/api/download/models/177164 -d /content/ComfyUI/models/checkpoints -o braBeautifulRealistic_v70.safetensors
# LoRAのダウンロード
!aria2c --console-log-level=error -c -x 16 -s 16 -k 1M https://huggingface.co/latent-consistency/lcm-lora-sdv1-5/resolve/main/pytorch_lora_weights.safetensors -d /content/ComfyUI/models/loras -o lcm-lora-sdv1-5_lora_weights.safetensors
# cloudflaredのダウンロードとインストール
!wget https://github.com/cloudflare/cloudflared/releases/latest/download/cloudflared-linux-amd64.deb
!dpkg -i cloudflared-linux-amd64.deb
def iframe_thread(port):
while True:
time.sleep(0.5)
sock = socket.socket(socket.AF_INET, socket.SOCK_STREAM)
result = sock.connect_ex(('127.0.0.1', port))
if result == 0:
break
sock.close()
print("\nComfyUI finished loading, trying to launch cloudflared (if it gets stuck here cloudflared is having issues)\n")
p = subprocess.Popen(["cloudflared", "tunnel", "--url", f"http://127.0.0.1:{port}"], stdout=subprocess.PIPE, stderr=subprocess.PIPE)
for line in p.stderr:
l = line.decode()
if "trycloudflare.com " in l:
print("This is the URL to access ComfyUI:", l[l.find("http"):], end='')
# スレッドの開始
threading.Thread(target=iframe_thread, daemon=True, args=(8188,)).start()
# ComfyUIの実行
!python main.py --dont-print-server
テキストをコピーしたら、Google Colabの画面に戻り、テキストボックスに先ほどコピーしたテキストを貼り付け、再生ボタンを押します。
これで貼り付けたテキストの内容が実行されます。
この処理には5分以上かかると思います。
しばらく待っていると、このようなリンクが表示されます。
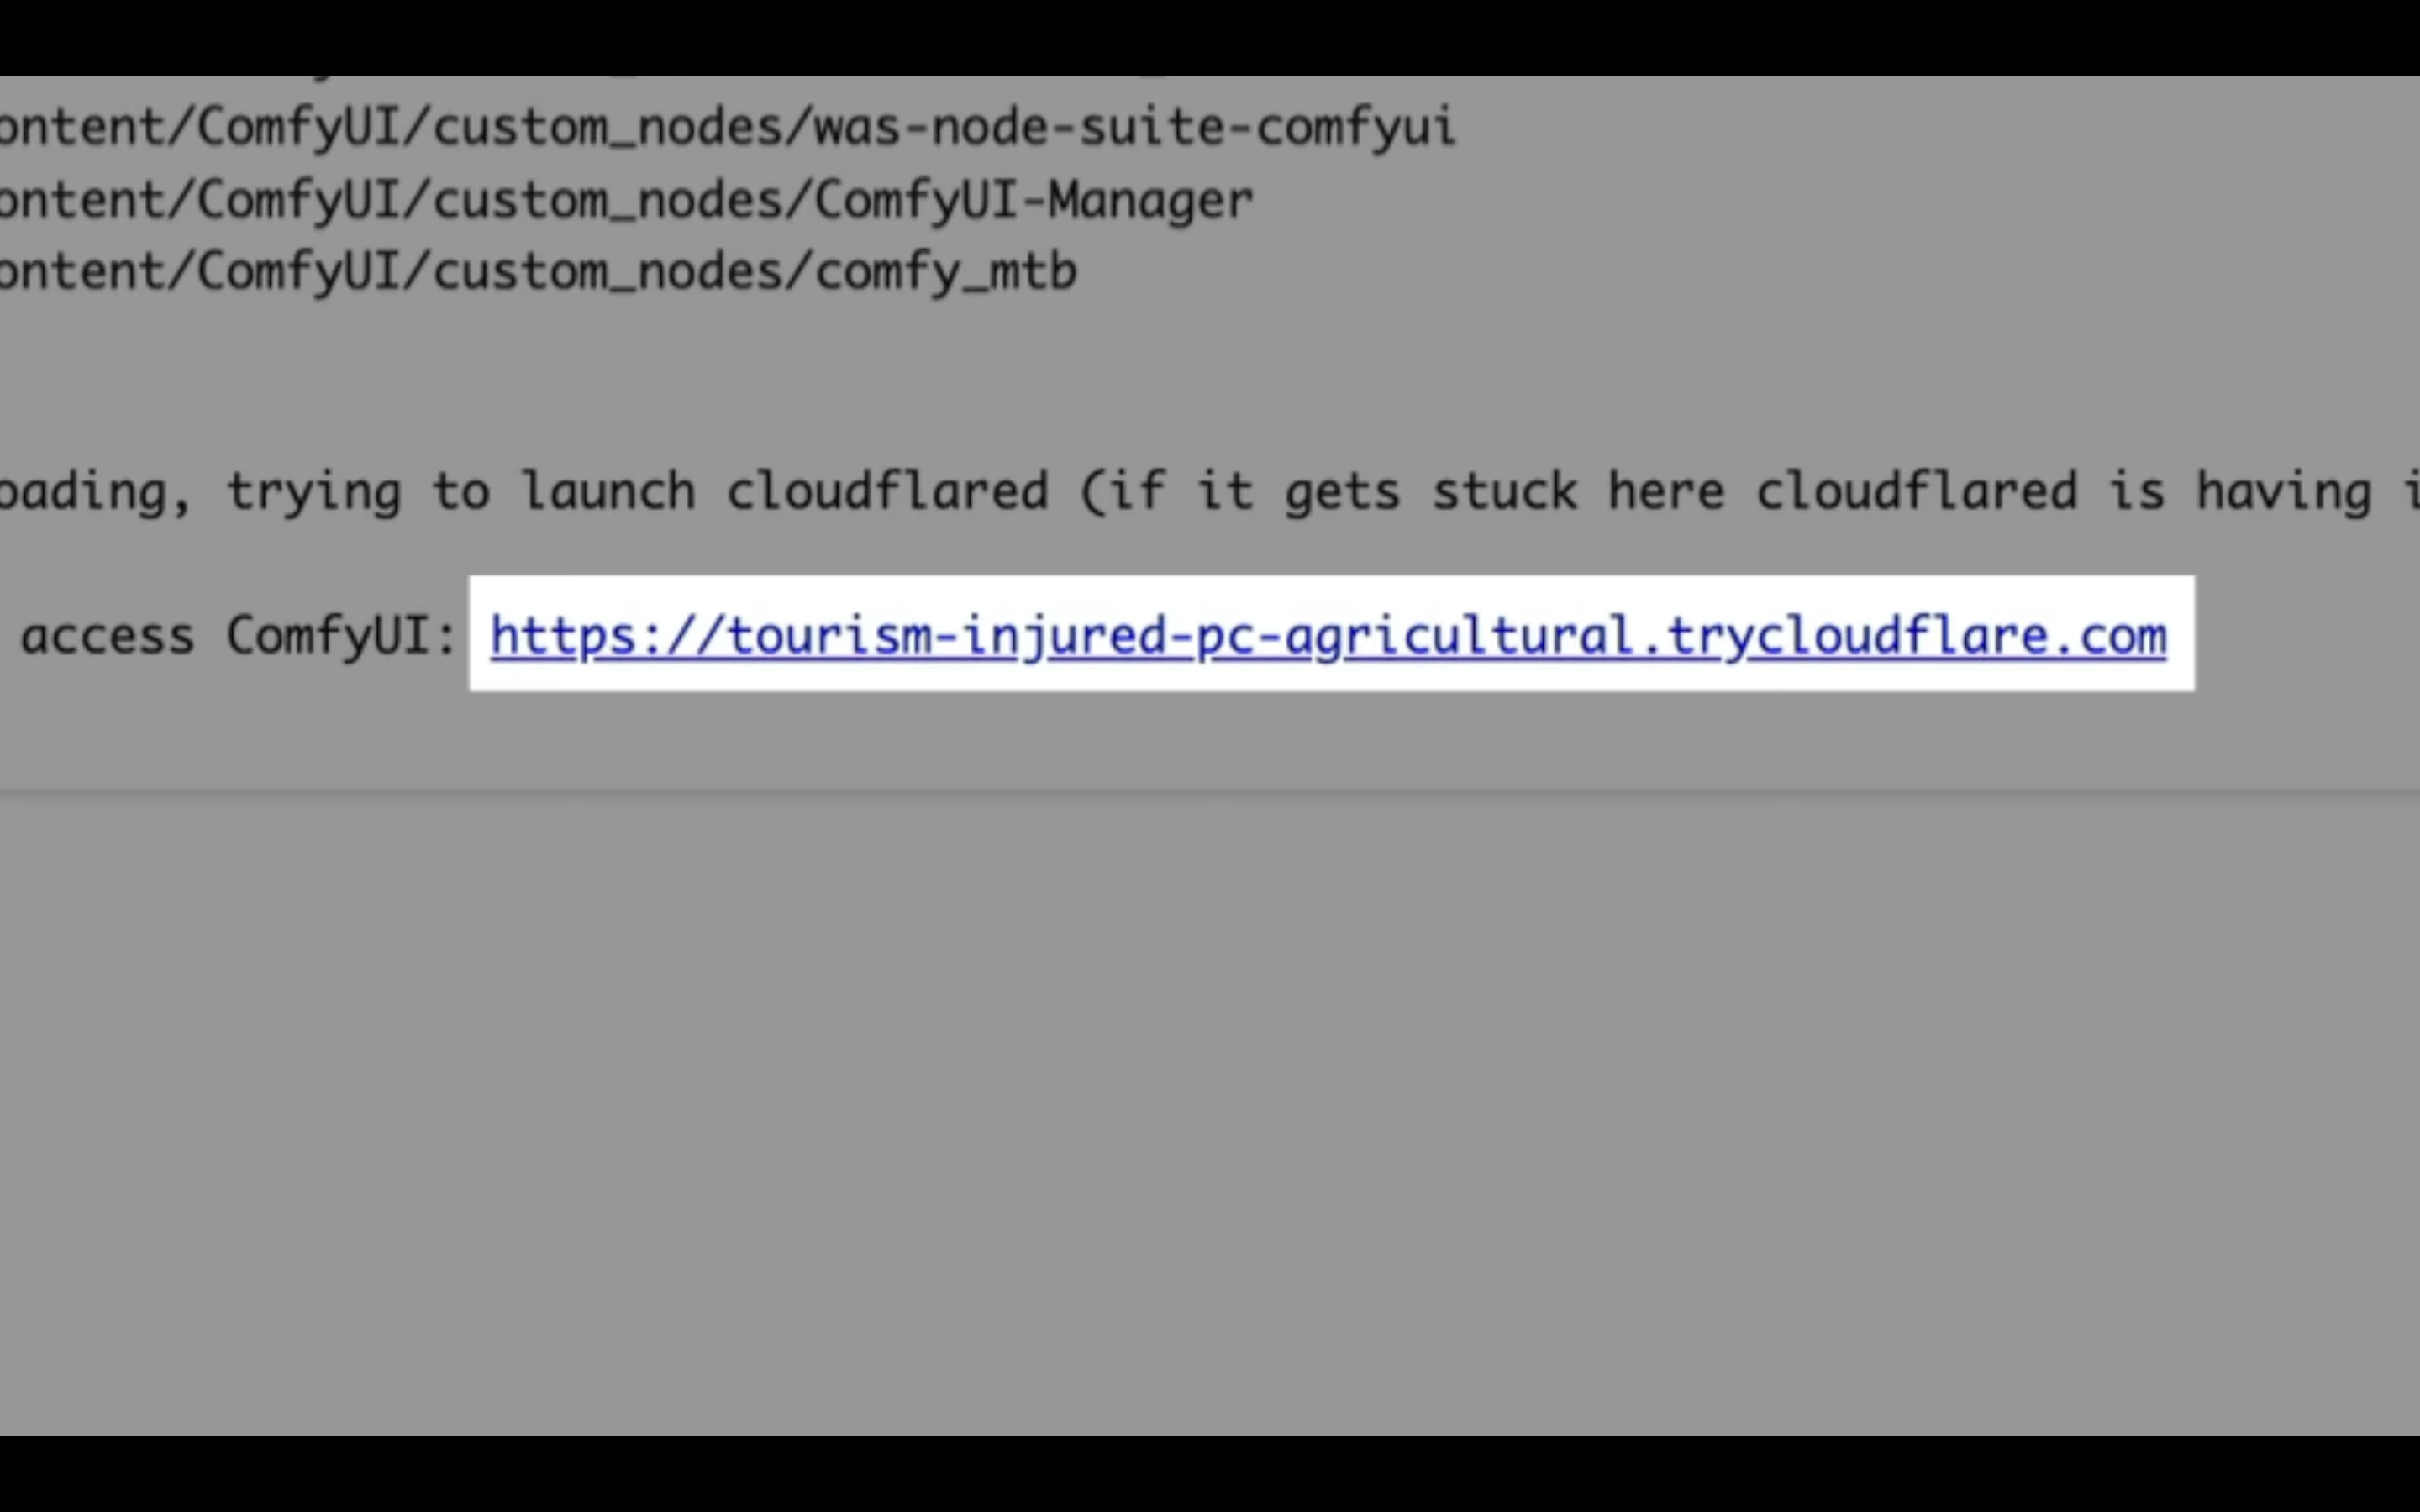
このリンクをクリックします。
そうすると、comfyUIの画面が表示されます。
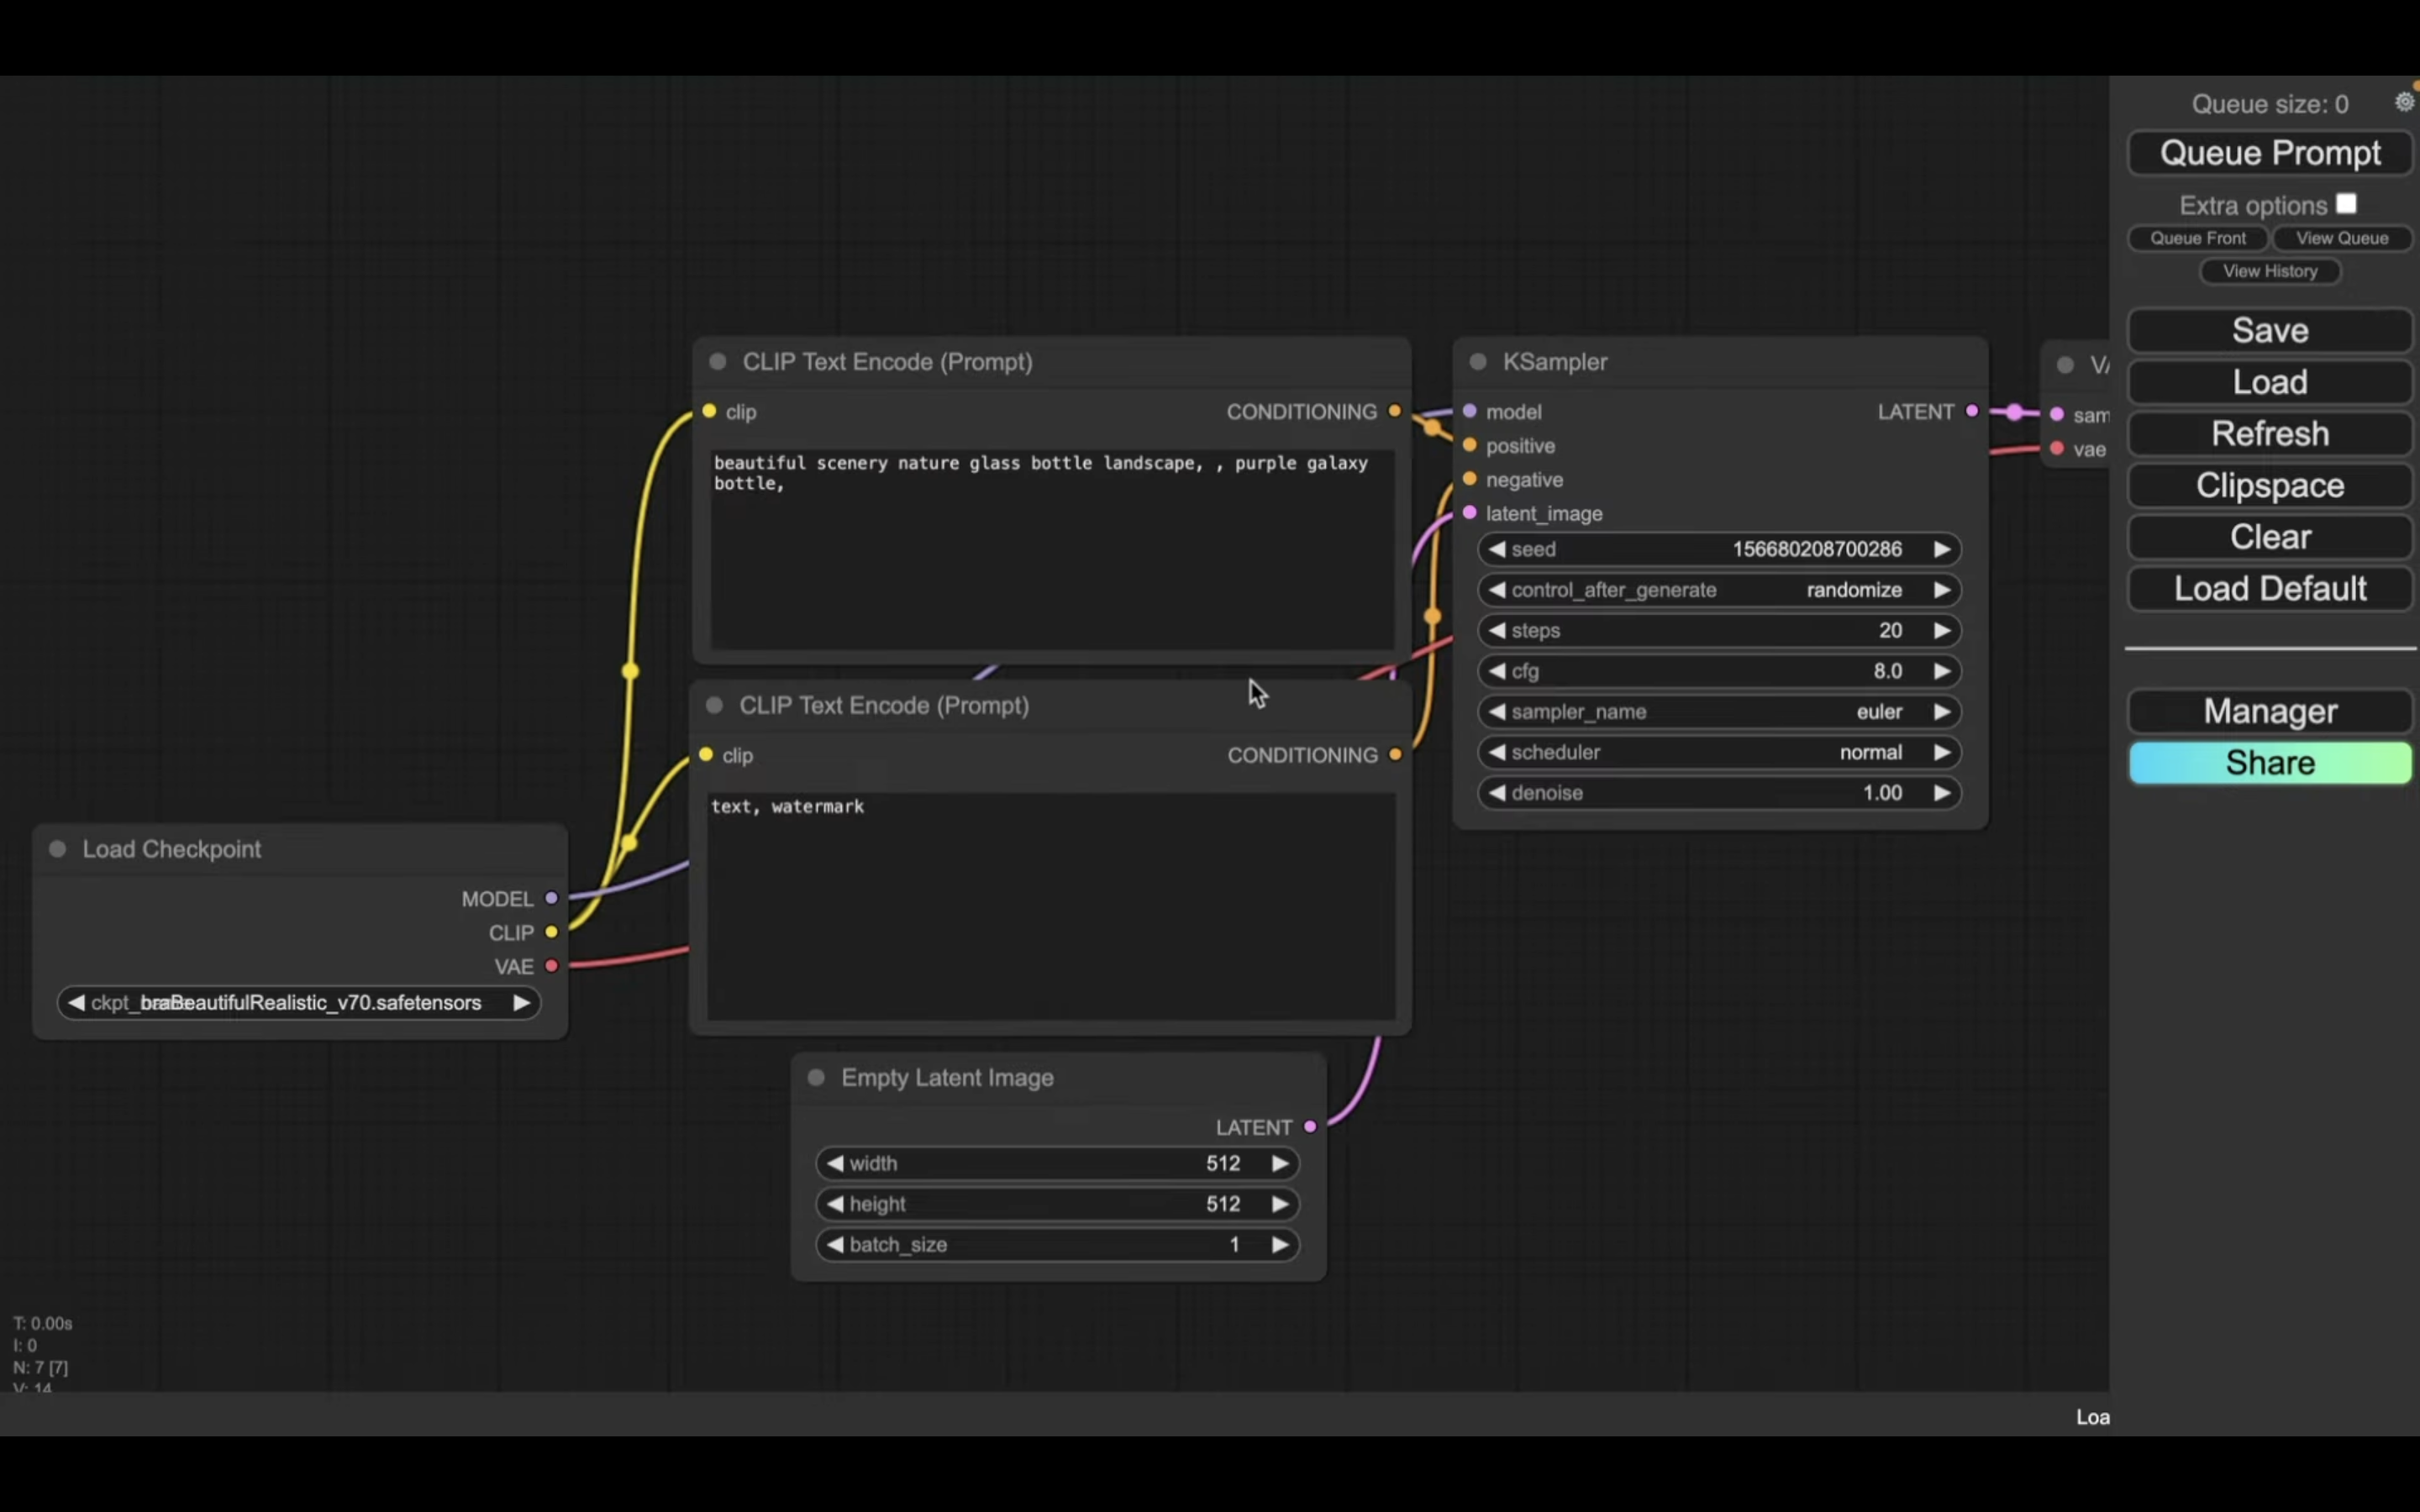
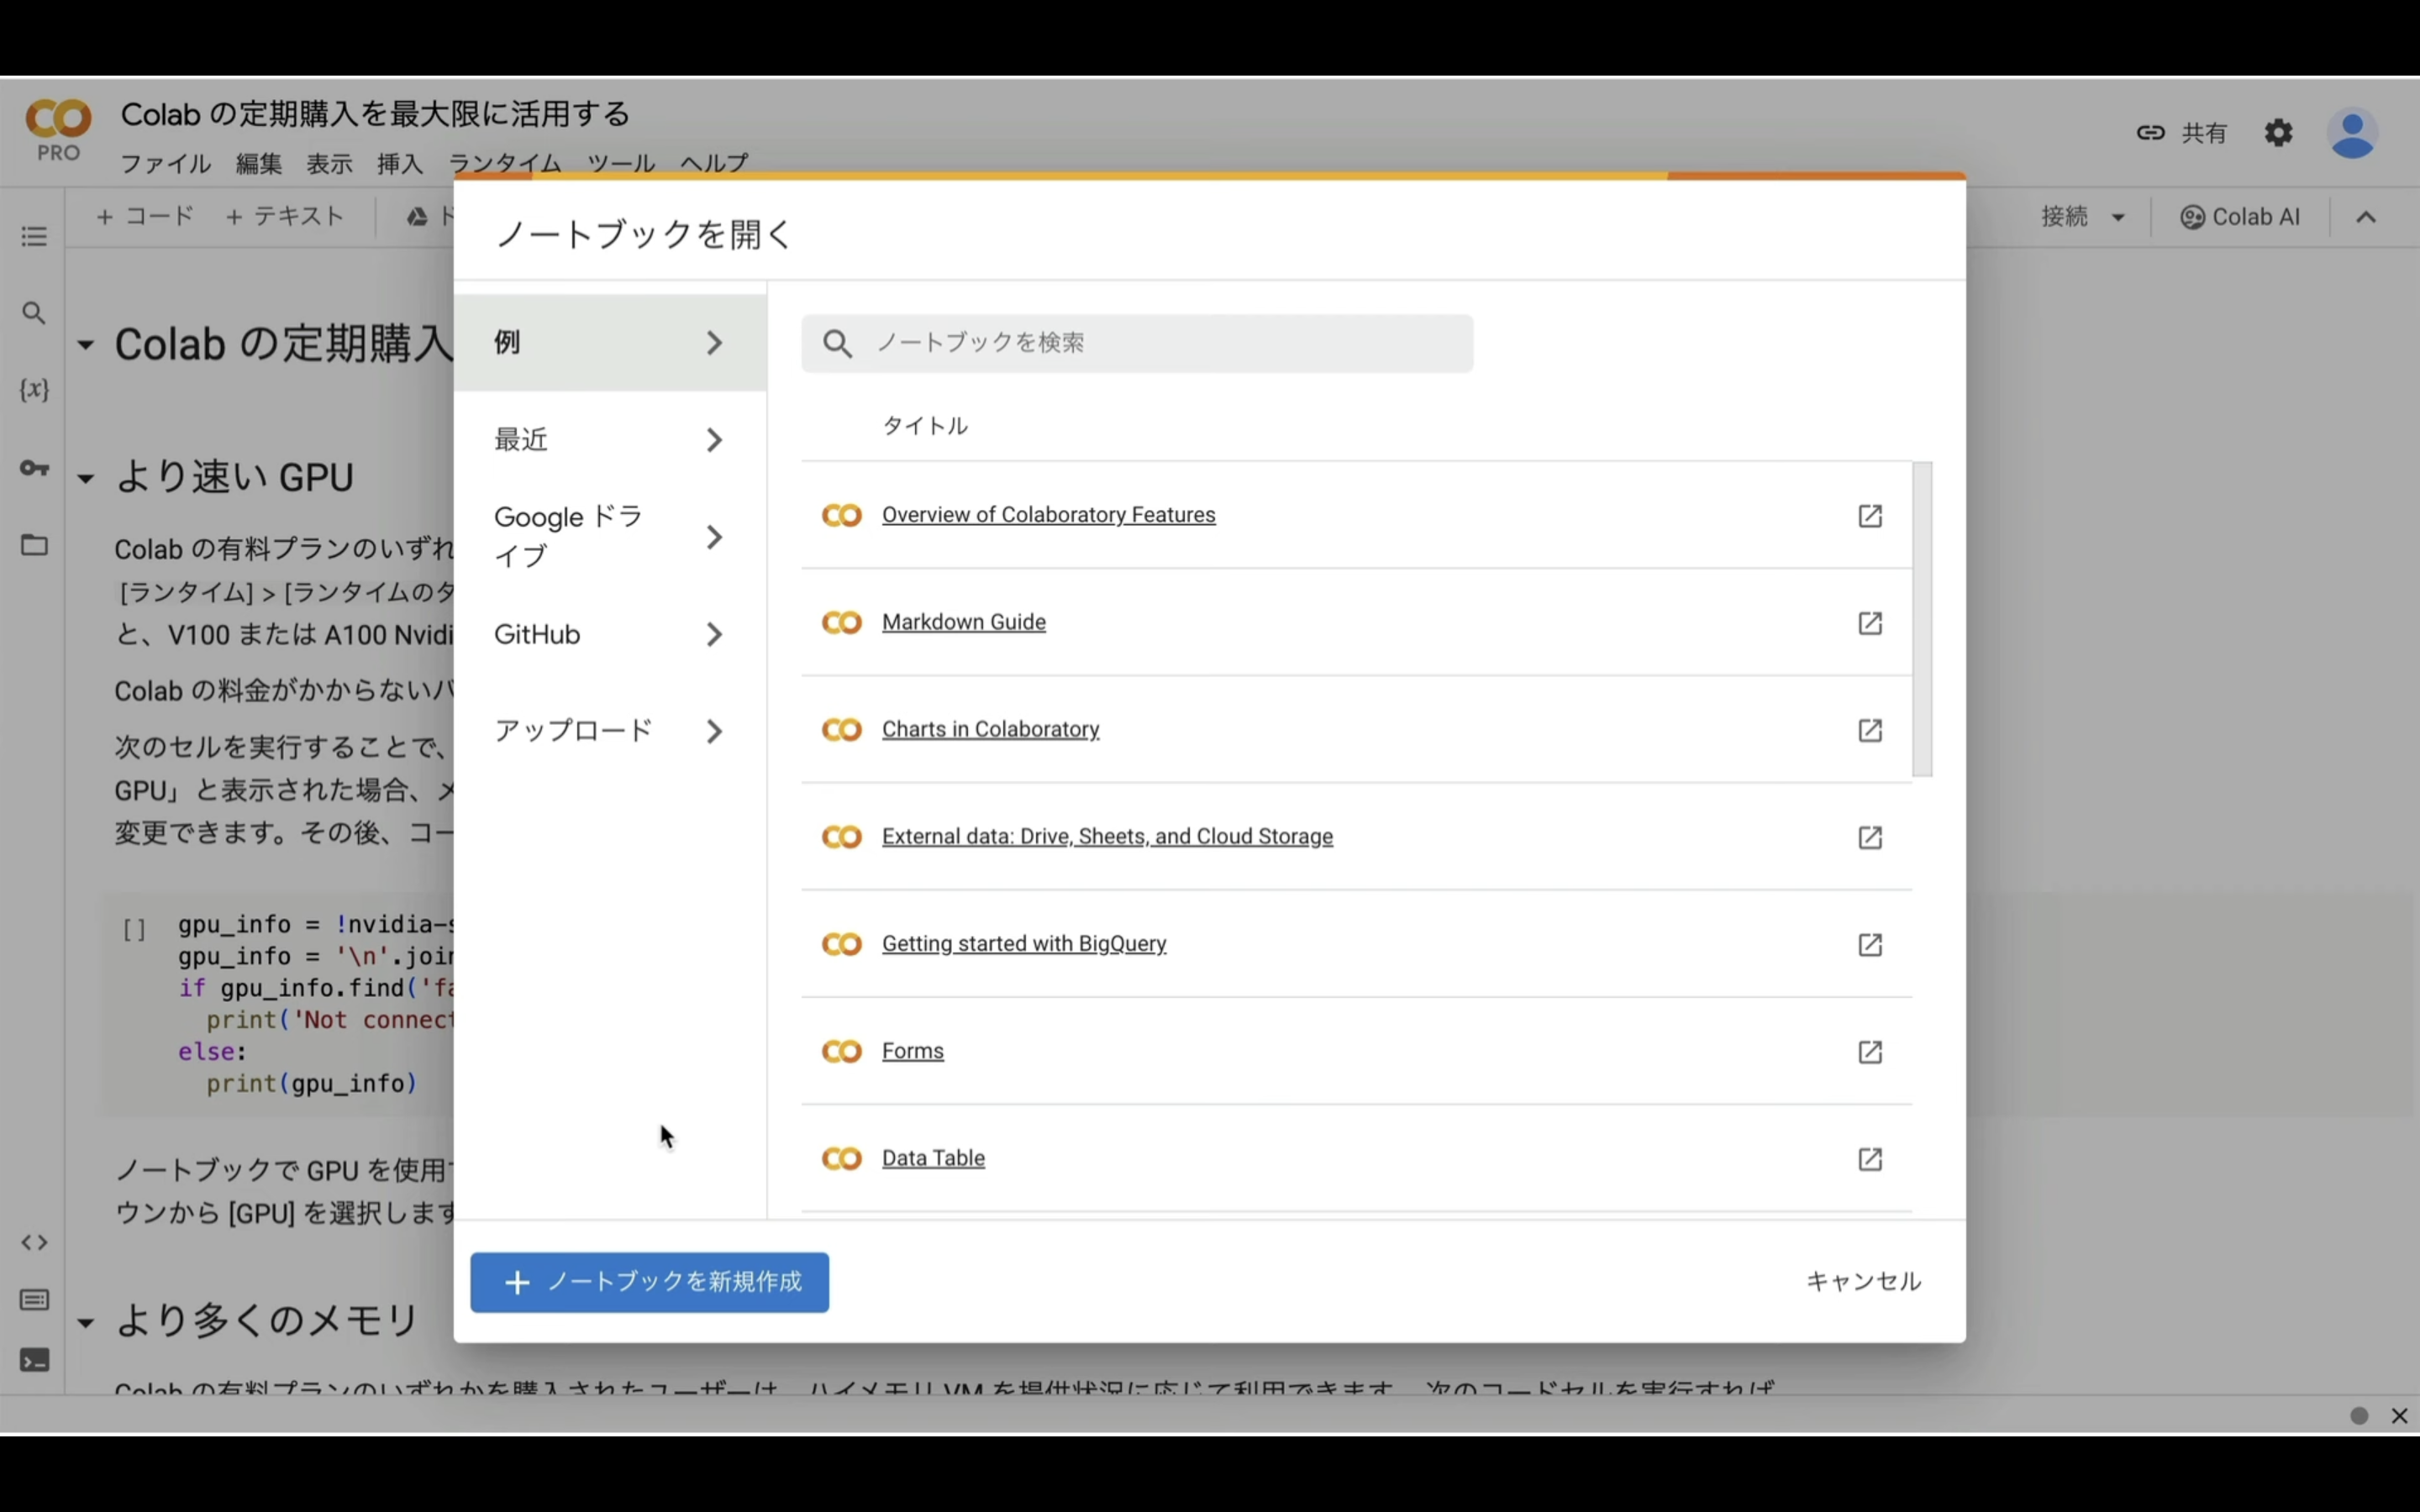
設定ファイルを読み込み
設定ファイルを読み込みます。
この解説では、あらかじめComfyUIの設定ファイルを用意していますので、そちらをご利用ください。
下記に貼ってあるページを表示します。
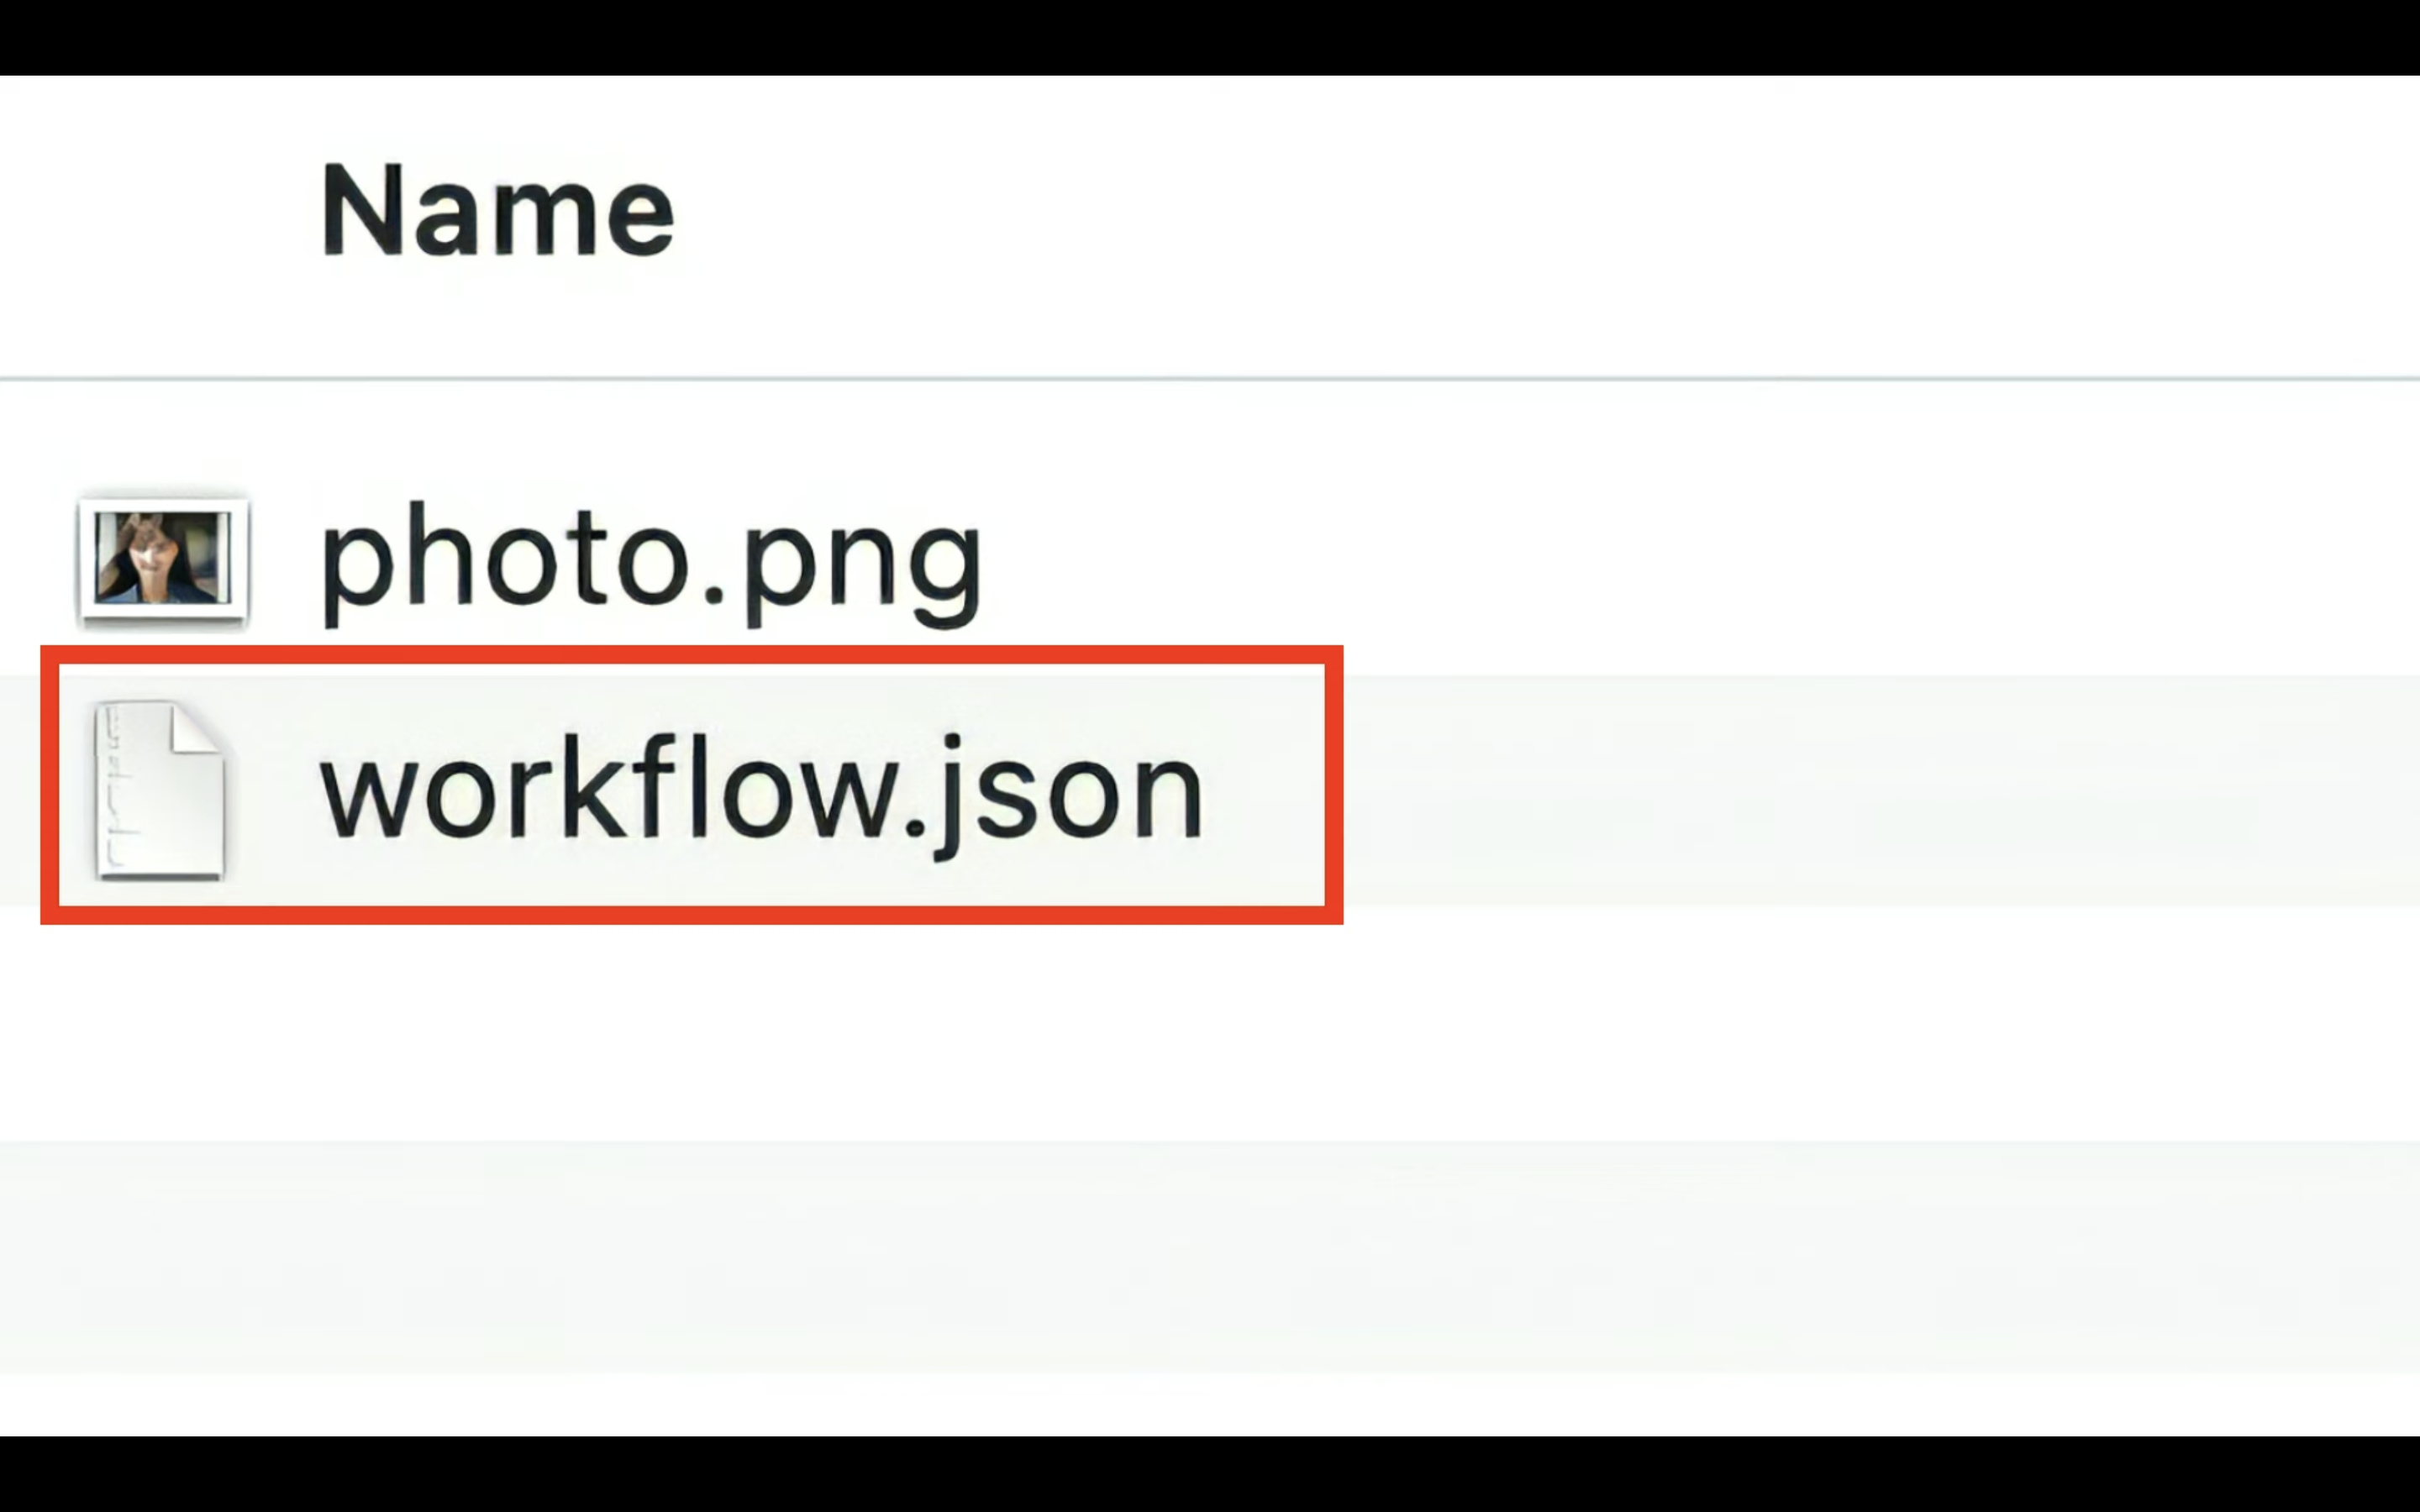
このページを表示したら、利用ファイルと書かれているタイトルの下にあるZIPファイルをクリックします。
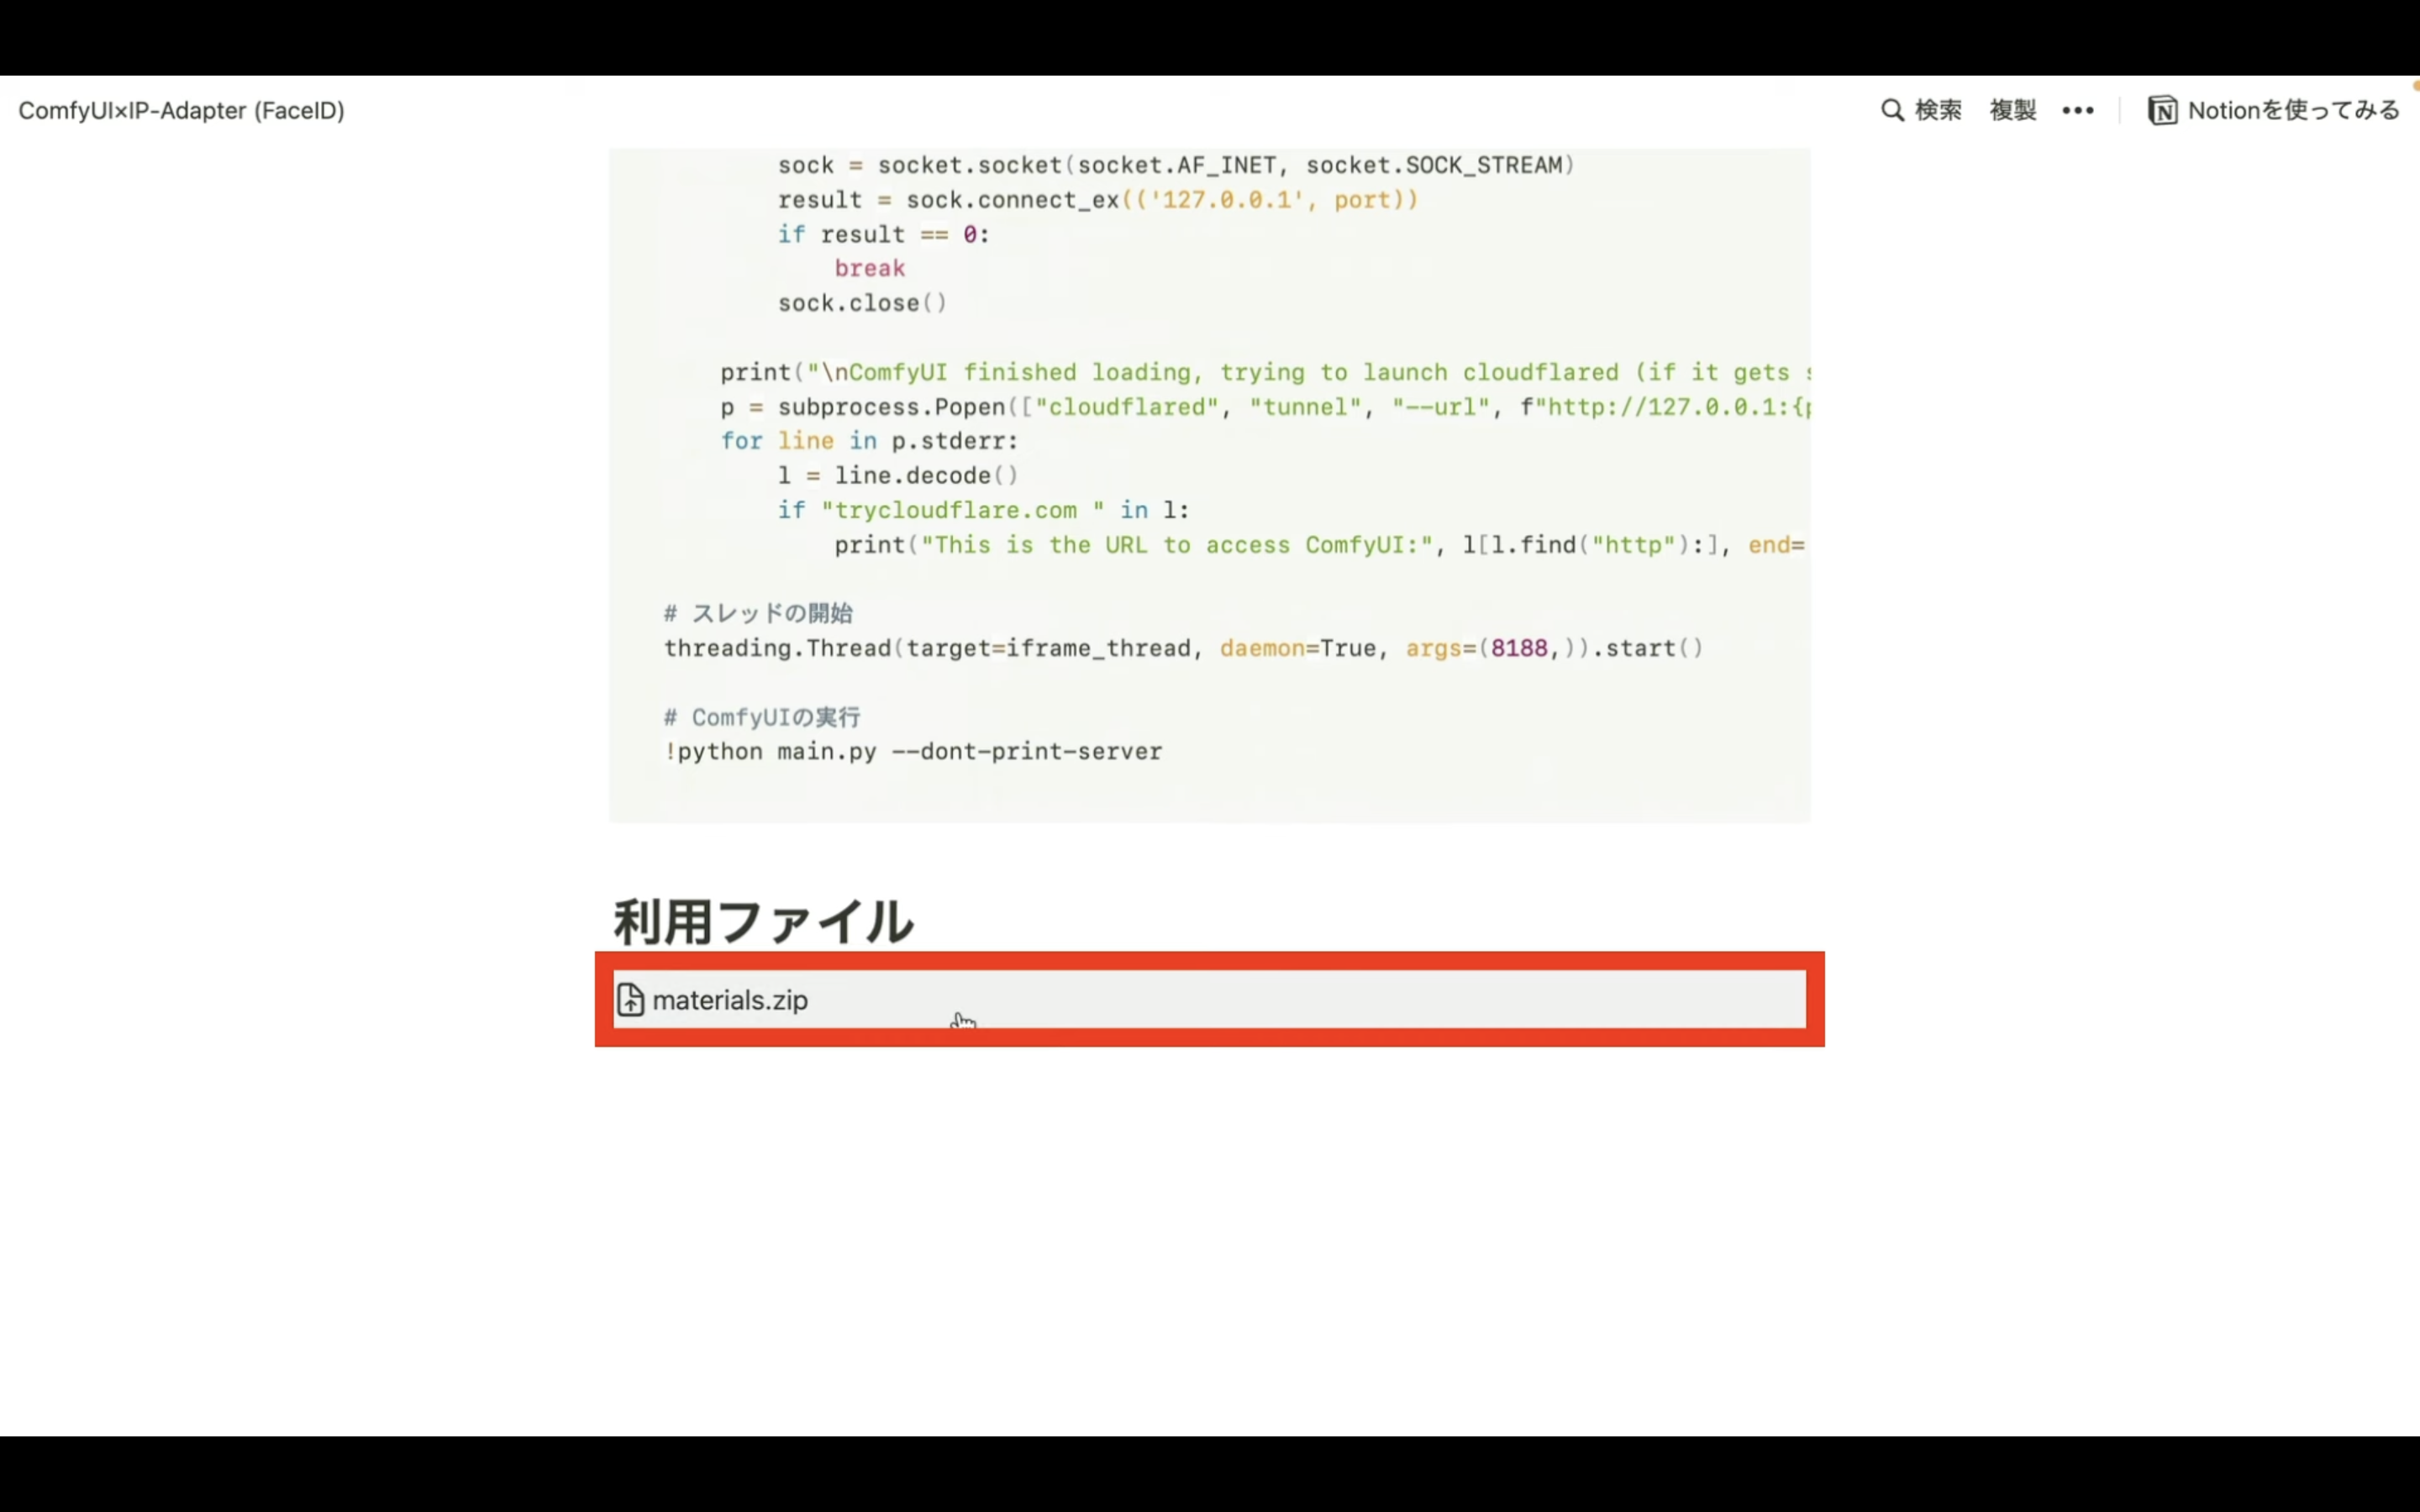
そうすると、ZIPファイルがダウンロードされるので、解凍します。
ダウンロードしたファイルを解凍したら、このようなファイルが表示されると思います。

この中にあるworkflow.JSONと書かれているファイルをComfyUIの画面にドラッグ&ドロップします。
ファイルは、何も表示されていない場所にドラッグ&ドロップするようにしてください。
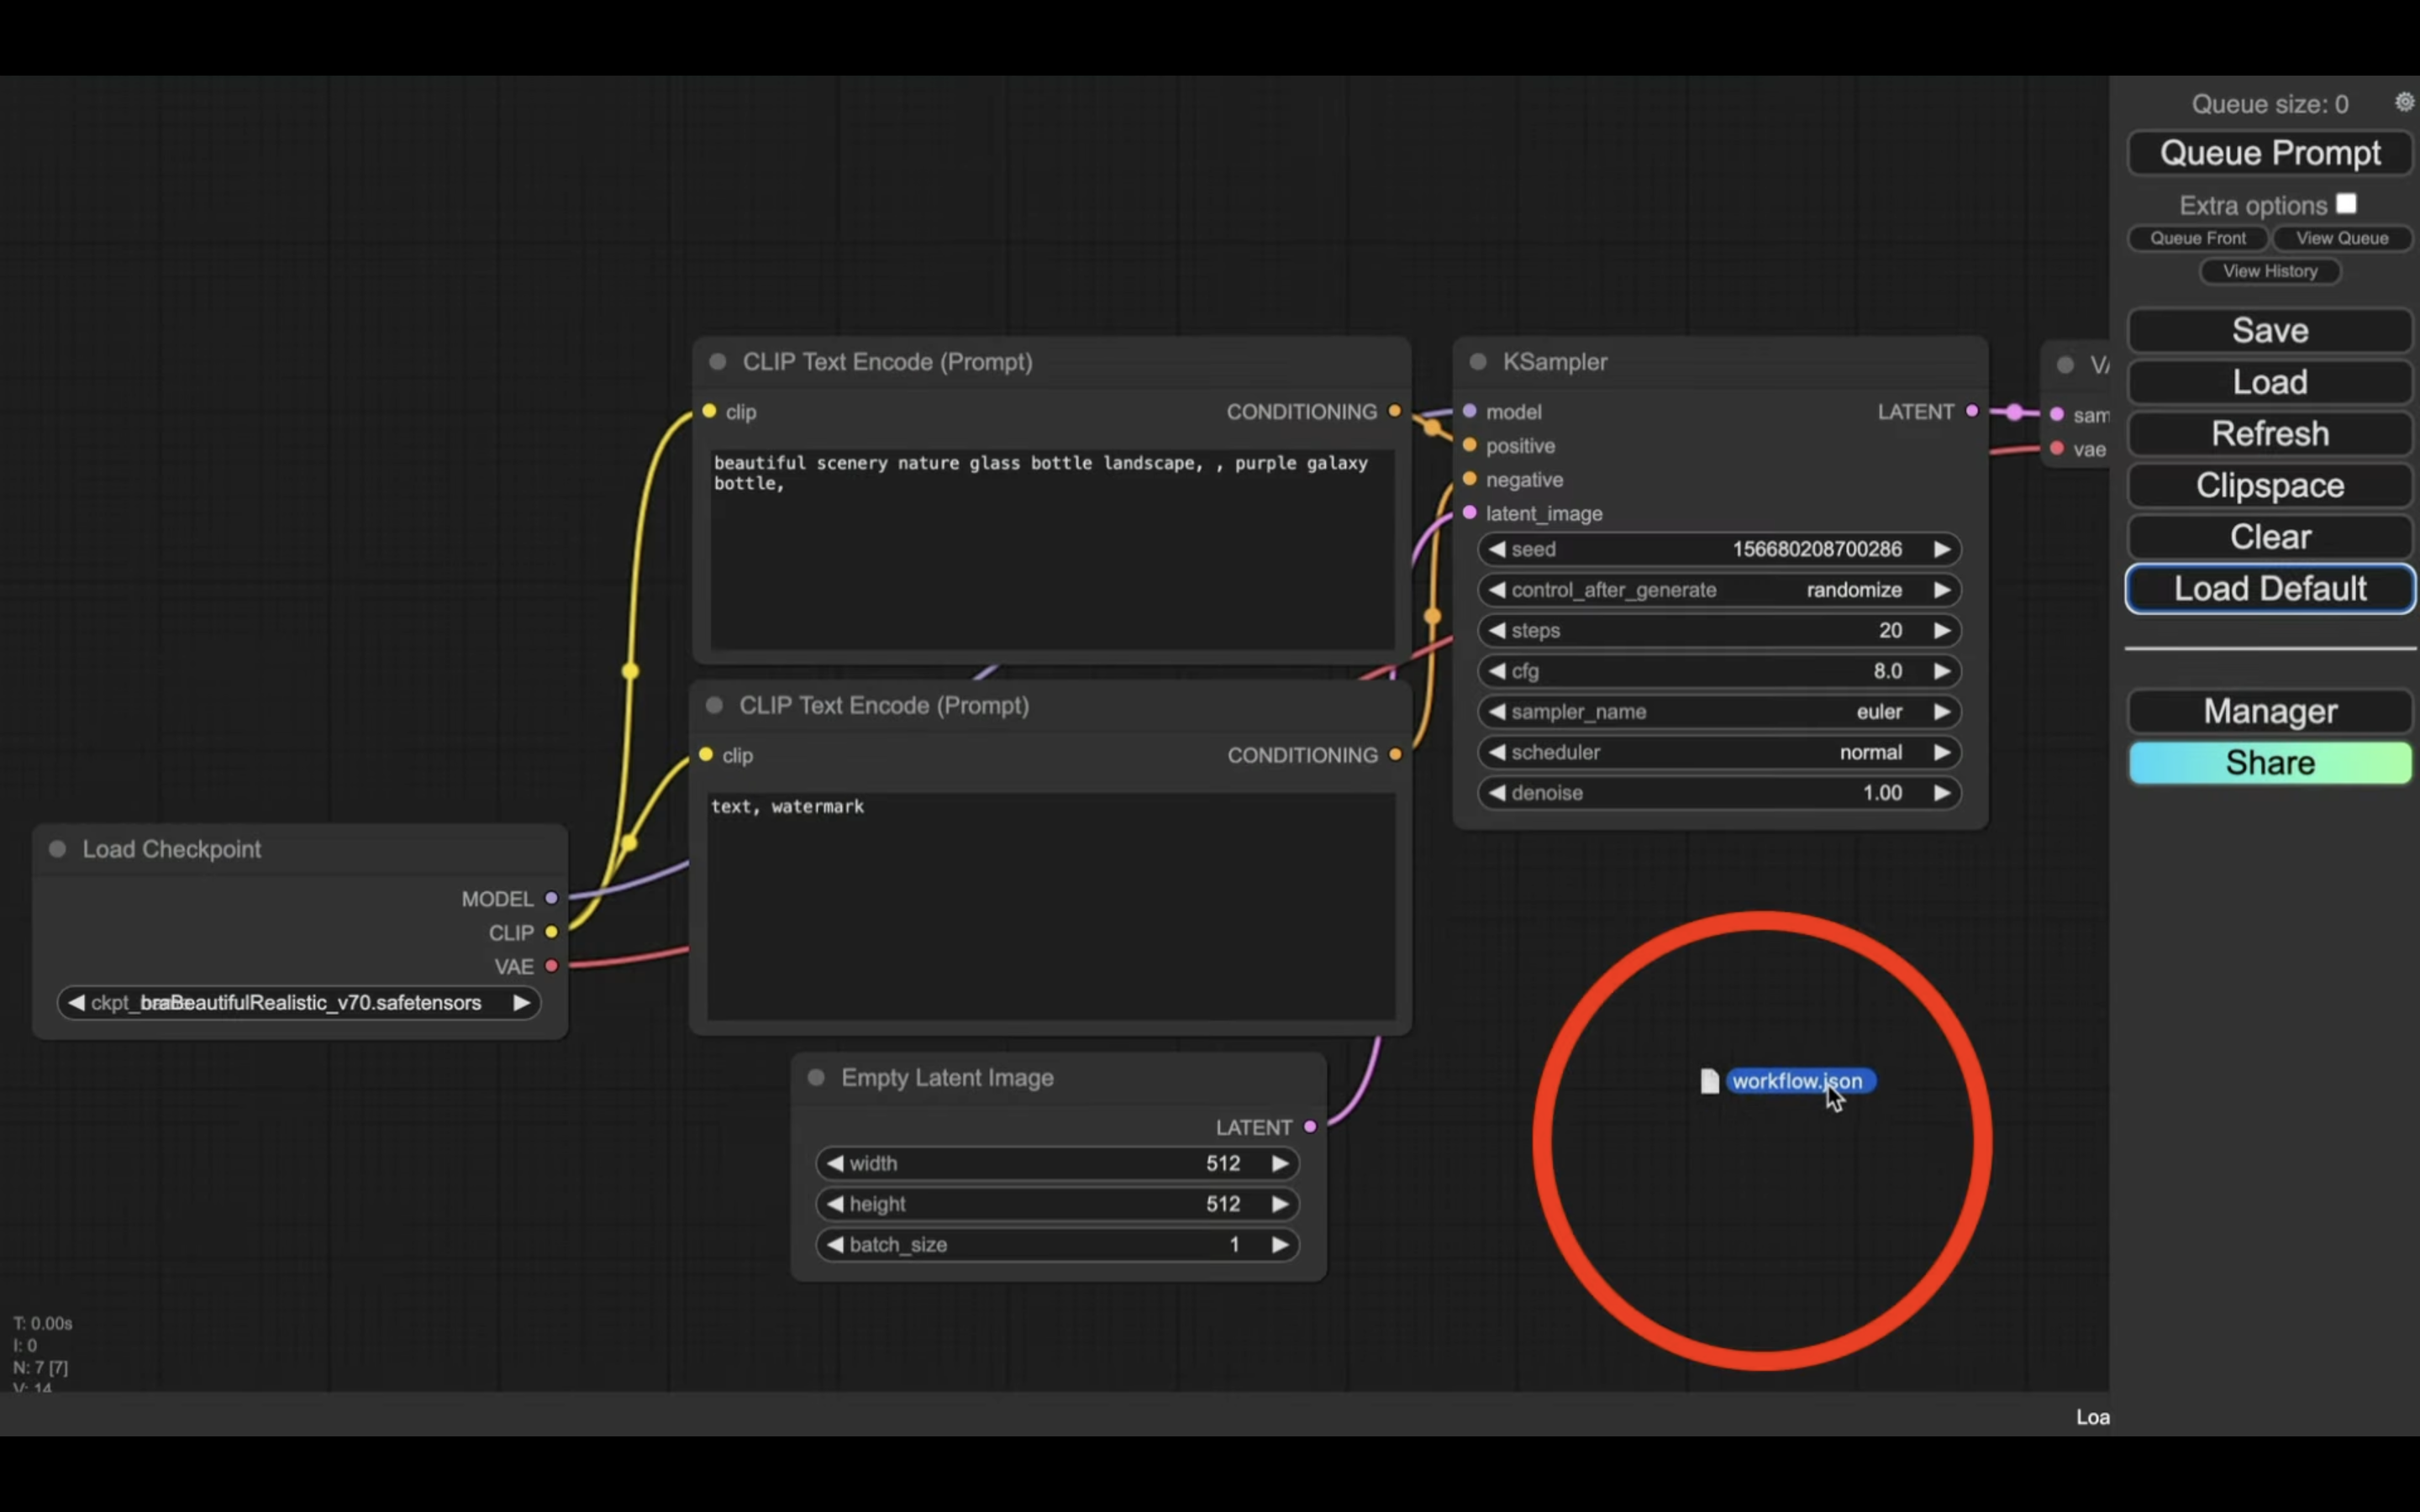
これでworkflow.JSONの設定ファイルが読み込まれます。
設定ファイルが読み込まれたら、「Load Image」という名前のタイトルのブロックに写真をアップロードします。
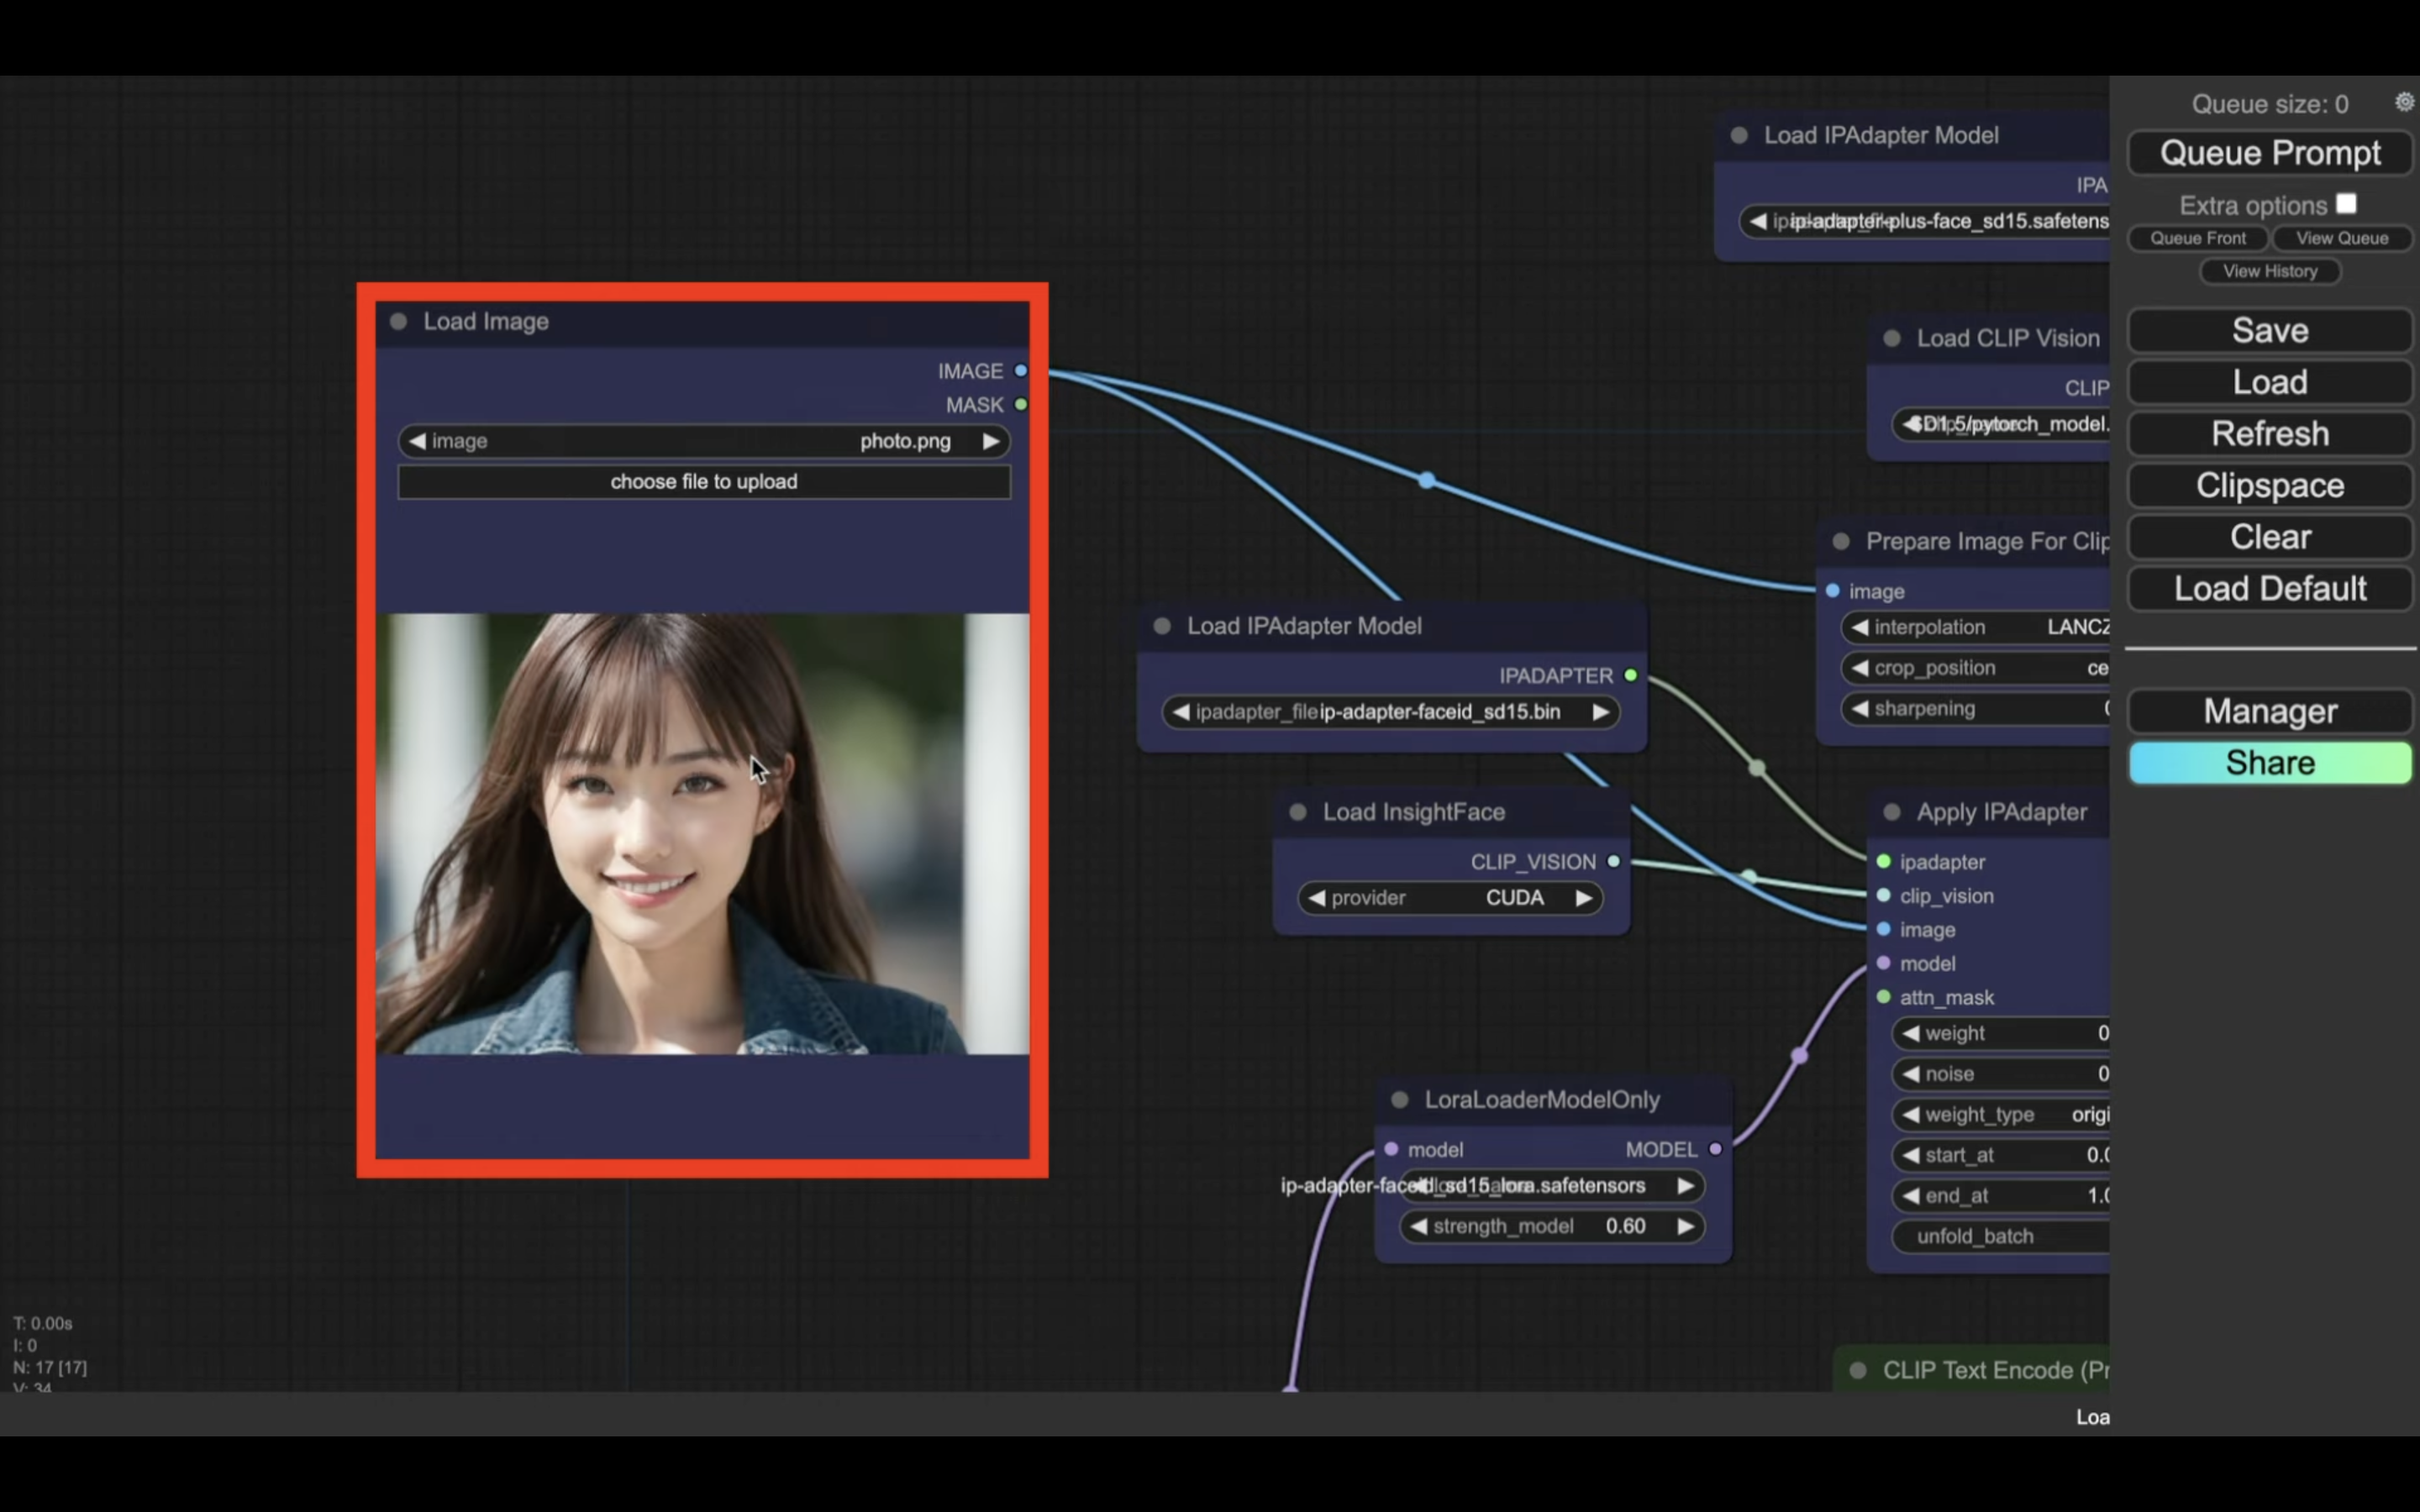
これで、同じ顔のAI美女を生成するための準備が整いました。
生成する枚数を指定
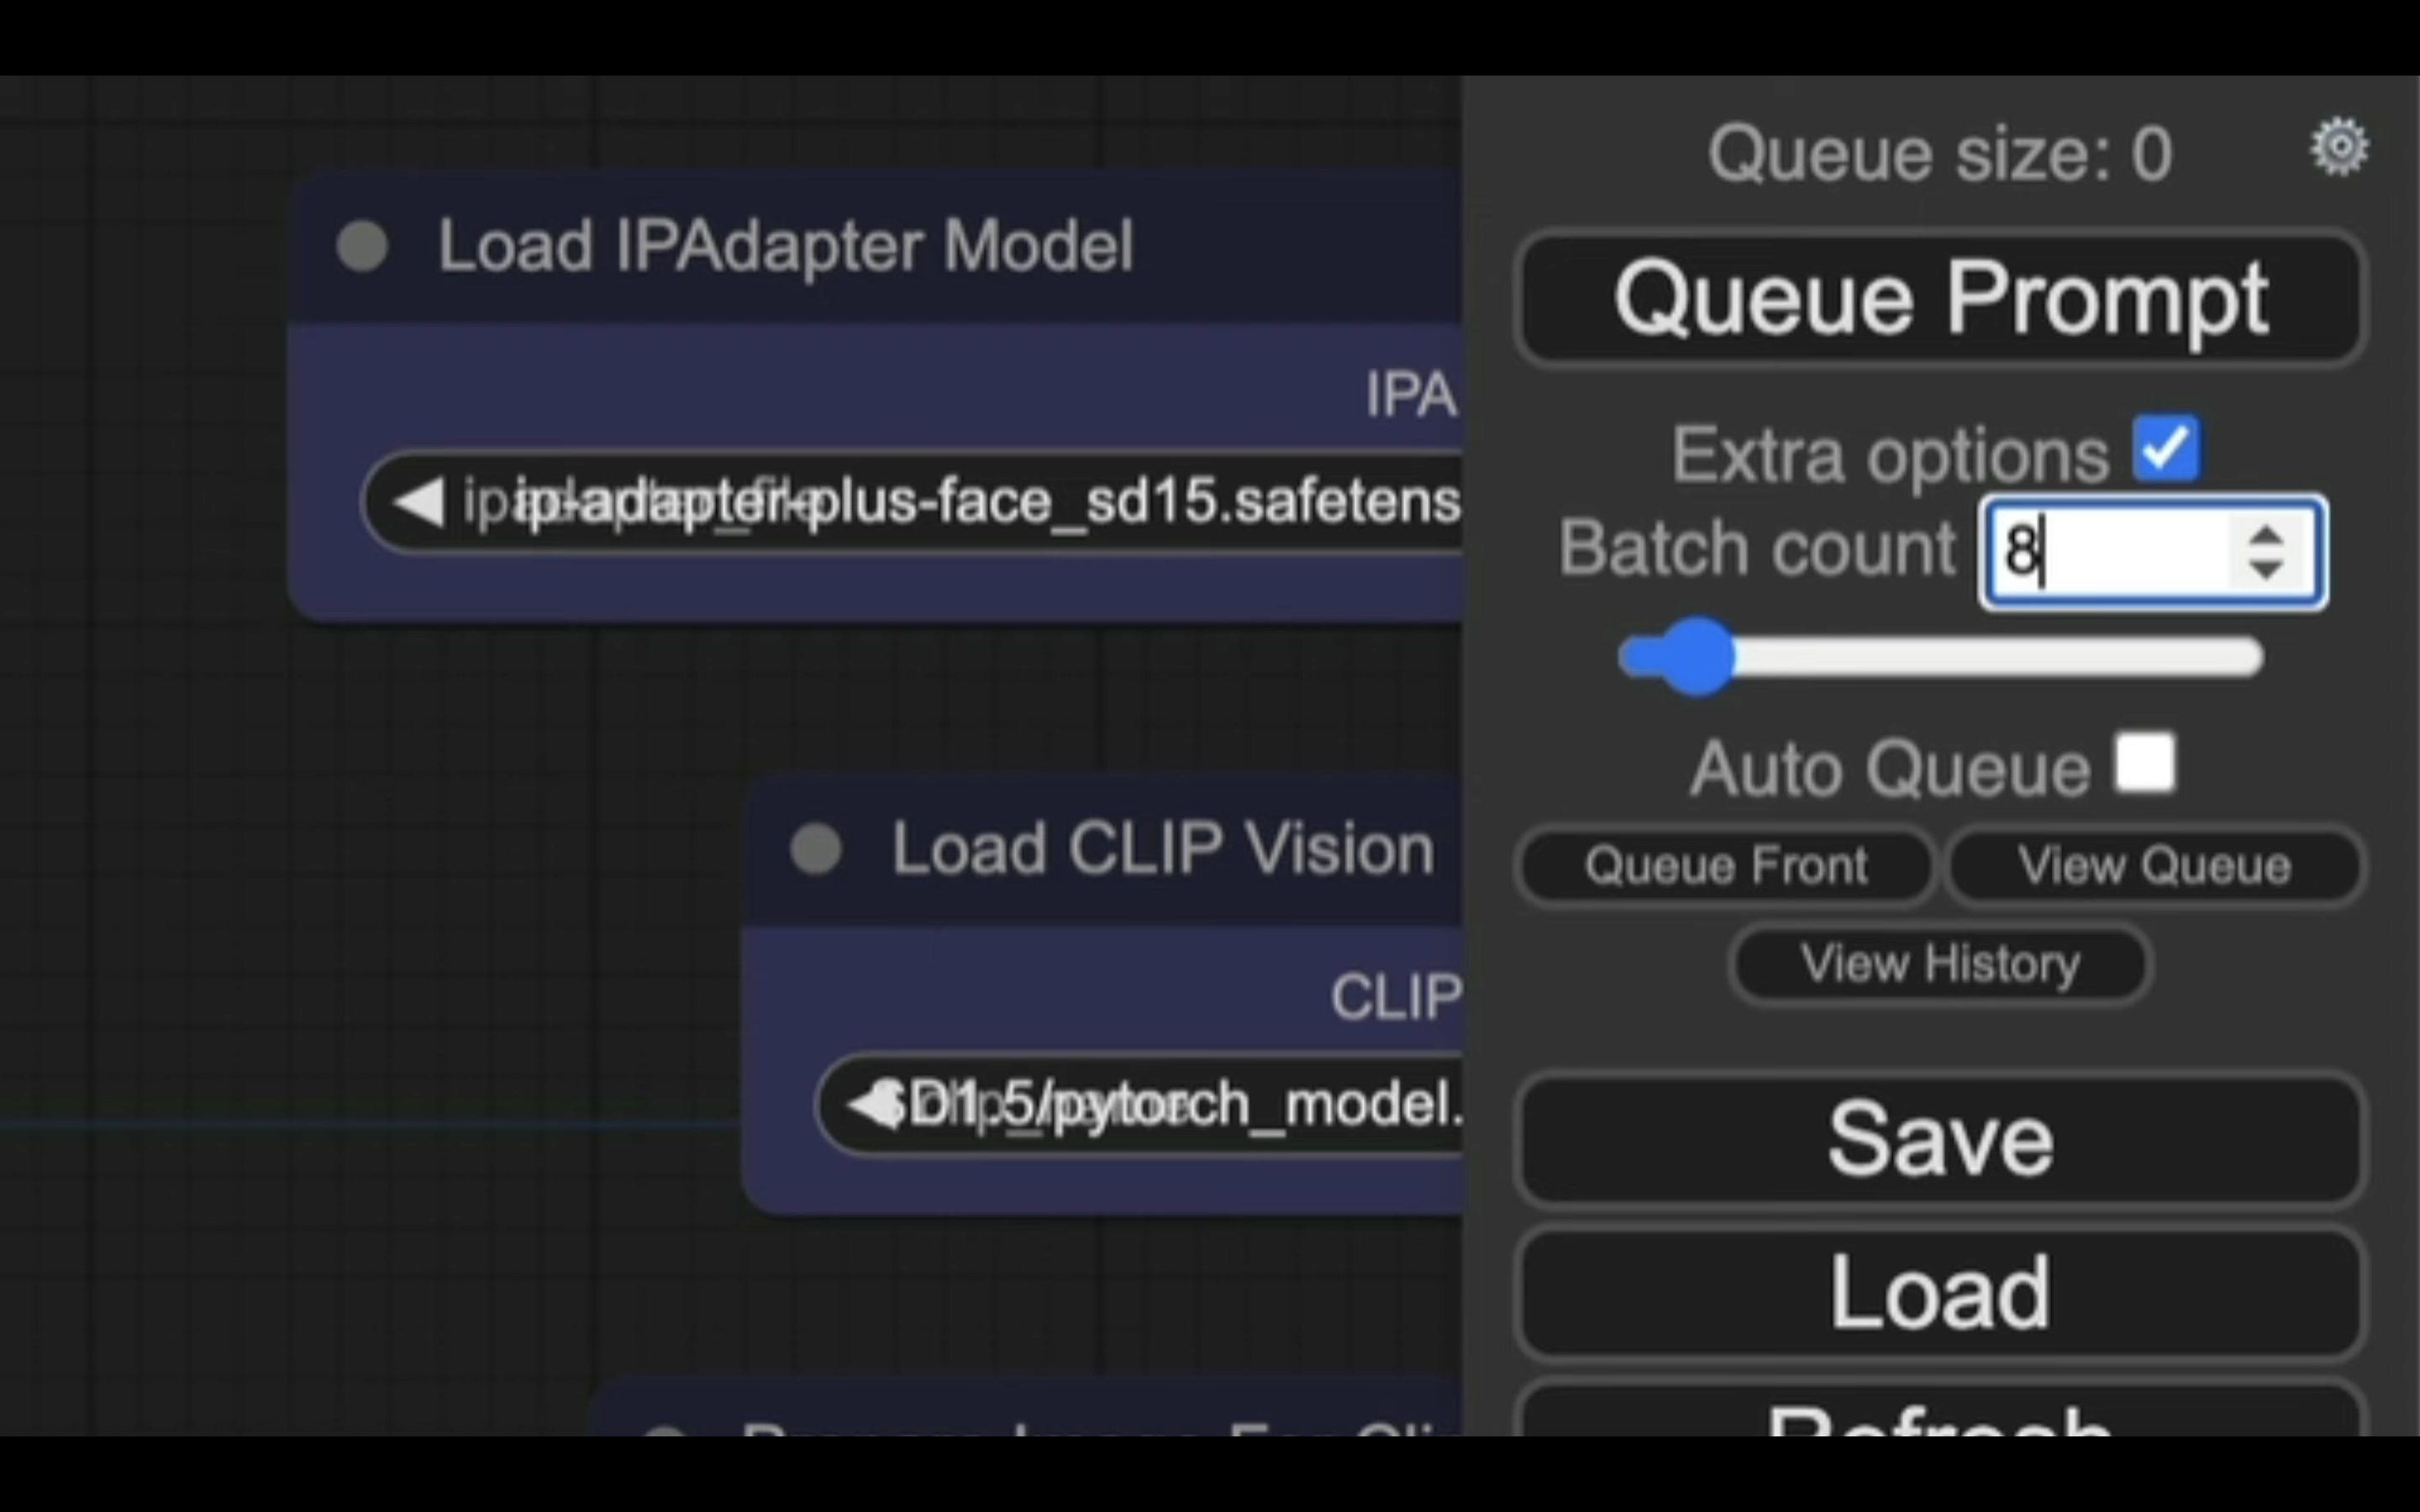
次に、生成する枚数を指定します。
Extra optionsにチェックを入れます。
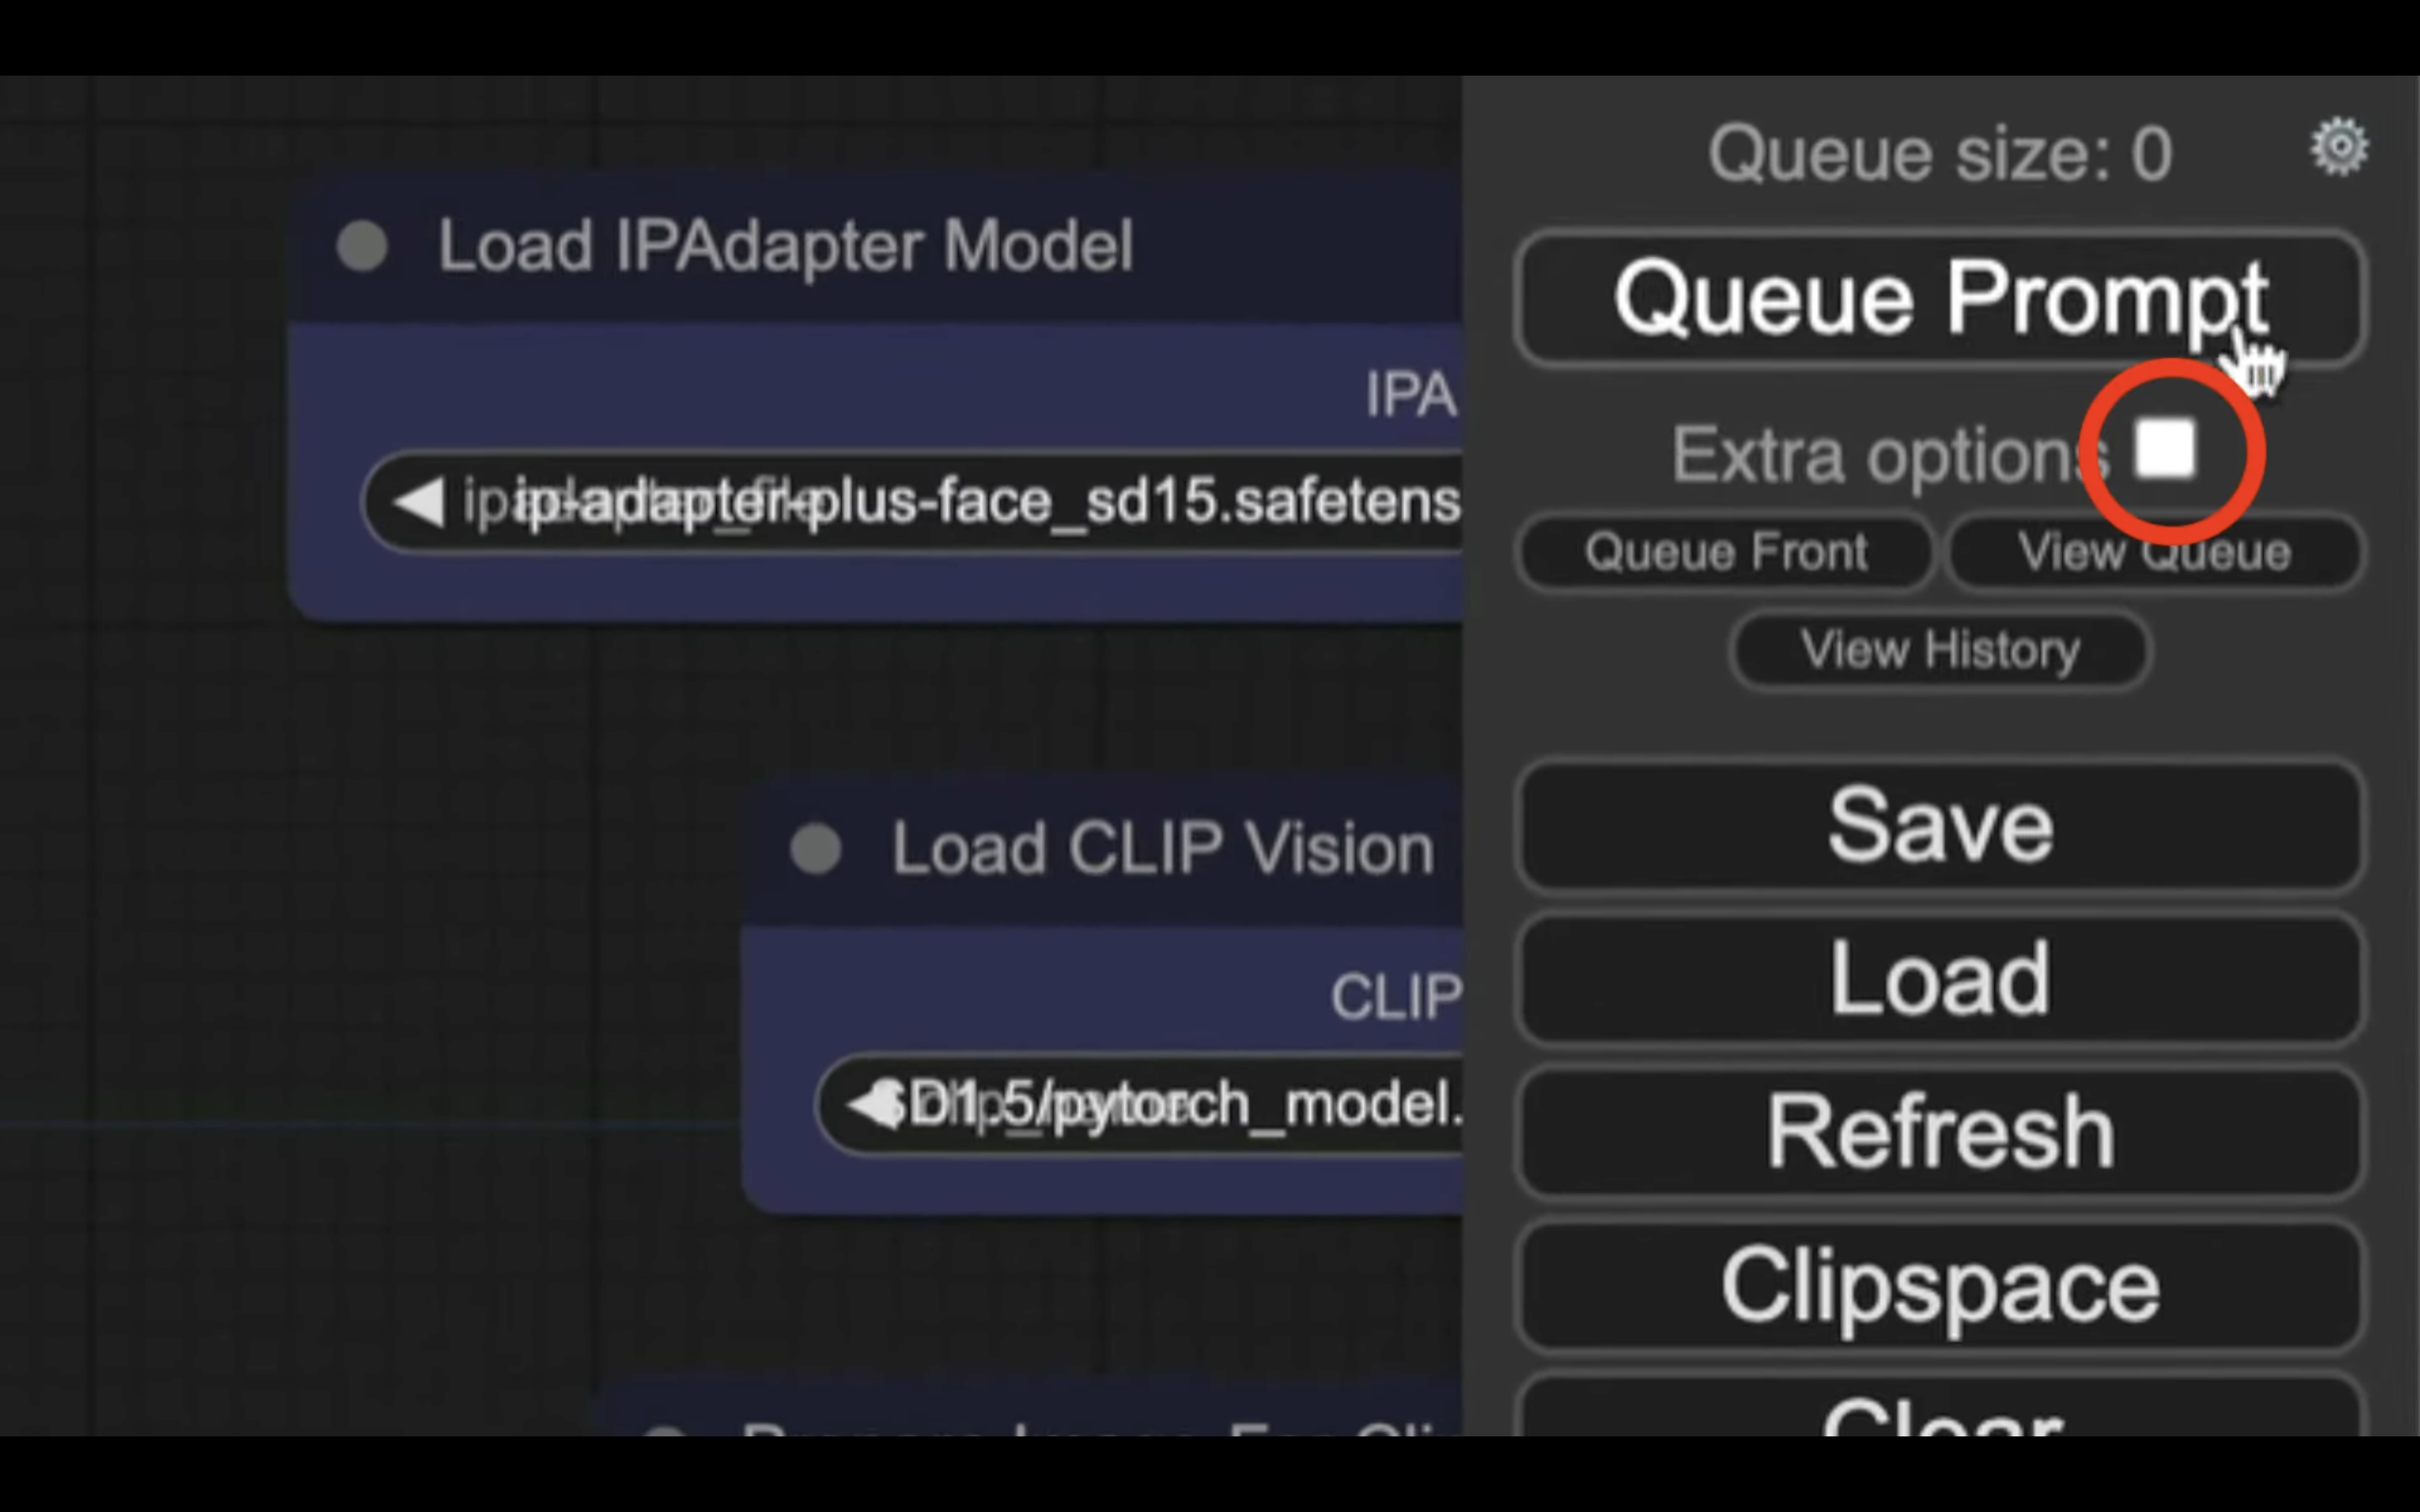
そして、バッチカウントに生成したい画像の枚数を入力します。
今回は、8枚の画像を生成させるために8と指定しました。
最後に、「Queue Prompt」ボタンを押して画像の生成を開始します。
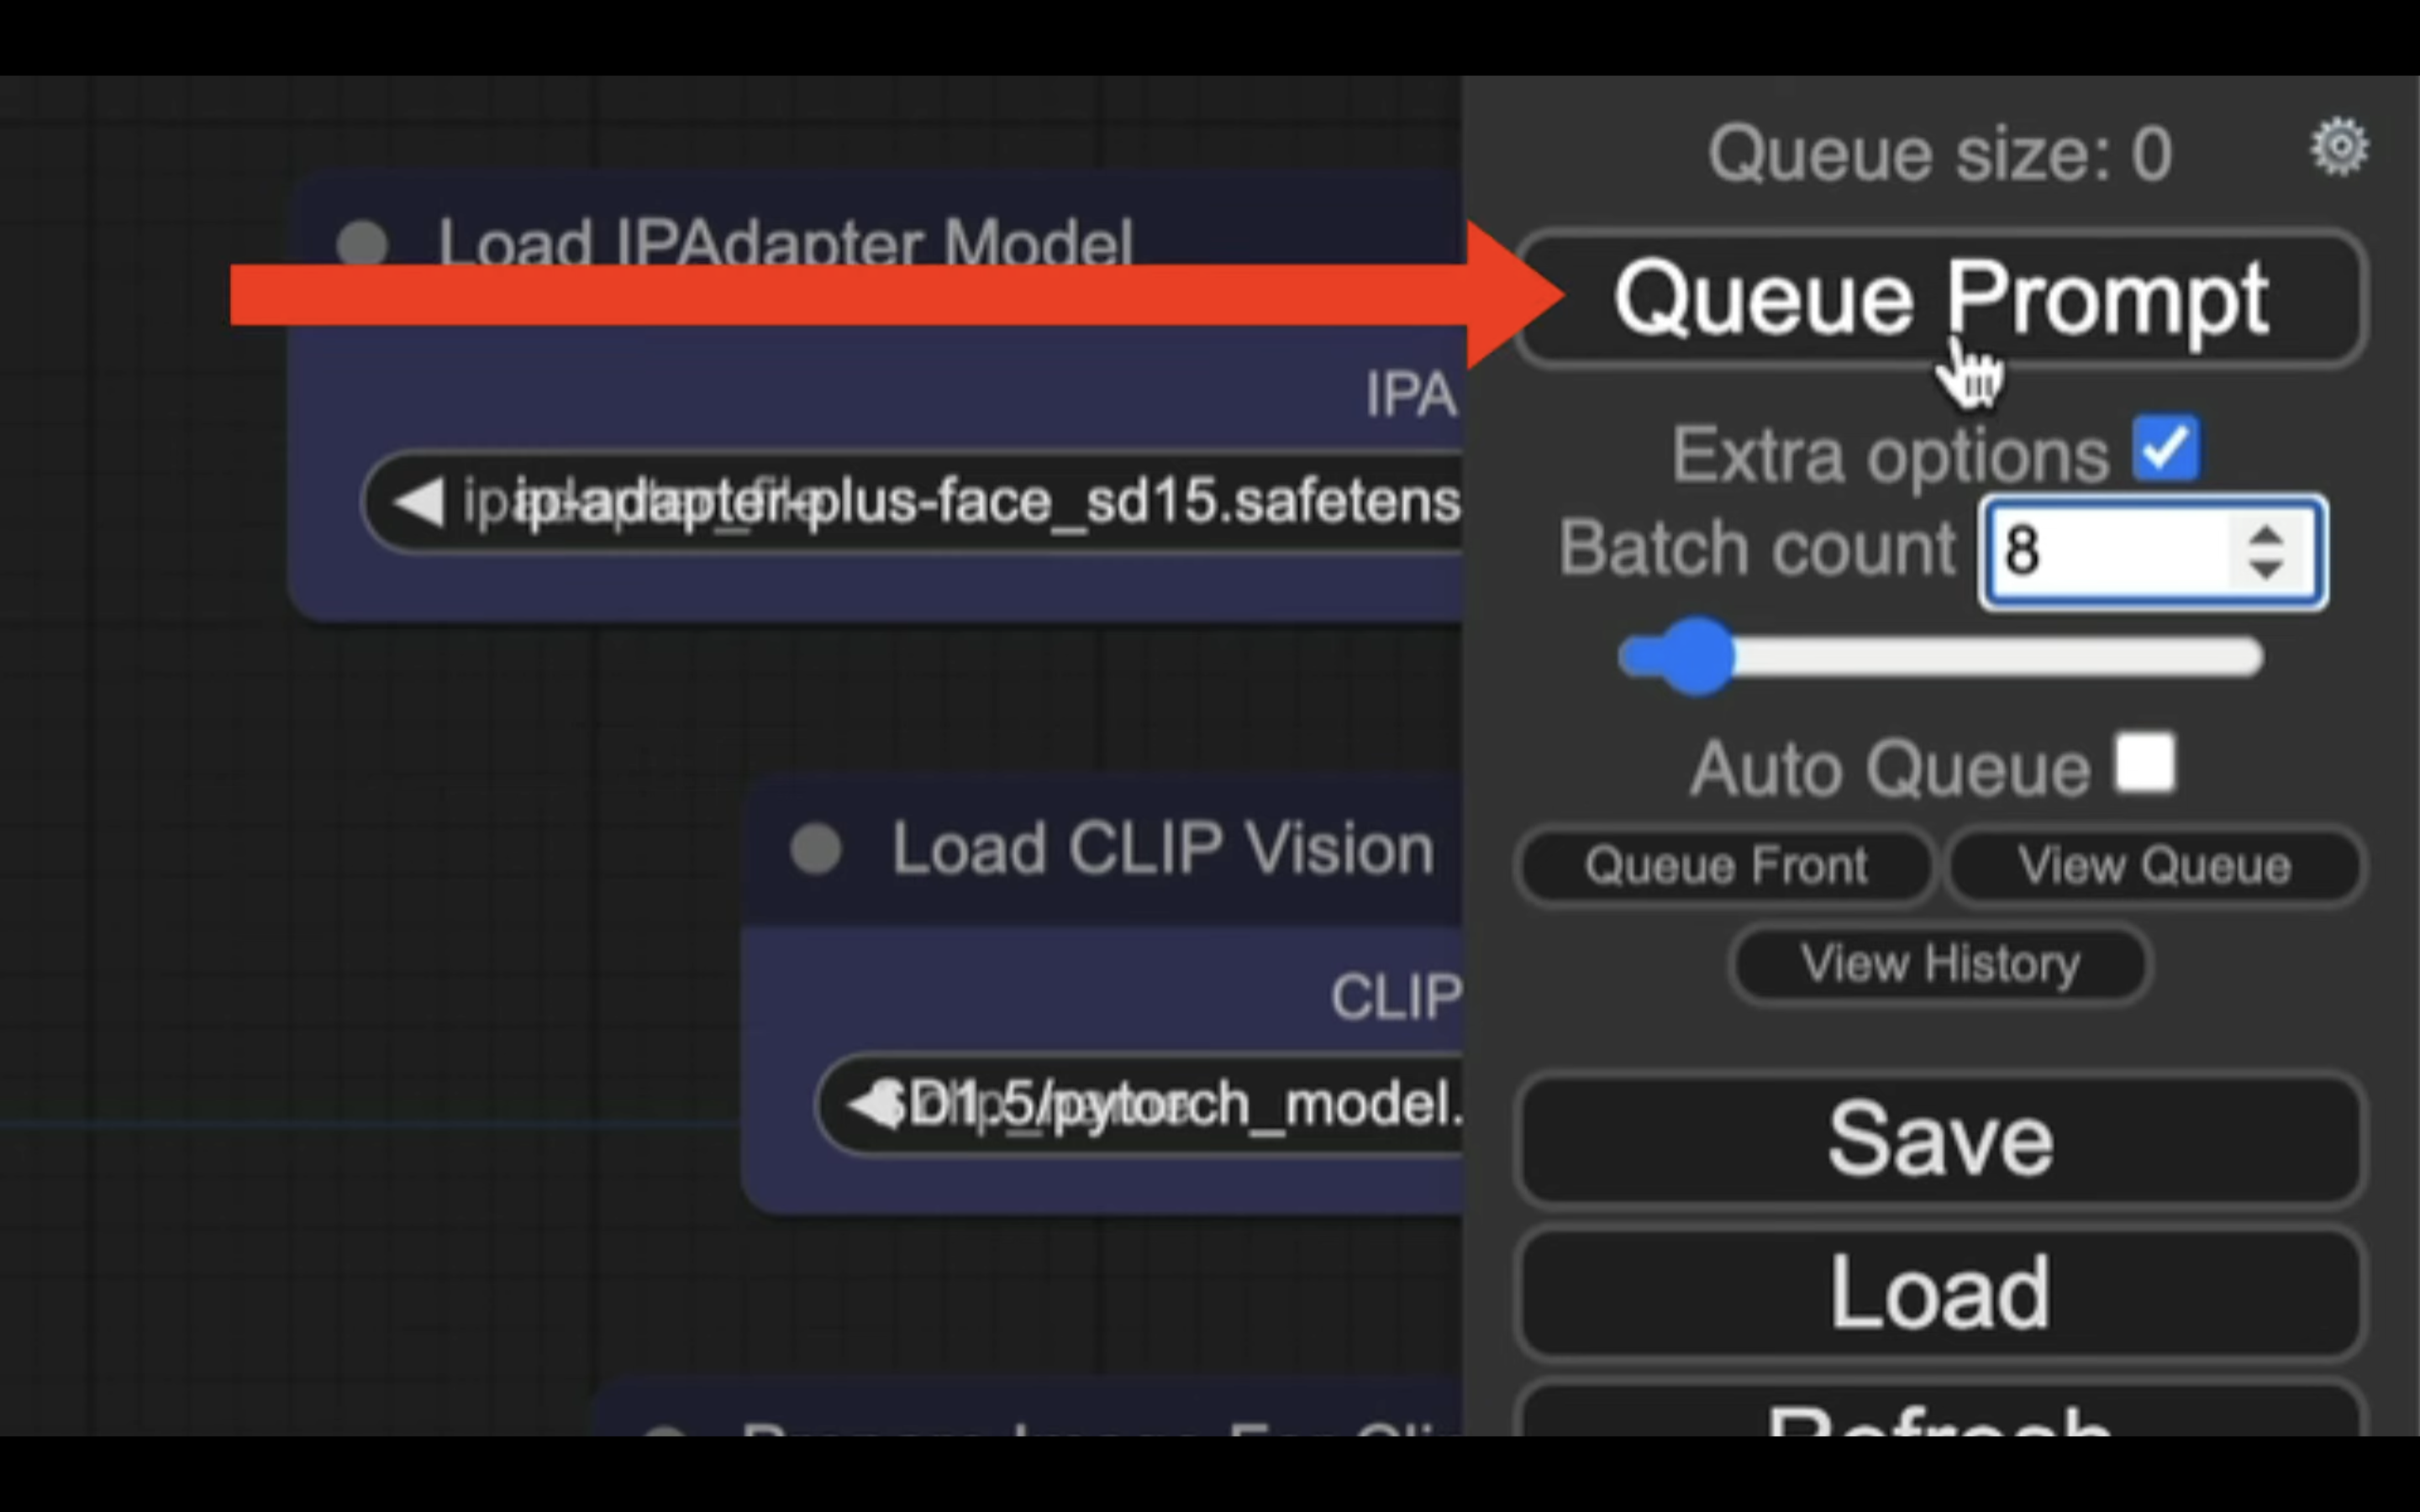
これで、動画の生成が開始されます。
生成処理の状況は、ブロックの表示で確認できます。
緑色で囲まれているブロックが現在実行されている処理です。

処理が完了すると、囲んでいる緑色の表示が移動します。
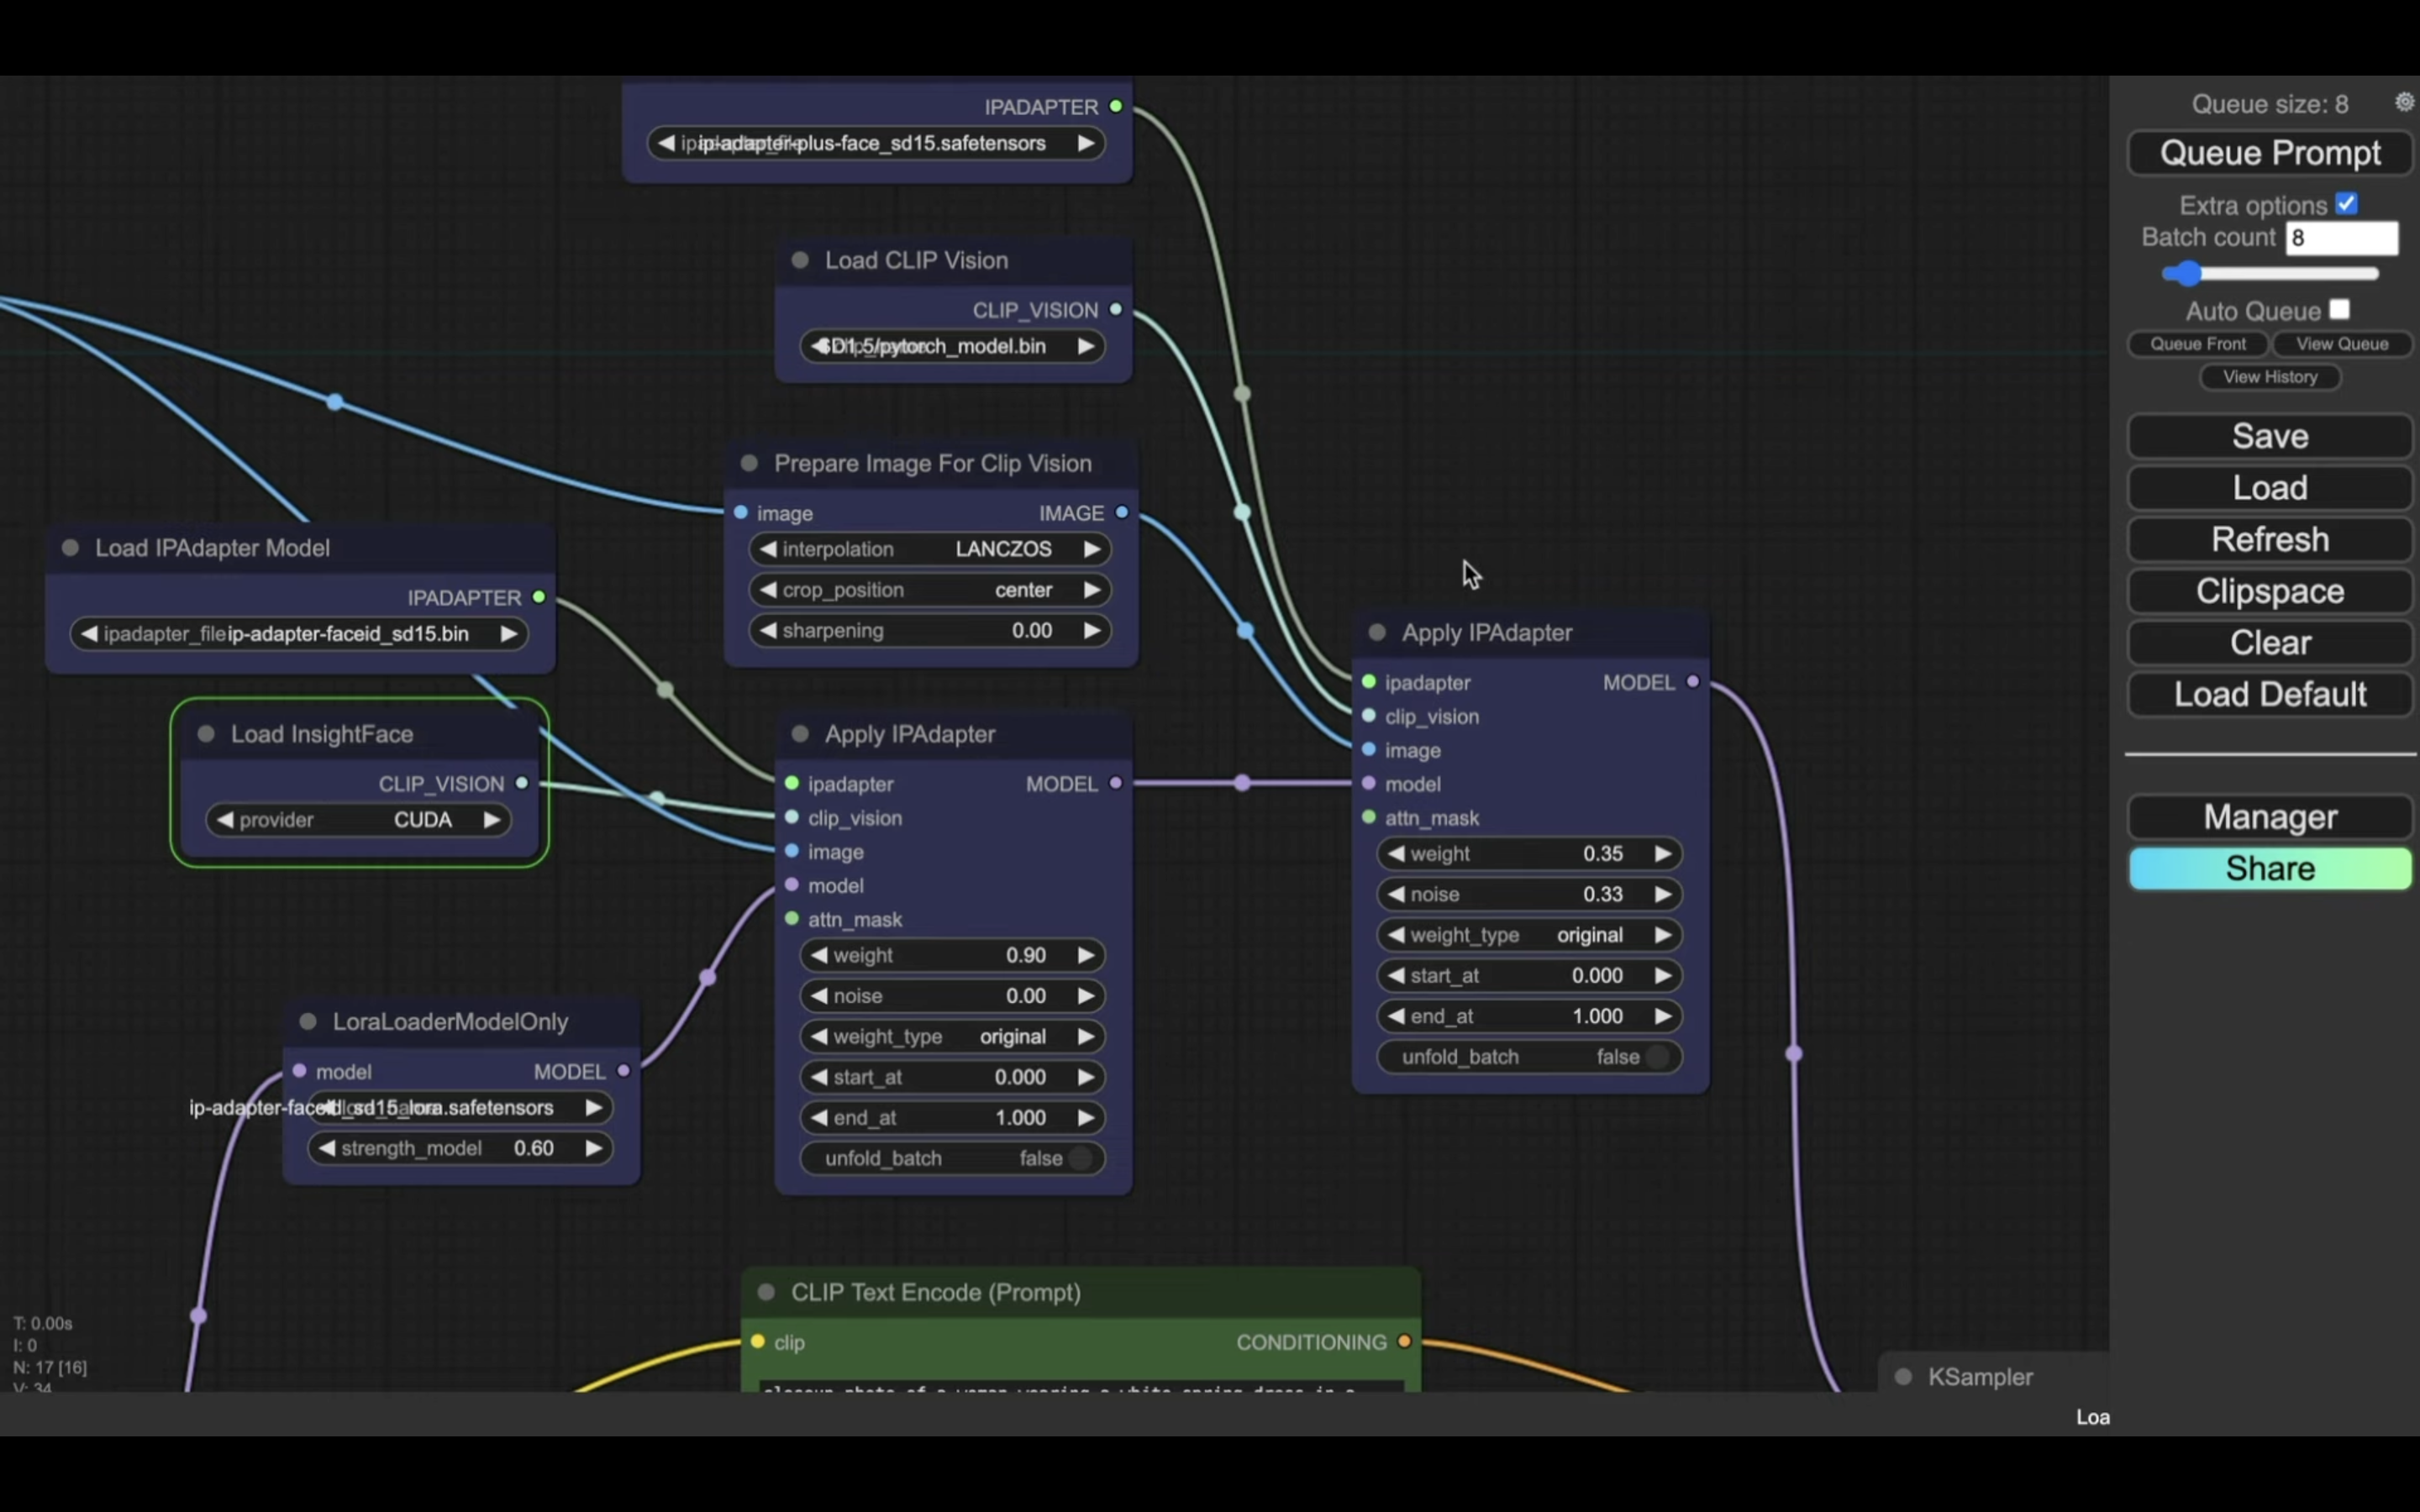
画像が生成されるまでしばらく待ちます。
しばらく待っていると、このような画像が生成されました。
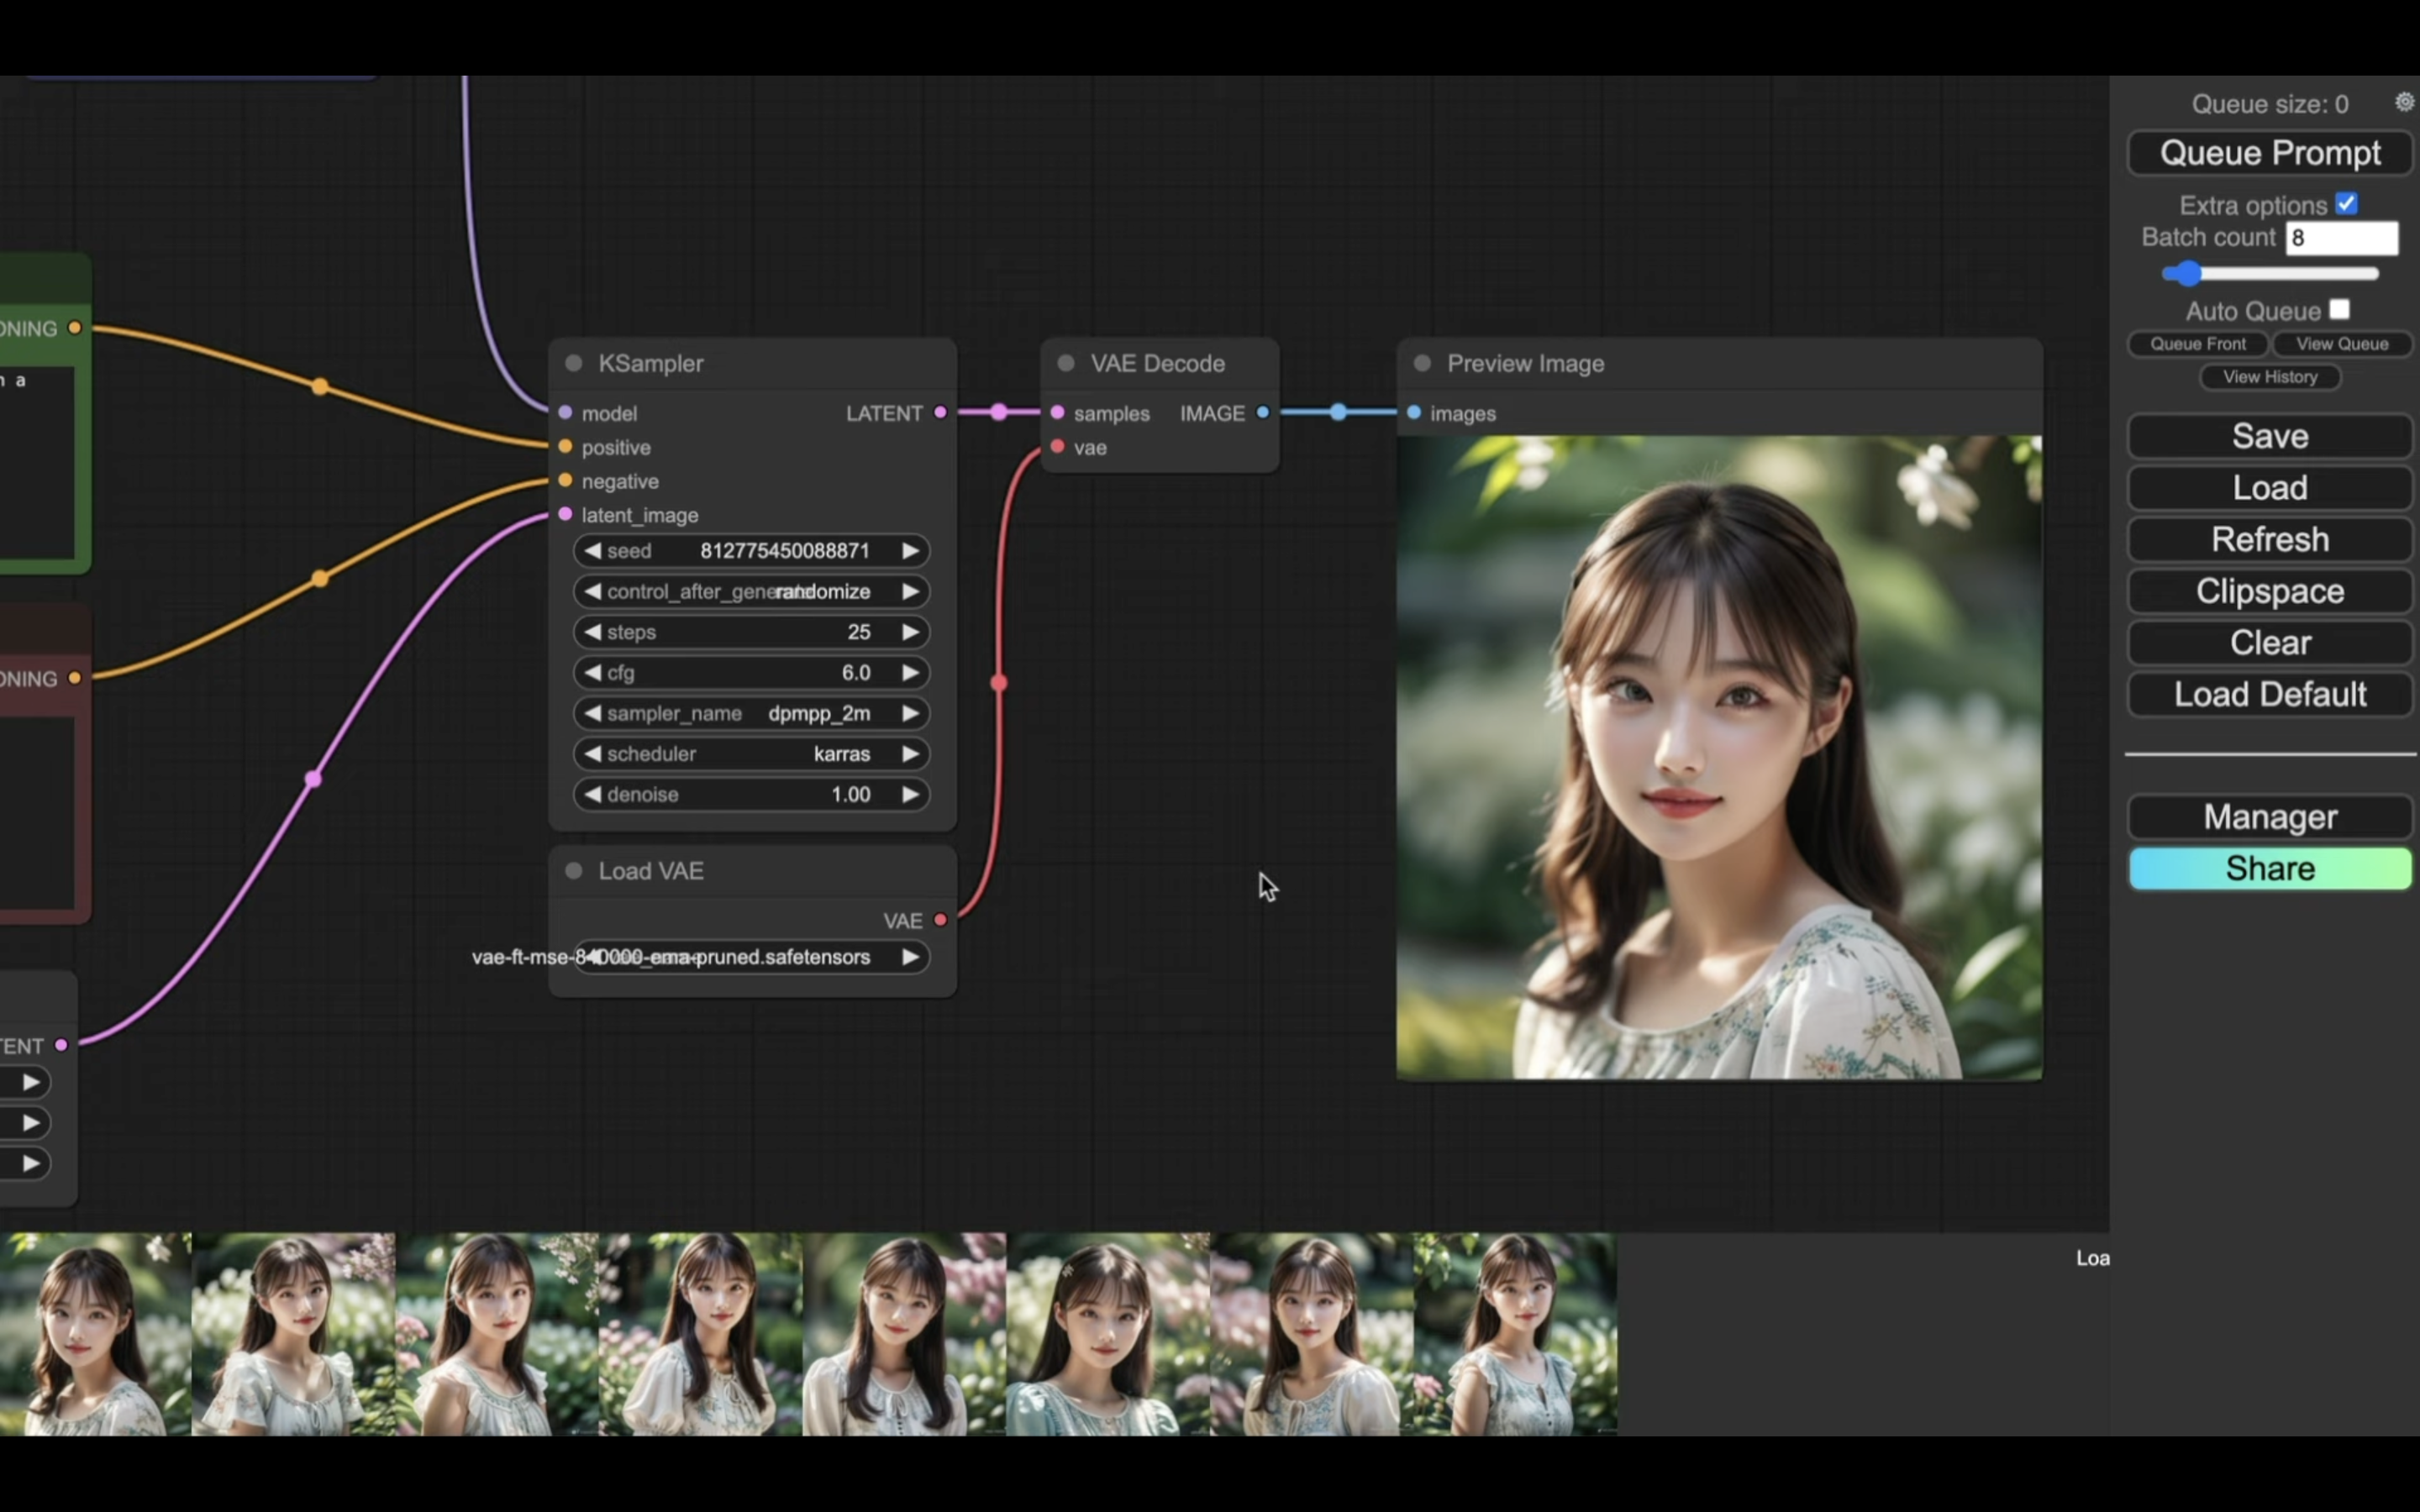
期待した通り、同じ顔のAI美女が生成されています。
このように、IPAdapterのFACE IDモデルを利用すると、簡単に同一人物の画像を生成することができます。
是非お試しください。